Are you trying to decide what components to use for your next F-Class build, or are you looking to upgrade your current rig? Wonder what the “big dogs” in the sport have selected as their hardware? Here’s what United States F-Open team members are using. The most popular chambering is the .284 Winchester, followed by the 7mm Walker (a 40° .284 Winchester Improved). Kelbly and BAT actions are the most popular, and nearly all team members are using cut-rifled barrels. A wide variety of stocks are used, with PR&T holding a slight edge over second-place McMillan.
Criterion Barrels Inc. (CBI) has a policy of rewarding excellence. As a way of supporting top shooters, Criterion will provide a new, free barrel to any shooter who sets or ties a national record when using a Criterion product. To explain, you get a new Criterion barrel for free if you set (or tie) a national shooting record using a Criterion barrel on your rifle.
Criterion Barrels hopes to increase awareness of its free barrel for record sectors program. Over the last few years a number of F-Class and vintage military competitors have benefited from this program, receiving a complimentary barrel of their choice after setting a new national record in their shooting discipline. Past record breaking shooters have included David Mark Honeycutt (with a 300-yard F-Class score of 600-50X), Samantha Huhtala (four records set in 600-yard F-TR competition), and Victor Betzold (M1 Carbine with a score of 375-6X).
Criterion may, in the future, create a rewards program for winners of national, regional, and local rifle matches. Potential earned rewards by match winners could include equipment sponsorships, barrel discounts, and free apparel items.
Set a Record with a Criterion Barrel? Then Give Criterion a Call…
If you or someone you know has set a pending national record with a Criterion barrel, have the shooter contact Criterion Barrels. Send email to contact[at]criterionbarrels.com or call (262) 628-8749.
Once the shooter’s information is verified and the record is confirmed by the governing body of their appropriate shooting discipline, the order will be processed and shipped to the new record-holder.
About Criterion Barrels, Inc.: Criterion Barrels, Inc. was founded in 1999 as a division of Krieger Barrels, Inc. in response to demands of rifle builders and firearms manufacturers for quality match grade barrels at a lower cost. Our company is now completely independent from Krieger Barrels, featuring a separate facility, personnel, and ownership.
The Lyman Borecam is an electro-optical borescope with a digital display. You can record “stills” on a SD card. This is one of the hottest products on the market right now — so hot that it has been sold out for weeks. But Grafs.com just got a shipment of Borecams (item LY04055), and the price is more than competitive. Right now Grafs has the Borecam in stock for $259.99 with free shipping (after a single $7.95 handling fee). That price is $40.00 less than some other online vendors are charging.
This is a good product. Guys who purchased the Lyman Borecam are very happy. If you don’t have one yet, now may be the time to “pull the trigger”. After this article goes live, we expect Grafs.com to sell out quickly. Graf’s inventory may be gone by end-of-day today.
Our British friend Vince Bottomley did an extensive review, giving the Lyman Borecam high praise. Vince says serious shooters should definitely acquire one of these tools: “In my opinion, this product is one of the very best to come along in recent years and I predict that the demand for these [Lyman Borecams] will be very heavy. I would advise you to place an order as quickly as possible if you want one.” Vince adds: “If I were to replace my [Hawkeye optical borescope] today with another Hawkeye, it would cost me well over £700 [$1015 USD]. Stick on a video adapter and we are looking at four figures. That’s what makes the new Lyman digital borescope so attractive — at around [$260.00 USD] including a monitor — it’s an absolute steal!”
The system really works. Many of our Forum members have the system and they say it functions very well and is “very easy to set up and use”. Here’s what an Optics Planet Borecam buyer wrote: “I have used Hawkeye borescopes and know their quality. The Lyman worked as advertised and is a great tool for checking for leading, cleanliness of bore, and bore wear. The compact size, ability to take pictures, and store them are a big plus.”
At the IWA Trade Show in Germany a few years ago, a correspondent for The Firearm Blog interviewed Woody Woodall, who runs Lothar Walther’s USA operation. While many shooters assume that Walther hammer-forges most of its barrels like some other European barrel-makers, in fact Lothar Walther USA uses the button rifling technique for most of its US-made barrels.
In the video below, created for The Firearm Blog, Woodall explains that button rifling involves some extra steps to ensure a good result: “The extra work that goes into it is that you’ve got to make rifling, stress relieve it, and have it come out the right size. And it takes a lot of skill to do that. Lothar Walther invented button rifling in 1925, if a better way of making rifling came out, we’d be glad to go to it.”
Woodall explains that hammer forging is a good method for mass production, but it is costly to set up: “Hammer forging is relatively new, it came out in 1934, but did not come into prominence until the 1950s…. But the cost of [hammer forging] in the world today is getting above what the market will bear for barrels. [Hammer forging] is more complicated. As the hammers hit the barrel the barrel gets longer, but the hammers have to hit uniformly so the barrel [stays] straight. There’s a higher failure rate in that. There’s also some surface delamination that can occur, and some other issues. So if you’re hammer forging, you really have to pay attention to the details. So, it’s like button rifling, only ten times more complicated. It’s for super-high-volume production… The large companies tend to use the hammer forging, intermediate size companies tend to use the buttoning, and craft companies tend to use the cut rifling. All three [methods] can make an equally accurate barrel.”
This image shows a barrel in the process of hammer forging. Watch this operation starting at 1:15 in the video linked below.
You have probably heard the term “hammer-forged barrel”. But do you know how the cold hammer-forging process works? In this interesting video from Ruger, you can see the full barrel making process, including cold hammer-forging on a massive machine. Watch long rods of steel barrel material get cut to length, then drilled. After that Ruger uses CNC machines to contour the barrels before hammer forging.
Anyone with an interest in barrel-making should watch this video:
As the barrel is cold hammer-forged, a giant machine literally pounds the barrel from all sides around an internal carbide mandrel, which forms the rifling inside the bore. The actual hammer-forging is illustrated starting at 1:15 in this video. Through the process of cold-working the barrel around the mandrel, the barrel ends up with a longer length, a smaller outside diameter, and a higher hardness.
Before hammer forging, the barrels are deep-hole drilled, four at a time, with a bit that is slightly larger diameter than the caliber planned for the barrel.
Following the drilling, the barrel rod is placed in CNC machines to be turned down to the correct outside shape and size and both ends are trimmed.
Editor: This article appears on the Criterion Barrels website. It provides good, conservative advice about barrel cleaning. Understand that cleaning methods may need to be adapted to fit the amount and type of fouling (and the particular barrel). In general, we do try to minimize brushing, and we follow the procedures Criterion recommends respecting the crown/muzzle. We have also had very good success using wet patches followed by Wipe-Out bore foam. Along with the practices outlined by Criterion below, you may want to try Wipe-Out foam. Just be sure to use a fitted cleaning rod bore guide, to keep foam out of the action recesses and trigger assembly.
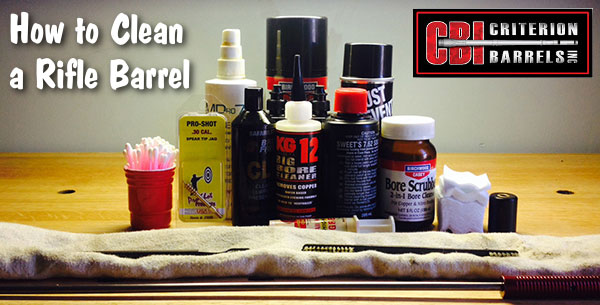
What is the Best Way to Clean a Rifle Barrel?
We are asked this question quite frequently alongside requests for recommended break-in procedures. Improper barrel cleaning methods can damage or destroy a barrel, leading to diminished accuracy or even cause a catastrophic failure. When it comes to barrel maintenance, there are a number of useful techniques that we have not listed. Some techniques may work better with different barrel types. This series of recommendations is designed to incorporate a number of methods that the Criterion Barrels staff has used successfully both in the shop and on their personal rifles. Please feel free to to list your own recommendations in the below comments section.
We recommend the use of the following components during rifle cleaning:
• Cloth patches (sized for the appropriate caliber)
• Brass jag sized properly for your bore
• One-piece coated cleaning rod
• General bore cleaner/solvent (Example: Hoppes #9)
• Copper solvent of your choosing (Example: Sweets/KG 12)
• Fitted cleaning rod bore guide
• Plastic AP brush or toothbrush
• Q-Tips
• Plastic dental picks
• CLP or rust preventative type cleaner
There are a number of schools of thought relating to the frequency in which a barrel should be cleaned. At minimum we recommend cleaning a barrel after each shooting session to remove condensation, copper, and carbon build-up. Condensation is the greatest immediate threat, as it can cause the barrel to rust while the rifle sits in storage. Copper and carbon build-up may negatively impact future barrel performance, increasing the possibility of a failure in feed or function. Fouling should be removed whenever possible.
The below tips will help limit the wear of different parts of your barrel during routine maintenance, helping extend the life of the barrel and improving its performance.
The Crown
The crown is the portion of the barrel where the bullet loses contact with the lands and grooves and proceeds to exit the firearm. The area most critical to accuracy potential is the angle where the bullet last touches the bore of the barrel.
Avoid damage to this area by using a plastic toothbrush and CLP type cleaner to scrub the crown from the exterior of the barrel. Even the most minimal variation in wear to the crown will negatively impact barrel performance, so be careful to avoid nicking or wearing away this part of the barrel.
Reducing Cleaning Rod Wear to the Crown
When running a patch through the barrel, place the muzzle about a ¼” from a hard surface that runs flat at a perpendicular angle to the cleaning rod’s direction of travel, like a wall or the edge of a work bench (pictured). When the jag impacts the hard surface, retract the cleaning rod and remove the patch.
By withdrawing the jag prior to its exit from the barrel, you are limiting the possibility of the brass dragging upon the crown if the rod is at all bent or misaligned. The soft cloth patch will continue to serve as the point of contact between the jag and the barrel, minimizing potential wear.
If possible, insert the rod through the chamber, pushing it forward toward the muzzle. Some rifles, such as the M1 Garand or M14, will require you to insert the cleaning rod through the muzzle. In these situations the use of a cleaning rod guide is recommended to limit the friction placed upon the crown.
Avoid using cleaning rod segments for scraping carbon from the recessed muzzle of an AR-15 barrel. We used this trick in the Marine Corps to impress the armorers and NCO’s with the cleanliness of our muzzles, but it likely played a significant role in reducing the service life of the rifle barrel in question.
Use a Q-Tip soaked in solvent to remove any copper or carbon residue from the recessed muzzle of an AR-15 barrel. A little bit of remaining carbon on the face of the muzzle will not negatively affect bullet travel so long as the crown edge remains consistent around the circumference of the bore.
The Lands and Grooves
This portion of the barrel may experience reduced efficiency due to copper fouling and cleaning rod damage. If copper fouling takes place during the initial break-in of the rifle, make sure to check our barrel break-in article.
For regular maintenance we suggest using a single piece coated cleaning rod rather than the traditional segmented rod or bore snake. While segmented rods and bore snakes may be convenient for field use, the corners between the segments may bow out and catch on the lands, scraping along the length of the rifling. Residual grit and particles from expended cartridges may also get caught between segments, resulting in an abrasive surface working its way down the length of the barrel. Most bore snakes will remove significant amounts of carbon fouling, but may fall short in the removal residual carbon buildup and copper fouling during deep cleaning. Good rods can be sourced from multiple manufacturers, but we have found good results using both Pro-Shot and Dewey brand products.
General cleaning requires the use of patches rather than nylon or brass bore brushes. Brass brushes may be required when aggressive cleaning is required, but can lead to unnecessary wear on the barrel if used frequently. This is not due to the nature of the soft brushes themselves, but from the abrasive particles of grit that become embedded in the material that is being run repeatedly through the bore. We recommend the use of bore guides when cleaning from both the muzzle and breech. These bore guides will help serve to protect the crown and throat from cleaning rod damage.
If significant resistance develops while running the cleaning rod through the bore, no attempt should be made to force it in further. Back the rod out and inspect the barrel to determine the cause of the resistance. The jag may be pushing between a bore obstruction and the rifling, digging a divot into the barrel before pushing the obstruction back through the muzzle. One way to minimize the risk of a stuck rod is by utilizing a slightly smaller patch during the initial push.
The process of cleaning the length of the rifling is relatively straightforward:
1. Check to make sure the rifle is safely unloaded.
2. Carry out any necessary disassembly procedures prior to cleaning.
3. Remove bolt (if possible) and insert fitted cleaning rod bore guide in action.
4. Soak a patch in bore solvent (similar to Hoppes #9).
5. Center and affix the patch on the brass jag, inserting it into the chamber end of the barrel. A misaligned patch may cause the jag to damage the lands of the rifling, so make sure the patch is centered on the jag.
6. Run the patch the full length of the barrel, retracting it upon reaching the end of the muzzle.
7. Let the solvent sit for a minute.
8. Continue to run patches through the bore until carbon residue is minimized.
9. Run a dry patch through the bore to ensure carbon residue has been removed.
10. Soak a patch in copper solvent (Sweet’s or KG-12).
11. Run the patch through the bore, leaving it to sit for 3-5 minutes (do not let solvent sit for more than 15 minutes.*)
12. Repeat this process until no blue residue remains on the patches.
13. Run a patch of Hoppes #9 and a dry patch through the bore to neutralize the copper solvent.
14. Inspect the barrel prior to reassembling the rifle, verifying that no bore obstructions remain.
*Please note that some ammonia-based copper solvents may prove to be corrosive if left sitting in the barrel for an extended period of time. It is essential that these solvents be removed within 15 minutes to avoid ruining the bore.
The Chamber
Proper cleaning of the chamber is a critical component of a general cleaning procedure. Carbon rings can build up near the neck and throat of the chamber wall, leading to feeding malfunctions and pressure spikes inside the chamber.
The chamber can be the trickiest part of the barrel to effectively clean, due to its fluctuation in size and the awkward ergonomics often required to remove carbon residue. Numerous chamber specific devices have been created to address this problem, and while some should be avoided (steel chamber brushes), others can be used to great effect (cleaning stars and plastic dental picks). The simplest approach to cleaning a chamber is to apply solvent to a couple patches, and use the cleaning rod to spin the wadded up patches inside the confines of the chamber. This should aid in removing any excess carbon. A Q-Tip can be used to reach portions of the chamber unreached by patches.
The Barrel Exterior
While the condition of the crown, rifling, and chamber are essential to firearm performance, the finish of the exterior should also be cleaned after handling. Condensation, humidity, direct water contact, and salt residue from skin contact can cause rust or corrosion. An application of anti-corrosion products is recommended when placing a firearm into deep storage for an extended period of time. [Editor: AccurateShooter.com recommends Corrosion-X or Eezox, but other products work well too.]
Finding Cleaning Components
While most cleaning components can be found at your local gun shop, some specialty items may need to be sourced through online retailers such as Brownell’s. Criterion utilizes both Dewey and Pro-Shot brand cleaning components during our day-to-day operations.
Do you have any rifle cleaning tips or tricks not mentioned in the above article? We’d love to hear about them. You can post your comments below.
Lyman’s digital BoreCam is one of the hottest rifle/gunsmithing accessories on the market right now. The product sells out quickly whenever a vendor gets a few in stock. Make no mistake, this is a good product that works well, and, at around $300.00, is it affordable for most shooters. The BoreCam provides vital information about your bore and chamber, and has the ability to save images to an SD card.
Our British friend Vince Bottomley recently obtained a Lyman BoreCam and put it through its paces. Vince came away very impressed. He says it is an easy-to-use and very capable bore inspection tool at a fraction of the cost of a high-end optical borescope (such as the Hawkeye). Vince says serious shooters should definitely acquire one of these tools: “In my opinion, this product is one of the very best to come along in recent years and I predict that the demand for these [Lyman BoreCams] will be very heavy. I would advise you to place an order as quickly as possible if you want one.”
Here are highlights from Vince’s review of the Lyman BoreCam: “If I were to replace my [Hawkeye optical borescope] today with another Hawkeye, it would cost me well over £700 – stick on a video adapter and we are looking at four figures. That’s what makes the new Lyman digital borescope so attractive – at around £250 including a monitor – it’s an absolute steal!
But £250 – with a video attachment and photo-capture facility – can this really be a useable borescope? Trust me it is! But what use is a borescope. Why do you need one? Well, whatever you shoot, the condition of your rifle’s bore is critical. And I’m not just talking about a bore that’s ‘shot-out’ – maybe you just aren’t cleaning it thoroughly. Or maybe some defect within the chamber or rifling is preventing your rifle delivering the kind of performance you expect. Even at £700, a borescope can be cost-effective – if it saves you the cost of just one new barrel.”
Vince explained how the BoreCam can quickly diagnose problems in a barrel: “A customer started to have difficulty chambering rounds in his 308 Target Rifle…. The borescope quickly revealed the problem – a hard ring of copper and carbon had built-up immediately in front of the chamber. When you use a bore-guide (and you always should do) it can sometimes ‘protect’ this first bit of the bore from the cleaning-brush. Although the rest of the bore was spotless, this tiny section was not. Once we knew where the problem was, it was simple matter to carefully clean it up.”
“A borescope will tell you if your cleaning regime is effective, or inspect for throat-erosion and the general condition of the rifling. In addition, it’s very useful to the gunsmith for inspecting newly-cut chambers – making sure they are free from scoring and other machining defects.” Vince also recommends using the BoreCam to inspect barrel crowns: “Tiny burrs can often be present on newly-cut crowns and even the minutest of damage to a crown… can play havoc with accuracy. For the serious shooter, you could say that a borescope is the equivalent of a doctor’s stethoscope.”
The Ugly Truth Revealed
Here are some inside-the-barrel photos Vince took with the Lyman BoreCam. Vince notes: “This barrel came out of the scrap-bin, but someone had actually been shooting this rifle before he finally gave up and came in for a new barrel. Shooting a barrel in this condition is really throwing good money down range! Buy a borescope and stop shooting long before your barrel gets into this state!”
Here’s an interesting $75 product that can help you “tune” the cycling force of your AR-platform rifle. Wilson Combat offers an Adjustable Lo-Profile AR Gas Block for direct gas impingement AR-type rifles. Wilson Combat’s adjustable gas block replaces a standard AR gas block and allows you to tune your AR’s gas system for smoother cycling and enhanced reliability. Wilson Combat explains: “Adjusting your rifle’s gas port will lower or increase your bolt’s cyclic rate. This tailors your rifle’s performance to your unique needs.” When varmint hunting with an AR, we like a less-energetic ejection so the brass lands close to the gun (and doesn’t tag fellow shooters).
A simple adjustment of the hex screw at the front of the block modulates the gas volume allowing you to tune your rifle’s function to your favorite loads. This is very handy when shooting non-standard AR calibers, unusual hand-loads, or suppressed rifles. Adjustable Gas Block systems are sold as complete kits starting at $74.95. Wilson Combat offers two diameters (.750″, .937″) and three lengths (Carbine Length, Mid-Length, & Rifle Length), so you can select the right dimensions for your rifle configuration and barrel diameter. The blocks are Chromoly steel with a Melonited finish.
Package Includes:
Adjustable Gas Block (Melonite Finish)
Adjustment Set Screw (Installed)
Straight Gas Tube (Installed, Gas Tube Pin Installed)
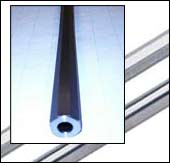
Can you guess what your next barrel will weigh? In many competition disciplines, “making weight” is a serious concern when putting together a new match rifle. A Light Varmint short-range Benchrest rifle cannot exceed 10.5 pounds including scope. An F-TR rifle is limited to 18 pounds, 2 oz. (8.25 kg) with bipod.
One of the heaviest items on most rifles is the barrel. If your barrel comes in much heavier than expected, it can boost the overall weight of the gun significantly. Then you may have to resort to cutting the barrel, or worse yet, re-barreling, to make weight for your class. In some cases, you can remove material from the stock to save weight, but if that’s not practical, the barrel will need to go on a diet. (As a last resort, you can try fitting a lighter scope.)
Is there a reliable way to predict, in advance, how much a finished barrel will weigh? The answer is “yes”. PAC-NOR Barreling of Brookings, Oregon has created a handy, web-based Barrel Weight Calculator. Just log on to Pac-Nor’s website and the calculator is free to use. Pac-Nor’s Barrel Weight Calculator is pretty sophisticated, with separate data fields for Shank Diameter, Barrel Length, Bore Diameter — even length and number of flutes. Punch in your numbers, and the Barrel Weight Calculator then automatically generates the weight for 16 different “standard” contours.
Calculator Handles Custom Contours
What about custom contours? Well the Pac-Nor Barrel Weight Calculator can handle those as well. The program allows input of eight different dimensional measurements taken along the barrel’s finished length, from breech to muzzle. You can use this “custom contour” feature when calculating the weight of another manufacturer’s barrel that doesn’t match any of Pac-Nor’s “standard” contours.
Gun guys are always shipping stuff around the country — whether it’s a barrel to be chambered, or a scope that needs to go back for warranty repair. Or maybe you’ve sold some bullets or reloading dies you no longer need. To ensure your precious packages get to their destination in one piece, it’s important to take precautions when boxing up your items. And by all means insure packages for full value — even if your packaging is perfect, there is always the possibility that your shipment might be lost altogether. Sadly, that can happen, no matter which carrier you choose: Fedex, UPS, or the U.S. Postal Service (USPS). Here are some tips for shipping gun stuff — we explain how to pack items properly and how to minimize the risk of loss.
Tips for Shippers
Dennis Haffner from McGowen Precision Barrels offers some advice on how to avoid damage when shipping gun parts or other valuable or heavy items. Dennis explains:
“First, I started double-packing the contents and in many cases double-boxing. I spend a fortune on heavy-reinforced shipping tape. If the contents are loosely packed, the package is going to get crushed. On real important items or delicate items, wrap the content in plastic and spray the inside void areas with non-expanding foam. They make shipping foam just for this. This method really works. Since I started paying more attention to packaging, I have just about wiped out my issues with all three companies (Fedex, UPS, USPS). Yes, I hate doing it, but in the long run for us, it’s cheaper.
Bullet shipments are the worst — a shipment of 500+ bullets can destroy a cardboard box. I have ordered bullets from individuals who put them in baggies and filled the remainder of the box with foam peanuts. That is not going to work. Any piece of metal, including a die, will puncture a cardboard box, or destroy a padded envelope. Just look at the tracking information and imagine your package bouncing around in the back of the shipping truck, probably under many other packages. My advice is to NEVER use padded envelopes. Barrel nuts or recoil lugs will most likely never make it.
ORM-D items are required to be shipped in heavily-reinforced, double-walled containers. The packages still get a little damage, but the contents usually survive.
How do shipments get damaged? Consider this — one of the shipping companies this year flipped (overturned) one of our new CNC machines (which rendered it useless). Maybe your small packages were in the same delivery truck as my CNC machine. I wonder how many little boxes were crushed underneath it.
As for USPS flat rate boxes — you would not believe what people try to stuff in these boxes. USPS finally put a weight limit on the boxes — they had to. I sometimes take my delicate items packed in an envelope or small box. I spray foam in a larger flat rate box and insert the smaller package, then fill the remainder of the void with foam. It works, and part usually arrives undamaged.”
Shipping Rifle Barrels (PVC Tube and Tennis Ball Method)
A new match-grade barrel can cost $350 or more, and it might take six months (or more) to replace it, given the current wait time with top barrel-makers. So, you don’t want your nice new tube to get damaged in transit. Forum Member Chuck L. (aka “M-61″) offers these tips for shipping rifle barrels:
“Packing a barrel can be a problem. Here’s a shipping method that won’t stop lost shipments but so far has stopped damage. Get a PVC pipe (of size appropriate to your barrel) with fitted caps for each end. Attach a cap to one end. Tape the barrel threads and tape over the muzzle. Then drop one standard tennis ball into the pipe. Place barrel in pipe. Next add whatever peanuts or foam you can jam in to support the barrel on the sides. Then place a second tennis ball into the opposite end of the PVC pipe. (So now you have a tennis ball on either end of your barrel.) With everything secure inside, attach the upper cap and tape it down securely. With this packing procedure, when the carrier launches the pipe like a javelin, at least the barrel will not come through like a spear and be gone. Label the pipe with very large address labels so no one suspects it’s just garbage laying around. This procedure may seem ridiculous but it has worked for me. Oh and definitely get insurance. If your item is insured, the shippers will look harder to find it.”
Editor’s Note: Fedex also makes a triangular-profile cardboard shipping box. This 38″ x 6″ x 6″ x 6″ Fedex Tube (designed for blueprints and posters) is free for the asking. For most barrels, there should be enough clearance to hold your PVC tube (with barrel packed inside tube). However, don’t ship the barrel inside the cardboard box by itself. Cap and pad the ends and bubble wrap it heavily, or better yet, use the PVC tube method described above, with the PVC tube inside the box.


 Story Tip from Dominion of Canada Rifle Association.


 At the


 Can you guess what your next barrel will weigh? In many competition disciplines, “making weight” is a serious concern when putting together a new match rifle. A Light Varmint short-range Benchrest rifle cannot exceed 10.5 pounds including scope. An F-TR rifle is limited to 18 pounds, 2 oz. (8.25 kg) with bipod.

 Gun guys are always shipping stuff around the country — whether it’s a barrel to be chambered, or a scope that needs to go back for warranty repair. Or maybe you’ve sold some bullets or reloading dies you no longer need. To ensure your precious packages get to their destination in one piece, it’s important to take precautions when boxing up your items. And by all means insure packages for full value — even if your packaging is perfect, there is always the possibility that your shipment might be lost altogether. Sadly, that can happen, no matter which carrier you choose: Fedex, UPS, or the U.S. Postal Service (USPS). Here are some tips for shipping gun stuff — we explain how to pack items properly and how to minimize the risk of loss.
 “First, I started double-packing the contents and in many cases double-boxing. I spend a fortune on heavy-reinforced shipping tape. If the contents are loosely packed, the package is going to get crushed. On real important items or delicate items, wrap the content in plastic and spray the inside void areas with non-expanding foam. They make shipping foam just for this. This method really works. Since I started paying more attention to packaging, I have just about wiped out my issues with all three companies (Fedex, UPS, USPS). Yes, I hate doing it, but in the long run for us, it’s cheaper.
 How do shipments get damaged? Consider this — one of the shipping companies this year flipped (overturned) one of our new CNC machines (which rendered it useless). Maybe your small packages were in the same delivery truck as my CNC machine. I wonder how many little boxes were crushed underneath it.
 “Packing a barrel can be a problem. Here’s a shipping method that won’t stop lost shipments but so far has stopped damage. Get a PVC pipe (of size appropriate to your barrel) with fitted caps for each end. Attach a cap to one end. Tape the barrel threads and tape over the muzzle. Then drop one standard tennis ball into the pipe. Place barrel in pipe. Next add whatever peanuts or foam you can jam in to support the barrel on the sides. Then place a second tennis ball into the opposite end of the PVC pipe. (So now you have a tennis ball on either end of your barrel.) With everything secure inside, attach the upper cap and tape it down securely. With this packing procedure, when the carrier launches the pipe like a javelin, at least the barrel will not come through like a spear and be gone. Label the pipe with very large address labels so no one suspects it’s just garbage laying around. This procedure may seem ridiculous but it has worked for me. Oh and definitely get insurance. If your item is insured, the shippers will look harder to find it.”


