Leupold now offers easy online ordering for custom riflescope dials for your elevation turrets. A custom CDS dial lets you simply “dial the yardage” to have the correct elevation at distances near to far. For example, as shown below, if your target is at 550 yards, you simply dial 5.5 on the turret index. This is possible because the dial has been customized with the particular ballistics of your rifle and your load.
“Leupold engineers do all the hard work in the lab, making sure it’s easy and fast in the field,” said Rob Morrison, Leupold’s global marketing VP. “All the shooter has to do is provide us with ballistic information. From this simple data, a custom-calibrated dial is laser engraved for that specific load.”
Order Multiple Dials for Different Bullet Types
Leupolds’ custom CDS dials are tailored to the exact load used. With the ability to quickly change dials, it’s easy to set up several loads in a single rifle with a single riflescope. Transition from coyote loads to big game cartridges with a simple change of the dial. Or you can get different dials for different cartridges if you move your optic from one rifle to another. To order a CDS dial, call 1-800-LEUPOLD or visit Customshop.leupold.com/custom-dials and click on the appropriate dial for your riflescope.
Have you recently purchased a new scope? Then you should verify the actual click value of the turrets before you use the optic in competition (or on a long-range hunt). While a scope may have listed click values of 1/4-MOA, 1/8-MOA or 0.1 Mils, the reality may be slightly different. Many scopes have actual click values that are slightly higher or lower than the value claimed by the manufacturer. The small variance adds up when you click through a wide range of elevation.
In this video, Bryan Litz of Applied Ballistics shows how to verify your true click values using a “Tall Target Test”. The idea is to start at the bottom end of a vertical line, and then click up 30 MOA or so. Multiply the number of clicked MOA by 1.047 to get the claimed value in inches. For example, at 100 yards, 30 MOA is exactly 31.41 inches. Then measure the difference in your actual point of impact. If, for example, your point of impact is 33 inches, then you are getting more than the stated MOA with each click (assuming the target is positioned at exactly 100 yards).
How to Perform the Tall Target Test
The objective of the tall target test is to insure that your scope is giving you the proper amount of adjustment. For example, when you dial 30 MOA, are you really getting 30 MOA, or are you getting 28.5 or 31.2 MOA? The only way to be sure is to verify, don’t take it for granted! Knowing your scopes true click values insures that you can accurately apply a ballistic solution. In fact, many perceived inaccuracies of long range ballistics solutions are actually caused by the scopes not applying the intended adjustment. In order to verify your scope’s true movement and calculate a correction factor, follow the steps in the Tall Target Worksheet. This worksheet takes you thru the ‘calibration process’ including measuring true range to target and actual POI shift for a given scope adjustment. The goal is to calculate a correction factor that you can apply to a ballistic solution which accounts for the tracking error of your scope. For example, if you find your scope moves 7% more than it should, then you have to apply 7% less than the ballistic solution calls for to hit your target.
NOTE: When doing this test, don’t go for the maximum possible elevation. You don’t want to max out the elevation knob, running it to the top stop. Bryan Litz explains: “It’s good to avoid the extremes of adjustment when doing the tall target test.I don’t know how much different the clicks would be at the edges, but they’re not the same.”
Should You Perform a WIDE Target Test Too?
What about testing your windage clicks the same way, with a WIDE target test? Bryan Litz says that’s not really necessary: “The wide target test isn’t as important for a couple reasons. First, you typically don’t dial nearly as much wind as you do elevation. Second, your dialed windage is a guess to begin with; a moving average that’s different for every shot. Whereas you stand to gain a lot by nailing vertical down to the click, the same is not true of windage. If there’s a 5% error in your scope’s windage tracking, you’d never know it.”
Verifying Scope Level With Tall Target Test
Bryan says: “While setting up your Tall Target Test, you should also verify that your scope level is mounted and aligned properly. This is critical to insuring that you’ll have a long range horizontal zero when you dial on a bunch of elevation for long range shots. This is a requirement for all kinds of long range shooting. Without a properly-mounted scope level (verified on a Tall Target), you really can’t guarantee your horizontal zero at long range.”
NOTE: For ‘known-distance’ competition, this is the only mandatory part of the tall target test, since slight variations in elevation click-values are not that important once you’re centered “on target” at a known distance.
On its YouTube Channel, the USAMU offers “Pro Tips” videos providing expert instruction on rifle marksmanship. One helpful video covers up/down angle shooting. In the video, SFC Emil Praslick III, one of America’s best long-range shooting coaches, explains how to determine up/down angle, and how to compensate for the angle using scope clicks. Praslick explains how gravity always works as a constant relative to the flat-ground distance to the target (which is distinct from the actual straight-line distance to target.)
The flat-ground distance is the actual distance over which the bullet will be affected by gravity. Use this as the basis for your elevation corrections. As Praslick explains, “this [flat-ground] distance will get less and less as the angle to the target increases [either up or down].” Once you know the straight-line distance to the target AND the exact angle of your shot, simple math lets you calculate the flat-ground distance to the target. Basically, to determine your flat-ground distance to target, you multiply the cosine of the shot angle by the measured straight-line distance to the target.
Application to Long-Range Hunting Since the effects of angles increase with distance, Praslick explains that: “Unless the angle is extremely severe, [a hunter] really won’t notice these effects at ranges of 200 yards or less.” However, for long shots, hunters definitely need to compensate when taking angled shots. Praslick recommends that hunters print out a small chart with the cosines of common angles (20°, 25°, 30° etc.). In addition, hunters need an accurate ballistic table for their rifle and particular ammo. This should show the elevation corrections (in MOA or clicks), for 200 yards to the maximum range at which you may take a shot.
SFC Emil Praslick III is an instructor/coach with the USAMU. He also has served as a coach and “wind guru” with numerous U.S. Teams in international competition, including the U.S. Palma Team, which recently participated in the World Long-Range Fullbore Rifle Championship in Australia. Praslick has also coached the U.S. F-Open Class Team.
New S1 and S5 Knurled Dials can be user-installed in place of older Leupold turret caps.
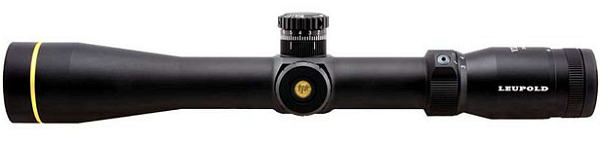
Leupold & Stevens makes good scopes, but the standard turrets with screw-on caps are inconvenient for some users. It’s too easy to misplace the caps. Also the standard turrets are not the easiest to grip, particularly with gloved hands. To improve the “gripability” of its scope turrets, Leupold now offers new S1 and S5 screw-on knurled dials that fit in place of the cap covers. These aluminum dials offer large, knurled surfaces that are easy to grip, even when wearing gloves. “These screw-on dials mean no more lost caps or the need for a coin to make adjustments in the field,” said Tim Lesser, Leupold’s Product Development Director. The S1 is for MOA scopes while the S5 is for MIL scopes.
The S1 and S5 dials simply replace Leupold’s screw-on turret caps, so the user can install these easily without tools. It is NOT necessary to send your scope(s) back to the factory. Just remove the caps on your windage and elevation turrets, and screw the knurled dials in their place. The S1/S5 dials automatically align with the adjustment slot and securely tighten down. These dials are interchangeable between different riflescopes in the field. MSRP is $50 per dial set (either S1 or S5).
The S1 dial is engraved in ¼-MOA increments while the S5 (for mil-based turrets) is marked in 0.1 MIL. Both come with a locking zero stop and can be equipped with the Custom Dial System® (CDS) through the Leupold Custom Shop. The Leupold S1 and S5 dials are compatible with most Leupold riflescopes with click adjustments, with the exception of the VX-1 series and older riflescopes with friction adjustments. For those with bullet-drop-compensating reticles, the S1 and S5 are completely compatible. The screw on dials are covered by Leupold’s full lifetime guarantee.
For many riflemen, reading the wind is the toughest challenge in long-range shooting. Wind speeds and directions can change rapidly, mirage can be misleading, and terrain features can cause hard-to-predict effects. To become a competent wind reader, you need range-time and expert mentoring. In the latter department, Frank Galli, founder of Sniper’s Hide, has just released a new digital resource: Wind Reading Basics for the Tactical Shooter.
Wind Reading Basics is much more than an eBook — it has charts, instructions for ballistic calculators, and even embedded videos. Galli explains: “We break down the formulas, walk you through using a ballistic computer, and give you all the information in one place. From videos, to useful charts, we make it simple to get started. It’s all about having a plan, and we give you that plan.”
Galli’s Wind Reading Basics, priced at $11.99, can be downloaded from iTunes for iPads, iPhones and iOS compatible devices. Here are sample sections from the eBook (which includes videos):
In this NSSF Video, Ryan Cleckner, a former Sniper Instructor for the 1st Ranger Battalion, defines the term, “Minute of Angle” (MOA) and explains how you can adjust for windage and elevation using 1/4 or 1/8 MOA clicks on your scope. This allows you to sight-in precisely and compensate for bullet drop at various distances.
For starters, Ryan explains that, when talking about angular degrees, a “minute” is simply 1/60th. So a “Minute of Angle” is simply 1/60th of one degree of a central angle, measured either up and down (for elevation) or side to side (for windage). At 100 yards, 1 MOA equals 1.047″ on the target. This is often rounded to one inch for simplicity. Say, for example, you click up 1 MOA. That is roughly 1 inch at 100 yards, or roughly 4 inches at 400 yards, since the target area measured by 1 MOA increases in linear fashion with the distance.
Riflescopes are mechanical contraptions. One of the sad realities about precision shooting is that, sooner or later, you will experience a scope failure. If you’re lucky it won’t happen in the middle of a National-level competition. And hopefully the failure will be dramatic and unmistakable so you won’t spend months trying to isolate the issue. Unfortunately, scope problems can be erratic or hard to diagnose. You may find yourself with unexplained flyers or a slight degradation of accuracy and you won’t know how to diagnose the problem. And when a 1/8th-MOA-click scope starts failing, it may be hard to recognize the fault immediately, because the POI change may be slight.
When An Expensive Scope Goes Bad
Recently, this editor had a major-brand 8-25x50mm scope go bad. How did I know I had a problem? Well the first sign was a wild “drop-down” flyer at a 600-yard match. After shooting a two-target relay, I took a look at my targets. My first 5-shot group had five shots, fairly well centered, in about 2.2″. Pretty good. Everything was operating fine. Then I looked at the second target. My eye was drawn to four shots, all centered in the 10 Ring, measuring about 2.4″. But then I saw the fifth shot. It was a good 18″ low, straight down from the X. And I really mean straight down — if you drew a plumb line down from the center of the X, it would pass almost through the fifth shot.
That was disconcerting, but since I had never had any trouble with this scope before, I assumed it was a load problem (too little powder?), or simple driver error (maybe I flinched or yanked the trigger?). Accordingly, I didn’t do anything about the scope, figuring the problem was me or the load.
But, at the next range session, things went downhill fast. In three shots, I did manage to get on steel at 600, with my normal come-up for that distance. Everything seemed fine. So then I switched to paper. We had a buddy in the pits with a walkie-talkie and he radioed that he couldn’t see any bullet holes in the paper after five shots. My spotter said he thought the bullets were impacting in the dirt, just below the paper. OK, I thought, we’ll add 3 MOA up (12 clicks), and that should raise POI 18″ and I should be on paper, near center. That didn’t work — now the bullets were impacting in the berm ABOVE the target frame. The POI had changed over 48″ (8 MOA). (And no I didn’t click too far — I clicked slowly, counting each click out loud as I adjusted the elevation.) OK, to compensate now I took off 8 clicks which should be 2 MOA or 12″. No joy. The POI dropped about 24″ (4 MOA) and the POI also moved moved 18″ right, to the edge of the target.
For the next 20 shots, we kept “chasing center” trying to get the gun zeroed at 600 yards. We never did. After burning a lot of ammo, we gave up. Before stowing the gun for the trip home, I dialed back to my 100-yard zero, which is my normal practice (it’s 47 clicks down from 600-yard zero). I immediately noticed that the “feel” of the elevation knob didn’t seem right. Even though I was pretty much in the center of my elevation (I have a +20 MOA scope mount), the clicks felt really tight — as they do when you’re at the very limit of travel. There was a lot of resistance in the clicks and they didn’t seem to move the right amount. And it seemed that I’d have four or five clicks that were “bunched up” with a lot of resistance, and then the next click would have almost no resistance and seem to jump. It’s hard to describe, but it was like winding a spring that erratically moved from tight to very loose.
At this point I announced to my shooting buddies: “I think the scope has taken a dump.” I let one buddy work the elevation knob a bit. “That feels weird,” he said: “the clicks aren’t consistent… first it doesn’t want to move, then the clicks jump too easily.”
Convinced that I had a real problem, the scope was packed up and shipped to the manufacturer. So, was I hallucinating? Was my problem really just driver error? I’ve heard plenty of stories about guys who sent scopes in for repair, only to receive their optics back with a terse note saying: “Scope passed inspection and function test 100%. No repairs needed”. So, was my scope really FUBAR? You bet it was. When the scope came back from the factory, the Repair Record stated that nearly all the internal mechanicals had been replaced or fixed: “Replaced Adjustment Elevation; Replaced Adjustment Windage; Reworked Erector System; Reworked Selector; Reworked Parallax Control.”
How to Diagnose Scope Problems
When you see your groups open up, there’s a very good chance this is due to poor wind-reading, or other “driver error”. But my experience showed me that sometimes scopes do go bad. When your accuracy degrades without any other reasonable explanation, the cause of the problem may well be your optics. Here are some of the “symptoms” of scope troubles:
1. Large shot-to-shot variance in Point of Impact with known accurate loads.
2. Uneven tracking (either vertical or horizontal).
3. Change of Point of Impact does not correspond to click inputs.
4. Inability to zero in reasonable number of shots.
5. Unexpected changes in needed click values (compared to previous come-ups).
6. Visible shift in reticle from center of view.
7. Changed “feel” or resistance when clicking; or uneven click-to-click “feel”.
8. Inability to set parallax to achieve sharpness.
9. Turrets or other controls feel wobbly or loose.
10. Internal scope components rattle when gun is moved.
Source of Problem Unknown, but I Have a Theory
Although my scope came with a slightly canted reticle from the factory, it had otherwise functioned without a hitch for many years. I was able to go back and forth between 100-yard zero and 600-yard zero with perfect repeatability for over five years. I had confidence in that scope. Why did it fail when it did? My theory is side-loading on the turrets. I used to carry the gun in a thick soft case. I recently switched to an aluminum-sided hard case that has pretty dense egg-crate foam inside. I noticed it took some effort to close the case, though it was more than big enough, width-wise, to hold the gun. My thinking is that the foam wasn’t compressing enough, resulting in a side-load on the windage turret when the case was clamped shut. This is just my best guess; it may not be the real source of the problem. Remember, as I explained in the beginning of this story, sometimes scopes — just like any mechanical system — simply stop working for no apparent reason.
Barrett offers an innovative scope ring set that adjusts to two different MOA elevations through the use of variable-position cross-pins in the rear ring. Barrett’s Pin-Lock® ExRings allow a dual-setting +MOA taper by placing the adjustment pin in one of two locations. To change settings, simply remove the rear pin from one hole and insert it into the other (after loosening side locking bolts*). There are multiple ExRing versions: 30mm with 15/40 MOA settings (#66850), 30mm with 20/30 MOA settings (#66858), and 34mm with 20/30 MOA settings (#66870).
Barrett says the lower 15 or 20 MOA settings are commonly used with canted rails while the higher 30 or 40 MOA settings are for flat rails. Once an elevation setting is selected and the ring’s cross bolts are torqued to specification, Barrett ExRings become a rock-solid mount with the MOA “pre-load” angle best suited to your application. NOTE: Rings come factory preset at the lower MOA setting. CLICK HERE for Barrett ExRing Mounting Instructions (PDF).
These rings are ideal for extreme long-range shooting, offering a huge amount of elevation “pre-load” that allows the shooter to keep his scope in the middle of its elevation range. We’re not aware of any other ring system that allows a quick, repeatable change from 15 MOA preload to 40 MOA (and vice versa), or even from 20 to 30 MOA. The system will work with a wide variety of installations. ExRings will work on both flat and tapered m1913 Picatinny-type rails, and there should be enough clearance for scopes with front objectives up to 70mm in diameter. ExRings are made from tough, T-6 aluminum, hard-anodized to 60 HRC specs. A special “Zero-Gap” clamping system provides a very secure mount.
Barrett ExRings® (Extended Range Scope Rings) Key Features:
• Maximizes the riflescope’s internal elevation adjustment.
• ZERO-GAP offers wider clamping area and maximizes “scope grip”.
• ZERO BACKLASH tongue and groove interface.
• High Strength Aircraft-grade 7075 T6 aluminum.
• 2.5 times lighter than steel.
• Heat-treated steel cross bolt and captured nut for increased strength.
• Hard Anodized with a 60 HRC (Rockwell C scale).
• Both 30mm diameter and 34mm diameter available.
• BORS compatible.
ExRings Prove Themselves in Long-Range Competition
You’ll find an extensive review of the Barrett ExRings on Australian Long Range Shooter Magazine. The creator of that website, Norm Nelson, mounted Barrett Pin-Lock 15-40 MOA adjustable rings on his 7mm F-Open rig. He then proceeded to use that rifle (with ExRings) to win the 2013 Australian Long-Range Championship. Here are Norm’s comments:
“I used [the ExRings] to great effect to win the Australian Long Range F-Class Open competition earlier this year. They enabled me to use a higher magnification scope at the 1200-yard range. I have since bought a second pair and run them on my .375 Cheytac to shoot way out yonder.
The operation and fitting of these rings is quite easy and they provide a strong mounting solution for long range rifles that need an extra bit of elevation. Once mounted to the rail the ring top halves are removed and the side locking plates are loosened. At this time the rear adjustable adjustable pin can be removed if desired and placed into either [MOA position].
These are solid rings designed to withstand the recoil of the big Barrett rifles. In the testing I have done so far, I have not noticed any movement of these rings and would be surprised if I did given their build design and quality.”
*HOW to CHANGE ExRing MOA SETTINGS
Barrett recommends changing the MOA setting after scope is installed on rifle.
1. Remove the two side locking bolts from the rear ring and loosen the two side locking bolts from the front ring using the T27 Torx® end of the supplied L-wrench.
2. Use a 1/8″ pin punch to remove the adjustment pin from the rear ring.
3. Align the corresponding pin hole locations, insert and tap the adjustment pin flush using a pin punch.
4. Tighten all four side locking bolts to 50 inch/lbs or 5.6Nm
The web-based JBM Ballistics Program is one of the most sophisticated and accurate ballistics calculators available — and it’s free. The latest version of the JBM Trajectory Calculator includes field-test-derived actual G7 BCs, as well as bullet drag data from Lapua’s Doppler radar testing. You can also change weather variables, and generate come-up tables for distances out to 3000 yards.
Whenever we have web access, the JBM program is our “go-to” resource for dependable ballistics calculations. In our experience, with most bullets, if you input all the correct variables for the JBM program, it should get you within 1/2 moa (2 clicks), at 600 yards.
New URLs for JBM Ballistics Calculators
With the release of the latest version of the JBM program, some URLs for the calculations pages have changed. You may want to update your bookmarks with the following web addresses:
Let’s say you’ve purchased a new scope, and the spec-sheet indicates it is calibrated for quarter-MOA clicks. One MOA is 1.047″ inches at 100 yards, so you figure that’s how far your point of impact (POI) will move with four clicks. Well, unfortunately, you may be wrong. You can’t necessarily rely on what the manufacturer says. Production tolerances being what they are, you should test your scope to determine how much movement it actually delivers with each click of the turret. It may move a quarter-MOA, or maybe a quarter-inch, or maybe something else entirely. (Likewise scopes advertised as having 1/8-MOA clicks may deliver more or less than 1 actual MOA for 8 clicks.)
Reader Lindy explains how to check your clicks: “First, make sure the rifle is not loaded. Take a 40″ or longer carpenter’s ruler, and put a very visible mark (such as the center of an orange Shoot’N’C dot), at 37.7 inches. (On mine, I placed two dots side by side every 5 inches, so I could quickly count the dots.) Mount the ruler vertically (zero at top) exactly 100 yards away, carefully measured.
Place the rifle in a good hold on sandbags or other rest. With your hundred-yard zero on the rifle, using max magnification, carefully aim your center crosshairs at the top of the ruler (zero end-point). Have an assistant crank on 36 (indicated) MOA (i.e. 144 clicks), being careful not to move the rifle. (You really do need a helper, it’s very difficult to keep the rifle motionless if you crank the knobs yourself.) With each click, the reticle will move a bit down toward the bottom of the ruler. Note where the center crosshairs rest when your helper is done clicking. If the scope is accurately calibrated, it should be right at that 37.7 inch mark. If not, record where 144 clicks puts you on the ruler, to figure out what your actual click value is. (Repeat this several times as necessary, to get a “rock-solid”, repeatable value.) You now know, for that scope, how much each click actually moves the reticle at 100 yards–and, of course, that will scale proportionally at longer distances. This optical method is better than shooting, because you don’t have the uncertainly associated with determining a group center.
Using this method, I discovered that my Leupold 6.5-20X50 M1 has click values that are calibrated in what I called ‘Shooter’s MOA’, rather than true MOA. That is to say, 4 clicks moved POI 1.000″, rather than 1.047″ (true MOA). That’s about a 5% error.
I’ve tested bunches of scopes, and lots have click values which are significantly off what the manufacturer has advertised. You can’t rely on printed specifications–each scope is different. Until you check your particular scope, you can’t be sure how much it really moves with each click.
I’ve found the true click value varies not only by manufacturer, but by model and individual unit. My Leupold 3.5-10 M3LR was dead on. So was my U.S.O. SN-3 with an H25 reticle, but other SN-3s have been off, and so is my Leupold 6.5-20X50M1. So, check ‘em all, is my policy.”
From the Expert: “…Very good and important article, especially from a ballistics point of view. If a ballistics program predicts 30 MOA of drop at 1000 yards for example, and you dial 30 MOA on your scope and hit high or low, it’s easy to begin questioning BCs, MVs, and everything else under the sun. In my experience, more than 50% of the time error in trajectory prediction at long range is actually scope adjustment error. For serious long range shooting, the test described in this article is a MUST!” — Bryan Litz, Applied Ballistics for Long-Range Shooting.


 Verifying Scope Level With Tall Target Test
 On its
  Since the effects of angles increase with distance, Praslick explains that: “Unless the angle is extremely severe, [a hunter] really won’t notice these effects at ranges of 200 yards or less.” However, for long shots, hunters definitely need to compensate when taking angled shots. Praslick recommends that hunters print out a small chart with the cosines of common angles (20°, 25°, 30° etc.). In addition, hunters need an accurate ballistic table for their rifle and particular ammo. This should show the elevation corrections (in MOA or clicks), for 200 yards to the maximum range at which you may take a shot.


 For the next 20 shots, we kept “chasing center” trying to get the gun zeroed at 600 yards. We never did. After burning a lot of ammo, we gave up. Before stowing the gun for the trip home, I dialed back to my 100-yard zero, which is my normal practice (it’s 47 clicks down from 600-yard zero). I immediately noticed that the “feel” of the elevation knob didn’t seem right. Even though I was pretty much in the center of my elevation (I have a +20 MOA scope mount), the clicks felt really tight — as they do when you’re at the very limit of travel. There was a lot of resistance in the clicks and they didn’t seem to move the right amount. And it seemed that I’d have four or five clicks that were “bunched up” with a lot of resistance, and then the next click would have almost no resistance and seem to jump. It’s hard to describe, but it was like winding a spring that erratically moved from tight to very loose.
 Barrett offers an innovative scope ring set that adjusts to two different MOA elevations through the use of variable-position cross-pins in the rear ring. Barrett’s
 “I used [the ExRings] to great effect to win the Australian Long Range F-Class Open competition earlier this year. They enabled me to use a higher magnification scope at the 1200-yard range. I have since bought a second pair and run them on my .375 Cheytac to shoot way out yonder.
 The web-based
 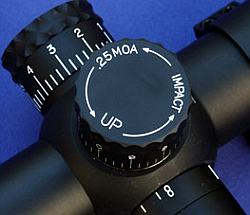 Reader Lindy explains how to check your clicks: “First, make sure the rifle is not loaded. Take a 40″ or longer carpenter’s ruler, and put a very visible mark (such as the center of an orange Shoot’N’C dot), at 37.7 inches. (On mine, I placed two dots side by side every 5 inches, so I could quickly count the dots.) Mount the ruler vertically (zero at top) exactly 100 yards away, carefully measured.


