Larry Medler has come up with a smart little invention — a simple, inexpensive Empty Chamber Indicator for rimfire rifles. It is made from a section of plastic “weed-wacker” line and a wooden ball from a hobby shop. Larry says he was inspired by Juniors who used something similar for their 17-Caliber Air Rifles.
How to Make the Empty Chamber Indicator
Construction Method: First, drill a 7/64″ diameter hole all the way through the 1″-diameter wooden ball. Then enlarge half of that 1″-long hole using a 13/64” diameter drill. Next insert an 8″ piece of heavy duty (0.095″ diameter) weed wacker line through the ball, leaving about 2″ on the side with the bigger-diameter hole. Then, with the short end of the line, fold over the last half-inch so the line is doubled-over on itself. Then slide the line into the ball, stuffing the doubled-over section through the 13/64″ (large) hole. Finally, pull the longer end of the line until the doubled-over section is flush with the outside of the ball. This gives you a sturdy line attachment without messy adhesives. When the assembly’s complete, hold the ECI by the tail and dip the ball in yellow paint. If you’re making more than one ECI, you can drill horizontal holes in a spare block of wood and use that as a drying rack.
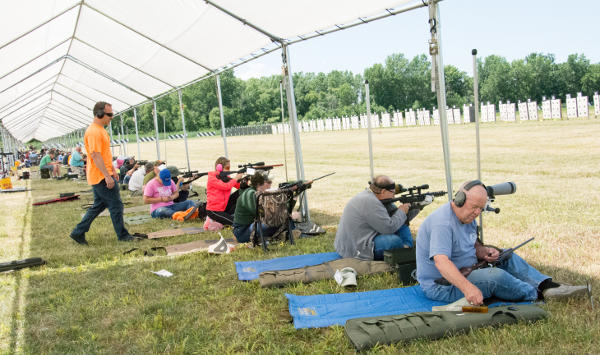
At a Rimfire Sporter match like this, all shooters must have an Empty Chamber Indicator.
The Empty Chamber Indicator for Smallbore Rifles
Larry explains: “At all Highpower rifle matches, silhouette matches, and other shooting events I have attended, Open Bore Indicators (OBI), or what are now called Empty Chamber Indicators (ECI) have been mandatory. The NRA’s yellow ECI for Highpower rifles is easy to use and has been well-received by the shooters. However, I had not seen a truly workable ECI for 22 rimfire rifles — until I visited Michigan’s Washtenaw Sportsman’s Club where I saw juniors using ECIs for their 17 Caliber Air Rifles. Someone at the club made the empty chamber indicators by attaching an 8″ piece of weed wacker line to a 1″-diameter wooden ball, painted bright yellow. I now make similar ECIs for the 22 rimfire silhouette matches I run.”
Do you know what the inside of a rifle chamber (and throat zone) really looks like? Do you understand the concept of headspace and why it’s important? If not, you should read the Brownells GunTech article Gauging Success — Minimum Headspace and Maximum COL. This article explains the basics of headspace and shows how to measure headspace (and length to lands) in your barrels with precision. The article also explains how to adjust your full-length sizing dies to “bump the shoulder” as needed.
Why is headspace important? The article explains: “Controlling headspace and setting proper C.O.L. also represent improved safety and reduced cost of handloading. Excessive headspace can cause case head separation and gases in excess of 60,000 PSI escaping from a rifle’s chamber. Too little headspace can result in a chamber forced bullet crimp and a bullet that becomes an obstruction more than a properly secured projectile. Excessive C.O.L. can result in a rifling-bound bullet, a condition that could result in spikes of excessive pressure.” [Editor’s NOTE: It is common for competitive benchrest shooters to seat bullets into the rifling. This can be done safely if you reduce your loads accordingly. With some bullets we often see best accuracy .010″ (or more) into the lands. However, this can generate more pressure than the same bullet seated .010″ away from initial lands contact. As with all reloading, start low and work up gradually.]
How is headspace specified? Most cartridges used within the United States are defined within ANSI/SAAMI Z299.3-4. Brownells explains: “In the case of the .243 Winchester, as an example, there are pressure specifications, cartridge drawings and, as pictured above, chamber drawings. Armed with a chamber drawing, each manufacturer producing a firearm for the .243 Winchester knows the proper standard dimension to cut chambers and set headspace. Notice there are two headspace reference dimensions for the chamber. The upper is a place in the chamber where the shoulder is .400″ in diameter; the “datum” or “basic” line. The lower is the 1.630″~1.640″ minimum – maximum dimension from the breech face (bolt face) to that point in the chamber that measures .400″.”
The actual headspace of any firearm is the distance from the breech face to the point in the chamber that is intended to prevent forward motion of a cartridge.
Finding Cartridge Length to Lands with OAL Gauge
Using a comparator on a set of calipers, you can quickly determine cartridge base-to-ogive length. This is the measurement from the base of the case to the forward-most full diameter section of the bullet, which is for convenience called the ogive. (Technically, the “ogive” is the full curve from bullet tip back to full-diameter ring). Shown here, that ogive is 0.243″ diameter.
The next step is using a modified (threaded) case with a Hornady OAL tool to determine Length-to-Lands (LTL) in your rifle’s chamber. During this measurement process, the modified case, with a bullet in its neck, is inserted in the chamber. Go slow, take your time. Here are 5 tips that will help you get repeatable and reliable LTL measurements:
1. Start with a clean chamber and clean barrel throat.
2. Make sure the modified case is fully screwed down and seated on the OAL Gauge. It can sometimes unscrew a bit during repeated measurements.
3. Insert the modified case slowly and gently, but ensure the shoulder of the modified case is fully seated on the end of the chamber.
4. Push the gray plastic rod GENTLY. It is common for the bullet to be tilted a bit. You want to allow the bullet to self-center in the throat BEFORE you apply much pressure. Then tap a couple times and push until you feel resistance. Do NOT push too hard — that will jam the bullet in the lands.
5. Repeat the measurement at least 3 more times. If you follow our instructions, you should, typically, get a repeatable measurement, within 0.0015″ or so, 3 out of 4 times.
Forum member Rich DeSimone uses a handy “Stub Gauge” for setting shoulder “bump” and seating depth. The gauge is made from a section of barrel lopped off when the muzzle is crowned. The chambering reamer is run in about 1/4 of the way, enough to capture the neck and shoulder area of the case. Rich then uses his full-length die to “bump” a master case with the ideal amount of headspace for easy feeding and extraction. He takes that case and sets it in this Stub Gauge, and measures from the front of the gauge to the rim. He can then quickly compare any fired case to a his “master” case with optimal headspace. Since the gauge measures off the shoulder datum, this tells him how much to bump his fired brass.
In addition, the Stub Gauge can be used to set bullet seating-depth. Rich has a channel cut transversely on one side of the gauge, exposing the throat area. Since the interior of the gauge is identical to the chamber in his gun, this lets him see where a seated bullet engages the rifling. He can tinker with bullet seating length until he gets just the right amount of land contact on the bullet, confirmed visually. Then he measures the case OAL and sets his seating dies accordingly. This is much handier than using a Hornady Tool to measure distance to the lands.
But what happens when the throat wears and moves out on your live barrel — making the actual length to lands different (slightly longer) than before. Well, the stub gauge is still valuable as a known starting point. As your barrel’s throat wears, you may seat your bullets out further to “chase the lands”, but the gauge provides a constant land engagement point, in the barrel’s “as new” condition. By measuring the difference between the land contact point on the gauge and the actual contact point on your barrel, you can determine throat “migration”.
Setting optimal bullet seating depth is very important for maximum accuracy. While some cartridges and barrels may deliver good accuracy with a wide range of bullet seating depths, other barrels may be more fussy, and may strongly prefer a specific seating depth, such as .006″ in the lands or .020″ off. To get this kind of precision, you need to know the exact position of the lands in your barrel. In addition, because barrel throats tend to move as the round count goes up, you should check the position of the lands regularly on a competition rifle.
Today’s Saturday Videos demonstrate a number of methods for finding Length to Lands in your rifle barrel. We start with the most common method — using the Hornady O.A.L. Gauge with a threaded modified case. With some practice, and a refined touch, this is actually very accurate. After this, we offer videos that have alternative methods, each with its pros and cons. You should find a method that works for you, that can achieve results within a couple thousandths for multiple measurements.
Finding Cartridge Length to Lands with O.A.L. Gauge
Probably the most common method to find length to lands is using a Hornady O.A.L. Gauge Tool with a comparator on a set of calipers. We regularly use this method with a custom modified case for our 6mmBR rifle. Using the technique described below, we can get results within .0015″ or so three out of four times. We do recommend taking multiple measurements. As explained below, be consistent and do NOT push the gray plastic rod too fast or with too much force.
During this measurement process, the modified case, with a bullet in its neck, is inserted in the chamber. Go slow, take your time. Here are FIVE TIPS that will help you get repeatable and reliable length-to-lands measurements with the Hornady O.A.L. Gauge:
1. Start with a clean chamber and clean barrel throat.
2. Make sure the modified case is fully screwed down and seated on the O.A.L. Gauge. It can sometimes unscrew a bit during repeated measurements.
3. Insert the modified case slowly and gently, but ensure the shoulder of the modified case is fully seated on the end of the chamber.
4. Push the gray plastic rod GENTLY. It is common for the bullet to be tilted a bit. You want to allow the bullet to self-center in the throat BEFORE you apply much pressure. Then tap a couple times and push until you feel resistance. Do NOT push too hard — that will jam the bullet in the lands.
5. Repeat the measurement at least 3 more times. If you follow our instructions, you should, typically, get a repeatable measurement, within 0.0015″ or so, 3 out of 4 times.
NOTE: We’ve seen some folks struggle to get repeatable measurements with this tool. In most cases, they were going too fast and pushing too hard on the gray rod, creating a hard jam.
Brownells — Using Hornady O.A.L. Gauge with Modified Case
This Brownells video shows how to use the modified (threaded) case for the cartridge your rifle shoots. Attach it to the O.A.L. Gauge, then insert a bullet into the case neck and slide the tool into the chamber. It takes a little practice to get consistent results. After getting the measurement in the barrel, you ascertain the length to lands using a Hornady Bullet Comparator attached to your calipers.
Making Your Own Modified Case — Threading the Case End
This helpful video from our friend Gavin Gear of UltimateReloader.com shows how to create a custom modified case to use with a Hornady O.A.L. Gauge. You need to drill out the primer pocket area, then tap and thread the bottom of the case.
Ultimate Reloader Shows 3 Ways to Find the Lands
This video shows three different ways to measure distance to lands. First Gavin Gear shows how to use a Hornady O.A.L. Gauge with Modified Case. The second methods shows how to use a bit of Loctite INSIDE the neck to secure a bullet. Be sure there is NO Loctite on the outside of the neck — you don’t want that in your chamber! You place the case with bullet into the chamber, then close bolt to seat the bullet. After waiting 5-10 minutes for the Loctite to set, you remove the cartridge gently. The third method (time-mark 16:50) is a Jam method using a bolt with the firing pin assembly and ejector removed (so there is no extra pressure on the case). Gavin notes: “The bullet ogive can be colored with a permanent marker if you want to indicate lands contact.”
About this third Jam method, ace F-Class shooter Erik Cortina posted: “My method is actually the last one that Travis showed. The one where you let the lands push bullet in. But it is neck tension dependent. I also put die wax in bullet ogive to prevent it from sticking in the lands. The method of seating bullet deeper and deeper until bolt closes is the Alex Wheeler method. As you said, there are a tons of ways to measure this.”
Finding Length to Lands the Speedy Way
Here is another method to find length to lands that can work with an unmounted barrel. This method is explained by Thomas “Speedy” Gonzales, a top gunsmith and ace benchrest shooter. Speedy drops a case with bullet seated into the chamber and then adjusts the seating depth with an inline seating die until there is no sticking or resistance felt. He can then adjust the true length to lands easily with his micrometer seating die. If you don’t have a modified case and do not want to partially disassemble your bolt to take measurement, you might want to use Speedy’s method.
Finding Length to Lands Using Bolt Movement — Primal Rights
This video shows how to remove the firing pin assembly in your bolt. This way the bolt can be used to advance a case with bullet smoothly into the chamber. Then the bullet seated in the case neck will move back to “first touch” contact position. Then extract the case slowly and measure.
The video host states: “Overall length gauges and modified cases tend to be close, but never as precise as we would like them to be. Here we describe how to measure the length to your lands in your rifle as precisely as possible, using a caliper and bullet comparator.” NOTE: The host says a store-bought Modified Case may not deliver that exact same length from case base to lands as your own fired case. That is true, but as long as the commercial Modified Case gives you repeatable results, you have a functional reference point which you can then use to test seating depths relative to that measurement.
Finding Length to Lands Using Bullet in Case With Split-Cut Neck
Here is a common method that requires no special tools. Simply take a fired (no primer), neck-sized case and split the necks down vertically with a Dremel. Done right, this will hold the bullet in place when you chamber the unloaded round. As the bullet touches the rifling it will move back. As the cartridge chambers, the bullet slides back into the case to give you length to lands. This is not super-accurate but it is probably good enough for finding the length to lands for a hunting rifle. The video maker explains: “No need to purchase gauges for this if you are willing to sacrifice one case. With a little time and patience you can get good results with this method.” Further Explanation.
How to Adjust Tension — Length and Number of Neck Cuts
Forum member Andris Silins, who uses this method, explains: “I made the neck cuts using a Dremel with a cut-off wheel. You can adjust tension two ways. First, you can make the cuts longer or shorter. Longer cuts = less tension. If you used only three cuts instead of four you would get more tension. The trick is to be gentle when you open and close the bolt. If you ram the bolt closed you may wedge the bullet into the lands. When you open the bolt it helps to keep a finger or two near by to guide the case out straight because the ejector wants to push it sideways.” READ MORE.
Finding the Lands with HK Rifleworks
This is another video that demonstrates how to disassemble the bolt so that the firing pin assembly and spring does not apply pressure on the empty case which would affect the bullet as it touches the lands. The video maker shows how to use a Brownells bolt disassembly tool to quickly take the bolt apart (3:20 time-mark). Once you have a repeatable measurement, you know exactly where is “first touch”. Then you can adjust your seating depth to be into the lands, or jumping the bullets. Many benchrest shooters like to load “into the lands”. PRS/NRL shooters and hunters will generally prefer to jump their bullets .0020″ or more.
Here’s a tip we feature every year or so, because it is something that costs nothing, yet can be very useful in the reloading process.
With a simple, easy modification to a fired case, you can determine the length to lands in your rifle barrel. As long as you set the tension right, the measurements should be repeatable, and you’ve just saved yourself $47.40 — the combined cost of a Hornady commercial OAL gauge ($41.41) and Modified Case ($5.99).
To achieve best accuracy with a rifle, you must control bullet seating depth very precisely, so all bullets end up in the same place relative to the entrance of the lands, every time. There may be multiple cartridge OALs which prove accurate. However, with each, you first need to determine a “zero” point — a reliable, and repeatable OAL where the bullet is “just touching” the lands.
There are tools, such as the Hornady (formerly Stoney Point) OAL Gauge, that will help you find a seating OAL just touching the lands. However, the tool requires that you use a special modified case for each cartridge you shoot. And, while we find that the Hornady OAL Gauge is repeatable, it does take some practice to get in right.
Make Your Own Length-to-Lands Gauge with a Dremel
Here’s an inexpensive alternative to the Hornady OAL tool — a slotted case. Forum member Andris Silins explains how to create a slotted case to measure length to the lands in your rifle:
“Here’s what I did to find length to lands for seating my bullets. I made four cuts into the neck of fire-formed brass. Then I pressed the bullet in lightly and chambered the entire gauge. As the cartridge chambers, the bullet slides back into the case to give you length to lands. It took less than five minutes to get it cut and working. A little light oil in the barrel just past the chamber helps ensure the bullet does not get stuck in the lands. It works great and is very accurate.
How to Adjust Tension — Length and Number of Neck Cuts
I made the cuts using a Dremel with a cut-off wheel. You can adjust tension two ways. First, you can make the cuts longer or shorter. Longer cuts = less tension. If you used only three cuts instead of four you would get more tension. The trick is to be gentle when you open and close the bolt. If you ram the bolt closed you may wedge the bullet into the lands. When you open the bolt it helps to keep a finger or two near by to guide the case out straight because the ejector wants to push it sideways.”
Our friend Gavin Gear has just released an excellent video showing how to make a threaded Modified Case for use with the Hornady Lock-N-Load Overall Length Gauge. You can watch Gavin make a Modified Case start to finish in the video below:
Video Shows How to Drill and Tap Modified Case
Gavin has some clever tricks. First he uses a sizing die to hold the cartridge case during the threading process. Second he uses two drill bits in sequence — a smaller bit to ream out the primer pocket, and then a larger “M” bit to increase the hole diameter before threading the brass. Finally he leaves the threading tap IN the brass, locks the tailstock, and then “gently pulls on the quill” to remove the brass from the die held in his lathe (See 5:46 timemark).
Get the Correct 5/16″-36 RH Tap
Unfortunately, Hornady has selected an uncommon thread type for OAL Gauges. You probably won’t be able to buy the correct 5/16″ – 36 RH HSS Tap at your local hardware store. However you CAN order this special tap from Amazon for $9.99.
Modified Case Q & A — TECH TIPS
Why do I need a Modified Case?
Every serious reloader should have a Modified Case for each cartridge type they shoot. The reason is that this allows you to get very precise measurements of the length-to-lands in your chamber. When used with the Hornady OAL Gauge, with some practice, you should be able to get repeatable length-to-lands measurements within about 0.0015″. We generally do 4-5 measurements with the OAL Gauge and usually 3 or 4 will be “on the money”. NOTE: We recommend a gentle, easy pressure on the plastic pusher rod. Don’t push too hard or you will jam the bullet hard into the lands, which produces inconsistent results.
Can’t I Just Buy a Modified Case?
Hornady makes a variety of Modified Cases sold on Amazon and through retailers such as Midsouth. While Hornady makes modified cases for many standard cartridges, if you shoot a wildcat such as the 6mm Dasher or .284 Shehane, you’ll need to create a custom modified case. And even if you shoot a standard cartridge such as the .308 Win, you can get more consistent measurements with a custom Modified Case.
If you do decide to make your own modified case, you’ll want to start with a case that’s been fired in your rifle. That way you get the best fit to YOUR chamber. Also, you won’t need to expand the neck to provide bullet clearance. Then you need to drill out the primer pocket and tap the base of the case to match the threads on the Hornady OAL Gauge tool. Make at least two modified cases, as you’ll probably misplace one at some point.
MORE INFORMATION: Want to learn more? We published a much longer story in which Erik Cortina explains in greater detail how to made the Modified Case. That article illustrates the 5/16″ – 36 RH HSS Tap required and shows how to set up the lathe to drill and tap your case. If you are serious about making your own Modified Cases, you should Read the Full Article.
Do you know what the inside of a rifle chamber (and throat zone) really looks like? Do you understand the concept of headspace and why it’s important? If not, you should read the Brownells GunTech article Gauging Success — Minimum Headspace and Maximum COL. This article explains the basics of headspace and shows how to measure headspace (and length to lands) in your barrels with precision. The article also explains how to adjust your full-length sizing dies to “bump the shoulder” as needed.
Why is headspace important? The article explains: “Controlling headspace and setting proper C.O.L. also represent improved safety and reduced cost of handloading. Excessive headspace can cause case head separation and gases in excess of 60,000 PSI escaping from a rifle’s chamber. Too little headspace can result in a chamber forced bullet crimp and a bullet that becomes an obstruction more than a properly secured projectile. Excessive C.O.L. can result in a rifling-bound bullet, a condition that could result in spikes of excessive pressure.”
[Editor’s NOTE: It is common for competitive benchrest shooters to seat bullets into the rifling. This can be done safely if you reduce your loads accordingly. With some bullets we often see best accuracy .010″ (or more) into the lands. However, this can generate more pressure than the same bullet seated .010″ away from initial lands contact. As with all reloading, start low and work up gradually.]
Headspace is a measurement from the bolt-face to a point in the chamber. This point of measurement will vary based on the type of cartridge. Improper headspace, either excessive or (conversely) under SAAMI specifications, can cause a variety of problems, many serious.
How is headspace specified? Most cartridges used within the United States are defined within ANSI/SAAMI Z299.3-4. Brownells explains: “In the case of the .243 Winchester, as an example, there are pressure specifications, cartridge drawings and, as pictured above, chamber drawings. Armed with a chamber drawing, each manufacturer producing a firearm for the .243 Winchester knows the proper standard dimension to cut chambers and set headspace. Notice there are two headspace reference dimensions for the chamber. The upper is a place in the chamber where the shoulder is .400″ in diameter; the “datum” or “basic” line. The lower is the 1.630″~1.640″ minimum – maximum dimension from the breech face (bolt face) to that point in the chamber that measures .400″.”
The actual headspace of any firearm is the distance from the breech face to the point in the chamber that is intended to prevent forward motion of a cartridge.
Finding Cartridge Length to Lands with OAL Gauge
Using a comparator on a set of calipers, you can quickly determine cartridge base-to-ogive length. This is the measurement from the base of the case to the forward-most full diameter section of the bullet, which is for convenience called the ogive. (Technically, the “ogive” is the full curve from bullet tip back to full-diameter ring). Shown here, that ogive is 0.243″ diameter.
The next step is using a modified (threaded) case with a Hornady OAL tool to determine Length-to-Lands (LTL) in your rifle’s chamber. During this measurement process, the modified case, with a bullet in its neck, is inserted in the chamber. Go slow, take your time. Here are 5 tips that will help you get repeatable and reliable LTL measurements:
1. Start with a clean chamber and clean barrel throat.
2. Make sure the modified case is fully screwed down and seated on the OAL Gauge. It can sometimes unscrew a bit during repeated measurements.
3. Insert the modified case slowly and gently, but ensure the shoulder of the modified case is fully seated on the end of the chamber.
4. Push the gray plastic rod GENTLY. It is common for the bullet to be tilted a bit. You want to allow the bullet to self-center in the throat BEFORE you apply much pressure. Then tap a couple times and push until you feel resistance. Do NOT push too hard — that will jam the bullet in the lands.
5. Repeat the measurement at least 3 more times. If you follow our instructions, you should, typically, get a repeatable measurement, within 0.0015″ or so, 3 out of 4 times.
Forum member Rich DeSimone uses a handy “Stub Gauge” for setting shoulder “bump” and seating depth. The gauge is made from a section of barrel lopped off when the muzzle is crowned. The chambering reamer is run in about 1/4 of the way, enough to capture the neck and shoulder area of the case. Rich then uses his full-length die to “bump” a master case with the ideal amount of headspace for easy feeding and extraction. He takes that case and sets it in this Stub Gauge, and measures from the front of the gauge to the rim. He can then quickly compare any fired case to a his “master” case with optimal headspace. Since the gauge measures off the shoulder datum, this tells him how much to bump his fired brass.
In addition, the Stub Gauge can be used to set bullet seating-depth. Rich has a channel cut transversely on one side of the gauge, exposing the throat area. Since the interior of the gauge is identical to the chamber in his gun, this lets him see where a seated bullet engages the rifling. He can tinker with bullet seating length until he gets just the right amount of land contact on the bullet, confirmed visually. Then he measures the case OAL and sets his seating dies accordingly. This is much handier than using a Hornady Tool to measure distance to the lands.
But what happens when the throat wears and moves out on your live barrel — making the actual length to lands different (slightly longer) than before. Well, the stub gauge is still valuable as a known starting point. As your barrel’s throat wears, you may seat your bullets out further to “chase the lands”, but the gauge provides a constant land engagement point, in the barrel’s “as new” condition. By measuring the difference between the land contact point on the gauge and the actual contact point on your barrel, you can determine throat “migration”.
Make Your Own Length-to-Lands Gauge to Check Bullet Position
Here’s a tip we feature every year or so, because it is something that costs nothing, yet can be very useful in the reloading process. With a simple, easy modification to a fired case, you can determine the length to lands in your rifle barrel. As long as you set the tension right, the measurements should be repeatable, and you’ve just saved yourself $47.98 — the combined cost of a Hornady C-1000 commercial OAL gauge ($41.99) and Modified Case ($5.99).
To achieve best accuracy with a rifle, you must control bullet seating depth very precisely, so all bullets end up in the same place relative to the entrance of the lands, every time. There may be multiple cartridge OALs which prove accurate. However, with each, you first need to determine a “zero” point — a reliable, and repeatable OAL where the bullet is “just touching” the lands.
There are tools, such as the Hornady (formerly Stoney Point) OAL Gauge, that will help you find a seating OAL just touching the lands. However, the tool requires that you use a special modified case for each cartridge you shoot. And, while we find that the Hornady OAL Gauge is repeatable, it does take some practice to get in right.
Make Your Own Length-to-Lands Gauge with a Dremel
Here’s an inexpensive alternative to the Hornady OAL tool — a slotted case. Forum member Andris Silins explais how to create a slotted case to measure length to the lands in your rifle:
“Here’s what I did to find length to lands for seating my bullets. I made four cuts into the neck of fire-formed brass. Then I pressed the bullet in lightly and chambered the entire gauge. As the cartridge chambers, the bullet slides back into the case to give you length to lands. It took less than five minutes to get it cut and working. A little light oil in the barrel just past the chamber helps ensure the bullet does not get stuck in the lands. It works great and is very accurate.
How to Adjust Tension — Length and Number of Neck Cuts
I made the cuts using a Dremel with a cut-off wheel. You can adjust tension two ways. First, you can make the cuts longer or shorter. Longer cuts = less tension. If you used only three cuts instead of four you would get more tension. The trick is to be gentle when you open and close the bolt. If you ram the bolt closed you may wedge the bullet into the lands. When you open the bolt it helps to keep a finger or two near by to guide the case out straight because the ejector wants to push it sideways.”
Make Your Own Length-to-Lands Gauge to Check Bullet Position
Here’s a tip we feature every year or so, because it is something that costs nothing, yet can be very useful in the reloading process. With a simple, easy modification to a fired case, you can determine the length to lands in your rifle barrel. As long as you set the tension right, the measurements should be repeatable, and you’ve just saved yourself $43.93 — the combined cost of a Hornady C-1000 commercial OAL gauge ($37.99) and Modified Case ($5.94).
To achieve best accuracy with a rifle, you must control bullet seating depth very precisely, so all bullets end up in the same place relative to the entrance of the lands, every time. There may be multiple cartridge OALs which prove accurate. However, with each, you first need to determine a “zero” point — a reliable, and repeatable OAL where the bullet is “just touching” the lands.
There are tools, such as the Hornady (formerly Stoney Point) OAL Gauge, that will help you find a seating OAL just touching the lands. However, the tool requires that you use a special modified case for each cartridge you shoot. And, while we find that the Hornady OAL Gauge is repeatable, it does take some practice to get in right.
Make Your Own Length-to-Lands Gauge with a Dremel
Here’s an inexpensive alternative to the Hornady OAL tool — a slotted case. Forum member Andris Silins explais how to create a slotted case to measure length to the lands in your rifle:
“Here’s what I did to find length to lands for seating my bullets. I made four cuts into the neck of fire-formed brass. Then I pressed the bullet in lightly and chambered the entire gauge. As the cartridge chambers, the bullet slides back into the case to give you length to lands. It took less than five minutes to get it cut and working. A little light oil in the barrel just past the chamber helps ensure the bullet does not get stuck in the lands. It works great and is very accurate.
How to Adjust Tension — Length and Number of Neck Cuts
I made the cuts using a Dremel with a cut-off wheel. You can adjust tension two ways. First, you can make the cuts longer or shorter. Longer cuts = less tension. If you used only three cuts instead of four you would get more tension. The trick is to be gentle when you open and close the bolt. If you ram the bolt closed you may wedge the bullet into the lands. When you open the bolt it helps to keep a finger or two near by to guide the case out straight because the ejector wants to push it sideways.”


 Finding Cartridge Length to Lands with OAL Gauge

 Forum member Rich DeSimone uses a handy “Stub Gauge” for setting shoulder “bump” and seating depth. The gauge is made from a section of barrel lopped off when the muzzle is crowned. The chambering reamer is run in about 1/4 of the way, enough to capture the neck and shoulder area of the case. Rich then uses his full-length die to “bump” a master case with the ideal amount of headspace for easy feeding and extraction. He takes that case and sets it in this Stub Gauge, and measures from the front of the gauge to the rim. He can then quickly compare any fired case to a his “master” case with optimal headspace. Since the gauge measures off the shoulder datum, this tells him how much to bump his fired brass.


