On some internet shooting forums, self-declared “experts” advise new rifle shooters to stick to low-end factory rifles. These “experts” (many of whom don’t own a single really accurate rifle), claim that it will take years for a new shooter to learn how to shoot a rifle accurately. So, the argument goes, the accuracy offered by a precision-chambered rifle, with a custom barrel, is “wasted” on a new shooter.
We disagree with that viewpoint, at least when it comes to rifles shot from a rest. We’ve seen relatively new shooters, with help from a skilled mentor, do remarkably well with precision rifles right from the start. With a good bench gun, many new shooters can shoot well under 1 MOA on the first day. Certainly it takes time for a complete novice to learn how to handle the gun and to work the trigger smoothly. However, this editor has personally seen some inexperienced shooters try their hand at benchrest shooting, and within few month they are doing very well indeed at club shoots.
Accurate Rifles Reward Progress As Novices Build Skills
For bench shooting, we think a highly accurate rifle is a much better training device for a new shooter than a typical, cheap factory sporter. With a gun capable of 1.5-2.0 MOA at best, you can never really determine if a “flyer” is you or the gun. Conversely, when a novice shoots a gun that can put 5 shots through one ragged hole, if a shot goes way high or low, the shooter knows his aim, trigger control, or gun-handling is to blame. He (or she) can then correct the problem. And when the shooter does everything right, he or she will see a nice tight group on the target. The accurate rifle provides more meaningful feedback and it rewards progress. That helps the novice become a better shooter in a shorter period of time.
A while back, Forum Member Preacher and his “bunny hugger” niece from California proved this point. The young lady, with almost no shooting experience, took Preacher’s 6-6.5×47 and shot a sub-quarter-MOA, 3-shot group at 350 yards. Don’t tell her she needs to stick to a cheap factory rifle. Preacher reports: “My niece flew in from the west coast and came up to visit. When she saw a few of my full-blown varmint rifles, she wanted to shoot one. She did a super job even if she IS a ‘bunny hugger’. She pulled the 1.5 ounce Jewell on a few fired cases to check out the trigger pull and then got in behind the gun and put three shots into a 350-yard target with a one-inch circle.” We measured her group at 0.822″ (0.224 MOA). Don’t tell Preacher that accuracy is “wasted” on novices. He joked: “I sure don’t want her shooting at me ….”
Rifle Features BAT Action, Krieger Barrel, and Russo Laminated Stock:
For those who are interested, Preacher’s rifle features a BAT 3-lug action, 30″ Krieger 7.5-twist heavy contour barrel, and Russo stock (with clear coat by Preacher). Chambered in 6-6.5×47 Lapua, this gun “shoots the 108gr Bergers very well” according to Preacher. Yep, we agree with that — even when a novice “bunny-hugger” does the trigger-pulling.
Photo by SFC Brandon Green, 2018 National High Power Champion.
The prestigious CMP National Matches will be held at Camp Perry, Ohio this summer, July 12 through August 9, 2026. The President’s 100 Match runs Monday, July 27th, followed by Individual and Team Trophy Matches. And the Garand and Modern Military events kick off on August 1st, while 600-yard Mid-Range rifle matches run August 3-4, with Long Range following, concluding with the Palma Team match on August 9.
For those competing at Camp Perry this summer, we offer some insights from Tyrel Cooper, a multi-time National Champion. A past member of the USAMU, Cooper’s shooting resume includes five national championships (one each in 2008, 2011, 2012, and two in 2013). He won the 2013 NRA National Long Range Championship, as well as the 2013 NRA National Service Rifle Championship. In this article, written in 2014, Cooper explains the mental preparation that helped him win National Titles in 2013.
Below is a 2012 file photo of Ty Cooper shooting a service rifle. Cooper won the 2013 Long Range Championship using a Nesika-actioned bolt gun chambered in 7mm SAUM.
Mental Preparation by Tyrel Cooper Getting focused mentally is an important part of preparation for Perry. In 2011 I was chasing Sherri Gallagher, since then I have been chasing Brandon Green[.] If I get beat by a Service Rifle I am going to make him or her work for it. So there is your peak into my mental process. I go for the top and if I am hanging with them then the Service Rifle National Championship will come, Kind of like how I shoot for X’s and Tens will come.
Now I understand everyone is at different levels. You have to figure out what your goals are and then lie to yourself that you’ve already achieved them. Here is a trick that I used back in 2008: When I was a kid just starting out, my Dad made me read several books on shooting. One of them being With Winning In Mind by Lanny Bassham. One of the things I remember from his book is that he would make notes and place them where he would see them often. They contained his goals or stated he was already a world champion. I took a page from his book and did the same thing.
I made 3×5 cards and wrote my personal best 500 and 800 aggregate scores and taped on the horn of my truck, above the radio in my truck, on my laptop and a few other places I would see them often. Every time I saw those I would tell myself that I average those scores and I would get used to seeing them. By doing this you are lying to yourself to overcome the mental blocks the subconscious mind lays out for you.
I went from my worst year in 2007 to winning my first National Championship in 2008. I kind of slacked off in 2009 because I had reached my goals and didn’t set new ones and it showed, so I had to find new goals and motivation which I did and that pushed me back to the top.
Long story short, this is a mental sport and you have to figure out what you need to do to perform at your highest levels and breaking through those mental road blocks. You have to figure out how to get yourself to relax and control your mind keeping calm when you are shooting a personal best, either standing or on the day.
Here is a tip from my mental process from shooting. First I shoot for Xs, I took the line from the movie The Patriot and applied it to my shooting, “Aim small, miss small” and it is true. If you accept wide shots then you will keep shooting wide shots.
Winning Techniques for Rifle Competition
Slow, Solid, Smooth, Center
Always focus on the positive and good shots, and what you did physically and mentally, when you shot them. When I am nervous and need to calm myself down I tell myself: slow, solid, smooth, center.
Slow
I want my movement to be slow…
I can shoot Tens and Xs all day with slow movement.
Solid
Solid like a rock, a rock doesn’t move and that’s how I want my positions. By saying solid it reminds me to go through my little checks to make sure I am doing what I need to do make that happen.
Smooth
Smooth — that is my trigger word for smooth movement. You don’t want fast choppy movement but slow and smooth. This also reminds me to be smooth on the trigger. You can be smooth-fast or you can be smooth-slow but you have to be smooth and most people aren’t when they think they are. Just before leaving the USAMU, I walked up and down the line of five shooters during a rapid fire string and only one of them was smooth with their trigger control. It’s the second most important thing when it comes to shooting.
Center
This reminds me that I want my shots in the middle. It is just a positive reinforcement of where I want my shots to go. I shoot a reverse flat tire so it also kind of reminds me as to what I am looking for.
Countdown to CMP National Matches:
Story Tip from ELR Researcher. We welcome reader submissions.
SSG Amanda Elsenboss, now with the Pennsylvania National Guard, wass the 2021 NRA National High Power Champion and 2019 NRA Long Range National Champion. These two major titles place Amanda among the greatest American shooters and one of only three women in U.S. history to win the High Power title. Amanda combines a superb “mental game” with great gun-handling and wind-reading skills.
In the archives of On The Mark magazine, DCM Emeritus Gary Anderson, an Olympic Gold medal-winning shooter in his younger years, offers sage advice for competitive shooters.
In his article Ten Lessons I Wished I Had Learned as a Young Shooter, Anderson provides ten important guidelines for everyone involved in competitive shooting. Here are the Ten Lessons, but you should read the full article. Anderson provides detailed explanations of each topic with examples from his shooting career.
LESSON 1 – NATURAL ABILITY WILL NOT MAKE YOU A SHOOTING CHAMPION.
(You also need hard work, training effort and perseverance.)
LESSON 2 – ANGER IS THE ENEMY OF GOOD SHOOTING.
(The key to recovering from a bad shot is to stay cool, no matter what happens.)
LESSON 3 – BAD SHOTS CAN TEACH YOU MORE THAN GOOD SHOTS.
(Today, error analysis is one of the most powerful tools for improving scores.)
LESSON 4 – NEVER GO WITHOUT A SHOT PLAN.
(A shot plan is a detailed breakdown of each of the steps involved in firing a shot.)
LESSON 5 – PRACTICE IN BAD CONDITIONS AS WELL AS GOOD CONDITIONS.
(Most competitions are fired in windy conditions or where there are plenty of distractions.)
LESSON 6 – CHAMPIONS ARE POSITIVE, OPTIMISTIC PEOPLE.
(Negative shooters expect bad results; positive shooters expect to train hard to change bad results.)
LESSON 7 – IT’S NOT ABOUT WHETHER YOU WIN OR LOSE.
(It’s about how hard you try to win.)
LESSON 8 – YOUR DOG WON’T BITE YOU AFTER SHOOTING A BAD SCORE.
(Hopefully your coach, parents and friends won’t bite you either.)
LESSON 9 – YOUR PRESS CLIPPINGS CAN HURT YOU OR HELP YOU.
(Winning can go to our heads. We start thinking we are so good we don’t have to work hard any more.)
LESSON 10 — YOU NEVER SHOT YOUR BEST SCORE.
(Great champions are always looking for ways to improve.)
USAMU shooters on the firing line at the Wa-Ke’-De outdoor range in Bristol, IN. Photo courtesy USAMU.
About Gary Anderson Gary Anderson served as the Director of the Civilian Marksmanship Program (CMP) from 1999-2009, and is now DCM Emeritus. As a Nebraska farmboy, Gary grew up hunting and shooting. Dreams of winning an Olympic Gold Medal in shooting led Gary to the U.S. Army. In 1959, he joined the elite U.S. Army Marksmanship Unit. Just two years later, he won his first national championship.
At the 1962 World Shooting Championships in Egypt, Anderson stunned the shooting world by winning four individual titles and setting three new world records. At the 1964 Tokyo Olympics, Gary won the 300m free-rifle Gold Medal, setting a new world record in the process. At the 1966 World Shooting Championships in Germany, Anderson won three additional world titles. At the 1968 Olympics, Gary won a second gold medal in the 300m free-rifle event.
After his “retirement” from international competition, Gary competed in the National High Power Championships, winning the President’s National Trophy in 1973, 1975 and 1976. Over his competitive career, Anderson won two Olympic Gold Medals, seven World Championships, and sixteen National Championships. He is unquestionably one of the greatest American marksmen ever.
Looking to improve your competition skills? The Shooting Sports USA website has scores of informative articles that can help your score higher at your next shooting tournament. You’ll find articles on wind reading, position shooting, match strategies, and much more.
One great Shooting Sports USA article, Shooting is 90% Mental, was penned by Chip Lohman (SSUSA’s former Editor). With the help of two very smart Ph.D types, Judy Tant and Mike Keyes, Lohman examines the mental processes involved in the shooting sports. Chip’s co-authors have impressive credentials. Dr. Judy Tant is a Clinical Psychologist and National Bullseye Pistol Champion. Dr. Michael J. Keyes, is a licensed Psychiatrist and former physician for the U.S. Shooting Team.
If you shoot competitively, this is definitely a “must-read” article. The authors examine how the brain functions under stress, how “visualization” can be used to improved performance, how “brain speed” can be enhanced through proper training, and how the brain stores learned routines into “muscle memory.” And that’s just for starters — the article gives many concrete examples of techniques top shooters have employed to improve their “mental game” and shoot higher scores.
Brain Speed and Trigger Control: Research: Scientists believe that the newer frontal lobe may not be able to keep up with “deep” brain signals that transmit at nearly 300 mph. This is explained when athletes talk about “letting go”, rather than over-thinking the shot.
This conscious signal can take up to 0.3 seconds from recognizing the desired sight picture to moving the trigger finger — too long to capture the opportunity for a perfect shot. However, if the signal is initiated spontaneously in the cerebellum where such procedures are thought to be stored through repetition, the reaction speed is much quicker. Signals are processed by the “deep brain” almost twice as fast as the problem-solving frontal lobes.
Mental Preparation for Shooting Matches
Below are tips from Emil Praslick III, former USAMU coach. Considered one of the best wind readers on the planet, Praslick also was known for his ability to help his shooters master the “mental game”.
Thinking Your Way to Success by Emil Praslick III
Why does it seem that the same small group of shooters wins the majority of the matches? What is the difference among shooters who are technically equal? Confidence. A confident shooter is free to execute his shots without the fear of failure, i.e. shooting a poor shot.
Negative thoughts (can’t, won’t be able to, etc.) will destroy a skilled performance. The mind’s focus will not be on executing the task, but on projecting fear and self-doubt. Fear is the enemy, confidence is the cure. How does a shooter on the eve of an important match … attain the confidence needed to perform up to his potential? A pre-competition mental plan can assist in acquiring that positive mental state. The plan can be broken down into a few phases.
Build a feeling of preparedness. Developing and executing a plan to organize your equipment and pre-match routine will aid you in feeling prepared on match day.
Avoid negative and stressful thoughts. Focusing on “winning” the match or shooting for a specific score (like making the “cut” or making the President’s 100) can cause undue stress. Good shooters focus on aspects that are within their control: their sight picture, their sight alignment, their position. Each shot should be treated as an individual event.
Train stage-specific tasks during your practice sessions. Instead of shooting matches or practice matches only, include some drills that focus on your problem areas. Training in this manner will assist your level of confidence.
As part of your pre-match routine, imagine yourself shooting perfect shots. Visualize getting into the perfect position, acquiring a perfect sight picture, and perfect trigger control.
Mental Training in Shooting
Mental training in Shooting” is a practical book packed with good, straightforward advice about techniques and mental preparation. Click for a link to a FREE PDF version of this excellent treatise.
This photo is one of Nightforce’s series of picturesque “Gunscapes”. SEE MORE HERE.
We should remember the real reasons many of us enjoy the shooting hobby. Many of us like shooting because it gets us outdoors, away from work pressures. Shooting gives us a chance both to enjoy solitude as well as have fun with friends and family in the outdoors. For this Editor, a solo trip to the range in mid-week was often the perfect antidote to job stress. Going to a scenic venue and sending a few shots downrange was satisfying. And getting out of the hustle and bustle of the city did indeed calm the soul.
Talented 3-position shooter (and trick-shot artist) Kirsten Joy Weiss says that any day at the range is “always a good day”. Here is her photo to prove it. If that shot doesn’t motivate you to spend a day outdoor with rifles, we’re not sure what will. Here’s hoping you’ll have a chance to get in many fun days of shooting and/or hunting this summer and fall. That can be with air rifles, rimfire guns, or centerfire guns — they are all fun to shoot.
Emil Praslick III is widely recognized as one of the greatest wind wizards on the planet — a master at identifying wind value and direction, and predicting wind cycles. As coach of the USAMU and top civilian teams, Emil has helped win many high-level championships. In the three videos we feature today, Emil, who works with Capstone Precision Group (Berger, Lapua, SK, Vihtavuori) and Team Applied Ballistics, explains how to determine wind direction and velocity using a variety of indicators. Praslick, now retired from the U.S. Army, was an 18-time National and 2-time World Champion coach with the USAMU.
Video ONE: Wind Theory Basics — Understanding “Wind Values”
In this video from UltimateReloader.com, Emil explains the basics of modern wind theory. To properly understand the effect of the wind you need to know both the velocity of the wind and its angle. The combination of those variables translates to the wind value. Emil also explains that the wind value may not be constant — it can cycle both in speed and velocity. Emil also explains some of the environmental conditions such as mirage that can reveal wind conditions.
Video TWO: Determining the Direction of the Wind
Key Point in Video — Find the Boil
Emil explains how to determine wind direction using optic. The method is to use spotting scope, riflescope, or binoculars to look for the “Boil” — the condition in mirage when the light waves rising straight up. The wind will generate that straight-up, vertical boil in your optics when it is blowing directly at you, or directly from your rear. To identify this, traverse your scope or optics until you see the boil running straight up. When you see that vertical boil, the direction your optic is pointing is aligned with the wind flow (either blowing towards you or from directly behind you).
Video THREE: The No Wind Zero Setting
In this second video, Emil defines the “No-Wind Zero”, and explains why competitive shooters must understand the no-wind zero and have their sights or optics set for a no-wind zero starting point before heading to a match. In order to hit your target, after determining wind speed and direction, says Emil, “you have to have your scope setting dialed to ‘no wind zero’ first.”
Coach of Champions — Emil Praslick III
SFC Emil Praslick III, (U.S. Army, retired) works with Berger Bullets and Applied Ballistics. Emil served as the Head Coach of the U.S. National Long Range Rifle Team and Head Coach of the USAMU for several years. Teams coached by Emil have won 33 Inter-Service Rifle Championships. On top of that, teams he coached set 18 National records and 2 World Records. Overall, in the role of coach, Praslick can be credited with the most team wins of any coach in U.S. Military history.
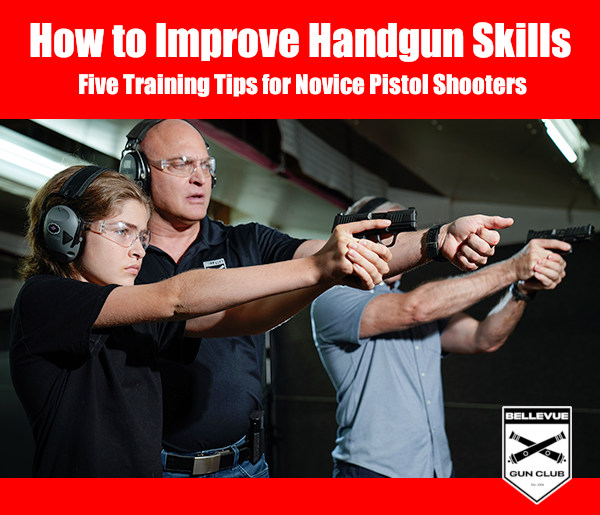
Photo from Training Program at Bellevue Gun Club, Washington State’s “premier indoor shooting facility”.
At AccurateShooter.com, our primary focus is precision target shooting with rifles. But it’s definitely fun to shoot pistols too, and we bet most of our regular readers own handguns. Here are five tips for shooting safely and accurately with handguns. These pointers will help you advance your skills and have more fun with your pistols and revolvers.
1. Make Sure Safety Is Number One
Whether you own one gun or one hundred, gun safety must always be your main priority. In this video, Smith & Wesson Team Captain Julie Golob covers the basics of gun safety.
2. Start with a .22 LR Handgun
We strongly recommend that new pistol shooters start off with a .22 LR rimfire handgun. The .22 LR cartridge is accurate but has very low recoil, less “bark” than a centerfire, and very little smoke and muzzle flash. New shooters won’t have to fight muzzle flip, and won’t develop a flinch from the sharp recoil and muzzle blast common to larger calibers. With the .22 LR, the trainee can focus on sight alignment, breathing, and trigger pull. When he or she has mastered those skills, move on to a .38 Special or 9mm Luger (9x19mm).
What gun to use? We recommend the 10-shot Smith & Wesson Model 617. This is ideal for initial training, shooting single action, slow-fire. You want to focus on sight picture and holding steady. Shown above is the 4″-barrel Model 617 which balances well. There is also a 6″-barrel version. It has a longer sight radius, but is a little nose-heavy. Both are great choices. They are extremely accurate and they boast a very clean, precise trigger.
If you prefer a semi-auto .22 LR pistol, we recommend the Browning Buck Mark series. Buck Marks are very accurate and very reliable. There are now 58 different Buck Mark models, priced at $469.99 to $839.99 MSRP. Retail prices start at about $330 for a basic Buck Mark Camper 22 UFX model. Like the S&W Model 617, a good Buck Mark will serve you for a lifetime.
3. Use Quality Targets with Multiple Aim Points
It’s common for new pistoleros to start shooting at cans or clay birds at a public range. That can be fun, but it’s better to start with proper targets, placed at eye level, at 7-10 yards. We like to use targets with large, brightly colored circles. Focus on putting 5 shots in a circle.
We recommend targets that have multiple bullseyes or aiming points — that way you don’t have to constantly change your target. There are also special paper targets that can help you diagnose common shooting problems, such as anticipating recoil. EZ2C makes very good targets with bright, red-orange aim points. You can also use the bright orange Birchwood Casey stick-on Target Dots (right). These come in a variety of diameters. We like the 2″ dot at 10 yards.
Too many new pistol shooters try to move right to rapid fire drills. It’s better to start slow, practicing the basics, under the guidance of a good mentor. If you belong to a club, ask if there are certified instructors who will help out. This Editor learned pistol shooting from a seasoned bullseye shooter, who got me started with a .22 LR revolver and very close targets. Over the course of a few range sessions we progressed to farther targets and faster pace. But the fundamentals were never forgotten. When starting your pistol training, it’s wise to view some instructional videos. Top Shot Champion Chris Cheng hosts an excellent Handgun 101 Series produced by the NSSF. We’ve linked one of these Handgun 101 videos for Tip #6.
5. SLOW DOWN — This Is Not a Race
When you learned to ride a bicycle, you started slow — maybe even with training wheels. The same principle applies to pistol shooting. When you get started with handguns, we recommend you shoot slowly and deliberately. Start with the handgun unloaded — just work on your sight alignment and breathing. With snap caps in place, try some dry-firing drills. Then progress to live fire. But be deliberate and slow. With the target at 20 feet, see if you can get three successive shot-holes to touch. Believe it or not, many common pistols are capable of this kind of accuracy (but you won’t see many shooters at indoor ranges who pursue that kind of precision). Once you master your form and accuracy, then you can work on your speed.
“Shoot Like a Champion”. Bryan Litz, author of Applied Ballistics for Long-Range Shooting, says he often sees notes like this tucked in shooter’s gear (or taped to an ammo box) at matches. What “marksmanship mantras” do you use? Do you have a favorite quote that you keep in mind during competition?
On the Applied Ballistics Facebook Page, Bryan invited other shooters to post the motivating words (and little reminders) they use in competition. Here are some of the best responses:
“Shoot 10s and No One Can Catch You…” — James Crofts
“You Can’t Miss Fast Enough to Win.” — G. Smith
“Forget the last shot. Shoot what you see!” — P. Kelley
“Breathe, relax, you’ve got this, just don’t [mess] up.” — S. Wolf
“It ain’t over ’til the fat lady sings.” — J. McEwen
“Keep calm and shoot V-Bull.” — R. Fortier
“Be still and know that I am God[.]” (PS 46:10) — D.J. Meyer
“Work Hard, Stay Humble.” — J. Snyder
“Shoot with your mind.” — K. Skarphedinsson
“The flags are lying.” — R. Cumbus
“Relax and Breathe.” — T. Fox
“Zero Excuses.” — M. Johnson
“SLOW DOWN!” — T. Shelton
“Aim Small.” — K. Buster
“Don’t Forget the Ammo!” (Taped on Gun Case) — Anonymous
PARTING SHOT: It’s not really a mantra, but Rick Jensen said his favorite quote was by gunsmith Stick Starks: “Them boys drove a long ways to suck”. Rick adds: “I don’t want to be that guy”, i.e. the subject of that remark.
In today’s high-inflation economy, FREE is good. Here’s a list of classic, older shooting books that can be downloaded for FREE from Google Books. This list includes many classic treatises on rifle marksmanship that still have value for today’s competitive shooters. In addition, we’ve included notable, illustrated firearm histories, such as Townsend Whelen’s fascinating book, The American Rifle, and The Gun and its Development (9th Ed.), by William Wellington Greener.
In the list below, the title link will take you to the Google Books page for each book. You can read the entire book online, or (in most cases) you can download it to your computer as a PDF file and save it (or print it). You can also create your own Google Library and save the books there for access from any computer.
To download a book, first click the title from the list above. Then, on the Google book page, look for the row of buttons under the book title. Click the “Download PDF” Button. This will load the full book as a PDF into your browser. You can then save this to your computer or tablet hard drive. Choose a location to hold your new e-book, and click “save”. Alternatively, click the blue “READ for Free” button and the book will appear right on the Google site, with navigation (forward/back) arrows at the top of the page.
Kirsten Joy Weiss has created a useful video about Dry-Fire practice. Dry-Fire is a method of training without a live round in the chamber. Dry-Firing is effective, Kirsten explains, because “it eliminates all the extra noise and messages that you get when you fire a live round. Without recoil, without the sound of a shot going off etc., all you hear is the click of the trigger. This allows you to focus on your sight picture and your trigger press.” This the lastest installment in Kirsten’s ‘How to Shoot Awesomely’ series. Kisten says: “I hope it helps you, and keep on aiming true!”
The Benefits of Dry-Fire Training
If you are not doing Dry-Fire practice yet, then it’s time to start. Dry-Fire training is essential to the sling disciplines, and very useful for F-Class. Dennis DeMille, a national Service Rifle Champion, told us that, for every minute he spent in actual competition, he would spend hours practicing without ammunition. While in the USMC, Dennis would practice in the barracks, working on his hold and dry-firing:
“The most important thing is to spend time off the range practicing. Most of what I learned as a High Power shooter I learned without ammunition — just spending time dry firing and doing holding exercises. Holding exercises will really identify the weak parts of your position. The primary purpose of dry firing is to get you used to shooting an empty rifle. If you can shoot a loaded rifle the same way you shoot an empty rifle then eventually you will become a High Master.”
Dry-Fire Training Can Benefit Benchrest Shooters
What about benchrest? Well, we’ve found that Dry-Fire sessions can even benefit benchresters — it can help reveal flaws in your trigger technique, or inconsistencies in the way you address the rifle from shot to shot. With the gun set up with your front rest and rear bag, if you see the scope’s cross-hairs wiggle a lot when you pull the trigger, you need to work on your technique. Also, dry-fire practice can help you learn to work the bolt more smoothly so you don’t disturb the gun on the bags.


 Getting focused mentally is an important part of preparation for Perry. In 2011 I was chasing Sherri Gallagher, since then I have been chasing Brandon Green[.] If I get beat by a Service Rifle I am going to make him or her work for it. So there is your peak into my mental process. I go for the top and if I am hanging with them then the Service Rifle National Championship will come, Kind of like how I shoot for X’s and Tens will come.

 In the archives of
 Gary Anderson served as the Director of the Civilian Marksmanship Program (CMP) from 1999-2009, and is now DCM Emeritus. As a Nebraska farmboy, Gary grew up hunting and shooting. Dreams of winning an Olympic Gold Medal in shooting led Gary to the U.S. Army. In 1959, he joined the elite U.S. Army Marksmanship Unit. Just two years later, he won his first national championship.
 Research: Scientists believe that the newer frontal lobe may not be able to keep up with “deep” brain signals that transmit at nearly 300 mph. This is explained when athletes talk about “letting go”, rather than over-thinking the shot.


 It’s common for new pistoleros to start shooting at cans or clay birds at a public range. That can be fun, but it’s better to start with proper targets, placed at eye level, at 7-10 yards. We like to use targets with large, brightly colored circles. Focus on putting 5 shots in a circle.

 “Shoot Like a Champion”. Bryan Litz, author of
 In today’s high-inflation economy, FREE is good. Here’s a list of classic, older shooting books that can be downloaded for FREE from Google Books. This list includes many classic treatises on rifle marksmanship that still have value for today’s competitive shooters. In addition, we’ve included notable, illustrated firearm histories, such as Townsend Whelen’s fascinating book, The American Rifle, and The Gun and its Development (9th Ed.), by William Wellington Greener.


 The Benefits of Dry-Fire Training


