Bullets.com has released a new, advanced handle-actuated primer seating device. Bullets.com President Shiraz Balolia tells us: “We have designed a new bench-mounted Bald Eagle Primer Press. It seats primers very consistently and you can adjust the depth of the primer in .002″ increments. I have been using one for months. In fact, I used it for the Canada win and also during the Nationals last year where our Team won the National Championships.”
Here’s a great video from German ammo-maker GECO (part of the Swiss RUAG group of companies). Employing advanced 3D rendering and computer graphics, this animation unveils the inside of a pistol cartridge, showing jacket, lead core, case, powder and primer. Next the video shows an X-ray view of ammo being loaded in a handgun, feeding from a magazine.
Then it really gets interesting. At 1:32 – 1:50 you’ll see the firing pin strike the primer cup, the primer’s hot jet streaming through the flash-hole, and the powder igniting. Finally you can see the bullet as it moves down the barrel and spins its way to a target. This is a very nicely-produced video. If you’ve ever wondered what happens inside a cartridge when you pull the trigger, this video shows all. They say “a picture’s worth a thousand words”… well a 3D video is even better.
For Best Viewing, Click Gear Symbol and Select HD Playback Mode
What can happen when the bottom-most primer in a primer feed tube goes off? A big bang, that’s what. Some or all of the primers in the vertical feeding tube can go off in a chain detonation. That’s exactly what happened to Dustin Ellermann, Top Shot Season 3 Champion. Scary experience, but thankfully Dustin was not injured. He writes: “Super thankful that I was wearing my Wiley X eye protection this weekend when I was reloading some .223 rounds. My press detonated nearly 100 small rifle primers. Shown here is the magazine feed tube. Not fun but it could have been much worse. Stay safe!”
When working with progressive reloading presses, you should definitely wear eye protection. Dustin’s chain detonation experience proves that — without a doubt. Remember you only have one set of eyes!
APS Strips — Alternative to Primer Tubes When you stack a column of primers in a single metal tube, you’re asking for trouble. As Dustin Ellermann learned, when one primer fires, the entire column can follow suit in a chain detonation. Thankfully, you do have options when it comes to primer feeding on a progressive press. RCBS developed an innovative primer system for its Pro-2000 progressive press. Instead of being stored in a vertical tube, primers are placed in flat, plastic “APS” strips, with a ring of plastic separating each primer. Moving horizontally, primers are never stacked, so the chance of a chain detonation is reduced dramatically. The re-usable APS strips are color-coded for different primer types. You can buy CCI “pre-loaded” primer strips, or you can insert any brand of primers into strips using an RCBS strip-loader tool.
RCBS Pro-2000 with APS Strip Priming System
AccurateShooter.com Editor Uses Strip Primers
This Editor owns an RCBS Pro-2000 progressive press (manual-indexing version). The RCBS strip-priming system was one key reason I selected the RCBS Pro-2000 over similar-priced progressives from Dillon and Hornady. I believe the strip primer system is safer, more positive, and easier to use. Before I purchased my RCBS progressive, I “road-tested” the competition. I loaded hundreds of rounds on each of four different progressives: Dillon 550B, Dillon 650, Hornady Lock-N-Load, and RCBS 2000. I was concerned about the primer feed tubes on the Dillons, and I found the RCBS rotary powder measure was much more precise (and easier to adjust) than the sliding bar system on the Dillon machines. The RCBS priming system was definitely more fool-proof than the system on the Hornady press (a first-generation L-N-L that had issues with primer feeding). After “test-driving” blue, red, and green brand progressives extensively, I settled on the RCBS Pro-2000. A decade later, I still think I made the right choice. I like the APS strips for big jobs, and I can also use them in the RCBS hand-priming tool (shown below). With the strips, its easy to prime 20 or 40 cases at a time, and then switch to another type of primer for comparison testing.
Many shooters prefer to deprime their fired cartridge cases before other operations (such as neck-sizing and full-length sizing). In addition, when cleaning brass with an ultrasonic system, it’s not a bad idea to remove primers first. That way the primer pockets get cleaned during the ultrasonic process.
To deprime cases before sizing or cleaning you can use a Depriming Die (aka “decapping die”). This pushes out the spent primer without changing the neck or body of a case. Such decapping dies work fine, but they do require the use of a press.
New Handheld Primer Removal Tool From Frankford Arsenal
Here’s a new tool that allows you to deprime cartridge cases without a press. This new hand-tool from Frankford Arsenal will deprime (and capture primers) conveniently. You can deprime your cases while watching TV or relaxing in your favorite chair.
This handy depriming tool is very versatile. With a universal, cylinder-style cartridge-holder, the tool can deprime a wide variety of cartridge types from .20 caliber up to .338 caliber. Spent primers are captured in a removable spent primer catch tube. With die-cast metal construction, this tool should last through many thousands of depriming cycles. MSRP is $54.99.
Will This Tool Work with Small Flash Hole Brass?
This new depriming tool will be introduced at SHOT Show in January 2015. We have not been able to measure the decapping shaft diameter, so we do not know whether this hand tool will work with small flash-holes found on Lapua benchrest brass (such as 220 Russian and 6mmBR). We’ll try to answer that question at SHOT Show. This tool is so new the specs are not yet listed on Frankford Arsenal’s website.
Product find by EdLongrange. We welcome reader contributions.
One of our Forum members complained that he wasn’t able to set his primers flush to the rim. He tried a variety of primer tools, yet no matter what he used, the primers still didn’t seat deep enough. He measured his primers, and they were the right thickness, but it seemed like his primer pockets just weren’t deep enough. He was mystified as to the cause of the problem.
Well, our friend Boyd Allen diagnosed the problem. It was the decapping rod. If the rod is adjusted too low (screwed in too far), the base of the full-diameter rod shaft (just above the pin) will contact the inside of the case. That shaft is steel whereas your case is brass, a softer, weaker metal. So, when you run the case up into the die, the shaft can actually stretch the base of the primer pocket outward. Most presses have enough leverage to do this. If you bell the base of the primer pocket outwards, you’ve essentially ruined your case, and there is no way a primer can seat correctly.
The fix is simple. Just make sure to adjust the decapping rod so that the base of the rod shaft does NOT bottom out on the inside of the case. The pin only needs to extend through the flash hole far enough to knock the primer out. The photo shows a Lyman Universal decapping die. But the same thing can happen with any die that has a decapping rod, such as bushing neck-sizing dies, and full-length sizing dies.
Whenever you use a die with a decapping pin for the first time, OR when you move the die to a different press, make sure to check the decapping rod length. And it’s a good idea, with full-length sizing dies, to always re-check the height setting when changing presses.
Lee Universal Decapping Die on SALE for $9.89
Speaking of decapping tools, Midsouth Shooters Supply sells the Lee Universal Decapping Die for just $9.34 (item 006-90292), a very good deal. There are many situations when you may want to remove primers from fired brass as a separate operation (prior to case sizing). For example, if your rifle brass is dirty, you may want to de-cap before sizing. Or, if you load on a progressive press, things will run much more smoothly if you decap you brass first, in a separate operation. The Lee Universal Decapping Die will work with cartridges from 17 Fireball all the way up to 45-70. However, NOTE that the decapping pin supplied with this Lee die is TOO LARGE for LAPUA 6.5×47, 6BR, 220 Russian, and Norma 6 PPC flash holes. Because the pin diameter is too large for these brass types, you must either turn down the pin, or decap with a different tool for cases with .059″ flash-holes. Otherwise, the Lee Decapping Die works well and it’s a bargain.
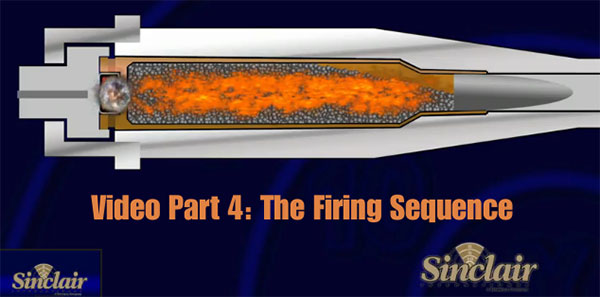
Sinclair International has produced an eight-part video series on metallic cartridge reloading, hosted by Sinclair’s former President Bill Gravatt. The entire series can be viewed (for free) via Sinclair’s “How-To Videos” archive. While this set of videos starts with the basics, it covers many more advanced aspects of reloading as well. Accordingly, both novice and experienced reloaders can benefit from watching the eight videos. We think everyone should watch Video No. 2, which outlines the hazards of reloading and provides guidelines for safe reloading practices.
We also strongly recommend Video No. 4 to readers who are getting started in reloading. This “How Things Work” segment covers the sequence of events inside the chamber (and barrel) when the cartridge is fired. The video includes helpful graphics that show what happens to the primer, powder, cartridge, and bullet when the round is fired. The video also illustrates “headspace” and explains how this can change after firing. We think this video answers many common questions and will help reloaders understand the forces at work on their brass during the firing process.
Conventional .308 Winchester brass has a large primer pocket with a large, 0.080″-diameter flash hole. Last year, Lapua began producing special edition .308 Win “Palma” brass that has a small primer pocket and a small flash hole, sized 1.5mm (.059″) in diameter. Tests by U.S. Palma Team members showed that the small-flash-hole .308 brass possibly delivers lower Extreme Spread (ES) and Standard Deviation (SD) with some bullet/powder/primer combinations. All things being equal, a lower ES should reduce vertical dispersion at long range.
Why Might a Small Flash Hole Work Better?
The performance of the small-flash-hole .308 brass caused some folks to speculate why ES/SD might be improved with a smaller flash hole. One theory (and it’s just a theory) is that the small flash hole creates more of a “jet” effect when the primer fires. Contributing Editor German Salazar sought to find out, experimentally, whether this theory is correct. German explained: “During one of the many internet forum discussions of these cases, Al Matson (AlinWA) opined that the small flash hole might cause the primer flash to be propagated forward more vigorously. In his words, it should be like shooting a volume of water through a smaller nozzle, resulting in a flash that reaches further up the case. Now that kind of comment really sparked my curiosity, so I decided to see what I could see.”
More Primer Testing by Salazar
You can read more about this test and other primer experiments on RiflemansJournal.com.
Large and Small Flash Hole .308 Cases — But Both with Small Primer Pockets
To isolate the effect of flash hole diameter alone, German set up a test with the two types of .308 case that have a small primer pocket: Remington BR brass with a 0.080″ flash hole and Lapua Palma brass with a 0.062″ flash hole. NOTE: German reamed the Lapua brass to 0.062″ with a Sinclair uniforming tool, so it was slightly larger than the 0.059″ factory spec. The Remington brass has a .22 BR headstamp as this brass was actually meant to be re-formed into .22 BR or 6 BR before there was factory brass available for those cartridges.
German set up his primer testing fixture, and took photos in low light so you can see the propagation of the primer “blast” easily. He first tested the Remington 7 1/2 primer, a primer known for giving a large flame front. German notes: “I thought that if there was a ‘nozzle effect’ from the small flash hole, this primer would show it best. As you can see from the photos, there might be a little bit of a flash reduction effect with this primer and the small flash hole, the opposite of what we expected, but it doesn’t appear to be of a significant order of magnitude.”
Next German tested the Wolf .223 primer, an unplated version of the Small Rifle Magnum that so many shooters use. German notes: “This is a reduced flame-front (low flash) primer which has proven itself to be very accurate and will likely see a lot of use in the Lapua cases. With this primer, I couldn’t detect any difference in the flash produced by the small flash hole versus the large flash hole”.
Remington BR case, 0.080″ Flash Hole, Wolf .223 Primer.
Palma case, 0.062″ Flash Hole, Wolf 223 Primer.
German tells us: “I fired five or six of each primer to get these images, and while there is always a bit of variance, these are an accurate representation of each primer type and case type. You can draw your own conclusions from all this, I’m just presenting the data for you. I don’t necessarily draw any conclusions as to how any combination will shoot based on the pictures.”
Results of Testing
Overall, looking at German’s results, one might say that the smaller diameter of the small flash hole does not seem to have significantly changed the length or size of the primer flame front. There is no discernible increased “jet effect”.
Many careful reloaders prefer to use a hand-tool for seating primers. The majority of short-range benchrest shooters seat one primer at a time, using finely-machined hand tools, such as the Sinclair priming tool Such tools offer unrivaled “feel” during the seating process, but they are slow to use and require that you handle primers with your fingers. If you’re a fumble-fingers type like this Editor, you’ll drop a primer now and then. That’s why I prefer a hand tool that keeps the primers in a strip or a tray.
We think one of the best affordable priming tools on the market is the latest RCBS hand tool. RCBS’s Universal Hand Priming Tool boasts some many nice features. The tool now shares the Universal shell-holder we liked so much in the RCBS APS (strip-priming) hand tool. An opposed set of spring-loaded jaws allows you to prime nearly all sizes of cases, without the need for conventional shell-holders. This makes the tool faster and more convenient if you load a variety of calibers. And you’re never “out-of-luck” if you can’t find the right shell-holder. However, you do have to change the “pusher” shaft when you switch from small primers to large primers or vice versa.
The universal shell-holder has another important benefit. With opposing jaws holding the casehead, this allows the case to “float” and align itself as the primer is seated. This may help primers seat more consistently every time. With most other hand-priming tools, the case is held by a conventional shell-holder. This leaves about 40% of the rim unsupported on one side. If you actually look closely at cases as you seat primers with conventional tools, you’ll see the case tilt in the shellholder as the primer is inserted. In the RCBS, by contrast, the case stays straight as the primer goes in. The new unit also shares its ergonomic grip (with plenty of leverage) with the APS model. A redesigned primer tray accommodates all brands of primer packages–you can easily load 100 primers at a time without worrying about spills. A unique Primer Safety Gate shields the primer being inserted from the remaining primers in the tray. That’s an important safety feature. The RCBS Universal Priming Tool retails for under $60.00 at major vendors such as Grafs.com, product #RCBS90201.
RCBS $10 CASH-BACK Rebate
RCBS is currently offering a $10 Mail-in Rebate good with the purchase of at least $50.00 in RCBS products. Purchase must be made between Jan. 1, 2013 and Dec. 31, 2013 and coupon must be received by Jan. 31, 2014. If you prefer, you can choose 100 Speer bullets rather than $10 cash back. CLICK HERE for RCBS $10 Mail-in Rebate Form.
Here are MidwayUSA user reviews for this tool:
“I have been reloading for 34 years and I don’t know why I didn’t buy one of these tools years ago. Everything about it is great. Changing from large primer to small primer was very easy. Ergonomic fit in the hand is good. Loading primers into the tray is no problem. The universal shell holder is a plus. I rate this product a 10″. — Keith McC., NH
“Primers flip as they should, and they are seated to a uniform depth. The universal shell holder is great! I reload .223 up to the Sharps 45-120 with no problem. Also as a few have said buy two and make each a seperate large and small primer unit. I happen to like it very much as it makes priming easy and portable.” — Tom H., NY
“This is a very well-made tool. I do not like the changing from small to large primers as it is a little bit of a time waster and a awkward. I think it is just a matter of time before one of the parts gets lost. If the price was a little lower I would just buy two. Much more substantial than the Lee which I have been using. I rate it 4 stars, deducting for price and the way you have to change between large and small. Works great however.” — Fred, FL
Conventional .308 Winchester brass has a large primer pocket with a large, 0.080″-diameter flash hole. In 2010, Lapua began producing special edition .308 Win “Palma” brass that has a small primer pocket and a small flash hole, sized 1.5mm (.059″) in diameter. Tests by U.S. Palma Team members showed that the small-flash-hole .308 brass possibly delivers lower Extreme Spread (ES) and Standard Deviation (SD) with some bullet/powder/primer combinations. All things being equal, a lower ES should reduce vertical dispersion at long range.
Why Might a Small Flash Hole Work Better?
The performance of the small-flash-hole .308 brass caused some folks to speculate why ES/SD might be improved with a smaller flash hole. One theory (and it’s just a theory) is that the small flash hole creates more of a “jet” effect when the primer fires. German Salazar (Rifleman’s Journal Editor) sought to find out, experimentally, whether this theory is correct. German explained: “During one of the many internet forum discussions of these cases, Al Matson (AlinWA) opined that the small flash hole might cause the primer flash to be propagated forward more vigorously. In his words, it should be like shooting a volume of water through a smaller nozzle, resulting in a flash that reaches further up the case. Now that kind of comment really sparked my curiosity, so I decided to see what I could see.”
More Primer Testing by Salazar
You can read more about this test and other primer experiments on RiflemansJournal.com.
Large and Small Flash Hole .308 Cases — But Both with Small Primer Pockets
To isolate the effect of flash hole diameter alone, German set up a test with the two types of .308 case that have a small primer pocket: Remington BR brass with a 0.080″ flash hole and Lapua Palma brass with a 0.062″ flash hole. NOTE: German reamed the Lapua brass to 0.062″ with a Sinclair uniforming tool, so it was slightly larger than the 0.059″ factory spec. The Remington brass has a .22 BR headstamp as this brass was actually meant to be re-formed into .22 BR or 6 BR before there was factory brass available for those cartridges.
German set up his primer testing fixture, and took photos in low light so you can see the propagation of the primer “blast” easily. He first tested the Remington 7 1/2 primer, a primer known for giving a large flame front. German notes: “I thought that if there was a ‘nozzle effect’ from the small flash hole, this primer would show it best. As you can see from the photos, there might be a little bit of a flash reduction effect with this primer and the small flash hole, the opposite of what we expected, but it doesn’t appear to be of a significant order of magnitude.”
Next German tested the Wolf .223 primer, an unplated version of the Small Rifle Magnum that so many shooters use. German notes: “This is a reduced flame-front (low flash) primer which has proven itself to be very accurate and will likely see a lot of use in the Lapua cases. With this primer, I couldn’t detect any difference in the flash produced by the small flash hole versus the large flash hole”.
Remington BR case, 0.080″ Flash Hole, Wolf .223 Primer.
Palma case, 0.062″ Flash Hole, Wolf 223 Primer.
German tells us: “I fired five or six of each primer to get these images, and while there is always a bit of variance, these are an accurate representation of each primer type and case type. You can draw your own conclusions from all this, I’m just presenting the data for you. I don’t necessarily draw any conclusions as to how any combination will shoot based on the pictures.”
Results of Testing
Overall, looking at German’s results, one might say that the smaller diameter of the small flash hole does not seem to have significantly changed the length or size of the primer flame front. There is no discernible increased “jet effect”.
The tool-makers at 21st Century Shooting have come up with a very slick new Precision Hand-Priming Tool. This extremely well-made, benchrest-grade unit raises the bar among single-primer seating tools. Feel is great, changing shell-holders is simple, and nothing else on the market offers better control over primer seating depth. The tool’s precision-adjusting head provides clicks in .0025″ increments for precise seating depth. The tool’s body, internals, and shell-holders are stainless, while the handle is anodized aluminum. Price is $118.00 for the tool itself. Shell-holders (sizes from 17 Remington up to .338 Lapua Magnum) cost $7.99 each.
21st Century Priming Tool Review By Boyd Allen
I have been priming cases, with various hand-priming tools, for about three decades, and in the process have pretty much tried them all, from least to most expensive. When I found out that this new 21st Century tool was adjustable for seating depth, I wondered about that. After all, what do I, who believes in seating by feel, need with adjustable seating depth? Well…..I was wrong. Let me explain.
Why Adjustment for Primer Seating Depth Is Important
Most hand-seating tools do not have an adjustment for how far up the priming punch comes up into the shell holder. As a result, when priming a case with a deep pocket, especially if there has been some wear of the tool’s linkage, the finger/thumb lever may contact the tool’s body before the primer is fully seated. Having a primer seated too high can cause a myriad of problems. Prior to this, the only seater that I had used that had an adjustable linkage was the Sinclair tool, and adjusting its linkage requires disassembly — regular disassembly if you want to keep it perfect. That’s not convenient. The Sinclair is good tool, but a pain in the neck to adjust.
Precision Control Over Seating Depth — With Click Adjustment
The 21st Century Priming Tool offers quick and easy depth adjustment (unlike its rival from Sinclair). The 21st Century unit can be adjusted in precise increments (.0025”) more quickly than you can read this sentence. The knurled head of the tool is threaded onto the body, which has a very sturdy ball and spring detent indexing system that is easy to adjust and precise. Clicks are secure and positive. With this feature, you can set the tool so that the handle is in any position (distance from the tool body) that you find convenient, when the primer is fully seated. Additionally, since leverage increases as the handle approaches the tool body, different stopping points afford differing mechanical advantages (more or less effort required) and sensitivity. By doing a little experimenting, I have found a point of adjustment that give me better feel for when the primer hits the bottom of the pocket, without overshooting the mark, while keeping the force requirement within a range that is comfortable when priming a large number of cases.
Quick and Easy Shell-Holder Changing
Changing shell holders is easily accomplished. No extra hex-wrenches or tools are needed, and there are no tiny set screws to roll of the desk, to be lost forever in the carpet, never to be heard from again until you hear them rattling up the vacuum cleaner hose. To swap shell-holders, simply screw the head off of the body, lift off the one that you one that you are replacing, set the one that you intend to use in place (assuming that it used the same size primer) and screw the head back down to the setting that you want. Changing primer sizes is equally easy. NOTE: The tool requires 21st Century-made shell holders. These may be turned (relative to the handle) so that the loading slot opening faces whatever direction you prefer.
Fit, Finish, and Feel
The body and head of the tool, as well as the internal linkages, are all made from stainless steel. These closely-fitted parts are precisely machined, with an smooth, attractive finish. The handle is black anodized aluminum. Overall, the tool is well-shaped, and built like a stainless/aluminum brick.
Bottom Line: Great Tool That Works Exceptionally Well I can’t imagine anyone, who uses a single-primer tool of this type, not liking this tool. When it comes to hand reloading tools, I can afford to have pretty much whatever I want (within reason). After testing and using this tool, I pulled my Sinclair tool from its case, and replaced it with this one. That should say it all. After using this tool, I will have to give serious consideration to other 21st Century reloading products the next time I need a new tool. One thing is for sure — we have an important new player in the design and manufacture of top end of reloading equipment. 21st Century’s Precision Priming Tool “raises the bar” among single-primer seating tools.
Tool Size Considerations
I wrote the review and then took the pictures, which, upon reflection, make the tool look smaller than it is, because of the size of my hands. I thought about putting a ruler in the pictures, but rejected that as visual clutter, so I will simply tell you that from tip of thumb to that of my little finger, my right hand measures a little over 10 inches, and the palm is 4 inches wide. The size of the tool is just right.


 Here’s a great video from German ammo-maker


 When you stack a column of primers in a single metal tube, you’re asking for trouble. As Dustin Ellermann learned, when one primer fires, the entire column can follow suit in a chain detonation. Thankfully, you do have options when it comes to primer feeding on a progressive press. RCBS developed an innovative primer system for its Pro-2000 progressive press. Instead of being stored in a vertical tube, primers are placed in flat, plastic “APS” strips, with a ring of plastic separating each primer. Moving horizontally, primers are never stacked, so the chance of a chain detonation is reduced dramatically. The re-usable APS strips are color-coded for different primer types. You can buy CCI “pre-loaded” primer strips, or you can insert any brand of primers into strips using an RCBS strip-loader tool.


 Many careful reloaders prefer to use a hand-tool for seating primers. The majority of short-range benchrest shooters seat one primer at a time, using finely-machined hand tools, such as the Sinclair priming tool Such tools offer unrivaled “feel” during the seating process, but they are slow to use and require that you handle primers with your fingers. If you’re a fumble-fingers type like this Editor, you’ll drop a primer now and then. That’s why I prefer a hand tool that keeps the primers in a strip or a tray.
 The tool-makers at

 I can’t imagine anyone, who uses a single-primer tool of this type, not liking this tool. When it comes to hand reloading tools, I can afford to have pretty much whatever I want (within reason). After testing and using this tool, I pulled my Sinclair tool from its case, and replaced it with this one. That should say it all. After using this tool, I will have to give serious consideration to other 21st Century reloading products the next time I need a new tool. One thing is for sure — we have an important new player in the design and manufacture of top end of reloading equipment. 21st Century’s Precision Priming Tool “raises the bar” among single-primer seating tools.


