At the request of our readers, we have launched a “Deals of the Week” feature. Every Monday morning we offer our Bargain selections. Here are some of the best deals on hardware, reloading components, and shooting accessories. Be aware that sale prices are subject to change, and once clearance inventory is sold, it’s gone for good. You snooze you lose.
1. Cabelas.com — Rock Chucker Supreme Reloading Kit
Everything you see above can be yours for just $225.00, after manufacturer’s rebate. Right now, Cabela’s is selling the Rock Chucker Supreme Master Reloading Kit for $300.00. That’s a good deal as this Reloading Kit sells elsewhere for up to $360.00. But he’s the real incentive — if you spend $300.00 on RCBS products in 2016, RCBS will send you a $75.00 rebate. That reduces your net cost to just $225.00 for the entire Kit.
2. Bullets.com — Bald Eagle Rest with Windage Top
Bullets.com is offering aluminum-base front rests, with flex-shaft remote windage adjustment, for just $165.00! These front rests originally retailed for over $400.00 (with windage drive). But Bullets.com is having an “overstock” sale so you can get blow-out pricing on these rests.
Bigger isn’t always better when it comes to spotting scopes. For hunters, compact size and light weight are advantages. This little Minox MD 50 has sharp lenses yet weighs just 22 ounces. The max 30X magnification is plenty for seeing shot markers or watching mirage. Right now this compact Minox is on sale at Amazon.com for just $250.00. No it won’t match a $2300.00 Kowa Prominar, but for basic viewing tasks (and hunting duties) it will do a good job. It’s also an excellent choice for bullseye pistol shooters who need a lightweight, affordable spotting scope.
4. Hornady — 500 Free Bullets with Gear Purchase
Hornady has announced its “Get Loaded” Promotion for 2016. If you buy any of the qualifying products (listed above), you get 500 free bullets. We’ve taken advantage of these promos in the past. It’s a pretty good deal if need a reloading press, case prep center, or large ultrasonic cleaning machine. We’re impressed with the new pyramid-frame, open front iron press. 500 bullets is a nice incentive.
5. CDNN Sports — Remington .22 LR Bulk Ammo
Chose from a 525-round box for $54.88 or a jumbo 1400-round “bucket ‘o ammo” for $139.88. Both offerings feature 36-grain hollowpoint bullets. With the big bucket you get ammo for under ten cents ($0.10) per round. Yes we’d say that’s affordable .22 LR plinking ammo!
6. Brownells — Hornady V-Max Bullets on Sale
Here’s a super deal on plastic-tipped V-Max bullets — a favorite for varmint hunters. V-Max bullets are accurate and deliver plenty of “pop” on ground squirrels, prairie dogs and other small varmints. Brownells has clearance pricing on many types of V-Max bullets. For example, for just $14.98 per hundred, you can get the excellent 40-grain, .20-caliber V-Max or the equally good 50gr or 53gr, 22-cal V-Max. That’s a great price.
7. Natchez — CCI Blazer 9mm ammo, $9.99 for 50 Rounds
This is the best price we’ve found this week on newly-manufactured 9mm pistol ammunition. And this is quality, CCI made-in-USA ammo with reloadable, brass casings. We have used this CCI-made Blazer 9mm ammo in Sig, HK, and Glock pistols and it performed very well. This stuff won’t last long at this price (less than $0.20 per round). If you need 9mm practice ammo, order soon.
8. Amazon — Best-Selling Nano LED Mini-Flashlight
This handy Nano Keychain Light, an Amazon BEST SELLER, has a super-bright 5mm LED with a 100,000 hour lifetime. Verified purchasers say the Nano is “well-constructed” and “super-bright for its size”. Weighing just 0.36 ounces and measuring 1.47″ long, the Nano stows easily. A handy snap hook is included. Streamlight offers a limited lifetime warranty. Read the Amazon Reviews — people love this keychain Nano Light. It’s great for campers, and it’s a smart addition to a house emergency kit.
A unique, comprehensive Cartridge Comparison Guide is available as a 340-page, spiral-bound book. Covering over 250 cartridges, the updated Second Edition of the Cartridge Comparision Guide is the product of many years of labor by Andrew Chamberlain, a Utah-based hunter. Andrew says his Guide “compares every factory available cartridge from the 17 calibers up to the 50 caliber cartridges”. (Sorry, most wildcat cartridges are not covered.) Chamberlain’s Guide also compiles cartridge data from major ammunition manufacturers such as Barnes, Federal, Hornady, Norma, Nosler, Remington, Sierra, Swift, Weatherby, and Winchester. It shows the optimal velocity achieved for each bullet weight and calculates bullet energy, recoil, and powder efficiency. Large color photos illustrate handgun and rifle cartridges.
The Cartridge Comparison Guide provides data for thousands of cartridge/bullet/velocity combos. Quick reference data sheets and ballistics charts cover Trajectory, Velocity, and Energy out to 500 yards. The Cartridge Comparison Guide also offers a firearms lexicon, plus Appendices covering Cartridge Selection for Game Animals, Bullet Selection/Design, Bullet Expansion, Wound Channel Characteristics and more.
New Content in Second Edition of Cartridge Comparison Guide
The Cartridge Comparison Guide (Second Edition) costs $32.95 plus shipping and tax. CLICK HERE to visit the Online Store where you can order the 340-page book. Here’s what’s new in the Second Edition:
Addition of Shotgun Ammunition (Both Slug and Shot loads).
Momentum Calculation for all Rifle, Shotgun and Handgun loads.
Integration of Shotgun Slug Ammunition with Center Fire Rifle Data Tables.
Factory Load Summary Added (Shows manufacturers and loads produced).
One factory load and one hand load for every bullet weight available in each cartridge.
Over 90 pages of additional ballistics content (roughly 35% more than in First Edition).
Award-Winning Content
The Cartridge Comparison Guide has been awarded the POMA Pinnacle Award for Excellence. (POMA, the Professional Outdoor Media Association, is the trade association for outdoor writers).
Great Resource for Hunters
One of Chamberlain’s main goals in creating the Cartridge Comparison Guide was to help hunters select the “right cartridge for the job.” According to Chamberlain: “This started as a personal project to gather information on the more popular cartridges commonly used for hunting. I began comparing cartridge performance, versatility, bullet selection, powder efficiency, recoil generation vs. energy produced, standing ballistic data for different environments, etc.” Chamberlain adds: “I wanted to find the best all-around performing cartridge and rifle that a guy on a budget could shoot.”
Giant Cartridge Poster for Computer Wallpaper (1665×1080 pixels)
Here’s a great illustration of hundreds of cartridges and shotshell types. For dedicated reloaders, this would work great as desktop “wallpaper” for your computer. CLICK HERE for full-size image.
SHOT Show 2016 kicks off in two weeks in Las Vegas. While at SHOT Show next month, we plan to get the “inside scoop” on new bullet designs from Berger, Hornady, Lapua, Nosler and Sierra.
A while back, at SHOT Show 2012 we chatted with Berger Ballistician Bryan Litz about Berger’s popular line of Hybrid bullets. Berger now offers a wide range of Hybrids in multiple calibers and weights. In fact, for .30-Caliber shooters, Berger now offers seven different Hybrid match bullets, with weights from 155 grains up to 230 grains. Two .338-caliber OTM Tactical Hybrids were introduced in 2012 (a 250-grainer and a 300-grainer).
Bryan tells us: “The hybrid design is Berger’s solution to the age old problem of precision vs. ease of use. This design is making life easier for handloaders as well as providing opportunities for commercial ammo loaders who need to offer a high performance round that also shoots precisely in many rifles with various chamber/throat configurations.”
For those not familiar with Hybrid bullets, the Hybrid design blends two common bullet nose shapes on the front section of the bullet (from the tip to the start of the bearing surface). Most of the curved section of the bullet has a Secant (VLD-style) ogive for low drag. This then blends in a Tangent-style ogive curve further back, where the bullet first contacts the rifling. The Tangent section makes seating depth less critical to accuracy, so the Hybrid bullet can shoot well through a range of seating depths, even though it has a very high Ballistic Coefficient (BC).
In the video we asked Bryan for recommended seating depths for 7mm and .30-Caliber Hybrid bullets. Bryan advises that, as a starting point, Hybrid bullets be seated .015″ (fifteen thousandths) off the lands in most barrels. Watch the video for more tips how to optimize your loads with Hybrid bullets.
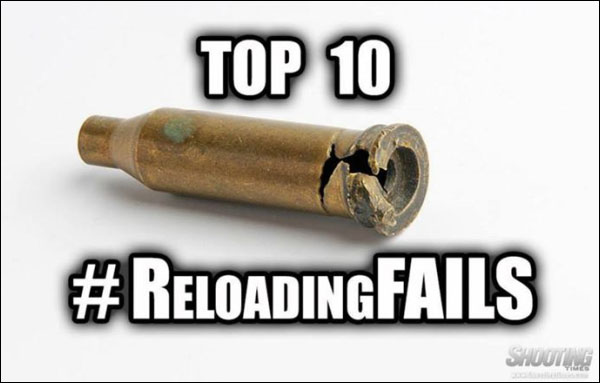
Shooting Times has released an article entitled “Ten Most Common Reloading Mistakes”. Listed below are the Top Ten mistakes hand-loaders can make, at least according to Shooting Times. What do you think of this list — does it overlook some important items?
Top Ten Reloading Mistakes According to Shooting Times:
1. Cracked Cases — Reloaders need to inspect brass and cull cases with cracks.
2. Dented Cases — Dents or divets can be caused by excess case lube.
3. Excessive Powder Charge — Overcharges (even with the correct powder) can be very dangerous.
4. Primers Not Seated Deep Enough — “High” primers can cause functioning issues.
5. Crushed Primers — Some priming devices can deform primers when seating.
6. Excess Brass Length — Over time, cases stretch. Cases need to be trimmed and sized.
7. Bullets Seated Too Far Out — If the bullet is seated too long you may not even be able to chamber the round. Also, with hunting rounds, bullets should not engage the rifling.
8. Burrs on Case Mouths — Ragged edges on case mouths can actually shave bullet jackets.
9. Excess Crimp — This is a common problem with pistol rounds loaded on progressives. If case lengths are not uniform some cases will get too much crimp, others too little.
10. Inadequate Crimp — This can be an issue with magnum pistol cartridges in revolvers.
Do you agree with this list? We think some important things are missing, such as not adjusting full-length sizing dies properly. This can cause the shoulder to be pushed back too far (or not far enough). Another common mistake is using brass that is worn out, i.e. stretched in the case-head area from multiple cycles of hot loads. We also think the #1 error a reloader can make is using the wrong powder altogether. That can be a fatal mistake. See what happens when you load pistol powder in a rifle.
Christmas is almost here, so today we’re featuring a hand-picked collection of “stocking stuffers” for precision shooters. So as not to bust your holiday budget, all of our selections are priced under $10.00. These items are handy tools that you’ll use over and over again at the range and/or at your loading bench (so you’re allowed to buy them for yourself, even after Christmas). Our AccurateShooter staffers use most of these items, including the Loading Blocks, Ballistol, Mirage Shades, Crocogators, and Barrel Bags.
Gifts $1 to $5
Surveyors Tape
$1.99
Safety Eyewear
$1.99
Hood Kwik Estimator
$2.50
Barrel Mirage Shade
$4.95
Surveyors’ Tape. Always watch the wind when you shoot. Inexpensive, Day-Glo Surveyors’ Tape (aka “Flagging Tape”), attached to a stake or target frame, makes a good wind indicator. It will flutter even in mild breezes, alerting you to both angle and velocity shifts. This should be part of every range kit. Don’t leave home without it.
Safety Eyewear ANSI Z87.1. Yes you can get ANSI-approved Safety Eyewear for under two bucks. At that price you should pick up a half-dozen sets, just so you have extras. We recommend that shooters wear eye protection at all times when handling firearms. This eyewear special is offered by CDNN Sports. Call 800-588-9500 to order.
Hood Kwik Estimator. Here’s a very handy tool to measure your 6mm groups. Bracket the group within the diverging lines of the Kwik Estimator and you’ll instantly get a good approximation of the actual group size. No more trips to the tool box for calipers. The inexpensive Kwik Estimator fits in a shirt pocket. (Thanks to Boyd Allen for this suggestion.)
Sinclair Barrel Mirage Shade. For high-volume varminters, and competitors who shoot fast in warm weather, a mirage shield is absolutely essential. This prevents hot air rising off the barrel from distorting the image in your scope. The aluminum Sinclair shield can be trimmed to fit, and comes with stick-on Velcro attachments. Two lengths are available: 18″ for short BR barrels, and 24″ for longer barrels.
Gifts $6 to $10
Dewey Crocogator
$6.50
Ballistol Aerosol Lube
$8.99
Sinclair Barrel Bag
$9.95
Sinclair Load Block
$9.99
Dewey Crocogator. The Crocogator tool, with knurled “teeth” at both ends, is simple, inexpensive, and compact. Yet nothing zips though primer-pocket gunk faster or better. Unlike some cutter-tipped primer pocket tools, the Crocogator removes the carbon quick and easy without shaving brass. One end is sized for large primer pockets, the other for small.
Ballistol Aerosol Lube. Ballistol is a versatile, non-toxic product with many uses in the reloading room. We have found it is ideal for lubricating cases for normal full-length sizing. It is clear, not gooey or chalky like other lubes. It is very, very slippery, yet is easy to apply and just as easy to wipe off. As you lube your cases, the Ballistol will also clean powder fouling off the case necks. For heavy-duty case forming and neck expansion, we’ll still use Imperial die wax, but for every-day case sizing, Ballistol is our first choice. It also helps prevent your dies from rusting and it even conditions leather. Ballistol is a favored bore cleaner for Black Powder shooters because it neutralizes acidic powder residues.
Sinclair Barrel Bag. If you run a switch-barrel rig, or take spare barrels to a big match, this simple but effective barrel bag will protect your valuable steel. The bag is moisture-resistant vinyl on the outside with a soft, quilted interior to protect the barrel’s finish and delicate crown. There are two sizes: one for barrels up to 26 inches, the other for barrels up to 31 inches. Both sizes are priced at $9.95 per bag. That’s cheap insurance for those priceless barrels.
Sinclair ‘Poly’ Loading Block. We’ve tried wood and injection-molded loading trays, and we prefer Sinclair’s white polyethylene loading blocks. They featured chamfered holes properly sized for the particular case you reload. The blocks are heavy enough to be stable on the bench, and the “dishwasher-friendly” material is easy to clean. The standard Poly Loading Block holds 50 cases, while the Competition Loading Block holds 25 cases with a tray for empties. For a bit more money, there’s also a Heavy-Duty 50-case model with an extra-thick 1″ base.
Here is an interesting new measuring device from L.E. Wilson, makers of precision hand dies, case trimmers, and other precision tools. This new Case Gage Depth Micrometer measures shoulder “bump”, so you can determine your headspace both before and after Full-Length sizing. With this Depth Micrometer, you can ascertain exactly how much your FL-sizing die is pushing back the shoulder during the sizing process. While you can measure shoulder setback with comparators on calipers, this Wilson Depth Mic is much more handy. Just place your sized round in the base gage and then slip the micrometer over the top. Take a measurement before FL sizing and then, after sizing, click the micrometer top to verify the amount of shoulder set-back. The measurement is quick and repeatable — very slick.
This is one more nice product from the folks at L.E. Wilson. The $110.00 tool comes with a Gage Block and micrometer top with .001 gradations. The Depth Mic top is compatible with all other Wilson case L.E. Wilson Gages (one size works for all).
Product Tip from EdLongrange. We welcome reader submissions.
At the request of our readers, we have launched a “Deals of the Week” feature. Every Monday morning we offer our Bargain Selections. Here are some of the best deals on hardware, reloading components, and shooting accessories. Be aware that sale prices are subject to change, and once clearance inventory is sold, it’s gone for good. You snooze you lose.
1. Optics Planet — Lyman BoreCam, $299.49
The Lyman BoreCam is an electro-optical borescope with a digital display. You can record “stills” on a SD card. This is one of the hottest products on the market right now — so hot that it sold out at Grafs, Midsouth, and MidwayUSA. But we found some in stock. Optics Planet has the BoreCam for $299.49 with free shipping. The Tactical Store, an Optics Planet outlet, also shows the product for $299.49.
The system really works. A few of our Forum members have the system and they say it functions very well and is “very easy to set up and use”. Here’s what an Optics Planet BoreCam buyer wrote: “I have used Hawkeye borescopes and know their quality. The Lyman worked as advertised and is a great tool for checking for leading, cleanliness of bore, and bore wear. The compact size, ability to take pictures, and store them are a big plus.”
2. Amazon — NRR 34dB Safety Ear Muffs
Ear muffs with a NRR34 noise rating were the most popular items we’ve yet listed in our Deals of the Week. Now we’ve found two more ANSI-approved muffs, both with a 34dB Noise Reduction Rating — the best you can get. Chose the dark green Walker EXT Range Muffs for $13.30, or the Bright Yellow TR Industrial Muffs at $17.00. Both products have padded head-bands and fold into a compact size. If you prefer “basic black”, consider the $19.99 Sumsonic G47 Muffs which also carry a 34dB NRR.
3. WeatherFlow — Remote Bluetooth Weather Meter
This handy, multi-function WeatherFlow Weather Meter provides key weather data to your iOS and Android Mobile devices wirelessly via Bluetooth. The unit measures temperature, humidity, air pressure and dew points. With its built-in impeller, the Weather Meter will also record wind speed (average and gust), and wind direction. Hand-hold it or attach it to a pole/tripod. This wireless Weather Meter is compatible with iPhone, iPad, iPod Touch and all major Android devices. This unit offers a lot of capabilities for $79.95 at Amazon.com.
We have used MidwayUSA shooting mats, as have many Forum members. This Competition Mat is a good product. The 400 denier, PVC-coated material is durable, the overall size is good, and we like the front flap that can be staked down. MidwayUSA normally sells this mat for about $85.00. Currently, it is on sale for $49.99, the best price we’ve seen all year. It’s hard to find a better padded mat for anywhere near that price.
Unrolled Dimensions: 73-½” Long x 35-½” Wide (Does not count the front flap).
Rolled Dimensions: 8-½” Diameter x 35-½” Wide | Weight: 6.5 lbs.
5. Amazon — Neiko Digital Calipers, $17.79
Even if you have a good set of calipers, you may want to get one of these Neiko 01407A Digital Calipers. The #1 best-selling digital caliper on Amazon.com, this Neiko tool features a large LCD Screen and measures up to 6.0 inches. With 1,500+ customer reviews, this product has earned an overall rating of 4.4 out of 5 stars. It’s hard to go wrong for $17.79, even if you just use these as a spare set for measuring group sizes and case trim lengths.
6. Eabco.com — Pillar-Bedded Laminated Stock for Savage
For a Savage-based general purpose rifle, this Laminated Thumbhole Savage Stock is a good choice, and a fine value at just $175.00 including installed pillars. (Most bargain-priced laminated stocks do NOT include pillars). This stock fits Savage actions with detachable magazines. There are four color options: Camo laminate (shown in photo), Brown Laminate, Gray Laminate, and walnut color.
7. Powder Valley — Berger .308 High-BC Match Bullets
Looking for High-BC .308-caliber match bullets? Well Powder Valley Inc. (PVI) has Berger .308 match bullets from 175 to 230 grains in stock at very attractive prices. Need Juggernauts or the latest 230gr Hybrids? PVI has them. If you are shooting a .308 Win in F-TR or a .300 WSM in F-Open, you may want to stock up now before demand picks up next spring. (PVI also has good inventories of Berger Bullets in lighter weights and other calibers.)
8. Monmouth Reloading — 1000 Lake City 5.56 Cases, $59.95
1000 pieces of Lake City brass for under sixty bucks? Yep, that’s a deal and a half. Monmouth Reloading is selling genuine, once-fired Lake City 5.56x45mm brass, thick-walled and sourced direct from the U.S. Military. Monmouth reports: “Our current stock of Lake City 5.56 looks to be all newer year Lake City head stamp but may contain a small percentage of other NATO headstamps. Lake City is a popular, reliable brass, normally capable of many reloads.” Monmouth includes 1% overage to account for any damaged brass. NOTE: Brass has crimped primers, so the pockets with need to be reamed or swaged prior to reloading.
Butch Lambert of ShadeTree Engineering provided this tip. Butch notes that many 6 PPC benchrest group shooters also enjoy shooting in score matches. But to be really competitive in the BR for score game, that means shooting a 30BR, which has a wider, .308-class rim (0.4728″ diameter). Likewise, if you want to compete in 600-yard registered BR events or in varmint matches, you probably want to run a bigger case, such as the 6BR, 6mm Dasher, or 6-6.5×47. Those cartridges also have the larger 0.4728″ rims.
To convert a PPC-boltface action to shoot the bigger cases you can spend a ton of money and buy a new bolt. That can cost hundreds of dollars. The simpler solution is to turn down the diameter of the larger cases on a lathe. Butch explains: “We’ve seen plenty of interest in rebating case rims. This lets you shoot a 30BR in score matches using your PPC action. All you need is a new barrel. This saves buying another bolt, receiver, or rifle if you have a PPC boltface. Anyone who has access to a lathe can do this job pretty easily. Yesterday I turned 150 case in about an hour.” Below are photos of a rebated 6BR case, along with the lathe form tool Butch uses to rebate the case rims.
Six bucks — that’s less than the price of a burger and fries these days. But for the same small sum you can get something that will last a lot longer — a Sierra Counter Mat that displays the entire line of Sierra Bullets from .20 caliber up to .458 caliber. Right now Sierra is offering its foam-backed 16 ¼” x 21 ½” counter mat for just $6.00 (plus S&H). This displays over 160 bullet types (including 10 new bullets), complete with specifications, BCs and product codes. You can order online from the Sierra website or call 1-888-223-3006. Note, the last shipping day for 2015 will be Friday, December 18th.
This is a handy item for your reloading room or workshop. The mat provides a comfortable, non-marring surface for working on your rifles and pistols. It will also, to some degree, provide a barrier to oils and solvents, protecting your bench top.
IMR just announced its latest Enduron powder, IMR 4955, which features a medium-slow burn rate similar to Hodgdon H4831 or IMR 4831. The IMR Enduron powders are clean-burning, temp stable, and feature a proprietary coating that helps reduce copper fouling. We are looking forward to trying IMR 4955 based on our positive experience with IMR 4166. We have used Enduron 4166 and have seen excellent accuracy in .308 Winchester and 6mm BR rifles.
IMR 4955 lands between IMR 4451 and IMR 7977 on the burn rate chart. Hodgdon, which distributes IMR powders, says that IMR 4955 works very well for cartridges such as 25-06 Remington, .270 Winchester, and the .300 Winchester Magnum. Perhaps this will prove a good choice for the .284 Win and .300 WSM as well (F-Open shooters take note). If you are currently using H4831 or H4831sc you should probably give IMR 4955 a try.
Hodgdon says IMR 4955 offers some important advantages:
1. IMR 4955 has a small kernel size. This allows the powder to flow through powder measures easily and meter very accurately.
3. IMR 4955 is very insensitive to temperature changes, so shooters should see uniform velocities across a broad temp range.
3. IMR 4955 has very good load density for medium and big game hunting cartridges (such as the .270 Win and .300 Win Mag).
4. Like other Enduron powders, IMR 4955 boasts a special additive that helps reduce copper fouling as the rifle is fired.
IMR 4955 Should Be Available Early Next Year
— Load Data is Online Now
IMR 4955 will be available in early 2016 in one-pound and eight-pound containers. With the addition of IMR 4955 to the series of Enduron powders, reloaders have a new, advanced-formulation powder that should work for a wide variety of popular cartridges — from the .260 Rem up to big magnums. Reloading data for IMR 4955 is now available online in the Hodgdon Reloading Data Center. Below is a sample of Hodgdon/IMR load data for IMR 4955 as used in the .300 Win Mag cartridge.


 A unique, comprehensive
  Great Resource for Hunters

 Christmas is almost here, so today we’re featuring a hand-picked collection of “stocking stuffers” for precision shooters. So as not to bust your holiday budget, all of our selections are priced under $10.00. These items are handy tools that you’ll use over and over again at the range and/or at your loading bench (so you’re allowed to buy them for yourself, even after Christmas). Our AccurateShooter staffers use most of these items, including the Loading Blocks, Ballistol, Mirage Shades, Crocogators, and Barrel Bags.


 IMR 4955 Should Be Available Early Next Year


