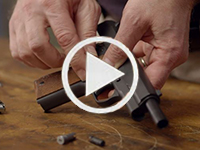
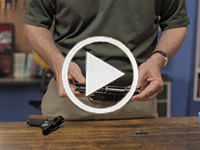
AR-platform rifles are fun and versatile, but the standard, mil-spec triggers leave much to be desired. They tend to be gritty, with creep and heavy pull weight. One of the easiest, most effective AR upgrades is a trigger group swap. An improved fire control group makes a huge difference. There are many aftermarket trigger options for the AR platform rifles. Choose single-stage or two-stage, either standard trigger assembly or unitized “drop-in” trigger, such as those made by Timney or Triggertech.
When upgraded with a precision trigger and match barrel, AR-platform rigs work great in NRA High Power competitions (Photo from NRA Blog, at Camp Perry).
Two-Stage vs. Single-Stage Triggers
Two-stage triggers have two separate movements. The first stage offers a light, spring-loaded pressure that works against the shooter’s pull until stopping at the second stage – this is called “take-up”. If there is no spring pressure, it is known as “slack”. Should the shooter continue to pull the trigger once he’s arrived at the second stage, the mechanism will operate like a single-stage trigger from there until engaging the sear and firing the gun. Good trigger reset requires the shooter to keep pressure on the trigger, even during reset, to minimize movement of the muzzle.
Single-stage triggers feature no take-up or slack, as they begin engaging the sear as soon as the shooter begins pulling the trigger. Some competitive shooters prefer the two-stage trigger because of the feedback it provides during its first stage, while other shooters, including those using their rifle in tactical scenarios, may want the surety of a single-stage trigger, ready to engage and fire once their finger is inside the trigger guard. Regardless of preference, a good trigger will feature minimal creep and should be free of grittiness, providing a smooth, even break.
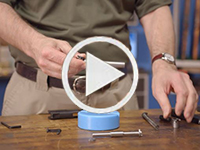
Drop-In Trigger Assembly vs. Standard Trigger Group
Once you decide between a single-stage or two-stage trigger, you can choose between standard and drop-in trigger groups. Standard trigger groups feature all the fire control group parts separated, and need to be pieced together and installed much like a mil-spec trigger, while drop-in trigger are pre-assembled and contained within a casing that simply drops in to the receiver and accepts the pins, hence the name.
After-Market Trigger Comparison
Some shooters prefer drop-in triggers due to the ease of installation, while others opt for standard groups so they can access the components individually for cleaning adjustment or replacement. If one piece of a drop-in trigger fails, you’ll need to either replace the entire unit or send it to the manufacturer for repair, whereas you may be able to simply replace the broken component of a standard trigger without needing a whole new trigger set.
Trigger Terminology — “Creep”, “Stacking”, “Overtravel”
“Creep” or “travel” is the distance the trigger moves between the end of take-up and when the trigger breaks to fire the fun. Too much creep can affect accuracy, but no creep can be unsafe, as the shooter may not be prepared to fire. “Stacking” occurs when the trigger weight actually increases during travel — this shouldn’t happen. Lastly, “overtravel” is the distance the trigger continues moving back after the gun fires.
This article is based on a longer story in the NRA Blog.
You can spend thousands on a fancy new rifle, but all that expensive hardware won’t perform at its best if you have poor trigger technique. One key element of precision shooting is trigger control. Our friend Kirsten Joy Weiss has produced a good video that shows how to refine your trigger technique for better accuracy. In this video, Kirsten talks about the actual placement of a shooter’s index finger on the trigger. It is important to have the finger positioned optimally. Otherwise you can pull the shot slightly left or slightly right.
Kirsten tells us: “Finger placement on the trigger might not seem like a big deal, but it actually is. The reason for this is because, depending on where your index finger is placed on the trigger, [this] translates to different muscle interactions with the gun.” Watch this video to see Kirsten demonstrate proper finger placement (and explain problems caused by improper finger positioning).
When you pull the trigger, you only want to engage the last section of your finger, in order to avoid unwanted muscle engagement and to achieve a smooth shot. Remember there is a “sweet spot” between the crease (first joint) and the tip of the finger. If you position the trigger in that “sweet spot”, you should see an increase in your accuracy. Don’t make the mistake of putting the trigger in the crease of your finger, as shown below.
Effects of Incorrect Finger Placements
You want to place the trigger shoe between the end of your finger and the first joint. If you place the trigger on the very tip of you finger you’ll tend to push the rear of the rifle to the left when engaging the trigger, causing shots to go right (for a right-handed shooter). On the other hand, if you put the trigger in the crease (first joint), you’ll tend to bring the rear of the rifle to the right, causing shots to fall left. This is illustrated below for a right-handed shooter.
Kelbly makes outstanding actions, including the Stolle Pandas. In the past 20 years, Pandas have probably won more benchrest matches than any other action (though BATs and Bordens are increasingly in the winning circle). Recently gunsmith Alex Wheeler of Wheeler Accuracy worked his magic on an aluminum Panda, optimizing the “ignition timing” of the action. This involves many small mods to bolt, camming surfaces, trigger, and firing pin: “The whole cam helix and detent shelf is re-cut. The firing pin and cocking piece are modified as well.” When executed properly, Ignition Timing has a number of benefits, including a smoother bolt opening/closing, improved firing pin fall, and enhanced accuracy (though the accuracy improvements can be subtle).
BEFORE Action Timing — Stiff and Clunky
Alex reports: “Normally Panda actions have plenty of firing pin fall. For one reason or another this one was very low. Before timing, firing pin fall was .210 with a Bix’N Andy (BNA) trigger. After trigger timing firing pin fall is .244 with zero cock on close.” Here is how the action functioned before timing work:
CLICK Photo to start VIDEO
Alex notes: “As you can see, after the cocking piece rides out of the detent notch it thenfalls to the trigger and is then re-cocked. This is normal on most un-timed actions.”
AFTER Action Timing — Smooth and Refined
Alex explains the modifications he made for this Panda action: “Moving the trigger back adds cock on close. The whole cam helix and detent shelf is re-cut. The firing pin and cocking piece are modified as well. I do love a timed Panda. In fact, I like aluminum actions, I think there is something to them. But yes, I also recommend Borden as my first choice.’
CLICK Photo to start VIDEO
Fix for Right-Bolt Actions Only
After seeing these videos on Facebook, one poster asked: “I do like my Panda but this is exactly why I bought a Borden action and I love it. It’s good to know you can make a Panda better. Alex, can you time a left bolt Panda?”
Alex replied: “No, the tooling I built is all for right hand actions sorry….”
Our friend Kirsten Joy Weiss has just released a useful video that shows how to refine your trigger control for better accuracy. In this video, Kirsten talks about the actual placement of a shooter’s index finger on the trigger. It is important to have the finger positioned optimally. Otherwise you can pull the shot slightly left or slightly right.
Kirsten tells us: “Finger placement on the trigger might not seem like a big deal, but it actually is. The reason for this is because, depending on where your index finger is placed on the trigger, [this] translates to different muscle interactions with the gun.” Watch this video to see Kirsten demonstrate proper finger placement (and explain problems caused by improper finger positioning).
Here Kirsten Illustrates how the index finger should be aligned along the face of the trigger shoe.
When you pull the trigger, you only want to engage the last section of your finger, in order to avoid unwanted muscle engagement and to achieve a smooth shot.
Remember there is a “sweet spot” between the crease (first joint) and the tip of the finger. If you position the trigger in that “sweet spot”, you should see an increase in your accuracy. Don’t make the mistake of putting the trigger in the crease of your finger, as shown below.
Effects of Incorrect Finger Placements
You want to place the trigger shoe between the end of your finger and the first joint. If you place the trigger on the very tip of you finger you’ll tend to push the rear of the rifle to the left when engaging the trigger, causing shots to go right (for a right-handed shooter). On the other hand, if you put the trigger in the crease (first joint), you’ll tend to bring the rear of the rifle to the right, causing shots to fall left. This is illustrated below for a right-handed shooter.
The NRA Blog has produced an interesting graphic guide to firearms function. This “How Guns Work” infographic shows the basics of bolt-action rifle operation and how a centerfire cartridge propels a bullet through a barrel during the “firing sequence”. There’s some good artistry here, with cutaway drawings letting you look inside an action and cartridge.
Enjoy this technical graphic. The NRA Blog says: “In celebration of cartridges big and small, we partnered with OutdoorHub to bring you a detailed look into how guns work. While the infographic will be most instructive to newcomers, we think avid shooters will find it interesting, too.”
Many folks think the ultra-smooth Bix’N Andy triggers are the best match triggers you can buy. But until now Bix’N Andy trigger units, with their light pull-weights, have been intended primarily for benchrest and F-Class disciplines, where light pull weights are favored by many competitors. Well, Bix’N Andy has just released a new TacSport trigger that can be adjusted to a pull-weight of up to five (5) pounds (combined first and second stages). But remarkably, the same new TacSport trigger can still go down to about one ounce — that way you can adjust the pull weight through a very wide range to suit the application. Length of trigger shoe travel can also be set from zero to 7mm.
This trigger can operate as a single stage or as a two-stage. Each stage can be adjusted independently. Set the trigger at a few ounces for load testing from the bench, then crank it up to 2.5 pounds for a tactical match. Run it as a single stage for the bench or a two-stage for field work. With this flexibility and wide pull-weight adjustment range, the new Bix’N Andy TacSport trigger is well-suited for tactical shooters, hunters, and LEO marksman. The TacSport trigger also comes with a right-side top safety.
The new Bix’N Andy TacSport trigger is now available from BulletCentral.com for $495.00. Yes, that’s pricey, but this trigger offers features and “feel” you can’t find anywhere else.
Product Tip from EdLongrange. We welcome reader submissions.
If you have a Remington bolt-action rifle, you may qualify for a trigger upgrade, a voucher, or reimbursement of costs spent changing out your trigger mechanism.
These benefits result from the settlement of a class action lawsuit which alleged that Remington trigger mechanisms with “trigger connectors” and X-Mark Pro® triggers could have accidental discharges without the trigger being pulled. The settlement involves two classes. The first class includes owners of firearms that utilize a trigger connector. The second class includes owners of firearms that utilize the X-Mark Pro trigger mechanism that is the subject of a voluntary safety recall. The settlement allows owners of Remington models 700, Seven, and related models to have their trigger replaced free of charge, among other benefits.
WHO IS INCLUDED?
The Settlement provides benefits to: Current owners of Remington Model 700, Seven, Sportsman 78, 673, 710, 715, 770, 600, 660, XP-100, 721, 722, and 725 firearms containing a Remington trigger mechanism that utilizes a trigger connector; Current owners of Remington Model 700 and Model Seven rifles containing an X-Mark Pro trigger mechanism manufactured from May 1, 2006 to April 9, 2014 who did not participate in the voluntary X-Mark Pro product recall prior to April 14, 2015; and Current and former owners of Remington Model 700 and Model Seven rifles who replaced their rifle’s original Walker trigger mechanism with an X-Mark Pro trigger mechanism.
WHAT DOES THE SETTLEMENT PROVIDE?
Settlement Class Members may be entitled to: (1) have their trigger mechanism retrofitted with a new X-Mark Pro or other connectorless trigger mechanism at no cost to the class members; (2) receive a voucher code for Remington products redeemable at Remington’s online store; and/or (3) be refunded the money they spent to replace their Model 700 or Seven’s original Walker trigger mechanism with an X-Mark Pro trigger mechanism.
HOW CAN I OBTAIN BENEFITS?
If you are in the affected class you can submit a claim form electronically by clicking the link below:
Even if you do nothing you will be bound by the Court’s decisions. To keep your right to sue the Defendants yourself, you must exclude yourself from the Settlement Class by November 18, 2016. If you stay in the Settlement Class, you may object to the Settlement by November 18, 2016. For more info, or to make a claim, call 1-800-876-5940 or visit www.remingtonfirearmsclassactionsettlement.com.
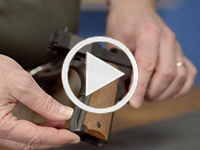
While AccurateShooter.com focuses on rifles, we know that a large percentage of our readers own handguns, with 1911-style pistols being particular favorites. For you 1911 owners, here are six short videos from Brownells showing how to customize a 1911-style pistol with after-market upgrades.
How to Accessorize Your 1911
This six-part series by Brownells provides step-by-step instruction on how to accessorize your 1911. The videos cover changing out the mainspring housing, magazine release, slide release, hammer, guide rod, and installing a group gripper.
You probably know by now that David Tubb has introduced a new two-stage trigger for Remington 700 rifles, the Model T7T. Priced at $385.00, the new T7T Trigger is a true two-stage design: first and second stages are independently adjustable for both weight and feel. Overall (combined stage) trigger pull weight can be adjusted from just under 1 pound to slightly over 3.5 pounds.
If you are interested in the 7ZT, watch these two videos. The first shows how to adjust pull-weights for both stages. The second video shows how to modify your stock to provide clearance for the T7T.
This video shows how to adjust the new Tubb T7T two-stage trigger for Remington 700s:
The new T7T is a quality product. We’ve received good feedback from “early adopters” who tell us the two-stage function works well. While installation of the T7T may require minor modifications to your action, most gun owners with basic mechanical skills can install the T7T by themselves. The T7T is made using stainless steel and aluminum for maximum corrosion resistance. Note, installation of the T7T trigger (either Right-Hand or Left-Hand) also requires a companion T7T bolt release, offered by DavidTubb.com for $10.00.
This video shows how to modify your stock to fit the T7T trigger:
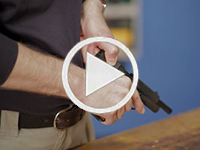
M-K IIA2 GEN2 Tactical Trigger from The Wisconsin Trigger Co.
Gear Review by Johnny Fisher
Do you shoot an AR-platform rifle? Here’s an excellent trigger upgrade option that has recently returned to the marketplace. The Wisconsin Trigger Company (WITC) has resumed production of the legendary Milazzo-Krieger M-K II trigger for the AR-platform rifles. Not merely marketing a replica of the original Milazzo-Krieger design, Wisconsin Trigger now offers an enhanced, drop-in version called the M-K IIA2. An easy install, the Milazzo-Krieger trigger drops in with no special tools or machining required (and no modification of the safety selector switch).
For those who are looking for an extremely crisp AR15 trigger that closely mirrors the “feel” of a finely tuned M1 / M14 trigger, this trigger might be the solution. The first stage is exceptionally clean and smooth due to a proprietary diamond-grinding process. I felt that the first stage travel was longer than a Geissele, but many guys will prefer that. Upon reaching the very noticeable and defined “wall” of the second stage, a further increase of pressure provides the instantaneous snap one looks for in a high-quality trigger — complete with a total absence of anything resembling creep or slop.
If you follow the instructions in the box and watch WITC’s informative how-to videos, installation of this trigger is extremely straightforward, requiring no special tools or fitting.
As supplied straight from the factory, the first stage requires about 2.25 pounds of take-up before encountering “the wall” of the second stage. For this purpose of this review and to ensure “making weight” in CMP Service Rifle Competitions, the (white) 5-lb. disconnector spring was used. The weight of the second stage came in right at an extremely repeatable 5 lb. 3 oz. (averaging +/- 1.5 oz.) for a ratio of about 40/60 between the two.
Upon release of the hammer, the disconnector reset is decidedly short. National Match shooters in particular will appreciate the very short but easy-to-recognize trigger reset during rapid-fire strings.
Tuning the Trigger Before Installation
As with most National Match-grade triggers on the market, the Millazo-Krieger utilizes proprietary pins that come supplied with this unit. They must be used for final installation and are purposely oversized to a specific diameter for a very snug fit. This is to ensure the trigger and hammer rotate solely on the pins, as opposed to the pins eventually rotating inside the receiver. It is best to use standard sized mil-spec trigger and hammer pins for the setting of tensions (trigger weight) before final installation to help avoid undue wear to the receiver pin holes. Final adjustment of second-stage pull weight must be done BEFORE final installation.
It is recommended to first set the amount of desired disconnector engagement by performing a very simple process that is detailed in the included installation instructions from the TOP of the trigger. The swapping out of disconnector springs and final tuning of the second stage can then be done, but only from UNDERNEATH a disassembled trigger.
The disconnector tensioning springs are easily swapped out by removing the spring plug from the bottom of the trigger housing that exposes the spring pocket. After inserting the desired weight spring, the spring plug must be installed at least flush with the bottom of the trigger housing. Installing it deeper will add trigger pull weight on the second stage. Installing it too shallow will interfere with trigger movement.
Transferable Warrnty:
The Wisconsin Trigger Company offers a full lifetime warranty to all unaltered parts of its triggers. This lifetime warranty is fully transferable when the trigger is sold to a new user! When have you heard of an AR component manufacturer with a transferable warranty — we’re impressed.
Not just a retailer, John Scandale of Keystone Accuracy is a distributor of these triggers. He currently has many in stock and for sale at a very special introductory price.
What Comes in the Box:
The $265.75 trigger kits come complete with everything you need: Trigger unit assembly, trigger return spring, full strength hammer spring, two proprietary oversized trigger & hammer pivot pins and three disconnector tensioning springs (3.25 lb., 4.5 lb., 5.0 lb.). Also included is a comprehensive installation manual, a color-coded disconnector spring selection chart, some promotional items, and the lifetime warranty card.


 Two-Stage vs. Single-Stage Triggers


 Transferable Warrnty:


