by Sierra Bullets Ballistic Technician Paul Box
All of us who have been in reloading and shooting for any period of time have read how sectional density has been regarded as a bullet’s ability to penetrate. Back before high velocity came along and modern bullet design, the easiest way to get more “power” and penetration was by increasing the diameter and mass. After all, a bowling ball will hurt more than a golf ball, right?
Let’s take a closer look at sectional density.
The formula for calculating sectional density is pretty simple and straight forward. Take the bullet weight and divide by 7000. This number is then divided by the bullet diameter squared. Two bullets of equal weight and the same diameter will have equal sectional sectional density. No regard is given to the bullet construction. This is where the fly hits the soup in considering sectional density as far as penetration is concerned.
Section Density Formula: (Bullet Weight divided by 7000) divided by Bullet Diameter squared.
Bullet construction is the biggest factor in how it is able to penetrate. The best example I can think of here is to look at the Sierra .224 55 Gr. FMJBT GameKing #1355 compared to the 55 Gr. BlitzKing #1455. Both are .224 and weigh 55 grs. Both have a sectional density of .157. But there is a huge difference in their construction. The FMJ has a thick jacket and is designed to penetrate. The BlitzKing is designed for fast and rapid expansion with little concern for how deep they will penetrate.
The next time you’re choosing a bullet, look at the construction and less at the sectional density number. It’s all about the construction anyway. If you have any questions or would like to discuss sectional density or bullet penetration further, please give us a call at 800-223-8799 or shoot us an email at sierra@sierrabullets.com.
Share the post "Bullet Sectional Density — What You Need to Know"
Tech Report by B. Walker, owner of The Urban Rifleman LLC
I have been moly coating since I started shooting rifles nearly 26 years ago. I have always moly-coated my bullets. I figured if it was good enough for Walt Berger, it was good enough for me (Walt still moly coats his bullets to this day, if recent match pictures are any indication). I had always used the typical dry method (without the wax) and I had the same jar of moly (molybdenum disulfide) for many years.
I had tried all kinds of methods over the years. But then AccurateShooter Forum member “Bowfisher” sent me a message about moly-coating bullets using water. After his suggestion, I did several batches using the moly-in-the-water method. I was stunned with the great results. This Wet Moly method is the cleanest, easiest, and best coating method I have ever tried. I strongly believe Wet Moly should be the recommended method.
Traditional Dry Moly Coating Process is Dusty and Messy
Before I started the Wet Moly process, I always coated my bullets in small containers in my big Dillon tumbler. I would put the bullets in old EMPTY 1-lb powder containers and add the moly. I would place the powder containers in my big Dillon tumbler and tumble for at least three hours. I would then throw rice in with the bullets to soak up any excess moly dust and shine the bullets. Then I would shake out the rice using a lid with holes drilled in it. My coated stuff came out beautiful if I do say so myself even dry. However, there was always dust and moly mess (there was always some on my fingers when I would handle the bullets after). I only liked to doing coating in big batches to get it over with because it was a chore (by all means don’t get moly on the bottom of your shoes and track the carpet)!
Wet Moly Method — Tumbling in Bottles with Moly and Water
The new wet method entails adding water to the bullets during the tumble in the bottle, and it is way easier and cleaner. The final product is totally dust free and will not come off on your fingers as there is no dust or residue. I think they shoot better too, and the moly works as it is supposed to. I won’t get into the debates over the merits of moly. Some folks believe it works for them. This article is intended for those guys — it is not intended to convert handloaders who are happy with shooting uncoated bullets.
Editor: None other than John Whidden, Multi-Time National Long Range Champion, moly-coats his bullets. Whidden also uses a Wet Moly application method. He agrees that applying moly in a water solution delivers the best results, and doesn’t leave dusty residues.
Here is the basic outline of the Wet Moly application method. In addition to this outline, I created an instructional video that shows my entire process. [Editor: Definitely WATCH the video. It is important to see the post-tumbling rinsing and buffing processses.]
1. Use old 1-lb powder containers. Work over a sink. Add the bullets in reasonable batches to the containers (lets say 2-3 inches of bullets). I try to use use only enough water to cover the bullets and I use a little more moly than I used to with a dry application. I suggest using half a teaspoon of moly per two inches depth of bullets.
2. Tumble for four hours (at least). I tape the container lids shut before placing them in the tumbler. Then, simply place the powder container in your vibratory tumbler.
3. After the elapsed time, take the bottle to the sink and, dump contents into a plastic strainer. I use an old spaghetti strainer that I save just for moly. IMPORTANT: BE SURE you have a strainer that won’t let the bullets fall out! Stream water (from faucet) gently over the bullets to thoroughly clean excess residues off the bullets. Shake strainer to get all the water out. See video time 6:00-10:00.
4. Sift out the bullets onto a paper towel inside an old baking pan and shake to buff. Repeat until the bullets are completely dry and buffed to a high shine. The bullets are clean, dust-free and the moly is gorgeous! Leave for several days before storing or put them in your oven at about 130 degrees for 30 minutes to remove the last bit of any moisture. (WARNING: DO NOT use excessive oven heat or cook too long — set a timer!).
If you follow these instructions, the result should be the best moly coating you have ever seen!
Before and AFTER Wet Moly. Note how uniform the moly coating is on the bullets. The Wet Moly process also leaves a perfect glossy finish after rinsing and drying. And the bullets are totally dust-free! These are Sierra #1380 .224 69gr HPBT MatchKings.
Be sure to visit our online store at TheUrbanriflemanstore.com. We have a full compliment of front and rear bag riders for various rifles that we designed and produce in-house. We also stock Revolution laminated benchrest stocks, and we sell stainless steel Remington prefit barrels (which are getting rave reviews from customers). Also available are Wilson dies, Timney and Triggertech triggers, Berger and Sierra bullets, Magpul and Accuracy International chassis, and lots more.
Share the post "Moly + Water — Wet Application Method for Moly Bullet Coating"
Powder Valley, a leading distributor of reloading supplies, is pleased to announce the launch of a major update and enhancement to its PowderValley.com website. The enhanced website now has a completely updated look, improved search and browse features, along with a streamlined checkout experience. The updated website is also mobile-friendly so it works great with smartphones and mobile devices. And right now the Powder Valley website features special discounts, with some items up to 50% Off. For big savings, click the Weekly Deals tag on the home page.
There are convenient, one-click product category links for:
“We’re excited to provide our customers with a new website that is fast, easy to navigate, and helps them make an informed buying decision” said Bill Clinton, CEO of Powder Valley. “The new website is the first step in a series of strategic changes at Powder Valley which will improve our ability to implement significant improvement in how we serve customers, from enhanced product information to increased breadth and depth of our product offering.”
To learn more about Powder Valley and its full lineup of reloading supplies, visit PowderValley.com. On the updated website, as you scroll down the home page, you’ll see convenient major feature categories for:
1. Sales and Clearance | 2. New Arrivals | 3. Popular Products
About Powder Valley
Powder Valley began in 1984 as Dexter Automotive, the first master distributor of Accurate brand powder. In 2000, Bryan and Noel Richardson purchased the company and moved operations to Winfield, Kansas. Since then Powder Valley has become the single largest distributor of canister powder in the USA, stocking nearly every brand of Smokeless and Black Powder offered in the nation. Powder brands include Hodgdon, IMR, Vihtavuori, Alliant, Ramshot, Winchester, Hornady, Shooters World, Goex, Schuetzen, Swiss and more, along with an ever-expanding offering of bullets, brass, wads, shot, gun care items, and reloading equipment. Powder Valley also carries a wide selection of rifle, pistol, and shotgun primers.
Share the post "Powder Valley Launches Enhanced, Full-Featured Website"
This week’s featured firearm belongs to John “SnakeEye” Seibel, founder of the VarmintsForFun website. In recent years, John has become a “true believer” in the little 20-Caliber cartridges. He says this light-recoiling 20 PPC, Rampro-actioned pistol is perfect for a quick shot on a critter, taken from the front seat of his truck. John tells us: “A long-range pistol is an ideal truck gun in my opinion. It stows in a small area and doesn’t take up the room a rifle does. Just keep ear protection near by at all times! I’ve taken varmints as far as 400+ yards with this 20 PPC pistol, so why would you need a rifle?”
Perspectives on Pistols for the Varmint Hunter
by John Seibel
I decided to try my hand at shooting varmints with a pistol one day when I grew tired of wrestling a rifle around in the truck for a quick shot. Many times when traveling around on the farm you’ll spy a groundhog or fox that usually isn’t more than 200 yards away. A single-shot pistol like the Thompson Contender could fit the bill. With its compact length, around 20 inches, a long-barrel pistol can lay on the truck’s passenger seat for easy access. I usually keep my two leather brick-style sandbags laying beside the console and seat. I have a box made from hard rubber that I lay across the top of the door. I then lay the two bags on top. This makes a nice platform to rest the pistol’s forearm. I like to use a forearm that is at least two inches wide. That lets the gun lay steady—almost like you are shooting from a bench rest. For the shooting hand, I prefer a pistol grip with finger grooves and a slight overhang or flare for the web of your hand.
As for optics, I tried long-eye-relief pistol scopes but they lacked the magnification you need for long-range target shooting or varminting. Those pistol scopes have really long eye-relief because they are designed to work with the pistol held at arm’s length. When shooting at the bench or from a truck that’s not what you want. By the time you find the target and get your eye in the exact location, the varmint has moved on or died of old age! After much fiddling around with pistol-type scopes, I finally decided to use rifle scopes on my long-range pistols. The minimum I use is a 4.5-14×40. Eye relief on a Leupold 4.5-14x40mm is about 3.5 inches at 4.5 power. Field of view is better with rifle scopes too and it’s easier to acquire your target. For this type of shooting a light-recoiling caliber is essential or you will have scope-eye bad! I currently have three long-range pistols and use them to shoot 17M4, 20 PPC, 22 BR, and .223 Rem. The featured gun may be the most accurate of my pistols, and your editor thinks it’s the most handsome of the three.
The Rampro Pistol Project — Working with John Illum
A couple of years ago I called John Illum of Rampro about building the ultimate long-range pistol. It just so happens that John was a big time long-range pistol shooter. I told him that I wanted a gun that didn’t recoil badly and wouldn’t torque when fired. As I am a quadriplegic, with no grip in my hands, the gun had to handle well under recoil so I didn’t drop it. Recoil had to be straight back–no twisting.
Well Illum listened to me and came up with a gun that performs just the way I wanted. Illum suggested a rear grip stock of his own design. It has a 2.25″ wide forearm and a rear grip with a slight palm swell that fits your hand perfectly. Another nice feature is the finger grips. It has an extended overhang or “beavertail” that fits comfortably in the web of your hand. Of course it had to be walnut! I chose Rampro’s STP small action with a PPC bolt. His bolt uses a Sako-type extractor. The action is a single-shot. Being right-handed, I chose a right bolt, left port configuration. This works really well in a pistol. You can load with your left hand and see the round laying in the action–that’s what you want in a pistol without a safety.
Gun Specifications John Illum’s Rampro actions are chrome-moly steel. Commonly you’d see them blued, but I had him put a brushed nickel finish on the action and rings. From a few feet away it looks like stainless. The trigger is Illum’s own design set at 8 ounces, and there’s no creep that I can detect. The action has Remington barrel threads and will accept Remington type triggers. One neat thing is that the action was milled with an integral recoil lug (much like the current Surgeon Action). And the bolt is milled all in one piece–no soldered-on handles. My only gripe with this bolt handle is that it could be a tad longer, but it still is manageable for a single-shot. You’ll also note how slick and streamlined the scope rings are. Illum made those as well. His rings mount to the action via two screws from the inside of the ring, a very elegant set-up for sure. (I currently have a 6.5-20x40mm Nikon scope on this gun. If I had to do this project over again the only thing I would change would be installing a 30mm scope because I like ‘em!).
The barrel is a PacNor Super-Match heavy taper with flutes milled by John Illum, who did all the gunsmithing on this pistol. Twist rate is 1 in 12 inches, with an 11° crown, polished to a mirror finish. The barrel was bead-blasted on the exterior to cut glare. I had Illum cut a 20 PPC minimum-spec chamber, with a .237″ neck. That way I don’t have to turn necks on the Lapua Brass (220 Russian necked down to .204). This is a varmint gun–there’s no need for turned necks. [Editor’s Note: Rampro is no longer in business. However, John tells us “I haven’t had any problems with the action so far. If I did, most competent gunsmiths could fix them easily.”]
Handgun Handling Tips
If you want to shoot a long-range pistol but have never have shot this kind of gun before, try to find a mentor — someone with a gun like this who can school you a bit in the correct technique. The first thing you notice is that you have no comb or cheek piece to help align your head and neck. And getting used to the optics takes some practice. Most people fit a pistol-type (long eye-relief) scope, but these can be awkward to use, and somewhat frustrating at first — the field of view is very restricted. Move your head very slightly and you can lose the sight picture completely. You can solve that problem by using a standard rifle scope, but that will put your head very close to the eye-piece — just three to four inches. With that arrangement, if you don’t hold the gun correctly … POW instant scope-eye!
Now once you get the hang of shooting a long-range pistol you will find it can be just as accurate as a rifle. But there is a trick to shooting them. Shooting a long-range pistol is a whole new world — you need to hold it just right. If you don’t let the gun roll back a little (i.e. if you grip too hard) you will get vertical stringing. I hold my hand against the back of the grip to guide the gun but let it almost free recoil. Looking at how compact the pistol is, you might think “Hey, this would make an ideal ‘walking-around’ varminter.” Well, that’s not really the case. For real precision shooting a solid benchrest type set-up is a must. You can attach a bipod to a long-range pistol, but you would need a flat surface. A fence-post top would work pretty well without a bipod if you carry a small light bag. Overall though, this type of pistol works best as a sandbag gun. For a walking-around gun, you’d be happier with a rifle I think.
Load Development and Accuracy
When I built this gun, Hornady had just released the 32gr V-Max (see footnote), a good match for my barrel’s 1:12″ twist. I choose the 20 PPC because of the very good Lapua brass (220 Russian parent case). I figured teaming Lapua brass with the little .204 bullet would offer excellent accuracy combined with very low recoil. My expectations were fulfilled. The brass proved to be excellent and the PacNor loved the little V-Max pills.
I tried quite a few different loads and most powders that I tried worked very well. These included: H322, Benchmark, AA 2460, and Reloader 7. Amazingly, with just 14″ of barrel, all of these powders delivered impressive velocities–ranging from 3914 to 4074 fps. I settled on 48 Harrell’s clicks of Accurate Arms (AA) 2460, which drives the 32gr V-Maxs to 3995 fps.
With AA 2460 the gun will shoot in the low 3s at 100 yards consistently — as long as I steer the gun right, which takes some practice. I think groups in the low 0.3″ range is excellent for a non-benchrest factory bullet. Despite having no buttstock to grab, recoil on my 20 PPC pistol is very minimal — it just rocks back into your hand. The main problem is to keep the scope from smacking you, since I used a rifle scope with short eye-relief. Muzzle flash and noise are tolerable but DO NOT shoot one of these without good ear protection. Your ears are very close to the muzzle.
I also have a 20 PPC rifle built on a BAT action with a Richard’s #008 laminated stock cut down in size. That gun’s 1:9″-twist Lilja barrel lets me shoot the Berger 50gr LTB bullets. In the wind, these perform quite a bit better than the 32s. My two favorite loads for the 50 grainers are: a) 26.0gr VV N135, CCI 450 primers, 3615 fps; and b) 27.3gr Hodgdon Varget, CCI 450s, 3595 fps. The BAT 20 PPC also shoots really well with the 40gr V-Max, pushed by N135 and Fed 205M primers.
Pistol Action Legal Issues
One important thing to remember if you build a pistol is to make sure the receiver came from the factory as a pistol and was titled as a pistol. Rifle actions are illegal to use as a pistol. Yes, that’s a nonsensical law, but it’s still on the books. You can use factory pistol actions such as the XP 100.
If you want a new custom action such as a BAT (my favorite), you can order it as a pistol action and when you get it, register it as a pistol. Note, in some states there may be additional fees, waiting periods, or restrictions for pistol actions (as opposed to rifle actions). Check your local laws before ordering the action.
Future Trends in Varmint Hunting — Plenty of Twenties
I think these sub-caliber rounds, both 20s and the 17s, are the future of recreational varminting, at least out to medium distances. The Twenties offer low recoil, excellent accuracy, and components keep getting better and better. The bullet-makers are finally making high-quality bullets in appropriate weights. Compared to something like a 22-250, I’ve noticed that my 20 PPC rifle has a lot less noise, a plus when you want to be quiet around other people and varmints.
The flat trajectory is another big advantage in the field. With the 20 PPC, zeroed at 100 yards, I can pretty much hold dead center and get hits out to 300 yards or so without touching the scope to add elevation. [Editor: The same is true with the 20 Practical cartridge, basically a .223 Rem necked down to .20 Caliber. It has proven very accurate and easy to tune.]
The 20-Caliber cartridges we have now, in particular the 20 PPC and 20 BR, are very well-refined. You don’t have to do a lot of tuning or tinkering to have a very accurate, effective varmint-slayer. In fact, if I could dream up a signature “20 VFF” (Varmints For Fun) cartridge it would basically be the 20 PPC. In truth, nearly any of the popular 17- or 20-Caliber cartridges will perform well if you start with top-quality brass. The sub-calibers have less recoil and burn less powder, and there are very good components for most varmint and target-shooting applications. To me it seems that these small calibers work so well because of good components, low recoil, and efficient cartridge designs (particularly in the VarTarg and PPC cases).
WARNING: For your own safety, ALWAYS reduce all starting charges by 10% and work up carefully! Ambient temperature changes, powder lot variations, and differences in barrel friction can result in significantly increased pressures.
20 PPC LOAD MAP
Bullet GR
Maker
Powder
Charge
Primer
Case
Velocity fps
Barrel Twist
Comments
32
Hornady V-Max
H322
27.6
Rem 7½
Lapua
4000
Lilja 1:12
WarrenB Form Load
32
Hornady V-Max
AA 2460
29.5
Rem 7½
Lapua
3995
PacNor 1:12
SnakeEye Pistol Load
32
Hornady V-Max
H4198
25.1
CCI BR4
Lapua
4222
PacNor 1:12
A. Boyechko Load
39
Sierra BlitzKing
H322
26.0
Rem 7½
Lapua
3700
Lilja 1:12
WarrenB Load
39
Sierra BlitzKing
VV N540
28.8
CCI BR4
SAKO
4064
PacNor 1:12
D.Moore, Low 2s
40
Hornady V-Max
VV N135
27.8
Fed 205m
Lapua
3950
Lilja 1:9
SnakeEye Load
50
Berger LTB
VV N135
26.0
CCI 450
Lapua
3615
Lilja 1:9
SnakeEye Load
50
Berger LTB
Varget
27.3
CCI 450
Lapua
3595
Lilja 1:9
SnakeEye Load
Footnote: When first manufactured, the small Hornady 20-Caliber V-Max bullet was actually 33 grains, not 32 grains as sold currently. I still have some of the 33-grainers. I’ve observed no functional difference between the 33s and the current 32-grainers.
Share the post "Sunday Gunday: 20 PPC Pistol — Great for Varmint Adventures"
Guys — honestly, if you do anything today on this site, watch this video. You won’t be disappointed. Guaranteed. This is a very informative (and surprisingly entertaining) video. Every serious hand-loader should watch this video to see how cartridge cases are made. Your Editor has watched the video 5 times now and I still find it fascinating. The camera work and editing are excellent — there are many close-ups revealing key processes such as annealing and head-stamping.
VERY Informative Video Show Cartridge Brass and Ammunition Production:
Norma has released a fascinating video showing how bullet, brass, and ammunition are produced at the Norma Precision AB factory which first opened in 1902. You can see how cartridges are made starting with brass disks, then formed into shape through a series of processes, including “hitting [the cup] with a 30-ton hammer”. After annealing (shown at 0:08″), samples from every batch of brass are analyzed (at multiple points along the case length) to check metal grain structure and hardness. Before packing, each case is visually inspected by a human being (3:27″ time-mark).
The video also shows how bullets are made from jackets and lead cores. Finally, you can watch the loading machines that fill cases with powder, seat the bullets, and then transport the loaded rounds to the packing system. In his enthusiasm, the reporter/narrator does sometimes confuse the term “bullets” and “rounds” (5:00″), but you can figure out what he means. We definitely recommend watching this video. It’s fascinating to see 110-year-old sorting devices on the assembly line right next to state-of-the art, digitally-controlled production machinery.
Video tip by EdLongrange. We welcome reader submissions.
Share the post "How Cartridge Brass (and Bullets) Are Made — Great Norma Video"
by Sierra Bullets Ballistic Technician Paul Box
All of us who have been in reloading and shooting for any period of time have read how sectional density has been regarded as a bullet’s ability to penetrate. Back before high velocity came along and modern bullet design, the easiest way to get more “power” and penetration was by increasing the diameter and mass. After all, a bowling ball will hurt more than a golf ball, right?
Let’s take a closer look at sectional density.
The formula for calculating sectional density is pretty simple and straight forward. Take the bullet weight and divide by 7000. This number is then divided by the bullet diameter squared. Two bullets of equal weight and the same diameter will have equal sectional sectional density. No regard is given to the bullet construction. This is where the fly hits the soup in considering sectional density as far as penetration is concerned.
Section Density Formula: (Bullet Weight divided by 7000) divided by Bullet Diameter squared.
Bullet construction is the biggest factor in how it is able to penetrate. The best example I can think of here is to look at the Sierra .224 55 Gr. FMJBT GameKing #1355 compared to the 55 Gr. BlitzKing #1455. Both are .224 and weigh 55 grs. Both have a sectional density of .157. But there is a huge difference in their construction. The FMJ has a thick jacket and is designed to penetrate. The BlitzKing is designed for fast and rapid expansion with little concern for how deep they will penetrate.
The next time you’re choosing a bullet, look at the construction and less at the sectional density number. It’s all about the construction anyway. If you have any questions or would like to discuss sectional density or bullet penetration further, please give us a call at 800-223-8799 or shoot us an email at sierra@sierrabullets.com.
Share the post "Sectional Density of Bullets — What You Need to Know"
Tech Report by B. Walker, owner of The Urban Rifleman LLC
I have been moly coating since I started shooting rifles nearly 26 years ago. I have always moly-coated my bullets. I figured if it was good enough for Walt Berger, it was good enough for me (Walt still moly coats his bullets to this day, if recent match pictures are any indication). I had always used the typical dry method (without the wax) and I had the same jar of moly (molybdenum disulfide) for many years.
I had tried all kinds of methods over the years. But then AccurateShooter Forum member “Bowfisher” sent me a message about moly-coating bullets using water. After his suggestion, I did several batches using the moly-in-the-water method. I was stunned with the great results. This Wet Moly method is the cleanest, easiest, and best coating method I have ever tried. I strongly believe Wet Moly should be the recommended method.
Traditional Dry Moly Coating Process is Dusty and Messy
Before I started the Wet Moly process, I always coated my bullets in small containers in my big Dillon tumbler. I would put the bullets in old EMPTY 1-lb powder containers and add the moly. I would place the powder containers in my big Dillon tumbler and tumble for at least three hours. I would then throw rice in with the bullets to soak up any excess moly dust and shine the bullets. Then I would shake out the rice using a lid with holes drilled in it. My coated stuff came out beautiful if I do say so myself even dry. However, there was always dust and moly mess (there was always some on my fingers when I would handle the bullets after). I only liked to doing coating in big batches to get it over with because it was a chore (by all means don’t get moly on the bottom of your shoes and track the carpet)!
Wet Moly Method — Tumbling in Bottles with Moly and Water
The new wet method entails adding water to the bullets during the tumble in the bottle, and it is way easier and cleaner. The final product is totally dust free and will not come off on your fingers as there is no dust or residue. I think they shoot better too, and the moly works as it is supposed to. I won’t get into the debates over the merits of moly. Some folks believe it works for them. This article is intended for those guys — it is not intended to convert handloaders who are happy with shooting uncoated bullets.
Editor: None other than John Whidden, Multi-Time National Long Range Champion, moly-coats his bullets. Whidden also uses a Wet Moly application method. He agrees that applying moly in a water solution delivers the best results, and doesn’t leave dusty residues.
Here is the basic outline of the Wet Moly application method. In addition to this outline, I created an instructional video that shows my entire process. [Editor: Definitely WATCH the video. It is important to see the post-tumbling rinsing and buffing processses.]
1. Use old 1-lb powder containers. Work over a sink. Add the bullets in reasonable batches to the containers (lets say 2-3 inches of bullets). I try to use use only enough water to cover the bullets and I use a little more moly than I used to with a dry application. I suggest using half a teaspoon of moly per two inches depth of bullets.
2. Tumble for four hours (at least). I tape the container lids shut before placing them in the tumbler. Then, simply place the powder container in your vibratory tumbler.
3. After the elapsed time, take the bottle to the sink and, dump contents into a plastic strainer. I use an old spaghetti strainer that I save just for moly. IMPORTANT: BE SURE you have a strainer that won’t let the bullets fall out! Stream water (from faucet) gently over the bullets to thoroughly clean excess residues off the bullets. Shake strainer to get all the water out. See video time 6:00-10:00.
4. Sift out the bullets onto a paper towel inside an old baking pan and shake to buff. Repeat until the bullets are completely dry and buffed to a high shine. The bullets are clean, dust-free and the moly is gorgeous! Leave for several days before storing or put them in your oven at about 130 degrees for 30 minutes to remove the last bit of any moisture. (WARNING: DO NOT use excessive oven heat or cook too long — set a timer!).
If you follow these instructions, the result should be the best moly coating you have ever seen!
Before and AFTER Wet Moly. Note how uniform the moly coating is on the bullets. The Wet Moly process also leaves a perfect glossy finish after rinsing and drying. And the bullets are totally dust-free! These are Sierra #1380 .224 69gr HPBT MatchKings.
Be sure to visit our online store at TheUrbanriflemanstore.com. We have a full compliment of front and rear bag riders for various rifles that we designed and produce in-house. We also stock Revolution laminated benchrest stocks, and we sell stainless steel Remington prefit barrels (which are getting rave reviews from customers). Also available are Wilson dies, Timney and Triggertech triggers, Berger and Sierra bullets, Magpul and Accuracy International chassis, and lots more.
Share the post "Moly Bullet Coating — Wet Moly Application Method"
If you wonder how ammo is made, starting with raw metal, check out this video from Hornady. It shows how bullet jackets are formed from copper, followed by insertion of a lead core. The jacket is then closed up over the core with the bullet taking its final shape in a die (a cannelure is applied on some bullet types). Next the video shows how cartridge brass is formed, starting with small cups of brass. The last part of the video shows how cases are primed and filled with powder, and how bullets are seated into the cases, using an automated process on a giant assembly-line. CLICK Link below to watch video:
Hornady’s New 150,000-sq-ft Ammo Production Center
In 2018, Hornady opened a new, state-of-the-art factory. The 150,000-sq-ft Hornady West Facility, featured in the video below, handles ammunition production and product distribution — Hornady produces millions of rounds annually. Hornady cartridge brass and bullets will continue to be produced at Hornady’s 100,000+ square foot factory in Grand Island, Nebraska. The Grand Island factory is open for tours Monday through Thursday. Hornady Manufacturing was founded by Joyce Hornady in 1949, so 2019 marked the company’s 70th anniversary.
Share the post "Hornady Video Shows How Ammunition is Made"
“The overturning moment MW tends to rotate the bullet about an axis, which goes through the CG (center of gravity) and which is perpendicular to the plane of drag….
Ruprecht Nennstiel, a forensic ballistics expert from Wiesbaden, Germany, has authored a great resource about bullet behavior in flight. Nennstiel’s comprehensive article, How Do Bullets Fly, explains all the forces which affect bullet flight including gravity, wind, gyroscopic effects, aerodynamic drag, and lift. Nennstiel even explains the rather arcane Magnus Force and Coriolis Effect which come into play at long ranges. Nennstiel’s remarkable resource contains many useful illustrations plus new experimental observations of bullets fired from small arms, both at short and at long ranges.
Shadowgraph of .308 Winchester Bullet
A convenient index is provided so you can study each particular force in sequence. Writing with clear, precise prose, Nennstiel explains each key factor that affects external ballistics. For starters, we all know that bullets spin when launched from a rifled barrel. But Nennstiel explains in greater detail how this spinning creates gyroscopic stability:
“The overturning moment MW tends to rotate the bullet about an axis, which goes through the CG (center of gravity) and which is perpendicular to the plane of drag, the plane, formed by the velocity vector ‘v’ and the longitudinal axis of the bullet. In the absence of spin, the yaw angle ‘δ’ would grow and the bullet would tumble.
If the bullet has sufficient spin, saying if it rotates fast enough about its axis of form, the gyroscopic effect takes place: the bullet’s longitudinal axis moves into the direction of the overturning moment, perpendicular to the plane of drag. This axis shift however alters the plane of drag, which then rotates about the velocity vector. This movement is called precession or slow mode oscillation.”
Raise Your Ballistic IQ
Though comprehensible to the average reader with some grounding in basic physics, Nennstiel’s work is really the equivalent of a Ph.D thesis in external ballistics. You could easily spend hours reading (and re-reading) all the primary material as well as the detailed FAQ section. But we think it’s worth plowing into How Do Bullets Fly from start to finish. We suggest you bookmark the page for future reference. You can also download the complete article for future reference and offline reading.
Who doesn’t want to save money? If you can get a significant discount, you should really take advantage of that opportunity. Guys, we’ve been tracking prices on shooting sports products at vendors around the country. Sad to say, we’ve seen price increases across the board in 2019. Reloading components, loading tools, stocks, targets, electronic gadgets — you name it, the price trend is moving upwards. Thankfully our friends at Precision Reloading are holding the line. Even better, Precision Reloading is running a really significant promotion right now.
Take Note! For today and tomorrow, January 16 and January 17, you can get 15% OFF All ORDERS over $100.00. That’s right, save 15% on your purchases at Precision Reloading with Code 15OFF. If you buy a $400.00 item that could save you $60.00. Yes, this applies to pretty much everything in stock at Precision Reloading, including all major brands below (and dozens more including Lapua, Berger, Forster, Hodgdon, Nosler, RCBS, Redding, Sierra etc.).
If you need bullets, brass, powder, dies, presses, powder dispensers, check out this sale. It’s a very good deal. Use Code 15OFF at check-out to save 15% on your orders over $100.00.
Share the post "Save 15% NOW on Reloading Components, Tools, and Gear"
Sierra Bullets has released very complete load data for the popular 6.5 Creedmoor cartridge. This medium-sized cartridge has become one of the most popular chamberings for tactical and PRS shooters. The 6.5 Creedmoor combines excellent accuracy, good mag-feeding, good barrel life, moderate recoil, and reasonable component cost. That’s why this cartridge has caught on quickly.
Developed in 2007 by Dennis DeMille and Dave Emary, the 6.5 Creedmoor is a shortened and improved 30 TC cartridge case that was inspired by the .308 Winchester design. This short action design was created to maximize case capacity and a wide range of loading lengths, while still fitting in standard short action magazines. With the correct twist barrel, the versatile 6.5 Creedmoor can take advantage of the wide range of bullet weights available in 6.5 mm (i.e. .264 caliber). Reloaders should keep in mind that the 6.5 Creedmoor works best with medium to medium-slow powders such as H4350, Varget, Win 760, and RE-17. The light recoil and adaptability of the efficient 6.5 Creedmoor cartridge has already proven itself in high power, precision rifle series and benchrest competitions. Couple that with respectable barrel life and its intrinsic accuracy potential and you have a recipe for success which should insure its legacy for decades to come.
Here are three tables from the Sierra Bullets Reloading Manual (5th Edition). IMPORTANT — This is just a sample!! Sierra has load data for many other 6.5mm bullet types, including FB, Spitzer, SBT, HPBT, and Tipped MK from 85 grains to 142 grains. To view ALL 6.5 Creedmoor DATA, CLICK HERE.
INDICATES MAXIMUM LOAD – USE CAUTION
LOADS LESS THAN MINIMUM CHARGES SHOWN ARE NOT RECOMMENDED.
INDICATES MAXIMUM LOAD – USE CAUTION
LOADS LESS THAN MINIMUM CHARGES SHOWN ARE NOT RECOMMENDED.
INDICATES MAXIMUM LOAD – USE CAUTION
LOADS LESS THAN MINIMUM CHARGES SHOWN ARE NOT RECOMMENDED.
Share the post "6.5 Creedmoor Cartridge Reloading INFO — Load Data from Sierra"
At the request of our readers, we provide select “Deals of the Week”. Every Monday morning we offer our Best Bargain selections. Here are some of the best deals on firearms, hardware, reloading components, optics, and shooting accessories. Be aware that sale prices are subject to change, and once clearance inventory is sold, it’s gone for good. You snooze you lose.
1. CDNN — Browning A-Bolt III Rifle, $349.99 with Rebate
Here’s an awesome deal on Browning hunting rifles. Browning will give you $100 Cash Back on a wide selection of hunting rigs. For example CDNN now offers the A-Bolt III Composite Stalker in .30-06 Springfield for just $449.99. With Browning’s $100.00 Rebate, you net cost is just $349.99. The same deal is offered for other chamberings, including .243 Win, .270 Win, and 7mm Rem Mag. That’s a great price — you could pay that much just for a custom barrel. NOTE: This Browning Bucks $100 Rebate Program also applies to Browning rimfire rifles and shotguns. There is a $50 Rebate for X-Bolt rifles. To make this deal even sweeter, CDNN is now offering a FREE 3-9x40mm Bushnell scope with each A-Bolt III Rifle sold. Check it out:
2. Precision Reloading — Discounts on All Powders in Stock
Right now Precision Reloading is running a big sale on reloading powders. Save 10% or more on all leading powder brands: Accurate, Alliant, Hodgdon, IMR, Norma, Ramshot, Vihtavuori, and Winchester. The sale applies to all one-pound containers, as well at 5-lb and 8-lb jugs. If you need powder, don’t hesitate — this promotion ends 10/19/2018 at 11:59 pm. NOTE: In addition to powders, Precision Reloading has CCI primers on sale this week — save up to 17% on all CCI primer types.
3. Midsouth — Lyman Brass Smith Ideal Press, $69.99
Lyman’s new Ideal compact press works great as a second, lighter-duty press. It also is a good choice for loading at the range. It can easily be mounted to a range bench with C-clamps. With its cast-iron body, this C-Frame press is stronger than other presses in its price class. If you are looking for a secondary press for decapping, bullet-seating and other tasks not requiring heavy leverage, this is an excellent choice. The Lyman Ideal costs just $69.99 at Midsouth Shooters Supply.
4. Midsouth — 10% Off All Sierra Bullets
Need match or hunting projectiles? All Sierra bullets are on sale right now at Midsouth Shooters Supplies. Save 10% on Sierra match, hunting, and varmint bullets, including regular and tipped bullets. Competitors take note — Sierra’s MatchKing bullets are top performers in many disciplines. The 6mm and 6.5mm MatchKings are great for PRS, and the new heavy (183gr and 197gr) 7mm MatchKings (pointed at the factory) have worked great for F-Open shooters. Here are some of the great deals:
6mm 110gr BTHP MatchKing (100) — $36.18 marked down from $40.20
6.5mm 142gr BTHP MatchKing (100) — $39.45 marked down from $43.84
7mm 183gr BTHP MatchKing (100) — $44.255 marked down from $49.16
5. MidwayUSA — Big Sale on Zeiss V4, V6, and V8 Riflescopes
Zeiss makes great scopes with superb glass, reliable tracking, and very positive clicks. Now you can save hundreds on Zeiss V4, V6, and V8 optics. The V4 is an affordable scope for hunters, while the V8 Line offers a stunning 8X zoom ratio. The V6 models, with 6X zoom ratio, are outstanding scopes that compete very well with Nightforce and other top brands on price and performance. Competition and long range shooters should definitely look at the V6 line-up. NOTE: These discounts are part of a Zeiss Field Days promotion running through 10/29/2018. See similar incentives at other retailers.
Leica’s outstanding Geovid 10×42 binoculars feature a built-in laser rangefinder rated to 2000 yards. We’ve used this HD-B 2000 unit and the optics are superb and the rangefinding is super fast. When placed on a tripod for support we were amazed at the ranging ability of these Geovids. Give credit to great glass, minimal beam divergence and Leica’s excellent error correction software. Act now and you can save $1000 over the original price. Note: This is discontinued model that has been replaced by the newer Leica HD-B 3000, priced at $2999.00.
7. Brownells — Sig P320 9mm Pistol, $399.99
The new SIG P320 is one of the best compact 9mm carry guns on the market. Accurate, slim, and reliable, it has earned praise from owners and reviewers alike. Yes we would rather carry a P320 than a sub-compact Glock. This modular, striker-fired pistol features a sub-compact grip, slim slide, and Night Sights. Safety features include a striker safety and disconnect safety. Brownells’ sale price is $399.99, marked down from $579.99. NOTE: Some buyers report you can get an extra $20 OFF with code “M8Y” entered on the final payment screen.
8. Midsouth — Hornady 17 HMR Ten Boxes for $84.99
Varmint hunters take note. Here’s a great deal on premium 17 HMR ammo. Midsouth is selling 500 rounds of Hornady 17 HMR ammo for $84.99. That works out to just $8.50 per 50-rd box — the best price we’ve seen in a while. Loaded with 17gr V-Max bullets, this ammo is accurate — expect about 1 MOA at 100 yards in a good rifle. The V-Max bullets are effective on small varmints out to 200 yards.
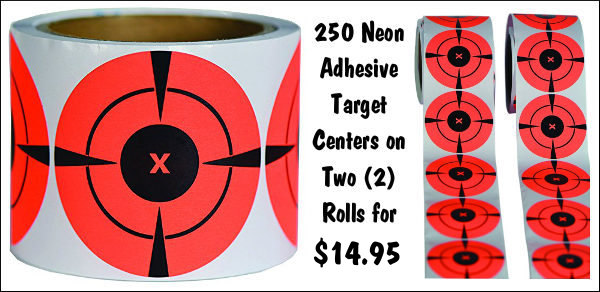
9. Amazon — Two Rolls of 3″ Neon Target Stickers, $14.95
We like these bright, Neon 3″ target stickers. They are big enough to see easily at 600 yards, giving you a 1/2 MOA target center at that distance. For $14.95 at Amazon.com, you get 250 3″-diameter self-adhesive centers (125 targets per roll) that stick to almost any surface The high-contrast fluorescent red/orange color provides an excellent HI-VIZ aiming point, along with good contrast for bullet holes that fall within the 3″ circle. To help line up your reticle cross-hairs, the target centers feature black markers at 3, 6, 9, and 12 0’Clock. NOTE: These stickers may qualify for FREE Shipping with combined orders over $25.00.
Share the post "Bargain Finder 160: AccurateShooter’s Deals of the Week"


 Be sure to visit our online store at


 John Illum’s Rampro actions are chrome-moly steel. Commonly you’d see them blued, but I had him put a brushed nickel finish on the action and rings. From a few feet away it looks like stainless. The trigger is Illum’s own design set at 8 ounces, and there’s no creep that I can detect. The action has Remington barrel threads and will accept Remington type triggers. One neat thing is that the action was milled with an integral recoil lug (much like the current Surgeon Action). And the bolt is milled all in one piece–no soldered-on handles. My only gripe with this bolt handle is that it could be a tad longer, but it still is manageable for a single-shot. You’ll also note how slick and streamlined the scope rings are. Illum made those as well. His rings mount to the action via two screws from the inside of the ring, a very elegant set-up for sure. (I currently have a 6.5-20x40mm Nikon scope on this gun. If I had to do this project over again the only thing I would change would be installing a 30mm scope because I like ‘em!).
 Handgun Handling Tips
 Load Development and Accuracy
 Pistol Action Legal Issues
 I think these sub-caliber rounds, both 20s and the 17s, are the future of recreational varminting, at least out to medium distances. The Twenties offer low recoil, excellent accuracy, and components keep getting better and better. The bullet-makers are finally making high-quality bullets in appropriate weights. Compared to something like a 22-250, I’ve noticed that my 20 PPC rifle has a lot less noise, a plus when you want to be quiet around other people and varmints.
 Norma has released a fascinating video showing how bullet, brass, and ammunition are produced at the


 If you wonder how ammo is made, starting with raw metal, check out this video from


 Developed in 2007 by Dennis DeMille and Dave Emary, the 6.5 Creedmoor is a shortened and improved 30 TC cartridge case that was inspired by the .308 Winchester design. This short action design was created to maximize case capacity and a wide range of loading lengths, while still fitting in standard short action magazines. With the correct twist barrel, the versatile 6.5 Creedmoor can take advantage of the wide range of bullet weights available in 6.5 mm (i.e. .264 caliber). Reloaders should keep in mind that the 6.5 Creedmoor works best with medium to medium-slow powders such as H4350, Varget, Win 760, and RE-17. The light recoil and adaptability of the efficient 6.5 Creedmoor cartridge has already proven itself in high power, precision rifle series and benchrest competitions. Couple that with respectable barrel life and its intrinsic accuracy potential and you have a recipe for success which should insure its legacy for decades to come.