This photo shows some of the handguns actually found by the TSA in carry-ons last year.
Here’s an important reminder to our readers who have concealed-weapon carry permits — don’t overlook your carry gun when traveling through airports. Many travelers with carry permits are forgetting weapons stashed in carry-on luggage. The TSA is encountering more firearms than ever, and those weapons are normally confiscated with their owners subject to penalties.
In 2014, according to TSA.gov, 2,212 firearms were discovered in carry-on bags at checkpoints across the country (that’s a 22% increase over 2013). Of those, 1,835 (83 percent) were loaded. Firearms were intercepted at a total of 224 airports.
Another problem is that Carry Permit holders may enter an airport with their guns still on their person. Here are actual examples:
A 94-year-old man attempted to enter the checkpoint at LaGuardia Airport with a loaded .38 caliber revolver clipped to his belt.
A loaded .380 caliber firearm was discovered strapped to the ankle of a passenger who walked through a metal detector at Cincinnati/Northern Kentucky International Airport.
A loaded .380 caliber firearm was discovered in the rear pocket of a San Antonio International Airport passenger during advanced imaging technology screening.
If you are traveling by air, make sure you remove all firearms from your person (or carry-on luggage), unload the firearm(s), place any weapon in a locked, hard-sided container, and declare them as checked baggage. Anything else can land you in jail.
Here are the TSA guidelines for transporting firearms as checked baggage:
Comply with regulations on carrying firearms where you are traveling from and to, as laws vary by local, state and international governments.
Declare all firearms, ammunition and parts to the airline during the check-in process. Ask about limitations or fees that may apply.
Firearms must be unloaded and locked in a hard-sided container and transported as checked baggage only. Firearm parts, including firearms frames and receivers, must also be placed in checked baggage and are prohibited in carry-on baggage.
Replica firearms may be transported in checked baggage only.
Rifle scopes are permitted in carry-on and checked bags.
All firearms, ammunition and firearm parts, including firearm frames, receivers, clips and magazines are prohibited in carry-on baggage.
Derek Rodgers is a member of the Team Sinclair F-TR squad. This talented group of shooters hasn’t lost a team match in years. What’s the secret of Team Sinclair’s success? Well there is not one single factor. These guys have very accurate rifles, work hard on load development, and practice in all conditions. In this interview, Derek Rodgers talks about long range competition, reviewing the hardware (and skill set) it takes to win. He offers some great tips on developing loads. You’ll find a longer version of this interview on the Sinclair Int’l website. CLICK HERE to Read Full Interview.
Derek Rodgers BIOGRAPHY
Derek Rodgers (Albuquerque, NM), is the only shooter to have won BOTH the F-Open and F-TR National Championships. Derek shot his first NRA sanctioned-match in 2007, and just three years later Derek won the 2010 F-Open Nationals. He also won the 2013 F-TR Nationals, making him the only person to win both divisions. He has won other major F-TR matches, including the 2013 Sinclair East Coast Nationals and the 2015 Berger SW Nationals. Derek holds the current 1000-yard, 20-shot, National F-TR Record (200-12X). Derek enjoys spending his time outdoors with his wife and two daughters, ages 12 and 7. He is blessed by his faith and supported by his family. Derek’s goal is to pass on what he has learned to the next generation.
Q: What is your favorite reloading product?
I really like my BenchSource Case Annealer. There is something about watching fire that I find relaxing. I can watch those shells go around the wheel for hours.
Q: What’s your preferred front rest or bipod?
I’m currently using a Duplin bipod. At 17.2 ounces it allows me a solid platform to shoot from and the extra wiggle room to make weight with a heavy barrel and Nightforce NXS scope. Also, I can’t do without my board under the bipod. We shoot off sand at my local range and in most cases the feet will tend to dig holes if not supported. The board is necessary gear for me.
Q: What rear bag do you use?
I have an Edgewood bag that I’ve used for years. Recently, I got a SEB Bigfoot and like how it supports the gun and stays put under recoil.
Q: Explain your load development process. What’s your methodology?
I have two log books that have many combinations that work with 308s. I have tried to keep detailed notes in these books. Now I am reaping the rewards, as I can go back to a particular twist and barrel length and find something very close. I usually start with 3-shot groups and check the chamber behavior. If something looks promising I will go back to the range and load up 6-shot groups. If those shoot well, I take it to a match to verify it in a 20-shot string. If it passes that test it is either good to go or I table it and try another. I tend to pick mild loads that the cartridge shoots well — consistently.
Q: What piece of shooting gear helps your load development?
I use a MagnetoSpeed Chronograph to record velocities. Then I can slow down or speed up my loads to reach an accuracy node. It is amazing that most barrels will shoot very accurately when fired at certain known velocity nodes.
Q: What do you carry in your range bag on Match days?
Multi-piece Brownells tool set, RX Glasses, Sunglasses, Range Rod, Towel, Empty Chamber Indicators, Jacket, Sunscreen, Foam Ear Protection, Ear Muffs, Data Book, Plot Sheets, Pen, Clip Board, iPod with ballistic data, and chewing gum.
Q: How did you get started shooting?
I was raised in New Mexico where outdoor activities are abundant. Once my father introduced me to a Crossman pellet gun, all I wanted to do was shoot and refine my skills. Shooting evolved into hunting and then into perfecting my skills in off-season matches. Shooting local F-Class matches made me better as a marksman. Now I feel like I am competitive with anyone. However, I will never forget that my roots started with hunting and still cherish the opportunity to hunt…
Q: What do you find most challenging? How do you learn from mistakes?
What I find most challenging about precision shooting sports is how great shooters are able to reflect on what was learned — both positively and negatively. It is important to slow down and perform this step. Stopping to reflect and learn from mistakes I’ve made on the firing line is challenging. Not many people enjoy accurately critiquing themselves. Also the wind usually blows here in New Mexico and choosing the right time to shoot and to stop is important. It’s often tempting to try to finish out a string of fire. But sometimes challenging yourself to quit and wait out some wind will pay off[.]
Q: What advice do you have for selecting a gunsmith?
The best recommendation I can give is for a person to get to know a gunsmith. If you can find a local gunsmith that is available — even better! If you run into a snag along the way, it is so nice to be able to work it out without sending things back and forth. Be honest, realistic with your expectations and tell the gunsmith what you want. If he only wants to do things his way, or takes extra or excessive time in meeting the goals, you may want to consider someone else.
Q: Who would you recommend for stock work on your rifle?
Alex Sitman from Master Class Stocks and Doan Trevor can build or fix most anything.
Q: What do you do to mentally prepare before a shooting competition?
I relax and try to remember I do this for fun. I anticipate what game plan I want to go to the line with. I also try to take small snapshots of the conditions. I do not like getting overloaded with staring down a spotting scope for long periods of time. I try not to get overwhelmed with the match and just shoot my game. My approach is “One shot at a time — good or bad”. I will usually tell my scorer what I’m going to do so he or she is ready as well.
Q: What advice would you give to novice competitors?
Partner up with an experienced shooter that is ranked nationally. Mentoring under a veteran shooter would be the best way to help save time learning instead of experimenting. Chances are an experienced shooter has already tried what you are considering. As a new shooter, do not get sucked into reading all of the opinionated blogs on the internet. Stick to good information. AccurateShooter.com | 6mmBR.com is a great resource with a wealth of information from knowledgeable writers. That site has articles that are based from facts and/or industry news and information.
Q: What is something you would NOT recommend before a shoot?
I do not recommend coming unprepared. If you are late, scrambling around, or do not have your gear in order, you will not perform at your best.
Q: How many rounds do you shoot in a year and how often do you practice?
I shoot 3000+ rounds a year. I try to shoot 1 x a week if I can get away in the evening or on the weekend. If I am close to finding a load I may try to get out more until I exhaust that load as an option. So there may be occasions that I will try to shoot three times a week. Fortunately, the winters are mild in New Mexico and it allows me to shoot year round. I actually shoot more when it is colder. The summer sun here can create mirage that makes it nearly impossible to learn anything.
Jonathan Ocab, a High Power shooter from California, had gunsmith Doan Trevor install a Sako-style extractor in the Rem 700 bolt in Ocab’s 6mmBR Eliseo R5 tubegun. Jonathan produced an excellent video showing how the Sako extractor improves the ejection of the short, fat 6mmBR cartridges in his rifle. Jonathan’s video demonstrates 6mmBR case ejection with an unmodified Rem 700 factory bolt versus a factory bolt fitted with a Sako-style extractor.
Johnathan explains: “Note how even when slowly operating the bolt, the bolt with the Sako extractor easily ‘kicks’ out the brass on ejection with minimal chance of operator error resulting in a failure to extract. While the unmodified bolt has issues ejecting brass on slow operation, it will eject if the operator pulls the bolt back quickly (fast and with some force).
While a Sako-style extractor isn’t an absolute necessity, this video shows the definite improvement this modification provides. For short cartridges like the 6mmBR, this is very useful. This modification is highly recommended for competition shooters, especially High Power competitors who seek improved function in rapid-fire stages. This modification is fairly inexpensive and any competent gunsmith should be able to perform the work (usually under $100 with parts and labor).”
EDITOR’s NOTE: In his video, Jonathan deliberately worked the unmodified Remington bolt slowly to show how the standard Rem extractor can struggle with short fat cases like the 6mmBR. In fact, when you work a standard, unmodified bolt more quickly, the extraction can be much more positive. Cycling the bolt with more “snap” provides more energy to eject the cases. We have run an R5 Tubegun chambered in 6mmBR with an unmodified Rem 700 bolt (no SAKO extractor), and the extraction was reliable, provided the bolt was worked quickly.
At the request of our readers, we are starting a Monday “Deals of the Week” feature. If this proves popular, we’ll try to run this every week. Here are some of the best deals on hardware, reloading components, and shooting accessories. Be aware that sale prices are subject to change. If you snooze, you lose.
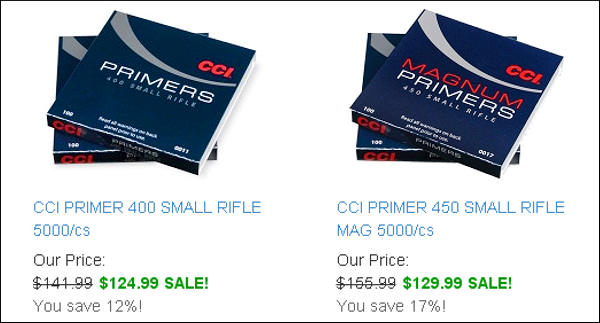
1. Grafs.com — CCI Primers on Sale
Here’s a very good deal on CCI 400 (small rifle) and CCI 450 (small rifle magnum) primers. These primers have strong cups so they work well with stout loads. The CCI 450s are a favorite for 6mmBR and Dasher shooters. (The prices include shipping, with a $7.95 flat fee, but not hazmat charges).
2. Midsouth Shooters Supply — Norma .22 LR Ammo on Sale
This is good ammo for the price — plenty good enough for practice and tactical rimfire competitions. We’ve used this ammo in a variety of rimfire rifles and it worked well. SEE Video Ammo Review. Midsouth also has the Norma .22LR Match-22 ammo at $7.95 per box.
3. Bullets.com — Bags and Rifle Cases on Sale
Bullets.com has slashed prices on its Bald Eagle Brand shooting bags and soft rifle cases. The shooting bags, now 50% off, are very well made and hold a lot of gear. The Long Rifle Cases, also 50% off, are designed for match rifle with barrels up to 32″ long. This Editor uses a Bald Eagle bag to carry his spotting scope and compact tripod. SEE Video Bag Review.
4. Bruno Shooters Supply — FREE Shipping on 500+ Bullets
Bruno Shooters Supply offers competitive pricing on Berger and Sierra bullets. And now you can save even more with FREE Shipping on orders of 500 or more Berger or Sierra Bullets. This FREE Shipping offer is limited to one order per customer per day.
5. Natchez Shooters Supply — Nikon Scope Close-Out Sale
Natchez is running a big sale on Nikon optics. Prices have been reduced as much as 43%. If you’re looking for an inexpensive, name-brand optic for your hunting or varmint rifle, check out these Nikon bargains. The M-223 3-12x42mm has nice turrets and constant eye relief. It’s a steal at $279.95.
The Lee Classic Cast “O”-style press has always been an excellent value — it works as well as some other presses costing twice as much. And now Lee has improved on its Classic Cast Press design by adding a breech-lock fitting in the top. This allows you to swap dies in and out in seconds, once your dies are equipped with breech-lock quick-change bushings. The Lee Classic Cast Breech Lock press is available for under $120.00. That makes it a bargain compared to other heavy-duty single-stage presses. Midsouth Shooters Supply offers this press (item #006-90999) for $112.95, while Natchez Shooters Supplies sells the press (item #LEE90999) for $112.99.
Breech-Lock System Allows Fast Die Exchanges
With the Lee Breech-Lock Press system, the die drops straight in from the top. Then, with a quick 1/6th (60°) turn, the die locks firmly in place (like the breech on an artillery canon). The interrupted three-start thread assures dies return and lock into the exact same position each time. Bushings cost $7.43 each at Midsouth. If you prefer, you can leave a bushing in the press, and screw your dies in normally. But consider that it normally takes a dozen or more turns to screw in a normally threaded die. The Breech-lock system is way faster.
The Lee Classic Cast press features a strong, cast-iron frame and all-steel linkage. The large 1 1/8″-diameter ram is guided by over twelve square inches of ram bearing surface. We like the fact that you can mount the handle on either side, and adjust handle angle and length. As Lee explains: “The start and stop position is adjustable with a 48-tooth, ratchet-type handle clamp. In addition, the handle length is completely adjustable. Shorten [it] when you’re loading handgun and short rifle cases.”
Lock-Ring Eliminator Quick-Change Bushings
With Lee’s basic quick-lock bushings, you control vertical die position with the normal locking ring that seats against the top of the bushing. That works fine, but Lee also offers a handy Lock-Ring Eliminator Bushing (Lee SKU 90063). This clever design combines bushing and lock-ring into a single part. The Eliminator is turned from a solid piece of steel and the lock ring is integrated into the design of the part. With the Eliminator you’ll get the most repeatable and precise die positioning because lock ring and bushing are all one piece. Moreover, some guys say the Eliminator Bushings are easier to grab and remove than the standard Lee Breech-Lock Bushings.
Reports from Classic Cast Press Owners
Press owners have praised their Lee Classic Cast Breech-Lock units. Here are reports from two MidwayUSA customers:
Five Stars: Perfect single stage press. Loads accurately 6mm BR and 308 Win for competition. Large clearance is also great for my 460 Wby and 30-378 Wby. Pistol rounds in 44 mag and 45 ACP also load easy. The press has a lot of leverage for full-length rifle case sizing. Nice primer disposal system. Lowest price for its class. This unit beats my Lyman press by several miles…. ”
— J. Davidson, California
Five Stars: I waited until Lee would bring out their breech-lock system in classic cast design. This thing is outstanding and better than my old RCBS partner press. Once you get the sweet setting of the die, lock it in place and next time you load, you need not fumble to find the best setting. Breech lock is the key. I choose this press over Hornady, due to all-steel construction. I load a lot of .308 Win and .223 Rem for my ARs and this requires full-length sizing. Lee meets the challenge with no flex and excellent ram/die fit and alignment. [T]he spent primer disposal is perfect vs. RCBS where primers can miss the primer catcher. The handle can also be placed left or right as needed and shortened for small cases or pistol to reduce the handle travel.”
— E. Stanley, Rockford, IL
On its YouTube Channel, the USAMU offers “Pro Tips” videos providing expert instruction on rifle marksmanship. One helpful video covers up/down angle shooting. In the video, SFC Emil Praslick III, one of America’s best long-range shooting coaches, explains how to determine up/down angle, and how to compensate for the angle using scope clicks. Praslick explains how gravity always works as a constant relative to the flat-ground distance to the target (which is distinct from the actual straight-line distance to target.)
The flat-ground distance is the actual distance over which the bullet will be affected by gravity. Use this as the basis for your elevation corrections. As Praslick explains, “this [flat-ground] distance will get less and less as the angle to the target increases [either up or down].” Once you know the straight-line distance to the target AND the exact angle of your shot, simple math lets you calculate the flat-ground distance to the target. Basically, to determine your flat-ground distance to target, you multiply the cosine of the shot angle by the measured straight-line distance to the target.
Application to Long-Range Hunting Since the effects of angles increase with distance, Praslick explains that: “Unless the angle is extremely severe, [a hunter] really won’t notice these effects at ranges of 200 yards or less.” However, for long shots, hunters definitely need to compensate when taking angled shots. Praslick recommends that hunters print out a small chart with the cosines of common angles (20°, 25°, 30° etc.). In addition, hunters need an accurate ballistic table for their rifle and particular ammo. This should show the elevation corrections (in MOA or clicks), for 200 yards to the maximum range at which you may take a shot.
SFC Emil Praslick III is an instructor/coach with the USAMU. He also has served as a coach and “wind guru” with numerous U.S. Teams in international competition, including the U.S. Palma Team, which recently participated in the World Long-Range Fullbore Rifle Championship in Australia. Praslick has also coached the U.S. F-Open Class Team.
Larry Racine is a respected gunsmith based in New Hampshire. He is also a two-time member of the U.S. Palma Team, and a five-time New Hampshire State High Power rifle champion. Larry, who runs LPR Gunsmithing, has developed a brilliantly simple means of switching rifle barrels with an ordinary spanner or open-end wrench. With this set-up you can switch barrels in the field in seconds without the need for a barrel vise.
For most barrels, Larry mills a hex with six flats on the end of the barrel. This allows a shooter to change barrels quickly at home or on the line with a simple box-head wrench or a socket wrench. Larry says: “You don’t even have to take the barreled action out of the gun. Just set the buttstock on the ground, between your feet, put a wrench on it, hit it with the palm of your hand — and off comes the barrel.” For barrels fitted with a muzzle brake, Larry has a slightly different system. He mills two flats behind the brake so you can use an open-end wrench to do the job.
With either a hex on the end, or two flats for a brake-equipped rifle, the system works with any medium- to heavy-contour barrel with a muzzle-diameter of at least 0.700″. This will even work for high-power rigs using clamp-on sights or bloop tubes. Larry explains: “A lot of us here in New England use clamp-on front sights. The barrel will be turned to 0.750 for the sight, with the hex on the end. A bloop tube can go right over the end, no problem.”
Larry has used this system over the past few years to win a number of matches. In one 600-yard 3 by 20 prone match, Larry used three different barrels, with three different chamberings, on the same Savage rifle. Larry changed the barrels on the line.
Larry was able to do this because the system has little to no loss of zero from one installation of a given barrel to the next installation of that barrel. This lets the shooter start the match with confidence that the first sighter will be on paper. Larry reports that the simple system works great: “To date we have used this system on Savage, Remington, Winchester, RPA, and Nesika actions.”
Racine’s system is very affordable. If Larry does the chamber work on your barrel he charges $45.00 extra to mill a hex or two flats on your barrel. If you only want the hex or flats done, Larry charges $55.00. For more info, visit LPRGunsmith.com or call Larry at (603) 357-0055.
It seems like every manufacturer has a new “tactical precision” rifle these days, and Mossberg is no exception. Mossberg offers the MVP-LC, which combines the Mossberg MVP receiver with a sleek, modern MDT LSS metal chassis with an AR-type buttstock that adjusts for length (11.25″ – 14.5″ LOP). The light-weight, tan-finished aluminum chassis features a V-shapped bedding area for the Mossberg MVP action. The MVP-LC’s LBA trigger is user-adjustable from 3 to 7 pounds pull weight.
GunTalk TV Video Review of Mossberg MVP LC:
The new rifle features the MDT LSS chassis system, Magpul furniture and magazine and Silencerco Saker muzzlebrake/QD mount. The rifle is available with optional Vortex HS-T 4-16X rifle scope.
Available in either .223 Rem or .308 Win, the MVP LC rifle will accept standard AR-15 and AR-10 magazines. The barrels are pretty short, 16.25″ for .223 Rem, or 18.5″ for .308 Win, but they do come with threaded SilencerCo Muzzle Brakes installed. Weight, without optics, is 8 lbs. for the .223 Rem version, 8.5 lbs. for the .308 version. We think the lighter .223 Rem model would make a nice “carry-around” varmint rifle. The current “street price” is $1099.99.
MVP-LC Featured in Shooting Illustrated
If you want to learn more about this rifle, check out Shooting Illustrated this month. Mossberg’s MVP-LC is the “cover girl” of the October issue; you’ll find a full report on this new tactical rifle with complete specs and lots of big photos.
FEATURES: Mossberg MVP bolt-action design compatible with standard AR magazines (AR15, LR308/SR25). MDT LSS light chassis aluminum stock. Magpul CTR Adjustable LOP Stock with A-frame profile to reduce snagging for height adjustment. Either a 16.25″ (.223 Rem) or 18.5″ (.308 Win) barrel threaded with SilcencerCo Saker Muzzle Brake (thread cap included). Includes LBA adjustable trigger system (3-7 lbs.), oversized bolt handle, Picatinny rail, adjustable bipod.
Hunting season is right around the corner. That means its time to inspect all your hunting gear, including your scope set-up. A proper scope installation involves more than just tensioning a set of rings — you need to consider the proper eye relief and head position.
In this NSSF video, Ryan Cleckner shows how to set up a scope on a hunting or tactical rifle. Ryan, a former U.S. Army Sniper Instructor, notes that many hunters spend a small fortune on equipment, but fail to set up their rifle to use the optics optimally. Cleckner likens this to someone who owns an expensive sports car, but never adjusts the seat or the mirrors.
Ryan notes that you want your head and neck to be able to rest naturally on the stock, without straining. You head should rest comfortably on the stock. If you have to consciously lift your head off the stock to see through the scope, then your set-up isn’t correct. Likewise, You shouldn’t have to push your head forward or pull it back to see a clear image through the scope. If you need to strain forward or pull back to get correct eye relief, then the scope’s fore/aft position in the rings needs to be altered. Watch the full video for more tips.
Tips on Mounting Your Scope and Adjusting Your Comb Height:
1. Normally, you want your scope mounted as low as possible, while allowing sufficient clearance for the front objective. (NOTE: Benchrest shooters may prefer a high mount for a variety of reasons.)
2. Once the scope height is set, you need to get your head to the correct level. This may require adding an accessory cheekpad, or raising the comb height if your rifle has an adjustable cheekpiece.
3. Start with the rifle in the position you use most often (standing, kneeling, or prone). If you shoot mostly prone, you need to get down on the ground. Close your eyes, and let you head rest naturally on the stock. Then open your eyes, and see if you are too low or too high. You may need to use a cheekpad to get your head higher on the stock.
4. If your scope has a flat on the bottom of the turret housing, this will help you level your scope. Just find a flat piece of metal that slides easily between the bottom of the scope and the rail. Slide that metal piece under the scope and then tilt it up so the flat on the bottom of the scope aligns parallel with the flats on the rail. Watch the video at 8:40 to see how this is done.
Video find by EdLongrange. We welcome reader submissions.
If you’ve been shopping for a Progressive Reloading Press, here is an excellent opportunity. The Hornady Lock-N-Load AP Progressive Press is now on sale for just $378.99 at Midsouth Shooters Supply. That’s the lowest price for this press that we’ve seen in a long time. Plus — to sweeten the deal — Hornady will kick in 500 free bullets. As part of its 2015 Get Loaded promotion, Hornady will give 500 free bullets to purchasers of a Lock-N-Load AP Press (or other qualifying product).
The Lock-N-Load AP press is a good machine that has been refined and enhanced over the years. We like the rotary-style case-activated powder measure. We find this easier to adjust that the Dillon system with horizontal sliders. The auto-indexing Lock-N-Load AP press features a Five-Station Die Platform allowing you to use a lock-out die or separate sizing and crimping dies.
See How the Hornady L-N-L AP Progressive Press Works in this video:
The features of the Lock-N-Load AP press are reviewed in this video from UltimateReloader.com. Our friend Gavin Gear put the Hornady progressive through its paces. The video shows how to set up the press, how to install/adjust dies, how to set loads with the powder measure, and how to operate the built-in priming system. If you plan to purchase a progressive press from any manufacturer (Red, Blue, or Green), you should definitely watch this video before you purchase.


 Derek Rodgers is a member of the Team Sinclair F-TR squad. This talented group of shooters hasn’t lost a team match in years. What’s the secret of Team Sinclair’s success? Well there is not one single factor. These guys have very accurate rifles, work hard on load development, and practice in all conditions. In this interview, Derek Rodgers talks about long range competition, reviewing the hardware (and skill set) it takes to win. He offers some great tips on developing loads. You’ll find a longer version of this interview on the


 Breech-Lock System Allows Fast Die Exchanges
 On its
  Since the effects of angles increase with distance, Praslick explains that: “Unless the angle is extremely severe, [a hunter] really won’t notice these effects at ranges of 200 yards or less.” However, for long shots, hunters definitely need to compensate when taking angled shots. Praslick recommends that hunters print out a small chart with the cosines of common angles (20°, 25°, 30° etc.). In addition, hunters need an accurate ballistic table for their rifle and particular ammo. This should show the elevation corrections (in MOA or clicks), for 200 yards to the maximum range at which you may take a shot.
 Larry Racine is a respected gunsmith based in New Hampshire. He is also a two-time member of the U.S. Palma Team, and a five-time New Hampshire State High Power rifle champion. Larry, who runs

 MVP-LC Featured in Shooting Illustrated

 In this NSSF video, Ryan Cleckner shows how to set up a scope on a hunting or tactical rifle. Ryan, a former U.S. Army Sniper Instructor, notes that many hunters spend a small fortune on equipment, but fail to set up their rifle to use the optics optimally. Cleckner likens this to someone who owns an expensive sports car, but never adjusts the seat or the mirrors.


