This Sunday we feature the German-crafted Merkel RX Helix with straight-pull bolt. We shot the Helix a few years back during Media Day at the Range. One notable difference between the German Merkel and the Austrian Strasser, another straight-pull rifle, is the bolt travel. During cycling, the Merkel bolt stays completely inside the action (see video below at 00:30). By contrast the Strasser bolt moves pretty far back, outside the action. For some folks that makes the Helix better for fast follow-up shots. All we can say is that Merkles and Strassers BOTH cycle way faster than conventional bolt-action rifles.
Merkel RX Helix Range Report
One of the most innovative rifles we have ever shot was the Merkel RX Helix, a very impressive piece of rifle engineering. Merkel claims the RX Helix is the fastest-cycling centerfire bolt action in the world. We can’t confirm that claim, but the Helix certainly cycles faster than any other centerfire bolt-gun this Editor has ever tried. (Yes, a Fortner biathlon action can be worked more rapidly, but that’s a rimfire). Both Jason and I really liked Merkel’s RX Helix. It balances well, the action is smooth, the wood is gorgeous, and the overall design thinking that went into this German-engineered take-down rifle is very impressive. The Helix’s universal-sized action lets you shoot anything from a .222 Rem to a .300 Win Mag with the same gun. And — get this — you can really swap barrels (and change bolt heads) in a couple of minutes with no tools, employing a dead-simple bolt-release lever concealed under the push-button-released removable forearm. (Watch VIDEO BELOW to see Barrel Swap procedure).
Rotary 7-Lug Bolt
While the RX Helix is a straight-pull rifle, it retains the strength and safety of a rotary bolt head with seven locking lugs that seat in a barrel extension. Unlike a Blaser, the RX Helix has a fully-enclosed action housing. That’s an important safety feature. Moreover, since the RX Helix employs a closed action, the bolt body doesn’t travel outside that action. This means the shooter can maintain his cheekweld with an eye on the target as he cycles the bolt.
The RX Helix’s linear (back and forth) bolt-handle motion is transmitted to the bolt head through a 1:2 ratio “transmission” gearing system. This allows smooth and fast cycling without the rotational or tipping movement found on other straight-pull, bolt-action rifles, such as the Blaser.
The Merkel linear-movement action cycles exceptionally fast, which allows for faster follow-up shots — a good thing if you’re hunting dangerous game. The RX Helix features a manual cocking lever on the tang and a direct trigger system. And here’s good news for southpaws — though Merkel does not make a dedicated left-hand version, lefties can very easily use their right hand to work the bolt while maintaining cheekweld. That may sound awkward, but with practice, it’s actually pretty efficient.
Fast, Easy Disassembly and Barrel Exchanges
The video below shows how the Helix can be disassembled (for cleaning or transport) in a matter of seconds WITHOUT TOOLS. The forearm slips off with the push of a button. A short lever on the left side of the action holds the barrel. Simply rotate the lever and the barrel (with bolt head) slips off. That’s it — in 30 seconds the rifle is apart, and you don’t even need an allen wrench as with a Blaser.
The RX Helix has a universal action length that covers calibers from .222 Rem to .300 Win Mag. Changing calibers (or chamberings) takes less than a minute with the appropriate barrel, bolt-head and magazine. Weaver rails are integrated into the action, and iron sights with three-dot rear and one-dot front fiber-optic inserts are standard.
The RX Helix is available with a standard black finish as well as four levels of design — Arabesque, Wild Boar, Spirit, and Deluxe. An all-carbon-fiber version was also available either with or without a carbon-wrapped barrel. The RX Helix comes in a wide range of calibers including .222 Rem, .223 Rem, .243 Win, 6.5×55 SE, .270 Win, 7×64, .308 Win, .30-06 Sprg., 8×57 IS, 9.3×62, 7mm Rem Mag and .300 Win Mag. Barrel lengths vary according to caliber, and barrels, bolt-heads and magazines are available for caliber changes. EuroOptic sells the Merkel RX Helix, but most models are back-ordered.
Many shooters these days clean their cartridge brass ultrasonically, or wet-tumble their cases with stainless media (above). Both methods get brass clean and shiny, inside and out. However, when those wet-cleaning processes are completed, you’re left with a pile of soaking wet brass. How do you dry your brass quickly and efficiently, without unsightly water spots? Read on for some great answers…
In our Shooters’ Forum, Forum Gold Member Terry asked: “How do you dry your brass after Ultrasonic cleaning?” In an interesting Reloading Forum Thread, many smart suggestions were posted. A dozen fellow members outlined a variety of effective case-drying procedures, which work equally well for both wet-tumbled brass and ultrasonically-cleaned cases. Here are the Top 10 brass-drying suggestions from our Forum members.
TOP TEN Ways to Dry Cartridge Brass After Wet Cleaning
1. Food Dehydrator — Shake the brass in towel to get the bulk of water off. Next leave in the food dehydrator for 45 minutes or until there are no signs of moisture inside the cases. — Lawrence97
2. Lyman 5-Level Case Dryer — Rinse off cleaning solution(s), then load brass by type into racks in Lyman Cyclone Case Dryer. This is easier to load/unload than food dehydrators and holds more cases.
3. Hot Water + Compressed Air — Rinse all your cases as a batch using scalding hot water from the kitchen sink. Hot water evaporates off of brass very very quickly. Then hit them with compressed air. Takes 10 minutes. Simple. — SG4247
4. Oven Dry in Pre-Heated Oven — After pre-heating to 200° or so, turn off oven and put brass inside on a tray. Most important! Tell your wife what you are doing so she doesn’t crank it up to 425 to heat pizza! — MClark
NOTE: Many other members suggested oven drying at 150-200°. We recommend turning OFF the oven so you don’t cook your brass if you forget to remove the cases.
5. Towel Dry then Warm with Heat Gun — Roll brass in a towel until no more water shakes out. Lay out on cardboard box top and blow off with Harbor Freight heat gun. $9.99 on coupon. Two minutes of heated air and about half hour of wait and they are good to go. This is with primers removed. — Shaggy357
6. Compressed Air, then Sun Dry Outside – I rinse the brass, then blow them out with compressed air. Then, dependent on the time of year, lay them on a towel in the sun. — HogPatrol
7. Dishwasher on Dry Cycle – In the winter, I drop my wet brass cases neck-down on the rack pegs in the dishwasher, then turn on the dry cycle. In the summer…well, I’m in Texas. They go to the porch for a bit. — Toolbreaker
8. Alcohol Rinse then Air or Oven Dry — Rinse in 90% Isopropyl alcohol and either let air dry or stick in 175° oven for half an hour. Alternatively, use a dehydrator. — Zipollini
9. Slow Air-Dry in Loading Blocks — I have a reloading block with holes drilled in it. I simply load the block up and let it air-dry in the cupboard for a couple of days. — JCS
10. Wipe with Towel Then Anneal Normally — This thread is stirring my OCD side. Seems complicated for just drying — my brass dries just fine when I anneal it. This entire process can’t take an hour per batch. When finished, the brass is cleaned, annealed, and ready to size. — CHLuke
Deprime, then tumble brass with stainless media, water, Lemishine, and dish detergent.
Shake them easily in a strainer to knock out most media then grab 4-5 pieces, shake them over the bucket for the last of the media then inside a towel.
Finally blow out the primer pockets and wipe with a towel, load in the Annealeez.
Headed to SHOT Show in Las Vegas? Then you should download the FREE SHOT Show Mobile App. Available for all mobile devices, this App really makes it easier to plan your SHOT Show schedule, and navigate the floor of the Sands Convention Center. The 2020 SHOT Show Mobile App is now available for download on Apple, Android, and Windows smartphones and devices. Apple users will find the app in the App Store, Android users will find their version in the Google Play Store. Windows users can access via the WEB Dashboard. Learn more at SHOTmobile.com.
Handy Interactive Map
The App includes an interactive map that can direct you from your current location to your next destination. Arrange your meetings with a handy scheduling calendar. And you can search for any SHOT exhibitor by name or product category. In addition, the App lists major show events as well as important new products.
SHOT SHOW 2020 APP FEATURES
— Locate Exhibitor Booths with searchable Vendor Database/Floor Map
— Build a personalized Schedule and bookmark Exhibitors
— Visit bookmarked Exhibitors with Quick Route Feature
— Multi-Device Sync for smartphones, tablets, laptops
— Up-to-date Exhibitor, Speaker, and Event information
The 2020 SHOT Show takes place January 21-24 at the Sands EXPO in Las Vegas, Nevada. Media Day at the Range takes place Monday the 20th in Boulder City. To learn more about SHOT Show, including seminar times, educational resources, event listings, and hotel/travel information, visit SHOTShow.org.
The next time a shooter comes up to you at the range, and says: “My rifle shoots one-third MOA all day long”, challenge him to put a first-round hit on a 1/2 MOA plate at 1000 yards. There’s a difference between shooting small groups at close range (Precision) and “on-target” Accuracy at long range.
Article by Applied Ballistics, LLC
Just how much better is a 0.5 MOA rifle vs. a 1 MOA rifle? Is it worth chasing quarter-MOA if you have half-MOA rifle? This is an important question. If you look across Facebook you will find scores of shooters posting 1/3-MOA or 1/4-MOA shot groups [usually at 100 yards]. Some of those guys are spending countless hours trying to chase that golden quarter-MOA group.
Don’t take this statement the wrong way, having a good, consistent rifle is a key to success. But accuracy is extremely important to long range shooting. Having a precision (0.5 MOA) rifle, but not having put the time in to practice accuracy (hitting a 0.5 MOA plate first shot at 1000 yards) is counter-productive. [Editor: By this, we mean that you can have a rifle capable of shooting small groups at 100 yards, but you won’t see that gun’s full potential unless you can practice and perfect the skills of long-range shooting. Successful long range shooting demands more than precision alone.]
What if, your goal was to produce 5-shot, sub-half-MOA groups at 1000 yards instead of 100 yards? Think about how much more you would be including in the learning process, especially that all-important factor: managing the wind! Here is a good article that talks about Precision vs. Accuracy: Hitting Targets at Long Range.
This is not intended to say that precision is not important; rather it is intended to show that balance is important. You can use WEZ to do your own studies on this very subject, and it might be surprising to the shooter just how much you don’t gain by chasing precision over accuracy. Two books which cover this subject really well are Accuracy and Precision for Long Range Shooting and Modern Advancements in Long Range Shooting Vol 2.
Here’s a stunning combination of Precision (small group) WITH accuracy (centered on target). Yep that’s ten shots at 1000 yards, all in the middle of the target:
Video Demonstrates Amazing 1000-Yard Accuracy AND Precision
Watch the video. You can see the group form up, shot by shot. It’s pretty amazing. Scott’s first shot (at the 45-second mark of the video) was right in the X-Ring, and four of Scott’s first five shots were Xs. That’s drilling them!
Comments
“Accuracy with precision is the route for me. It is not an either/or game. If I have a precision rifle (0.25 MOA or less) and I practice to be accurate, then high scores will be the result — Jim Borden
“I would agree for PRS, hunting, and to a certain extent F-Class. However, for 1000-yard IBS benchrest competition, 0.5 MOA groups in good conditions will almost always loose the relay.” — James B
“Another thought is that [at 1000 yards] a 1 MOA gun with single-digit standard deviations [may] out shoot a 0.5 MOA rifle with standard deviations of 20+ fps.” — Beard Owens
“Both… you need both: Accuracy AND Precision. I competed in varmint matches — we shot small silhouettes at 600 yards. I started with a factory .260 Rem rifle that was 0.8 MOA on a good day. I typically hit 8-9 of 20 targets, but rarely nailed the small chickens — which had a hit zone just 4″ in diameter. I then started using a semi-custom 6mmBR rifle that could reliably deliver 1/4 MOA at 100 yards (honest). My hit count on the silhouettes zoomed to 15-18, and suddenly the chickens were going down. In that game — small targets at 600 yards — there was no substitute for precision.” — Paul McM
Are you planning to purchase or sell a gun? Or perhaps you want to give one to a family member. Maybe you want to transfer a gun to a friend out of state. These are all situations that demand you understand the law before you buy, sell, or transfer a gun. Thankfully the NRA Blog has a series of helpful articles that can guide you through firearms transfers and transactions. Do note that laws on private transfers vary from state to state.
Here are five articles providing key facts you need to know.
Click each title to read the specific article.
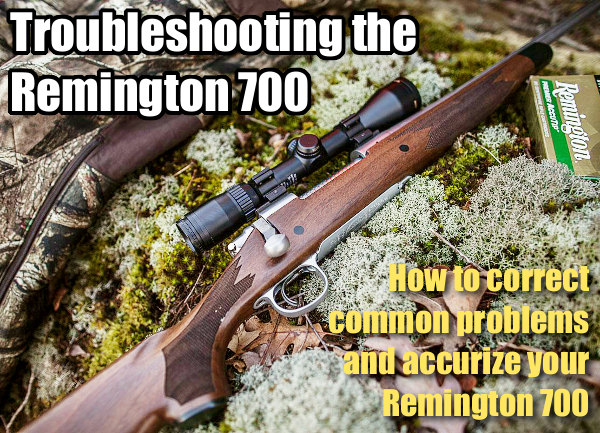
Turn a Rough Factory Rifle into an Accurate Hunting Rig
Kiwi Nathan Foster has produced a good video for hunters with “under-performing” Remington Model 700 rifles. In this video, Nathan helps a client turn a badly-behaving Rem 700 into a reliable tack-driver. A customer had sent Nathan this rifle to rectify stubborn copper fouling. After bedding the rifle, the customer discovered that the rifle produced terrible groups due to the stubborn bore.
Nathan told us: “This was a grand opportunity to study what can go wrong with the M700 rifle with regards to both do-it-yourself work and flaws within rifle production. To help structure the video, we used the chapters of our Accurizing Book as reference steps for the video. This footage also works in conjunction with our free Remington bedding tutorials on YouTube.
Those who have watched the full M700 Troubleshooting video say this is one of the most helpful videos yet released on problem-solving with a factory hunting rifle. This video is especially helpful for those just getting into the accuracy game, as it walks the viewer through the basics of rifle tuning, then proceeds to more advanced methods of improving a badly-behaving rifle.
This video focuses on the Remington M700 and Rem clones, such as the Bergara rifle. However the lessons and techniques in the video can apply to any type of bolt-action rifle suffering heavy copper fouling. The video features detailed footage of barrel break-in and barrel-lapping procedures. These procedures may be beneficial for rough factory barrels. IMPORTANT! AccurateShooter.com recommends different break-in and maintenance regimes for custom, hand-lapped premium barrels — be conservative with fine custom barrels. Our best custom barrels have all shot superbly with minimal break-in and zero use of abrasives during break-in.
Troubleshooting the Remington 700 Rifle with Nathan Foster
NOTE: This is a free 70-second trailer video. The FULL Remington Troubleshooting Video is 1 hour, 16 minutes long and can be streamed through Vimeo-on-Demand for $12.00. Access Full Video HERE.
Nathan Foster of Terminal Ballistics Research in New Zealand, is a expert hunter and highly-respected author of a series of hunting and long range shooting books. Nathan’s first book, The Practical Guide to Long Range Hunting Rifles, is a classic — one of the best treatises ever written on choosing and using a hunting rifle.
The Remington 700 is the most popular bolt-action rifle in America, according to Gunbroker.com sales figures for new and “previously-owned” rifles. So, chances are that you (or a family member) have a Rem 700 of some vintage sitting in the gunsafe. Click the link above for a PDF version of the Remington 700 Owner’s Manual (also covers models Seven, and 673).
Forum member Keith W. (aka “Cigarcop”) of KW Precision LLC is a talented riflesmith whose projects display outstanding finish work and attention to detail. Keith does some of the best bedding work we’ve ever seen. Back in 2018, Keith built a stunning F-Class rig for a shooter in Delaware. It’s a beauty, that’s for sure. Keith has posted more details about this rifle in a Shooters’ Forum Thread.
This handsome rifle features a polished Stolle (Kelbly) Panda Action, and two (2) Brux barrels, both chambered for the .284 Winchester cartridge. The real eye-catching component of this rifle is the stunning Cerus F-Open stock. This features multiple laminations with highly-figured Walnut on the sides. This certainly ain’t your “off-the-shelf” laminated stock. This just shows the beauty that can be achieved with carefully-chosen lamination layers (plus 12 coats of clear).
This beautiful F-Open rig features a laminated wood stock with stunning figured walnut on the outside.
Keith of KW Precision LLC is renowned for his bedding work, and this rifle shows why. Keith takes great pride in his work, and his attention to detail is second to none. This bedding job is as good as it gets.
Bringing out the figure in the wood requires multiple finish coats (and careful sanding between coats). But the results are worth it. Shown below is the Cerus stock, BEFORE the finish coats were applied. It took time and effort to transform the “naked” Cerus stock into a true stunner. Keith applied twelve (12) coats of PPG Automotive Clear with wet sanding between each coat.
And Another Beauty — This One Built for Capstone’s Boss
CigarCop recently completed a handsome rifle for Bill Gravatt, President of the Capstone Precision Group, distributor for Berger, Lapua, Vihtavuori, and SK products. This F-TR rig is another example of beautiful craftsmanship. Look at that bedding job in the lower photo! To learn more about this rifle, which features a black Borden Rimrock BRM action (with fluted bolt), read this Shooters’ Forum Thread.
This article is part of Sinclair Int’l Step-By-Step Reloading Series. Most of the products mentioned in this article are sold through Brownells.com.
by Roy Hill, Brownells/Sinclair Copywriter
Making your own precision handloads is a meticulous journey with many steps, many important matters to consider, and many sets of measurements to calculate. For those who pursue the perfect group, the highest score, the really long accurate shot, the rewards more than outweigh the effort. Choosing the right cases, deburring the flash holes, making the primer pockets uniform, trimming the cases, and lubricating them are all familiar – and critical – steps along the journey. And now that your brass preparation is complete, you are at last ready to start running the cases through your press and fill them with primers, powder, and bullets. The very first die the brass encounters is the sizing die. You insert the case, work the press’s lever to return the case to its correct pre-fired dimensions – and the journey continues.
There are three types of sizing dies to think about: neck, full-length, and small base. All three have specific benefits and potential drawbacks, and you should choose the type of die you use by thinking very carefully about what kind of shooting you plan to do with your handloads. No matter which type you select, most sizing dies will also punch out the old spent primer with some sort of decapper assembly that uses a hardened steel rod. Many types of sizing dies use an expander ball inside the die to make sure the neck of the case will accommodate a bullet after being sized. With some size dies, the expanders are easily removable and interchangeable, letting you get exactly the neck tension you want. If you are reloading for pistol cartridges, carbide sizing dies allow you to quickly resize without applying any lube to the case. But rifle cases always need lube.
Neck-Sizing Dies Neck-sizing dies resize only the neck of the case. The benefit of sizing only the neck is that the brass is “worked” very little, letting you reuse the same cases many times over. Also, cases that have already been fired in your rifle are perfectly fireformed to fit that rifle’s chamber, which can help accuracy. However, neck-sized cases will fit only the specific rifle they were originally fired in, and may still require a little extra force to chamber or extract.
Sinclair recommends that neck-sized-only cartridges should not be used any in other rifle besides the one they were originally fired from [unless they are also FL-sized], or in any action other than a bolt-action. Neck-sized-only rounds are great for the target range or the benchrest but should not be used in critical situations like military or police operations, or hunting. And if you fire them enough times, neck-sized cases will still need to be full-length sized periodically for you to keep using them.
Full-Length Sizing Dies Full-length sizing dies do exactly what their name says: resize the full length of the case, not just the neck. Full-length sizing helps create handloads that will function in any rifle, not just the one from which the cases were originally fired. The potential downside of full-length sizing is that it may shorten case life because it works the brass more than neck sizing. But it’s possible to “tune” today’s full-length sizing dies so they barely work the brass at all, as this article by Sinclair Reloading Tech Ron Dague shows.
Illustration Shows How a Full-Length Sizing Die Works
Another way to reap the benefits of full-length sizing is to use Redding’s full-length bushing dies, which size the full length of the case but use a system of interchangeable bushings that enable you give the case neck the bare minimum of resizing needed. To see how finely adjustable bushing dies are, and how they resize the case while fully supported, CLICK HERE for Video. The neck bushing helps you precisely control the neck tension to help increase the consistency and accuracy of your handloads.
Small Base Dies
A Small Base Die is just another type of full-length sizing die, but one that is typically used when reloading for semi-automatic rifles, like the AR-15, M14, or AR-style .308 rifles. (It may also work well for bolt guns that need extra sizing on the lower section of the case.) A small base die works exactly like a full-length sizing die, only it compresses the brass just a bit more, usually about .001″ more, and may even push the case shoulder back just a hair. Small base dies give that extra bit of compression to the brass to help make sure the case will properly extract from a semi-automatic firearm. The upside is that you get precision handloads that should work flawlessly in your semi-automatic. The downside is case life is really shortened, especially compared to brass used only in one bolt-action rifle, because the brass is worked more.
Shoulder Bump Gauges
A handy tool for setting up your full-length sizing dies as close as possible to your rifle’s chamber is the Sinclair bump gauge. The bump gauge lets you resize the case as little as possible, to extend case life and help your handloads fit your rifle almost like a neck-sized only die. You use deprimed cases fired in your rifle and bump gauge inserts to help you set up the die so it resizes the case only about .001″ to .004″, depending on what type of rifle you’re shooting.
Video shows how to use a shoulder bump gauge to set up your full-length dies
Article Find by EdLongrange. We welcome reader submissions
Long Shot Precision offers a great new product for the popular Ruger Precision Rifle (RPR) — a beautifully-crafted Adjustable Bag Rider (ABR). Made from CNC-machined aluminum, this fits an RPR perfectly, and weighs less than one pound. For more information, or to place an order, visit AdjustableBagRider.com.
The Patent-Pending Adjustable Bag Rider (ABR) is a direct replacement for the lower Picatinny rail of the RPR and RPR Magnum. Riding securely in your rear bag, the ABR provides horizontal stability and aids smooth, repeatable tracking. But in addition, now you have micro-adjustment built right into your RPR — the ABR adjusts up/down with a control wheel. This allows vertical adjustment without requiring positional body changes. This allows you to get on target faster, and reduces the vertical adjustment range needed from front rest or bipod. Because this unit is attached to the rifle, and does not move the bag up/down, it should be F-Class legal.
This video show how to adjust the ABR while in position:
ABR Installation is quick and easy with just two Allen wrenches. Once installed, you can leave the ABR on your Ruger Precision Rifle all the time. The bottom horizontal piece is available in two different styles: V-bottom or Square-bottom. Choose what works best for your bag. The maker suggests the V-Bottom for standard 2-stitch bags. The square-bottom ABR should fit bags with wider ear-spread and/or center flats.
The ABR is 100% made in the USA from high-grade 7075 aircraft aluminum. It is precision CNC-machined and then anodized for superior wear resistance. The length of pull adjustments are machined into the ABR. There are two custom hardened alloy steel dowels that ride in linear bearings for smooth operation. Though it weighs less than one pound, the ABR is made to last. This is an excellent new RPR accessory that works for competition, fun shooting, and varmint hunting.
There an excellent YouTube channel, THLR.NO, that offers videos for long-range hunters and marksmen. The channel’s creator, Thomas Haugland, is a serious, knowledgeable shooter, who takes his rifles out into the field, in all conditions. The THLR.NO channel offers solid advice on scopes, reticles, wind-reading, field positions, and much more. Haugland’s team puts a wide variety of gear through serious field tests — every thing from suppressors to packs to the latest electro-optical hardware. In addition the THLR.NO channel provides good advice on stalking techniques and hunting skills. Here are some recent videos that can help any rifleman.
How to Shoot Better with a Hunting Rifle
This “must-watch” video has great practical advice for hunters. It illustrates proper hand-hold and head position, and shows how to stay steady when breaking the shot. Even competition shooters can learn a few things. One viewer notes: “This was very informative. The footage through the scope showing how one’s position moves the sight alignment was particularly helpful.”
How to Gauge Wind Speed and Hold Off Using Reticles
This field video shows how to observe natural indicators — trees and vegetation — to estimate wind velocity. Then it shows how to calculate hold-offs using the reticle hash-marks. Thomas shoots a fast-cycling Blaser R93 rifle with Norma 6XC ammunition.
If you like these three videos, there are hundreds more on the THLR.NO YouTube channel. In addition, there is an excellent long-format video, Longrange Shooting 2, available on DVD or Vimeo on Demand. This impressive outdoors video features Thomas Haugland and Ulf Lindroth. Here is a preview:


 Rotary 7-Lug Bolt


 5. Towel Dry then Warm with Heat Gun — Roll brass in a towel until no more water shakes out. Lay out on cardboard box top and blow off with Harbor Freight heat gun. $9.99 on coupon. Two minutes of heated air and about half hour of wait and they are good to go. This is with primers removed. — Shaggy357