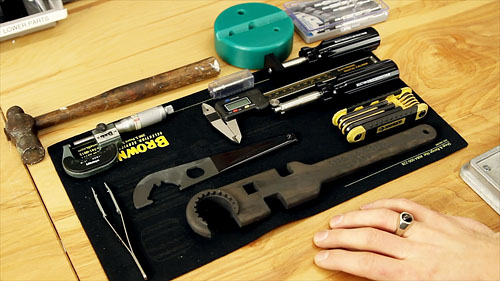
Here are the main tools you’ll need to assemble an AR-platform rifle
With the anti-gun agenda pushed by radical Democrats in Washington, many Americans are anxious to buy an AR-15, or put together an AR-platform rifle while it is still legal to do so. In Canada, the government ordered confiscation of AR-type modern sporting rifles, and both Joe Biden and Kamala Harris applauded that Executive Order. And Joe Biden recently called for a complete ban on semi-auto ARs and full-capacity magazines. With the prospect of radical gun control, we understand why many Americans are looking to buy, and/or build an AR-15. This article explains how.
If you ARE planning to put together an AR-platform rifle or want to upgrade your AR with a new barrel or trigger group, then you should check out the AR-15 Rifle Build DVD from our friends at UltimateReloader.com. This DVD covers all the details of a custom build, using high-resolution video sequences, and helpful supporting graphics.
In this DVD, Gavin Gear guides you through the entire process including selecting components, acquiring and using the necessary tools, assembly steps and details for each component, and even mounting a scope. Building an AR-15 can be overwhelming, but with the right guidance and help it’s not difficult and can be very rewarding. With this DVD you’ll be able to build your AR-15 with confidence.
Upper: Barrel / Gas Block / Gas Tube
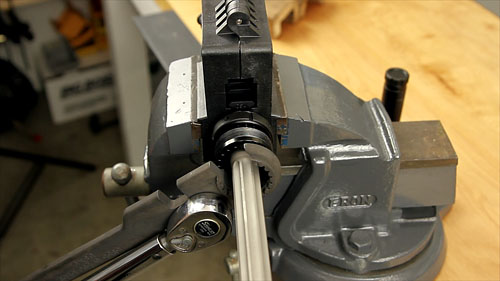
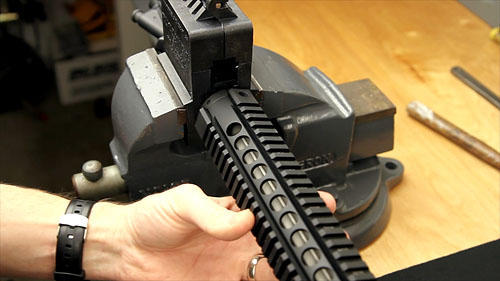
Upper: Handguard Installation
UltimateReloader.com’s AR-15 Build DVD is available just $9.90 (plus $3.80 shipping/handling). This DVD can pay for itself many times over by showing you how to do your own gunsmithing (and get quality AR components at attractive prices).
Can you form a wildcat cartridge such as the 6mm Dasher or 6 BRA (BR Ackley) without expending primer, powders, and bullets? Absolutely. Using the hydro-forming method you can form improved cases in your workshop with no firing whatsoever, so there is no wear on your precious barrel. Watch this video to see how it’s done for the 6 Dasher:
6 Dasher Case Hydro-Forming Demonstration:
Forum member Wes J. (aka P1ZombieKiller) has produced a helpful video showing how to form Dasher cases use the Hornady Hydraulic forming die kit. This includes a two-part die (body and piston), and a special shell holder. To form the case, you insert a primer in your virgin brass, top the case off with with a fluid (water or alcohol), then run the case up into the Hydro-forming die. A few stout whacks with a hammer and your case is 95% formed.
Hydro-Forming Procedure Step-by-Step:
1. Insert spent primer in new 6mmBR brass case.
2. Fill with water or alcohol (Wes prefers alcohol).
3. Wipe excess fluid off case.
4. Place case in special Hornady shell-holder (no primer hole).
5. Run case up into Hydraulic forming die.
6. Smack top piston of forming die 3-4 times with rubber mallet or dead-blow hammer.
7. Inspect case, re-fill and repeat if necessary.
8. Drain alcohol (or water) into container.
9. Remove primer (and save for re-use).
10. Blow-dry formed case. Inspect and measure formed case.
Wes achieves very uniform cartridge OALs with this method. He measured ten (10) hydro-formed 6 Dasher cases and got these results: two @ 1.536″; 2 @ 1.537″; and 6 @ 1.538″.
Three or Four Whacks Produces a 95%-Formed Case
With a Hornady hydro-forming die, hydraulic pressure does the job of blowing out the shoulders of your improved case. The process is relatively simple. Place a spent primer in the bottom of a new piece of brass. Fill the case with water, and then slip it into a special Hornady shell-holder with no hole in the middle. Then you run the case up into the forming die. Now comes the fun part. You gently insert a plunger (hydraulic ram) from the top, and give it three or four stiff whacks with a mallet (or better yet, a dead-blow hammer). Remove the plunger and you have a 95% formed case, ready to load.
Special Shell-Holder
Hornady supplies a shell holder made specifically for the hydro die; there’s no hole in the bottom of it. Just insert a spent primer into the primer pocket and you’re ready to go. The spent primer, combined with the solid shell holder, keeps the water from seeping out of the primer pocket. The primer pushes out a little bit during this process, but it’s impossible for it to come out because of the way the shell holder is designed. The shell holder has a grove which allows the case to slide out of the shell holder even when the primer protrudes a bit.
Another Option — Hydro-Forming by DJ’s Brass Service
If you want to hydro-form your brass to save barrel life but you don’t want to go through the effort, or purchase the hydro-forming dies, there is a very good option. Darrell Jones of DJ’s Brass Service will do the job for a modest charge. You send Darrel your brass and he does all the hard work, preparing perfectly formed brass. Darrell can also anneal and/or neck-turn your cases — all for a reasonable fee.
DJ’s Brass Service offers case hydro-forming to your exact specs. Darrell Jones offers this service for a variety of popular cartridges: 6 PPC, 30 PPC, 30 BR, 6 BRA (BR Ackley), 6mm Grinch, 6 BRDX, 6 BRX, .260 Ackley, .284 Shehane and of course the very popular 6mm Dasher. After hydro-forming your brass, Darrell can also neck-up or neck-down the cases to meet your needs. For example, if you shoot a 22 Dasher, Darrell can hydro-form the cases to a 6 Dasher and then neck them down to .22 caliber. He can also turn the necks to your specs (for an additional charge). Hydro-forming by Darrell costs $0.60 (sixty cents) per case with a minimum order of $60 per hundred. NOTE: After cases are hydro-formed by Darrell, every case is washed, cleaned, and re-annealed. This cleaning and annealing process is included in the $0.60 (sixty cents) per case price.
This article based on story by Jason J. Brown, EditorNRABlog.com
Americans are purchasing firearms at historically high levels, with more than 7 million new gun owners in 2020 and gun sales setting new records. There were over 2 million NICS-adjusted gun buyer background checks in January 2021, a 75% increase compared to January 2020.
Gun ownership is a great responsibility, entailing not only a well-formed understanding of the basic rules of gun safety while shooting, but at all times. Gun safety is never more important than inside your own home. Gun safety isn’t just for gun owners — it’s a critical skill for everyone.
In the Home Firearm Safety Course, students will also learn about gun parts, ammunition, basic gun cleaning and care, and provide hands-on training on how to safely unload select types of guns. Each participant receives the NRA Home Firearm Safety handbook, NRA Gun Safety Rules brochure, Basic Firearm Training Program brochure, and a course completion certificate.
The NRA’s network of more than 128,000 NRA Certified Instructors delivers the Home Firearm Safety Course at locations nationwide. To find a course near you or learn about other NRA Training programs, visit the NRA Training portal.
In recent months, Forster Co-Ax® presses have been somewhat hard to find, as demand has out-stripped supply. But they are still worth looking for. The Co-Ax Single Stage Press accepts any standard 7/8″ X 14 reloading die, but Forster suggests using Forster Cross Bolt Lock Rings for best results. As the Co-Ax is currently back-ordered at most vendors, but you can try multiple sources.
If you are not yet familiar with the many unique features of the Forster Co-Ax, we recommend you watch the video embedded below. This shows how the press operates and highlights the design elements which set the Co-Ax apart from every other reloading press on the market.
Video Shows Special Features of Forster Co-Ax Reloading Press
Forster Co-Ax Press Video Review
This is a very thorough review of the Forster Co-Ax done by Rex Roach. This 14-minute video shows the key Co-Ax features, explaining how the floating case-holder jaws work (3:30 time-mark), how the dies are held in place (4:40 time-mark), how spent primers are captured (6:10 time-mark), and how to set the primer seating depth (10:00 time-mark). We’ve used a Co-Ax for years and we still learned a few new things by watching this detailed video. If you are considering purchasing a Co-Ax, definitely watch this video start to finish.
The Co-Ax case-holder features spring-loaded, floating jaws. These jaws have two sets of openings, small and large. This allows the system to adapt to various rim diameters. The jaw plates can simply be reversed to switch from small jaw to large jaw. In the photo above, the Co-Ax is configured with the large jaw openings in the center.
The U.S. Army Marksmanship Unit (USAMU), in cooperation with Shooting USA TV, has created a series of instructional Pro Tip pages covering a wide range of shooting disciplines. All totaled, there are more than 50 USAMU Pro Tips. Most relate to rifle marksmanship but there are also numerous tips for shotgunners and pistol shooters. Each Pro Tip entry includes multiple photos and 6-15 paragraphs, in an easy-to-follow format. Many Pro Tips also include an instructional video produced by Shooting USA. Here are three Pro Tip videos, and links to seven more Pro Tip web pages.
USAMU TOP TEN PRO TIPS
1. Reading the Wind with SGT Sherri Gallagher.
Apart from gravity, wind has the most pull on the bullet as it travels down range. Being able to accurately read the wind and mirage will greatly enhance your performance on the rifle range. National Champion, SGT Gallagher gives you some of her tips.
2. Angle Shooting with SFC (Ret.) Emil Praslick.
SFC Praslick shows you how to determine the angle to your target, and then how to include that to change your data necessary to hit your target on the first shot.
3. Rifle Grip, Stance and Body Position for 3-Gun with SFC Daniel Horner.
Professional 3-gun marksman SFC Daniel Horner, U.S. Army Marksmanship Unit (USAMU), give tips on how to properly handle a semi-automatic rifle, including grip, stance and body position.
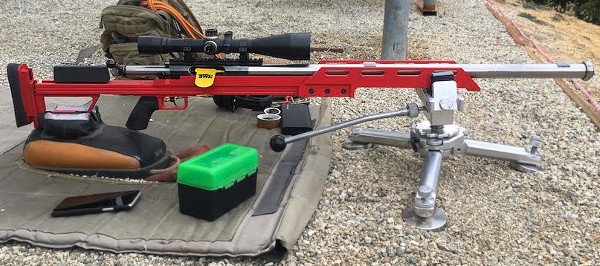
Forum member Martin Tardif (aka “Killick” in our Forum) competes with a very accurate .284 Win F-Open rig fitted with a Barnard action, Brux barrel, and Eliseo F1 chassis. Unlike some F-Class shooters, Martin has tried many disciplines over the years, including service rifle and Mid-Range and Long Range sling competition. But he told us, “After experiencing arthritis in my hands and wrists, I decided I would dabble with F-Class. And that has turned into a happy obsession.” Today’s story features the object of that happy obsession — Martin’s tack-driving .284 Win he calls the “Red Rocket”.
F-Open Match Rifle — .284 Winchester “Red Rocket”
by Martin Tardif
This is the story of the new “Red Rocket”, my new F-Open rifle. It’s chambered in .284 Winchester (.317″ neck, .220″ freebore). This rifle features Barnard P action, Barnard single-stage trigger (4 oz.), and Brux 30″ one-inch straight-taper, 1:8.5″-twist barrel fitted with Blake Tuner. The barreled action rides in a Gary Eliseo Competition Machine (CMI) F1 F-Open metal chassis with Marine Corps Red powder coat. On top is March 48x52mm fixed-power High Master scope. In a previous incarnation, this same Barnard action served in a wood-stocked F-Class rig, a Red Retromod built from a modified Anschutz stock. I still have the Barnard action (and trigger), but mostly everything else is new.
Here’s the .284 Win “Red Rocket” with CMI F1 Stock, Barnard action, Brux barrel, and Blake Tuner on my SEB Mini at Burbank Rifle and Revolver Club in SoCal.
My previous F-Class rifle started out as a Palma rifle back around 2008. With a modified Anschutz prone stock, that .308 Win Palma sling gun served me well, helping me earn the 2009 California State Palma Championship. Much later I grafted more wood on and whittled that same stock into an F-Open specimen (shown below). That did get me to Long Range High Master but it definitely had limitations. For one it had annoying flex in the fore-end and the buttstock was not aligned with the barrel channel.
I wanted to upgrade my stock to get a more consistent, better-shooting F-Open performer. So in April of 2020 I contacted Gary Eliseo of Competition Machine and ordered one of his streamlined, F1 “boom-stick” chassis units. These feature a very low Center of Gravity. I sent Gary my Barnard action and had Brux send him a barrel that I had won at the 2020 SWN raffle.
This video shows Martin shooting the “Red Rocket” in California
This rifle has been a success from the very start. At its first big match, the 2020 California State Championships, the Red Rocket tied for First Place on points but finished second overall on X-count.
Martin tells us: “The new red Eliseo stock is phenomenal and far surpasses the old red stock on my RetroMod project previously featured on the Daily Bulletin. The three things I like best about this Eliseo F1 chassis system are:
1. The lean, clean, efficient engineering and styling.
2. Easy manipulation of buttstock and cheek piece adjustments, ease of bolt removal.
3. Inherent confidence in its straightness and the durability of all the parts and finish.”
“I’m extremely impressed with the potential of this rig and I have still yet to fiddle with the tuner and test some of my Wolf/KVB primers. It’s all gravy now.” — Martin Tardif
I received the finished rifle in September and was impressed with its stark and consummate functionality and there is no doubt as to that function. The collinear aspect from any angle suggests a Red Rocket Car on the Bonneville Salt Flats, so that’s what I call this rig.
Reloading Methods and Load Development
My virgin brass prep starts with a .284 neck mandrel with the occasional squirt of WD-40, then to the drill press to turn the necks to 0.014″ wall thickness with my PMA Model B turner. After a quick dip in the media tumbler I run the whole batch through my DIY cake pan annealer and they’re ready for sizing. I like the Whidden Gunworks full length bushing dies. I use a .310″ bushing and a loaded round measures .312″. After sizing, I run the cases through the tumbler for 10-15 minutes to clean them up and then they are primed. I’m using my stash of S&B primers with an RCBS benchtop primer seater with a Holland Perfect Primer Seater add-on. I do point my 180-grain Berger Hybrid bullets with a Hoover die (see below).
Here is Martin’s reloading bench. From left to right: A&D FX-120i Force Restoration Scale with Auto-Trickler V3, Hoover Bullet-Tipping Die, Whidden .284 Win FL Sizing Die with PMA click-adjust lock ring, Hodgdon H4350 powder. Martin reports: “I’m also using some of F-Class John’s Auto Trickler Methods — using two powder cups to speed up the process, hash marks on Auto Trickler gear drive, and minimal openings on FX-120i wind guards. These all improve the powder measuring.
Load Development and Accuracy Testing in Competition
I started load testing in November 2020. I tried both H4831sc and H4350 at 100 yards. I usually have excellent results with H4831sc but the Brux tube stubbornly preferred H4350. So I took a preliminary recipe (52.2 grains) to the California Long Range Championship and tied for First Place on points but got beat on Xs. Having seen a little too much vertical at the state match, I went with a lighter load that looked good for vertical at 100 yards (51.8 grains — see photo below). That load got me an overall win at our 1000-yard club match.
I wanted to fine tune that load so I started a seating depth test. I did a final head to head test, comparing .015″ jump (away from first lands contact) and .018″ jump at 1000 yards. The .015″ jump load was the clear winner. This 15-round group was shot at 1000 yards with no flags on an overcast day with no mirage.
The ShotMarker screenshot above shows 15 shots at 1000 yards with bullets seated .015″ out, switching winds and no flags, just watching the mirage. I added .25 MOA up after the first round ‘9’ (me fighting a clean barrel on first shot) and went to town.
Advice for New F-Class Shooters — by Martin Tardif
1. Watch a Top Competitor — Find a good shooter that you respect and watch and take note of their equipment, how they set up to shoot, how they shoot, what conditions they shoot in or don’t. Ideally you should ask to be squadded with them (if possible) so you can score for them. That way you’re not dividing your attention from the shooter you’re supposed to be scoring for. Be mindful not to pester them while they are setting up. Best to wait until they have finished shooting and try to ask questions off the firing line, others still shooting need to concentrate.
2. Cartridge Selection for F-Open– Go to Accurate Shooter’s 7mm Cartridge Guide and scroll to the .284 Winchester section by Charles Ballard. You can read further about the 7mm WSM and 7mm SAUM but for a caliber that’s not fussy you should stick with the .284 Win.
3. Reloading Equipment — To win, you really need ammo as perfect as you can make it. You should be able to find out everything you need to know about reloading equipment via the Accurateshooter Forum’s Reloading and Competition areas. It’s a one-stop shopping brain trust for everything F-Class, Sling, and Benchrest. And the Forum Marketplace is literally a never ending ‘Gun Show’ of For Sale items. It’s a great place to buy quality used stuff for newbies.
As a final bit of advice — BELIEVE the wind — it’s smarter than you are!
Commentary on Metal Chassis vs Wood Stock
I previously had a wood F-Class stock so flexible you could easily pinch the barrel to the fore-end with one hand and hold it there. My Eliseo metal chassis is MUCH more rigid. I don’t think there is any argument that a metal stock is more rigid than wood. I also think a metal stock with its monolithic properties has a more consistent cross-sectional density along its length than a wood stock would have due to the vagaries of grain structure. However I have no experimental data to support that theory, or how that might positively affect shot to shot consistency. I CAN say that the gun shoots better, with smaller groups and higher scores, than the previous wood stock version.
The CMI F1 chassis has three main sections: rear assembly, main assembly, and fore-end. The main assembly is a 27″-long solid billet section with milled cavities for the rear assembly and trigger group. This also supports the action V-Block which cradles the full length of the action. The V-Block is mated to the top of the billet in a milled channel but doesn’t touch the sides to avoid uneven harmonics. The rear assembly hold the LOP-adjustable butt pad/bag rider and “easy off” cheek piece. The 3-piece fore-end is fitted to the main section with screws. The complete F1 chassis with grip and cheek piece weighs 6 pounds.
F1 Chassis Maker Gary Eliseo Talks about His Design
The F1 was designed to incorporate the most important features needed in an F-Open rifle system. Top priority was placed on how the rifle tracked. The chassis had to be perfectly straight, and immune to weather so it will stay straight. On the F1, the fore-end is designed to keep the centerline of the barreled action as low as possible. This super-low center of gravity, along with the tall vertical sides, keep torque to a minimum, so the gun doesn’t twist or hop, but instead comes straight back.
The F1 chassis can be fitted with bedding blocks to accommodate any action. These action bedding blocks are carefully epoxy-bedded to the chassis so the customer’s barreled action is perfectly in line with the central axis of the chassis. In addition to optimizing tracking, I also took a look at how the shooter interfaced with the rifle. I wanted the cheek piece to be narrow so that the shooter would not be forced into applying side pressure on the stock to get their eye behind the scope. The cheek piece is also easy to remove for those who shoot without one. This also facilitates bolt removal.
If you’re interested in an F1 F-Open Chassis, contact Gary via the Competition Machine eMail page. The current price for an F1 Chassis with Cerakote finish (any color) is $1150.00. Lead time is about 12 weeks.
Green Tools for Red Rocket — Martin uses an RCBS Rock Chucker single-stage press on an Inline Fabrication UltraMount. Primers are seated with an RCBS Bench Primer fitted with Holland’s Gunsmithing Perfect Primer Seater Adapter. This provides ultra-consistent primer seating.
F-Class Match Strategies for California Ranges
My strategy for a match clearly depends on the specific location. For instance, at my home range, the Burbank Rifle and Revolver Club, which has several cuts and gullies crossing the canyon, the wind comes primarily from NNE and since the range faces slightly NNE the predominant condition will be a head or right wind so I’m looking for R to L mirage and left angled flags.
By contrast, Coalinga CA is a much more open/exposed range which can make it much more challenging. When you see all the flags going against the mirage for the majority of the string (after you’ve gone for record of course) that can be tough. So I like to watch the wind while I’m scoring and for a few minutes during sighters and shoot them in a few ‘looks’ if I can get them. But sometimes you have to go with your gut if your sighters whisper “go-for-record-you-knucklehead” and so it’s off to the races. It often seems like I should have just chased the spotter when I’m waiting out a fishtail or let-up there.
I absolutely love using this press stand. I use it with my Forster Co-Ax as well as my Dillon 550. The stand mounts those presses at the right height to minimize fatigue and maximize torque. Some products I merely review and return but this one is a keeper and won’t be leaving my bench anytime soon. — F-Class John
Lyman Universal Press Stand REVIEW
Product Review by F-Class John
Positioning your press at the optimal height is one of the oldest problems in reloading. Most presses sit low off the edge leading to uncomfortable arm strain or inconsistent pressure being applied while using. Lyman has set out to fix that problem with a reasonably-priced ($54.99 at Midsouth) press riser that works with the vast majority of reloading presses. This unit will raise just about any press up off your bench securely, allowing you to working more comfortably from a standing position. This also frees up vital bench space UNDER the press. Unfortunately this press stand is so popular it is back-ordered at most vendors.
I have used a variety of presses over the years. At times I’ve run into issues mounting a press at a level that doesn’t promote arm or hand strain during normal operations. In the past I’ve used blocks of wood or even tried other brands’ proprietary stands. But I had very limited success with those options. Accordingly, I was very excited to give the Lyman Universal Press Stand a chance.
Lyman’s Universal Press Stand comes complete with side plates, two different top plates, and a large collection of mounting hardware. The two top plates are pre-drilled for numerous popular Single Stage or Progressive presses. Helpful diagrams and instructions show which side of the top plate you need to use. The pre-drilled holes accommodate a variety of presses from RCBS, Dillon, Lyman, Redding, and Hornady. But surprisingly, the plates are not pre-configured for the Forster Co-Ax Press.
CLICK to WATCH VIDEO Showing Lyman Universal Press Stand
Setting up the stand was very simple. The two sides bolt to the lower shelf unit at which point you attach the top plate. All the supplied bolts made this a breeze and once everything was snugged down, I was able to place it on my bench where I wanted it and mark the drill holes to mount it. After securing the stand to my bench it was time to mount my press.
Lyman Universal Press Stand with Dillon 550 Press
Adapting Lyman Universal Press Stand for Forster Co-Ax
At the time of testing I was primarily using a Forster Co-Ax press. With no pre-drilled Co-Ax configuration for either Lyman top plate, I decided to customize the blank side of one of the top plates. I opted to position the mounting holes so that the press could sit 100% on top of the mounting plate and not just off one edge. I found this process simple to execute. Mark your drill holes, then drill the plate. This can easily be done with regular drill bits although using a step-bit worked faster and cleaner to help enlarge the holes just a little when I needed some extra clearance.
Lyman Universal Press Stand Is Stable and Strong
Once set-up, I found the stand to be incredibly stable. The design allows for full force to be applied to the press no matter what the operation. Having used this Lyman Press stand regularly over the past few months with both my Co-Ax and a Dillon 550c, I still find myself loving it. The height is perfect and allows me to load as much as I like without straining my arm or getting fatigued. With an attractive price point (under $55.00 street price) and a simple design, I feel this is a great system for those looking for a secure and raised platform for their reloading presses.
The Universal Press Stand comes with two plates. If you have different presses that fit each plate you could easily swap presses just by changing plates while leaving the presses attached. It’s less functional if you have two presses that share one plate and would require removing one press before installing the next one.
Lyman Press Stand Unboxing and Set-Up (KFW Video Review):
The U.S. Army Marksmanship Unit (USAMU) has produced an excellent series of videos covering the Basic Rifleman’s Course. If you are getting started in High Power shooting, or want to improve your position shooting skills, this series is well worth watching. And these videos are not just for service rifle shooters — even bench shooters can benefit from these videos, particularly Part 5, which explains how to estimate wind speed and direction. The lead instructor for these videos is SFC Brandon Green, three-time National High Power Champion, and 2017 Service Rifle Champion. When SFC Green talks, you should listen.
SFC Brandon Green is a shooting superstar. Green won his third NRA National High Power Rifle Championship in 2018 at Camp Atterbury, Indiana. He dominated the HP Championship cycle, finishing eight points and ten Xs ahead of his nearest competitor. Brandon also won High Power National Championships in 2015 and 2013. One of the greatest marksmen in the nation’s history, SFC Green excels at all positions, both rapid-fire and slow-fire.
Part 5 — Wind and Weather Estimation (Very Useful for All Shooters)
Note: This video includes a hit location “target analysis” in the first 6 minutes.
Part 4 — Minute of Angle Explained
Part 3 — Ballistics and Zeroing
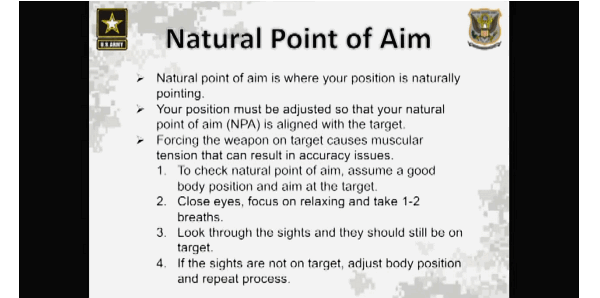
Part 2 — Positions, Sight Alignment, and Natural Point of Aim (Very Useful)
Part 1 — Aiming and Sight Picture
SFC Brandon Green (left above) has set multiple National Records at Camp Perry.
If you are a F-Class competitor or use machine tools, chances are you know Shiraz Balolia. Shiraz is one of America’s top F-Class shooters, an all-star competitor who has won major titles, including three straight Canadian F-Open National Championships. Shiraz also owns Grizzly Industrial Inc., a large, successful enterprise he founded in 1983. For 38 years, Grizzly has provided quality tools to wood-workers and metal workers. Grizzly’s catalog is now over 700 pages.
Shiraz’s life story is an interesting one. He came to the USA from Kenya, and then became a very successful businessman, building Grizzly Industrial into a major player in the tools/parts/machinery business. Shiraz also founded Bullets.com, which sold firearms accessories and reloading components for some years. Shiraz’s effort to start Bullets.com was an outgrowth of his desire to “give back” to the shooting sports, the hobby he loves.
To cover his noteworthy business career and life, Shiraz has written an impressive 288-page autobiography, entitled A Bad Case of Capitalism (referring to his love for the world of selling products). This book covers Shiraz’s early years though the present, providing a “tale of travel through war-torn countries, courtroom battles, success, failure, and everything in between.” It explains the challenges of starting direct-to-consumer businesses, first via mail-order and then adapting to the new online world.
We enjoyed the book because it provides a clear inside look at the challenges of starting a business. And we are grateful that Shiraz, through his businesses, has been a strong supporter of AccurateShooter.com for more than a decade. Balolia’s autobiography has been described as “equal parts business primer, history, and collection of life lessons”. The book shows how vision and determination can create a true American success story.
Readers have enjoyed the book and the lessons it offers on how to build a business:
“As someone who loves to create things with his hands, I was immediately drawn to this book, as Mr. Balolia is basically the father of machinery for woodworkers like me. It’s a great read that opens your eyes to a place and time I’d never heard of before, and it paints a great picture of determination and grit…. This book is certainly a motivating tale, and it shows that with a supportive family and vision (and a ton of hard work) you can do anything you dream.” — Jameson H.
“This is as much a story of Mr. Balolia as it is of Grizzly Industrial. In this book, and probably real life, the two are inseparable. From humble beginnings to a substantial empire of industrial equipment you have to admire and applaud the success story and this chronicle of hard work and perseverance. Impressive, very impressive.” — Own One
Grizzly Lathes for Gunsmiths
In this video, Shiraz talks about Gunsmithing Lathes sold by Grizzly.com:
Shiraz Uses the Machines That He Sells
Shiraz is not just a talented business leader and ace marksman. He is also a very skilled fabricator and woodworker. He has crafted guitars, and worked on his own gunstocks. This shows an F-Class Stock Shiraz upgraded using Grizzly Industrial machinery. The modified stock has a significantly lower Center of Gravity, riding 1/2″ lower in the front bag. Shiraz says the modified stock performed great.
Shiraz Balolia (left) and Norma Managing Director Paul-Erik Toivo.
Do you enjoy shooting pistols for sport, or perhaps you carry a handgun for self-defense? If you’re like most of us, you might benefit from a “refresher course” on the fundamentals of handgun shooting. The NRA has created a useful Infographic that covers important basics of handgun marksmanship — key things such as Sight Alignment and Trigger Control.
Here are the first two (2) lessons. Click the link below to see all SIX (6) training topics: Sight Alignment, Sight Focus, Trigger Control, Breath Control, Hold Control, and Follow-Through.
Video Shows Sight Alignment, Grip, Stance, Trigger Control and More
In this USAMU video, SGT Shane Coley talks about the basics of sight alignment and trigger control. But then SGT Coley talks about other important control factors such as grip, arm position, and body stance. For rapid-fire shooting, you need to have a good arm and body positioning to control recoil and get back on target quickly. This video is a valuable complement to the NRA Infographic because it demonstrates all the important pistol fundamentals during live fire, at the range.




 Hydro-Forming Procedure Step-by-Step:
 Special Shell-Holder