Well the lady did it… Taya Kyle (Chris Kyle’s widow), triumphed over Bruce Piatt, reigning NRA World Shooting Champion (see below). Using Tracking Point “Intelligent” firearms, Taya won the much-publicized American Sniper Shootout, hitting every one of the 29 targets (Piatt hit only 58% of his targets). In the process, Taya earned $500,000 for the Chris Kyle Frog Foundation. Here’s a Fox News Video covering the event, which was held Saturday, December 5, 2015 in Mason, Texas.
This unique competition pitted a novice shooter armed with Tracking Point’s rifle systems against a World Champion-level shooter in a head-to-head competition. There were 29 targets total, with a variety of shooting scenarios and distances.
Taya Kyle Earned $500,000 for the Chris Kyle Frog Foundation.
To the surprise of many in attendance, Taya Kyle, the widow of Navy SEAL Chris Kyle, soundly beat the reigning WSC champion. She hit every one of her targets, while Bruce missed more than 40%. Taya used Tracking Point’s precision-guided M600 and M800 firearms, while Bruce competed with M4A1, M110, and M2010 basic military rifles. Bruce certainly was motivated. Had he won the Shootout, he would have received a $1,000,000 prize. But, in the end, it wasn’t even close. Taya hit all the targets, while Bruce hit less than two-thirds.
The competition involved an unusual course of fire. Outdoor Hub’s Daniel Xu reports: “The American Sniper Shootout was unlike most other competitions. The environment was built to imitate the layout of Sadr City [Iraq], where Chris Kyle made his famous 2,100-yard shot on an enemy insurgent. The competition itself reflected war-like conditions instead of traditional shooting competitions and both shooters were tasked with making difficult shots. The most difficult part of the shootout was when Kyle and her opponent had to make blind shots from cover, simulating a scenario in which soldiers had to shoot while under enemy fire.”
While the Tracking Point “precision guidance” system helped Taya aim and break the shot precisely, the Tracking Point system does not call the wind. The “operator” must still make a wind call, input wind speed and direction, and then the Tracking Point system, using internal ballistics tables, will adjust the aiming point accordingly in the scope’s viewfinder/reticle. Apparently the system works well enough to enable Taya to prevail over a very experienced shooter.
Bruce Piatt, 2015 WSC Champion
Bruce Piatt won the 2015 NRA World Shooting Championship (WSC). The WSC is a multi-discipline event involving pistols, rifles, and shotguns with targets out to 1K and beyond. Bruce competed against many top shooters including previous WSC winner SFC Daniel Horner of the USAMU.
Over his shooting career, Piatt has also won World and National titles in USPSA/IPSC, Steel Challenge, Bianchi Cup, Sportsman’s Team Challenge, Masters Pistol Championship, and the SOF Tactical 3-Gun disciplines.
Here’s an early Christmas present to our readers from Beretta — a really great video about gun-making. This movie, entitled “Human Technology”, is one of the best videos we’ve ever featured on this site. It’s that good. You’ll see an amazing blend of ultra-modern manufacturing technology along with old-world artisanship — “a mesmerizing meld of the high-tech and the traditional”. (Daniel Xu, Outdoor Hub.)
“Human Technology is a singular and symbolic movie, its cast entirely made up of Beretta workmen, thus illustrating the perfect synthesis between craftsmanship and technology,” Beretta writes. This artistic movie by Ancarani Studio illustrates all the aspects of the manufacturing of a high-end Beretta shotgun. This video is a study in contrast. The movements of robotic assembly machines are juxtaposed with the centuries-old craftsmanship of stock carvers. Beautifully filmed and edited, this video should amaze and entertain anyone who loves fine firearms. (Full-screen HD Recommended.)
The R-F Cam Cradle is a smart new product that lets you securely mount a Laser Rangefinder (LRF), digital camera, and spotting scope all on a single tripod. The “game-changing” feature of the R-F Cam Cradle is that it allows you to colimmate (i.e. precisely align) all your optics on the same spot. This way you can simultaneously aim all three devices at a long range target by simply moving the tripod head. A tactical shooter can easily range his target while watching the wind though his spotting scope. And the long-range hunter can range and film his prey as he watches it through the spotter. This unit costs $179.95 from DefensiveEdge.net.
You’ll find a detailed product evaluation of the R-F Cam Cradle on the LongRangeOnly.com website. Reviewer Sam Millard uses the R-F Cam Cradle in the field with a variety of optics and rangefinders. Millard explains how the R-F Cam Cradle conveniently allows combined use of spotting scope, LRF, and compact video camera.
Millard was very impressed with the system: “I field-tested the R-F Cam Cradle in the mountains of northern Idaho and the wide open spaces of eastern Wyoming. I believe the most effective way to use the cradle is in a long range ambush; get the spotting scope, camera, and LRF aligned on a landmark, then lock it down. The LRF and spotter won’t be aligned perfectly, but they’ll be well within the field of view of each other, requiring only a gentle tilt of the tripod to center the beam of the LRF on the target. At ELR distances, a well-supported LRF is crucial to obtaining an accurate range. This mount makes it easy, and doesn’t require displacing your spotting scope to get it done.”
See R-F Cam Cradle Demonstrated in the Field:
Having a video camera mounted in alignment with spotting scope is great for Long Range applications notes Millard: “The camera mount is my favorite feature of the R-F Cam Cradle. It allows co-witnessing the video camera to the spotting scope, then aiming the field of view of both with one movement of the tripod head. This is a great improvement to the normal way of recording the shot and spotting at the same time, which previously required two tripods or a clamp-on head for the camera, both of which required separate aiming of the camera and spotting scope.”
R-F Cam-Cradle Product Details
Manufacturer: RLC Customs
Vendor: Defensive Edge, Inc.
Rathdrum, ID DefensiveEdge.net
Order Phone: (208) 687-2659
Material: 3/16” 53 Series aluminum
Finish: Powder-coated Matte Black
Total Weight: 16.5 ounces
Mount: ¼-20 Threaded Standard Camera Mount
Retail price: $179.95
Shawn Carlock of Defensive Edge explains: “The R-F Cam Cradle is a way for one person to run everything. Otherwise it’s really difficult to run the spotting scope, run the video camera, run the rangefinder, get dope — do all those different things. So RLC Customs has come up with the idea to put everything together in one platform, where you can sync it together and use it effectively, as a cluster.”
Product Find by Boyd Allen. We welcome reader submissions
What really happens when an M1 Garand fires the final round and the En-Bloc clip ejects with the distinctive “Ping”. Well thanks to the folks at ForgottenWeapons.com, you can see for yourself in super-slow-motion. The entire cycling process of a Garand has been captured using a high-speed camera running at 2000 frames per second (about sixty times normal rate). In this video, watch the clip eject at the 00:27 time-mark. It makes an acrobatic exit, spinning 90° counter-clockwise and then tumbling end over end. At the 1:20 time-mark you can actually see the two sides of the clip oscillating back and forth as the clip flies through the air.
2000 frame per second video shows M1 Garand ejecting spent cartridges and En-bloc clip.
Here’s an interesting project — using a second-hand barrel to upgrade an AR15. Our friend Erik Cortina decided to make his AR15, originally chambered in 6.8 SPC, into a 6.5 Grendel. Erik acquired a “pre-owned” 6.5-06 match barrel through our Shooters’ Forum. Erik inspected the barrel with a bore-scope and confirmed it was in good shape after the first few inches (past the chamber). The 6.5-06 barrel had more than enough length, so he trimmed off the chamber end, then contoured the barrel to fit his AR15. This is a smart way to upgrade a gun without spending $350 or more on a brand new barrel.
In the first video, Erik explains the process of converting his 6.8 SPC AR15 into a 6.5 Grendel: “I take the upper completely apart and pull barrel off which will be used to take dimensions for new barrel. The new barrel will be turned from an old competition heavy barrel. All the barrel reaming will be done using JGS reamers. I will also use JGS reamers to make a seating and F/L sizing die.”
In the second video, Erik contours the “pre-owned” barrel to fit his AR. He uses an old bolt-action 6.5-06 competition barrel and cuts it to 17″ long and contours it to fit his AR-15. The barrel is turned down on a manual lathe to .750″ outside diameter for the majority of its length in order to fit the gas system barrel block that is made for a .750″ barrel. After contouring, the barrel will be threaded and chambered.
Getting started in the shooting sports can be intimidating, especially for women. Thankfully, there are many training resources available. NSSF has compiled a series of target shooting tips for women, by women. These tips, presented by instructors Deb Ferns, Kay Miculek, and Lena Miculek-Afentul, cover basic shooting methods and safety. Topics include pistol grip, stance, eye dominance, and ear protection. These tips can benefit any novice shooter, not just the ladies.
Rifle Stance and Hold (for Action Shooting)
Champion 3-Gun shooters Kay Miculek and Lena Miculek-Afentul demonstrate rifle stance basics and how to properly hold an AR-platform rifle for action shooting.
Grip and Stance for Pistol Shooting
Mother/daughter team Kay Miculek and Lena Miculek-Afentul demonstrate proper grip and stance for shooting semi-automatic pistols in action disciplines.
Eye Dominance (and Hand/Eye Cross-Dominance)
Learn how to identify your dominant eye. Kay Miculek, a cross-dominant shooter, explains how other cross-dominant individuals can maintain a proper sight picture.
Ear Protection — Double-Up for Safety
Babes with Bullets Director Deb Ferns says the most common complaint among new shooters is, “It’s too loud!” Deb recommends “doubling up” — wearing muffs OVER soft foam earplugs. That’s “sound advice” for any shooter.
You probably know that MOA stands for “Minute of Angle” (or more precisely “minute of arc”), but could you define the terms “Milrad” or “MIL”? In his latest video, Bryan Litz of Applied Ballitics explains MOA and MILs (short for “milliradians”). Bryan defines those terms and explains how they are used. One MOA is an angular measurement (1/60th of one degree) that subtends 1.047″ at 100 yards. One MIL (i.e. one milliradian) subtends 1/10th meter at 100 meters; that means that 0.1 Mil is one centimeter (1 cm) at 100 meters. Is one angular measurement system better than another? Not necessarily… Bryan explains that Mildot scopes may be handy for ranging, but scopes with MOA-based clicks work just fine for precision work at known distances. Also because one MOA is almost exactly one inch at 100 yards, the MOA system is convenient for expressing a rifle’s accuracy. By common parlance, a “half-MOA” rifle can shoot groups that are 1/2-inch (or smaller) at 100 yards.
What is a “Minute” of Angle?
When talking about angular degrees, a “minute” is simply 1/60th. So a “Minute of Angle” is simply 1/60th of one degree of a central angle, measured either up and down (for elevation) or side to side (for windage). At 100 yards, 1 MOA equals 1.047″ on the target. This is often rounded to one inch for simplicity. Say, for example, you click up 1 MOA (four clicks on a 1/4-MOA scope). That is roughly 1 inch at 100 yards, or roughly 4 inches at 400 yards, since the target area measured by an MOA subtension increases with the distance.
MIL vs. MOA for Target Ranging
MIL or MOA — which angular measuring system is better for target ranging (and hold-offs)? In a recent article on his PrecisionRifleBlog.com website, Cal Zant tackles that question. Analyzing the pros and cons of each, Zant concludes that both systems work well, provided you have compatible click values on your scope. Zant does note that a 1/4 MOA division is “slightly more precise” than 1/10th mil, but that’s really not a big deal: “Technically, 1/4 MOA clicks provide a little finer adjustments than 1/10 MIL. This difference is very slight… it only equates to 0.1″ difference in adjustments at 100 yards or 1″ at 1,000 yards[.]” Zant adds that, in practical terms, both 1/4-MOA clicks and 1/10th-MIL clicks work well in the field: “Most shooters agree that 1/4 MOA or 1/10 MIL are both right around that sweet spot.”
Have you recently purchased a new scope? Then you should verify the actual click value of the turrets before you use the optic in competition (or on a long-range hunt). While a scope may have listed click values of 1/4-MOA, 1/8-MOA or 0.1 Mils, the reality may be slightly different. Many scopes have actual click values that are slightly higher or lower than the value claimed by the manufacturer. The small variance adds up when you click through a wide range of elevation.
In this video, Bryan Litz of Applied Ballistics shows how to verify your true click values using a “Tall Target Test”. The idea is to start at the bottom end of a vertical line, and then click up 30 MOA or so. Multiply the number of clicked MOA by 1.047 to get the claimed value in inches. For example, at 100 yards, 30 MOA is exactly 31.41 inches. Then measure the difference in your actual point of impact. If, for example, your point of impact is 33 inches, then you are getting more than the stated MOA with each click (assuming the target is positioned at exactly 100 yards).
How to Perform the Tall Target Test
The objective of the tall target test is to insure that your scope is giving you the proper amount of adjustment. For example, when you dial 30 MOA, are you really getting 30 MOA, or are you getting 28.5 or 31.2 MOA? The only way to be sure is to verify, don’t take it for granted! Knowing your scopes true click values insures that you can accurately apply a ballistic solution. In fact, many perceived inaccuracies of long range ballistics solutions are actually caused by the scopes not applying the intended adjustment. In order to verify your scope’s true movement and calculate a correction factor, follow the steps in the Tall Target Worksheet. This worksheet takes you thru the ‘calibration process’ including measuring true range to target and actual POI shift for a given scope adjustment. The goal is to calculate a correction factor that you can apply to a ballistic solution which accounts for the tracking error of your scope. For example, if you find your scope moves 7% more than it should, then you have to apply 7% less than the ballistic solution calls for to hit your target.
NOTE: When doing this test, don’t go for the maximum possible elevation. You don’t want to max out the elevation knob, running it to the top stop. Bryan Litz explains: “It’s good to avoid the extremes of adjustment when doing the tall target test.I don’t know how much different the clicks would be at the edges, but they’re not the same.”
Should You Perform a WIDE Target Test Too?
What about testing your windage clicks the same way, with a WIDE target test? Bryan Litz says that’s not really necessary: “The wide target test isn’t as important for a couple reasons. First, you typically don’t dial nearly as much wind as you do elevation. Second, your dialed windage is a guess to begin with; a moving average that’s different for every shot. Whereas you stand to gain a lot by nailing vertical down to the click, the same is not true of windage. If there’s a 5% error in your scope’s windage tracking, you’d never know it.”
Verifying Scope Level With Tall Target Test
Bryan says: “While setting up your Tall Target Test, you should also verify that your scope level is mounted and aligned properly. This is critical to insuring that you’ll have a long range horizontal zero when you dial on a bunch of elevation for long range shots. This is a requirement for all kinds of long range shooting. Without a properly-mounted scope level (verified on a Tall Target), you really can’t guarantee your horizontal zero at long range.”
NOTE: For ‘known-distance’ competition, this is the only mandatory part of the tall target test, since slight variations in elevation click-values are not that important once you’re centered “on target” at a known distance.
Thinking of getting started in 3-Gun competition? In this NSSF video, Top Shot Finalist Chris Cerino reviews the hardware you’ll need for multi-gun matches. Chris talks about carbine configurations — including barrel, handguard, and optics options. In reviewing shotguns, Chris discusses shotshell caddies and the high-capacity extended tubular magazines now available. Cerino also demonstrates pistol techniques and explains the key features of a belt/holster rig for 3-Gun competition.
Gun Control — Tips on AR Shooting with Jerry Miculek
In another NSSF video, pro shooter Jerry Miculek provides tips on handling an AR-type rifle in 3-Gun matches. First, Jerry recommends a slightly forward stance, with your nose over your front toe. Second, it is important to have a consistent trigger pull. No matter how good your sight alignment, Jerry cautions, you can miss the target with a sloppy trigger pull. Finally, Miculek recommends placing your non-trigger hand well forward on the handguard. That provides better balance, tames muzzle rise, and gives you better control over the rifle for quick follow-up shots. Some shooters use a low hand position on the magwell, but Jerry says that makes the AR-15 feel top-heavy. Having your support hand out front on the handguard lowers the AR’s perceived center of gravity, allowing faster transitions for better stage times.
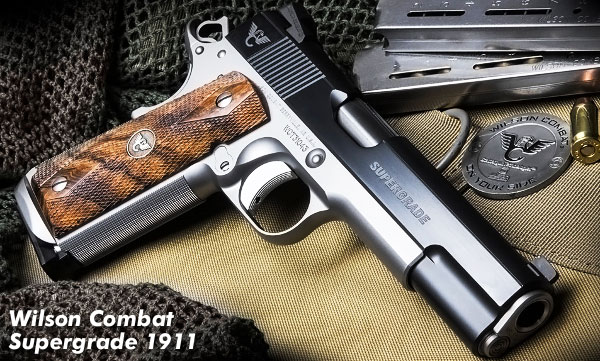
While AccurateShooter.com focuses on rifles, we know that a large percentage of our readers own handguns, with 1911-style pistols being particular favorites. For you 1911 owners, here are four short videos from Brownells showing how to fieldstrip, clean, lubricate, and re-assemble a 1911-style pistol.


Bruce Piatt, 2015 WSC Champion


 Verifying Scope Level With Tall Target Test