Splatterburst 1″ circles, 62 per sheet, 10-pk $9.99. These can be pasted on other paper backers.
We’ve all seen conventional splatter targets with a single large black bullseye. When a shot hits the target, a halo (usually neon yellow) appears around the bullet hole. This makes it easier to see your shot placements indoors, or at long range outdoors. Today we feature a variety of other targets that also offer the cool halo/splatter effect. We’ve found grids, multiple bull targets, sheets with 62 one-inch circle pasters, handgun training targets, and even white background splatter targets (that produce black halos). Try out some of these targets for fun (kids love plinking with splatter targets).
Ruger has created a helpful set of online resources for new Firearm owners. The New Firearm Owner Resources site features a Fundamentals of Firearms Ownership Video Series, Industry Resources for local “hands-on” training, as well as information on safe storage. In addition, this online Resource Center offers a full library of product instruction manuals along with suggestions for recommended safety equipment.
There are a variety of informative videos, hosted by Mark Gurney, Ruger Director of Product Management. These short (2 min. on average) videos provide key information for new gun owners. If you have friends or family members who are new gun owners, they should watch these videos.
Introduction for New Firearms Owners
Safety Rules — The FOUR Fundamental Safety Rules
Range Safety Equipment — What You Need
This video reviews essential Eye and Ear Protection for shooters.
Do you own an RCBS electronic powder dispenser? If you do, take the time to watch this ChargeMaster Tuning video from 8541 Tactical. This nine-minute video demonstrates how to re-program your ChargeMaster to “tune” the dispensing process. The video shows the exact programming procedures to follow, step-by-step. Some folks want a faster powder flow — others tune their machines for a more reliable drop (with fewer over-runs). One cheap and popular modification is to insert a 1″-long section of a McDonald’s plastic straw in the ChargeMaster’s silver dispensing tube. This works surprisingly well to smooth kernel drop and prevent “clumping” that can cause an over-charge. The McDonald’s straw MOD is demonstrated in this video, starting at the 6:22 mark.
Large-Diameter Dispensing Tube Mod
Many folks have had success with the McDonald’s straw modification demonstrated in the above video. However, some folks would like to get even better flow performance (with virtually no clumping). Forum Member Frank B. has come up with a new option using a brass hose fitting with a large outside diameter. The hose fitting (with tape wrapped around the barbed nose section) is placed inside the RCBS dispensing tube (have some kind of wrap — you don’t want metal-on-metal). Here’s how the unit looks installed:
Frank tells us: “I have found a cure for the over-throw problem. It is a simple 1/4″ barbed hose nipple. I wrapped a couple layers of tape around the barbed end for a snug fit. With this in place, I have thrown 100+ charges of Varget without a single overthrow. The ID of the barbed end needs to be approximately 3/16″ to feed a steady flow. This works because of the larger ID at the drop.”
Frank adds: “You can see in the photo that the powder is not stacking up. You can watch it drop one grain at a time. Hope this will take the aggravation out of your case charging.” For best performance with this brass fitting MOD, we recommend de-burring and smoothing out the front edge of the brass fitting over which the kernels drop.
Brass fitting mod suggested by Boyd Allen. We welcome reader submissions.
While many AccurateShooter.com readers load their own competition centerfire rifle ammunition, we all still need factory ammo for our rimfire rifles in .17 and .22 calibers. And most of the 65+ million American handgun owners rely on factory-made ammunition for their pistols and revolvers.
Today’s video collection showcases state-of-the-art ammunition factories in Europe and the United States. You can see the extremely accurate Lapua .22 LR ammo being produced, as well as excellent centerfire ammunition being made by Norma, Remington, Sellier & Bellot and other makers.
From the creation of lead bullet cores to the final packing of ammunition, you can see it all in these videos. Watch primers being made, brass being annealed, bullets being jacketed, tips being inserted, and every phase of production. Weighing and testing procedures are also revealed.
Modern Ammo Production in Multiple Facilities
This 11.5-minute video shows highly automated bullet and ammunition production in multiple facilities in Europe and the USA. You can see bullets produced from start to finish beginning with lead smelting. Then watch pistol and rifle cartridges being made on modern, computer-controlled assembly lines. Watch from start to finish. Here are some notable highlights:
00:10 — Lead Melting Pots and Billet Caster
01:20 — Lead made into strings and then formed into bullets
01:50 — Brass alloy sheets fed into machine and then punched (2:10-2:35).
03:35 — Lead pistol cores being produced
04:15 — Pistol ammo being packaged
06:15 — Ammo loaded into belts
07:15 — Completed primers being shuttled then loaded into brass (Second factory)
07:20 — Bullets being seating into rifle ammunition
07:32 — Cartridge case-neck treatment
07:42 — Robot arm loads finishes cartridges into boxes
08:04 — Cups being pressed (Third Factory S&B)
08:45 — Cartridge case draw
09:06 — Priming pistol cases
09:20 — Bullet production and weight control (10:02)
10:08 — Cartridge assembly and cartridge sealing (10:38)
11:00 — Pistol ammo packaging
Lapua Rimfire Ammunition Production in Germany
This video shows Lapua rimfire ammo production in Schönebeck, Germany. The video shows quantities of the excellent X-ACT .22 LR ammunition being produced and packaged. Starting at the one-minute mark, you can see the ammo being inspected with advanced scanning machines. Then at 1:16 time-mark you can see the ammo accuracy-tested in a tunnel, with results displayed on a computer screen (1:27).
Norma Ammunition Production in Sweden
In this video, the RecoilTV team lead by EIC Iain Harrison ventures to Sweden to visit the Norma ammunition production plant in Huvudentré, Sweden. Demand for Norma ammo has risen dramatically. A Norma marketing manager notes that production has doubled in the last three years.
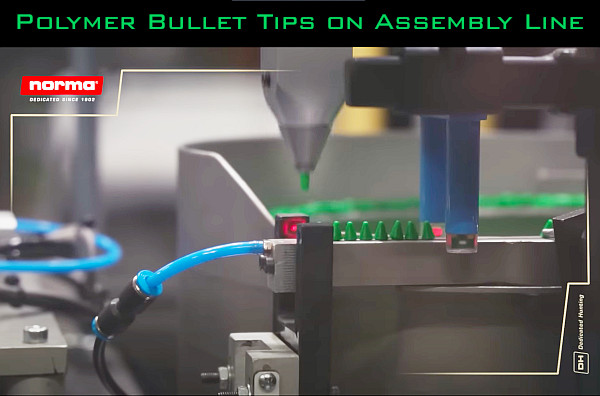
This second Norma ammunition video shows close-ups of the production process and the machinery used for centerfire ammo. This was filmed at the Norma factory in Åmotfors, Sweden, which has operated continuously for over 120 years. Among the many interesting highlight is a sequence showing how polymer bullet tips are inserted. See 6:50 time-mark.
Sellier & Bellot Ammunition Factory in Czech Republic
In this video, Larry Vickers of Vickers Tactical tours a Sellier & Bellot ammunition plant in the Czech Republic. This video shows details of primer production as well as bullet-making, brass-making, and production-line cartridge manufacturing.
Remington Ammunition Plant Re-Opened by Vista Outdoors
This video shows ammo production at the re-opened Remington ammunition plant in Lonoke, Arkansas. “This is one of the largest ammunition manufacturing plants in the world” said Mark Keefe, NRA Publications editorial director. “It was set up in 1969 by DuPont, who owned Remington at the time. They do it all here. Cases, bullets, centerfire rifle, centerfire pistol, rimfire and shotshell.” It’s great to see this plant back in production after Remington Ammunition filed for bankruptcy in 2020 and the assets of the Remington conglomerate were auctioned off. Ultimately, Vista Outdoor, owner of Federal, CCI and Speer, purchased the assets of Remington Ammunition and got the Lonoke plant running again, better than ever.
This article is Copyright 2024 AccurateShooter.com. Republication on any other site gives rise to statutory penalties and compensatory damages.
More and more shooters are “wet-tumbling” their brass (in liquid) with reusable polishing media, rather than using dry media in a vibratory tumbler. The “wet-cleaning” method works best with a rotary tumbler fitted with a water-tight, horizontal drum to hold your brass, cleaning solution, and stainless, pin-type media. The rotary tumbler of choice has been the Thumler’s Tumbler Model B Heavy-Duty. That is a great, sturdy machine, but now you have a more affordable option.
Frankford Arsenal offers “Platinum Series” rotary tumblers designed to clean cartridge brass with liquid and stainless media. The watertight, polymer drum rides on four rollers which rotate the drum around its horizontal axis. Two filters are provided so you can quickly separate your brass and media. A built-in timer allows you to set tumbling sessions up to three hours. There is a large, 7-liter unit and a smaller, 3.3-liter tumbler. Frankford Arsenal says the big version will clean up to 1000 cases of .223 Rem brass. That’s impressive capacity.
Rotary Tumbler Sources Online
The Frankford Arsenal Platinum Series rotary tumblers are sold by major retailers including Grafs.com, Midsouth, MidwayUSA, and Amazon. It’s wise to shop multiple vendors to find the best current pricing.
Amazon often has very competitive pricing on the Frankford Arsenal Rotary Tumblers, both the big, high-capacity 7-liter unit ($179.97) and the smaller 3.3-liter tumbler ($84.99).
How to Wet-Clean Your Brass in a Rotary Tumbler On our main Accurateshooter.com website, you’ll find a comprehensive review of the STM system for cleaning cartridge brass with stainless media. To clean brass with stainless media, start with five pounds of small stainless pins sold by StainlessTumblingMedia.com. Place these along with a gallon of water, a little liquid cleaner, and two pounds of cartridge brass in a rotary tumbler, and run the machine for one to four hours. After cleaning be sure to inspect all your primer holes. CLICK HERE for Brass Cleaning System Review.
Forum Member Tests STM System
Our reviewer, Forum member Jason Koplin, purchased the STM media and a new Thumler’s Tumbler. He then tested the STM cleaning procedure on his own brass, including some extremely dirty and tarnished “range pick-up” brass. Jason was thoroughly impressed with how well the STM process worked — as you can see from the “before and after” photos below. Brass which looked like it was ready for the scrap heap was restored to “like-new” appearance. The process works equally well on both rifle brass and pistol brass. Jason observed that one surprise benefit of the STM cleaning procedure is a big reduction in noise. Jason said the water-filled rotary tumbler was much quieter than his vibratory tumblers. One tip though — you should always inspect every cartridge carefully after wet-tumbling with stainless media. With large-flash-hole brass it is possible to have a pin stuck in a flash hole. This is rare, but it CAN happen.
33XC — Popular ELR Cartridge
Paul Phillips is a past King of 2 Miles (K02M) winner. The founder of the Global Precision Group, Paul is one of the top ELR marksmen on the planet. He has also been a team-mate of past K02M winners.
In 2019, Paul had this rifle built for the 25-lb max, .338 caliber-or-under ELR Class. This is chambered for the 33XC, an efficient cartridge devised by 11-time National HP Champion David Tubb. With promising initial testing at 500 yards, it looks like Paul’s 33XC project is a success. The rifle’s first match was the NRA Extreme Long Range Championship held in 2019 at Camp Atterbury, Indiana.
Paul reports: “The 33XC is ready… I have tested loads from 3100-3450 FPS and and will settle on a load around 3250 FPS [which is] my most accurate load so far. The Peterson Cartridge brass is really working well.”
Paul states he would like to look for a higher node from 3300-3400 GPS: “Next stop is with the Applied Ballistics LLC mobile labratory and radar testing with a PDM.” Paul cautions: “I encourage everyone to start low and work up. Every chamber, barrel, and components are a little different.”
During initial testing, Paul’s 33XC put three shots in 0.27″ at 100. Then, at 500 yards, the rifle produced a 3-shot group around 1/3-MOA with just 1.22 inches of vertical. That’s pretty impressive for early testing. Paul will also be trying some Berger bullets soon. When he determines the most accurate load, Phillips will stretch the rifle’s legs, shooting out to 2500 yards and beyond.
Quote: “The Cutting Edge Bullets are not the highest BC but they are very stable and consistent at ELR (sub-sonic) ranges and that’s the most important factor in finding the best ELR bullet. I actually test all my bullets at sub-sonic speeds to make sure they are consistent and stable. Finding a good load at 500 yards is just the first part. The real test is shooting them at sub-sonic speeds and see how consistently they group. This is what gives you the highest percentage to impact at 2 miles and beyond.”
This rifle features a BAT action mated to a 34″ Bartlein barrel chambered for David Tubb’s new 33XC cartridge. Paul Phillips is currently running Cutting Edge 275gr Lazer solid bullets. Paul notes: “I also have a .338 Lapua Magnum barrel and 300gr Berger bullets for the restricted class in France.” Paul gave special thanks to Alex Wheeler for doing the metal work and Alex Sitman for doing the bedding.
Rifle Component List
Action: BAT Machine CTH dual-port action
Trigger: Bullet Central Bix’N Andy
Barrel: Bartlein 1:8″-twist barrel (34″)
Chambering: 33XC for Peterson brass
Stock: McMillan A6 Super Mag, Bedding Alex Sitman
Scope: Nightforce Optics 7-35x56mm F1 ATACR.
Bipod: Duplin Rifles
Paul Phillips notes: “Alex Sitman has been bedding rifles stocks for most of his life. I believe that [bedding] is a very important … to keep consistent accuracy and repeatable zeros after traveling all over the globe.”
Even with the TacomHQ Charlie Tarac scope prism in place, the rifle makes the 25-pound weight limit with Duplin Rifles bipod. Paul says: “I love it when a plan comes together!! I’m under by 2 ounces!”
About the 33XC (eXtra Capacity) Cartridge
David Tubb invented the 33XC cartridge because he thought the CheyTac cases were too much trouble — requiring a larger action, oversize presses, and ultra-expensive dies. The 33XC was designed to fit .338 Lapua Magnum-size actions and use normal reloading presses.
The 33XC (eXtra Capacity) has 137.5 grains of H2O capacity with over 125 grains of usable powder capacity while leaving the 0.393″ neck unfilled for bullet seating.
The 33XC has a .338 Lapua Magnum lineage. Think of it as a better, 35°-shoulder .338 LM. David explains: “The 33XC uses standard reloading dies along with a 7/8″ x 14 TPI reloading press. There is no fire-forming — all case ‘improving’ has already been done with a production case that has 20 grains more powder capacity, 35-degree shoulder, and longer neck compared to a .338 Lapua Magnum. This puts the various .338 Lapua wildcats and the Rem Ultra Mag Improved into the ‘also ran’ category. They simply can’t compete with the velocities attainable with the 33XC.”
The 33XC is based off of a .580″ bolt head. Tubb states that “A fired case will extract with little effort when using a properly-polished chamber with a maximum powder charge after resizing with the Superior Shooting Systems FL sizing die.” Tubb’s 33XC die reaches the case head which is important for accuracy. Peterson Cartridge produces the 33XC brass for Superior Shooting Systems. This high-quality brass costs $260 for 100 cases (i.e. $2.60 per case), and can be purchased directly from Superior Shooting Systems.
Bonus Video — Global Precision Group Team Makes 4-Mile Hit
With a .416 Barrett rifle, Team GPG makes a 4-mile impact that is captured on video during team practice. James Devoglaer was shooting his GPG spec .416 Barrett with Team Captain Paul Phillips doing the ballistics and wind. Spotters were David Parrish and Derek Rodgers. Forward Observers were John Droelle and Mauro Del Mastro. Approximately 60 shots were taken before impact. There were four 3-shot groups that measured under 2 MOA at 4 miles. The .416 Barrett cartridges were loaded with 550gr Cutting Edge bullets and Vihtavuori powder.
Jewell triggers are still the most-used triggers on competition benchrest and F-Class rifles and they are also popular for hunting, varmint, and tactical rifles (with or without safeties). While a Jewell trigger can work for years with minimal maintenance, if the trigger becomes gunked up, it may be necessary to disassemble the trigger for a thorough cleaning. Our friends Ed and Steve, aka the 6.5 Guys, have produced a helpful video that shows how to disassemble and then reassemble a Jewell trigger.
Why You May Need to Disassemble Your Jewell Trigger — the 6.5 Guys
Jewell triggers are a popular choice in the sport of long range precision shooting, and like everything else require regular cleaning and maintenance. In most cases they can be cleaned with charcoal lighter fluid or dropped into an ultrasonic cleaner. Should the situation require, they can be completely disassembled according to the Jewell Trigger Manual.
We ran into a situation where we had to dissemble a trigger due to the entrapment of some sticky dirt that couldn’t be removed with an ultrasonic cleaner. Our first step was to find some step-by-step instructions but we couldn’t find anything.
Recognizing that other shooters might be in the same situation we produced a step-by-step guide and video, published in full on 65Guys.com. These instructions will work with a left- or right-handed trigger. In our case we worked with a left-handed BR model trigger with safety and bolt release.
Step-by-Step Instructions are provided on 65Guys.com website. We recommend you read all the instructions carefully before you even think about disassembling your trigger. This video explains the process so you can get a sense of what is involved.
Today we showcase five YouTube videos that explain basic reloading processes. This article primarily focuses on the .45 ACP cartridge because this a very good choice for hand-loaders getting started. The .45 ACP is one of the easier cartridges to reload, because it has a large case diameter and large primer pocket, and because it operates at relatively low pressures (compared to rifle rounds).
We recommend that new reloaders consider starting with the .45 ACP cartridge. There are many reasons why the .45 ACP is a good choice for those just getting started in hand-loading:
1. The case is fairly short but has a relatively large diameter (and minimal taper), so it is easy to see inside the case. That helps you quickly check powder levels.
2. Many good powders (for the .45 ACP) will fill the case over 60%, so you will have an obvious overflow if you double-charge by accident.
3. The .45 ACP round runs at relatively low pressures, but delivers excellent accuracy.
4. Good .45 ACP brass lasts a long time, is easy to size, and is good for many reloads.
5. Along with 1911s, there are fine .45 ACP revolvers that shoot the round with moon clips.
6. The vast majority of .45 ACP brass uses large pistol primers (although there ARE some small primer pocket varieties*). We find that large primers are easier to pick up and handle if you are using a single primer tool.
The .45 ACP (Automatic Colt Pistol) cartridge is a rimless straight-walled handgun cartridge originally developed in 1904 by John Moses Browning for use in his prototype Colt semi-automatic pistol. After successful military trials, it was adopted as the standard chambering for Colt’s M1911 pistol.
For reloading, there are many good powder choices. We recommend Vihtavuori N320. This is very accurate and burns cleaner than some otherwise good powders, such as Accurate (AA) No. 5 and Unique.
Basic Reloading for the .45 ACP Cartridge
This is the most-viewed .45 ACP reloading video on YouTube. It is directed primarily for the novice or prospective reloader. It covers the basic processes: case inspection, cleaning, trimming, sizing, priming, powder filling, bullet seating, and crimping. The video creator notes: “Trimming pistol/revolver brass is optional and usually not necessary. it was included because that is what I did when I first began reloading, before I found out that handgun brass does not stretch as much as bottleneck rifle brass.”
How To Reload .45 ACP Start to Finish on Progressive Press
This is a detailed 19-minute video that shows the reloading process start to finish, along with an bit of history on the .45 ACP cartridge. The video begins with case cleaning using a tumbler. The cartridges are loaded with Hodgdon CFE pistol powder, Federal primers, and 230gr plated bullet. Equipment used in the video are: Hornady LnL progressive press, Hornady Carbide die set and taper crimp die, RCBS 505 balance scale, and harbor freight wet tumbler. While we like the efficiency of a progressive press, we recommend that novice hand-loader begin with a single stage or turret press. We recommend a powder that fills the .45 ACP case pretty full. That reduces the risk of double-charging.
Safety First When Loading All Cartridges
Along with the first two instructional videos above, we include two important videos focused on reloading safety. In the first video, UltimateReloader’s Gavin Gear explains how to check your cartridge during the loading process to eliminate squib loads and other defects. In the second video, Starline Brass tech Hunter Pilant explains how to avoid double charges.
Load .45 ACP Safely — Avoid Squib Loads and Overcharges
You need to check the powder level of EVERY round you load. Do this visually BEFORE seating a bullet. (Or, with a progressive press, use a lock-out die that monitors powder levels). This is very important because a squib load (with little or no powder) can leave a bullet lodged in the barrel. A subsequent full, live round can cause a Kaboom with dire consequences.
Preventing Double Charges — Use a Case-filling Powder with .45 ACP
IMPORTANT TIP: Use a bulky powder that fills your case more than half way with a correct charge. “This will over-fill the case if it is double-charged, making it impossible to load. This is one safeguard that can keep you from making a big [mistake]” (Hunter Pilant, Starline). A bulky powder with high fill level will also be easier to see inside the case.
Good Powder Choices for the .45 ACP
We know that many of our readers own .45 ACP handguns and load for this extremely accurate “classic” cartridge. When selecting a powder for the .45 ACP, there are many good options. All the major powder manufacturers make propellants with appropriate density and burn rate characteristics for the .45 ACP. Popular choices include: AA #5 (Accurate Powder); Bullseye (Alliant); Clays, HP-38, and Titegroup (Hodgdon); VV N310 and N320 (Vihtavuori); and WW 231 and WST (Winchester). We’ve tried all those powders in a variety of .45 ACP handguns. When we consider all the factors that make for a good pistol powder, we think Vihtavuori N320 is one of the best available propellants for the .45 ACP.
Vihtavuori N320 is very accurate, it meters well, and it burns clean, with minimal smoke and flash. If you haven’t tried VV N320 yet, you should.
Pros and Cons of Different Powders for the .45 ACP
This Editor has personally tried out eight or more different powders for the .45 ACP. Bullseye works but it is very dirty (both smoke out the barrel and sooty powder fouling on case). Though it otherwise burns clean, Titegroup leaves a singular (and nasty) high-temp flame streak on your brass that is hard to remove. AA #5 is a good choice for progressive press newbies as you use more powder so a double charge will (usually) be obvious. I like AA #5 but N320 was more accurate. Clays burns clean but some powder measures struggle with flake powders like this. WW 231 offered excellent accuracy and metered well, but it kicked out sparks with little pieces of carbon that would hit me in the face.
The Progressive Option — Loading .45 ACP on the Dillon 550B
Once you have mastered the basics of reloading for the .45 ACP, if you require large quantities of ammo, you may want to consider getting a progressive press. Progressive presses can significantly increase your ammo output, but there are also important safety considerations. You need to be careful about powder levels and priming. In this video, Gavin Gear explains how to reload safely with a Dillon 550B progressive press. The equivalent current model is the Dillon 550C.
.45 ACP Ammunition Loading Guide — Nosler Data
If you “roll your own” .45 ACP cartridges, there are many good powder choices. Our favorites are Vihtavuori N320, AA No. 5, and Hodgdon TiteGroup, but there are many other good choices. You’ll find these three recommended powders (plus many others) in the .45 ACP Load Data Charts from Nosler. Shown below are the Nosler Guides for 185gr bullets and 230gr bullets. Right-click each image below to access/download printable PDF files.
Click for PDF File
Click for PDF File
* However, be aware that CCI and other companies are now manufacturing .45 ACP brass with SMALL PRIMER POCKETS. Whenever you get new brass, be sure so check ALL the cases for primer size, and segregate large and small in two groups. Attempting to push a large primer into a small primer hole can lead to jams, or worse, dangerous detonation. Be CAREFUL!
Hickok45 Carves Pumpkin Faces with Handguns
To celebrate Halloween, here’s an example of master wheelgun marksmanship. Popular YouTube host Hickok45 skillfully creates a smiling face on a pumpkin using a S&W Model 29 .44 Magnum revolver. This is the classic blued, double-action revolver popularized by Clint Eastwood as Dirty Harry. This has become a tradition for Hickok 45 — every year he puts a face on a pumpkin using a different firearm, typically a pistol, but he’s used a couple rifles as well. A 2022 pumpkin-carving effort was done with a suppressor-equipped 9mm Mini Uzi. SEE PUMPKIN Shooting Playlist for all Hickok45’s annual pumpkin blasts. The lead video shows a pumpkin face-making session with a .44 Magnum.
Want to see more? Hickok45 has also carved pumpkins with a dozen firearms. Here is a pumpkin carved with a genuine, WWI-era Colt 1911 carried by an American soldier in the Pacific theater.
And here is a rather grim-looking face applied using the .40 SW Glock 23.
With inflation, the increased cost of .223 Rem centerfire ammo has driven more folks to shooting .22 LR rimfire ammo, both for fun and practice. Thankfully, handy conversion kits will let you shoot .22 LR ammo from your existing .223/5.56 AR-15 platform rifle. This allows low-cost training with no change in rifle balance, ergonomics, and/or optics.
The CMMG Bravo .22 LR Conversion Kit provides a replacement bolt/bolt carrier along with three 25-round magazines with special .22 LR-fitted followers and ammo slots. This allows you to shoot rimfire ammo from any AR-15 chambered for the .223 Rem (5.56×45). The CMMG Bravo has an integrated extension that fits into your current chamber. The rimfire bullet passes through this extension and then enters the barrel. This conversion kit is now on sale at Brownells for $172.99 with three 25-rd mags.
The CMMG Bravo conversion Kit comes with blowback-operated .22 LR bolt carrier, rubber protector for bolt carrier tip, and three 25-round polymer magazines. To use, simply replace the rifle’s .223 Rem bolt and carrier with the Bravo .22 LR conversion unit and load up the included magazine(s) with rimfire ammo.
To use the CMMG Kit, simply remove the centerfire bolt/bolt carrier, and replace it with the CMMG silver colored bolt shown above. CMMG states: “For best performance use a round-style hammer as notched hammers can cause function issues.” Testers have stated that high-velocity .22 LR ammo works best, and CMMG notes that “36gr plated-nose bullets have proven to be the best choice for function.” The copper-plated bullets help reduce fouling.
Ultimate Reloader Tests CMMG .22 LR Conversion Kit
Our friend Gavin Gear of UltimateReloader.com recently tested the CMMG .22 LR AR Conversion Kit. He observed that installation was very straight-forward and the CMMG magazines worked well. He and fellow tester Travis Fox shot the unit both slow-fire and rapid-fire successfully.
Gavin and Travis found the CMMG Kit easy to install and fun to use. With an AR that can shoot both .223 Rem and .22 LR, it’s like having “two guns in one”. Travis was impressed with the ease of use: “It is so simple to change over to the CMMG .22 LR AR kit! It took me about 68 seconds the very first time I tried. Each time after that it took me about 40 seconds — it’s that simple. It takes longer to fully load one of the mags than it does to switch over from .223/5.56 to .22 LR and back.”
The AR shot very well with the higher-velocity ammo types. 100% functioning was achieved with both 40gr Federal Game Shok ammo and American Eagle High Velocity 38gr Copper-plated HP ammo. NOTE: CMMG does recommend high-velocity Copper-plated rimfire ammunition.
Maintenance Tip — After converting back to your centerfire .223 Rem (5.56), Travis says “make sure to clean the gas tube and components as .22 LR tends to run dirty”. READ Full Test on UltimateReloader.com.
CMMG Bravo Conversion Kit Gets Thumbs Up from Gavin and Travis
“Does this conversion kit get the Ultimate Reloader stamp of approval? Absolutely! In these times of ammunition/component scarcity this gives options to shooters. Finding bulk .22 LR can sometimes be easier than 223/5.56. This kit gives that option at a great price. Any chance to keep skills up and familiarize new shooters to a platform is a good thing. Basically two rifles for a lot less than another rifle.”
How to Install CMMG Bravo .22 LR Conversion Kit
The Brownells video below shows the installation process step-by-step:
In this instructional video, a Brownells gunsmith demonstrates (step by step) how to install, disassemble, clean, lubricate, and reassemble the CMMG AR-15 .22 LR Conversion Kits. Clear the rifle and make safe before you start the conversion. Separate the upper and lower, remove the standard bolt carrier group. You then install the conversion bolt and connect the upper and lower as normal.
Details of CMMG .22 LR Conversion Kit
“For years I’ve had a CMMG conversion kit. It’s a drop-in system that’s … very reliable and it’s accurate. The [CMMG conversion] has lower recoil [and is] great for training. Even though ammo prices have gone through the roof, .22 LR is still cheaper to shoot than anything else.” — SootchGear




 On our main


 33XC — Popular ELR Cartridge


 Good Powder Choices for the .45 ACP


 Hickok45 Carves Pumpkin Faces with Handguns


