John Nosler lived 97 years, passing in 2010. During his long lifetime, John was an iconic figure in the shooting and hunting world. Considered a true pioneer in bullet and ammunition design, Nosler developed the famous Partition bullet in the 1940s. Born on April 4, 1913 in Brawley, California, John built his business from scratch. He founded his bullet company in 1948. He was considered to be one of the great innovators whose designs helped create the premium bullet category and influenced ammunition manufacturers worldwide.
Moose-Hunt Inspires Partition Bullet Design
While hunting in Canada, John experienced a bullet failure on the hide of a mud-caked bull moose. He then began developing a revolutionary new projectile, which he called the “Partition”, because of the barrier that separated the bullet into two sections. One year later, John and a friend traveled back to British Columbia with his new Partition bullets, which were designed to provide deep penetration and expansion. The men bagged two moose with two shots, and the rest is history.
NRA Golden Bullseye Pioneer Award
In recognition of his contribution to the shooting sports industry, John was the unanimous choice for the inaugural 2007 NRA Golden Bullseye Pioneer Award. The award was the highlight of a long and fruitful career. Even though he officially retired in 1988 when his son and daughter-in-law, Bob and Joan Nosler purchased the company, John still managed to come to the office on a daily basis until his health declined.
Today, John’s son Bob Nosler still presides over the company as president and CEO of Nosler, Inc., based in Bend, Oregon. Along with bullets, the company now produces cartridge brass, loaded ammunition, and hunting rifles.
To learn more about John Nosler and his bullet designs, get your hands on Going Ballistic, a “Professional Memoir” told by John Nosler to outdoor writer Gary Lewis. CLICK HERE to hear a short John Nosler audio clip or to order the book from the author.
John Nosler remained an avid hunter and shooter even late in life. Gary Lewis recalled that, at age 92, John Nosler attended the opening of a new shooting range outside Bend, Oregon. Even in his nineties, Nosler managed to drill two shots inside nine inches at 1000 yards. John Nosler leaves a legacy that will benefit hunters and shooters’ nationwide. The John A. Nosler Endowment of The NRA Foundation, sponsors the NRA’s Basic Rifle Training Program which instructs novices in safe rifle handling.
Will you be traveling out of state this spring? Or do you have questions about your own state’s firearms laws? Then you’ll want to have quick access to summaries of gun laws in America’s 50 states. Here’s a very valuable online resource you may want to bookmark.
The NRA-ILA (Institute for Legislative Action) has a great feature on the NRA-ILA’s homepage. From the NRA home page, NRA-ILA.org, you can instantly access a host of information for all 50 states. There is a menu box that includes all 50 states plus the District of Columbia, New York City, and Guam. Look for the box that appears below the “NRA-ILA Top Stories Banner”:
Alternatively, look at the UPPER LEFT for three horizontal lines. Click that to open a drop-down menu. Then select the third line Gun Laws > State Gun Laws. That will open a page with all the 50 states listed in order A to Z. Or bookmark the NRA-ILA State Gun Laws Page.
NOTE: Some of this information is not completely current, so you may want to check with more detailed, up-to-date reference, such as the Legal Heat $20 50 State Guide to Firearms Laws and Regulations (2023 Edition). Most of the information in the book is also available in the FREE Legal Heat Firearms Law APP for Android and iOS (Apple) mobile devices. Here are screenshots from the Legal Heat iPhone App.
Shown below is part of the NRA-ILA’s coverage for Texas. There is a summary of the most important Texas gun laws. Below that is a map showing the states that recognize Texas carry permits.
Headed to SHOT Show next week? Good news, SHOT Show organizer NSSF now has multiple locations for getting badges. That will make picking up your badge easier once you arrive in Las Vegas. Find the location below that works best for you. Then go to the official Badge Pickup Location Page. On that page if you click on a specific location, it will provide more detailed information, including hours of operation.
SHOT Show 2024 Registration and Badge Pickup Locations:
Venetian Expo — Main Registration
Caesars Forum — Main Registration
Venetian Expo — Express Registration
Venetian Expo — Int’l Trade Center Registration
Venetian Expo — Media Registration
Venetian Expo — Education Registration
Venetian Expo — Supplier Showcase Registration
Industry Day at the Range (Boulder City)
Airport — Terminal 1
Airport — Terminal 3
Circus Circus
Horseshoe
MGM Grand
Mirage
POV Vehicle Lot
Treasure Island
If you are attending SHOT Show, we recommend you visit the Badge Pickup Location Page. There are specific details for each location where you can get your badges and credentials. Here is an example for Terminal 1 at the Las Vegas Airport:
Please note that some locations, such as the airport terminals, have limited hours. However, starting Sunday, January 21, 2024 at 8:00 AM, there is 24-Hour Registration for approved persons at the Express Registration area located next to the Summit Show Room at the Venetian Expo Center. To help cut down on amount of people in lines, NSSF encourages a company’s designated onsite contact to pick up all the badges for his/her team.
Do you have a friend or family member who is a first-time gun owner? Then show them this article. It provides important guidelines for new gun owners. There’s an Infographic printed below. And, there’s a helpful Firearm Storage and Safety Assessment Quiz. This walks gun owners through questions related to safe handling and storage of firearms. Here is Part One of the Quiz. If you click on this part, you can complete the entire Quiz and see how you score.
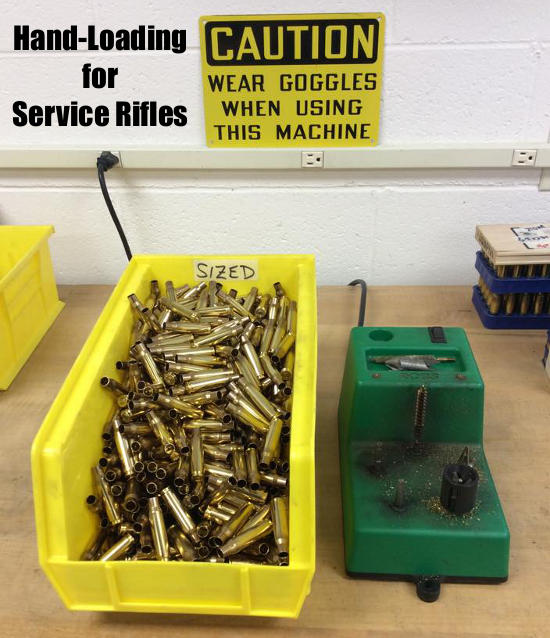
The U.S. Army Marksmanship Unit (USAMU) has published a great series of reloading “how-to” articles on its Facebook Page. This post covers key factors to consider when loading ammunition for Match Rifles and Service Rifles, with a particular focus on self-loading “gas guns”. Visit the USAMU Facebook Page regularly for other, helpful reloading and marksmanship tips.
We offer some “cardinal rules” to help new gas-gun handloaders with safety and efficiency. These address both Match Rifle and Service Rifle versions of the AR15, M1 Garand, M1A, and M110. However, they can also improve safe reloading for many other auto-loaders such as M1 Carbines, FALs, SIGs, etc. The author distilled these principles many years ago to help focus on the essential aspects of these rifles.
RULE ONE: Service Rifles Are Not Benchrest Rifles
Gas-guns require a relatively loose fit between ammunition and chamber (vs. bolt actions) for safe, smooth operation. Many techniques, such as neck sizing and keeping cartridge headspace quite tight, are popular in the extreme bolt gun accuracy realm. However, they are of little value with Service Rifles, and some could even be hazardous. Before adopting a specialized technique, seriously consider whether it is appropriate and beneficial in a gas-gun.
RULE TWO: Never Compromise Safety to Obtain Accuracy
Example: If choosing a brand of great, but ultra-sensitive match primers offers possibly better accuracy at the risk of slam-fires in your design of rifle, don’t do it! You are issued exactly two eyes and ten fingers (best-case scenario). Risking them trying to squeeze 0.25 MOA better accuracy out of an M1A, etc. simply isn’t worth it.
RULE THREE: Tailor the Precision to Your Individual Skill and Your Rifle’s Potential
This has been addressed here before, but bears repeating for newcomers. If you are struggling to break out of the Marksman Class, or using a CMP M1 “As-Issued,” then laboriously turning the necks of your 600-yard brass is a waste of time. Your scores will improve much faster by practicing or dry-firing. On the other hand, if the reigning champions anxiously check your scores each time you fire an event, a little neck-turning might not be so far-fetched.
Verifying Load Improvements — Accuracy hand-loading involves a wide variety of techniques, ranging from basic to rather precise. Carefully select those which offer a good return on investment for your time and labor. In doubt? Do a classic pilot study. Prepare ammo for at least three or four ten-shot groups with your new technique, vs. the same with your standard ammo. Then, pick a calm day and test the ammo as carefully as possible at its full distance (e.g. 200, 300, or 600 yards) to verify a significant improvement. A little testing can save much labor!
This video explains the procedure for ordering an M1 Garand from the CMP.
RULE FOUR: Be Your Own Efficiency Expert
Serious Service Rifle shooters generally think of ammunition in terms of thousands of rounds, not “boxes”, or even “hundreds”. Analyze, and WRITE DOWN each step in your reloading process. Count the number of times each case is handled. Then, see if any operations can be dropped or changed without reducing safety or accuracy. Eliminating just two operations saves 2000 steps per 1000 rounds loaded. Conversely, carefully consider any measurable benefits before adding a step to your routine.
RULE FIVE: In Searching for Greater Accuracy with Efficiency, Look for System Changes
For example, instead of marking your 300-yard rounds individually to differentiate them from your 200-yard ammo, would a simple change in primers work? If accuracy is maintained, using brass-colored primers for 200 and silver for 300 provides an indelible indicator and eliminates a step! Similarly, rather than spending hours selecting GI surplus brass for weight and neck uniformity, consider splurging on some known, high-quality imported match brass for your 600-yard loads. Results should be excellent, time is saved, and given limited shooting at 600 yards, brass life should be long.
RULE SIX: Check All Your Primers Before Packaging Your Loaded Ammo
This seems simple and even intuitive. However, many slam-fires (which were much more common when M1s and M1As were the standard) are due, at least in part, to “high” primers. Primers should be seated below flush with the case head. The USAMU has addressed this at length in a previous column, but each round should be checked for properly-seated primers before they are packaged for use.
Report by Craig Arnzen, Area419.com
It’s easy to think about shooting your first precision rifle match and worry about all of the gear and trinkets that you may need to make it through. In reality, the old rules apply — keep it simple.
We wanted to put together for you a no-nonsense list of the Top Five Gear Items you need for your first match. This list focuses on the “must-have” items you’ll need for PRS-Style competitions.
1. A Rifle (That is Reliable and Sub-MOA Accurate)
Your rifle is the most obvious piece of kit, but we can give you a little more information. Most of the guys you’ll find out there are shooting 6.5 Creedmoor. Yeah, there are guys using .308 Wins and 6mm Dashers, but the 6.5 Creedmoor makes up more than half of the rounds shot in PRS competition, when looking at both national and club matches. Your comp rig needs to be mag-fed and shoot better than 1 MOA. It DOESN’T need to be better than 0.5 MOA (half-MOA). With most targets being 2-3 MOA in size, a half-MOA gun will do just fine. More accuracy is better of course, but you don’t need an exotic quarter-MOA rig to win.
[Editor’s NOTE: PRS does offer a Gas Gun division, but most guys start out with a bolt-action rifle, which will be less maintenance-intensive than an AR-platform rig.]
Muzzle brakes, like our Area 419 Hellfire, are also very popular as much of the PRS game is recoil management. If you can’t see your misses, you’re sure to have more of them.
The rifle also needs an optic with repeatable clicks and a reticle with Mil- or MOA-based hashmarks. The clicks can be either Mil system or MOA system (Mil is more common), so long as the click values match the reticle (i.e. you don’t want 1/4-moa clicks with a Mil-marked reticle). How much power do you need? Anything that zooms in the mid-teens will suffice. I could shoot a match with a fixed 12X scope and not feel disadvantaged. We love the Kahles K624i, if you’re looking for a suggestion.
Oh, and you’ll want a bipod — but the choice in bipod deserves a whole separate article by itself. Nothing wrong with starting out with a Harris swivel. Then you might look at different bipods on other competitors’ rifles for comparison.
2. Ammunition — Factory Ammo and Hand-loads
Good ammo is important, but as we discuss above, 0.5 MOA is good enough. Also, speed is great but it matters FAR less than you’d think. Drop can be calculated with precision, and distances are normally known, so a slightly flatter trajectory doesn’t really matter. Wind matters, but the difference you’ll find when eeking out that last 50 fps is very, very small.
Federal, Hornady, and Prime all make quality ammo that is widely used by shooters from local to national matches. Facebook photo by CReece.
Precision Handloads
If you want to run down the rabbit hole of finding that perfect ammo that shoots in the “twos” (0.2 MOA), get yourself an AutoTrickler and some of our billet aluminum accessories — you’ll love the setup.
3. A Versatile Support Bag
There are countless bag options. But there is ONE bag you’ll see everywhere, and for good reason. The Game-Changer from Armageddon Gear is aptly named. Many shooters use it as a barricade bag as well as a rear bag, meaning a guy could get away with using only this bag for an entire match. If you need another bag when you get there, ask someone in your squad, they’ll share. I promise.
4. Ballistics Calculator APP
All PRS/NRL shooters need reliable and accurate ballistic solutions. The software-enabled Kestrel is a very common item on the range, but you’ll also see lots of guys using mobile Apps such as Shooter or Applied Ballistics Mobile, and they have great results.
It’s also handy to have an armband or an item like the Hawk Hill data card holder for stages with various targets at differing ranges. Once the RO says “engage” and your mind stops working, you’ll appreciate having it written down.
5. Hearing Protection
PRS Competitors shoot with brakes and sometimes in enclosed spaces. That’s why you need serious hearing protection. We recommend NRR 33 earplugs, doubled up with Electronic Muffs to hear range commands. I have used the 33 dB NRR Mack’s foamies at matches for most of the last year, and the Howard Leight NRR 33 Max-1s are also very effective. The budget-priced (under $55) Howard Leight Impact Sport Electronic muffs work well, but premium electronic muffs may be more comfortable.
Growing in popularity are high-tech, in-ear digital units like the ESP Stealth. I have a set of linked ESP Steaths on the way and hope to evaluate them soon. These are supposed to be very good, but the ESP Stealths cost $2100.00 per pair!
Think we missed something? Have more questions? Let us know.
SHOT Show 2024 commences two weeks from now in Las Vegas, Nevada. On January 23, doors will open at the Venetian EXPO and Caesars Forum. Over 2500 companies will be exhibiting products this year, with booths and displays covering over 800,000 square feet of floor space. The SHOT Show boasts 13.9 miles of aisles — a distance more than half a marathon.
If you will be attending SHOT Show, the SHOT Show Tracker is a great digital resource you should definitely utilize. Everything you need to know about NSSF’s 2024 SHOT Show is detailed in the 2024 SHOT Show Tracker publication. It’s packed with show schedules, networking details, education descriptions, exhibitor lists, and a sneak peek of the products being displayed.
In the table below are the key features in the SHOT Show Tracker. This is available online for free. Click any box to see more details — such as the full Exhibitor List or Floor Plan Maps:
Anschutz .22 LR rifle set up for F-Class competition. Photo courtesy Sportschieben Blog.
Here’s a fun new discipline that will grow in years ahead — Smallbore F-Class with .22 LR rimfire rifles. Rest-supported prone rimfire matches have been held around the world for quite some time, but only a few years ago was the discipline officially codified in the NRA Smallbore Rulebook. And the first-ever Smallbore F-Class National Championship was held in July 2018 in conjunction with the Smallbore Nationals at Camp Wa-Ke’-De in Bristol, Indiana. The Nationals involved multiple days of prone shooting at 50 meters and 100 yards. For more information read Hap Rocketto’s Shooting Sports USA Smallbore F-Class Report.
Smallbore F-Class competitors may shoot F-TR style with a bipod, or use a front rest. In the above photo from the inaugural NRA National Championship you can see a shooter with SEB Coaxial Rest at top, with a competitor using a low-profile bipod at bottom. Note the extended handle used to adjust bipod elevation. This is not a coaxial joystick, but rather a long handle attached to the mariner wheel.
Smallbore F-Class — The Future Looks Bright
With the high cost of centerfire ammunition, and the limited number of 1000-yard (or even 600-yard) ranges, we can envision that Rimfire F-Class will become a popular event at ranges across the country. Clubs don’t even need benches — just a 100-yard target bay and flat ground for the shooters. You can start with an inexpensive rimfire rig and Harris bipod. Then work up from there. Here is a custom rimfire F-TR style rig that belongs to F-Class ace and past centerfire F-TR National Champion James Crofts.
Rimfire F-Class and Fun Prone Matches with Front Rest or Bipods
Rimfire F-Class offers the fun of centerfire shooting at a much lower cost. Shooting is done prone with either a front rest or a bipod. You can shoot a relatively inexpensive rifle such as a CZ 457 MTR, or a custom build that has the same design features, weight, and ergonomics as a full-size F-TR or F-Open rifle. The choice is yours. We like shooting smallbore F-Class, because you can find decent .22 LR ammo for just $0.20 per round. By contrast, you’ll probably spend at least $1.20 per round for F-Class centerfire ammo (counting bullet, powder, primer, and part of the brass cost).
Top-Tier Vudoo V22-S Target Rifle for Rimfire F-Class
Vudoo Gun Works now offers an impressive .22 LR Single Shot Target Rifle that should prove ideal for rimfire F-Class (Open division). It features the new V22-S single-shot action, McMillan stock, and Flavio Fare BR-VS trigger.
Rimfire F-Class in the Canary Islands
This video comes from the Canary Islands, part of Spain. The voice-over is in Spanish but there are English sub-titles. The host explains: “In this video we summarize the main characteristics of this [shooting sport] that is practiced at 50 meters, 100 meters, and 200 meters with your .22 LR. Learn how to prepare your rimfire carbine and learn how to score your own targets by following our simple explanations. In another video we will delve into shooting techniques, shooting accessories and field accessories.”
Here is another rimfire F-Class video from the Canary Islands. This shows how the sport can be done with a variety of rimfire rifle types, even including a .22 LR AR clone. Some shooters are using a wide-base bipod, others are using normal Harris-type bipods, while others are using a large, benchrest-style front rest.
Rimfire F-Class-Style Local Fun Match in Oregon
In this video, F-Class John shoots an F-Class-style local fun match in Oregon. He is using a .22 LR rimfire rifle that has a full-size stock very similar to his custom F-Open centerfire rifles. This allows him to easily switch from centerfire F-Class to rimfire prone shooting with front rest and rear bag. The local fun match rules are a little different than an official F-Class match, but the shooting skills required are the same. Shooting this kind of local rimfire match allows John to keep his F-Class skills at a high level at a fraction of the cost of shooting centerfire F-Open.
Rimfire F-Class in Russia
NOTE: This video was filmed in Russia. The dialog is in Russian (without English subtitles), but it is still interesting to watch. Shooting F-Class with .22 LR ammo has become popular in Russia and other parts of Europe. You can have fun on a relatively short (200m) range with low-cost ammo.
Smallbore F-Class Course of Fire
The Smallbore F-Class Nationals was completed on paper targets at 50 yards and 100 yards. According to Shooting Sports USA: “The tournament ran during the any sight and metric phases of the 2018 NRA National Smallbore Rifle Championships, featuring a daily course of fire which mirrored the sling shooters, 40 shots at 50 meters on the A-50 target, a Metric Dewar, followed by 40 shots at 100 yards on the A-33 target. Although the international targets were shot throughout, the first two days were titled ‘conventional’ and the last two ‘metric’.”
The specifics of the match such as rifle requirements, rests, and sights may be found in the Provisional Smallbore Rifle F-Class Rules (Section 23), found on page 65 of the current NRA Smallbore Rifle rulebook. Any rules not covered in Section 23 will [reference] the normal rules of Sections 1 through 22.
Top to bottom: Remington firing pin assembly with ISS, Tubb SpeedLock alloy-composite system without ISS (current versions have dual, opposite-wound springs), and Remington short action firing pin assembly without ISS.
The U.S. Army Marksmanship Unit regularly publishes technical articles on the USAMU Facebook page. One informative USAMU article covered mechanical issues and related ignition irregularities that can cause vertical fliers even with good ammunition in an otherwise excellent rifle. We highly recommend you read this article, which offers some important tech tips.
Vertical Dispersion: Mechanical/Ignition Issues?
Poor or inconsistent ignition has long been known to be one of the “usual suspects” when one encounters vertical fliers that just shouldn’t be there. By having a sense of some of the basic principles involved, and a few basic areas to check, the shooter may avoid colsiderable frustration, not to mention time, expensive loading components and barrel wear.
Is your well-built rifle of high-quality components plagued with vertical fliers across more than 1-3 handload combinations? Consider the bedding, crown and scope/sight mounts. Are they correct? If so, then you might check for ignition issues before boldly undertaking an extensive, expensive, and quite possibly fruitless quest for the “magic handload”.
SEEING IS BELIEVING: While the author had been aware for many years that poor ignition should be considered and ruled out when dealing with vertical fliers in an otherwise-excellent rifle, actually seeing the problem and its almost instantaneous cure really drove the lesson home.
He was working with a “dot” rifle – a .22 LR match rifle that really stacked bullets into little piles at 50 yards and beyond. With one lot of ELEY Tenex, it produced consistent “bughole” groups at 50, but with another, selected lot of Tenex, similar groups were regularly ruined by single, vertical fliers that did not appear in other rifles. Rather than spending days burning up expensive, select ammunition looking for “magic lots”, he contacted a well-respected rimfire gunsmith and explained the situation.
Without so much as batting an eye, the highly-experienced ‘smith tore into the rifle’s action, and quickly found the cause(s) of the problem. He discovered a demonstrably weak firing pin spring, plus a chip out of the face of the firing pin where it contacted the cartridge rim.
After replacing and tuning the offending parts, the rifle immediately began shooting tiny, bughole groups with the previously “unacceptable” lot of Tenex. Centerfire rifles can also benefit from ensuring positive, consistent ignition. A wise riflesmith is literally worth his weight in gold!
So, what are some issues we as shooters can inspect in our rifles to help determine if ignition woes could be part of our problem? At the club level, ask yourself if that “experienced” Remington, Winchester 70, or even Springfield-based match bolt gun you’re using is still running its’ original 40-80 year-old factory striker spring? If so, a new replacement is cheap insurance against current or future problems. (And BTW, it might be best to stick to the normal, factory-spec spring weight. A super-powerful spring can cause vertical, just as a weak one one can.) Along with that, a routine check for proper firing-pin protrusion is a quick preventive measure that can rule out potential issues.
Other areas to consider are the centering and consistency of the firing pin’s operation in the bolt. Admittedly, with the increasing use of precision-machined custom actions, this is becoming less an issue every day. Below is the firing pin assembly from a custom BAT action:
However, particularly with factory actions, a very quick and easy check is to remove the bolt, let the firing pin go forward, and look at the firing pin tip through the firing pin hole. Is the tip off-center in the hole, and possibly striking it as it moves forward? Is the hole out-of-round or burred from being struck repeatedly? If so, a trip to the riflesmith is likely in order.
Similarly, machining issues in the bolt/firing pin system can lead to rough and erratic firing pin movement, in which the firing pin drags against an internal surface of the bolt. In high-quality rifles these issues are relatively rare, but not unheard-of, and it takes mere minutes to rule them out. It may be worthwhile to remove the cocking piece/firing pin/spring assembly and look for any unusual gouges, dings, peening, burrs or signs of abnormal wear.
This task is especially easy with Winchester 70s, Springfields, and the similar Mauser 98s, involving little more than the push of a button and unscrewing the cocking piece assembly. This is just one of the many reasons these tried-and-true actions have earned such a loyal following in the field, among hunters who must maintain their rifles away from a shop.
Particularly with older rifles, watch for and remove excess grease (or even Cosmoline!) from both the firing pin assembly and inside the bolt. This can help improve firing pin speed and consistency. Other bolt-action designs may need a take-down tool or other measures.
As part of this inspection, AFTER ENSURING THE RIFLE IS UNLOADED, slowly cock the rifle, dry-fire, and repeat several times. Listen carefully near the action for inconsistency in the sounds it generates. Does the striker falling make the same sound each time? Do you hear or feel grinding upon operation? If so, where?
Be sure to check the operation of the cocking piece (bolt shroud), firing pin within the bolt shroud, the cocking piece cam and the rear of the bolt body where the cocking piece cam operates. As with our examination for abnormal wear marks discussed above, look for marks indicating roughness or a possible need for light polishing. Then, clean and lightly grease the bearing surfaces while you’re at it.
Remington 700 bolt shroud and cocking cam
These are relatively easy checks that shooters can undertake to perform a preliminary inspection on their own. Other mechanical issues can also cause ignition issues, chiefly centered around the action of the trigger, sear and sear spring. If these are suspected, a trip to an experienced, qualified riflesmith for diagnosis is recommended. We hope you find this information helpful! Join us again next week, and in the meantime, enjoy the shooting sports safely!
The Coriolis Effect comes into play with extreme long-range shots like this (2100 yards at Raton, New Mexico). The rotation of the earth actually moves the target a small distance (in space) during the long duration of the bullet’s flight.
When you’re out at the range, the Earth seems very stable. But it is actually a big sphere zooming through space while spinning around its axis, one complete turn every 24 hours. The rotation of the earth can create problems for extreme long-range shooters. During extended bullet flight times, the rotation of the planet causes an apparent deflection of the bullet path over very long distances. This is the ballistics manifestation of the Coriolis Effect.
Bryan Litz of Applied Ballistics discusses and explains the Coriolis Effect in his Ballistics Books and Seminars. Bryan notes that Coriolis is “a very subtle effect. People like to make more of it than it is because it seems mysterious.” In most common shooting situations inside 1K, Coriolis is not important. At 1000 yards, the Effect represents less than one click (for most cartridge types). Even well past 1000 yards, in windy conditions, the Coriolis Effect may well be “lost in the noise”. But in very calm conditions, when shooting at extreme ranges, Bryan says you can benefit from adjusting your ballistics solution for Coriolis.
Bryan explains: “The Coriolis Effect… has to do with the spin of the earth. You are basically shooting from one point to another on a rotating sphere, in an inertial reference frame. The consequence of that is that, if the flight time of the bullet gets significantly long, the bullet can have an apparent drift from its intended target. The amount [of apparent drift] is very small — it depends on your latitude and azimuth of fire on the planet.”
Coriolis is a very subtle effect. With typical bullet BCs and velocities, you must get to at least 1000 yards before Coriolis amounts to even one click. Accordingly, Bryan advises: “Coriolis Effect is NOT something to think about on moving targets, it is NOT something to think about in high, uncertain wind environments because there are variables that are dominating your uncertainty picture, and the Coriolis will distract you more than the correction is worth.”
“Where you could think about Coriolis, and have it be a major impact on your hit percentage, is if you are shooting at extended range, at relatively small targets, in low-wind conditions. Where you know your muzzle velocity and BC very well, [and there are] pristine conditions, that’s where you’re going to see Coriolis creep in. You’ll receive more refinement and accuracy in your ballistics solutions if you account for Coriolis on those types of shots. But in most practical long-range shooting situations, Coriolis is NOT important. What IS important is to understand is when you should think about it and when you shouldn’t, i.e. when applying it will matter and when it won’t.”


 NRA Golden Bullseye Pioneer Award
 To learn more about John Nosler and his bullet designs, get your hands on Going Ballistic, a “Professional Memoir” told by John Nosler to outdoor writer Gary Lewis. CLICK HERE to hear a short John Nosler audio clip or to order the book from the author.





 Is your well-built rifle of high-quality components plagued with vertical fliers across more than 1-3 handload combinations? Consider the bedding, crown and scope/sight mounts. Are they correct? If so, then you might check for ignition issues before boldly undertaking an extensive, expensive, and quite possibly fruitless quest for the “magic handload”.


 When you’re out at the range, the Earth seems very stable. But it is actually a big sphere zooming through space while spinning around its axis, one complete turn every 24 hours. The rotation of the earth can create problems for extreme long-range shooters. During extended bullet flight times, the rotation of the planet causes an apparent deflection of the bullet path over very long distances. This is the ballistics manifestation of the


