Creedmoor Sports is a leading vendor of products for competitive shooters and serious hand-loaders. Along with great gear, Creedmoor Sports provides informative content for its customers. The Creedmoor InfoZone provides Reloading Tips, Gear Reviews, Shooting News, and basic gunsmithing information.
Bill Gravatt, President of Creedmoor Sports, is an expert on reloading processes and gear. He developed many of the popular tools marketed by Sinclair Int’l, and he brings that expertise to Creedmoor Sports. Bill hosts a series of “how-to” videos produced for the Creedmoor InfoZone.
In this video, Bill Gravatt demonstrates several methods to clean your cases. Bill tells us: “Powder residue should be removed before you insert your cases into your reloading dies. There are several ways to clean your cases. Many shooters use a combination of various methods…”
1. Manual Cleaning — You can use 0000 Steel wool for the outside of the case and a Case Neck brush for the inside. A paper towel can remove any remaining residue. This is a handy way to clean if you load at the range.
2. Vibratory Tumbling — This traditional method works well, particularly for pistol brass. Experiment with both Corn Cob and Walnut media. You can get a brighter shine by putting a small amount of liquid brass polish in the media.
3. Wet Tumbling with Stainless Media — This process can get your brass clean inside and out. Do check to ensure no pins are stuck in the flash-holes. Watch for peening of case mouths that can occur over time.
4. Ultrasonic Cleaning — Ultrasonic cleaning works great for small parts as well as brass. The ultrasonic process removes all carbon and traces of lube, which can leave the inside of case necks too dry. To smooth bullet seating, try putting a tablespoon of Ballistol in the cleaning solution.
Cleaning Reloading Dies
Cleaning your reloading dies is something that many hand-loaders neglect. In this 60-second Tech Tip, Bill Gravatt provides some smart advice on cleaning your dies. Bill notes: “After heavy use, case lube and carbon can build up in your reloading dies. It’s important to keep them clean. Also, with new dies, give them a good cleaning before first use, because they ship with a corrosion inhibitor.”
1. Step 1 — Prior to cleaning, disassemble the die and spray it with a good degreaser. Do this with brand new dies too.
2. Step 2 – Take a patch and run it in the die to remove old lube and gunk. Don’t forget the decapping assembly and other internal parts.
3. Step 3 — After cleaning the die, but before reassembly, spray the die with a good corrosion inhibitor, such as Corrosion-X or Starrett M1.
When shooting groups at long range on paper it can be difficult to distinguish which bullet holes belong to a particular sequence of shots. If, for example, you shot three 5-shot groups at 600+ yards on a paper target, you would have 15 bullet holes on the target (assuming no misses). But at that distance it would be difficult to see the holes on target (even with a spotting scope). Accordingly, when you inspected the target up close, it would be hard to tell which shots belonged to which group. You might have a vague idea, but couldn’t be sure, without a target camera recording the shot sequence.
Here is a method to separate multiple shots into specific groups so you can better evaluate your load and shooting skills. The trick is pretty simple — mark your bullets with a color from a Sharpie or other felt marking pen. If you are shooting three 5-shot groups, mark five with red, five with green, and five with blue (or purple). Then, when you inspect the target, you can identify the group placements by the colors that appear on the paper.
Round Robin: Using colors you can shoot “Round-Robin” to evaluate seating depths, neck tension, or other variables without having the shot order (and barrel heating) affect group sizes unequally. For example you might have three different neck tensions, each marked with a different color on the bullets. Then shoot Red, Blue, Green in that sequence for five total shots per color.
Smart Tip to Show Colors More Vividly
If the bullet inks are not showing up on your target paper clearly, here is a simple trick that can make the colors “bleed” to be more visible. In your range kit, bring some alcohol solution along with some Q-tips. Then dab the shots on the paper target lightly with wet Q-Tips. Here is the front of a target before and after application of alcohol:
Forum Member NewbieShooter explains: “Dabbing a bit of alcohol on the bullet holes with Q-Tips makes the color pop a bit… especially on the back side.” See below:
In short order you will see the colors spread into the paper, clearly marking the shot holes by distinguishing colors. If you were shooting a dark bullseye, view the the BACK side of the target to see the colors on a light background.
Credits: Bullet Tips photo by Forum Member Dave Way; Target photos by Forum Member NewbieShooter; Story tip from Boyd Allen.
Tumblers and walnut/corncob media are old school. These days many shooters prefer processing brass rapidly with an ultrasonic cleaning machine. When used with the proper solution, a good ultrasonic cleaning machine can quickly remove remove dust, carbon, oil, and powder residue from your cartridge brass. The ultrasonic process will clean the inside of the cases, and even the primer pockets. Tumbling works well too, but for really dirty brass, ultrasonic cleaning may be a wise choice.
Our friend Gavin Gear has evaluated an RCBS Ultrasonic cleaning machine using RCBS Ultrasonic Case Cleaning Solution (RCBS #87058). To provide a real challenge, Gavin used some very dull and greasy milsurp brass: “I bought a huge lot of military once-fired 7.52x51mm brass (fired in a machine gun) that I’ve been slowly prepping for my DPMS LR-308B AR-10 style rifle. Some of this brass was fully prepped (sized/de-primed, trimmed, case mouths chamfered, primer pockets reamed) but it was gunked up with lube and looking dingy.”
UltimateReloader.com Case Cleaning Video (7.5 minutes):
Gavin describes the cleaning exercise step-by-step on UltimateReloader.com. Read Gavin’s Cartridge Cleaning Article to learn how he mixed the solution, activated the heater, and cycled the machine for 30 minutes. As you can see in the video above, the results were impressive. If you have never cleaned brass with ultrasound before, you should definitely watch Gavin’s 7.5-minute video — it provides many useful tips and shows the cleaning operation in progress from start to finish.
Ultra Dry Necks After Ultrasonic Cleaning — Some Suggestions
The Ultrasonic cleaning process gets cartridge brass so “squeaky clean” that increased force may be required to seat your bullets, or they may “grab” as they go in the necks. To reduce bullet-seating effort, you may benefit from adding a little dry case lube inside the case-neck before loading (use a nylon brush). Another trick is adding a teaspoon of Ballistol lube to the cleaning solution. That provides a trace lubricant inside the necks, but does not interfere with powder ignition in any way.
The latest Gen2 RCBS ultrasonic cleaning machine has a large 6.3-quart capacity. That’s nearly 100% larger than the first generation machine in Gavin’s video. The Gen2 machine, $399.99 on Amazon, features a second ceramic heater and transducer to better clean brass cases and firearm parts. The LED is easily programmable, and the timer can be set for up to 30 minutes of cleaning. The original 3.2 quart-capacity RCBS ultrasonic machine, as shown in Gavin’s video, is still available for $189.99 at Midsouth Shooters.
Modern binoculars and Laser Rangefinders have built-in sensors and microprocessors that can provide ballistics solutions. These work via on-board software as well as systems that talk (via Bluetooth) to a mobile device with a Ballistics App installed. Today we feature an Applied Ballistics Podcast that covers these impressive products with integrated ballistics functionality.
AB Integrated Products and Features In this podcast, Applied Ballistics Founder Bryan Litz and Product Manager Francis Colon answer some of the most common questions received from listeners. They primarily discuss the latest Applied Ballistics integrated devices and highlight their capabilities.
Along with describing the basics of optics and rangefinder products with Applied Ballistics functionality, Bryan and Francis talk about how software can tailor the ballistics output to specific applications and firearms. Francis explains Drop Scale Factor (“DSF”) — a means by which you “train” your solver to match your specific equipment.
NOTE: As we cannot embed the full 42-minute podcast here, you’ll need to go to the Applied Ballistics site to listen. CLICK HERE.
Integrated Solution — Leica LRF and Kestrel with AB Software
This video shows how to pair a Leica Rangemaster 2800.com to a Kestrel Elite 5700. The Leica Rangemaster 2800.com provides the Kestrel with the Range, Firing Direction, and Inclination angle. The Kestrel will then calculate the firing solution and provide that solution on its own display as well as feed that back to the Leica which then displays the hold-over when looking through the Rangefinder. This allows for remote, hands-free operation of the Kestrel in a mount while still being able to see the firing solution in the range finder. NOTE: This is an older video, but similar systems operate with the latest products.
Here are two different bullet types, seated to the same CBTO length, but different COAL. Note the shiny scratches on the bullets made by the comparator tool which indicates a point on the bullet ogive near where the ogive will engage the rifling.
Effects Of Cartridge Over All Length (COAL) And Cartridge Base To Ogive (CBTO) – Part 2 by Bryan Litz forBerger Bullets. Part One of this series focused on the importance of COAL in terms of SAAMI standards, magazine lengths, seating depths, and pressure levels. Another measure of length for loaded ammunition is highly important to precision, namely Cartridge Base to Bullet Ogive Length (CBTO).
Figure 2. Chamber throat geometry showing the bullet jump to the rifling or lands.
Look at Figure 2. Suppose the bullet was seated out of the case to the point where the base of the bullet’s nose (ogive) just contacted the beginning of the riflings (the lands) when the bolt was closed. This bullet seating configuration is referred to as touching the lands, or touching the riflings and is a very important measurement to understand for precision hand-loading. Due to the complex dynamics of internal ballistics which happen in the blink of an eye, the distance a bullet moves out of the case before it engages the riflings is highly critical to precision potential. Therefore, in order to systematically optimize the precision of his handloads, it’s critically important that the precision hand-loader understands how to alter bullet seating depth in relation to the barrel rifling. Part of the required knowledge is understanding how to accurately and repeatably measure the Cartridge Base To Ogive (CBTO) dimension. This is explained in the FULL ARTICLE.
Bryan Litz offers an extended discussion on how to measure CBTO using different tools and methods, including the Hornady OAL gauge. You can read this discussion in the full article found on the Berger Bullets website. CLICK HERE to Read Full Article.
Why Not Use CBTO as a SAAMI Standard?
If CBTO is so important to rifle accuracy, you might ask, “Why is it not listed as the SAAMI spec standard in addition to COAL?” There is one primary reason why it is not listed in the standard. This is the lack of uniformity in bullet nose shapes and measuring devices used to determine CBTO.
Benefits of Having a Uniform CBTO
There is another aspect to knowing your CBTO when checking your COAL as it pertains to performance. With good bullets, tooling, and carefully-prepared cases you can easily achieve a CBTO that varies less than +/- .001″ but your COAL can vary as much as .025″ extreme spread (or more with other brands). This is not necessarily bad and it is much better than the other way around. If you have a CBTO dimension that varies but your COAL dimension is tight (within +/- .002″) then it is most likely that your bullet is bottoming out inside the seater cone on the bullet tip. This is very bad and is to be avoided. It is normal for bullets to have precisely the same nose shape and it is also normal for these same bullets to have nose lengths that can vary as much as .025″.
Summary of Cartridge Base To Ogive (CBTO) Discussion
Here are four important considerations regarding bullet seating depth as it relates to CBTO:
1. CBTO is a critical measurement to understand for handloaders because it’s directly related to precision potential, and you control it by simply setting bullet seating depth.
2. Tools and methods for measuring CBTO vary. Most of the measurement techniques have pitfalls (which may give rise to inconsistent results) that you should understand before starting out.
3. A CBTO that produces the best precision in your rifle may not produce the best precision in someone else’s rifle. Even if you have the same rifle, same bullets, same model of comparator gauges, etc. It’s possible that the gauges are not actually the same, and measurements from one don’t translate to the same dimension for another.
4. Once you find the CBTO that produces the best precision in your rifle, it’s important to allow minimal variation in that dimension when producing quality handloads. This is achieved by using quality bullets, tooling, and properly preparing case mouths and necks for consistent seating.
At the request of our readers, we provide select “Deals of the Week”. Every Sunday afternoon or Monday morning we offer our Best Bargain selections. Here are some of the best deals on firearms, hardware, reloading components, optics, and shooting accessories. Be aware that sale prices are subject to change, and once clearance inventory is sold, it’s gone for good. You snooze you lose.
NOTE: All listed products are for sale to persons 18 years of age or older. No products are intended for use by minors.
1. Brownells — 15% Off All Brownells Products Plus Weekly Deals
⏺ Great savings on large variety of products at Brownells
To mark its 85th year in business, Brownells has been running a big sale throughout June 2024. During this month all Brownells brand products are 15% OFF. In addition, shipping is free with orders over $85, and FFL fees are waived on firearms purchases. Along with those promotions, there are some exceptional Weekly Deals. Here are some of the best deals we found for the last week of June:
⏺ Significant savings on many types of pistol, rifle, and shotgun ammo
If you need factory ammo, check out this sale on pistol, rifle, and shotgun rounds over at Natchez. A wide selection of ammo is on sale including .22 LR, .22 WMR, Pistol Ammo (9mm, .40SW, .45 ACP), and Rifle Ammo (.223 Rem, .300 BLK, .30-06). Save up to 30% off the regular price. Federal 12ga “Top Gun” shotshells are are also on sale — just $8.99 for 25 shells. NOTE: This promo ends Tuesday, 6/25/24 so grab the deals while you can.
It’s important to check run-out on your cases. With this Redding Slant Bed Concentricity Gauge you can quickly identify excessive case neck and bullet run-out on loaded rounds. The “Slant Bed” design moves the bearing surface down and away from the user, making case rotation easier and more precise. Precision stainless steel bearings provide single point contact with the cartridge case. You can easily adjust for various cartridge lengths using bearing sliders on stainless steel guideways.
4. Graf & Sons — Graf’s Brass Tumbler Kit, $99.00
⏺ Complete kit including tumbler, separator, media and polish
With a good tumbler system so you can clean fired brass inside and out efficiently. Right now, for $99.00, you can get a complete Graf Brass Tumbler Kit with Separator, Corn Cob Media, and Polish. The kit includes everything you need to clean and polish your cases: Vibratory Case Tumbler 110v, Rotary Brass Case/Media Separator, Corn Cob Media (6 lb.), and Hi-Luster Brass Polish (8 oz.).
The Walther PPQ M2 Q5 Match 9mm is very accurate, with great ergonomics and excellent reliability. If you shoot action pistol matches, this is a good competition gun. The PPQ M2 Q5 Match has nice adjustable LPA sights with fiber optic red front. The optics-ready slide is pre-milled for a battery-powered Red Dot optic. The PPQ M2 Q5 Match’s trigger boasts a short, smooth pull and fast reset. This Walther handgun comes with interchangeable backstraps, allowing it to be customized to the shooter’s hands. Get this now at EuroOptic for $629.99, $350 off the regular price.
6. Amazon — Tuxapo Rifle Covers, $28.99
⏺ Quality cover keeps grit out of action and protects scope
Here is a good field cover for both competition and match rifles. The Tuxepo Rifle Cover protects your stock, barreled action, and optic. This keeps out brush, sand, dirt, and dust, and provides some protection from moisture and abrasions. This rifle cover has a tubular barrel cover, plus an elastic band the secures the cover in place running along the bottom of the rifle from forearm to buttstock. The elevated middle section (with elastic) provides good coverage for your riflescope.
7. Amazon — Caldwell Stable Table Lite, $126.85
⏺ Very good price on collapsible ambidextrous shooting bench
Every avid shooter should have some kind of portable shooting bench for practicing at undeveloped ranges, and/or for varmint safaris. Priced at $126.85, the Caldwell Stable Table (#ad) is a secure and affordable platform for practice, sight-in sessions, and varmint field trips. This table is fully collapsible for easy transport. Set-up is fast and simple with a right/left movable seat and height adjustments for maximum shooting comfort. This ambidextrous shooting table works for both right-handed or left-handed shooters.
8. Amazon — AR500 Steel Targets with Mounting Kit, $39.99
⏺ AR500 steel plates complete with hanging hardware
Here’s a pistol and RIMFIRE plinking target kit at a super-low price. The Jenaai AR500 Steel Targets with Gong Mounting Kit (#ad) includes two metal targets, one 6″ round and one 7″x12″ rectangular. This Kit includes complete target hanger hardware (4 chains, washers, nylon lock nuts, flange nuts, carriage screws, eye hooks screws, and steel connecting rings). IMPORTANT: While these targets are made from AR500 steel they are NOT heavy enough for centerfire rifle rounds. Use these targets ONLY with rimfire ammo or centerfire pistol ammo (such as .38 Special, 9x19mm, .45 ACP). Do NOT use this with ANY centerfire rifle ammo — the bullets will damage the steel.
9. Amazon — Tipton Deluxe Rifle Cleaning Rods, $31 and up
⏺ Durable rod with good grip handle and ball bearings
For proper barrel cleaning you want a quality cleaning rod that spins freely. The Tipton Deluxe Cleaning Rod (#ad) is a good design that has earned many positive user reviews. These cleaning rods have an ergonomic handle that spins on two sets of ball bearings. This allows the rod to smoothly follow the rifling both pushing and pulling, even under pressure. The “shank-through” construction also allows the user to tap the end of the cleaning rod to get a tight patch through a bore. Amazon offers a variety of Tipton Rod lengths and diameters, for barrels from .17 caliber up to .45 caliber, plus shotguns.
As an Amazon affiliate, this site can earn revenues through sales commissions.
This custom war wagon hauls varmint hunters around the Longmeadow Game Resort in Colorado.
We’re at the height of summer now — summer Solstice was on June 20, 2024. Will you be heading to the varmint fields this summer? Proper planning is key to a safe, satisfying, and productive varmint holiday. Of course you’ll be busy reloading, but you should make a check-list of all the gear and supplies you need. Bring a variety of rifles if possible — you’ll need to switch off as one barrel gets hot, and the chambering that works best for your close shots may not be ideal for those longer shots out past 400 yards.
Here are some tips from our Forum members that can help you shoot more effectively, and avoid problems on your varmint hunt. Here’s one key tip: at your shooting station, put a strip of surveyor’s tape on a tall stake to show the wind direction. Then shoot in the direction the wind blows. This will minimize the effect of cross-winds.
This photo is from a Dan Eigen TV Show video featuring a P-Dog hunt.
Varmint Safari Planning, Equipment, and Shooting Advice
From PatchHound: “The gear you bring will make or break a trip out to Prairie Dog land. A lot has to do with where you going and how far you are from [civilization]. For starters, bring lots of water. It will be hot in Wyoming in a few more weeks but it don’t hurt to bring warm clothes in case it snows. It’s best to wear leather boots unless you’re real good at dodging cactus while walking around. Good sunscreen [and a wide-brimmed hat] will save the day too. [What you need to bring] really depends on whether you’re shooting on some friendly ranch or 100 miles in the middle of [a wilderness area]. Good survival gear is a good thing to have for the latter!”
From Stoner25mkiv: “I’d suggest an adjustable bipod if you are going to do any walking. A laser rangefinder is a huge asset. Have a fanny pack or backpack for extra ammo, water, bore-snake, etc. when you go on your walkabouts. We also take a couple pivoting benches, heavy movers’ pad/blanket, sandbags (Uncle Bud’s Bulls Bag) for shooting from near the vehicle. Boonie hat for blocking the sun, sun glasses, sunscreen. High leather boots.
From CTShooter: “The .204 [Ruger] is a laser beam and good to 400 yards easy. Forget the rimfire! Do you have a portable bench that pivots? Bring bipod, binocs. Bring a LOT of water. I have a milspec sniper shooter’s mat/drag bag with shoulder straps. It is good to carry everything when you want to wander off and shoot prone with bipod. Here’s a view through my 6BR in ND.”
From RJinTexas: “In most of the locations that we’ll be shooting we’ll usually set up a minimum of 200 yards from the edge of a major dog town. We’ll start by working over the close-in dogs and shooting our way out, some of these towns may run in excess of 500/600 yards deep. [A .204 Ruger] will work well out to 300/400 yards unless the wind is blowing hard. We classify a 10-mph crosswind as a very calm day and what makes it a little more challenging is that it is usually also gusting.”
From Wes (P1ZombieKiller): “[For my first PD trip] there are so many things I was not ready for. The one thing that I did bring (that no one told me about) was a canopy. I’m glad I did. Even though the weather was [near perfect], I know that sun can humble you real fast. With my pop-up canopy, I could shoot all day without getting killed by the sun. You had to tie the canopy down real well or the wind would blow it across the pasture.
We sat on shooting benches that pivot 360°, and are fast and easy to set up. Most all shots were 175-250 yards. I just felt comfortable at that range. It was more fun for me to be able to film the hits, and the camcorder I was using just did not get good video past 350 yards. The digital zoom distorted the image too much. I knew I would only get this one chance to film my first P-dog outing, and I wanted to get it on film for [posterity].”
Bring Multiple Rifles on Your Varmint Adventures
On our P-Dog adventures, we like to have multiple rifles — a .17 HMR for close work, then maybe a .20 Practical AR for 150-250 yards, then a larger caliber such as 22 BR, 6BRA, 6 Dasher or 6-6.5×47 for those long shots. The classic .22-250 is also a wickedly effective varmint cartridge.
We like to have a Rimfire varmint rig for the closer shots, inside 150 yards. The .17 HMR or .17 WSM are good choices. With a rimfire you save on ammo costs and you don’t waste precious centerfire barrel life. This video shows a successful Prairie Dog hunt with a .17 HMR. Watch and you’ll see hits out to 160 yards (00:50), proving the effective range of the 17 HMR cartridge. The host is shooting a Savage A17 semi-auto 17 HMR rifle in a Boyds laminated stock.
.17 WSM Rimfire in Franklin Armory F17-L
What’s the ultimate rimfire varmint rifle? An AR chambered for the .17 WSM could be the answer. Eric Mayer of Varminter.com states: “The Franklin Armory F17-L in .17 Winchester Super Magnum (WSM) has a lot of firsts. It is the first semi-automatic rifle in .17 WSM now available to the general public. It is the first gas-piston system, AR-15 rimfire rifle built in partnership between Franklin Armory and Osprey Defense.”
Eric has used the .17 WSM AR shooting ground squirrels, rock squirrels, prairie dogs, and rabbits. Eric notes: “The report of the .17 WSM is nowhere near as loud as most of the centerfire [varmint] cartridges. I found that when I shot the FA-17, it did not cause the other ground squirrels… to run for cover. The lack of recoil … allowed me to see right where I hit [and] if I happened to miss, [low recoil] made for quick corrections for wind, or distance.” READ Full Report
The .17 WSM is a much larger, more powerful round than the .17 HMR. See the size difference above.
.20 Practical (20-223 Rem) AR-Platform Varminter
Here is a .20 Practical built by Robert Whitley. Whitley’s Ultimate Prairie Dog Rifle (PDR) features a 24″ Bartlein 1:11″-twist cut-rifled barrel, DPMS side-charging upper, and a Jewell trigger. It is chambered in 20 Practical, a cartridge popularized by Warren “Fireball” Brookman.
This .20 Practical cartridge is simply the .223 Remington necked down to .204. You can use your existing .223 Rem brass — no special case-forming required! The 20 Practical is accurate, flat-shooting, and has almost no recoil. The advantage over the standard .223 Remington is that, grain for grain, the bullets have a higher BC and travel at a higher velocity for more dramatic effect on a small varmint. The ultra-low recoil allows you to easily see your hits, even without a muzzle brake. The 20 Practical, launching 40-grainers at about 3750 fps, shoots flatter than a .223 Rem with 55gr hollowpoints.
.204 Ruger AR-15 (Suppressed) for Cottontail Rabbit Hunting
As a varmint hunting tool, the .204 Ruger in an AR-15 is a versatile, worthy cartridge/rifle combo for the job. This video covers a cottontail rabbit hunt. The host states that “We were contacted by a farmer who was being slammed with cottontail rabbits eating out huge portions of his alfalfa fields.” This suppressed .204 Ruger AR-15 proved seriously effective on the rabbits, driving high-velocity rounds with impressive accuracy. See more details on the Varminter.com website.
.22 BR Savage Varminter — Accuracy on a Budget
This .22 BR Savage, with upgrades from Sharpshooter Supply, is the “pride and joy” of Forum member Maynard. Note the heavy-contour custom barrel with brake. That .22 BR cartridge is a very effective choice for varmint work, as the ground hog in the photo proves. The .22 BR and .22 Dasher are capable of outstanding accuracy with a large variety of bullets and powders. A .22 Dasher can rival the ballistics of a 6mmBR out to 500+ yards, but with reduced recoil.
Avid varmint hunter Bill White (aka “CT10Ring” in our Forum) concurs about the effectiveness of the .22 BR Cartridge: “.22 BR — My .22 BR is my first choice for most prairie dog missions. Accuracy is superb with necked-down 6mmBR Lapua brass — quarter-MOA and blazing fast. With the right twist rate, this chambering can shoot anything from 40gr FB bullets to 80gr VLDs. Load development is easy. Below is my .22 BR ammo for another varmint trip. I use 55gr Sierra BlitzKings with Varget in my 1:12″-twist Shilen-barreled rifle. 60gr Bergers are very accurate with a fairly flat trajectory for useful distances.”
6mm Dasher for Voldoc’s 2024 Prairie Dog Safari
Respected Forum member Voldoc has a long thread about his 2024 Prairie Dog Safari, his 20th trip of this kind. He reported: “After the 1st day of shooting with 30+ MPH wind, we settled down on a High Point, and set up the Benches the second day for a ‘Shooting Gallery’ of non-stop shooting. PDogs were in play from 125 to 1,000 yards.” Voldoc’s rifle features these components: Nesika J RBRP action, 1:12″-twist Krieger barrel chambered by Mike Bryant for the 6 Dasher, 2 oz. Jewell trigger, Thunder Beast Suppressor, Nightforce ATACR 7-35X FFP optic. He usually shoots 87gr V-Max bullets in annealed Lapua brass pushed to 3240 FPS by Vihtavuori N135 powder. To spot critters, Voldoc uses Vortex Fury 5000 AB Rangefinding Binoculars.
More Power — 6-6.5×47 Lapua for Longer Range Varmint Shots
Soon after Lapua released the 6.5×47 cartridge, wildcatters recognized the potential of a necked-down 6mm version of the case. The 6-6.5×47 has emerged as a great, do-it-all cartridge that performs well in High Power competition, 600- and 1000-yard benchrest, and PRS tactical matches. But the 6-6.5×47 is not just for paper-punching. An efficient cartridge with great inherent accuracy, the 6-6.5×47 can be an excellent, flat-shooting, long-range varmint round. Here we feature Stan Stewart’s BAT-actioned 6-6.5×47 varminter. Fitted with a Krieger 1:10″ barrel, Stan’s rifle excels with a wide variety of varmint bullets. Whether driving 70-grainers at 3700 fps, or pushing the Berger 88gr High-BC FB bullet at 3400 fps, this 6-6.5×47 delivers half-MOA (or better) accuracy, in a well-balanced, easy-handling rifle. He has developed very accurate loads with Varget, Vihtavuori N550, and Reloder 15.
Six Tips for Novice Long Range Varmint Hunters
1. Take twice as much ammo you think you may need. The fields could be particularly rich, or, because of wind or other variables, you may have far more misses than expected.
2. When possible, set up with the wind at your back (or, alternatively, directly ahead). This will minimize the effect of cross-winds. Set up a stake with a ribbon to show wind direction.
3. Bring at least two rifles. Ideally one would be a low-recoil rifle with cheaper components for the closer shots. Then bring a rifle with higher-BC bullets for longer shots where wind is a bigger factor.
4. Check the weather before you head out. Prairie dogs like sunshine and calm conditions. If a cloudy, very blustery day is predicted, considering staying in town and cleaning the rifles.
5. Bring plenty of water on a trip. An adult male should be drinking at least 64 ounces of water (or other liquid) every day — more if it’s very hot or you are sweating a lot.
6. Preferably always hunt with a companion. If you do go out solo, have a Garmin inReach SatComm/GPS for emergencies if there is no cell coverage in your location.
This year Hornady Mfg. celebrates its 75th year in business. To mark this milestone, Midsouth is running a series of sales and special promotions. Plus Hornady offers free bullets with many reloading gear items including dies and presses. Founded in 1949 by Joyce Hornady, the company began making bullets in a rented garage in Grand Island, Nebraska. The business remains family-owned today.
Currently, nearly all Hornady products are discounted now at Midsouth. And — get this — product shipping is just $0.75 (seventy-five cents) for all Hornady product purchases of $75 or more. Enjoy the savings!
Below are noteworthy featured Hornady product deals:
Click to go to the Hornady Product Sales Page with Featured Deals
FREE Bullets with Purchase of Certain Hornady Products
Hornady is also offering 500 FREE bullets with the purchase of select Hornady Products such as press combo kits. And you get 100 free bullets with certain dies and reloading gear. Check it out:
With the huge popularity of NRL22 and PRS rimfire matches, along with the growth of rimfire benchrest events, and local rimfire fun matches, we’ve seen heightened demand for all types of .22 LR ammunition. Plus the high cost of centerfire bullets and limited availability of powders and primers has pushed many centerfire shooters into the rimfire fold. Accordingly, prices have been rising for quality .22 LR ammunition. Thankfully, if you use Ammoseek.com, you can find most types of .22 LR ammunition, from bulk-pack plinking fodder to high-end Lapua, ELEY, RWS, SK, and Norma ammo.
Find Rimfire Ammunition Fast with AmmoSeek.com
Here’s a great search service that can help you locate hard-to-find ammunition and reloading components — while saving money in the process. AmmoSeek.com monitors scores of online vendors — checking current pricing and available inventory, for pistol, rifle, and shotgun ammunition. Looking for .22 LR ammo for your rimfire trainer or NRL22 rifle? Just select “.22LR” from AmmoSeek’s “Quick Seek” menu. NOTE: In mobile view type “22LR” in the “Search Ammo by Caliber” field top center.
And here are the 6/20/2024 search results for .22 LR ammunition. These are six of the 1000+ entries, starting with the least expensive, just 4.1 cents ($0.041) per round:
How to Search by Manufacturer and Bullet Weight
You can also search for a particular .22 LR ammunition manufacturer, and/or search by bullet weight. Just click on the “Modify Search Link”. Once you see the “Modify Search” column on the left, scroll down and you can sort by price (cost per round) and/or shipping cost. Here are the results of a search for LAPUA .22 LR rimfire ammunition:
The Tactical Rifle Shooters Facebook Group recently showcased tools used to measure case headspace before and after “bumping” the shoulder. After a case is fired, hand-loaders who full-length size their cases will typically bump the shoulders back anywhere from .001″ to .0035″, depending on the rifle and application. With our 6mmBR and Dasher cases we like about .0015″ bump.
You want the amount of case sizing and bump to be the same for all your brass. To ensure uniformity, it makes sense to measure your cases before and after the FL sizing process. When we have time, we check every case. Other folks will simply check the first 3-4 cases coming out of the FL sizing die to ensure the FL die setting is correct and delivering desired headspace/bump.
1. Whidden Gunworks Shoulder Bump Gauge
There are a variety of tools that can be used to measure shoulder bump. Our favorite is a special cartridge-specific bushing made by Whidden Gunworks. The Whidden Shoulder Bump Gauge enables you to adjust your sizing die to the desired measurement. The bump gauge is attached to your calipers with a set screw and determines the measurement from the base to the shoulder of the case. The photo below, from Tactical Rifle Shooters, shows the Whidden Bump Gauge for the .375 CheyTac cartridge.
2. Dave Manson Vertical Comparator with Dial Read-Out
Dave Manson states: “This tool was designed to make life easier for the advanced shooter and re-loader by allowing precise measurement of ammunition, case, and chamber headspace. With this information, the re-loader will be able to fine-tune clearances and fits between his ammunition and chamber, with resultant improvements in accuracy and case life.” The functions of the Manson Comparator are:
1. Measure headspace of factory or reloaded ammunition
2. Quantify chamber headspace by measuring headspace of a fired case
3. Ensure minimal shoulder set-back when setting up re-loading dies
4. Compare base-to-ogive length to ensure consistent bullet-to-rifling relationship.
Hornady’s Lock-N-Load Headspace Comparator system is easy-to-use and handy. You can get a kit with Red bushing-holder body and 5 bushings for $39.99 at Midsouth. Hornady explains: “The Lock-N-Load® Headspace Comparator… gauge measures variations in brass before and after firing or re-sizing. It allows for headspace comparison between fire-formed brass and re-sized brass.” IMPORTANT: Hornady states: “To determine the proper bushing diameter for your cartridge, simply add the neck diameter and the shoulder diameter and divide that number by two. Use the bushing closest to that number.” Hornady offers five: .330″, .350″, .375″, .400″, and .420″.
One tip — We have found the Hornady gauges may vary a little from unit to unit even with the same nominal size. If you have more than one gauge for the same cartridge, test each on your brass — you may then note a slight difference in your bump measurements. Mark one and use that consistently. There is also an Anvil Base Kit that mounts to the opposite blade on the caliper. This provides a more stable surface for the base of your case.
4. L.E. Wilson Case Gage Depth Micrometer
If you are looking for precise “bump” measurements without having to mess with calipers and clamp-on gauge blocks, you may want to consider the L.E. Wilson Case Gage Depth Micrometer (currently $130.00). This takes very precise, repeatable measurements, but you need to know your starting point. The manufacturer explains: “Every reloader should know exactly how much your Full Length Sizing Die is pushing back the shoulder. With the NEW Case Gage Depth Micrometer you can do just that! It has never been easier to measure you cases headspace before and after sizing. The Depth Mic allows you to slip the micrometer perfectly over the top of the Gage with your case inserted into the Gage and take a measurement. Micrometer has graduations of .001″. The Case Gage Depth Micrometer is set to a zero of .100″ on the scale at our factory. Because of differences in ‘feel’ and temperature, we include a the Gage Block for you to test Zero and to adjust if necessary.”
5. Pistol Brass Case DIY Bump Gauge
Last is a “field expedient” set-up if you do not have any of the comparator tools shown above. A sized .45 ACP case (or other suitable pistol case) can be used to measure shoulder bump. The mouth of the pistol case sits on the shoulder of your rifle cartridge brass.
Make sure the .45 ACP case is trimmed square and that it is round. We recommend you first run it through an expander, then size it, trim it and chamfer. Next, take the .45 ACP case and slip it over the neck of a fired, unsized rifle case with the primer removed. Align the two cases between the jaws of your calipers and note the length from rim to rim (See left photo below).
OK, now you have the length for a fired rifle case BEFORE sizing. Next, take a full-length sized rifle case (without primer) and do the same thing, placing the .45 ACP case over the neck of the FL-sized case (Right Photo). The difference between the two numbers is the amount of “bump” or set-back you are applying to the shoulder. Here the difference is .0015″. The amount of bump you need varies with your chamber and your load, but .0015-.002″ is a good initial setting.


 In this podcast, Applied Ballistics Founder Bryan Litz and Product Manager Francis Colon answer some of the most common questions received from listeners. They primarily discuss the latest Applied Ballistics integrated devices and highlight their capabilities.


 Effects Of Cartridge Over All Length (COAL) And Cartridge Base To Ogive (CBTO) – Part 2


 From Wes (P1ZombieKiller): “[For my first PD trip] there are so many things I was not ready for. The one thing that I did bring (that no one told me about) was a canopy. I’m glad I did. Even though the weather was [near perfect], I know that sun can humble you real fast. With my pop-up canopy, I could shoot all day without getting killed by the sun. You had to tie the canopy down real well or the wind would blow it across the pasture.
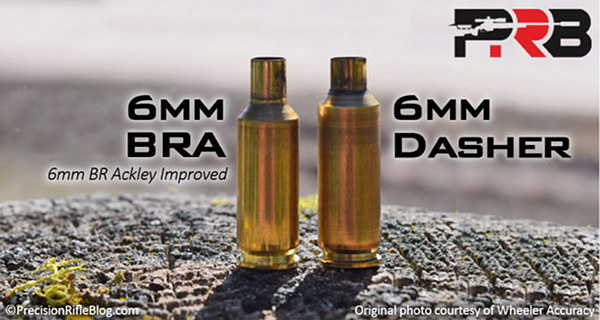


 Respected Forum member Voldoc has a long thread about his


