However, if you don’t have a printer, don’t want to pay for commercial targets or adhesive target stickers, then there IS an interesting option. One of our Forum members has created his own Custom TARGET STAMP. Using an INK PAD, this creates a black multi-ring bullseye on paper that matches the exact dimensions of a competition target (SEE Top Photo).
Forum member JimmyMac wanted a target that replicates a competition multi-ring bullseye. He wanted to be able to stamp this bullseye quickly and easily on blank paper. Shown below is the custom stamp he created to accomplish that task. JimmyMac posted: “I took dimensions of a 100-yard group target and had a stamp made to transfer to the paper of my choice. Not revolutionary by any stretch, but works good. I may do a UBR score target stamp next.” JimmyMac purchased the target stamper through an online vendor: “I bought mine online. I provided a template. They did the rest. Here is the stamp and the ink that goes inside.” READ FORUM Thread for more information.
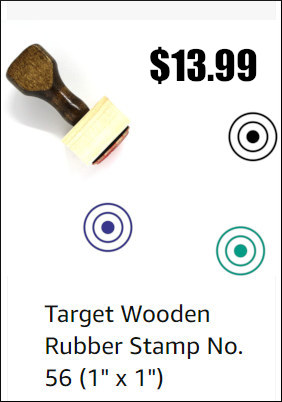
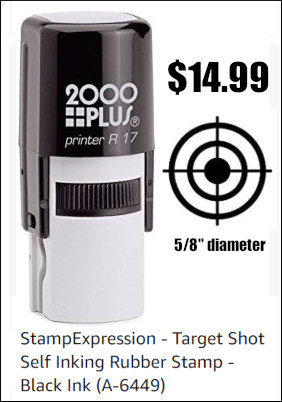
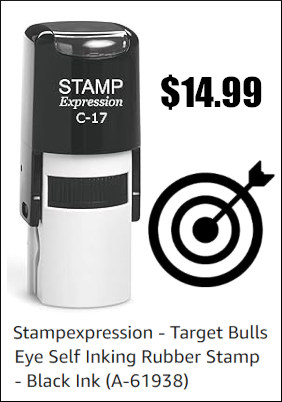
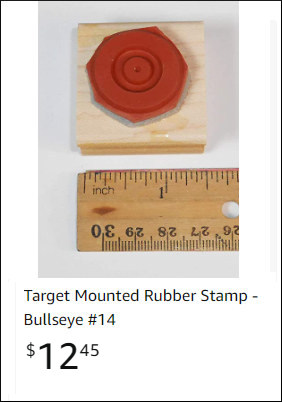
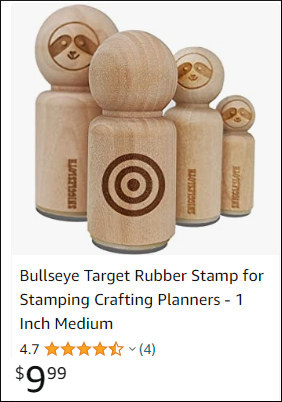
Target Stamp Sets on Amazon
There are a large variety of ink-using target stamps available now on Amazon. Some of these are “self-inking” for convenience, while others require a separate ink pad to function. Here are some of the many target stampers currently offered. There are many target pattern and target size options.
This article is Copyright 2026 AccurateShooter.com. Republication by any other website or media violates Federal copyright law and obliges that third party to pay statutory penalties and damages.
“Shoot Like a Champion”. Bryan Litz, author of Applied Ballistics for Long-Range Shooting, says he often sees notes like this tucked in shooter’s gear (or taped to an ammo box) at matches. What “marksmanship mantras” do you use? Do you have a favorite quote that you keep in mind during competition?
On the Applied Ballistics Facebook Page, Bryan invited other shooters to post the motivating words (and little reminders) they use in competition. Here are some of the best responses:
“Shoot 10s and No One Can Catch You…” — James Crofts
“You Can’t Miss Fast Enough to Win.” — G. Smith
“Forget the last shot. Shoot what you see!” — P. Kelley
“Breathe, relax, you’ve got this, just don’t [mess] up.” — S. Wolf
“It ain’t over ’til the fat lady sings.” — J. McEwen
“Keep calm and shoot V-Bull.” — R. Fortier
“Be still and know that I am God[.]” (PS 46:10) — D.J. Meyer
“Work Hard, Stay Humble.” — J. Snyder
“Shoot with your mind.” — K. Skarphedinsson
“The flags are lying.” — R. Cumbus
“Relax and Breathe.” — T. Fox
“Zero Excuses.” — M. Johnson
“SLOW DOWN!” — T. Shelton
“Aim Small.” — K. Buster
“Don’t Forget the Ammo!” (Taped on Gun Case) — Anonymous
PARTING SHOT: It’s not really a mantra, but Rick Jensen said his favorite quote was by gunsmith Stick Starks: “Them boys drove a long ways to suck”. Rick adds: “I don’t want to be that guy”, i.e. the subject of that remark.
AIM SMALL, MISS SMALL: At 25 yards, this is a fun rimfire plinking target. At longer distances it can be a great training target for precision centerfire shooters.
NRL22 and PRS rimfire competition is hugely popular. And we’re seeing great interest in .22 LR rimfire tactical cross-training. With a rimfire rig, you can practice regularly for a fraction of the cost of centerfire shooting. That way you can build your skill set without breaking the bank. Good rimfire ammo can be had for 12 to 20 cents a round. Compare that to $1.00 (or more) for centerfire handloads and as much as $2.20 per round for factory ammo such as Hornady 6.5 Creedmoor.
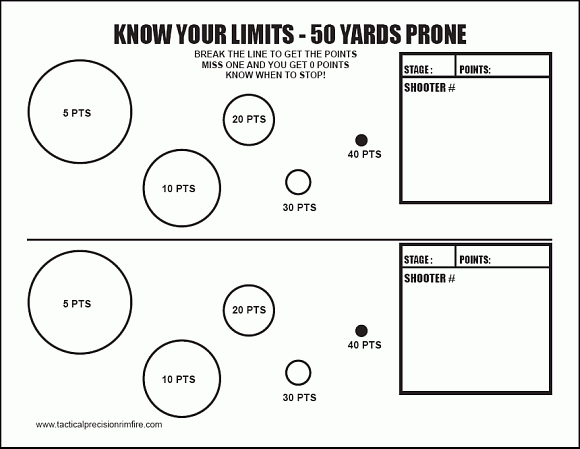
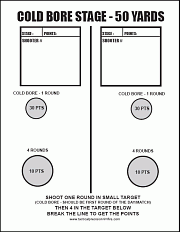
To help with rimfire cross-training, here are some of our favorite rimfire tactical targets, all in easy-to-print PDF format. Click each target image to download the FREE target. You’ll find more free targets for load development, precision practice, and fun shooting on our AccurateShooter FREE Targets Page.
Modern Rimfire Tactical Rifle with MPA BA Comp Chassis and Vudoo V-22 action.
Targets for Rimfire Training and Fun Matches
Here’s a rimfire training target with “big to small” target circles. Start with the largest circles, then move to the smaller ones in sequence. This systematic drill provides increasing challenge shot-by-shot. Novices often are quite surprised to see their accuracy improve as they move from bigger to smaller aiming points. That provides positive feedback — always a good thing.
Right Click and “Save as” to download printable PDF versions of target.
This Vortex Nation video features an 80-minute interview with Travis Ishida, one of the original founders of the NRL22 and NRL22-X disciplines. Travis told us that the NRL now runs 7-8 times as many rimfire matches as centerfire matches.
Rimfire Practice Targets
SPECIAL BONUS–Rimfire Tactical Precision Targets
These FREE targets by DesertFrog are offered in Adobe Acrobat format for easy printing. CLICK HERE to download all six targets as a .ZIP archive.
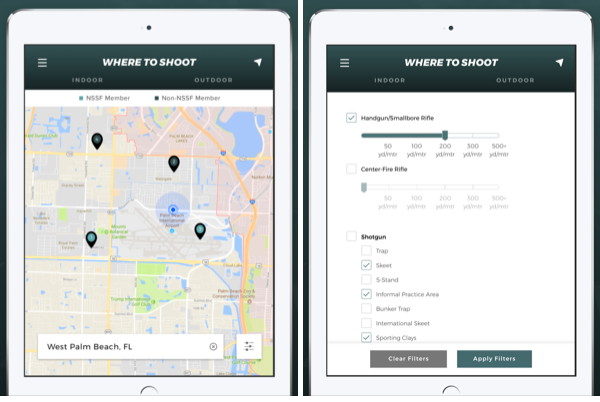
The Where To Shoot Mobile App quickly locates shooting ranges near you, drawing on North America’s most comprehensive directory of shooting ranges. Users can search by current location, state, or zip code. Once you locate a range, you can view activities offered along with a summary of range facilities. You can even get driving directions. If you don’t want to install an App, you can also access the NSSF shooting range database and maps via the NSSF WheretoShoot webpage.
The app is modeled after NSSF’s popular WhereToShoot.org® website and is updated frequently with range information for every U.S. state and Canadian province. Once you’ve located a place to shoot, the App can provide directions to the range. The App also includes video tips for shooters, news, and firearm-safety information.
Yes, as we start 2026, there’s snow on the ground in many parts of the nation. There have been some big snow-storms in the northeast, with very cold weather in many parts of the country.
Rifle Transformed from Ordinary Varmint Rig to a Stunning F-TR Machine
As an antidote to these weather-related worries, for this Sunday GunDay we’re offering a bit of beauty amidst snow — a handsome rifle showcased in a white winter wonderland. This handsome rifle started life as a rather ordinary .204 Ruger Rem VSSF varmint rig. With a new barrel, a new stock, and a stunning flame-pattern hydro-dip coating, this is now an ultra-accurate .223 Rem F-TR competition rifle.
Flames in the Snow…
Forum Member Brandon Schlund (aka “Bois Blanc Boy”), photographed this handsome flame-themed F-TR rifle against the snowy background of Michigan’s Bois Blanc Island. Brandon posted this to our long-running Pride and Joy Rifle Forum thread. He notes: “This is my first F-TR build, which started out as a stock Remington .204 Ruger. I had the action blue-printed, firing pin was bushed by Speedy, and I had a new bolt handle and knob installed by John Pierce.” This rifle is now fitted with a 3-groove Pac-Nor 1:6.5″-twist barrel chambered in .223 Remington to shoot the 90gr Bergers. Other components are: Kelbly KTS stock, Phoenix bipod, and Sightron 8-32x56mm SIII scope. Brandon says: “It took a long time to get this gun where it is now but I’m truly happy with it!” Here’s the “before” photo:
The Transformation — F-TR Comp Rig Made from Rem .204 Ruger Varminter Report by Brandon Schlund
This rifle started out as a “plain Jane”, factory Remington VSSF II. I shot it on varmint hunts in factory configuration. Then I decided to transform the rifle into a .223 Rem F-TR gun. As the .204 has the same bolt face as a .223 made sense to go in that direction since I would be able to use the gun for varmint hunting as well as F-TR.
While I had shot some F-Class matches with my dad (Joe Schlund aka Bench on AccurateShooter) it wasnt much. When we did a PD hunt in Wyoming I primarily shot my .204 but I decided I wanted a cartridge that could reach out a little further and also do double duty — competition and varminting.
The first step in transforming this rifle was selecting a barrel. We ordered a Pac-Nor, 1:6.5″-twist, 3 groove, 30.5″ heavy Palma contour. This was then chambered with a PTG .223 ISSF reamer with 0.169″ freebore to run the .224 caliber heavies. I went with Pac-Nor because both my father and my brother Mark (aka Labrador2 on AccurateShooter) owned Kelbly-built F-TR rifles with the same barrels. Mark and my father couldn’t be happier with the results. Pac-Nor has great customer service along with a short wait time.
I sent the barrel and the factory Remington 700 action down to Kelbly’s where they did the chambering and cut the threads. While Kelbly’s had my action I had them blueprint it. A Kelbly KTS stock with the three-way buttplate and adjustable cheek piece came next. After getting behind Dad’s rifle and Mark’s gun there was no reason to look any further. With all its adjustments, the KTS stock fits very comfortably.
Loading for the .223 Rem with H4895 and 90gr Bergers
As a .223 Rem, this rifle has proven very accurate — it’s a bullet-hole cutter at 100 yards (low twos easy). Our best load is with Hodgdon H4895, 90gr Berger VLDs, CCI BR4 primers. This load is running at about 2835 FPS but YMMV (remember this is a LONG 30.5″ barrel). The Bergers are loaded .008″ into the lands with base-to-ogive of 2.035″.
Our loading technique may be tedious — with lots of sorting and measuring. But brother Mark, father Joe, and I all enjoy the steps. Our three .223 Rem match guns all love the same load which makes loading much easier. Believe it or not we use a Hornady Lock-N-Load progressive ammo plant, which is great when loading for three guns. Our consistency is fantastic with run-out a mere .001-.0015.
We also turn necks and weigh our primers. Does neck-turning and primer weighing really make a difference? Who knows but we try to eliminate more variables since we have to the time to do it, and we actually enjoy the procedures.
Pierce Engineering Installed Action and Modified Bolt
Being from Michigan, Pierce Engineering has done a lot of work for my family’s guns. For this project the Pierce team bedded the action and glued in a single-shot follower. The stock bolt handle/knob was too short for comfort in the KTS stock. Pierce added a longer handle and tactical knob to the bolt. I then installed a .223 Rem Lapua case base into the knob.
The complete .223 Rem rifle ready to shoot F-TR, as fitted with 8-32X56mm Sightron and Phoenix Bipod, weighs 17 pounds, 15 ounces.
Flame Graphics by Camo Creek Hydrographics
After the action was bedded by Pierce, the stock was sent to Camo Creek Hydrographics in Fenton, Michigan. I selected a flame-style design which Camo Creek applied through hydro-dipping. The stock went back to Pierce’s shop, which applied three coats of clear over the entire stock. The clear-coating really enhanced the flame graphics.
Firing Pin Bushed by Speedy
I sent the bolt to Thomas “Speedy” Gonzalez to have the firing pin hole bushed as otherwise the load could crater the primers pretty bad. Knowing I’d be shooting heavy-weight .22-Cal bullets with a stout load this was a good idea. Speedy also cut his trademark grooves into the bolt shroud which looks amazing. His work is top notch! There is zero cratering now, even with the hottest of loads.
Competition Components — 8-32x56mm Sightron and Phoenix Bipod
For an F-TR rig you need a quality high-magnification optic and a premium, wide-base bipod. I installed a 8-32x56mm SIII Sightron. This was another easy choice because of the attractive price and because my family has four other Sightrons that work great.
I installed a fore-end Picatinny rail to attach a Phoenix Bipod. I extended the Mariners wheel handles by adding short sections from an aluminum arrow shaft. This lets me adjust elevation without stretching forward. I also installed a Calvin Elite Timney Trigger set at 6 ounces.
$2500.00 Invested in Rifle Transformation and Upgrade
How much did this all cost? Brandon tells us “I have roughly $2500 into the rebuild of the gun from a .204 Ruger to the .223 Rem.”
Bois Blanc Island in Michigan
Here on Bois Blanc Island we don’t have many amenities, but we do have the ability to shoot 550 yards at our local gravel pit on state land. It’s snow-bound right now as you can see. But later in the year this will be our close-to-home training center.
Winter at Bois Blanc Island, Michigan — Here’s the gravel pit where we can load test during warmer weather. When I took this photo, it was a “balmy” 10-degree day.
Most bolt-action rifle shooters work the bolt with their trigger-pulling hand. This is because most rifles sold to right-handed shooters come with right-side bolts, while “lefty” rifles come with left-side bolts. This “standard” configuration requires the shooter to take his dominant, trigger-pulling hand off the stock to cycle the bolt, then re-position his hand on the stock, and “re-claim” the trigger. Often the shooter must lift or move his head to work the bolt, and that also requires him to re-establish his cheek weld after each and every shot. Not good.
This really doesn’t make much sense for precision shooting with fore-end support*. There is a better way. If you leave your trigger hand in position and work the bolt (and feed rounds) with the opposite hand, then you don’t need to shift grip and head position with each shot. All this requires is a weakside-placed bolt, i.e. a left bolt for a right-handed shooter or a right bolt for a left-handed shooter. The video below shows a “Lefty” working a right bolt. Note how efficient this is:
As our friend Boyd Allen explains: “If you think about it, if you are going to work with a factory action where your options are left bolt and left port or right bolt and right port, and you are building a rifle that will only be shot from a rest, using the left/left for a RH shooter or using a right/right for a LH shooter works better than the conventional configuration”.
Shoot Like a Champ and Work the Bolt with Your Weakside Hand
Derek Rodgers is a recent F-TR World Champion, a King of 2 Miles champion, AND is the only person to have won BOTH the U.S. F-Open and the U.S. F-TR National Championships.
And guess what? Derek runs this kind of “opposite” bolt set-up. Yep, Derek shoots right-handed with a left bolt. Though Derek is a right-hander, he shoots with a Left Bolt/Left Port (LBLP) action. He pulls the trigger with his right index finger, while working the left-side bolt with his left (weakside) hand. This allows him to stay in position, and maintain his cheekweld. He places his right hand on the grip, while manipulating the bolt (and feeding rounds) with his non-trigger-pulling hand.
Past F-TR World Champion and Past King of 2 Miles Derek Rodgers
This is the rifle with which Derek won the 2013 F-TR National Championship.
*For true standing, off-hand shooting (whether in competition or on a hunt), a conventional strongside bolt placement makes sense, since the non-dominant arm must support the front of the rifle all the time. When shooting from bipod or rest, it’s a different story.
Can you hit an egg at 600+ yards? We mean hit it reliably — not just by luck. To do that you’ll need good shooting skills and a very accurate rifle. How accurate? Well, a chicken egg is, on average, 2 1/4 inches (57 mm) long and 1 3/4 inches (44.5 mm) in diameter. That means to hit an egg (on demand) at 600 yards, you’ll need a rifle capable of 1/3-MOA accuracy (or better). Forum member DukeDuke has such a gun, and he demonstrated its egg-busting prowess in this short video. DukeDuke’s rifle is chambered in 6BRX (a 30° 6BR Improved) and it’s loaded with DTAC 115gr bullets pushed by Alliant Reloder 17. In the video, the eggs are placed on top of poles set 616 yards from the firing line.
See Egg Hit at 38 second mark…
As you can see in the video, that’s a heck of a nice shooting range where DukeDuke scrambled those eggs at 616 yards. The range is situated just outside of Lake Jackson, Texas. As for the gun… the action is a Rem 700 SA BDL, blueprinted and bedded in a Rem/HS Precision PSS stock. The 31″ barrel is 1:8″-twist Broughton. The “P3″ on the barrel stands for Porter’s Precision Products, Lake Jackson, TX. The rifle was built by Kenneth Porter. The load was 33.5 grains of RL-17 at 2950 fps, with 115gr DTAC bullets touching the lands. Cartridge OAL is 2.400″.
The 6mm BRX was developed by Bob Crone. Retaining the 30° shoulder of the parent 6mmBR case, the BRX has a little less capacity than a 6mm Dasher. Bob told us that his original design for the 6mm BRX always had a .100″ longer head space than a 6mmBR Norma and that he never deviated from that. But after Bob developed the first 6mm BRX, Bill Shehane made a 6mm BRX version that had a .120″ longer head space, and thus some confusion started. In truth, the original 6mm BRX always was (and still is) a chambering with a head space .100″ longer than a 6mm BR Norma.
Stunners in silver. Above are the NRA Leech Cup (left) and Wimbledon Cup (right).
Shooting Sports USA has a fascinating article about the Perpetual Trophies awarded in national-level NRA matches. The story recounts the history behind the elaborate trophies, some from the 1870s. SSUSA’s Jennifer Pearsall writes: “The pieces of wood, stone and precious metal … are more than just instant recognition of achievement. They are the link of the American shooter’s present to his or her patriotic past. As you read this legacy of the NRA ranges, their founders, and the long list of cups, bowls, and plaques, realize that the history of competitive shooting is undeniably a significant part of the foundation of this country”. Read Full Trophy Story HERE.
The NRA was co-founded by Col. William Church and Gen. George Wood Wingate (ranked Captain at the time). Both Church and Wingate hoped to improved the marksmanship skills of American soldiers. One of the newly-formed NRA’s first actions was to issue: “An Act to Establish a Rifle Range and Promote Skill in Marksmanship”. That led to the opening of the famed Creedmoor Range, with a special inaugural match in June of 1873.
Many of the awards presented in the first NRA matches were cash or firearms. Some of these firearms were heavily embellished works of art. In the very first match, a member of the 22nd New York Regiment took home a gold-mounted Winchester Model 1866 valued at $100 — big money for the time.
In the 1870s shooting competitions were social as well as sporting events. Ladies and gentlemen came to watch and cheer the winners. This illustration, originally from Harpers Weekly, portrays the shooters and the viewing gallery at the 1876 Grand Centennial Championship—the “Palma” Match.
The Leech Cup — A Gift from Ireland
The Leech Cup was created for the first meeting of the American and Irish shooting teams. The elaborate cup was presented by Major Arthur Leech, captain of the the Irish team, to the Amateur Rifle Club of New York. This masterpiece of Irish silversmithing was later given to the NRA in 1901 by the New York Club. Today, the Leech Cup is the oldest trophy offered in overall NRA competitive target shooting, awarded through the National High Power Long Range Championships.
Michelle Gallagher with Leech Cup in 2013.
The Wimbledon Cup
The Wimbledon Trophy was a gift from the NRA of Great Britain. It was given, as a gesture of sportsmanship, after the the U.S. Team was denied the ability to compete in England’s Elcho Shield match, then limited to Britain, Scotland, and Ireland. To maintain friendly competitive relations, the British presented the Americans with a large, engraved, lion-footed tankard trophy to be awarded each year to the Champion U.S. long-distance rifleman.
The Palma Team Trophy
Originally named the Centennial Trophy, in honor of the Centennial celebration of the independence of the United States of America, the Palma Trophy was commissioned from Tiffany’s at a cost of $1,500. The trophy was a full-sized replica of a Roman Legion standard, executed in bronze with silver and gold inlay. On the banner of the standard was the legend, “In the name of the United States of America to the Riflemen of the world”. Above the banner was an eagle, bearing in its talons a wreath of palm leaves and a plaque on which was the single word, “PALMA”, the Latin word for palm tree, which was used by the Romans to signify victory, or the ultimate in excellence.
Because the word Palma was so easily seen, the trophy soon became known as the “Palma Trophy”, and by 1878 was referred to officially by that name. The sriginal seven and one-half foot trophy is now lost, having not been seen since at least 1954. Serving in its place is a copy which was commissioned by Dr. Herbert M. Aitken of Eau Claire, WI. The copy was made from the original Tiffany blue-prints at a cost of $32,500. Dr. Aitken has given this copy of the Palma Trophy to the NRA for use in the Palma Match. The trophy is retained by the winning team until the next Palma Match.
In 2008, the Palma Trophy was returned to the NRA, and it was decided that the trophy, once refurbished, will travel to the host nation for the match every four years, then returned to the NRA for safekeeping.
The first competition for the Palma Team was a challenge match for which the British Commonwealth nations were invited. The match was fired in 1876 at the old Creedmoor Range on Long Island as part of the Centennial celebration of the United States. Teams representing Scotland, Ireland, Canada, Australia, and the United States took part. The match is currently fired on a four-year interval.
Our friend Dennis Santiago is a talented Service Rifle shooter, who regularly competes with an AR shooting the .223 Rem cartridge. A few seasons back, he decided to go over to the “dark side”, putting together a Palma (fullbore) rifle chambered for the .308 Winchester. Dennis selected a Competition Machine (Gary Eliseo) R1 Chassis for the project. Here’s Santiago’s account of his “true blue” Palma build.
Palma Rifle Report by Dennis Santiago
“This project was a .308 Win Palma rifle with an Eliseo R1 chassis, Rem 700 action (blue-printed with PT&G upgrades), Jewell trigger, Boots Obermeyer 1:11″-twist barrel, and Phoenix sights holding Gehmann apertures. Next comes chassis and sling set-up, initial mechanical zeroing, and load development. Yup, I have a bunch of Peterson small primer .308 brass, Sierra #2156 155gr MKs, and Varget to get started with. I’m told I can drive 155gr pills to stay supersonic to 1K. Should make for an interesting 2020. My goal was to be cozy with this blue beast by the time the Berger Southwest Nationals kicked off in February 2020.”
CLICK Imagefor full-screen photo with more detail.
Pinning the Picatinny — For a Super-Solid Mount
One of the key parts of the build, Dennis explains, is mounting the top rail with pins: “Once the rail is aligned using a spin-centered optic, it locks down with three 3/16″ roll pins. That way there is no reliance on screws that can come loose. Above is a photo of the top of the Eliseo tube chassis showing the three, 3/16″ roll pins that unitize the Picatinny rail. You can also see the four brass screws that just kiss the action to fully stabilize it in the tube. The recoil ring buttresses completely around the action with metal to metal contact. There are a million details hidden inside a Gary gun.”
Phoenix Sights Front and Rear
Rise of the Phoenix — Here are the sights for the Eliseo R1. There are very few manufacturers left making these kinds of ultra-precise and repeatable iron sights.
These Ray-Vin tools help set mechanical zero on the sights. Dennis notes: “Finally a reason to pull out the Ray-Vin calibration paraphernalia to set up a mechanical zero. This photo is for all of you who still remember that those barrel flats and screws in our sight towers actually had a purpose once upon a time.”
Sling ‘N Irons — Classic Palma Configuration Dennis plans to use an Eric Hollis sling with his new blue Palma rifle.
Peterson Small Primer .308 Win Brass for Santiago’s Rig
Dennis has used Peterson Cartridge Small Rifle primer .308 Win brass. Peterson offers a “Select” version weight-sorted and length-sorted at the factory. All Select casings (in a 50ct box) are guaranteed to be within 1 grain in weight and .001″ in OAL. Peterson Select brass is available for 20 different cartridge types, including .308 Win both small primer/small flash hole and large primer/large flash hole.
Now Adapted with a Scope
Currently (in 2025) Dennis has this rifle fitted with a high-magnification Nightforce zoom scope, and he competes with his blue prone rifle in the “Any-Any” division. He usually runs the scope at about 22X power. For an older guy with aging eyes, being able to run high-magnification optics is a big plus.
With the optics Dennis has found the rifle to be exceptionally accurate. Shooting 168gr bullets it has produced 5-round groups around 1/3-MOA during testing. And it can easily hold the X-Ring at 300 yards.
Getting the Blue Rifle Ready for the Berger SW Nationals
Dennis has campaigned his rifle at recent Berger Southwest Nationals (SWN) events. At the SWN a Palma shooter can shoot iron sights, or also fit a scope and shoot in the “Any Sights” category. The week-long Berger SWN is the biggest rifle match in the Western United States. Hundreds of shooters compete in both individual and team events. The SWN begins with the Mid-Range Nationals at 600 yards. Then the Long-Range matches are held, with targets out to 1000 yards. Watch the video to see the Ben Avery facility, home of the Berger SWN:
Chassis-maker Gary Elesio at the 2017 Berger SW Nationals. Gary shoots what he sells:
At long range, small bullet holes are much easier to see “in the white” than in the black center of the normal High Power target. When you’re practicing at long range using a scoped rifle, one way to enhance your ability to see your bullet holes is to print a “negative” version of the regulation bullseye target so that your black center is now white.
How do you create a “negative” of a target image? Many image programs, including the FREE Irfanview software, have a “Negative” function in the pull-down menu. If you don’t see a “Negative” menu option in your program, look for a “substitute colors” option. Many printers also have a “reverse colors” function. If you can’t find a solution with your computer or printer, just take a normal bullseye target to a copy shop, and the staff can easily print you a set of targets with white centers in black fields.
Forum member Watercam has a Pentax PF-80ED spotting scope that allows him to see 6mm bullet holes in the white at 600 yards. However, 6mm holes in the black are only visible out to 400 yards or so. Accordingly, Watercam uses a modified “reversed” black-to-white target for 600-yard practice. Watercam explains: “[Using the Pentax] With my 6mm and limited mirage I see defined, 6mm holes in the white out to 600. In the black, however, I can see bullets holes at about 400. I now use reverse-color targets for training without a pit partner at the 600-yard line.”
The Hi-Viz Solution — Day-Glo Pasters
If you’re not concerned with official scoring rings, you can use an all-white target with a bright, fluorescent target dot in the middle. A 2″- or 3″-diameter stick-on target dot is highly visible at 600 yards. Birchwood Casey Target Spots® assortment #33928 offers neon orange target dots in 1″, 2″, and 3″ diameters.
TARGET TIP — Use Chart Paper
For practice backers for the Day-GLo pasters at long distance, use Flip Chart Paper (aka Easel Pads) marked with graph lines at 1″ intervals. Available either regular or self-stick, one sheet can hold 4-8 pasters and the white paper allows for easy spotting of the holes and quick estimation of group size. Get Flip Chart Paper at Amazon.com, Staples, or Office Depot.
Brits Use White-Field Target for F-Class
In the UK, some ranges are now using a “reverse-style” target with a mostly white area. Laurie Holland says this allows shooters to see shots much more easily. Laurie reports: “Here’s a photo of the 500/600 yard F-Class match target we use in PSSA comps at Diggle Ranges with club members Chris Hull (L) and Terry Mann (R). We now use this target form at all ranges up to 1K for F-Class, and, yes you can often see your hits at 600 yards on the target before the markers pull it. Regards from England — Laurie”.


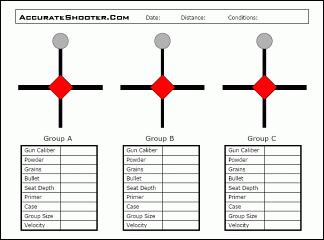 AccurateShooter.com has a page with dozens of FREE printable targets including many sets of multi-aimpoint targets and our very popular Three Row Diamond and Circle Target with load data tables (see photo at right).


 “Shoot Like a Champion”. Bryan Litz, author of


 Flame Graphics by Camo Creek Hydrographics


 Can you hit an egg at 600+ yards? We mean hit it reliably — not just by luck. To do that you’ll need good shooting skills and a very accurate rifle. How accurate? Well, a chicken egg is, on average, 2 1/4 inches (57 mm) long and 1 3/4 inches (44.5 mm) in diameter. That means to hit an egg (on demand) at 600 yards, you’ll need a rifle capable of 1/3-MOA accuracy (or better). Forum member DukeDuke has such a gun, and he demonstrated its egg-busting prowess in this short video. DukeDuke’s rifle is chambered in 6BRX (a 30° 6BR Improved) and it’s loaded with DTAC 115gr bullets pushed by Alliant Reloder 17. In the video, the eggs are placed on top of poles set 616 yards from the firing line.
 As you can see in the video, that’s a heck of a nice shooting range where DukeDuke scrambled those eggs at 616 yards. The range is situated just outside of Lake Jackson, Texas. As for the gun… the action is a Rem 700 SA BDL, blueprinted and bedded in a Rem/HS Precision PSS stock. The 31″ barrel is 1:8″-twist Broughton. The “P3″ on the barrel stands for Porter’s Precision Products, Lake Jackson, TX. The rifle was built by Kenneth Porter. The load was 33.5 grains of RL-17 at 2950 fps, with 115gr DTAC bullets touching the lands. Cartridge OAL is 2.400″.


 The Palma Team Trophy


 Forum member Watercam has a Pentax PF-80ED spotting scope that allows him to see 6mm bullet holes in the white at 600 yards. However, 6mm holes in the black are only visible out to 400 yards or so. Accordingly, Watercam uses a modified “reversed” black-to-white target for 600-yard practice. Watercam explains: “[Using the Pentax] With my 6mm and limited mirage I see defined, 6mm holes in the white out to 600. In the black, however, I can see bullets holes at about 400. I now use reverse-color targets for training without a pit partner at the 600-yard line.”


