Forum member F-Class John is an avid F-Class competitor and expert handloader. John reviews reloading hardware and shooting-related products for his popular F-Class John YouTube Channel, which now boasts 220+ videos. John also does important product testing for AccurateShooter.com. Through his YouTube channel, John has reviewed many of the latest and greatest reloading tools and accessories. For today’s Video Showcase, we selected eight F-Class John tool and reloading product reviews.
If you like these selected videos, consider joining F-Class John’s Patreon Channel for live video meetings, more in-depth videos, and detailed explanations.
21st Century Hydro Press and Standard Arbor Press
John notes: “You can’t really talk about precision reloading without taking about inline dies and arbor presses. For my money there’s nothing better than the lineup from 21st Century Shooting. They offer the Hydro Seater which is hands-down the best manual seater out there as well as their standard arbor press which is great for taking on the road to push back bullets as needed.”
Primal Rights Competition Priming Seater (CPS) Review
If there is a Ferrari of priming tools, it has to be the Primal Rights Competition Primer Seater (CPS). This impressive bench-mounted tool allows very precise control over primer seating depth. A vertical tube holds primers ready for insertion. The action is smooth and precise. John believes that this is definitely the best priming tool on the market, though it may not be for everyone given its premium $600.00 price.
Lyman Powered Case Trimmer Review
The Lyman Case Trim Xpress is an efficient, precise unit that allows easy adjustment of trim length with a click-adjustable collar. The trimmer comes with a set of cartridge-specific bushings that index off the case shoulder. One nice feature is a variable speed control. For the price, $154.99 on Amazon, this trimmer delivers excellent performance. F-Class John has another video review of the Lyman Case Trim Xpress which shows set-up and operation.
Dillon 750 Tips and Tricks
The Dillon XL 750 is a favorite of high-volume reloaders. With the optional case feeder, the XL 750 offers high output with great reliability. And Dillon offers one of the best warranties in the business. In this video, F-Class John features upgrades including the Armanov tool-head holders from Europe. These are drilled and tapped for all FIVE stations allowing the user to put threaded dies in any station.
Gunsmithing Torque Wrench Comparisons
When you are working on custom rifles that might cost $5000+, and mounting scopes that can run $3000 (or more), you need to use very high-quality tools. Precise torque settings are essential, both to avoid damage to valuable parts, and to have the rifle and optic perform optimally. In this video, F-Class John looks at a variety of torque wrenches suitable for gunsmithing duties.
Concentricity Checking with Accuracy One Gauge
Every serious hand-loader needs a quality concentricity gauge. The Accuracy One Concentricity Gauge boasts a smart design that delivers precise, repeatable results. We like the unit’s easy adjustability and its ability to work in a variety of configurations. The Accuracy One Gauge measures internal and external neck runout of cartridge cases as well as seated bullet runout. It can also measure the runout of the ogive, bearing surface, and boat-tail of individual bullets. And it can even measure your primer pocket runout.
Teslong Rigid (Shaft) Borescope with Monitor
Seeing inside your barrel can provide clues to how well you’re cleaning and the bore’s overall health. One of the best tools on the market is the Teslong Rigid Borescope. This features a solid rod for easy use in barrels. Plus it comes with a self-contained high-definition viewing monitor so no smartphones or WiFi tablets are needed. If you’re looking for something more portable and a bit more versatile, try the Teslong Flexible Borescope, $99.99 including monitor. John was impressed with the new rigid Teslong he tested, and he likes having a dedicated monitor (no WiFi required).
Zero Turret Press with Whidden Sizing Die
The new Zero Press from Area 419 is arguably the best turret press ever crafted. It offers unrivaled precision, along with the highest-capacity turret head with NINE die/tool stations. Milled from billet aluminum and stainless steel, this press moves with the help of 14 bearings. In this video, F-Class John shows how to use a Whidden Gunworks full-length sizing die on the Zero Press. And John has two other video reviews of the $1200 Zero Press: 1. Zero Press First Thoughts Video; 2. Loading on a Zero Press.
AccurateShooter.com offers a dozens of free, printable targets in our Target Collection. However, we know that sometimes shooters may prefer a commercially-printed specialty target. These may offer unique designs, hi-viz colors, splatter effect, or special functions (such as scope checking). Here are a variety of excellent commercial grid targets you can buy via Amazon or the target-maker’s website.
EZ-AIM 12″x12″ Grid with Orange Bullseyes — $1.46 for 13-pack
We like this EZ-Aim Sight-in Grid Target for sighting-in, load development. and general practice. The full 12″x12″ target is covered with a precise black-lined grid on white background. There is a large center orange bullseye, plus four additional bulls, one in each corner. Right now this target is a bargain. You can get a 13-pack of targets for just $1.46. That’s right, less than $1.50. This is a steal.
Freedom Targets — Bullseye Sight-In Grid Target, 25 for $15.99
Here’s a great Bullseye Sight-in Grid Target. This target provides a central bull on a 1″ grid pattern. There 8 additional small orange dot aim points, plus helpful numbers on the central vertical and horizontal lines. The outer four orange aim points are set inside heavier black lines to help align your scope crosshairs. This target is nicely printed, with sharp lines and bright orange circles. You get a pack of 25 targets for $15.99 — that’s $0.64 per target.
Birchwood Casey Grid — Black on White Splatter, 10 for $11.70
We’ve all seen conventional splatter targets with a black bullseye or grid. When a shot hits the target, a halo (usually neon yellow) appears around the bullet hole. Here is another kind of splatter target that creates a black circle on a white background. This can be very effective for spotting your hits at long range. This Birchwood-Casey White Grid Target is $11.71 for a 10-pack. These Shoot-N-C Sight-In Targets have a self-adhesive backing, making for easy put up and take down. In addition, the target pack comes with corner pasters to cover holes or use as additional aim points.
High-Viz Option — Yellow on Black Grid with Yellow Halos
If you prefer seeing ultra-high-contrast yellow/green “halos” for your hits, Birchwood Casey also makes adhesive grid targets with five yellow-edged diamonds. Red circles provide precise aiming points in the middle of each box. You can quickly estimate group size or dial-in your zero using the hi-viz yellow 1″ grid lines. These yellow-on-black targets are available in three sizes: 8″ square, 12″ square, and 17.5″ square. These yellow-on-black grid targets start at $6.99 for an 8″ six-pack.
B-2-B Precision LR Load Dev & Scope Tracking Target — 3 for $22
Here is one BIG target that handles a myriad of important tasks at the range: Zeroing, Load Development, Click Value Verification, and Click Tracking Repeatability Tests. Box to Bench Precision (B2B) offers the most versatile (and biggest) precision targets ever developed. With precise grid geometry, and razor-sharp printing, B2B’s targets are probably the most advanced shooting targets ever created.
B2B’s 100 Yard Long Range Load Development and Scope Tracking Target performs many functions. This big, 30″ x 23.5″ target has specific aiming points for various tasks. In the upper left, there are 11 small orange circles for precision load testing. Over on the upper right are 7 more small, orange circles for doing a Seating Depth Comparison test. The bottom half of the target has larger black-on-white circles that serve multiple functions. Use the corner circles to do a “Box Test” to confirm scope tracking. On the bottom row is one B/W circle to confirm zero and another to use for velocity testing. There’s another great feature on this target — running up the center of the target is a tall line that shows elevation in both MILs and MOA. That helps you confirm the TRUE click values of your optic. Get a precision 100-yard 3-Pack for $22.00, or the 100m version 3-Pack for $13.00.
Splatterburst — 12″ x 12″ Splatter Grid Targets, 10 for $10.99
This 12″x12″ Splatterburst Target combines splatter shot marking with a grid background, with five aiming points. The bright neon shot circles make it easy to see your shots. And the handy grid lets you quickly estimate your group size. Get a 10-pack for $10.99, or a 25-pack for $18.99 (better deal). This particular target has earned rave reviews — 87% of verified buyers gave this a FIVE-Star rating. One example: “Excellent quality and durability. The adhesive is really strong and the splatter contrast is [great].”
Performs as Promised — Prevents Mess at Home or at Range
When cleaning rifles, wet and dirty patches can make a real mess. And solvent spray from the muzzle is another issue. Here’s a solution — the MTM Gun Cleaning Patch Catcher. Simply slip it over your barrel to contain all the patches pushed out the muzzle. No more mess and stains on your bench/table. When cleaning tasks are done, simply remove the Patch Catcher and dump the contents into the trash.
We’ve tried this product and it definitely helps keep your work surfaces and floors clean. No more messes on the bench or spray from solvents. Purchasers really like this product — it has 80% five-star reviews on Amazon (current Price $9.03). Watch the video to see how the MTM Patch Catcher works.
Here are product reviews from actual MTM Patch Catcher purchasers:
“This box straps over the muzzle end of a barrel and keeps the mess completely contained. Excess cleaning solvents collect in the bottom. Patches fall off the jag and are captured as well when the cleaning rod is withdrawn. It also completely contains the splatter burst when a bore brush exits the muzzle of whatever firearm is being cleaned.” — D.J. Bradley
“This little device is more than a patch catcher. It also contains that dirty, smelly spray when a bore bristle exits the barrel. With the top open, it will also catch spray cleaners and lubes when used on small parts. It takes a little work to mount it on a railed over/under, but it gets the job done there too.” — TwoBoxer
“This does exactly what it claims. It keeps the table or floor clean while you are cleaning barrels. It is easy to use and easy to clean. If you are cleaning guns outside on a range, then you probably don’t need this. If you cleaning them in your garage, then buy this. Your garage and workbench will love you.” — DDDnotes
Q: Does this fit securely if you have a standard muzzle break?
Answer: Yes, I regularly use this product on all of my rifles including my Savage 111 Long Range Hunter with a factory brake. It really keeps the smell down with the top closed. Also stops the splatter of a stiff brush exiting the muzzle. Great Product! — Iklwa
Q: Has anyone used this with an AR15?
Answer: It works quite well — goes on and off easily. Slide it on the barrel until you can tighten the strap behind the flash suppressor.” — Cactus
Tumblers and walnut/corncob media are old school. These days many shooters prefer processing brass rapidly with an ultrasonic cleaning machine. When used with the proper solution, a good ultrasonic cleaning machine can quickly remove remove dust, carbon, oil, and powder residue from your cartridge brass. The ultrasonic process will clean the inside of the cases, and even the primer pockets. Tumbling works well too, but for really dirty brass, ultrasonic cleaning may be a wise choice.
Our friend Gavin Gear recently put an RCBS Ultrasonic cleaning machine through its paces using RCBS Ultrasonic Case Cleaning Solution (RCBS #87058). To provide a real challenge, Gavin used some very dull and greasy milsurp brass: “I bought a huge lot of military once-fired 7.52x51mm brass (fired in a machine gun) that I’ve been slowly prepping for my DPMS LR-308B AR-10 style rifle. Some of this brass was fully prepped (sized/de-primed, trimmed, case mouths chamfered, primer pockets reamed) but it was gunked up with lube and looking dingy.”
UltimateReloader.com Case Cleaning Video (7.5 minutes):
Gavin describes the cleaning exercise step-by-step on UltimateReloader.com. Read Gavin’s Cartridge Cleaning Article to learn how he mixed the solution, activated the heater, and cycled the machine for 30 minutes. As you can see in the video above, the results were impressive. If you have never cleaned brass with ultrasound before, you should definitely watch Gavin’s 7.5-minute video — it provides many useful tips and shows the cleaning operation in progress from start to finish.
Ultra Dry Necks After Ultrasonic Cleaning — Some Suggestions
The Ultrasonic cleaning process gets cartridge brass so “squeaky clean” that increased force may be required to seat your bullets, or they may “grab” as they go in the necks. To reduce bullet-seating effort, you may benefit from adding a little dry case lube inside the case-neck before loading (use a nylon brush). Another trick is adding a teaspoon of Ballistol lube to the cleaning solution. That provides a trace lubricant inside the necks, but does not interfere with powder ignition in any way.
The latest Gen2 RCBS ultrasonic cleaning machine has a large 6.3-quart capacity. That’s nearly 100% larger than the first generation machine in Gavin’s video. The Gen2 machine, $385.49 on Amazon, features a second ceramic heater and transducer to better clean brass cases and firearm parts. The LED is easily programmable, and the timer can be set for up to 30 minutes of cleaning. The original 3.2 quart-capacity RCBS ultrasonic machine, as shown in Gavin’s video, is still available for $180.72 at Midsouth Shooters.
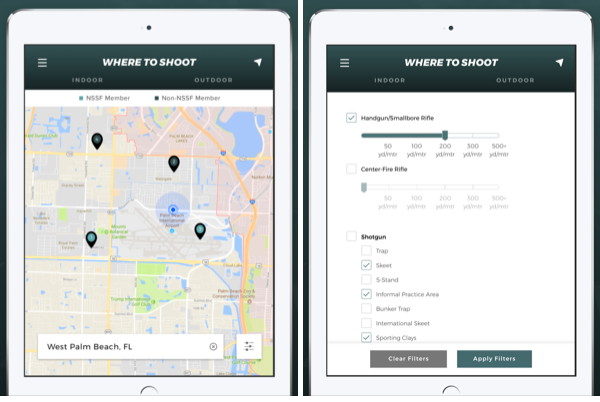
The Where To Shoot Mobile App quickly locates shooting ranges near you, drawing on North America’s most comprehensive directory of shooting ranges. Users can search by current location, state, or zip code. Once you locate a range, you can view activities offered along with a summary of range facilities. You can even get driving directions.
The app is modeled after NSSF’s popular WhereToShoot.org® website and is updated frequently with range information for every U.S. state and Canadian province. Once you’ve located a place to shoot, the App can provide directions to the range. The App also includes video tips for shooters, news, and firearm-safety information.
This photograph and all images for this story are by Bill White, aka “CT10Ring” in our Forum.
AccurateShooter Forum member Bill White (aka “CT10Ring”) is not your typical member. For 37 years, Bill worked in NYC as a studio photographer specializing in still lifes and products. A neighbor visiting Bill’s home in Connecticut with a .270 Sako inspired Bill to revive his interest (obsession?) with shooting after a 25-year drought. And he owns a few Sakos now! With his gun hobby renewed, for many years Bill drove to the Western USA to shoot long range steel and a LOT of prairie dogs in season. He loved the life of the varminter, so it made sense for him to move West after retiring. He choose Idaho as his new home.
From his Idaho base, Bill enjoys long-range target shooting. But his favorite gun pastime has been varmint hunting in nearby states — the Dakotas, Montana, and Wyoming. Bill found prairie dog shooting rewarding and mapped out a western circuit route of ranches and National Grasslands in SD, ND, MT, and WY. Every year he loads up his truck and hits the road, often doing a grand circle route, visiting prairie dog havens in multiple states. In this article we feature photos from Bill’s annual “grand circle” varmint safari.
For his many cartridge types, Bill learned about reloading methods, loads, and vendors (and more) primarily from AccurateShooter.com. We start today’s story with the biggest caliber rifle he shoots regularly, his 6.5-284 Winchester. Bill favors this rig for his long-range steel shooting. He also uses it for prairie dog shooting, but only “sparingly”, because he wants to preserve barrel life, and he has many other dedicated varmint rigs.
6.5-284 for Long Range Steel Targets (and Sometimes Varmints)
In his home state of Idaho, Bill likes to shoot steel at long range. For distance work, Bill favors his McMillan-stocked 6.5-284 Win. This rifle was crafted in 2012 by Bob Green of York, PA, using a 1:8″-twist 28″ Krieger HV barrel (.298″ neck). The trued Rem 700 action was purchased from Long Rifles in Sturgis, SD. Bill did the Cerakote and bedded the action. For his 6.5-284, Bill loads 139gr Lapua Scenars, H4831sc powder and BR2 primers. He shoots both steel and varmints with this rifle, but the varmint work is limited because the 6.5-284 cartridge tends to be a barrel burner. The photo below from an Idaho range was taken near a 500-yard target, looking back at the firing line.
In the Varmint Fields — Traveling Light
Once situated, Bill (shown above) prefers to walk to Prairie Dog towns with a shooting mat, two bipod-equipped rifles slung up, rear bag, water, and his trusty Leica 10X42 GeoVid binoculars. While he has used a portable bench, he prefers to shoot from bipod, firing down from a mound if possible. This allows him to set up a line-of-fire that minimizes cross-wind effects. Bill notes: “While I often start early, end-of-day shooting has worked worked well for me. A setting sun shows targets better, the wind is usually down, and it’s not so hot. Often you can spot the bullet trace and that’s fun.”
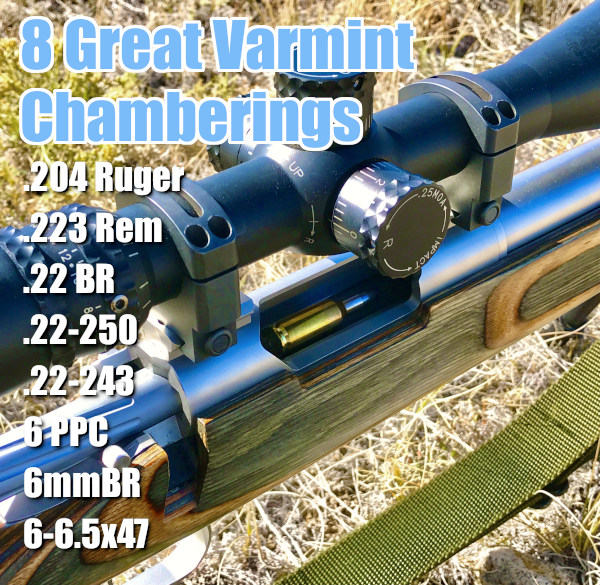
Eight Great Varmint Cartridge Types — .204, .224, .243 Calibers
Here is one of Bill Reid’s 6mmBR (6BR) rigs. Like his Sako 6 PPC, this is exceptionally accurate.
Bill has a large rifle collection, most of which see duty in the varmint fields of Montana, North Dakota, South Dakota, and Wyoming. Here are his key “take-aways” for his eight favorite varmint chamberings: .204 Ruger, .223 Rem, .22-250, .22 BR, .22-243, 6 PPC, 6mmBR, and 6-6.5×47 Lapua (aka 6×47).
.204 Ruger — This delivers great velocity with the little .20-caliber bullets, with mild recoil. The .204 Ruger easily reaches out to 400 yards, but heavier winds do move the tiny bullet around. Tremendous splat factor under 250 yards. I use Sierra 39gr bullets with IMR 8208 XBR in a Sako 75. Even now, .204 Ruger ammo is relatively easy to find.
.223 Remington — Probably the most popular centerfire rifle round in the USA, the .223 Rem offers inexpensive brass, and is a great choice for AR-15 owners. If you run short on ammo, you can find it nearly everywhere. I often bring one AR-15 and one .223 Rem bolt gun on varmint safaris. My Rem 700 5R 1:9″-twist barrel likes 53gr V-Max bullets.
.22 BR — My .22 BR is my first choice for most prairie dog missions. Accuracy is superb with necked-down 6mmBR Lapua brass — quarter-MOA and blazing fast. With the right twist rate, this chambering can shoot anything from 40gr FB bullets to 80gr VLDs. Load development is easy. Below is my .22 BR ammo for another varmint trip. I use 55gr Sierra BlitzKings with Varget in my 1:12″-twist Shilen-barreled rifle. 60gr Bergers are very accurate with a fairly flat trajectory for useful distances.
.22-250 Rem — A classic varmint cartridge, the .22-250 with 50gr V-Maxs delivers spectacular hits. If three P-Dogs happen to be lined up, I’ve witnessed one .22-250 shot take ‘em all out with a triple hit. I currently have five .22-250-chambered rifles: 3 Sako 75s, one Rem 700, and a single shot Nesika that shoots tiny groups. I favor the very deadly Berger 52gr Varmint HP. Making a custom .22-250? With a 1:8″-twist barrel you can use the full weight range of .22-cal bullets, while spinning the lighter bullets fast for “red mist” effect. Remember this cartridge can be a barrel burner. Don’t shoot too many rounds too quickly.
.22-243 Win — This wildcat is even more potent than the .22-250, delivering devastating results on P-Dogs. Run a .243 Win case slowly through a full-length .22-243 die, with plenty of lube to form the brass. I start with Lapua .243 Win brass. There can be some issues necking-down the brass. Watch for donuts forming at the neck-shoulder junction. I bought my .22-243 rifle not sure how it would perform. But now I love shooting it. My .22-243 delivers half-MOA groups with 41.0 grains RL-22 and Hornady 75gr Amax bullets. With those 75-grainers, it’s great in the wind and good to 600 yards easily.
6 PPC — You may consider the 6 PPC a benchrest competition cartridge only, requiring fire-forming. However I have an original Sako 75 single-shot 6 PPC rifle that I load with Sako-headstamp 6 PPC brass (see below) so no fire-forming is required. This Sako 75 came with a test target that measured 0.113″! With my 6 PPC Sako, I found that 58gr V-Maxs, pushed by Vihtavuori N133, are potent out to 300 yards.
6mmBR — The 6mmBR Norma (6BR) offers a nearly unbeatable combination of accuracy, efficiency, and tunability. With the 6BR and a fast twist barrel, you can shoot everything from 40gr flat-base bullets to the latest 105-110gr match bullets. I load Lapua brass, Vihtavuori N135, and Hornady 58, 65, and 75gr bullets for my Krieger 1:14″-twist HV barrel. While this cartridge is capable of long-range accuracy, I usually limit my 6BR shots to 350-400 yards.
6-6.5×47 Lapua — In this story’s lead photo is my 6-6.5×47 Lapua varmint rifle, with Surgeon action and Manners stock. I Cerakoted the barreled action and then bedded the action. Shown below is 6-6.5×47 ammo I loaded for recent testing. Note how I separated different bullets and powder loads into multiple, labeled bags. Hodgdon H4350 is a great choice for this cartridge — 39 grains H4350 with 105gr Amax was the winner here, but 88gr Bergers also shot well. This cartridge has tremendous “critter dismantling” abilities out to 600-700 yards.
Six Tips for Novice Long Range Varmint Hunters
1. Take twice as much ammo you think you may need. The fields could be particularly rich, or, because of wind or other variables, you may have far more misses than expected.
2. When possible, set up with the wind at your back (or, alternatively, directly ahead). This will minimize the effect of cross-winds. Set up a stake with a ribbon to show wind direction.
3. Bring at least two rifles. Ideally one would be a low-recoil rifle with cheaper components for the closer shots. Then bring a rifle with higher-BC bullets for longer shots where wind is a bigger factor.
4. Check the weather before you head out. Prairie dogs like sunshine and calm conditions. If a cloudy, very blustery day is predicted, considering staying in town and cleaning the rifles.
5. Bring plenty of water on a trip. An adult male should be drinking at least 64 ounces of water (or other liquid) every day — more if it’s very hot or you are sweating a lot.
6. Preferably always hunt with a companion. If you do go out solo, have a Garmin inReach SatComm/GPS for emergencies if there is no cell coverage in your location.
Veteran Varmint Hunter Shares his Secrets
Where to Find Abundant Prairie Dogs — Generally, black-tailed P-Dogs are found in the Western high desert, in the same states/areas where cattle are raised. You’ll find good hunting in Montana, North and South Dakota, Colorado, and Wyoming. There are good hunting grounds on private ranches, BLM tracts, and U.S. National Grasslands. To find specific locations, I’d suggest calling the USFS, BLM, and State Fish & Game. Some have lists of ranches that allow P-Dog shooting. Give the agencies a call before your trip and then check in with ranchers. IMPORTANT: You need a current hunting license in some states.
How to Connect with Ranch Owners– A good varmint adventure can begin with a local connection. Stop into the local Ag/feed store and the town breakfast spot. I bet you’ll find some retired ranchers having coffee together who may direct you to a place that needs rodents thinned out. Let’s say you’re in Roundup, Montana. Stop by a local store and ask what ranchers allow PD shooting. Keep in mind that ranchers may be wary of allowing a total stranger to sling lead on their place. Show respect and if you had a good experience, send a thank-you note. A guided shoot is worth considering — the outfitter will know where the P-Dogs are and he has arrangements with landowners. He may even supply benches. I’ve taken two guided trips, with excellent results, one near Sturgis, SD, and the other on Sioux tribal land near Rosebud, SD.
Getting Set Up — I start early in the a.m. to mitigate mirage. Plus there is usually less wind at that hour. I prefer to drive to within half mile or so of a PD town, then walk and shoot prone. Most shooters like to set up a rotating bench on a knoll. This is a tried-and-true way to shoot long distances accurately, especially if you are on top of a hill and can shoot 360 degrees. I once shot from a rotating bench, but I prefer walking now. Some country is quite stunning and that’s half the fun — being out in nature. But yes there are negatives to shooting prone — ground hazards and tall grass can impede your vision.
Equipment for a Serious P-Dog Safari — In the field, I normally carry two rifles with Harris 9-13″ bipods, backpack, a rolled-up shooting mat, at least two liters of water, food, ammo, two rear bags, and binoculars. A good laser rangefinder comes in handy. If you prefer shooting from a bench you may want to have a front rest and a spotting scope. Many guys will shoot prone from the bed of a truck. That gets you off the ground without the need to haul around a heavy bench. But some locations restrict vehicles. Before a P-Dog trip, I make a detailed pack list and check off as I load my truck and camper. I would suggest bringing waterproof rubber or muck boots. June in South Dakota can be cold and wet, and the mud there is not to be believed. Don’t attempt to drive off road in it!
It’s good insurance to bring an extra 5 gallons of fuel for your vehicle in a jerry can and 2 gallons of H20. There may be NO shade for miles and dehydration is a real possibility. Having a couple heavy duty tarps will provide a sun shade and cover your gear in a rainstorm. I bring a 16″ X 20″ plywood target backer, a stand, and paper targets. This allows me to check zero on each rifle before I head out to the Dog Town.
Western Varmint Country Vistas
Taking Photos on Shooting Adventures
Bill knows a thing or two about taking pictures, having been a professional photographer in NYC for many decades. He uses modern digital cameras for both his outdoor and indoor work. Most photos in this story were taken with a Canon EOS 5DSR MKIV. We asked Bill for some tips on taking good photos. Here are his FIVE Top Tips for Photography:
1. Take photos in the early a.m. and later p.m. when the light has definition. Mid-day results will not be so nice.
2. Use the highest-resolution camera available that fits your budget. Yes lens quality, focus, and exposure controls make a big difference.
3. When feasible, shoot using a manual setting with the lens wide open (for shallow focus). Set the focus on the most important object/subject in the frame.
4. Photoshop is useful, especially when RAW images need to be corrected to show the scene more faithfully, or enhance it.
5. After you take a picture, before you post it on social media, learn to crop the image, straighten the horizon, and do other basic fixes. This can make a big difference.
Running out of space in your gun safe? Here’s a clever product that will allow you to store more long guns in your current vault. The plastic Rifle Rods from Gun Storage Solutions slip in long-gun barrels and then grip the shelf above using Velcro pads. This allows you to nestle your rifles and shotguns much closer together than with the conventional racks provided with most gunsafes. The rods are offered in bright orange or basic black. We prefer the safety orange rods (shown above with the Velcro “receiver” shelf liner provided with the Rod Kit).
Rifles with narrow furniture (such as lever guns) can be placed very close together, saving lots of space. For benchrest or varmint rifles with wider fore-ends, you won’t benefit as much. Note that, in the photo above, all of the guns are fairly slim — none have wide fore-ends. Still we think these Rifle Rods could open up 12″ or more horizontal clearance in a medium-sized safe — that could easily allow you to store six (6) more guns in two rows, as shown.
Rifle Rod Kits Starting at $21.70
A kit with 5 Rifle Rods and fabric shelf liner costs $21.70 on Amazon.com, while the 10-Rod Kit with liner costs $34.70 on Amazon. That’s a lot cheaper than buying a new safe. A six-pack of additional rods is $19.95 from StoreMoreGuns.com. NOTE: Some Amazon kits have black rods. To get the bright orange rods you may have to pay a few dollars more and order directly from Gun Storage Solutions.
WARNING: Always REMOVE Rod from barrel before taking gun to the range. Never place live ammunition in a gun with storage Rod in the barrel!
Hardware Choices: Actions, Stocks, Barrels, Optics and More Tech Talk by Jeff Stover
This article was prepared by past IBS President Jeff Stover based on results from the 2019 IBS 100/200 Group Nationals held August 12-17, 2019 at the Holton Gun & Bow Club in western Michigan.
Let’s examine the Top Ten rifles from the 2019 IBS Group Nationals in the 10.5-lb Light Varmint Class. We’ll focus on the most popular rifle components — the choices for Actions, Stocks, Barrels, and Scopes.
Hall of Famer Jeff Gaidos taking aim at the 2018 IBS Group Nationals. He has a low-profile carbon-fiber stock with a Leupold fixed-power scope.
For some years now, BAT has been the predominant action. This year BAT actions held nearly 100% of the Top Ten places in all the Bag Gun equipment lists. Bruce Thom’s Idaho-crafted actions, except for a couple stray actions in Heavy Bench, swept the top rankings.
Next, look at barrels. Bartlein or Krieger seem to rule with upstate New York’s venerable Hart barrels as competitive. Shooters tend to go with winners, so Wayne Campbell and Jeff Peinhardt dominate as gunsmiths for the top benchrest shooters.
In stocks there seems to be variety, but there is some commonality. The Scoville and Scarbrough stocks, both Michigan-made, are laminated wood (balsa and other wood) with carbon fiber and wrapped in carbon fiber. The Scoville stock on my 10.5-lb rifle weighs 18 ounces but is full size with a nice long fore-end. Bob Scarbrough makes a very similar product. Both are winners — it’s a choice of Ferrari or Lamborghini. The Roy Hunter and Terry Leonard stocks among these top rifles take a different route to winner’s circle. Both are wood (cedar or other), but super high-tech as they are laminated with carbon fiber. They are beautiful to boot. High-magnification Leupold, March, and Nightforce scopes rule the roost among benchrest optics.
Bullets and Powder
Bullets are important. Really important. A hot bullet gives you “Teen Aggs” and lots of trophies. An average bullet does not. Most of these are 68 grain 6mm boattails. The Peinhardt (StaMoly Precision) bullet is well represented on this list, but some top shooters make their own as you can see. Bullet jackets are likely StaMoly or J4. For powder, nearly everyone shoots Vihtavouri N133 except a few guys running LT30/32 or surplus 8208.
Here’s a product we’re pleased to see on the market. Walker’s, a major supplier of hearing protection for shooters, offers smaller-sized NRR 23 ear muffs specifically designed for small children from six months to eight years of age. Walker’s basic Kid’s Folding Muffs provide protection for children against dangerous loud noises. The muffs are designed to fit smaller heads properly, and protect the sensitive hearing of youngsters. Priced under $15.00 on Amazon, these are very affordable so there’s no excuse not to protect your childrens’ hearing.
The adjustable headband on these muffs is designed for the smaller heads of kids up to age 8. These Kids’ Folding Muffs have a 23 NRR noise reduction rating. We wish that were at least 25 NRR, but this can be supplemented with foam plugs for extra protection (plugs under the muffs). The important thing is that these muffs are sized right for youngsters and fit properly (for a good sound-seal). Walker’s Kids’ Folding Muffs start at $14.99 MSRP and come in seven color choices: Coral, Highlighter Yellow, NEXT Camo, Blue, Green, Orange, and Pink. (Other colors are offered on Amazon including Purple and Black.)
In addition, Walker’s has a new series of Youth and Infant Muffs, designed expressly for smaller kids. These fit the smaller heads of youngsters and have comfortable padding so the young ones will tolerate them for longer periods. There is an Infant Muff for children 0-2 years, and a larger Youth Muff for kids 3-7 years. CLICK HERE for Product Info.
Baby BANZ for Children 0-2 Years Parents of very young infants should consider Baby BANZ Muffs, which are designed for infants 0-2 years. These small-sized muffs can protect toddlers’ hearing during rock concerts, when loud machinery is running, during fireworks displays, or other noisy activities. With an impressive NRR 31 dB rating, these really work for tiny tots and toddlers.
One mother reports: “I bought these for my two-month old and they work great! He’s never fought us putting them on. He’s now falling asleep with them. He’s slept through a demolition derby and a rowdy wedding reception. I’m ordering another pair for my nephew.” Another mom says: “We bought these when we took our four month-old to a loud event. They fit her head well and were well-padded. She looked very comfortable, so comfortable in fact that she slept for most of her first rock concert. I’d say they worked exceptionally well!”
We like the swivel (“S”) version of the Harris bipod. The swivel (actually tilting) capability of the bipod allows you to tilt (cant) your rifle around the bore axis to level the rifle on a side slope or uneven ground. Unfortunately, the swivel tensioner (friction knob) that comes standard with a Harris swivel bipod leaves much to be desired. The tensioning knob is hard to adjust with your fingers. The small knurled ring doesn’t offer enough leverage. When it’s tight enough to prevent movement it’s hard to release. For this reason, many folks replace the standard knurled ring with a rotating adjustment lever with push-button release. This works great and is easy to install.
While you can buy levers from various sources, EABCO.com has a tried-and-true system that works with both Harris and Caldwell XLA-S swivel bipods: “Our S-Lever Tension Lever is an economical replacement for the friction tensioning knob to give you much better control and leverage.” For just $16.95, Eabco.com delivers all the parts you need for the upgrade to your swivel bipod. Shown below are instructions for installing the EABCO S-Lever.






 Bill knows a thing or two about taking pictures, having been a professional photographer in NYC for many decades. He uses modern digital cameras for both his outdoor and indoor work. Most photos in this story were taken with a Canon EOS 5DSR MKIV. We asked Bill for some tips on taking good photos. Here are his FIVE Top Tips for Photography: