Springtime is just a few weeks away (Vernal Equinox, the official start of Spring, is March 20, 2026), so the outdoor season will be underway soon. Do you have a good first-aid kit in your vehicle to deal with possible injuries to family members of all ages? For just $18.41 on Amazon you can get an excellent kit from Be Smart/TRI, the #1 maker of First Aid Kits in the USA. Don’t delay, we expect this sale price to go up soon.
TRI’s Be Smart Get Prepared First Aid Kit has 303 items inside a sturdy case with shoulder strap and carry handle. There is also a handy, detachable mini pouch with key essentials for first aid on-the-go. You can easily bring the mini-pouch along on a bike ride or hike.
This multi-purpose First Aid Kit includes:
• 50 – Bandages 3/4 x 3
• 30 – Bandages 3/8 x 1 1/2
• 6 – Bandages Closure
• 3 – Knuckle Bandages
• 1 – Tapes – .5 x 2.5yd Waterproof
• 10 – Cotton Tips – 2.75″”/10 Pack
• 4 – Finger Splints
• 1 – First Aid Guide
• 4 – Gauze Pad – 2 x 2 / 4 ply
• 4 – Gauze Pad – 4 x 4 / 4 ply
• 1 – Gauze Pad – 5 x 9
• 2 – Nitrile Gloves
• 1 – Instant Cold Pack – 5 x 6
• 1 – Metal Pointed Scissors 4.5″
To help ensure that outdoor adventures remain safe and trouble-free, the CTD Shooters’ Log has a helpful Essential Summer Survival Guide. This is worth reading before you venture away from civilization.
Here are some highlights of the article with links for MORE INFO:
First Aid Kits for Campers
You should never venture outside without a first aid kit close at hand. While exploring the outdoors, all types of accidents can occur—from cuts, scrapes, and burns to broken limbs and severe allergic reactions.
Basic Survival Skills
Basic survival skills are a necessity if you plan to spend any amount of time outdoors. These five tips, plus a how-to on what to pack in a lightweight, basic survival kit will help if you are ever stuck, lost, stranded or injured in the field.
How to Treat Burns
Fireworks, barbeques and campfires — in the summer we are frequently around fire, which increases our chance of getting burned. A first-degree burn is most likely home treatable, while a third degree burn requires immediate medical attention. Learn how to spot the differences between minor and severe burns.
Did you know you can damage your hearing even if you are wearing the best hearing protection available? Well, have you ever heard of concussion (or concussive) hearing loss? There is no amount of anything you can put in or over your ears to protect you from concussion loss. My audiologist explained to me the concussion comes through the facial bone structure and damages the ear’s tiny bones.
Editor’s NOTE: This a very important article that explains how you can suffer inner ear damage and hearing loss even if you use quality earplugs and/or muffs. Read that again — hearing loss can happen even with typical hearing protection. This kind of concussive hearing loss can result from shooting with muzzle brakes in confined spaces. Using a suppressor (aka sound moderator) can reduce the risk of concussive hearing loss. You may not have the ability to use a suppressor, but this article explains how you should be more mindful of your hearing.
Why I Use a Suppressor (Preventing Concussive Hearing Loss)
It must have been the road noise. I thought I was having a hard time hearing my five-year-old daughter speaking to me on my cell phone because of the road noise. That old SUV was kind of loud inside. Until I switched the phone to my left ear and suddenly I could hear her just fine. Wait, what just happened? I moved the phone back to the right ear and there was that muffled voice again. That’s when I knew I had a problem.
“What?” Lots of us in the shooting community have lost some hearing along the way due to our time on the range or in the field. Those of us who hunt have certainly discharged a firearm or three without ear protection and without concern for our hearing. After all, it’s just one shot, right? How much can it hurt?
Actually, that one shot DOES hurt your hearing. Any sound over 140 dB is immediate hearing loss. It just happens to be killing a small amount of our hearing so most of us continued the practice without a care. Living with hearing loss now makes me wish I could go back 20 years and better protect my hearing. I can’t change what I did in the past, but going forward I can certainly do the most to protect the hearing I still have.
I decided to shoot about a year’s worth of matches with just braked rifles. That year is when I lost significant hearing in my right ear and some in the left. I’ve gone back to shooting only suppressed rifles whenever possible.
I shot my first suppressed firearm, a .22 LR pistol, in 2003. After a few rounds I wondered why everyone (who can do so legally) didn’t shoot suppressed? No one drives without a muffler. Why would you? Point is I immediately appreciated the hearing protection benefits of suppressors. That passion got me into the business of selling suppressors and it wasn’t long before I was one of the biggest retailers for companies like AAC, SWR, SilencerCo, Ops Inc. and others. [Editor: The author’s business, Accurate Ordnance, no longer sells suppressors. So this article is NOT a sales pitch. Mark just wanted to share his experience so others might protect their hearing.]
Did you know you can damage your hearing even if you are wearing the best hearing protection available? You’ve heard guys say, “I’ll wear plugs and muffs, so I’ll be just fine shooting that .50 BMG!” Well, ever heard of concussion (or concussive) hearing loss? Yeah, I hadn’t either. I’ll sum it up the way the last audiologist I spoke with about my hearing loss did – there is no amount of anything you can put in or over your ears to protect you from concussion loss.
A hand grenade went off right next to a buddy of mine. He lost some hearing as a result of the blast. No one is really surprised by that. I mean it is an EXPLOSION. It’s loud. Duh. But I had no idea the blast from a muzzle brake could basically hurt my hearing the same way. The doctor explained to me the concussion comes through the facial bone structure and damages the ear’s tiny bones. Same thing as what can happen through any TBI (traumatic brain injury).
I’ve owned quite a few different suppressors over the years and have shot just about everything out there. I’m still as big a fan as ever. However, I wanted to see if using a suppressor in PRS (Precision Rifle Series) and similar matches was actually a hindrance. Some people feel the added length and weight of a suppressor can make getting into some shooting positions slower or problematic. So I decided to shoot about a year with a muzzle brake instead of a suppressor. I sure regret that decision…
Getting Headaches at PRS Matches Was Warning Sign
It is fairly common in PRS matches to shoot through pipes, vehicles, inside “shoot houses” and around other obstacles that echo a rifle’s blast. I noticed I was starting to get headaches about halfway through a day of PRS match shooting. I knew the issue wasn’t hydration. I mean look, if you are peeing every other stage down at the amazing CORE range facility in mid-summer you are NOT dehydrated. So, what was causing the headaches? It wasn’t until I went back to shooting suppressed in those same environments that it became clear the little mini concussions from that muzzle brake was causing my headaches. And of course the doctors confirmed that.
Let me stop here and say I am NOT anti-brake. Muzzle brakes are useful tools and for some situations are the best tools. An aggressive brake can be more effective at reducing recoil than a good suppressor. A suppressor does add some recoil reduction, just not as much as most quality brakes. Don’t forget to factor other variables, such as caliber and rifle weight, into the equation though. For example, a 15-lb 6mm Creedmoor rifle doesn’t need much recoil reduction in the first place.
So, I started shooting matches long before the PRS even existed and always shot suppressed in those days. The suppressors made communication with a partner or RO easier and it was just a more pleasant shooting experience. On the recommendations of a few people I decided to shoot about a year’s worth of matches with just braked rifles. That year is when I lost significant hearing in my right ear and some in the left. I’ve gone back to shooting only suppressed rifles whenever possible and especially at matches. I’ve only once or twice found the extra length of the suppressor made it a little more inconvenient to run a stage, but not by much. Trust me, the points I missed were not because I took two extra seconds getting the muzzle in a port or window.
My hearing is something I value and will do everything to protect from this point forward. You’ll never again see me on a match field with an un-suppressed rifle. To me the minimal gains of running a braked rifle aren’t worth losing more hearing.
Choosing a Suppressor — What to Consider
Okay, so I have hearing loss that I can’t get back and realize I need to go back to shooting matches with a suppressor. But which one? I’ll still be shooting matches with custom fit plugs so I just need something to add a little recoil reduction and kill that concussion.
At our shop, Accurate Ordnance, we generally recommend direct-thread suppressor solutions to our customers. The main reason for that is all the problems we’ve seen with other fast-attach muzzle devices. It doesn’t take much tolerance stacking to result in accuracy issues. There are a few exceptions for us and the Rugged Suppressors products top the list. Since the Razor 762 uses a muzzle brake adapter on the rifle to attach the suppressor, I can use the same suppressor on my .223 Rem training rifle. My primary match rifles are chambered in 6mm Creedmoor and 6.5 Creedmoor and the muzzle threads on those is a standard 5/8×24. My .223 Rem training rifle has .5×28 threads on the muzzle, which is standard for that caliber. Thus, the muzzle adapter interface lets me share the suppressors between all the rifles. And on that .223 Rem training rifle I have the option of switching the end cap on any of the Rugged products to a .223 aperture size, which makes the suppressors slightly more sound efficient (meaning quieter).
Women are arming themselves — millions of females now have carry permits and female gun ownership is up 77% since 2005. What factors should women consider when choosing a handgun for self-defense? What are good choices for a lady’s defensive handgun, suitable for concealed carry? Is a self-loading pistol better than a revolver? In this article we include two videos focusing on handgun options for females. The videos cover six key factors: function, size, weight, ergonomics, reliability, and concealability.
Classic Swiss Precision — the Sig P239
The single-stack Sig P239 is an ultra-reliable, compact pistol with a grip suitable for smaller female hands. Weighing 25 oz. in 9mm, it is slightly heavier than polymer-framed handguns, but that may be a good thing. During my handgun training days, this Editor found most women shot the Sig P239 better than Glocks, with more control over recoil. This is a hammer-fired pistol with decocker but no separate safety. There are many other good handgun options for concealed carry — some smaller, thinner and lighter, but the Sig P239 provides a good benchmark for reliability and accuracy. Shown is the .40 S&W model. We prefer the 9mm Luger version. Photo Creative Commons BY-SA 3.0.
Choosing a Self-Defense Handgun — Ladies Explain the Options
Not Just a Guy Thing — Half of New Gun Buyers Are Women
According to the Wall Street Journal, over the past few years, “Close to half of all new U.S. gun buyers since the beginning of 2019 have been women.” And the percentage of female gun owners overall has increased dramatically. Here’s an interesting statistic — according to an NSSF survey, the percentage of gun owners who are female has increased dramatically. The National Shooting Sports Foundation (NSSF) has documented a 77% rise in female gun ownership since 2005.
And now nearly one-quarter of American gun owners are female. According to statistics from the NRA, around 23% of women in the U.S. own guns presently, when just 13% did in 2005.
The vast majority of first-time female gun buyers acquire a handgun for defensive purposes. However, the statistics also show that many new female gun owners are also getting involved in sport shooting and/or competitive shooting. An interesting TWAW survey shows that 76% of female gun owners are over 45 years of age, and most are married or in a serious relationship.
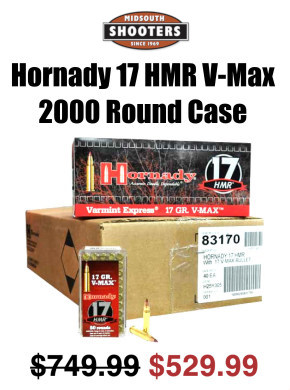
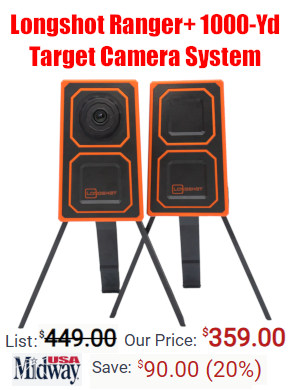
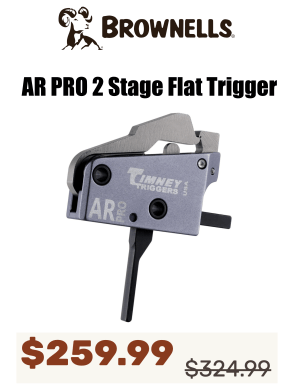
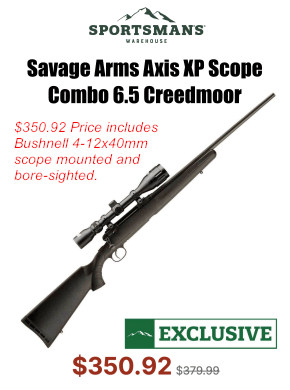
At the request of our readers, we provide select “Deals of the Week”. Every Sunday afternoon or Monday morning we offer our Best Bargain selections. Here are some of the best deals on firearms, hardware, reloading components, optics, and shooting accessories. Be aware that sale prices are subject to change, and once clearance inventory is sold, it’s gone for good. You snooze you lose.
NOTE: All listed products are for sale to persons 18 years of age or older. No products are intended for use by minors.
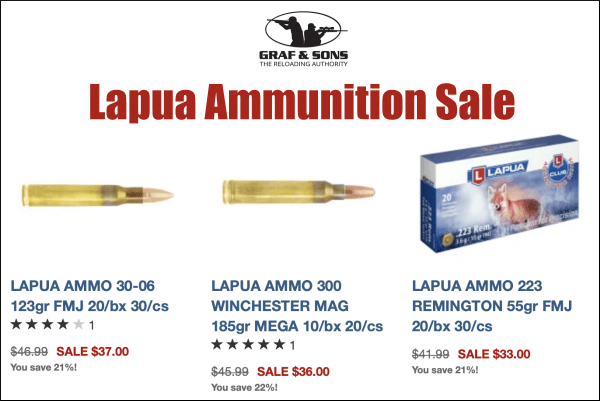
Graf & Sons — Lapua Ammo Sale, Save 14-25%
⏺️ » Superb Lapua rifle ammunition with significant savings
Sometimes you need quality ammo but don’t want to spend the time loading and testing. Lapua Ammunition is a great option, using ultra-high-quality Lapua brass and bullets. With this Lapua ammo you can feel confident that on your next hunt you’ll have the best ammo possible when the shot is on the line. Right now Graf’s has Lapua ammo, in many popular cartridge types, on sale with 14-25% savings.
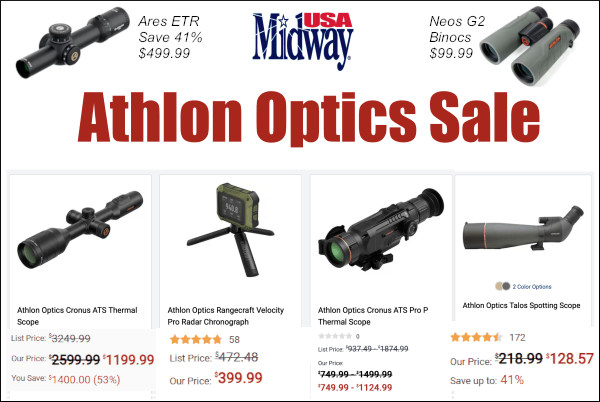
MidwayUSA — Major Athlon Optics Sale, Save up to 53%
⏺️ » Major discounts on wide selection of Athlon scopes and more
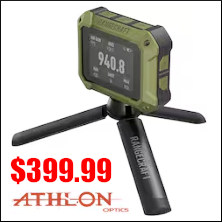
Athlon makes a variety of high-quality products, including rifle scopes, spotting scopes, thermal scopes, rangefinders, radar chronographs, and binoculars.
Right now at MidwayUSA you can get discounts up to 53% on a large selection of quality Athlon products. For example the Athlon Talos Spotting Scope is just $128.57, 41% off the regular price. And the Athlon Cronus ATS Thermal Scope is now $1199.99, a stunning 53% ($1400) savings off the regular price.
For today’s Sunday GunDay story, we look at the legendary Remington 700, perhaps the most popular American bolt-action rifle of all time. After covering the history of the Rem 700 rifle, we provide an inside look at the Rem 700 through a series of cutaway animations. Then we explain how gunsmiths can enhance a Remington 700 action through “blueprinting” procedures.
Remington 700 Origins and History
After World War II, Remington Arms engineer Mike Walker began designing lower-cost alternatives to the Model 30, which resulted in the Model 721. These used a cylindrical receiver produced from cylindrical bar stock that could be turned on a lathe, rather than machined in a series of milling operations, which significantly reduced the cost of production. Further developments of the basic 721 action under the direction of Walker produced the Model 722 and Model 725, and ultimately in 1962, the Model 700.
Walker sought to increase the accuracy of the rifles, by utilizing tight tolerances in the chamber and bore, a short leade, and a very fast lock time. Like the earlier 721, the Remington 700 action was designed for mass production. Remington initially produced two variants of the Model 700, the ADL and BDL, in both long- and short-action versions. In 1969, Remington introduced upgrades for the rifle, including a longer rear bolt shroud, a jeweled bolt, and improved stock finishing. Four years later, production of left-handed Rem 700s began, to compete with the Savage Model 110, at that time the only major American-made left-bolt rifle.
Other Rem 700 versions include the titanium receiver 700ti, the 700 SPS (which replaced the ADL in 2005), and the CDL model. In addition to its development as a hunting rifle, the Model 700 also provided the basis for military and police sniper rifles, starting with the M40 rifle in 1966, which was initially ordered by the U.S. Marine Corps. The U.S. Army adopted the M24 Sniper Weapon System in 1986.
The Remington 700 is sold in both short action and long action variants. This photo is from the Big ED YouTube video comparing the two action lengths.
The Remington 700 is a manually-operated bolt action with two forward dual-opposed lugs. The bolt face is recessed, fully enclosing the base of the cartridge, The extractor is a C-clip sitting within the bolt face. The ejector is a plunger on the bolt face actuated by a coil spring. The bolt is of 3-piece construction, brazed together (head, body and bolt handle). The receiver is milled from round cross-section steel.
Chassis Systems for Remington 700s
With the popularity of the Remington 700 series rifles, and the availability of Rem 700 barreled actions by themselves, many companies have created after-market chassis systems. This Brownells Video reviews modern Accuracy Int’l chassis systems configured for Remington 700 barreled actions. Modular chassis systems have become particularly popular with PRS/NRL competitors.
Rem 700 Cutaway Video Shows Components + Operation
Ever wish you could look inside your rifle, to see how the trigger and fire-control system work? Well now that is possible with the magic of 3D computer graphics. Modern software allows detailed “cutaway” side-views (see below), as well as 3D views with 360° rotation. The software can also provide X-Ray-type views into the gun’s internals — as you can see above. And computer animation can show the complete firing process from trigger pull to chambering of the next round.
READERS — Do take the time to watch the video! This Rem 700 animation is really outstanding! EVERY bolt-action shooter should watch this video all the way through.
The Model 700 series of bolt-action rifles have been manufactured by Remington Arms since 1962. All are based on basically the same centerfire bolt action. They are typically sold with an internal magazine depending on caliber, some of which have a floor-plate for quick-unloading, and some of which are “blind” (no floor-plate). The Model 700 is a development of the Remington 721 and 722 series of rifles, which were introduced in 1948.
The Remington 700 is a manually-operated bolt action with forward, dual opposed lugs. It features “Cock On Opening”, meaning the upward rotation of the bolt when the rifle is opened cocks the firing pin. A cam mechanism pushes the firing pin’s cocking piece backward. The bolt face is recessed, fully enclosing the base of the cartridge. The extractor is a C-clip sitting within the bolt face. The ejector is a plunger on the bolt face actuated by a coil spring. The bolt is of 3-piece construction, brazed together (head, body. and bolt handle). The receiver is milled from round cross-section steel.
Blueprinting Rem 700 Action — Making a Good Action Better
You may have heard the phrase “blueprinting an action”, but do you know what that really means? Do you know what operations are done to an action during the blueprinting process? To help you understand, gunsmith Bill Marr of RifleShooter.com has created a helpful article showing a Rem 700 blueprinting job start to finish. This article spotlights how the procedures can be done with manual tools. Bill, who runs 782 Custom Gunworks Ltd., can also perform many of these operations with modern automated machinery. In fact, Bill has written a follow-up article on Truing a Rem 700 receiver with a Lathe.
Bill explains: “Blue-printing, or truing a rifle action, ensures the receiver face, threads, lugs, bolt lugs, and bolt face are square to the center line of the receiver.” In Bill’s informative article, Bill shows how he blueprints a Remington 700 short action receiver with .308 Win bolt face. He covers the following procedures step by step:
Action Disassembly
Ream Minor Diameter of Receiver Threads
Square the Receiver Lugs
Square the Face of the Receiver
Lap the Bolt Lugs
Square the Bolt Face
Bill employed a variety of tools from Brownells to complete the blueprinting job, including: Remington 700 Armorer’s Kit; Manson Receiver Accurizing Kit; Bolt Lapping Kit; Bolt Face Truing Tool; Manson Receiver Ring Facing Cutter; Multi-Vise with Jaw Pads; Silicone Carbide Abrasive; and Do-Drill Cutting Oil.
1. Truing the Receiver Face
Using the receiver facing tool, the front of the receiver is trued. The tool is placed over the tap and turned by hand. We used Do Drill to lubricate it.
2. Lapping the Lugs
The bolt lapping tool screws into the front of the action and applies rearward pressure on the bolt face. A little bit of lapping compound is placed on the front of the receiver lugs. The bolt handle is then raised and lowered repeatedly. Note — it is critical that we do not get any lapping compound on any other surfaces.
3. Truing the Bolt Face
On this bolt, the central part of the bolt face was low. After the truing operation, this Rem 700 bolt face is now completely square to the action.
IMPORTANT: Rifleshooter.com states: “This article highlights our project and is presented for information purposes only. This provides an overview of the process and should not be attempted without the guidance and supervision of an experienced gunsmith“.
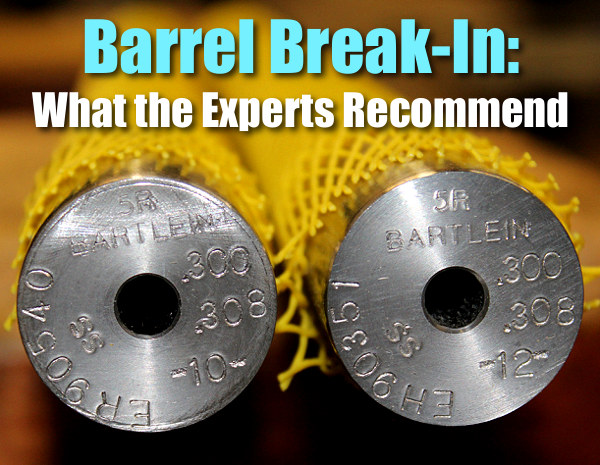
The question of barrel break-in is controversial. Some folks advocate an elaborate, lengthy cycle of shooting and brushing, repeated many times — one shot and clean, two shots and clean and so on. This, it is argued, helps barrels foul less and shoot more accurately. Others say minimal break-in, with patching and brushing after 10-15 rounds, is all you need. Still others contend that break-in procedures are a total waste of time and ammo — you should just load and shoot, and clean as you would normally.
We doubt if there will ever be real agreement among shooters concerning barrel break-in procedures. And one must remember that the appropriate break-in procedure might be quite different for a factory barrel vs. a custom hand-lapped barrel. This Editor has found that his very best custom barrels shot great right from the start, with no special break-in, other than wet patches at 5, 10, and 15 rounds. That said, I’ve seen some factory barrels that seemed to benefit from more elaborate break-in rituals.
What’s the best barrel break-in procedure? Well our friend Eric Mayer of Varminter.com decided to ask the experts. A while back Eric interviewed representatives of three leading barrel manufacturers: Krieger, Lothar-Walther, and Shilen. He recorded their responses on video. In order of appearance in the video, the three experts are:
Do I Need to Break-In a New Rifle Barrel?
Eric Mayer of Varminter.com says: “That is a simple question, [but it] does not necessarily have a simple answer. Instead of me repeating my own beliefs, and practices, on breaking-in a new rifle barrel, I decided to answer this one a bit differently. While we were at the 2016 SHOT Show, we tracked down three of the biggest, and most popular, custom barrel makers in the world, and asked them what they recommend to anyone buying their barrels, and why they recommend those procedures. We asked the question, and let the camera run!” Launch the video above to hear the answers — some of which may surprise you.
Long-Term Barrel Care — More Experts Offer Opinions
Apart from the debate about barrel break-in, there is the bigger question of how should you clean and maintain a barrel during its useful life. Some folks like aggressive brushing, other shooters have had success with less invasive methods, using bore foam and wet patches for the most part. Different strokes for different folks, as they say. In reality, there may not be one solution for every barrel. Different fouling problems demand different solutions. For example, solvents that work well for copper may not be the best for hard carbon (and vice-versa).
“Why worry about a little barrel fouling when the throat is subjected to a brutal 5,600° F volcano at 55,000 PSI? To investigate these and other questions about taking care of a match barrel, we spoke with a dozen experts and share their knowledge in this first of a series of articles.
After listening to folks who shoot, build barrels or manufacture cleaning solvents for a living, we concluded that even the experts each have their own unique recommendations on how to care for a match barrel. But they all agree on one thing — the gun will tell you what it likes best. Because the life expectancy of a match barrel is about 1,500 to 2,500 rounds, the objectives of cleaning one should include: preserve accuracy, slow the erosion, and remove fouling — all without damaging the gun. This article doesn’t claim that one cleaning method is better than the next. Rather, we set out to interject a little science into the discussion and to share some lessons learned from experts in the field.” — Chip Lohman
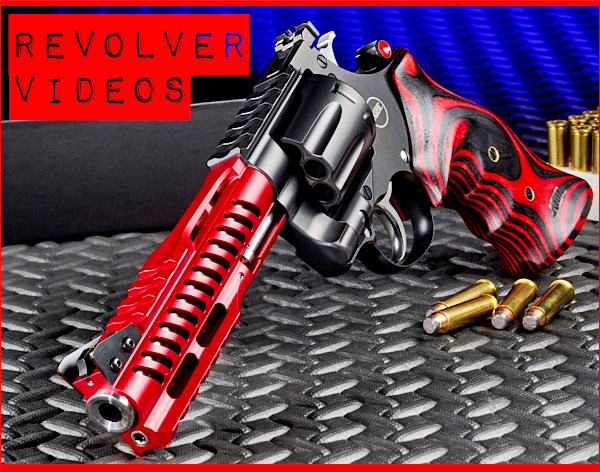
Today’s Saturday video showcase is a wheelgun extravaganza. We offer eight videos covering some of the most famous double-action revolvers in existence. Check out reviews of Colt, Smith & Wesson, Korth, Dan Wesson, Ruger, and other models, in a variety of chamberings, both centerfire and rimfire. We think every serious gun enthusiast should have at least two revolvers in his collection — one centerfire and one rimfire. This Editor owns a stainless, 10-shot .22 LR Smith & Wesson Model 617. It has probably shot more rounds than all my other pistols combined, and it is still performing flawlessly after two decades.
Multiple Revolver Line-up: S&W, Colt, Ruger, Taurus, Dan Wesson, Chiappa, Charter Arms, Webley and More
This 12-minute video provides a quick introduction to eleven interesting wheelguns: Smith & Wesson Model 29 (00:22), Colt Python (1:22), Ruger GP100 (2:25), Taurus Model 66 (3:40), Smith & Wesson Model 686 (4:38), Charter Arms Bulldog (5:41), Chiappa Rhino (6:32), Webley Revolver (7:27), Dan Wesson 715 (8:21), H&R Model 929 (9:59), Taurus Judge Public Defender (10:52). NOTE: This video also includes a review of the Bersa .380 which is NOT a revolver, so the video title is a little misleading. There are 12 handguns, but only 11 revolvers.
Colt Python .357 Mag 1000-Round Test
How well do modern wheelguns hold up to extended use? This video provides an answer. Honest Outlaw’s testers put 1000 rounds through a new-generation Colt Python chambered for the legendary .357 Magnum round. The Python showed outstanding accuracy, and the tester praised the trigger. Testing was done indoors and outdoors, both rapid-fire and slow-fire. After a couple hundred rounds, the Python needed a thorough cleaning of cylinder and barrel, but otherwise the revolver performed really well.
Hickok45 Shoots the New Colt Anaconda in .44 Magnum
Hickok45 is a respected YouTube video reviewer. In this detailed 19.5-minute video, Hickok45 reviews and tests a new generation Colt Anaconda revolver, chambered for the powerful .44 Magnum cartridge. This is one of the most popular wheelgun videos on YouTube, having logged over 1.4 million views.
Colt King Cobra Target .22 LR Revolver
This TFB Showtime episode examines the new .22 LR rimfire Colt King Cobra Target. The King Cobra Target .22 LR features a 10-shot cylinder, and the same adjustable target sights as the .357 Magnum version.
At the NRA Annual Meetings in 2022, Colt Manufacturing introduced an impressive rimfire revolver — the King Cobra Target .22 LR. Colt states: “From competition to plinking and small game hunting, this baby Cobra does it all and packs 10-rounds of .22 LR in its cylinder”. The King Cobra Target 22 LR is available with 4.25-inch and 6-inch barrel lengths, both with 1:16″ RH rifling twist. MSRP is $999.00.
The Massive Smith & Wesson 500 Magnum X-Frame
If bigger is better, then a Smith & Wesson 500 Magnum should be in your collection. This jumbo-size wheelgun shoots a huge 50-caliber cartridge, the .500 S&W Magnum. Even with compensator slots on the end of the barrel, the recoil is massive — enough so that we would NOT recommend this big revolver to novice shooters.
In 2003 the engineers at Smith & Wesson wanted to deliver maximum power for serious handgun hunters. The power they sought required an entirely new frame, the massive “X-Frame”. That became the basis for the new Model S&W 500, the most powerful production revolver in the world.
Colt vs. Smith & Wesson
Here’s a pretty informative video, with two qualified experts, Bill Wilson and Ken Hackathorn. This covers the basic differences between Smith & Wesson and Colt revolvers. This video explores the classic “Ford vs. Chevy debate” of the revolver world. Both S&W and the Colt revolvers have their die hard loyalists. In this episode, the Gun Guys weigh the merits of Bill’s Colt Shooting Master and Ken’s S&W Registered Magnum.
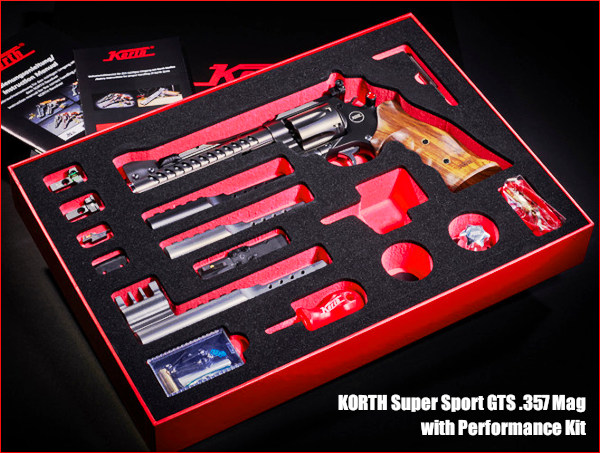
Korth Super Sport STS Revolver — $5,572.00 Wheelgun
Germany’s Korth Arms makes some of the best revolvers on the planet. Korth’s machining tolerances are second to none. The triggers are superb and the accuracy is excellent. For high-end Bianchi Cup-type competition Korth offers a “badass” black heavy-barreled wheelgun, the Super Sport GTS Revolver. This features a full-length scope rail and vented sides. Note this video was originally in the French language so there is an English voice-over. NOTE: If the English sound-track doesn’t work on your platform, click the “Watch on YouTube” option and/or click the settings button and set the audio track to English.
You’ll need serious bucks to buy a Korth Super Sport GTS. Currently the GTS model in .357 Magnum with full multi-barrel performance kit sells for €4,730.00 Euros (about $5572.00 U.S.).
Smith & Wesson Model 648 in .22 WMR
We love Smith & Wesson rimfire revolvers. We have put thousands of rounds through S&W Model 617 revolvers, with 4″ and 6″ barrels. These stainless .22 LR handguns are accurate, superbly reliable, and they hold their value. In general we’ve found that Smith & Wesson rimfire revolvers may be less fussy with ammo, and more trouble-free than typical semi-auto rimfires. Bottom line, we feel that everyone should have an S&W rimfire wheelgun in their collection.
Along with its .22 LR wheelguns, S&W now offers another very impressive Rimfire Revolver option — the “revived” Model 648 in .22 WMR (Winchester Magnum Rimfire). This stainless Model 648 brings a more powerful cartridge to S&W rimfire revolver fans.
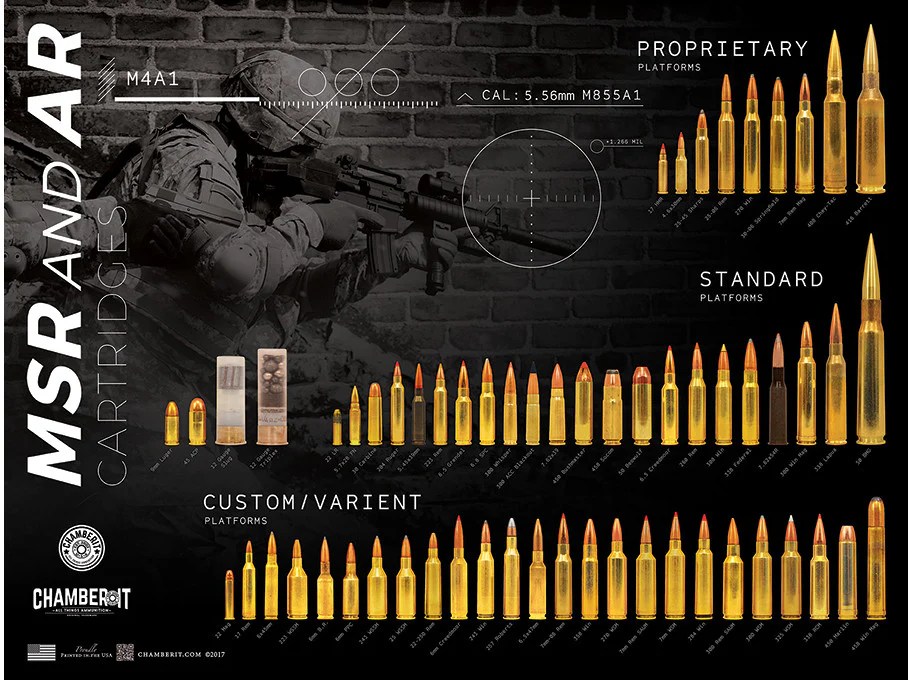
Need something for the walls of your “man cave” or reloading room? Looking for a great birthday gift for one of your shooting buddies? The creators of the Cartridge Comparison Guide offer a collection of wall posters showing ammunition types from 17 caliber rimfire cartridges all the way up to giant 35mm military rounds. ChamberIt.com currently offers 15 different large wall posters that display a huge variety of cartridge types. For example, the American Standard Poster (shown above) contains every standardized cartridge mass produced in the USA as of 2021. The cartridges are 100% to scale (life size). These posters feature full color images on high gloss / high quality 100-lb poster paper.
For example, the new MSR & AR Cartridges poster contains 60 cartridges that are commonly available in either a standard, customized, or proprietary MSR or AR platform with calibers from .17 Cal up to .500 Cal. This $14.92 poster displays 60 rifle cartridge types at true size (within 4/1000 of an inch).
MSR & AR Cartridges Poster Click to view large size poster.
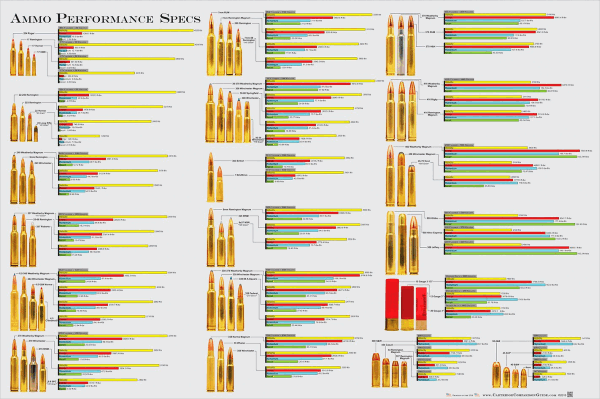
Ammunition Performance Specifications Poster
There is also an interesting Ammo Performance Specs poster. This shows dozens of popular hunting cartridges with the velocity, energy, momentum and recoil for each cartridge displayed in a bar graph.
This shows the actual size of the Ammo Performance Poster as displayed on a wall.
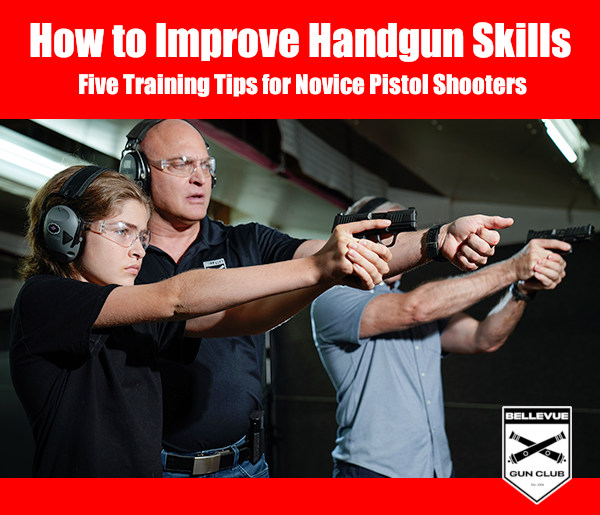
Photo from Training Program at Bellevue Gun Club, Washington State’s “premier indoor shooting facility”.
At AccurateShooter.com, our primary focus is precision target shooting with rifles. But it’s definitely fun to shoot pistols too, and we bet most of our regular readers own handguns. Here are five tips for shooting safely and accurately with handguns. These pointers will help you advance your skills and have more fun with your pistols and revolvers.
1. Make Sure Safety Is Number One
Whether you own one gun or one hundred, gun safety must always be your main priority. In this video, Smith & Wesson Team Captain Julie Golob covers the basics of gun safety.
2. Start with a .22 LR Handgun
We strongly recommend that new pistol shooters start off with a .22 LR rimfire handgun. The .22 LR cartridge is accurate but has very low recoil, less “bark” than a centerfire, and very little smoke and muzzle flash. New shooters won’t have to fight muzzle flip, and won’t develop a flinch from the sharp recoil and muzzle blast common to larger calibers. With the .22 LR, the trainee can focus on sight alignment, breathing, and trigger pull. When he or she has mastered those skills, move on to a .38 Special or 9mm Luger (9x19mm).
What gun to use? We recommend the 10-shot Smith & Wesson Model 617. This is ideal for initial training, shooting single action, slow-fire. You want to focus on sight picture and holding steady. Shown above is the 4″-barrel Model 617 which balances well. There is also a 6″-barrel version. It has a longer sight radius, but is a little nose-heavy. Both are great choices. They are extremely accurate and they boast a very clean, precise trigger.
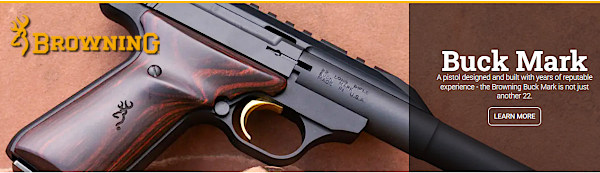
If you prefer a semi-auto .22 LR pistol, we recommend the Browning Buck Mark series. Buck Marks are very accurate and very reliable. There are now 58 different Buck Mark models, priced at $469.99 to $839.99 MSRP. Retail prices start at about $330 for a basic Buck Mark Camper 22 UFX model. Like the S&W Model 617, a good Buck Mark will serve you for a lifetime.
3. Use Quality Targets with Multiple Aim Points
It’s common for new pistoleros to start shooting at cans or clay birds at a public range. That can be fun, but it’s better to start with proper targets, placed at eye level, at 7-10 yards. We like to use targets with large, brightly colored circles. Focus on putting 5 shots in a circle.
We recommend targets that have multiple bullseyes or aiming points — that way you don’t have to constantly change your target. There are also special paper targets that can help you diagnose common shooting problems, such as anticipating recoil. EZ2C makes very good targets with bright, red-orange aim points. You can also use the bright orange Birchwood Casey stick-on Target Dots (right). These come in a variety of diameters. We like the 2″ dot at 10 yards.
Too many new pistol shooters try to move right to rapid fire drills. It’s better to start slow, practicing the basics, under the guidance of a good mentor. If you belong to a club, ask if there are certified instructors who will help out. This Editor learned pistol shooting from a seasoned bullseye shooter, who got me started with a .22 LR revolver and very close targets. Over the course of a few range sessions we progressed to farther targets and faster pace. But the fundamentals were never forgotten. When starting your pistol training, it’s wise to view some instructional videos. Top Shot Champion Chris Cheng hosts an excellent Handgun 101 Series produced by the NSSF. We’ve linked one of these Handgun 101 videos for Tip #6.
5. SLOW DOWN — This Is Not a Race
When you learned to ride a bicycle, you started slow — maybe even with training wheels. The same principle applies to pistol shooting. When you get started with handguns, we recommend you shoot slowly and deliberately. Start with the handgun unloaded — just work on your sight alignment and breathing. With snap caps in place, try some dry-firing drills. Then progress to live fire. But be deliberate and slow. With the target at 20 feet, see if you can get three successive shot-holes to touch. Believe it or not, many common pistols are capable of this kind of accuracy (but you won’t see many shooters at indoor ranges who pursue that kind of precision). Once you master your form and accuracy, then you can work on your speed.
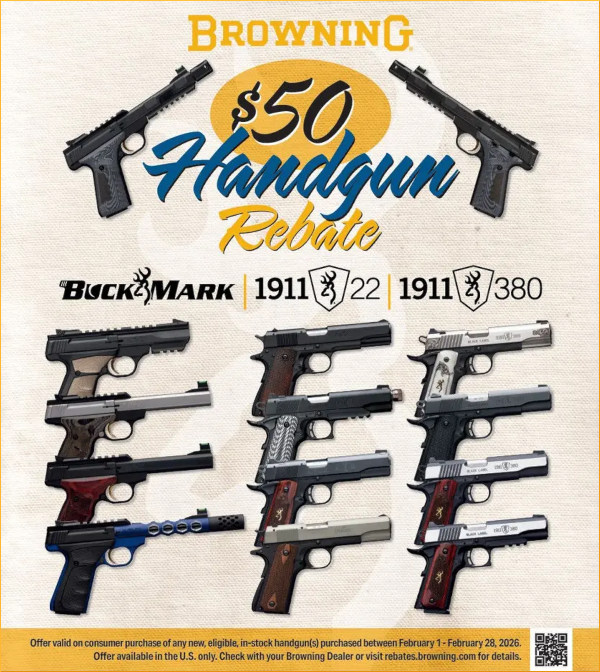
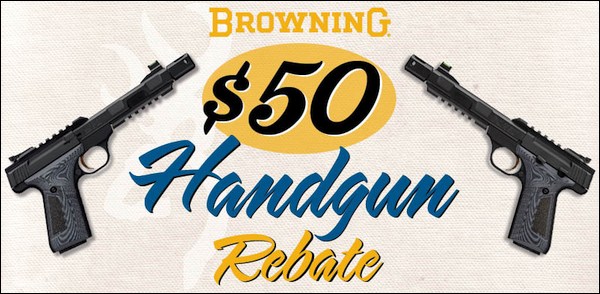
Looking for a nice, new handgun — rimfire or centerfire? Well through the end of February, 2026 you can get a solid $50.00 rebate on a new Browning pistol. This $50 Rebate Offer is valid for consumer purchases of a new, eligible, in-stock handgun purchased between February 1 and February 28, 2026. NOTE: This offer is available in the U.S.A. only.
To qualify you must buy one of three types of Browning handguns before the end of the month: Buck Mark, 1911-22, and/or 1911-380. Our first choice would be a long-barrel .22 LR Buck Mark with a scope rail. There are now 58 different Buck Mark models, priced at $469.99 to $839.99 MSRP. Retail prices start at about $330 for a basic Buck Mark Camper 22 UFX model.
Browning Buck Mark .22 LR — 58 Varieties Offered
Here’s a field test of a Buck Mark Plus stainless UDX model. This features an aluminum alloy frame with Picatinny top rail, and 5.5″ slabside stainless barrel. This model boasts black wood laminate UltraDeluxe grips, adjustable rear sight, and TRUGLO/Marble Arms fiber-optic front sight. MSRP is $759.99.
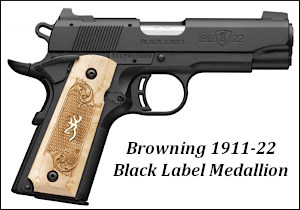
Browning 1911-22 — 85% Scale Rimfire Version of M1911
This video explores the design process behind the 1911-22, a scaled-down version of the iconic Model 1911 .45 ACP pistol. The video highlights the use of 3D modeling to determine the optimal size for a .22 caliber pistol in this format, ultimately settling on an 85% scale. The video also compares the 1911-22 to the full-size 1911, showcasing the similarities in design and functionality.
Key Terms of Browning Pistol Rebate: Offer valid only on the retail purchase of new, eligible, Browning handgun(s) purchased February 1 to 28, 2026. Qualifying purchases must be made from available in-store inventory; no rain checks or prepayments for out-of-stock retail inventory are allowed. To submit your Handgun rebate go to Rebates.browning.com, fill out the online application, and upload supporting documents as required. All applications must be submitted online no later than midnight March 14, 2026. Allow 6-8 weeks for processing and delivery of rebate. Offer valid in USA only, and void where prohibited by law.


 First Aid Kits for Campers


 Do I Need to Break-In a New Rifle Barrel?

 If bigger is better, then a


 It’s common for new pistoleros to start shooting at cans or clay birds at a public range. That can be fun, but it’s better to start with proper targets, placed at eye level, at 7-10 yards. We like to use targets with large, brightly colored circles. Focus on putting 5 shots in a circle.