Here’s a handy, affordable product that will help you organize gear in your reloading room or “man cave”. Tipton’s new Cleaning Rod Rack (Tipton #100335) can accommodate up to six rods with various size handles. The wall-mounted Rod Rack also has horizontal studs on either end for additional accessories. These are useful for hanging the Tico Tool shotgun cleaning wands that stow in a tube with a plastic hook on the top.
Tipton Cleaning Rod Racks come complete with mounting screws (and screw slots are molded-in). You’ll find Tipton Cleaning Rod racks for under $10.00 at most vendors. They are $7.99 at Cabelas.com, while Amazon.com offers the racks for just $7.99 with free shipping for Amazon Prime Members.
The 6.5×47 Lapua necked down to 6mm is a popular wildcat. However, we’ve learned that, when necking down a 6.5×47 Lapua case to 6mm, simply running the brass into a 6-6.5×47 full-length sizer won’t give the best results. Reader “Fireball”, who has worked with both a 6-6.5×47 and a 22-6.5×47, offers this tip: “You don’t want to bring the 6.5mm case all the way down to 6mm in one step — it’s too big of a jump. First, to smooth entry, run a 6.5mm expander in the case mouth, and chamfer the outside of the case mouth — be sure to remove all burrs. Apply some lube to the neck. Then, if you have a .257 bushing, put that in a 6BR bushing neck die, and run the case up [for initial reduction].” Then, use your 6mm die for the final step.
Alternatively, you can use a Redding 6BR body die initially. The body die will funnel the neck down about half way. Body dies are pretty inexpensive ($29.99 at Grafs.com, Item #RED75317). After running the brass through the 6BR body die, then you can run the case into the Forster 6-6.5×47 Full-length sizing die. The Forster die is excellent — it sizes a no-turn neck just about perfectly, so long as you do an intermediate step first.”
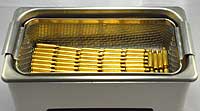
If you’ve read our feature story on Ultrasonic Cleaning by Jason Baney, you’ve seen the remarkable results that can be achieved with this method. Ultrasonic cleaning has many advantages over traditional tumbling methods of case cleaning. There is no dust or media residue to remove from the brass, and when done right, the cases come out clean and shiney, inside and out, even the primer pockets.
In its Benchtalk Archives, Brownell’s has an excellent article discussing Ultrasonic Case Cleaning. Brownell’s staff compares results, with measured dwell times from 5 to 75 minutes, using both Mpro-7 and HCS 200 cleaning solutions. Tests are performed with once-fired and 5X-fired Tactical 20 (Tac20) cases, as well as once-fired .260 Rem Cases. The article also compares the results from ultrasonic cleaning vs. tumbling in walnut media. Below are Brownell’s results for Tac20 cases with the HCS 200 (non-acidic solution). Go to Brownell’s article for MPro7 results and Rem 260 results.
HCS 200 Cleaning Solution Test
Procedure — Solution was de-gassed for 15 minutes, then 63 Tac20 cases were placed in a single layer, in stainless steel mesh basket. The temperature of the starting solution was 102° F. When the cases were removed the temperature was 110° F.
Once-Fired Tactical Twenty Cases (HCS 200) — Observations 5 minutes: The exterior of the cases are not significantly brighter/cleaner. The primer pockets and case interiors are still dirty. 10 minutes: Exterior of the cases are brighter. 70% of the cases show some degree of cleaning of the primer pockets. Little difference seen inside the case, but case mouths are cleaner. 15 minutes: Case brightness is about the same. Still only 70% of the primer pockets are clean, but a larger portion of each is cleaner. A Q-tip swabbed inside the cases shows that carbon/powder residues are loosening up. 20 minutes: Case exteriors are brightening up. 80-85% of the primer pockets are about 90% clean. The insides of the cases and case mouths are cleaner. 25 minutes: Cases are brighter/cleaner than even new brass. 80-85% of the cases have almost completely clean primer pockets. The inside of the cases are 80-90% clean. 30 minutes: The insides of the cases and case mouths appear to be completely clean. 87% of the primer pockets are virtually 100% clean. 13% of the cases had stubborn primer pocket residue that could not be completely removed. 60 minutes: Eight cases (13%) were placed in the tank for another 30 minutes to try to remove the remaining residue in their primer pockets. Six out of the eight cases were completely clean.
Five-Times Fired Tac20 Cases — Observations 30 minutes: Based on the above observations, I didn’t begin to observe these 5-time fired cases until after 30 minutes: The exterior cases are bright/clean. Brighter than new cases. The primer pockets on 75% of the cases are 75% clean. The remaining cases had primer pockets that were only 25% clean. The inside of the cases appear to be clean. 65 minutes: 25% of the primer pockets were 95% clean, 25% of the primer pockets were 90% clean, 25% of the primer pockets were 85% clean; and 25% were 80% clean. 75 minutes: 75% of the primer pockets were 90% clean.
How Does Ultrasonic Cleaning Work? The Brownell’s article explains: “Ultrasonic cleaning uses high-frequency sound waves (generally between 20-80 kHz) to remove a variety of contaminants from objects immersed in a liquid. The result of these high-frequency sound waves is a process called cavitation. These high frequency bursts of ultrasonic energy produce a three-dimensional wave of alternating positive and negative pressure areas as the sound wave passes through the solution. During negative pressure, microscopic cavitation bubbles form and will continue to grown until they reach resonant size. As the positive sound wave passes, the pressure rises rapidly and implodes these tiny bubbles. Before these minuscule bubbles implode they store a tremendous amount of energy. These bubbles can be as hot as 10,000 degrees and have as much as 50,000 lbs per square inch of pressure. This sounds alarming, but you have to remember that these bubbles are microscopic in nature and pose no harm to anything, unless you are a carbon /powder residue deposit on a cartridge case!
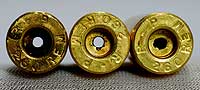
When this cavitation bubble implodes near your brass case, it transforms the bubble into a jet about 1/10th of its size. This jet of energy can travel as fast as 400 km/hour. At 43 kHz, as is the frequency for our L & R HCS 200 ultrasonic cleaner, this is happening 43,000 times per second. This micro-burst of extreme energy is responsible for removing contaminants from the surface of your cartridge brass. Ultrasonic cleaning can reach into crevices and inaccessible areas and remove surface debris that can’t be cleaned by any other process.”
We know guys are desperate to get rifle primers these days. This may help you out — but you need to act quickly. As of September 23, 2013 at 1:00 pm ET, Powder Valley was showing some hard-to-find primers in stock. Some notable PVI primer offerings are listed below (all are subject to change).
Readers — Check the publish date on this notice! if you are reading this more that a day or two after our release date, the listed product may be sold out. Check availability at PowderValleyInc.com before you get too excited.
PVI — Primers in Stock 9/28/2013
CCI BR4 SMALL RIFLE BENCHREST PRIMERS (1000) — In Stock at $49.00 per 1000 primers
CCI #350 LARGE PISTOL MAGNUM PRIMERS (1000) — In Stock at $30.00 per 1000 primers
TULA SMALL RIFLE PRIMERS (KVB223) (1000) — In Stock at $23.50 per 1000 primers
Following the success of CFE 223, Hodgdon Powder Company has released a new addition to the CFE (“Copper Fouling Eraser”) line of propellants. Hodgdon’s new CFE™ Pistol, a general purpose handgun powder, is designed to deliver less copper fouling. CFE Pistol is a spherical (ball) powder that meters very well. Hodgdon hopes to have CFE Pistol available in January 2014.
When CFE 223 rifle powder was first introduced, people were skeptical about claims that CFE reduced copper fouling in barrels. In fact, field reports from our Forum members indicate that CFE 223 does deliver on the promise of reduced copper fouling. Our readers also found CFE 223 to be very accurate in a variety of cartridge types. Hopefully CFE PISTOL will perform as well in handguns.
The secret to CFE products’ reduced copper fouling is a proprietary “Copper Fouling Eraser” chemistry developed for U.S. rapid-fire military systems. Better living (and less cleaning) through chemistry, as they say. Hodgdon states: “Whatever your game is… you will benefit significantly with longer periods of top accuracy with less barrel cleaning time and minimal muzzle flash.”
Load data for CFE Pistol should be available on Hodgdon’s Reloading Data Center starting in December 2013. Hodgdon plans to provide over 100 available loads for 15 pistol cartridges, and 37 bullet weights. Load data will be offered for 9mm Luger, 38 Super, 40 S&W, .45 ACP and many other cartridge types. To find out more, visit Hodgdon.com, see Hodgdon’s upcoming 2014 Annual Manual, or call Hodgdon at 913-362-9455.
What is the most-used piece of equipment on this editor’s reloading bench? No it’s not my Rock-Chucker press, or even my calipers. The one item in near-constant use is a small, folding magnifying glass. Mine folds into a square case and offers 4X viewing with an 8X bifocal insert. With this handy tool I can inspect case mouths for burrs, check primer pockets, inspect meplats, and look for flaws on bullet jackets. I also use the magnifier to see rifling marks on bullets seated into the rifling, or check my bolt for galling. The number of uses is nearly endless. I keep one magnifier at my reloading bench and another in my range kit.
Folding magnifiers are so handy yet inexpensive that you should own a couple spares (including one in the range box). I bought my magnifier in a book-store, but you can also find them on the web at FoldingMagnifier.com and WidgetSupply.com starting at just $1.95. To see the finest details, Widget Supply offers a powerful 17X/50X slide-out magnifier with a built-in, battery-powered LED light. With that gadget, you can easily see any minute flaws in your barrel crowns. That’s important because crown damage can cause hard-to-diagnose accuracy issues. We’ve known guys who spend weeks tinkering with loads, when the real problem was a worn-out or damaged crown.
Story by Boyd Allen
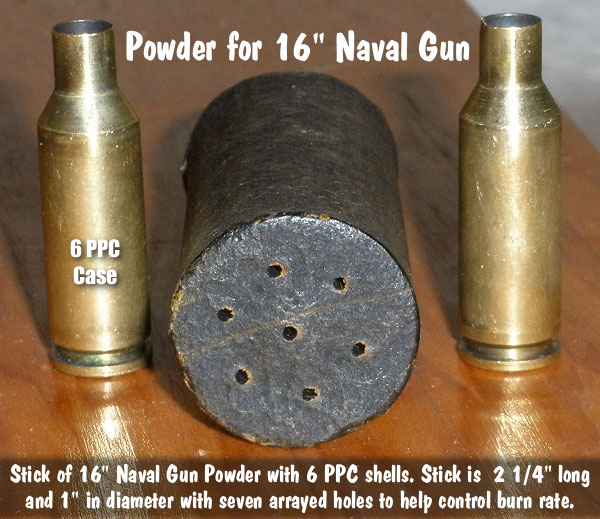
While many top competitive shooters trickle their stick powder charges to a kernel or two, that would be impractical when loading charges for giant naval guns. You may be surprised, but the shells fired by the U.S. Navy’s massive 14″ and 16″ naval guns were also propelled by stick-type extruded powders. You couldn’t trickle these ‘kernels’ though — a single stick or ‘grain’ can be over 2″ long. Take a look…
In connection with a Benchrest Central discussion that drifted to the subject of powders used in large naval guns, I heard from Joe McNeil, whose father was involved in manufacturing those very propellants as a DuPont employee. Joe writes:
“My Dad worked for the DuPont company for over 40 years. Every time the nation went to war he was assigned to the gun powder plants which DuPont ran for the government for $1.00 per year! His last assignment was at the Indiana Ordnance Plant in Jefferson, Indiana from 1952 through 1958. He had a display case made of all of the different powders made at the plant and left it to me. That’s why I have a grain of 16″ gun powder. He took me out to the Jefferson proving grounds once when they tested the powder in a 16″ gun. We watched from a half-mile away but it left a lasting impression when they fired that gun. They actually had a set of rings they fired through to test the performance of the powder and shell. This was a truly fond memory of my Dad and his work.”
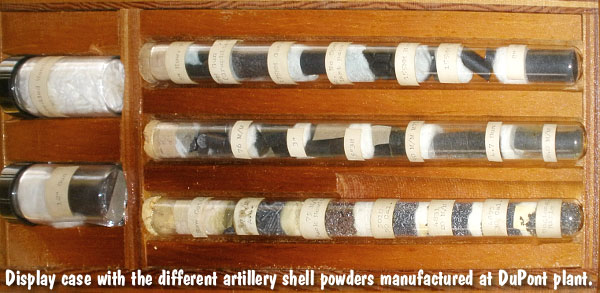
Here are some pictures of the gun powder “grains” made during the Korean War at the Indiana Ordnance Works where Joe McNeil’s father worked.
Above is the display case with the different powders manufactured at the DuPont plant. They include: 37 MM/AA, 75MM Pack Howitzer, 50 Cal. 5010, 20 MM 4831, 30 Cal. 4895, 76 MM, 3″, 5″, 90 MM, 4.7″, 240MM, 8″, 280 MM, 175 MM, 155 MM Howitzer, 155 MM Gun M.P., 8″ Gun M.P., 12″, 14, 16″. There are different-sized ‘grains’ for specific rounds.
K&M Precision Shooting Products has two very handy products you may not know about yet. The first, a brilliantly simple device that lets you see your case necks as you expand them, can be used by anyone who necks-up brass (with a compatible expander die body). The second new product is a specialized “fat grip” holder that will make neck-turning easier for those of you out there who use K&M neck-turners.
K&M Expand Mandrel Window Riser
This is a simple threaded extension placed between your expander die body (K&M Expand Iron) and the top of your press. It carries the expander mandrel higher, above the press, and has a cut-out view port so you can see the mandrel as it passes through the neck. Smart, eh? This provides visual feedback during the process of expanding your brass. The patent-pending view riser costs $20.00. Will it expand necks faster, or reduce run-out? We doubt it, but we still would like to have one, if only to eyeball the mandrel to control the neck-entry rate more consistently from case to case.
Installation: Thread the Expand Mandrel Window Riser into the top of your loading press, then thread the K&M Expand-Iron (Expander Die Body) fully into the top of the window riser and adjust each so you can stroke out the press completely without driving the case mouth into the press adapter. This allows you to view the expanding operation which is typically blind under the press. The riser also eliminates the need for the stop screw in the expander mandrel. LINK: Expand Window Riser Instructions (PDF).
Ergo Holder for K&M Neck-Turning Tool
K&M’s rounded, oversized Ergo Holder lets you hold the K&M neck-turning body more securely (and with less hand cramping). Priced at $35.00, it is an expensive accessory, but we suspect many guys with K&M neck-turners will spring for an Ergo holder just because it gives you a more secure and comfortable grip on the small, square-edged K&M neck-turner.
Customer Feedback Inspired K&M’s Ergo Holder
The folks at K&M told us that their new Ergo Holder was produced in response to customer requests: “[Customers reported that] the neck turner can be hard to hold due to its compact size, especially in high-volume use. The Ergo Holder is machined from aluminum, providing a fatigue-proof grasp of the neck turner. Its mass works like a heat sink to help dissipate heat from the pilot during the turning process. The neck-turner body easily assembles into the Ergo Holder and is held in place with one set screw. The Ergo holder is also designed with the dial indicator in mind and actually makes its use more convenient”.
LINK: Ergo Holder Installation/Use Instructions (PDF).
We reported two weeks ago that Texas shooter Mike Stinnett nailed a .0077″ group in competition — the smallest 5-shot group ever shot at 100 yards. This has now been officially recognized as a new NBRSA record, eclipsing the .009″ record group shot 40 years ago by Mac McMillan. Congrats to Mike for breaking the “unbreakable record”. As Glenn C. posted on Benchrest Central: “They said it couldn’t be done. Hats off to Mike for an awesome personal achievement in a Sport/Hobby where getting your name in the record books is a rarity.”
Stinnett Sets .0077″ Record with a .30-Caliber Modified Grendel Cartridge, Pre-Loaded
Many folks have asked about the gun and ammo that produced the .0077″ group. The rifle was chambered as a .30-caliber wildcat, the 30 Stewart, which is based on the 6.5 Grendel case necked up. Mike was using Hodgdon H4198 powder behind BIB 114gr, 10-ogive bullets. Notably, the record-setting ammo was pre-loaded before the match. Unfortunately, we don’t have a photo of the target yet — it is still in the hands of the official NBRSA certification committee. However, Mike has been kind enough to tell us about his rifle and his load.
Mike Stinnett .0077″ Record Group Equipment Report
Mike reports: “Several guys have asked so here is my equipment listing. The hardware build actually started in 2008 with the goal of building two identical Benchrest rifles which could be used for both group and score. The idea was to shoot 6PPC and a 30 Cal without a base rifle change.”
Action: Kelby Panda “Speedy Shorty” with solid bolt and PPC-diameter bolt face. Kelby was asked to build several actions which were identical with the intent to eliminate any variance in head space between the two new rifles. This helped me use a single set-up on sizing dies for both rifles and ammo is interchangeable. Both actions were sent to Thomas ‘Speedy’ Gonzalez to be blue-printed and have Jewell triggers installed.
Reamer: 30 STEWART (I just call it a 30 PPC as that is what everyone expects, but it is in fact a custom design and Ralph deserves about 99% of the credit).
Barrels: Krieger was selected for the barrels. After discussions with Randy Robinett of BIB Bullets, a 1:17″ twist was identified as the correct, safe solution. Ralph Stewart has cut all my chambers using a custom-designed reamer. [Our goal] was consistent headspace and Ralph has been able to keep my barrels within .0002 variance. The barrel tuner also comes from Ralph Stewart.
Stock: Larson (including action bedding)
Scope: Leupold 45X Competition in Kelby Single Screw Tall Rings
Brass: Lapua (Base case is 6.5 Grendel)
Bullets: Randy Robinett (BIB) 30 Cal. 114gr, 10 Ogive (secondary bullet; primary is 112gr BIB)
Powder: H4198 – Stout Load with 2980 FPS Velocity
Front Rest: Farley Coaxial
Bags: Micro Fiber
Flags: Graham Wind Flags (large)
About the Cartridge — 30 Stewart (Based on Lapua 6.5 Grendel Parent Brass)
Mike explains: “Our goal was to shoot H4198 as the optimal powder for stability. There were several versions of the reamer before we settled on the current configuration. I am optimized for the 10 Ogive BIB bullet, powder to the base of the bullet. I found in testing the small 30-cal case did not like compression at all. The bullet is seated only 0.12″ into the case with zero freebore.
Cases were initially created with the .220 Russian (like a PPC) but I later decided it was better to build from the 6.5 Grendel. I size the brass and bump the shoulder back until it will fit into the chamber, fill to shoulder with International Clays, cotton wad packed on top. I have a fire-forming barrel. (I would not recommend this Clays and cotton wad method in a good barrel.) After initial fire-forming, I then mandrel the neck up the rest of the way to .30 caliber, turn the necks and trim.
It takes at least 8 firings to fully form a case! If you fire only three loads I find the brass does not have a sharp shoulder or any pressure on the bolt so any die selection is incorrect. Brass continues to harden well past 25 firings. I have match brass with well over 500 rounds fired, and I have never blown a case or neck yet (using my forming method).
For loading I use a Hornady Custom Shop Sizing Die and a Ralph Stewart Custom Seating Die. For those who are curious, yes the small group was fired with pre-loaded rounds. I do this now and then with local matches or may load 50 in a batch for one match.”
Mike wanted to thank his smiths, Randy Robinett, and all the folks involved in running the matches: “A big THANKS — as these are the guys that make our matches possible and without question maintain the integrity of the targets and record system. I was very fortunate to have all the right people in the right places for this match and my record. As for measurement – I only saw the target for about 10 seconds up close and can say I’m very happy I did not have to measure that group! Thanks again to everyone!” — Mike Stinnett
He who dies with the most toys wins — right? Well Sinclair has another interesting gadget you can add to your reloading bench. The Sinclair Case Neck Sorting Tool lets you quickly sort brass by neck-wall thickness. For those who shoot “no-turn” brass, this can improve neck-tension consistency. Large variances in neck-wall thickness can cause inconsistent neck “grip” on the bullet. Generally, we’ve found that more consistent neck tension will lower ES and (usually) improve accuracy. We know some guys who shoot no-turn 6mmBR brass in competition with considerable success — but their secret is pre-sorting their brass by neck-wall thickness. Cases that are out-of-spec are set aside for sighters (or are later skim-turned).
Watch Case Neck Sorting Tool Operation in Video
How the Case Neck Sorting Tool Works
Here’s how the Sinclair tool works. Cases are rotated under an indicator tip while they are supported on a case-neck pilot and a support pin through the flash hole. The unit has a nice, wide base and low profile so it is stable in use. The tool works for .22 through .45 caliber cases and can be used on .17- and .20-caliber cases with the optional carbide alignment rod. The MIC-4 pin fits both .060 (PPC size) and .080 (standard size) flash holes. Sinclair’s Case Neck Sorting Tool can be ordered with or without a dial indicator. The basic unit without dial indicator (item 749-006-612WS) is currently ON SALE for $49.95, marked down from $64.95 — a 23% savings! You can also buy the tool complete with dial indicator (item 749-007-129WS) for $86.99. IMPORTANT: This tool requires caliber-specific Sinclair Case Neck Pilots which must be ordered separately.
Editor’s Comment: The purpose of this Sinclair tool is rapid, high-quantity sorting of cartridge brass to ascertain significant case-neck-wall thickness variations. Consider this a rapid culling/sorting tool. If you are turning your necks, you will still need a quality ball micrometer tool to measure neck-wall thickness (to .0005) before and after neck-turning operations.


 The 6.5×47 Lapua necked down to 6mm is a popular wildcat. However, we’ve learned that, when necking down a 6.5×47 Lapua case to 6mm, simply running the brass into a 6-6.5×47 full-length sizer won’t give the best results. Reader “Fireball”, who has worked with both a 6-6.5×47 and a 22-6.5×47, offers this tip: “You don’t want to bring the 6.5mm case all the way down to 6mm in one step — it’s too big of a jump. First, to smooth entry, run a 6.5mm expander in the case mouth, and chamfer the outside of the case mouth — be sure to remove all burrs. Apply some lube to the neck. Then, if you have a .257 bushing, put that in a 6BR bushing neck die, and run the case up [for initial reduction].” Then, use your 6mm die for the final step.
 If you’ve read our feature story on
  The Brownell’s article explains: “Ultrasonic cleaning uses high-frequency sound waves (generally between 20-80 kHz) to remove a variety of contaminants from objects immersed in a liquid. The result of these high-frequency sound waves is a process called cavitation. These high frequency bursts of ultrasonic energy produce a three-dimensional wave of alternating positive and negative pressure areas as the sound wave passes through the solution. During negative pressure, microscopic cavitation bubbles form and will continue to grown until they reach resonant size. As the positive sound wave passes, the pressure rises rapidly and implodes these tiny bubbles. Before these minuscule bubbles implode they store a tremendous amount of energy. These bubbles can be as hot as 10,000 degrees and have as much as 50,000 lbs per square inch of pressure. This sounds alarming, but you have to remember that these bubbles are microscopic in nature and pose no harm to anything, unless you are a carbon /powder residue deposit on a cartridge case!
 When this cavitation bubble implodes near your brass case, it transforms the bubble into a jet about 1/10th of its size. This jet of energy can travel as fast as 400 km/hour. At 43 kHz, as is the frequency for our L & R HCS 200 ultrasonic cleaner, this is happening 43,000 times per second. This micro-burst of extreme energy is responsible for removing contaminants from the surface of your cartridge brass. Ultrasonic cleaning can reach into crevices and inaccessible areas and remove surface debris that can’t be cleaned by any other process.”
 Following the success of
  The secret to CFE products’ reduced copper fouling is a proprietary “Copper Fouling Eraser” chemistry developed for U.S. rapid-fire military systems. Better living (and less cleaning) through chemistry, as they say. Hodgdon states: “Whatever your game is… you will benefit significantly with longer periods of top accuracy with less barrel cleaning time and minimal muzzle flash.”
 What is the most-used piece of equipment on this editor’s reloading bench? No it’s not my Rock-Chucker press, or even my calipers. The one item in near-constant use is a small, folding magnifying glass. Mine folds into a square case and offers 4X viewing with an 8X bifocal insert. With this handy tool I can inspect case mouths for burrs, check primer pockets, inspect meplats, and look for flaws on bullet jackets. I also use the magnifier to see rifling marks on bullets seated into the rifling, or check my bolt for galling. The number of uses is nearly endless. I keep one magnifier at my reloading bench and another in my range kit.




 He who dies with the most toys wins — right? Well Sinclair has another interesting gadget you can add to your reloading bench. The Sinclair


