Do you know what the inside of a rifle chamber (and throat zone) really looks like? Do you understand the concept of headspace and why it’s important? If not, you should read the Brownells GunTech article Gauging Success — Minimum Headspace and Maximum COL. This article explains the basics of headspace and shows how to measure headspace (and length to lands) in your barrels with precision. The article also explains how to adjust your full-length sizing dies to “bump the shoulder” as needed.
Why is headspace important? The article explains: “Controlling headspace and setting proper C.O.L. also represent improved safety and reduced cost of handloading. Excessive headspace can cause case head separation and gases in excess of 60,000 PSI escaping from a rifle’s chamber. Too little headspace can result in a chamber forced bullet crimp and a bullet that becomes an obstruction more than a properly secured projectile. Excessive C.O.L. can result in a rifling-bound bullet, a condition that could result in spikes of excessive pressure.” [Editor’s NOTE: It is common for competitive benchrest shooters to seat bullets into the rifling. This can be done safely if you reduce your loads accordingly. With some bullets we often see best accuracy .010″ (or more) into the lands. However, this can generate more pressure than the same bullet seated .010″ away from initial lands contact. As with all reloading, start low and work up gradually.]
How is headspace specified? Most cartridges used within the United States are defined within ANSI/SAAMI Z299.3-4. Brownells explains: “In the case of the .243 Winchester, as an example, there are pressure specifications, cartridge drawings and, as pictured above, chamber drawings. Armed with a chamber drawing, each manufacturer producing a firearm for the .243 Winchester knows the proper standard dimension to cut chambers and set headspace. Notice there are two headspace reference dimensions for the chamber. The upper is a place in the chamber where the shoulder is .400″ in diameter; the “datum” or “basic” line. The lower is the 1.630″~1.640″ minimum – maximum dimension from the breech face (bolt face) to that point in the chamber that measures .400″.”
The actual headspace of any firearm is the distance from the breech face to the point in the chamber that is intended to prevent forward motion of a cartridge.
Finding Cartridge Length to Lands with OAL Gauge
Using a comparator on a set of calipers, you can quickly determine cartridge base-to-ogive length. This is the measurement from the base of the case to the forward-most full diameter section of the bullet, which is for convenience called the ogive. (Technically, the “ogive” is the full curve from bullet tip back to full-diameter ring). Shown here, that ogive is 0.243″ diameter.
The next step is using a modified (threaded) case with a Hornady OAL tool to determine Length-to-Lands (LTL) in your rifle’s chamber. During this measurement process, the modified case, with a bullet in its neck, is inserted in the chamber. Go slow, take your time. Here are 5 tips that will help you get repeatable and reliable LTL measurements:
1. Start with a clean chamber and clean barrel throat.
2. Make sure the modified case is fully screwed down and seated on the OAL Gauge. It can sometimes unscrew a bit during repeated measurements.
3. Insert the modified case slowly and gently, but ensure the shoulder of the modified case is fully seated on the end of the chamber.
4. Push the gray plastic rod GENTLY. It is common for the bullet to be tilted a bit. You want to allow the bullet to self-center in the throat BEFORE you apply much pressure. Then tap a couple times and push until you feel resistance. Do NOT push too hard — that will jam the bullet in the lands.
5. Repeat the measurement at least 3 more times. If you follow our instructions, you should, typically, get a repeatable measurement, within 0.0015″ or so, 3 out of 4 times.
Starline Brass offers a series of videos with helpful reloading tips. Focused primarily on pistol cartridges, these short videos can help anyone get started with metallic cartridge reloading. If you load pistol rounds on a progressive, this video series is particularly helpful. The on-camera host is Hunter Pilant, son of Carroll Pilant of Sierra Bullets.
Preventing Double Charges
Tip: Use a bulky powder that fills your case more than half way with a correct charge. This will overfill the case if it is double-charged, making it very difficult to seat a bullet.
Tumble New Brass Before Loading the First Time
Tip: Tumble new pistol cartridge brass in used media for 30 minutes before loading for the first time. This will add enough graphite (carbon residue) to smooth case entry into dies. You can also lube the case mouths with graphite, or use spray lube.
Powder Through Expander — How to Eliminate Hang-ups
Tip: When loading pistol brass with a progressive press, sometime the powder-through expander is hard to remove, especially with short cases. There are two fixes — first, try deburring the inside of the case mouth on your cases. Second, the radius of the powder through expander plug can be modified to smooth entry and exit (see photo). Starline will do this modification for free.
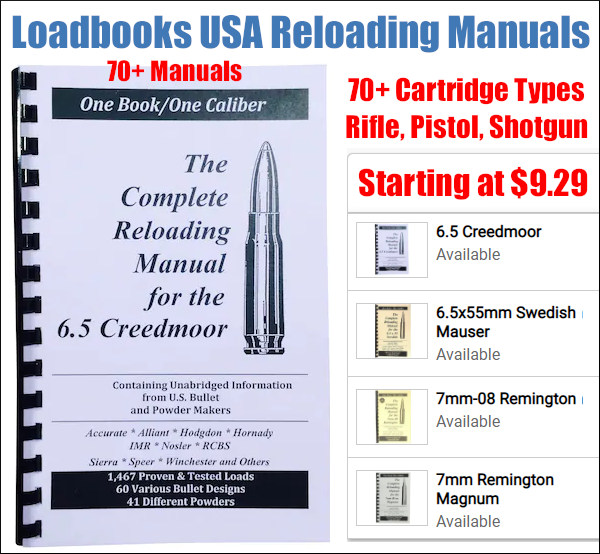
⏺️ » Over 70 loadbook varieties — great for pistol and hunting loads
Loadbooks pack a ton of valuable load data in a single handy volume. These booklets efficiently summarize data from multiple bullet and powder manufacturers. We have used these Loadbooks for our pistol loading as well as common rifle hunting loads. Right now a wide selection of these loadbooks are in-stock at MidwayUSA, with affordable prices. The 6.5 Creedmoor manual is $9.29, the .45 ACP book is $10.49, the .223 Rem book is $11.49, and the .308 Win book is $12.49.
Chose from over 70 cartridge types, including .380 ACP, 9mm Luger, .357 Magnum, .40 SW/10mm, .45 ACP, .204 Ruger, .223 Rem, 22-250, 6mm Remington, 6.5 Creedmoor, 6.5×55, 7mm-08, .270 Win, .284 Win, .308 Win, .30-06, 300 WinMag, .338 LM, 12ga shotshell and many more. NOTE: On MidwayUSA’s landing page, click “Select Title” then scroll down to choose your preferred cartridge type. You an order multiple loadbook titles by adding to the shopping cart.
NOTE: Good load information is available online from Hodgdon and other powder companies. But it’s handy to have a print book that you can use without Wifi, and make notes about your loads. Sometimes a traditional reference is actually more convenient than the internet.
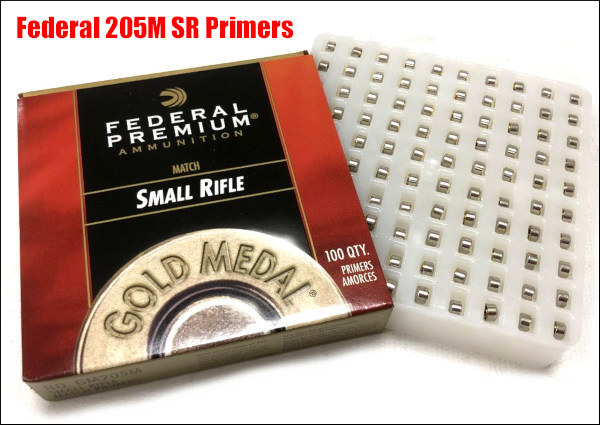
Do you know how gun primers are made — how the explosive elements are applied into those tiny cups? Find out by watching this video filmed at a Federal ammunition factory. It starts out with empty primer cups loaded, 1000 at a time, into trays using vibration (0:05 time-mark). While much of the process is automated, there is still a significant role played by production workers who apply a green, paste-like charging compound to the inside of hundreds of primer cups.
At the 0:17-second time-mark you can see the factory worker “charging” the primers with the priming compound. After the cups are filled, then the plate of cups “mates up with a plate of anvils” (0:40 time-mark). Then the primers are unloaded from trays and inspected.
Primer “Mysteries and Misconceptions” Article
There is an excellent article about primers on the Shooting Times website. This authoritative Shooting Times article explains the fine points of primer design and construction. The author reveals some little-known facts about primers and corrects common misconceptions. Here are some highlights:
Size Matters
Useful Trivia — even though Small Rifle and Small Pistol primer pockets share the same depth specification, Large Rifle and Large Pistol primers do not. The standard pocket for a Large Pistol primer is somewhat shallower than its Large Rifle counterpart, specifically, 0.008 to 0.009 inch less.
Magnum Primers
There are two ways to make a Magnum primer — either use more of the standard chemical mix to provide a longer-burning flame or change the mix to one with more aggressive burn characteristics. Prior to 1989, CCI used the first option in Magnum Rifle primers. After that, we switched to a mix optimized for spherical propellants that produced a 24% increase in flame temperature and a 16% boost in gas volume.
Foiled Again
Most component primers have a little disk of paper between the anvil and the priming mix. It is called “foil paper” not because it’s made of foil but because it replaces the true metal foil used to seal early percussion caps. The reason this little disk exists is strictly a manufacturing convenience. Wet primer pellets are smaller than the inside diameter of the cup when inserted and must be compacted to achieve their proper diameter and height. Without the foil paper, the wet mix would stick to the compaction pins and jam up the assembly process.
When your cases become hard to extract, or you feel a stiff bolt lift when removing a cartridge, it’s probably time to full-length size your cases, and “bump” the shoulder back. We generally recommend bumping shoulders each time you reload, after the initial fire-forming. Benchrest and F-Class benchrest shooters, running relatively high pressures, typically full-length size every load cycle, bumping the shoulder .001-.003″. High Power shooters with gas guns generally full-length size every time, and may need to bump the shoulders .003″ or more to ensure reliable feeding and extraction.
Use Shims for Precise Control of Shoulder Bump
Some shooters like to set the “default” position for their full-length die to have an “ample” .003″ or .004″ shoulder bump. When they need less bump, a simple way to reduce the amount of shoulder movement is to use precision shims in .001″ (one-thousandth) increments.
Here are reports from Forum members who use the shims:
“Great product. I have my die lock ring(s) adjusted for the shortest headspace length on my multiple chambers 6BRs and 6PPCs. When needing a longer headspace, I just refer to my notes and add the appropriate shim under the lock ring. Keep it simple.” — F.D. Shuster
Mats Johansson writes: “I’ve been using [shims] since Skip Otto (of BR fame) came out with them. I set up my dies with the .006″ shim, giving me the option of bumping the shoulder a bit more when the brass gets old and hardens while still having room to adjust up for zero headspace, should I have missed the original setup by a thou or two. Hunting rounds can easily be bumped an extra .002-.003″ for positive, no-crush feeding. Being a safety-oriented cheapskate, I couldn’t live without them — they let me reload my cases a gazillion times without dangerous web-stretching. Shims are a must-have, as simple as that.” — Mats Johansson
Sinclair Die Shim Kit — Seven Shims for $14.99
Sinclair Int’l (through Brownells) offers a seven-piece set of Sizing Die Shims that let you adjust the height of your die (and thereby the amount of bump and sizing) in precise .001″ increments. Sinclair explains: “Some handloaders will set their die up to achieve maximum sizing and then progressively use Sinclair Die Shims between the lock ring and the press head to move the die away from the shellholder. Doing this allows you to leave the lock ring in the same position. These shims are available in increments of .001″ and work very well.”
Seven Shims from .003″ to .010″
Sinclair’s $14.99 Die Shim Kit (item 22400) includes seven shims in thicknesses of .003, .004, .005, .006, .007, .008, and .010. For ease of use, shim thickness is indicated by the number of notches cut in the outer edge of each shim. Even without looking you can “count” the notches by feel.
The 6.5 Creedmoor is now one of the most popular cartridges chambered in factory rifles. It found favor among hunters and PRS competitors, but then its little brother the 6mm Creedmoor became widely adopted because the 6mm version delivered less recoil, equivalent or better ballistics, and lower bullet cost.
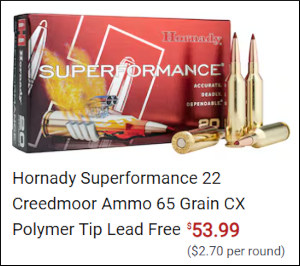
There’s another Creedmoor cousin, the 22 Creedmoor, basically a 6mm Creedmoor necked down to .224 caliber. While this certainly can be used for PRS and tactical competition, the 22 Creedmoor seems to be ideally suited as a high-velocity varmint round — something to replace the 22-250. You get 22-250 class velocities with a more modern cartridge design, and high-quality brass.
LEARN MORE about the 22 Creedmoor
There is an excellent write-up in the GunsAmerica Digest about the 22 Creedmoor cartridge. Reviewer Jeff Cramblit built a 22 Creedmoor rifle and tested it with a variety of bullet weights. He concluded it worked best as a varminter, but could also do PRS duty, provided it is loaded under the 3200 fps velocity limit common in PRS matches. CLICK HERE to read full GunsAmerica 22 Creedmoor test report.
22 Creedmoor Ammunition, SAAMI Spec
SAAMI (Sporting Arms & Ammunition Mfg’s Institute) officially approved the 22 Creedmoor Cartridge in February, 2024. The cartridge has become more popular over the last two years, so ammo production has increased. Loaded 22 Creedmoor ammo is available from Copper Creek, Gunwerks, Hornady, Nosler, and Spark Munitions. Copper Creek has produced the most 22 Creedmoor loaded ammo varieties, with 18 different bullet options from 68 grains to 95 grains, including two lead-free bullet types. Copper Creek also offers load development packs with either Peterson or Hornady brass. Below are five Cooper Creek loaded ammo options with Sierra and Berger bullets.
In addition, multiple companies now offer 22 Creedmoor cartridge brass: Alpha Munitions, Atlas ADG, Hornady, and Peterson Cartridge. The Peterson 22 Creedmoor brass is excellent.
Of course you can neck down high-quality Lapua 6mm Creedmoor brass. Lapua brass has outstanding consistency and durability. Choose from large primer or small primer types. Necking down is a relatively easy one-step operation with a neck-sizing or full-length sizing die. You’re just stepping down to .224 from .243 — not that big of a jump.
22 Creedmoor Brass from Peterson Cartridge
According to Derek Peterson, President of Peterson Cartridge, “We decided to build the tooling to make our .22 Creedmoor brass in response to the uptick in long-distance predator and varmint hunting. Plus the round is just straight-up fun to shoot. It is a low-recoil, flat shooting, wind-bucking round [that is] deadly accurate up to 800 yards.”
“When we designed the tooling for the .22 Creedmoor we set out to make casings with improved features”, Peterson added. “And we were successful. We increased the head hardness to tolerate higher pressures. And we increased our internal volume slightly to work better with the slow-burning powders [such as Reloder 26 or H1000].”
22 Creedmoor for Varmints — Video from the Varmint Fields of Eastern Oregon
Bullet Choices for 22 Creedmoor
If you have an appropriate twist-rate barrel, you can load the 22 Creedmoor with heavy 85-95 grain bullets. However, we think that, for varminting, the cartridge is better suited for lighter 65-80 grain bullets. This yields high velocities that provide explosive impacts on small varmints.
This GunsAmerica photo shows, L to R, 90gr Sierra MK, Hornady 88gr, 80gr, and 75gr .224 caliber bullets.
What is the Best Role for the 22 Creedmoor?
GunsAmerica tester Jeff Cramblit favors the 22 Creedmoor as a varmint round: “The performance of the 22 Creedmoor with 75-80 grain bullets makes it an outstanding varmint cartridge. I’ve seen claims of 80 grain Bergers at 3500 fps out of 26″ barrels, which would be devastating on any varmint. Loaded ammunition is available with bullets in the 70-75 range leaving 24” barrels at velocities around 3400+ fps, a bit more conservative than personal hand-loading, but still making it a very flat shooting, low recoiling round delivering impressive results.”
Jeff says the 22 Creedmoor will also work for PRS with heavier bullets: “I built the 22 CM to be a dual-purpose gun, or actually a 3-purpose gun. The first was for the coyotes and varmints previously mentioned. The second was for shooting PRS (Precision Rifle Series) style matches on occasion, and the third was for hunting deer-sized game. As with any multi-purpose tool there tends to be compromises.”
More Efficient Alternatives — the 22 BR and 22 BRA
If you already have a 6mmBR rifle, and you want a higher velocity cartridge for varmint shooting, you may want to consider just necking down your brass. We’ve shot the 22 BR in the varmint fields and a steel match. This cartridge offers excellent accuracy, and is very flat shooting. We recommend getting a fairly fast-twist barrel so you can shoot the longer, high-BC bullets if you want to use your 22 BR in local matches. You’ll find that shorter 40gr to 66gr varmint bullets shoot great even in the faster-twist barrels.
For more information on the 22 BR for varminting and target shooting, with recommended loads for 40gr to 90gr bullets, read our Accurate Shooter 22 BR Cartridge Guide.
If you want more velocity than a 22 BR offers, you can have your barrel chambered for the 22 BRA (BR Ackley). With its 40-degree shoulder, the 22 BRA offers a few more grains capacity, so you can get more FPS with all classes of bullets. Fire-forming is easy — just use a normal 22 BR load with good bullets and shoot. We’ve fire-formed a 22 BRA in a varmint match and it showed excellent accuracy — there’s no need to waste bullets fire-forming. Go ahead and fire-form during a fun match.
Here are some really smart tips for hand-loaders compiled by Sierra Bullets. These suggestions were submitted by Sierra’s Facebook fans — and some are very valuable indeed. Some of these tips will help you load more accurate ammo. Other selections will help you stay SAFE — which should always be your #1 priority. For example, we concur with the advice to “Check and Double Check. Everything. Every Time”. Also definitely keep “One powder on the bench at a time” — that could be a life-saver. You may want to print these “words of wisdom” and place them on a wall in your loading room.
Reloading Safety Tips — Sound Advice
ALWAYS START LOW: “Just because a load manual says X grains of X powder with X bullet is max, your rifle could reach max pressure a grain or two before what the book says. Start low and work up.” — Walter Coats
BE SAFE and CAREFUL: “Check and double check. Everything. Every time. Only one type of powder on the bench at a time.” — Glen Lundgren
DON’T RUSH: “Be patient, don’t be in a hurry, have fun and find your rhythm. Just tell your family you’re putting yourself in ‘time-out’. They will understand.” — Erik Dyal
POWDER RULE #1: “One powder on the bench at one time, it might save your life.” — James A. Kimery
STAY FOCUSED: “Relaxed but concentrated attention. Have fun enjoying a great hobby and pastime but stay focused.” — Jim Caldwell
POLICE LOADING AREA: “Keep your reloading bench area clean and put items away ASAP.” — Eric J. Ford
BE PATIENT: “Focus, Focus, Focus — be patient — it AIN’T a race.” — William Stanley
RECORD YOUR LOADS: “Write down on a small card what you’re loading – bullet weight, powder weight, type of powder, and primer. And put it in the powder hopper. I am unloading .45 FMJ because I forgot what type powder was in the hopper.” — Michael Conniff
HAVE a PROCEDURE for INTERRUPTIONS: “If, for any reason, you have to leave the bench while in the process of dropping powder charges, turn the next case to be charged upside down in the loading block so you know where you left off.” — Bill Tinsley
LABEL EVERYTHING: “OCD is a good habit to have with your loading bench. CLEARLY label everything!” — Andy Pynckel
HAVE a GOAL: “Never start reloading or developing a load without a specific goal in mind. Second keep meticulous records.” — Peter Eick
RESEARCH THE JOB: “Read all you can about it before you start!” — Keith Shively
KEEP TRACK of the Brass: “I put all my primed brass upside down (primer up) and as I charge the casing, I (of course) flip it primer down.” — Mark Ewing
One of our Forum members complained that he wasn’t able to set his primers flush to the rim. He tried a variety of primer tools, yet no matter what he used, the primers still didn’t seat deep enough. He measured his primers, and they were the right thickness, but it seemed like his primer pockets just weren’t deep enough. He was mystified as to the cause of the problem.
Well, our friend Boyd Allen diagnosed the problem. It was the decapping rod. If the rod is adjusted too low (screwed in too far), the base of the full-diameter rod shaft (just above the pin) will contact the inside of the case. That shaft is steel whereas your case is brass, a softer, weaker metal. So, when you run the case up into the die, the shaft can actually stretch the base of the primer pocket outward. Most presses have enough leverage to do this. If you bell the base of the primer pocket outwards, you’ve essentially ruined your case, and there is no way a primer can seat correctly.
The fix is simple. Just make sure to adjust the decapping rod so that the base of the rod shaft does NOT bottom out on the inside of the case. The pin only needs to extend through the flash hole far enough to knock the primer out. The photo shows a Lyman Universal decapping die. But the same thing can happen with any die that has a decapping rod, such as bushing neck-sizing dies, and full-length sizing dies.
Whenever you use a die with a decapping pin for the first time, OR when you move the die to a different press, make sure to check the decapping rod length. And it’s a good idea, with full-length sizing dies, to always re-check the height setting when changing presses.
There are a variety of decapping dies currently on the market, with models available from LEE, Lyman, Hornady, RCBS, Redding, and Area 419 (at Brownells).
LEE Universal Decapping Die Costs Just $11.99
Speaking of decapping tools, Midsouth Shooters Supply sells the LEE Universal Decapping Die for just $11.99 (item 006-90292), a very good deal. There are many situations when you may want to remove primers from fired brass as a separate operation (prior to case sizing). For example, if your rifle brass is dirty, you may want to de-cap before sizing. Or, if you load on a progressive press, things will run much more smoothly if you decap your brass first, in a separate operation.
Decapping Dies for Cases with Smaller Flashholes
TAKE NOTE: Some Euro Small Flash Holes are spec’d at 1.5mm or 0.059″, and max out at about .062″, so these need a smaller die pin.
The low-cost LEE Universal Decapping Die will work with cartridges from 17 Fireball all the way up to big Magnums. However, NOTE that the decapping pin supplied with this Lee die is TOO LARGE for LAPUA 220 Russian, 6mmBR, 6.5×47, 6.5 Creedmoor, .308 Win (Palma) and Norma 6 PPC flash holes. Because the pin diameter is too large for these brass types, you must either turn down the pin, or decap with a different tool for cases with .059-.062″ flash-holes.
Brownells sells the impressive Area 419 Zero Universal Decapping Die. This features a spring-loaded decapping pin, with replaceable heads. The $50.00 die works with cases up to and including .338 Lapua length/diameter with no need for different inserts.
Redding makes a Universal Decapping Die with an optional smaller-diameter decapping rod for the smaller .059-.062″ flash holes found on the BR and PPC cases. The use of this die is explained in the video below:
When he measures his loads or sorts bullets by weight, Forum Member Boyd Allen often employs his trusty RCBS 10-10 balance beam scale (although he does have handy digital scales as well). He finds that the balance beam scale works predictably, time after time, and it doesn’t suffer from the drift and calibration issues that plague some of the less expensive electronic scales on the market.
To make it easier to see the balance point, Boyd has adapted a magnifying glass with a mirror. This makes the end of his balance beam easier to view from his normal position on the bench. Boyd explains: “This set-up uses a cheap magnifier with positioning arms that was probably designed to hold and magnify small objects while soldering them. I think that it came from Harbor Freight many years ago. The mirror lets you look at the scale as if is was at eye level, and of course the magnifier makes the image easier to see.”
If you have a balance beam scale, we suggest you try this simple enhancement. We predict you’ll find the magnifier speeds up the process with enhanced assurance of your load weight.
Progressive reloading presses offer shooters speed and efficiency in producing custom-tailored rifle and pistol ammunition. However, there is a wide choice of Progressive Presses and a bewildering array of options to consider. In this video, the 6.5 Guys and UltimateReloader.com’s Gavin Gear provide an overview of the leading Progressive Presses on the market along with key considerations for precision rifle shooters. If you are considering getting a Progressive for rifle ammo reloading, you should watch this informative, 25-minute video.
10 Tips for Reloading Rifle Ammo on a Progressive Press:
1. Make sure the brass is very clean. Don’t mix old range pick-up brass with newer brass.
2. Apply a thin, spray lube to all cases before the sizing/loading cycle.
3. Consider priming your brass separately (with a hand or bench tool) before the operation. Then inspect the primers before loading powder and bullets.
4. Always wear eye protection when loading with the Progressive, particularly if you are priming cases.
5. With masking tape, mark the powder measure/dropper with the powder type and cartridge charge weight. Check the charge mass multiple times (see below).
6. Cycle a few cases, sizing and adding powder but NOT seating bullets. Weigh the powder charges to ensure the powder measure is dispensing the correct charge. Sometimes this will change a couple tenths as it “settles down” after the first few charges.
7. Check the brass for shoulder bump and bullet seating depth carefully for the first few rounds, then check again periodically.
8. Try to maintain a steady pace and operate the handle the same way every time.
9. Visually inspect the powder charge in each case (before bullet seating), and use a lock-out die if your Progressive Press has enough stations.
10. Never, ever mix pistol and rifle powders! If you have previously loaded pistol ammo with your Progressive, make sure ALL the powder (every flake and kernel) is removed from all parts of the powder-dropping system before you add rifle powder.
Visit these sites for more Reloading and Precision Shooting Videos:


 Finding Cartridge Length to Lands with OAL Gauge


 If you already have a 6mmBR rifle, and you want a higher velocity cartridge for varmint shooting, you may want to consider just necking down your brass. We’ve shot the 22 BR in the varmint fields and a steel match. This cartridge offers excellent accuracy, and is very flat shooting. We recommend getting a fairly fast-twist barrel so you can shoot the longer, high-BC bullets if you want to use your 22 BR in local matches. You’ll find that shorter 40gr to 66gr varmint bullets shoot great even in the faster-twist barrels.


