Q: What is the most popular gun book in the history of the planet?
A: That distinction goes to the Shooter’s Bible, which has sold over 7 MILLION copies since it was first published over 80 years ago.
Released in October 2025, the 117th Edition of this respected resource is better than ever. This latest Shooter’s Bible boasts 608 pages with over 270 color photos and more than 1000 black-and-white photos. The latest 117th Edition features many new firearms as well as new optics. This paperback book is now just $24.92 on Amazon, 17% off the $29.99 list price.
Published annually for more than eighty years, the Shooter’s Bible is one of the most comprehensive firearms reference guides in print. The publishers claim that “nearly every firearms manufacturer in the world” is included. The 117th Edition also contains new and/or enhanced sections on ammunition, optics, and accessories, along with updated handgun and rifle ballistic tables. There are also extensive charts of currently available hunting and match bullets for hand-loaders.
While many shooters are now using the internet to get reloading data and equipment specifications, the Shooter’s Bible remains a valuable resource with a great legacy. As one recent Shooter’s Bible purchaser explains: “While it’s true that much of the information contained in the Shooter’s Bible can be found on the Internet, there are many of us who would first rather relax in our easy chair and page through the book at our leisure. If you find an item that catches your fancy, you can then follow up by going to their Web site.”
Another buyer observed: “This [2020 edition] is proof that, even with all the attacks on our 2nd Amendment right over the years, the industry has persevered and grown. I hope the day never comes when there will no longer be a reason to publish the Shooter’s Bible.”
The Shooter’s Bible contains a vast collection of firearms product information and descriptions. Hundreds of firearms are listed, complete with specifications and photos. Products from nearly all commercial gun makers on the planet are included.
More Great Gun Books From Shooter’s Bible Publishers
RCBS, one of the biggest names in the reloading and gun maintenance world, changed ownership a couple years ago. Hodgdon Powder Company (Hodgdon) acquired RCBS from Revelyst, a division of of Vista Outdoor (VSTO). Most operations of RCBS have been continued, and the full product line remains in production — presses, dies, powder measures, case prep tools, priming tools, scales and more.
Today’s Saturday Showcase feature some of the most popular and noteworthy RCBS products including single-stage, turret, and progressive presses, plus powder dispensers and other tools.
RCBS ChargeMaster Link Scale/Dispenser with Bluetooth
Having a modern, electronic powder scale/dispenser makes the hand-loading process vastly more efficient. The latest generation of powder dispensers are very accurate, and they can store charge settings for multiple cartridge types. The latest RCBS ChargeMaster Link dispenser has a modern interface, plus Bluetooth technology that “talks” to a handy App on your mobile device. The popular ChargeMaster Link is available now for $299.99 at MidwayUSA.
RCBS Combo Kit — Good Choice for Getting Started in Reloading
You can definitely save money by buying multiple reloading gear items in one combo package. RCBS offers a variety of Reloading Combo Kits which feature reloading press, powder measure, scale, priming tool, and other items. These range in price from $265-$620 on Amazon. This video reviews an RCBS Rebel Master Kit. This is a very complete starter set-up, sold for $449.99 at Midsouth.
Along with the press, we like many of the components in the Rebel Master combo kit. The powder measure works well as does the trickler, and the hand primer tool is reliable, with good feeding and plenty of leverage.
RCBS Partner Press
We think all serious reloaders should have a small, secondary single-stage press for repetitive tasks such as decapping primers. In addition, a small, compact press can be transported easily to the range. Load development can be done more efficiently when loading at the range, as you can easily modify seating depth and other variables. The RCBS Partner Press (#ad) is a great choice for a secondary press. This UltimateReloader video shows the key features of the Partner Press.
RCBS 6-Station Turret Press — Operation Tips
This editor has owned and used an RCBS Turret Press for over two decades. While certainly not as versatile/sophisticated as the Area 419 XERO turret press, this six-station RCBS press does its job handily. It is a good choice if you load multiple pistol cartridges. With six stations, you can install both a sizing and a seating die for three different cartridge types, such as 9mm Luger, .357 Magnum, and .45 ACP. It is currently $406.99 at MidwayUSA.
RCBS Brass Boss Case Prep Center
The RCBS Boss is a powered case prep center that performs multiple tasks efficiently. Priced at $214.99 on Amazon (#ad), the RCBS Boss boasts six variable, high-speed rotating stations (four at <350 RPM; two at <550 RPM). This unit is great for initial case prep (chamfering/deburring) and regular brass maintenance.
RCBS Summit — Set-UP and Field installation on Vehicle
The RCBS Summit Press (#ad) is a very unique, small footprint press that operates differently than most reloading presses. The cast-iron Summit has a large-diameter center column and die moves up and down to meet the cartridge. With this small footprint, the Summit can be used in the field. As you can see in the second video, one of our testers actually mounted a Summit Press on his vehicle (with a special pedestal) so he could load anywhere.
RCBS Bench-mount Priming Tool (Two Short Videos)
If you need to prime large numbers of cases, the RCBS bench-mount Auto Priming Tool can do so efficiently at a modest cost (currently $135.84 on Amazon #ad). It attaches to your bench so it is secure and stable. A vertical tube holds dozens of primers that feed into the pusher as you can see in these videos. Older guys who experience pain when gripping hand primer tools have praised this bench-mounted RCBS unit.
Choosing a Case Cleaning System
Here Kent Sakamoto of RCBS looks at the three main types of brass cleaning systems: Vibratory Tumbler, Wet Tumbler (with media), and Ultrasonic Cleaning Machine. Kent reviews the pros and cons of each system. Most gun owners can benefit by having an ultrasonic machine for parts cleaning as well as a tumbler for cleaning fired brass.
As an Amazon affiliate, this site can earn revenues through sales commissions.
Get WAY Better Groups with New Criterion Pre-Fit Custom Barrel
In our Shooters’ Forum, you’ll find a lengthy thread about accuracy problems with a Savage LRPV, chambered in 6mmBR. The gun would repeatedly split groups at 100 yards, and at 300 yards, the “flyers” would open up the groups to 1.5 MOA or larger. Interestingly, the factory test target (at right) showed a split group — not a good sign.
The gun’s owner, forum member LR_Shooter, tried a variety of tweaks: “I did this, done that… [changed] torque, tang floated, bedded action, recut chamber, and [adjusted firing pin]”. But nothing really helped. Frustrated, LR_Shooter asked his fellow Forum members for help. Much advice was proffered, including the novel idea of removing the middle action screw in the Savage 3-screw target action. Some of the advice proved helpful, but none of the suggested remedies produced a major improvement. This rifle, out of the box, tossed flyers and no amount of tweaking (or changes in shooting technique) really cured the basic problem. That is, until, the factory barrel got replaced…
New Criterion Pre-Fit Barrel Works Wonders
LR_Shooter acquired a Criterion pre-fit barrel from Jim Briggs at Northland Shooters Supply (NSS). These pre-fits are designed for easy installation with the standard Savage barrel nut. Wouldn’t you know it, with a new 30″ heavy-contour barrel on the LRPV, the gun started shooting way better. No more crazy fliers, no more split groups, no more excessive vertical. And the improvement came without any other major modifications. LR_Shooter reports: “I got a replacement barrel from Jim at NSS. It is a 30″ bull Criterion barrel. So far, without playing with torque screws and having my old setup… I’m very satisfied with the barrel I got. Now I have no problem getting [groups] under 0.25 MOA. Finally this thing can shoot!” The targets below, shot with the new Criterion barrel, speak for themselves. The left target was shot at 100 yards, while the target on the right was shot at 300 yards (very impressive).
Targets Shot with Savage LRPV Fitted with Criterion Barrel
Moral of the Story — Sometimes A New Barrel Really Is the Right Solution
All of us have struggled at times with a rifle that won’t live up to expectations. This Editor personally struggled for over a year with a .260 Rem Savage with a factory tube. The gun tended to split groups and the POI walked as the barrel heated. I tried one powder/primer combination after another, working through a variety of seating depths over many months. I was persistent. Out of stubbornness, I just believed that sooner or later I’d find the magic load.
Well folks, sometimes there’s really nothing you can do about a sub-par barrel. It is what it is. To really improve a gun’s accuracy (particularly a gun with a factory tube), you may need to open your wallet and get a quality aftermarket barrel. Spending months trying one recipe after another may simply be an overwhelming waste of powder, bullets, and your precious time.
Albert Einstein supposedly said: “Insanity is defined as doing the same thing over and over again, and expecting different results.” Well that sort of describes my efforts with my .260 Rem. Once I had enough evidence that my barrel split groups no matter what load combo (and seating depth) I tried, it was time to pony up for a new barrel. When I did finally screw on a nice PacNor 3-groove SuperMatch, that Savage suddenly became a true tack-driver. As re-chambered in 6mmBR with the Pac-Nor, in calm conditions, my Savage will now consistently shoot in the twos with heavy bullets, and it can sometimes dip down into the ones with Berger 80gr flat-base bullets. The moral of the story here is simple — don’t waste weeks or months chasing your tail with a barrel that just won’t deliver (after a reasonable amount of testing). Save up for a custom barrel, get it chambered properly, and stop your cycle of frustration.
Here is great news for score benchrest shooters. For years 100/200 yard score competition has been dominated by the 30 BR cartridge, which offers outstanding accuracy and consistency with .30-caliber bullets. But creating a .30 BR cartridge took time and effort forming the brass from a parent typically using Lapua 6mm BR Norma brass or Peterson 7mm BR brass.
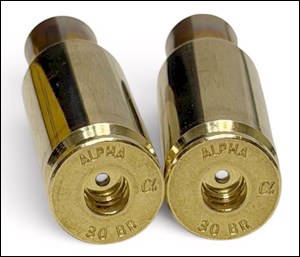
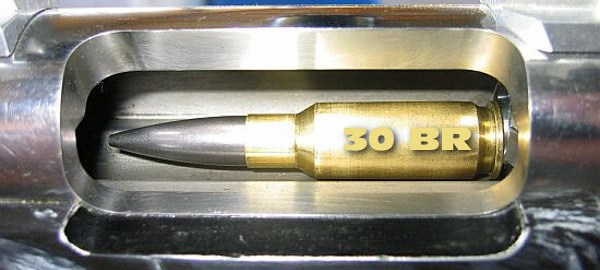
Now that has changed. Alpha Munitions now offers excellent, ready-to-shoot 30 BR brass. No separate fire-forming or hydro-forming is required. This Alpha 30 BR brass has shown excellent accuracy both with a no-turn neck and as turned for a tighter chamber. Case life is excellent as Alpha brass is strong with good longevity. This impressive new 30 BR brass is now available exclusively through Bruno Shooters Supply. It is IN STOCK now and priced at $159.99 for 100 pieces.
Ace benchrester and gunsmith Speedy Gonzales has praised this new Alpha 30 BR brass: “Well fellow score shooters, the days of expanding 6mm or 7mm brass up to make 30 BR brass are just about over. UPS just dropped off the test samples for me to test, and should be in full production soon. I will post a full video after testing and give you all the full report. 30 BR brass by Alpha will be sold exclusively through Bruno Shooters Supply and has an order list up and running[.]”
Here’a useful article by Sierra Bullets Media Relations Manager Carroll Pilant. This story, which originally appeared in the Sierra Bullets Blog, covers some of the more common ammo problems that afflict hand-loaders. Some of those issues are: excessive OAL, high primers, and improperly-sized cases. Here Mr. Pilant explains how to avoid these common problems that lead to “headaches at the range.
I had some gentlemen at my house last fall getting rifle zeros for an upcoming elk hunt. One was using one of the .300 short mags and every 3rd or 4th round would not chamber. Examination of the case showed a bulge right at the body/shoulder junction. These were new cases he had loaded for this trip. The seating die had been screwed down until it just touched the shoulder and then backed up just slightly. Some of the cases were apparently slightly longer from the base to the datum line and the shoulder was hitting inside the seating die and putting the bulge on the shoulder. I got to thinking about all the gun malfunctions that I see each week at matches and the biggest percentage stem from improper handloading techniques.
One: Check Your Cases with a Chamber Gage
Since I shoot a lot of 3-gun matches, I see a lot of AR problems which result in the shooter banging the butt stock on the ground or nearest solid object while pulling on the charging handle at the same time. I like my rifles too well to treat them that way (I cringe every time I see someone doing that). When I ask them if they ran the ammo through a chamber gage, I usually get the answer, “No, but I need to get one” or “I didn’t have time to do it” or other excuses. The few minutes it takes to check your ammo can mean the difference between a nightmare and a smooth running firearm.
A Chamber Gauge Quickly Reveals Long or Short Cases
Size Your Cases Properly
Another problem is caused sizing the case itself. If you will lube the inside of the neck, the expander ball will come out a lot easier. If you hear a squeak as the expander ball comes out of a case neck, that expander ball is trying to pull the case neck/shoulder up (sometimes several thousandths). That is enough that if you don’t put a bulge on the shoulder when seating the bullet … it can still jam into the chamber like a big cork. If the rifle is set up correctly, the gun will not go into battery and won’t fire but the round is jammed into the chamber where it won’t extract and they are back to banging it on the ground again (with a loaded round stuck in the chamber). A chamber gage would have caught this also.
Oversizing cases also causes problems because the firing pin doesn’t have the length to reach the primer solid enough to ignite it 100% of the time. When you have one that is oversized, you usually have a bunch, since you usually do several cases at a time on that die setting. If the die isn’t readjusted, the problem will continue on the next batch of cases also. They will either not fire at all or you will have a lot of misfires. In a bolt action, a lot of time the extractor will hold the case against the face of the breech enough that it will fire. The case gets driven forward and the thinner part of the brass expands, holding to the chamber wall and the thicker part of the case doesn’t expand as much and stretches back to the bolt face. If it doesn’t separate that time, it will the next time. When it does separate, it leaves the front portion of the case in the chamber and pulls the case head off. Then when it tries to chamber the next round, you have a nasty jam. Quite often range brass is the culprit of this because you never know how many times it has been fired/sized and in what firearm. Back to beating it on the ground again till you figure out that you have to get the forward part of the case out.
Just a quick tip — To extract the partial case, an oversized brush on a cleaning rod [inserted] and then pulled backward will often remove the case. The bristles when pushed forward and then pulled back act like barbs inside the case. If you have a bunch of oversized case that have been fired, I would dispose of them to keep from having future problems. There are a few tricks you can use to salvage them if they haven’t been fired though. Once again, a case gage would have helped.
Two: Double Check Your Primers
Another thing I see fairly often is a high primer, backwards primer, or no primer at all. The high primers are bad because you can have either a slam fire or a misfire from the firing pin seating the primer but using up its energy doing so. So, as a precaution to make sure my rifle ammo will work 100% of the time, I check it in a case gage, then put it in an ammo box with the primer up and when the box is full, I run my finger across all the primers to make sure they are all seated to the correct depth and you can visually check to make sure none are in backwards or missing.
Three: Check Your Overall Cartridge Length
Trying to load the ammo as long as possible can cause problems also. Be sure to leave yourself enough clearance between the tip of the bullet and the front of the magazine where the rounds will feed up 100%. Several times over the years, I have heard of hunters getting their rifle ready for a hunt. When they would go to the range to sight in, they loaded each round single shot without putting any ammo in the magazine. On getting to elk or deer camp, they find out the ammo is to long to fit in the magazine. At least they have a single shot, it could be worse. I have had hunters that their buddies loaded the ammo for them and then met them in hunting camp only to find out the ammo wouldn’t chamber from either the bullet seated to long or the case sized improperly, then they just have a club.
Four: Confirm All Cases Contain Powder
No powder in the case doesn’t seem to happen as much in rifle cartridges as in handgun cartridges. This is probably due to more handgun ammo being loaded on progressive presses and usually in larger quantities. There are probably more rifle cartridges that don’t have powder in them than you realize though. Since the pistol case is so much smaller internal capacity, when you try to fire it without powder, it usually dislodges the bullet just enough to stick in the barrel. On a rifle, you have more internal capacity and usually a better grip on the bullet, since it is smaller diameter and longer bearing surface. Like on a .223, often a case without powder won’t dislodge the bullet out of the case and just gets ejected from the rifle, thinking it was a bad primer or some little quirk.
For rifle cases loaded on a single stage press, I put them in a reloading block and always dump my powder in a certain order. Then I do a visual inspection and any case that the powder doesn’t look the same level as the rest, I pull it and the one I charged before and the one I charged after it. I inspect the one case to see if there is anything visual inside. Then I recharge all 3 cases. That way if a case had powder hang up and dump in the next case, you have corrected the problem.
On progressive presses, I try to use a powder that fills the case up to about the base of the bullet. That way you can usually see the powder as the shell rotates and if you might have dumped a partial or double charge, you will notice as you start to seat the bullet if not before. On a progressive, if I don’t load a cartridge in one smooth stroke (say a bullet tipped over sideways and I raised the ram slightly to reset it) Some presses actually back the charge back adding more powder if it has already dumped some so you have a full charge plus a partial charge. When I don’t complete the procedure with one stroke, I pull the case that just had powder dumped into it and check the powder charge or just dump the powder back into the measure and run the case through later.
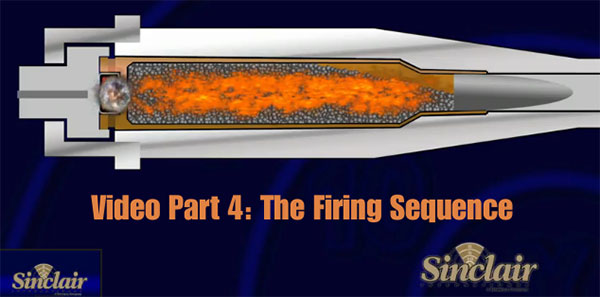
Sinclair International has created a series of instructional videos illustrating the basics of metallic cartridge reloading. The 8-Part series starts with reloading basics and provides step-by-step, how-to instructions that will help new reloaders get started. Detailed, animated illustrations show you what happens inside the chamber when shooting, and inside the dies during each step of reloading. The videos can be viewed on Sinclair International’s YouTube channel. Shown below is the first video in the series:
Each of the Sinclair videos is hosted by then Sinclair Int’l President Bill Gravatt (now with Creedmoor Sports). Bill doesn’t just show you “how”, he tells you “why”. The how-to segments cover case inspection, proper die set up, case sizing, primer installation, powder measuring, bullet seating, crimping, and even goes into the record keeping needed for the handloader. “We wanted to give shooters who haven’t reloaded a look at all the advantages of creating your own ammo and how easy it is to get started,” said Gravatt, “without telling them they had to have any certain brand or type of equipment to do the job.”
The Eight Video Topics Are:
Part 1 — Intro to Video Series
Part 2 — Intro to Reloading Safety
Part 3 — Metallic Cartridge Components
Part 4 — The Firing Sequence
Part 5 — Tools for Reloading
Part 6 — Loading Bottle-Neck Cartridges (2 videos)
Part 7 — Loading Straight Wall Cartridges
Part 8 — Reloading Series Conclusion
Reloading Tools
Shown below is Part 5 of the video series, covering the tools used for precision reloading.
We also strongly recommend the Part 4 Video to readers who are getting started in reloading. This “How Things Work” segment covers the sequence of events inside the chamber (and barrel) when the cartridge is fired. The video includes helpful graphics that show what happens to the primer, powder, cartridge, and bullet when the round is fired. The video also illustrates “headspace” and explains how this can change after firing. We think this video answers many common questions and will help reloaders understand the forces at work on their brass during the firing process.
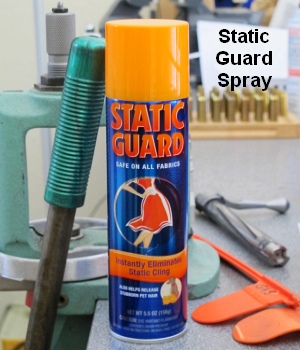
Apparently reducing static charges on and around electronic scales can reduce their propensity to drift, lessening the problem of “wandering zero”. Just how and why static charges interfere with scale performance is unclear, but many shooters have noticed that static electricity can cause electronic scales to behave strangely. So how do you reduce static charges around your digital balance? Our late friend German Salazar (aka “GS Arizona”), creator of the Rifleman’s Journal Blog, found a very simple solution — an anti-static aerosol spray — that, by all indications, actually works. When this “spray-can solution” was suggested to German by a fellow shooter, German was skeptical. However, he tried the stuff and he says that it really does help the scale maintain zero over time, with much less observed drift.
Static Guard Reduced Scale Drift
German Salazar explained that the use of “Static Guard” spray helped mitigate the problem of a drifting zero on his Ohaus Navigator electronic scale. He writes: “My electronic scale… suffers from drifting zero (as they all seem to). I’ve read dozens of forum posts about drift and how to minimize its occurrence, so I know this problem isn’t limited to my scale or my workshop. Sometime last year, John Lowther mentioned the use of anti-static spray as a solution to the drift problem. John stated that the spray had virtually eliminated drift for him.”
Salazar found that the Static Guard actually worked: “The spray works great, just as John said it would. I spray all surfaces that I touch with my hands and arms as well as the pan (top and bottom), the metal tray on which the pan rests and the table under the scale. In six months or so of using the spray I’ve re-applied it about two or three times; it certainly isn’t something that you need to do each time you sit down to load. Before using the spray, it was not uncommon for me to re-zero the scale 10 times in the course of loading 72 rounds; now it might need it once during a session.”
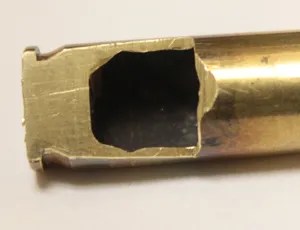
When developing loads, it is important to know the true internal capacity of your cases, both fired and “as FL-sized”. In particular, when using the QuickLOAD program, it is vital to determine true case capacity. The default case capacity values listed by QuickLOAD may be off half a grain (or more) because brass from different manufacturers can vary considerably in capacity. Case capacity is a very important variable that will affect the pressure of a load and the velocity of your bullets.
To determine the true internal capacity of your cases, first weigh an empty cartridge case, then fill the case with water (all the way to the top of the neck) and weigh the case again. The difference in weight is your H20 capacity in grains. But how do you keep the H20 from flowing out the bottom? When measuring fired, unsized cases, you can simply leave the spent primer in the pocket. However, if you want to measure new brass or “as-FL sized” cases that have been deprimed, you’d have to insert a spent primer to “stem the tide”. Until now that is… 21st Century Shooting sells a great little $5.50 tool that plugs the bottom of the case so you can measure H20 capacity with ease.
When we saw 21st Century’s Primer Pocket Plug we thought “That’s smart — why didn’t someone think about that a long time ago?”. This handy “end-cap” lets you quickly measure multiple new brass cases or deprimed FL-sized cases so you can get an average H20 capacity. The primer pocket plugs are NOT case-specific (they feature an O-ring that fits the pocket). One version will work with all small-primer-pocket cases, while another works with all large-primer-pocket cartridge types. Price is $11.99 for either small-pocket or large-pocket version.
ALTERNATIVE: >If you want to measure H20 capacity on fired, sized brass, but don’t want to shell out the money for the tool (or re-insert a spent primer), here’s a simple suggestion. When you size your case, first remove the decapping rod from the die. Then you can FL-size the case without removing the primer. Of course, you will eventually have to knock the primer out, and that requires putting the decapping rod back in the die and running the case through a second time. To avoid that hassle, the Primer Pocket Plug may be worth the $5.50 over the long haul.
Product Find by ELR Reseacher. We welcome reader submissions.
by Sierra Bullets Ballistic Technician Paul Box
One thing that plays a major role in building an accuracy load is neck tension. I think a lot of reloaders pretty much take this for granted and don’t give that enough thought.
So, how much neck tension is enough?
Thru the years and shooting both a wide variety of calibers and burn rates of powder, I’ve had the best accuracy overall with .002″ of neck tension. Naturally you will run into a rifle now and then that will do its best with something different like .001″ or even .003″, but .002″ has worked very well for me. So how do we control the neck tension? Let’s take a look at that.
First of all, if you’re running a standard sizing die with an expander ball, just pull your decapping rod assembly out of your die and measure the expander ball. What I prefer is to have an expander ball that [can give] you .002″ in neck tension [meaning the inside neck diameter is about .002″ smaller than the bullet diameter after passing the expander through]. If you want to take the expander ball down in diameter, just chuck up your decapping rod assembly in a drill and turn it down with some emery cloth. When you have the diameter you need, polish it with three ought or four ought steel wool. This will give it a mirror finish and less drag coming through your case neck after sizing.
Tips for Dies With Interchangeable Neck Bushings
If you’re using a bushing die, I measure across the neck of eight or ten loaded rounds, then take an average on these and go .003″ under that measurement. There are other methods to determine bushing size, but this system has worked well for me.
Proper Annealing Can Deliver More Uniform Neck Tension
Another thing I want to mention is annealing. When brass is the correct softness, it will take a “set” coming out of the sizing die far better than brass that has become to hard. When brass has been work hardened to a point, it will be more springy when it comes out of a sizing die and neck tension will vary. Have you ever noticed how some bullets seated harder than others? That is why.
Paying closer attention to neck tension will give you both better accuracy and more consistent groups.
Do primer types make a significant difference in accuracy or vertical dispersion at long range? The answer is “maybe”. Here’s one anecdotal study that tracked vertical variance among six different primer types. The tester is a good shooter with a very accurate rifle — four of the six 4-shot groups were under 2″ at 500 yards. This test doesn’t settle the question, but does suggest that it may be worth trying a few different primer types with your match ammo.
Here is a very interesting test for the 6 BRA (6mmBR Ackley) cartridge. Forum member James Phillips, a talented long-range benchrest shooter, tested SIX different primer types from three different manufacturers. To help determine vertical dispersion, James set his target out at 500 yards. He then proceeded to shoot 4-shot groups, in order, with each primer type. Velocities were recorded with a chrono. The photo above shows the results. James says: “I’ll retest the best two for accuracy and consistency with 10 shots each”. CLICK HERE for full-screen target photo.
As you can see, ALL the groups are pretty impressive. The smallest groups, 1.253″, was shot with CCI 400 primers. Next best (and very close) was CCI BR4, at 1.275″ for four shots. The “flat line” winner was the Remington 7.5, at upper left. There was almost no vertical. If you are intrigued by this interesting primer test, you can join the discussion in this Primer Test FORUM THREAD.
Primer Brand
Group Size
Velocity
Extreme Spread
Std Deviation
Remington 7.5
1.985″ 4 shot
2955 FPS
8 FPS
4.0 FPS
Federal 205M
2.200″ 4 shot
2951 FPS
11 FPS
4.8 FPS
Sellier Bellot SR
1.673″ 4 shot
2950 FPS
14 FPS
5.9 FPS
CCI 450M
2.341″ 4 shot
2947 FPS
14 FPS
6.6 FPS
CCI 400
1.253″ 4 shot
2950 FPS
3 FPS
1.3 FPS
CCI BR4
1.275″ 4 shot
2949 FPS
15 FPS
6.9 FPS
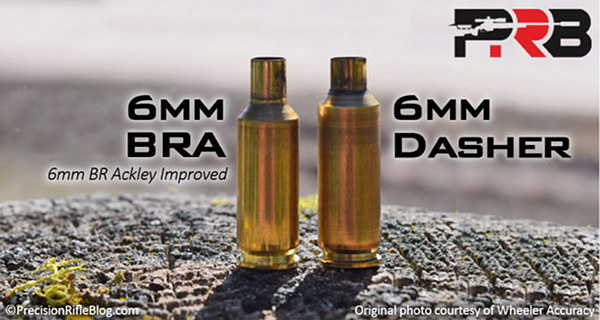
CARTRIDGE: 6mmBR Ackley, aka 6 BRA. Parent case is 6mmBR Norma. The 6 BRA is fire-formed to create a 40-degree shoulder and less body taper. Capacity is increased, but the neck is longer than a 6mm Dasher. The capacity is enough to get to the 2950+ FPS accuracy node. Some shooters say the 6 BRA is more forgiving than the 6mm Dasher. The 6 BRA is certainly easier to fire-form.
TEST REPORT — Conditions, Shooting Method, Loading Method
Tester James Phillips posted this report in ourShooters’ Forum:
Conditions: The testing was done in the morning over flags. The flags never moved or even twitched. I had as perfect conditions as I could have asked for. It was overcast so no mirage and no wind. There were no other shooters, just me.
Test Procedure: Each shot was precisely shot at my pace and centered the best possible using my Nightforce 15-55X scope. I did not use the round-robin method. Each four-shot group with the same was shot at one time. Then I moved onto the next primer. Everything felt right for each and every shot fired today. Of course I could repeat the test tomorrow and it could be exact opposite of today’s test. We can chase this forever. But [soon] I’m going to test the BR4 and 400 primer… for best accuracy and consistency for 10 shots each.
How Rounds Were Loaded: Each load was weighed to one (1) kernel of powder. So I know that’s as good as I can weigh them. Each bullet seating force was within 1# on my 21st Century hydraulic arbor press.
Previous Initial Load Testing: All groups were shot with 31.1 grains of H4895. During initial load testing I settled in on the Sellier & Bellot primer to finalize everything as it showed more promise over the CCI 450 Magnum I also tried. I was actually surprised to have seen the higher ES and SD from that primer today along with the vertical shown. [Editor: Look carefully — one shot from the CCI 450 is right in the center black diamond, stretching the vertical. By contrast the Rem 7.5 had almost no vertical.]
Velocity and NODE Considerations: I was about 5-6 FPS above what appeared to been my optimum velocity of 2943-2945 FPS, so I’ll test 5 shots of 31.0 and 5 of 31.1 and see what happens from there. I can only assume my velocities where higher due to the higher humidity and of course temps were 5 degrees warmer this morning as well. It wasn’t far off but I noticed it.


 In our
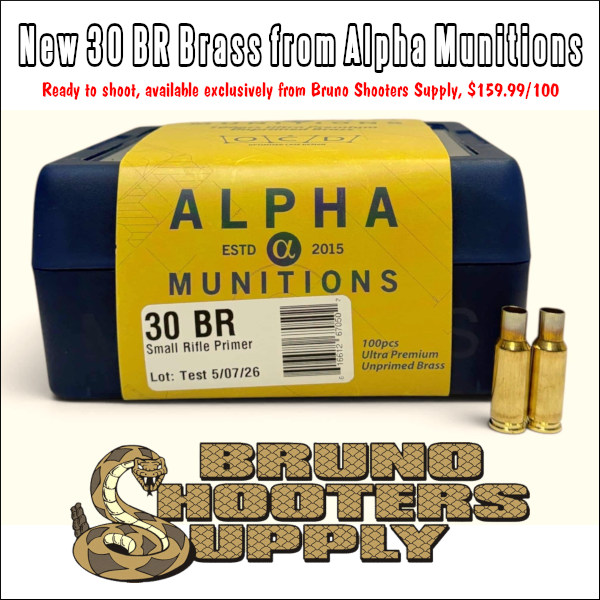


 Oversizing cases also causes problems because the firing pin doesn’t have the length to reach the primer solid enough to ignite it 100% of the time. When you have one that is oversized, you usually have a bunch, since you usually do several cases at a time on that die setting. If the die isn’t readjusted, the problem will continue on the next batch of cases also. They will either not fire at all or you will have a lot of misfires. In a bolt action, a lot of time the extractor will hold the case against the face of the breech enough that it will fire. The case gets driven forward and the thinner part of the brass expands, holding to the chamber wall and the thicker part of the case doesn’t expand as much and stretches back to the bolt face. If it doesn’t separate that time, it will the next time. When it does separate, it leaves the front portion of the case in the chamber and pulls the case head off. Then when it tries to chamber the next round, you have a nasty jam. Quite often range brass is the culprit of this because you never know how many times it has been fired/sized and in what firearm. Back to beating it on the ground again till you figure out that you have to get the forward part of the case out.


 Apparently reducing static charges on and around electronic scales can reduce their propensity to drift, lessening the problem of “wandering zero”. Just how and why static charges interfere with scale performance is unclear, but many shooters have noticed that static electricity can cause electronic scales to behave strangely. So how do you reduce static charges around your digital balance? Our late friend German Salazar (aka “GS Arizona”), creator of the Rifleman’s Journal Blog, found a very simple solution — an anti-static aerosol spray — that, by all indications, actually works. When this “spray-can solution” was suggested to German by a fellow shooter, German was skeptical. However, he tried the stuff and he says that it really does help the scale maintain zero over time, with much less observed drift.