CCI is now producing Catalyst lead-free primers and Catalyst-primed CCI and Speer ammunition at the CCI factory in Lewiston, Idaho. The proprietary Catalyst lead-free primer was first developed in 2016 by Federal Ammunition, a CCI/Speer partner company. The advanced lead-free Catalyst primers are being used in CCI- and Speer-brand pistol ammo, and may eventually be sold separately for the reloading market.
Writing for the MagLife Blog, Kat Ainsworth described Catalyst lead-free primers: “Many manufacturers use lead styphnate mixtures in the production of primers, but Federal Ammunition states the proprietary design utilized in the Catalyst is not only lead-free but outperforms those other methods. The company also says the Catalyst primers are safer to manufacture and provide a host of benefits over lead designs. For example, the Catalyst primers deliver greater compatibility with modern powders, produce less pressure from the gases generated during live fire, and don’t cause degradation in the powder they touch.
The company says these primers are extremely clean-burning which helps them perform more uniform and complete propellant combustion. Even better, the Catalyst has minimal velocity variation[.] These primers are also non-hydrophilic, meaning they don’t attract water molecules like DDNP-based mixes that are found in other brands[.]”
Catalyst Primers Promise Best-in-Class Performance
“We are extremely proud of this new production capability which continues the rollout of an incredible primer technology” said Federal/CCI/Speer President Jason Vanderbrink. “This product has proven to be the best in its class after nearly seven years of continuous production. Its consistent performance has been tested over hundreds of millions of rounds. Most notably, the product is featured in Federal’s innovative Syntech Range ammo and American Eagle Lead-Free.”
The extremely clean-burning Catalyst primer creates more uniform and complete propellant combustion, yielding minimal velocity variation and consistent bullet launch for improved accuracy. It is also non-hydrophilic, so it does not attract water molecules like DDNP-based mixes found in most lead-free primers, resulting in better reliability.
“Catalyst lead-free priming technology provides the cleanest, most consistent ignition possible. We are excited that our Lewiston plant is now set up to run Catalyst priming in our target pistol products”, said Speer and CCI’s Director of Factory Operations Mike Overberg. “The Anoka facility has proven this to be the best lead-free priming technology available. Our staff here has done a fantastic job of working across factories to extend this product into Speer and CCI Blazer ammunition products made in Lewiston, Idaho.”
More and more shooters are “wet-tumbling” their brass (in liquid) with reusable polishing media, rather than using dry media in a vibratory tumbler. The “wet-cleaning” method works best with a rotary tumbler fitted with a water-tight, horizontal drum to hold your brass, cleaning solution, and stainless, pin-type media. The rotary tumbler of choice has been the Thumler’s Tumbler Model B Heavy-Duty. That is a great, sturdy machine, but now you have a more affordable option.
Frankford Arsenal offers “Platinum Series” rotary tumblers designed to clean cartridge brass with liquid and stainless media. The watertight, polymer drum rides on four rollers which rotate the drum around its horizontal axis. Two filters are provided so you can quickly separate your brass and media. A built-in timer allows you to set tumbling sessions up to three hours. There is a large, 7-liter unit and a smaller, 3.3-liter tumbler. Frankford Arsenal says the big version will clean up to 1000 cases of .223 Rem brass. That’s impressive capacity.
Rotary Tumbler Sources Online
The Frankford Arsenal Platinum Series rotary tumblers are sold by major retailers including Grafs.com, Midsouth, and Cabela’s. Shop multiple vendors to find the best current pricing.
Amazon often has very competitive pricing on the Frankford Arsenal Tumblers, both the 7-liter unit and the smaller, 3.3-liter tumbler.
How to Wet-Clean Your Brass in a Rotary Tumbler On our main Accurateshooter.com website, you’ll find a comprehensive review of the STM system for cleaning cartridge brass with stainless media. To clean brass with stainless media, start with five pounds of small stainless pins sold by StainlessTumblingMedia.com. Place these along with a gallon of water, a little liquid cleaner, and two pounds of cartridge brass in a rotary tumbler, and run the machine for one to four hours. After cleaning be sure to inspect all your primer holes. CLICK HERE for Brass Cleaning System Review.
Forum Member Tests STM System
Our reviewer, Forum member Jason Koplin, purchased the STM media and a new Thumler’s Tumbler. He then tested the STM cleaning procedure on his own brass, including some extremely dirty and tarnished “range pick-up” brass. Jason was thoroughly impressed with how well the STM process worked — as you can see from the “before and after” photos below. Brass which looked like it was ready for the scrap heap was restored to “like-new” appearance. The process works equally well on both rifle brass and pistol brass. Jason observed that one surprise benefit of the STM cleaning procedure is a big reduction in noise. Jason said the water-filled rotary tumbler was much quieter than his vibratory tumblers. One tip though — you should always inspect every cartridge carefully after wet-tumbling with stainless media. With large-flash-hole brass it is possible to have a pin stuck in a flash hole. This is rare, but it CAN happen.
Seating primers is a key part of the reloading process. You need to seat primers consistently to achieve best accuracy. There are many different tools offered for seating primers, both hand-held and bench-mounted. Deluxe premium hand-held seaters may hold just a single primer, while a variety of handheld units employ trays to hold more primers. With bench-mounted primer seaters there are a variety of feeding systems — vertical tubes, angled trays, and even a strip feeder — the APS system pioneered by RCBS.
Today’s Saturday at the Movies feature covers a variety of primer seater options, from low-cost hand tools to the $600.00 Primal Rights unit. We also cover the innovative Lee Automated Case Primer (ACP) system which even feeds your brass, increasing your processing rate.
Forster Co-Ax Bench-Mounted Priming Tool
The Forster Co-Ax® Primer Seater is a trusted bench-mounted priming tool that works very well. Set the jaws for a particular rim size, load the tube, and you’re ready to seat primers. The tool has good “feel” plus plenty of leverage. Forster says that the tool’s “unique design allows the operator to eliminate all slop when working with a specific cartridge, translating into perfect seating, reliable ignition, and reduced misfires.” This Forster tool requires no separate shell holders. The spring-loaded jaws close to securely grip most modern rifle and pistol cases with a rim thickness of .045″ to .072″. And Forster provides a primer flipper tray that makes it easy to load the provided small and large tubes. If you shoot a large variety of cartridge types with various rim sizes, this Forster Co-Ax primer seater is a good choice.
Primal Rights Competition Priming Seater (CPS) Review
If there is a Ferrari of priming tools, it has to be the Primal Rights Competition Primer Seater (CPS). This impressive bench-mounted tool allows very precise control over primer seating depth. A vertical tube holds primers ready for insertion. The action is smooth and precise. Seating depth control is as good as you can get. That precise, repeatable control, and the tool’s smooth operation, are the tool’s major selling points. Video reviewer F-Class John believes that Primal Rights machine is definitely the best priming tool on the market, though it may not be for everyone given its premium $600.00 price.
Frankford Arsenal Perfect Priming Tool
Our friend Jim See of Elite Accuracy LLC has tested the depth-adjustable hand priming tool from Frankford Arsenal. This product, called the Platinum Series Perfect Seat Hand Primer, has some unique features. Primer seating depth can be adjusted with a handy wheel in the tool’s center handgrip. Each “click” of the wheel moves the primer post .001″ (one one-thousandth of an inch). Additionally, the design of the case-holder allows quick and easy removal of a primed case. The unit ships with a full set of shell-holders to match all types of cases. Like many other hand priming units, the primers are loaded into a flip tray that attaches to the head of the tool.
Accuracy Variances and Priming Tool Types
The above video compares the performance of the Frankford Arsensal adjustable priming tool with a Sinclair Int’l hand priming tool — a unit used for many years by top benchrest shooters.
LEE Automatic Case Priming (ACP) System
The LEE Automatic Case Primer (ACP) is the world’s first automatic-feeding priming tool that does not need shell-holders. Cases are guided into position by a sliding “finger guide”. The “dead length” priming device ensures that primers are seated uniformly without “feel” or adjustments required. This is very efficient and relatively easy, once the primers are loaded into the triangular tray. This ACP tool is on sale at Midsouth for $84.99, 16% off the regular price. We’ve tested the product and it works well, but sometimes needs a little fiddling with the primer feed guide.
Gavin Gear of UltimateReloader.com has reviewed Lee Precision’s new lever-operated, bench-mounted priming tool. The Lee Auto Bench Prime features a hopper-style primer feeder set at an angle. Gavin likes the tool, reporting that primers feed well and seat fully with very little effort. And switching from large to small primer size (or vice-versa) is quick and easy. Overall, Gavin says the Lee Auto Bench Prime has earned a place in his reloading room: “The Lee Auto Bench Prime is easier to use than a hand priming tool, and more efficient.”
How the Lee Auto Bench Prime Performs
Gavin had three important “take-aways” from his initial loading sessions with the Lee Auto Bench Prime:
1. I was surprised by the low effort needed to prime cases — it’s pretty amazing.
2. You can quickly and easily install shellholders and change primer sizes.
3. The folding primer tray works very well. It’s a great setup from my testing so far.
Are there any negatives with the tool? Gavin noted that, in the course of loading 100+ rounds, once or twice he had to tap the triangular tray to get the primer to feed: “That’s not a big deal, and may smooth out with time”.
RCBS APS Strip Priming System — Bench Tool and Strip Loader
RCBS pioneered an innovative priming system that held primers in handy horizontal strips. This video shows primers being placed in strips, and then cases being primed using an RCBS bench-mounted APS strip-priming system. Many years ago, this Editor acquired an RCBS Pro 2000 progressive press, which employed the APS strip priming system. Primers were held in strips which could be easily connected for continuous feeding — no tubes to load! I liked the system so much I then acquired an APS hand priming tool (photo right), an APS bench-mounted tool, and an APS strip priming tool that fits on a single stage press. I loaded many thousands of rounds successfully with the APS system with not one inverted primer ever. I still use the APS hand primer tool to prime most of my rifle rounds.
Unfortunately, RCBS has discontinued sales of most APS priming tools, but you can still get primers pre-packaged in APS strips, and you can still buy the Strip Loader tool for placing primers into strips.
BONUS Video — K&M Primer Pocket Correction Tool
K&M offers a handy tool for optimizing primer pocket depth. K&M’s Primer Pocket Correction Tool uses a carbide cutter with a preset depth, allowing consistent depth squaring of the primer pocket bottom. Designed with a drive shank to be used with your cordless screwdriver and/or a K&M handle, these tools are available in four types: Small Rifle/Pistol; Large Pistol; Large Rifle; and .50 BMG.
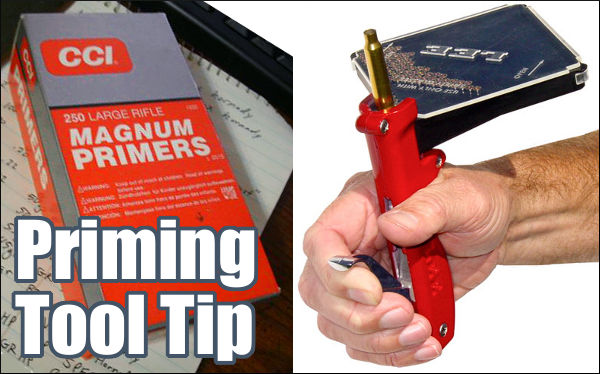
Priming Tool Tip — Check Your Primer Seater for Wear
From time to time, we all encounter a primer that doesn’t go off. It’s normal to attribute the problem to a bad primer. But sometimes there are other explanations. George S., one of our Forum members, experienced a couple failures to fire, but he learned that the issue was his priming TOOL, not his primers. Here’s what George told us. There’s a lesson to be learned:
“I had issues with CCI 450s when I had my first 6BR barreled. I had probably three or four out of 20 rounds that failed to fire. the primers were dented but didn’t fire. I called CCI since I had bought a case of them. The tech was decent enough but had the audacity to tell me I was not seating the primers all the way in the pocket. I proceeded to let him know I had been reloading longer than he had been alive and I knew how to seat a primer.
Turns out that I did and I didn’t! I was using the RCBS primer tool I had used for years and the primers felt just fine to me. I finally decided to check the tool and since I had a new one I took the seating pins out and measured them. The seating pin on the tool I had been using for years was shorter by a few thousandths! I then used the pin from the new primer tool and darned if the primers that didn’t seat down to the bottom of the cup.
Sinclair International has created a series of instructional videos illustrating the basics of metallic cartridge reloading. The 8-Part series starts with reloading basics and provides step-by-step, how-to instructions that will help new reloaders get started. Detailed, animated illustrations show you what happens inside the chamber when shooting, and inside the dies during each step of reloading. The videos can be viewed on Sinclair International’s YouTube channel. Shown below is the first video in the series:
Each of the Sinclair videos is hosted by then Sinclair Int’l President Bill Gravatt (now with Creedmoor Sports). Bill doesn’t just show you “how”, he tells you “why”. The how-to segments cover case inspection, proper die set up, case sizing, primer installation, powder measuring, bullet seating, crimping, and even goes into the record keeping needed for the handloader. “We wanted to give shooters who haven’t reloaded a look at all the advantages of creating your own ammo and how easy it is to get started,” said Gravatt, “without telling them they had to have any certain brand or type of equipment to do the job.”
The Eight Video Topics Are:
Part 1 — Intro to Video Series
Part 2 — Intro to Reloading Safety
Part 3 — Metallic Cartridge Components
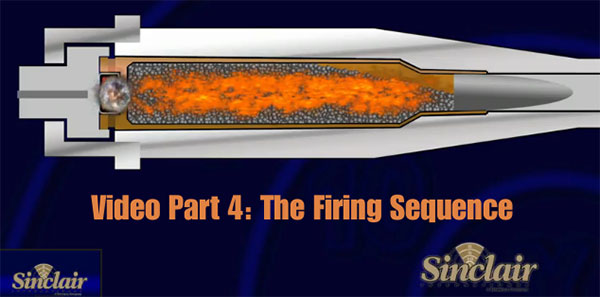
Part 4 — The Firing Sequence
Part 5 — Tools for Reloading
Part 6 — Loading Bottle-Neck Cartridges (2 videos)
Part 7 — Loading Straight Wall Cartridges
Part 8 — Reloading Series Conclusion
Reloading Tools
Shown below is Part 5 of the video series, covering the tools used for precision reloading.
We also strongly recommend the Part 4 Video to readers who are getting started in reloading. This “How Things Work” segment covers the sequence of events inside the chamber (and barrel) when the cartridge is fired. The video includes helpful graphics that show what happens to the primer, powder, cartridge, and bullet when the round is fired. The video also illustrates “headspace” and explains how this can change after firing. We think this video answers many common questions and will help reloaders understand the forces at work on their brass during the firing process.
Bryan Litz and The Science of Accuracy Academy has released a new Podcast with vital information for all handloaders. This Podcast examines the effects of humidity variances on powder. Bryan notes: “If you want to know how much this can matter, we’re talking up to 200 fps difference for the same load of H4350 in 6.5 Creedmoor” at opposite extremes of humidity.
Bryan adds that “Most shooters don’t realize what a big deal this can be — it overshadows many of our efforts to make consistent velocity and hit targets. This can happen in loaded rounds not just for hand loading where you expose powder to ambient humidity. This is especially important for hunters considering the range of environments hunting ammo goes through.”
25% Off Sale on The Science of Accuracy Academy Products
As a Black Friday/Cyber Monday promotion, The Science of Accuracy Academy is running a 25% OFF Sale on everything in the store, now through Monday, November 28, 2022. Save on Bryan Litz’s six impressive books about Ballistics, Bullet Performance, and Long Range Shooting. The Berger Bullets Reloading Manual is also discounted. Use Discount Code BF2022.
In addition you can get your own subscription to the Academy, allowing you to access all podcasts, exclusive videos, learning resources, and bullet data sheets.
Progressive reloading presses offer shooters speed and efficiency in producing custom-tailored rifle and pistol ammunition. However, there is a wide choice of Progressive Presses and a bewildering array of options to consider. In this video, the 6.5 Guys and UltimateReloader.com’s Gavin Gear provide an overview of the leading Progressive Presses on the market along with key considerations for precision rifle shooters. If you are considering getting a Progessive for rifle ammo reloading, you should watch this informative, 25-minute video.
10 Tips for Reloading Rifle Ammo on a Progressive Press:
1. Make sure the brass is very clean. Don’t mix old range pick-up brass with newer brass.
2. Apply a thin, spray lube to all cases before the sizing/loading cycle.
3. Consider priming your brass separately (with a hand or bench tool) before the operation. Then inspect the primers before loading powder and bullets.
4. Always wear eye protection when loading with the Progressive, particularly if you are priming cases.
5. With masking tape, mark the powder measure/dropper with the powder type and cartridge charge weight. Check the charge mass multiple times (see below).
6. Cycle a few cases, sizing and adding powder but NOT seating bullets. Weigh the powder charges to ensure the powder measure is dispensing the correct charge. Sometimes this will change a couple tenths as it “settles down” after the first few charges.
7. Check the brass for shoulder bump and bullet seating depth carefully for the first few rounds, then check again periodically.
8. Try to maintain a steady pace and operate the handle the same way every time.
9. Visually inspect the powder charge in each case (before bullet seating), and use a lock-out die if your Progressive Press has enough stations.
10. Never, ever mix pistol and rifle powders! If you have previously loaded pistol ammo with your Progressive, make sure ALL the powder (every flake and kernel) is removed from all parts of the powder-dropping system before you add rifle powder.
Visit these sites for more Reloading and Precision Shooting Videos:
Do you ever use military-style brass with swaged primer pockets? Then you can really benefit from the new LEE Ram Swage tool. This innovative swaging tool provides a fast, simple, and efficient method of removing the primer pocket crimp on milsurp brass.
Primer pocket swaging is necessary when reloading brass with crimped primer pockets. Many brands of brass for military (and some law enforcement) applications have this crimp. You may find such primer pocket crimps on a variety of milsurp brass types including: 9mm Luger, LEO .40 S&W, .45 ACP, .223 Rem (5.56×45), .308 Win (7.62×51), and .30-06 Springfield, as well as older European cartridge types such as 6.5×55. If you use a progressive press, this new LEE Ram Swage is a boon. Nothing reduces priming problems on a progressive press more than properly swaged primer pockets.
Why use milsurp brass? Surplus military and police department brass is a great low cost source of cases. It is typically very strong, long-lasting, and can often be acquired for a fraction of the cost of new commercial brass. For example, Lake City 7.62×51 (.308 Win) brass is excellent.
Note: This tool is designed for Boxer-primed cases only, not cases with Berdan Primers.
The Lee Ram Swage works on all single stage presses with 7/8″-14 frame threads, and rams which take common “universal” shell-holders. This new tool features spring-assisted case extraction, and an all-steel case guide. This ensures that your cases will be positively centered on the push rod. The swage holder, large or small, installs in seconds into your press ram with no adjustments required.
LEE’s engineers devised a clever “Shell-holderless design” for the LEE Ram Swage. This allows you to swage any small or large primer pocket, without swapping to a different size shell-holder. The hardened steel swage punch is automatically extracted from the primer pocket by five disc springs. The complete LEE Ram Swage set includes one guided 7/8″-14 threaded swage push die, with both large and small ram swage holder assemblies.
Good news — this should eventually help ease the primer shortage. Fiocchi will be building a new primer production center in Arkansas. The new facility will be one of only six primer manufacturing operations in the USA and the only dedicated lead-free primer plant in the world. Fiocchi announced the selection of a 281-acre site in the Port of Little Rock, Arkansas for a new ammunition primer manufacturing facility. Representing a $41.5 million investment and a 120-person workforce expansion, the new primer production center will, eventually, provide much-needed primer supply relief for handloaders. The primers will also be used in Fiocchi’s factory ammo.
Maurizio Negro, Fiocchi Group CEO stated: “This groundbreaking represents another significant milestone in Fiocchi’s long-term plan to strengthen and expand our manufacturing capabilities and to bolster primer supplies not only for Fiocchi products but also to increase supplies for the ammunition manufacturing industry at large.” Part of Fiocchi’s vertical integration strategy, the new primer facility will allow the company to meet internal primer supply needs and provide second-sourcing for industry contracts.
New Plant Will Produce Lead-Free Primers
Fiocchi is a leader in lead-free and heavy-metal-free primers and is the only manufacturer of lead-free primers to receive NATO qualification. The new Arkansas facility will follow Fiocchi’s other commitments to sustainable technology: lead-free projectiles, non-toxic shot, and biodegradable components.
Arkansas Leaders Praise Fiocchi Decision to Build Facility in Arkansas
Arkansas Governor Asa Hutchinson stated: “I am pleased to celebrate Fiocchi’s growth, which is also a demonstration of the continued expansion of the firearms and ammunition industry in our state. Fiocchi’s decision to grow in Arkansas speaks to the significance of maintaining the business-friendly climate that Arkansas is becoming so well known for.” The new facility will bring 120 jobs to the Little Rock area.
Arkansas Secretary of Commerce Mike Preston praised Fiocchi’s decision to build a new plant in Arkansas: “For more than a century, Fiocchi has been a leader in its industry, and we have witnessed firsthand their commitment and excellence in business. This expansion will help Fiocchi reach more customers as they continue to strengthen their brand[.]” Pulaski County Judge Barry Hyde concurred: “Fiocchi joins a growing list of world-class international businesses choosing to locate at the Port of Little Rock. Fiocchi is a leader in sustainable technology, and we are proud to welcome their investment in Pulaski County.”
For more information about Fiocchi ammunition and primers, including inquiries about available positions, visitFiocchiUSA.com.
At the request of our readers, we provide select “Deals of the Week”. Every Sunday afternoon or Monday morning we offer our Best Bargain selections. Here are some of the best deals on firearms, hardware, reloading components, optics, and shooting accessories. Be aware that sale prices are subject to change, and once clearance inventory is sold, it’s gone for good. You snooze you lose.
NOTE: All listed products are for sale to persons 18 years of age or older. No products are intended for use by minors. Prices may vary for Amazon Prime members.
⏺ Good alternative to bulky, heavy electronic muffs
Electronic earmuffs work well but they can be heavy and bulky. And they can interfere with cheek weld. If you want the benefits of electronics but the comfort of ear plugs try the Caldwell E-MAX Shadow electronic ear plugs which boast a 23 decibel NRR (Noise Reduction Rating). Experience high quality stereo sound while confidently protecting your hearing. With six sizes of included foam tips, you’ll find a custom fit for your ear to ensure proper noise cancellation and hearing protection.
2. Midsouth — CCI Bargain Rimfire Ammo in Stock
⏺ Large inventory of CCI Rimfire ammo starting at 9 cents per round
More people than ever are getting rimfire rifles for plinking and/or matches. Rimfires are inexpensive to shoot, and the reduced noise and recoil are big positives. If you need some .22 LR rimfire ammunition check out the CCI .22 LR ammo sale at Midsouth. There’s a wide variety of CCI rimfire ammo on sale, starting at $4.50 per 50ct box. This is a great chance to pick up quality .22 LR ammo at attractive prices.
3. Brownells — $25 Gift Card Bonus with $100 Gift Card Purchase
⏺ Spend $100, get $25 Gift Card back with Brownells promo
Do you like giving gift cards for the holidays? For a limited time you can pick up a FREE $25 gift card with the purchase of $100 in Brownells gift cards. That’s like getting a 25% rebate! This is a great deal and good way to treat someone else AND yourself.
⏺ Very good spotting scope with great long eye relief
Whether shooting at matches or just target shooting having a good spotting scope is a must. A great choice is this Kowa TSN-82SV Combo on sale for $975, a $110 savings. This item includes the highly-rated 82SV spotting body, plus an excellent 25X LER (Long Eye Relief) eyepiece AND a deluxe protective cover. NOTE: With its fixed-power Long Eye Relief eyepiece, this scope works great for prone work, mounted right next to the shooter. However, for long-range spotting duties you may want a unit fitted with a higher-magnification zoom eyepiece.
5. Palmetto SA — Taurus TX 22 .22 LR Pistol Sale, $276.85
⏺ Great price on a very good rimfire pistol
If you’re looking to keep ammo costs down by training with .22 LR rimfire handgun, consider this Taurus TX 22 pistol. Taurus TX 22s have earned very positive reviews from purchasers. The frame has comfortable ergonomics and the Taurus Pittman Trigger System (PTS) offers a very good trigger pull. This is a good choice for a first .22 LR rimfire pistol, at a very good price — starting at $276.85.
6. Amazon — 3″ Splatter Squares On A Roll, $19.99
⏺ Cool product — stick-on grid targets with splatter effect
Splatter targets are popular but the cost of large-size bullseye splatter targets adds up quickly. A cool alternative are these Pistep Splatter Shooting Targets. These are handy “reactive” targets that show a yellow splatter on shot locations. Each roll contain 250 three-inch-square stick-on grids. Each sticker has nine 1″ squares on it so determining group size is easy. For a shooter with an accurate rifle, these 3″ x 3″ splatter squares can work better than a large splatter bullseye target.
Don’t want a gun case that screams “There’s a rifle inside”? If you need to transport small rifles discreetly, check out the Darekuku 30″ Rifle Backpack Bag. The main compartment has padded protection for two rifles. The handy shoulder straps can be covered with a zip-over panel. There is a zipper-access top compartment and a large secondary compartment (with inner mesh pocket and MOLLE straps) to hold ammo, Kestrel, muffs, targets, or other accessories. We like this case to carry a carbine with folding stock. It’s a steal at just $49.99.
It’s getting easier to stock up on ammunition and .223 Rem is the most popular rifle cartridge. If you need a good supply of .223 Rem ammo, consider this PMC 1000-round case of .223 Rem at Locked & Loaded. This is one of the best deals we’ve seen on quality .223 Rem ammo in quite some time.
9. Amazon — NEIKO 6″ Digital Calipers, $25.99
⏺ Good, reliable digital calipers at attractive price
Every handloader needs to measure shoulder bump, cartridge length, and other dimensions. A good set of calipers is essential. If you need calipers, check out the NEIKO Electronic Digital Calipers. The tool’s body/frame is constructed of finely polished stainless steel with a knurled thumb roller and locking screw that ensures smooth sliding and accurate positioning. If you’re getting started in reloading or are looking for a back-up set of calipers, this is a good option.
10. Graf & Sons — Sierra Ammo Sale with Rebate
⏺ Nice rebate on quality Sierra hunting and defense ammo
Did you know that Sierra makes hunting and self-defense ammo? You can grab Outdoor and Sports Master ammo on sale PLUS there’s a rebate that takes $3 off 1 box or $10 off 2 boxes. NOTE: These boxes contain TWENTY (20) rounds only. These are NOT 50-rd boxes.
Cleaning Rod Rack Costs Just $7.99
Looking to better organize your reloading room (aka “man cave”)? Here’s a handy, affordable product that will help you organize gear in your reloading room or “man cave”. Tipton’s Cleaning Rod Rack (Tipton #100335) can accommodate up to six rods with various size handles. The wall-mounted Rod Rack also has horizontal studs on either end for additional accessories. These are useful for hanging the Tico Tool shotgun cleaning wands that stow in a tube with a plastic hook on the top.
Tipton Cleaning Rod Racks come complete with mounting screws (and screw slots are molded-in). You’ll find Tipton Cleaning Rod racks for under $9.00 at most vendors. They are $7.99 at MidwayUSA, while Amazon.com offers the racks for just $9.99 with free shipping for Amazon Prime Members.


 On our main


 RCBS pioneered an innovative priming system that held primers in handy horizontal strips. This video shows primers being placed in strips, and then cases being primed using an RCBS bench-mounted APS strip-priming system. Many years ago, this Editor acquired an RCBS Pro 2000 progressive press, which employed the APS strip priming system. Primers were held in strips which could be easily connected for continuous feeding — no tubes to load! I liked the system so much I then acquired an APS hand priming tool (photo right), an APS bench-mounted tool, and an APS strip priming tool that fits on a single stage press. I loaded many thousands of rounds successfully with the APS system with not one inverted primer ever. I still use the APS hand primer tool to prime most of my rifle rounds.


 The
The 


