Hunting season is coming soon around the country. If you want to get hunting tips from experts, here is a great audio “infotainment” resource. Leupold offers podcasts, 40-75 minutes in length, on a variety of topics of interest to hunters and precision shooters. A podcast is like a radio show that’s available 24/7, at your convenience. When you want to “tune in”, via your home computer or mobile devices, just visit the Leupold Podcast Page.
Oregon-based optics-maker Leupold & Stevens (“Leupold) offers the “Core Insider” podcast series. These podcasts deliver hunting advice and recount successful hunting trips — such as Caribou hunting in Alaska. Other Leupold podcasts provide optics info, industry intel, and tech tips. Leupold’s Core Insider podcasts can also be accessed directly from Leupold.com. From the Leupold Podcast Home Page, you can stream the podcasts live or download for later listening.
You can also stream these podcasts via iTunes and Spotify.
The Leupold Core Insider Podcasts cover a wide variety of shooting and hunting topics. One early episode features Leupold team members Kyle Lamb and Buck Doyle discussing long-range shooting, while recent Episode 55 explains how Binoculars and Rangefinders function. There are now 96 Leupold Podcasts available online for FREE.
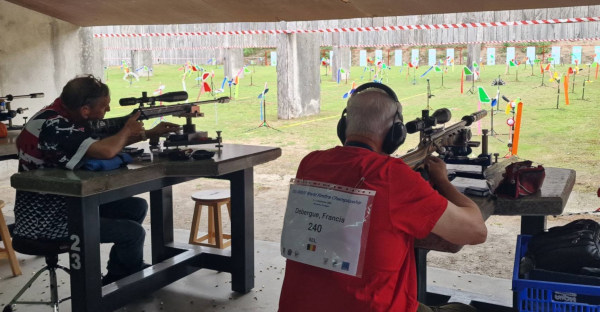
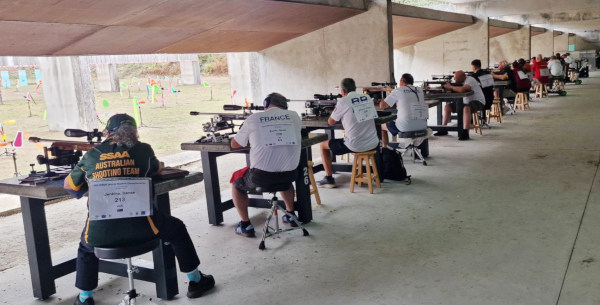
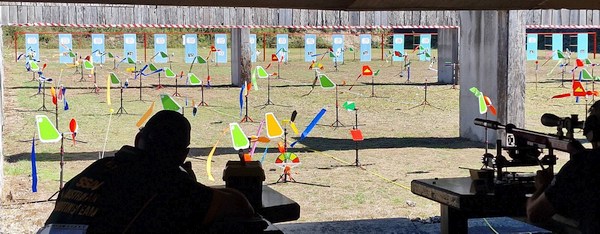
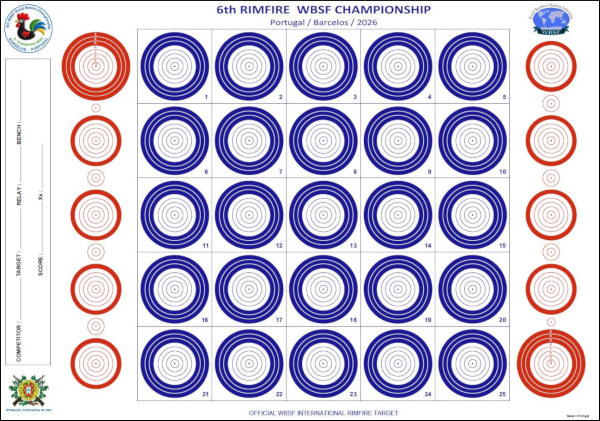
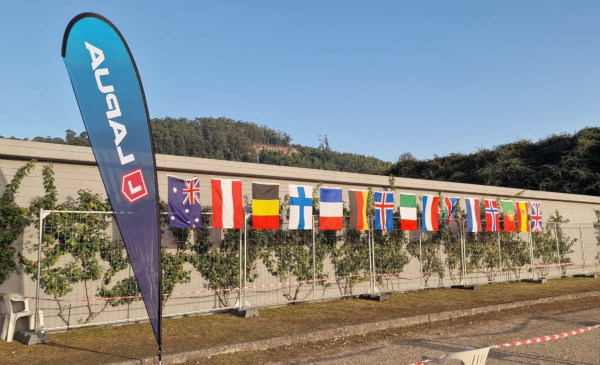
This week the 6th World Benchrest Shooting Federation (WBSF) Rimfire Benchrest World Championship event is taking place in Portugal. Running September 6-12, 2026 at Clube de Tiro de Fervença in Barcelos, the event features nearly 100 participants from 15 nations competing in both individual and team matches. The event is organized and hosted by the Portugese Shooting Federation and Lapua is the primary sponsor for this special event.
“We’re really thrilled to be hosting this event and our partnership with Lapua as a main sponsor,” commented Pedro André, WBSF Match Director. “We have a great team working together to create a successful [rimfire benchrest] event that strengthens the shooting community and offers great development opportunities for our sport.”
The event is organized by the Portuguese Shooting Federation. “We’re really thrilled to be hosting this event and our partnership with Lapua as a main sponsor,” commented Pedro André, WBSF Match Director. “We have a great team working together to create a successful event that strengthens the shooting community and offers great development opportunities for our sport.”
“The WBSF World Championship is one of the world’s rimfire benchrest highlights. We’re excited and proud to support this event that brings together the world’s top rimfire benchrest shooters,” stated Lapua Sales & Marketing Manager, William Thao.
Hunting season is coming soon in most parts of the country. As part of NRA Women TV, hunting guide Kristy Titus hosts a series of videos that explain important strategies and shooting skills for hunters. These videos can help you prepare for a fall hunt. Titus is a certified instructor who has hunted around the globe. She grew up in the outdoors, running pack mules in Oregon with her father. In these videos, Kristy discusses demonstrates field positions that can be employed during a hunt. She also explains preparation for a hunt, including fitness training.
Click each link below to watch other Kristy Titus Hunting Videos.
Kristy says: “When it comes to bolt-action rifle fit, there is no ‘one size fits all’. When picking out your rifle [consider options] after the purchase to ensure you are as comfortable as possible.”
The 41st Annual Gun Rights Policy Conference (GRPC) takes place in Dallas, Texas on September 25 through 27, 2026. Co-hosted by the Second Amendment Foundation (SAF) and the Citizens Committee for the Right to Keep and Bear Arms (CCRKBA), this is one of the most important gatherings of Second Amendment legal experts and Federal ATF and DOJ administrators.
The 2026 GRPC event will be held at the Westin Dallas Fort Worth Airport hotel. This year there is a modest $25 Registration Fee which includes access to all Gun Rights Policy Conference events, including evening receptions on Friday and Saturday. The fee also includes coffee service during conference hours and boxed lunch on Saturday.
Note: 2026 GRPC Registration ends Friday, 09/11/2026 at 11:59pm EDT. Visit SAF.org/GRPC to REGISTER.
This year’s keynote address will be given by the Honorable Roger T. Benitez (Ret.), a highly respect Federal Judge who authored many landmark decisions while serving as a Federal District Judge in California. Judge Benitez authored multiple key decisions which have helped to restore and safeguard gun rights in California. Judge Benitez is considered to be one of the most important judicial defenders of the Second Amendment in the post-Heller era. Other notable speakers are ATF Director Rober Cekada, and William Kirk, Second Amendment attorney, and host of the Washington Gun Law YouTube channel.
Additional Notable Speakers Will Include: Robert Leider, ATF Chief Counsel Barry Arrington, Acting Chief of Civil Rights Division (2d Amend. section), U.S. Department of Justice Joseph Greenlee, NRA Institute for Legislative Action Litigation Counsel Office Alan M. Gottlieb, Founder and Executive V.P., Second Amendment Foundation Adam Kraut, Executive Director, Second Amendment Foundation Chris Boeck, General Counsel and Chief Legal Officer at Silencer Shop Mark Smith, Constitutional lawyer and host of The Four Boxes Diner YouTube Channel Cam Edwards, Editor of BearingArms.com and the host of the Cam & Company podcast Brandon Herrera, Second Amendment advocate and Congressional candidate
Pre-Conference AMM-Con Event
In addition to attending GRPC, registrants can also participate in the AMM-Con pre-conference event on Friday, September 25. This is a gathering of leading Second Amendment media personnel.
2026 GRPC Official Sponsors
GRPC 2026 is sponsored by NSSF, USCCA, U.S. Law Shield, Silencer Shop, Colt, Vortex, Magpul, Credova, Volquartsen, Trijicon, GrabAGun, RAYVN Group, AZFirearms Auctions, and Taurus.
Keith Glasscock is an outstanding competitive shooter, who has finished second at the F-Class National Championships (F-Open) multiple times. Keith is also a skilled wind coach who runs the popular Winning in the Wind YouTube Channel. Along with his interest in F-Class competition and (recently) PRS/NRL competition, Keith also enjoys game hunting and varmint adventures.
Hunting season is coming soon, so today we showcase two videos Keith has made about developing hand-loads for hunting rifles. Developing accurate hand-loaded ammo for hunting and varmint rifles involves procedures that may be a bit different than load testing for a match rifle. You want to be efficient, and use the types of brass and bullets you’ll be using on the hunts. In these two videos, Keith shows how he developed good, accurate loads for a .223 Rem varmint rifle and a .308 Win hunting rifle.
In addition to Keith’s two informative videos, today we feature three other videos with useful tips and techniques for hunters and huntresses. These cover rifle marksmanship, hunting optics selection, and methods for sighting-in hunting rifles.
.223 Rem Load Development — Powder Charge and Seating Depth
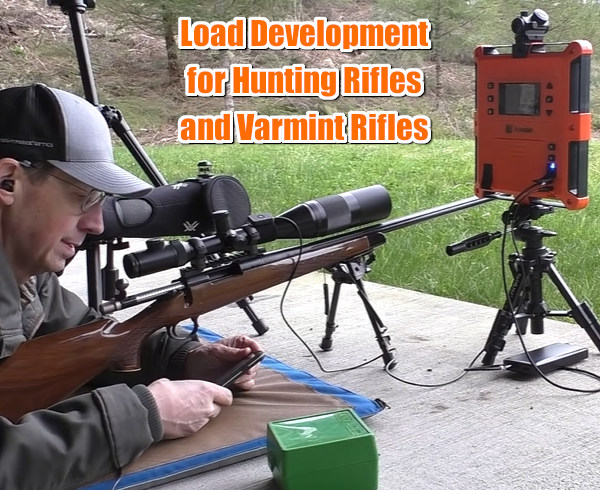
In the first video, Keith covers the load development process for a Remington 700 bolt-action varmint rifle chambered in .223 Remington. Keith starts by full-length sizing the brass. Then he experimented with powder charge weights, and came up with a promising load of 24.7 grains of Alliant AR Comp with Hornady 50gr A-Max bullets.
Next Keith experimented with seating depths (see 5:30-6:100) and found that accuracy improved as he changed OAL length in .005 increments. Keith ended up with 2.270″ with a 3-shot group in the twos! This video shows the importance of testing your bullet choice at various seating depths. Keith shoots this rig prone off bipod, which is similar to the bipod shooting he does in the varmint fields. Keith explains key factors to consider when optimizing the .223 Rem cartridge in a varmint rig. Velocity readings are made with a LabRadar unit.
Load Development for .308 Win Hunting Rifle
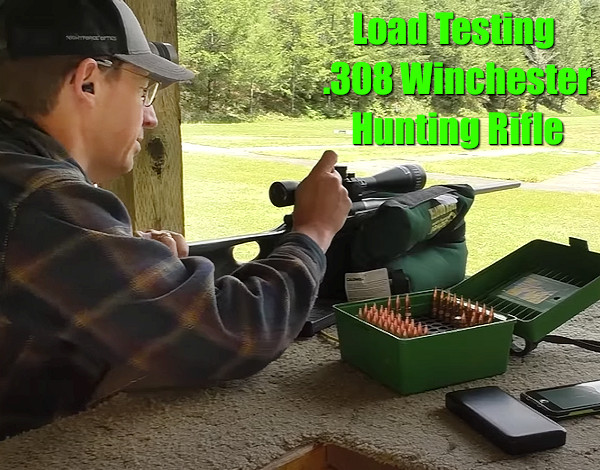
In a second video, Keith shows the process for load development with a .308 Winchester hunting rifle. Here Keith uses a large X-type sandbag for a front support. Again, he was shooting a Remington 700 bolt-action rifle, this time with Barnes TSX solid copper bullets, PPU Brass, Federal 210m primers, and AR Comp powder. Keith said the Barnes bullets were excellent — he commented that these bullets were “match quality in terms of precision”. Keith achieved some very small three-shot groups with AR Comp and the TSX projectiles. Keith did note that point-of-impact shifted up significantly with increases in charge weight (see 6:20-7:10). With thinner-contour hunting barrels, this is not unexpected. But POI change should be observed carefully during load development, as you may need to adjust your zero after completing testing.
Three Bonus Videos for Hunters and Huntresses
Here are three videos with useful tips and techniques for hunters and huntresses. These cover rifle marksmanship, optics selection for deer hunting, and efficient methods for sighting-in hunting rifles.
How to Shoot Better with a Hunting Rifle
This “must-watch” video has great practical advice for hunters. It illustrates proper hand-hold and head position, and shows how to stay steady when breaking the shot. Even competition shooters can learn a few things. One viewer notes: “This was very informative. The footage through the scope showing how one’s position moves the sight alignment was particularly helpful.”
You’ll find more great videos on Thomas Haugland’s THLR.NO YouTube Channel, that offers videos for long-range hunters and marksmen. Haugland, who hails from Norway, is a serious shooter, who takes his rifles out into the field, in all conditions. The THLR.NO channel offers solid advice on scopes, reticles, wind-reading, field positions, and much more. Haugland’s team puts a wide variety of gear through serious field tests — every thing from suppressors to packs to electro-optical hardware. In addition the THLR.NO channel provides good advice on stalking techniques and hunting skills.
The Complete Optics Selection for For Deer Hunting
In this video, Vortex optics techs explain the optics package deer hunters will want to take into the field. Along with a good medium-power zoom riflescope, you’ll want binoculars and (probably) a spotting scope. You’ll also want a Laser Rangefinder (LRF) or laser-equipped binoculars. As the team points out, the LRF is not just to range your prey right before you take a shot. A top-quality LRF can range a reflective object as far as 1500 yards away. That helps you decide whether you want to hike a mile to reach that buck you see way out on the next ridge.
How to Sight-In Your Hunting Rifle
This video offers good basic advice for sighting-in a hunting rifle. There are a series of six points covered. Here’s Tip #1: “Find a safe place to shoot your rifle with a backstop. If possible, use a bench and a rock-solid shooting rest. Sighting-in is all about consistency, so the less human error you have, the better. For safety, be sure to also bring ear and eye protection.” READ FULL ARTICLE on NRAWomen.com.
Have you ever wondered how Olympic-class position shooters hold their aim so steady? Those bulky shooting coats help, but there is a lot of bio-mechanics involved also. Top shooters employ their body structure to help support the weight of their rifles, and to steady their aim. This interesting video, produced by GOnra Media, demonstrates rifle hold and body alignment for prone, standing, sitting, and kneeling positions. Olympic Gold Medalist Jamie Corkish (formerly Jamie Gray) demonstrates the proper stance and position of arms and legs for each of the positions.
Ideally, in all of the shooting positions, the shooter takes advantage of skeletal support. The shooter should align the bones of his/her arms and legs to provide a solid foundation. A shooter’s legs and arms form vertical planes helping the body remain stable in the shooting position.
Jamie Corkish, London 2012 Gold Medalist in Women’s 3 X 20, has retired from top-level competitive shooting. However, Jamie remains involved in the shooting sports as a Public Relations/Marketing representative for ELEY, a leading maker of rimfire ammunition. Jamie also works with shooting clubs and educational institutions to promote smallbore target shooting.
Images are stills from GOnraMedia video linked above.
Talented sharpshooter Kirsten Joy Weiss is featured in an episode of NRA All Access. The show covers Kirsten’s development as a competitive shooter, and her success as a trick-shot artist with her own popular YouTube channel. Here’s the All Access segment featuring many of Kirsten’s most famous trick shots.
During the video Kirsten also talks about her background in shooting and how she wants to be a good ambassador for the shooting sports, “spreading the positive reality of shooting”. Kirsten explains: “The fun challenge and joy of shooting is important to me because I really wanted to be a positive example. So when the media says the ‘guns are a bad thing and nobody does anything good with guns’, they can say ‘Well, what about her [Kirsten]’?”
Kirsten: “I think that it’s important for young girls to have somebody that they can look up to… I feel responsibility to show young shooters coming up, especially females, that you can respect yourself and shoot a gun as well.”
A gifted “natural” shooter, Kirsten started shooting fairly late — at age 16. Despite her relatively late start, she learned very quickly, and managed to earn a place on the University of Nebraska shooting team. That literally opened up a new world for Kirsten: “During the course of my career, I’ve had a lot of success. I’ve gone to World Cups… in Zagreb, Croatia, in Munich, Germany. I’ve won National Championships, and got on to the U.S. Olympic short list, so it’s been a good career.”
Proper Cheek Weld
No matter what your discipline — smallbore, silhouette, High Power, F-Class, or even PRS — it’s vital to have a consistent cheek weld for every shot. You want your head to be in the same position on the stock each time. This helps ensure proper eye-to-sights/optic alignment and consistent rifle balance.
In this video, Kirsten explains how to find the best position for your head on the stock, which may require adjusting the cheekpiece and/or length of pull. Then Kirsten demonstrates how to maintain consistent cheek weld shot after shot.
Kirsten tells us: “A lot of people don’t think of shooting as a sport, but it absolutely is, and I would even go so far as to say that it is an art form.” We don’t know if this is art, sport, or magic, but very few shooters have the skill or flexibility to make this upside-down shot…
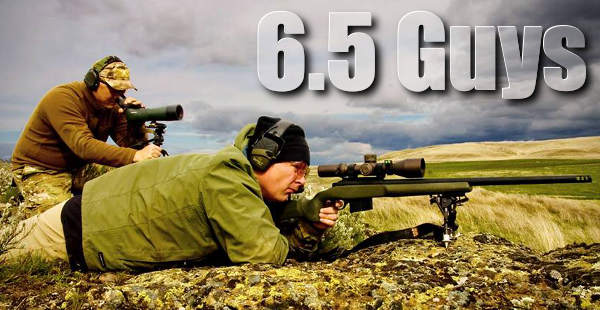
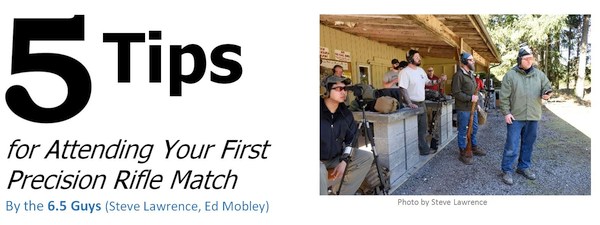
Our friends, Ed Mobley and Steve Lawrence, aka the “6.5 Guys”, have written an excellent article on getting started in practical/tactical competition. If you are new to the game, these tips can help you save money, progress faster, and have more fun. Here are article highlights, but we recommend you read the full story,5 Tips for Attending Your First Precision Rifle Match, onwww.65guys.com.
We often meet people who are new to long range precision shooting, and want to improve their knowledge and skill level. However, they aren’t sure if they are ready to sign up to compete in a match. They often ask, “What knowledge or skills are necessary to compete in a match?” Others may state, “I need to purchase this gear or that gear before I can attend a match”. For those guys who have a strong interest in precision rifle shooting, and who wish to chec out a precision rifle match, below are Five Tips to make it a positive experience.
TIP ONE: Make Plans and Commit to Go
First you need to start by finding a match to attend. This may entail a little bit of research and investigative work on your part to find what matches are scheduled in the next few months. We recommend starting with any match that may be within a reasonable driving distance. This may likely be a local “club” match, many of which are held on a regular basis. These make great venues because it will provide an opportunity to meet some of the regular attendees as well as shooters that are from your geographic area. Additionally, most of the smaller matches are a little more relaxed in terms of level of competitiveness.
Once you decide on the match you want to attend, do your homework. This means finding out if you need to pre-register or pre-pay the match fee. Commit to going by registering for the match and putting it on your schedule. Be sure to find other useful information for questions such as:
— What time should I arrive?
— Is there a mandatory safety briefing for new shooters at that venue?
— What is the travel time required to get to the match site?
— How many stages will there be?
— Is there a description of the stages available before the match?
— How many rounds should you bring?
— Are there special equipment requirements? (E.g. do you need chamber flags, is there a pistol stage?)
TIP TWO: Bring What You Have
(Don’t Spend a Fortune at the Start)
Some new shooters often assume they need a custom match rifle or all of the miscellaneous shooting gear associated with long range precision shooting to compete in match. While having a Kestrel weather meter and a high quality laser range finder and other shooting accoutrements are invaluable kit, you will find other shooters at your first match that will provide you with the information and coaching you need to get on target.
In fact, the only gear you really need to bring is a scoped rifle with a bipod and ammo capable of consistently shooting within one MOA. Also, be sure to know the ballistic drops or have a ballistic drop table prepared for your rifle/ammo to dial the correct DOPE on your scope for different target ranges. Many of the other participants at the match will be willing to let you borrow a support bag, bipod, tripod or other gear if you need one — just ask. Don’t use the excuse of not having the right gear to delay getting out to a match!
One reason not to make a big initial investment in a new rifle and assorted gear before competing, is we’ve seen a number of people come into the sport and try it for a year and then make the decision to move on to something else.
TIP THREE: Be Prepared to Learn
As a new shooter at a match, there is no better opportunity to learn. We often look to our local club matches as a group ‘training’ session to prepare for the bigger matches. You will find competitors at all levels of skill and many of your fellow shooters will enthusiastically provide helpful advice once they learn you are new to the sport. Take advantage of the opportunity to ask questions if you would like ideas for how to engage a stage, but also be sure to do more listening than talking as you receive guidance and tips from more experienced competitors.
Watch and observe other shooters and how they approach and ‘game’ a specific stage or course of fire. You’ll begin to recognize which shooting positions work best for different scenarios, and maybe even come up with some new ones that no one has thought of before.
Seeing what the better shooters do is an invaluable instructional tool. You can use your smart phone’s video camera to record other shooters (with their permission). When you’re ready to shoot, ask another shooter to record your performance. Watching yourself will point out needed areas of improvement.
After each match conduct an informal after action review and summarize for yourself the things that went well and what you should continue to do. You should also identify the specific shooting skills you should develop and make a plan to integrate the appropriate practice drills into your practice sessions. Finally, if you maintain a shooter’s data book or journal you’ll want to note things such as:
After Action Review – How you did, what went well, things you need to work on in practice. Stage Observations – Successful methods used for specific courses of fire. Note barricades, positions used, specific gear used for stages. Gear Observations – How your rifle/gear performed, what new items you should add to your “buy list”.
TIP FOUR: Be Safe and Have Fun
You’ve all heard a parent or teacher say, “It’s all fun and games until someone loses an eye.” The same can be said of the shooting sports. Safe handling of firearms is the number one rule at any match, and comes before the FUN part in terms of importance.
Before all matches start there will always be some form of a mandatory safety briefing. Make sure you know, understand, and follow any unique safety protocols for the match you attend. Some matches require all rifles have chamber flags inserted and are stowed in bags/cases while not on the firing line — other matches may not. If you run afoul of any safety rules, you risk the chance of being disqualified from a stage or worse, the entire match.
The second rule is simply have fun. This starts with having a good attitude throughout the day. Keep in mind that as a new competitor you should think of a match as a solid day of practice and training. If you blow a stage, use it as an opportunity to diagnose what you could have done differently or what you need to improve on — then smile and drive on.
Any day at the range or shooting is a good day. A match is an opportunity to hang out with like-minded people who are passionate about shooting and impacting targets far-far away. Life is great when you are doing what you enjoy!
TIP FIVE: Make Friends
There is no better way to meet lots of precision rifle shooters and make friends than at a match. The people that attend the tactical precision matches on a regular basis are those that have ‘fallen into the deep end of the pool’ and are really into the sport. As a result, they have become part of the local precision shooting community. As you strike up conversations at the match, find out if your new-found friends visit specific forum boards or social media outlets, or if there are other matches they attend.
Precision shooters tend to congregate and share information in different corners of the Internet. It will serve you well to meet some of the guys in person at matches and be able to connect a face to a screen name. As you develop your friendships and develop a level of trust, you will find opportunities become available to shoot with others in your local area, or get ‘read-in’ on a secret honey-hole of a spot to shoot long distance. Additionally, the local shooting community will often find it more convenient to sell or trade gear and equipment locally than deal with buyers/sellers that are out of state.
Getting Started in PRS/NRL — One Man’s Story
My name is Jeff Cosgrove. I have shot for 20+ years but I found my interest in shooting was dwindling over time. I got somewhat bored with shooting paper at 100 yards or plinking cans out in the desert. About 3 years ago I decided I wanted to shoot long range. I picked up a used MPA in .300 Win Mag and started shooting long range with a new buddy. That day I fell in love with guns all over again.
With that new .300 WM I found my reloads were not up to my expectations (high ES/SD), so I purchased all new reloading hardware. One of my purchases was a used Benchsource Annealer. The guy I bought that from asked if I had ever tried PRS and he invited me to check out a match. So I went to a local PRS event as a spectator. I looked at many rigs and took notes. By the end of the day I knew this was something I really wanted to do. I then acquired a used chassis rifle that I thought would work well for PRS.
After working with that first PRS rifle, a 6.5 CM with Stiller Tac30 action, MDT chassis, and Proof Carbon-wrapped barrel, I quickly learned that gun did not handle and balance the way I hoped. It was too light in the front, the ergos were poor, and scope eye relief was not optimal. So I decided to build my own GEN 2 PRS rifle, a switch-barrel rig that I now use in competition. READ FULL Story HERE.
Load Development Using 6.5 Guys Custom Spreadsheet
To hold and analyze his load development data, Jeff uses the spreadsheet from 65Guys.com. this can really help identifying your best load. The Excel spreadsheet is detailed, yet makes it simple to analyze your data. You can even copy and paste your chronograph data if your chrono logs on to a SD card.
In this 6.5 Guys video Steve provides an overview and tutorial for using the Excel load development analysis model that he has developed. The Excel Load Development Analysis Spreadsheet version 2.0 is FREE. Download from the 6.5 Guys Load Development Page using this LINK for XLSM spreadsheet.
NOTE: If that direct link does not work, CLICK HERE to go to the 6.5 Guys website page, then look for the “Load Development Analysis Model Version 2.0″ link in the second paragraph.
In this video Steve explains some key statistical concepts for performing load data analysis. He also provides tips and guidance for determining the optimal load for your rifle as you analyze the load data you’ve collected.
Good Resource for PRS/NRL Newbies — Practical Shooter’s Guide
Marcus Blanchard, $19.98 Paperback, $9.99 Kindle
Thinking of getting started in the Practical/Tactical shooting game? Looking for ways to be more stable when shooting from unconventional positions? Then you may want to read Marcus Blanchard’s Practical Shooter’s Guide (A How-To Approach for Unconventional Firing Positions and Training). Unlike almost every “how to shoot” book on the market, Blanchard’s work focuses on the shooting skills and positions you need to succeed in PRS matches and similar tactical competitions. Blanchard provides clear advice on shooting from barricades, from roof-tops, from steep angles. Blanchard says you need to train for these types of challenges: “I believe the largest factor in the improvement of the average shooter isn’t necessarily the gear; it’s the way the shooter approaches obstacles and how they properly train for them.”
AIM SMALL, MISS SMALL: At 25 yards, this is a fun rimfire plinking target. At longer distances it can be a great training target for precision centerfire shooters.
NRL22 and PRS rimfire competition is hugely popular. And we’re seeing great interest in .22 LR rimfire tactical cross-training. With a rimfire rig, you can practice regularly for a fraction of the cost of centerfire shooting. That way you can build your skill set without breaking the bank. Decent rimfire ammo can be had for 10 to 20 cents a round. Compare that to $1.30 (or more) for centerfire handloads and as much as $2.25 per round for factory ammo such as Hornady 6.5 Creedmoor.
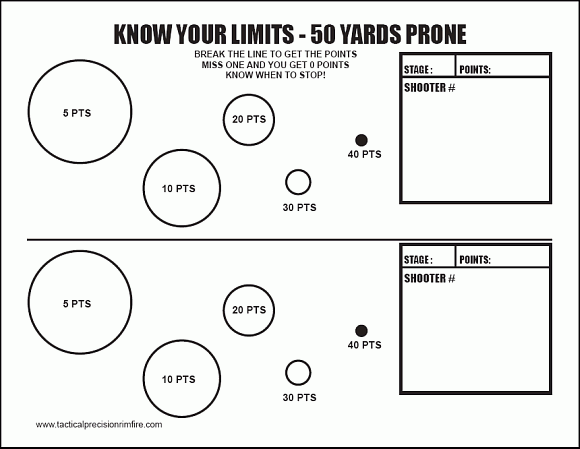
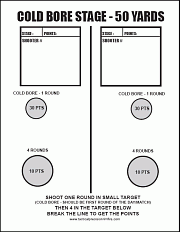
To help with rimfire cross-training, here are some of our favorite rimfire tactical targets, all in easy-to-print PDF format. Click each target image to download the FREE target. You’ll find more free targets for load development, precision practice, and fun shooting on our AccurateShooter FREE Targets Page.
Modern Rimfire Tactical Rifle with MPA BA Comp Chassis and Vudoo V-22 action.
Targets for Rimfire Training and Fun Matches
Here’s a rimfire training target with “big to small” target circles. Start with the largest circles, then move to the smaller ones in sequence. This systematic drill provides increasing challenge shot-by-shot. Novices often are quite surprised to see their accuracy improve as they move from bigger to smaller aiming points. That provides positive feedback — always a good thing.
Right Click and “Save as” to download printable PDF versions of target.
This Vortex Nation video features an 80-minute interview with Travis Ishida, one of the original founders of the NRL22 and NRL22-X disciplines. Travis told us that the NRL now runs 7-8 times as many rimfire matches as centerfire matches.
Rimfire Practice Targets
SPECIAL BONUS–Rimfire Tactical Precision Targets
These FREE targets by DesertFrog are offered in Adobe Acrobat format for easy printing. CLICK HERE to download all six targets as a .ZIP archive.
This custom war wagon hauls varmint hunters around the Longmeadow Game Resort in Colorado. Bottom image by Forum member Randful, Big Horn Mountains, Wyoming.
Will you be heading to the varmint fields this summer? Proper planning is key to a safe, satisfying, and productive varmint holiday. Bring a variety of rifles if possible — you’ll need to switch off as one barrel gets hot, and the chambering that works best for your close shots may not be ideal for those longer shots out past 400 yards. Here’s one tip that can help you shoot more effectively on your varmint hunt — at your shooting station, put a strip of surveyor’s tape on a tall stake to show the wind direction. Then align to the wind direction, so that it is a direct headwind or tailwind. This will minimize the effect of cross-winds.
For fans of varmint hunting, we’ve assembled eight videos for this Saturday at the Movies Feature. You’ll see a variety of rifles being used in classic American varmint country — Montana, Oregon, and the Dakotas. We’ve also included an interesting video from South Africa.
Extreme Outer Limits — Oregon Adventure with .22 Creedmoor
This varmint safari video features the Extreme Outer Limits squad in Central Oregon. The host is shooting the .22 Creedmoor cartridge from a 22″ Benchmark barrel. The shooters benefit from a great operation, with elevated mobile shooting stations and benches. Watching this video made this Editor want to travel up to Oregon this summer, and try out a .22 Dasher that’s been sitting in the safe.
This video has plenty of action, with hits on small varmints (mostly ground squirrels) out to considerable distances. You can see the effectiveness of the .22 Creedmoor cartridge — it basically vaporizes some of the critters.
.22-250 Nails Ground Squirrels and Rock Hyraxes in South Africa
Here’s an interesting video from South Africa. The video maker starts with shots on ground squirrels. His .22-250 blasts them into little pieces. They he switches to more distant targets, a furry ground-hog size animal called the Rock Hyrax, Cape Hyrax, or Dassie. Mature Rock Hyraxes weigh 4-5 kilograms and have short ears and tail. These Rock Hyraxes are found at higher elevations in habitats with rock crevices, allowing them to escape from predators (but not skilled varmint hunters).
1125-Yard Rockchuck Hit with Extreme Outer Limits
Here a team from Extreme Outer Limits tests their skills at Extreme Long Range Varminting. The group set up benches and aim their rifles at a distant hillside over 1100 yards away. You can see a successful first-shot rockchuck hit at the 5:15 time-mark. On this episode of Extreme Outer Limits, Bob Beck, Tim Titus, and some MOA Rifles clients to put the .22 Creedmoor and other MOA-brand rifles to the test. At these long distances, Rockchucks are relatively small targets providing plenty of challenge.
Long Range Rockchuck Adventure with Gunwerks Crew
This Gunwerks video showcases varmint hunting in the Western USA. In this video Aaron Davidson and the Gunwerks crew try out some new rifles on some rockchucks. Most of the the rifles were suppressed but the host said the rockchucks took cover after the first shot, so this required good coordination among shooters and spotters. A 6XC varminter is featured at 2:44 and there’s some nice drone footage starting at 2:00.
Varminter.com — Great Resource for Varmint Hunters
Varminter.com is a great resource for serious varmint hunters. This site regularly reviews rifles, optics, and varmint ammunition. In addition, the site’s founder, Eric Mayer, often ventures out in the backcountry to film his varmint adventures.
Varminting with .17 HMR Savage A17 and Custom .17 WSM AR
On varmint excursions, we like to have a .17 rimfire for the closer shots, inside 150 yards. This video shows a successful Prairie Dog hunt with a .17 HMR. Watch and you’ll see hits out to 160 yards (00:50), proving the effective range of the .17 HMR cartridge. The host is shooting a Savage A17 semi-auto 17 HMR rifle in a Boyds laminated stock.
Varminters now enjoy three .17-caliber rimfire options. The .17 Mach 2, .17 HMR, and .17 WSM are all good choices, with the 17 Mach 2 being the cheapest and the .17 WSM the most powerful. With a rimfire you save on ammo costs and you don’t waste precious centerfire barrel life. Also the noise is reduced so you don’t spook the critters so much. We have shot ground squirrels with both the 17 HM2 and .17 HMR. And with a 3000 fps MV, the .17 WSM has some really impressive ballistics. As you can see, the .17 WSM has a much flatter trajectory than both the .17 HMR and .22 WMR:
Last but certainly not least, this video from Eric Mayer, founder of Varminter.com and AR15Hunter.com. This video features an innovative AR-platform rifle chambered for the potent .17 Winchester Super Magnum (aka .17 WSM) cartridge. Eric was able to have instant kills out to 200 yards. This rifle features a Franklin Armory F-17 V4 upper with a Franklin Armory 10-rd magazine. Eric was very impressed with the .17 WSM and he believes the 20gr bullet with 3000 fps MV will be very effective for most of his small varmint hunting out to considerable distances.
KILL Shots — BONUS Age-Restricted Videos
Linked below are a couple very good varminting videos that show explosive hits. However, YouTube has decided these can’t be posted on third-party websites so you’ll have to click the links below to see the Prairie Dogs going airborne. In the first video, the lady shooter nails THREE P-Dogs with one shot!
1. Eastman’s Hunting Journals. Great Video from Eastern Montana. This has nice Aerial Footage and an amazing shot with three P-dogs (in line) dropped with a single shot (at time-mark 9:28). One shot — THREE prairie dogs down! This prairie dog hunt features slow-motion kill shots, digiscope close-ups, and a rare prairie dog triple kill. A group of hunters works to remove prairie dog pests from private grazing lands in this episode of Beyond the Grid by Eastmans’ creators of Eastmans’ Hunting TV. You’ll have to CLICK HERE to watch this video. See Also Eastman’s Prairie Dog Armageddon video.


 Episode 94: Anyone’s Hunt Colorado Rifle Elk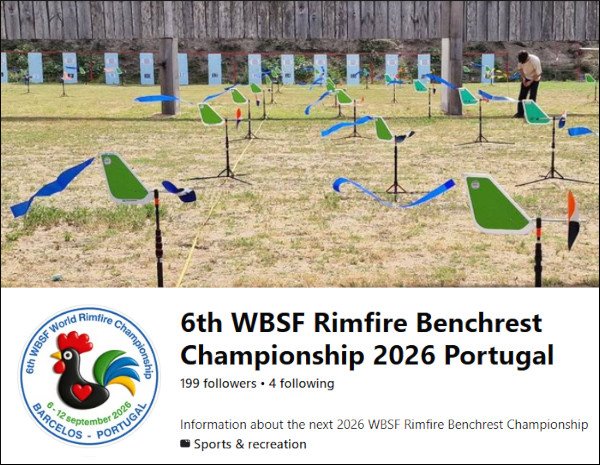








 A gifted “natural” shooter, Kirsten started shooting fairly late — at age 16. Despite her relatively late start, she learned very quickly, and managed to earn a place on the University of Nebraska shooting team. That literally opened up a new world for Kirsten: “During the course of my career, I’ve had a lot of success. I’ve gone to World Cups… in Zagreb, Croatia, in Munich, Germany. I’ve won National Championships, and got on to the U.S. Olympic short list, so it’s been a good career.”






 This varmint safari video features the Extreme Outer Limits squad in Central Oregon. The host is shooting the .22 Creedmoor cartridge from a 22″ Benchmark barrel. The shooters benefit from a great operation, with elevated mobile shooting stations and benches. Watching this video made this Editor want to travel up to Oregon this summer, and try out a .22 Dasher that’s been sitting in the safe.


