Want to learn the basics of position shooting? Then you should check out an article by Gary Anderson, DCM Emeritus, in On the Mark digital magazine (Summer 2014, pp. 6-13). This article covers all the key elements: body position (prone, sitting, standing), sling use/adjustment, sight picture, aiming process, and trigger control. While this 8-page article was specifically written for Rimfire Sporter shooters, the techniques described by Anderson apply to all types of position shooting, whether you shoot air rifles, smallbore rifles, or centerfire rifles.
Here’s what Anderson says about aiming — how to keep your sights steady and get them centered on the middle of the target:
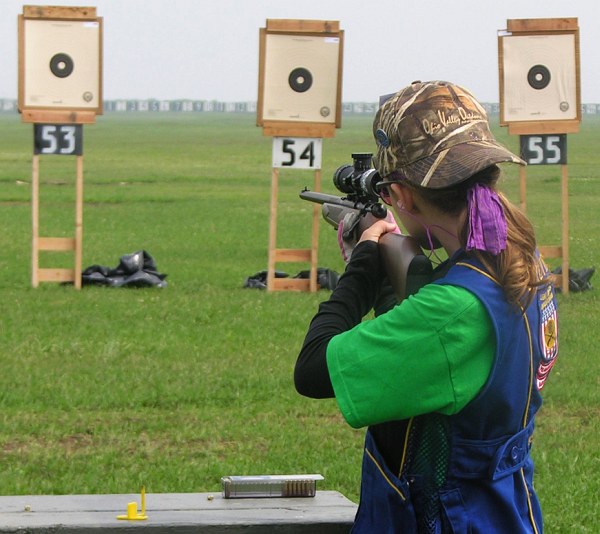
Trigger Contact and Center As soon as aiming at the target begins, the index finger must move from the trigger-guard to contact the trigger. It is important to get initial pressure on the trigger as soon as aiming begins. Then the shooter must focus on the sight picture and centering the sight picture movements over the aiming point. No one, not even champion shooters, can hold the aligned sights perfectly still. The sights are going to move a little bit or a lot, depending on the shooter’s skill level. The secret is to center those sight picture movements over the aiming point on the target (see trace illustration) before pulling the trigger.
When the sight picture movements on the target are centered, the last step in firing the shot is to add… smooth pressure on the trigger until the shot breaks.
Anderson also discusses the 5 Basics of Shot Technique:
BONUS: Olympic Gold Medalist Jamie Gray
Here’s an interesting video about three-position shooting. Produced by GOnra Media, this video demonstrates rifle hold and body alignment for prone, standing, sitting, and kneeling positions. Olympic Gold Medalist Jamie Gray demonstrates the proper stance and position of arms and legs for each of the positions. Ideally, in all of the shooting positions, the shooter takes advantage of skeletal support. The shooter should align the bones of his/her arms and legs to provide a solid foundation. A shooter’s legs and arms form vertical planes helping the body remain stable in the shooting position.
Bang Clang! The 2023 Steel Challenge World Speed Shooting Championship is featured on Shooting USA TV this week. The Shooting USA Steel Challenge episode runs August 23, 2023 on the Outdoor Channel. Show times are: Wednesdays, 9:00 PM Eastern and Pacific, 8:00 PM Central. After those broadcast times, you can watch the show via Vimeo on Demand for $0.99 per episode.
This past April, the fastest speed shooters in the world showcased their skills at the Steel Challenge Championship at the CMP Talladega Marksmanship Complex in Alabama. The Steel Challenge course consists of eight 5-target close-range stages. This discipline has been called “drag racing with guns”. Draw and shoot 5 steel targets with time as your score. The shooter with the lowest overall time wins. This is a very popular event — when registration opened for the 2023 Steel Challenge, more than 700 slots filled in just 12 minutes.
The 2023 Steel Challenge at Talladega was featured this month on the NRA Shooting Sports USA site.
There are multiple pistol and revolver classes, both rimfire and centerfire, iron sights and optics. Increasing in popularity (and speed) are the rimfire rifle and pistol-caliber centerfire rifle classes. There are 13 gun classes in total, the most for any shooting championship. In the centerfire handgun match, the fastest times are posted by competitors using enhanced open guns with compensators and red-dot optics.
Here is a full length Shooting USA Steel Challenge Episode from 2017:
Shooting USA Video covers Course of Fire, Firearms Classes, and Target Layouts (1:20)
Definitely watch the 4-minute video (above) produced by Shooting USA. It explains the classes, shows the stages, and illustrates ALL the different gun classes, pistol AND rifle. You can also see some of the world’s fastest shooters including Jessie Harrison (1:47, 3:44) and Max Michel (3:48). Be amazed by the speed of semi-auto rimfire rifles — five targets hit in under two seconds!
The Steel Challenge was founded in 1981 by Mike Dalton and Mike Fichman, in Southern California. The two Mikes wanted an exciting alternative to paper targets and came up with the all-steel format. The Steel Challenge World Speed Shooting Championships have grown to one of the largest professional pistol competitions in America. In 2022, scores of competitors competed at the Talladega Marksmanship Park for glory and cash prizes. The Steel Challenge is governed by the Steel Challenge Shooting Association (SCSA) that consists of eight standardized stages with three types of steel targets: small circle, big circle, and square. Here is a steel challenge layout in Germany.
CMP Announces Western Fall Classic Event for October 2023
If you missed this year’s Civilian Marksmanship Program (CMP) Western Games and Highpower Matches in March 2023, here’s your second chance to attend. The CMP will be returning to the Ben Avery Shooting Facility October 10-15, 2023, for the Western Fall Classic – a condensed version of the Western CMP Games, CMP Pistol & CMP Highpower (HP) Rifle Matches. Despite the shorter schedule, the event will still offer a wide variety of events for rifle and pistol competitors. Adults and juniors of all experience levels are welcome to attend.
The CMP Western Fall Classic in Arizona will feature three days of popular CMP Games rifle competitions including: Garand/Springfield/Vintage & Modern Military Matches, a Carbine Match, a Rimfire Sporter Match, and the Vintage Sniper Match. In addition, handgun shooters can compete in CMP Match Pistol 2700, EIC Service Pistol, EIC Service Revolver, EIC .22 Rimfire Pistol, Military & Police Service Pistol, and As-Issued Pistol matches.
The Highpower Rifle portion of the Western Fall Classic will include a 2-Man Team Match, two days of CMP 800 Aggregate Matches, a CMP Service Rifle EIC Match and a Mid-Range 3×600 event. For educational purposes, a Rifle & Pistol Marksmanship 101 Classes with introductory EIC Matches are also part of the October lineup.
The Civilian Marksmanship Program is a federally chartered 501 (c) (3) non-profit corporation. It is dedicated to firearm safety and marksmanship training and to the promotion of marksmanship competition for citizens of the United States. For more information about the CMP and its programs, log onto www.TheCMP.org.
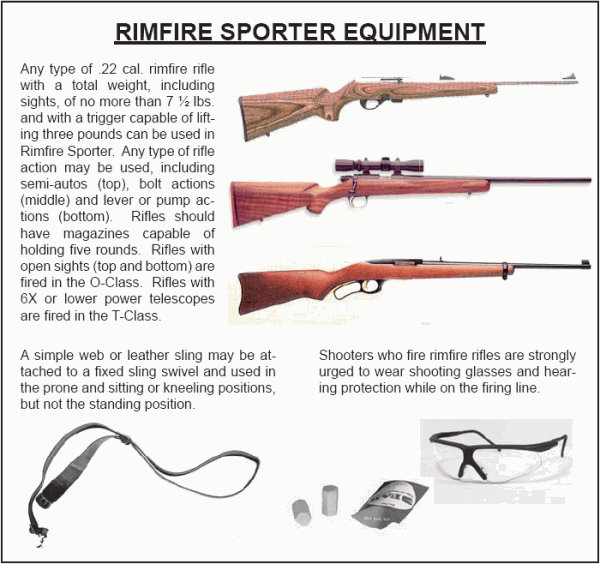
The CMP National Rimfire Sporter Match is a fun competition with affordable smallbore rifles with either scopes or iron sights. All you need are a .22 LR rifle, sling, and ammo.
Each year, the Rimfire Sporter Match attracts hundreds of shooters to Camp Perry on the shores of Lake Erie. If there is a single CMP event at Camp Perry that offers the most diverse group of competitors (of all ages), and the lowest cost of entry, that would be the annual Rimfire Sporter Match.
This year’s summer match was held on Saturday, July 8, 2023 at the Viale Range during the first weekend of the National Match Schedule at Camp Perry. One of the most popular annual Camp Perry events, the Rimfire Sporter Rifle match features .22 LR competition in open sights (O-Class), telescopic (T-Class) and tactical/unlimited (TU) classes, fired at 25 and 50 yards. A CMP/AMU Rimfire Sporter Small Arms Firing School was held on July 7, 2023.
The Rimfire Sporter Match is for smallbore rifles that weigh 7 1/2 pounds or less with sights. Firing is done at 25 and 50 yards in prone, sitting and standing positions, in slow and rapid fire modes. The CMP has a special smart-phone App that will help speed up scoring.
Each year, the Rimfire Sporter Match attracts hundreds of shooters to the shore of Lake Erie at Camp Perry. The CMP National Rimfire Sporter Rifle Match offers shooters a recreation-oriented competition where they use affordable, smallbore sporter rifles with either scopes or iron sights. All you need are a .22 LR rifle, sling, and ammo.
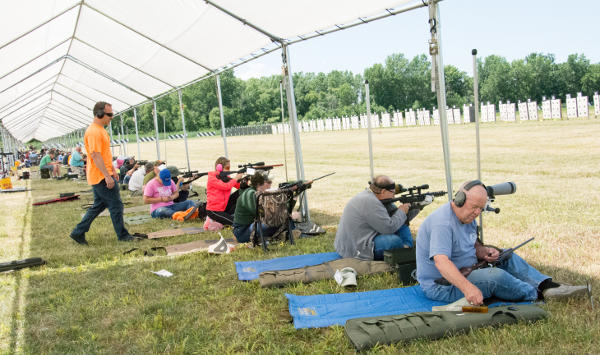
Hundreds of shooters compete in the Rimfire Sporter Match at Camp Perry.
Prior to the match at Camp Perry, Rimfire Sporter competitors check-in, have their rifles weighed, triggers checked, and receive their squad assignments.
Rifles may be manually operated or semi-automatic, in three classes: the standard “O Class” for open-sighted rifles, “T-Class” for telescope-sighted rifles, and the “Tactical Rimfire” Class. Firing is done at 50 and 25 yards on a target with a 1.78″ ten-ring. The target is simple enough for a beginner to hit, yet challenging enough that only one competitor in the history of the match has ever fired a perfect 600 score.
Rimfire Sporter Course of Fire
At the Rimfire Sporter Match, competitors complete slow fire prone, rapid fire prone, slow fire sitting or kneeling, rapid fire sitting or kneeling, slow fire standing, and rapid fire standing shot sequences.
What is Required for the Camp Perry Rimfire Sporter Match
Competitors need to bring their own .22 cal. Rimfire rifle(s) and ammunition. Special target shooting equipment, shooting jackets, or shooting gloves are not permitted, but you can bring a spotting scope and ground cloth or shooting mat. The firing points have grass (sometimes a bit wet with rain). Competitors are strongly urged to wear hearing and eye protection. Assistance for disabled competitors is provided.
A free Shooters’ Clinic is usually held in connection with the Rimfire Sport match at Camp Perry. The Clinic covers Rimfire Sporter rules, safety instructions, course of fire, and competition procedures. Shooters who have not previously attended a CMP Rimfire Sporter Match are strongly encouraged to attend.
Do you want to see more Rimfire Sporter photos? CLICK HERE to view the CMP Zenfolio Archive with 1200+ photos from Rimfire Sporter Matches at Camp Perry and elsewhere.
From the late ’70s through 1983, a huge, concrete-walled warehouse in Houston was used for benchrest testing. Virgil King and Bob Fisher set up a bullet-catching backstop at the end of a 30-yard-wide, 325-yard-long fire lane that remained unobstructed even when the warehouse was in use. This allowed accuracy tests in virtually perfect “no wind” conditions. Over a six-year period, about 30 shooters were invited to test their rifles. The results were amazing, with numerous “zero groups” being shot in the facility. Many of the lessons learned in the legendary Houston Warehouse still help benchresters achieve better accuracy today.
Dave Scott explains why the Warehouse was so unique:
“Over a period of six years, the levels of accuracy achieved in the Houston Warehouse went beyond what many precision shooters thought possible for lightweight rifles shot from sandbags and aimed shot-to-shot by human eye. For the first time, a handful of gifted, serious experimenters — armed with the very best performing rifles (with notable exceptions) — could boldly venture into the final frontiers of rifle accuracy, a journey made possible by eliminating the baffling uncertainties of conditions arising from wind and mirage. Under these steel skies, a shooter could, without question, confirm the absolute limits of accuracy of his rifle, or isolate the source of a problem. In the flawlessly stable containment of the Houston Warehouse … a very few exceptional rifles would display the real stuff, drilling repeated groups measuring well below the unbelievably tiny .100″ barrier. The bulk of rifles, however, embarrassed their owners.”
Scott’s article also reveals some interesting technical points: “One thing that IS important is that the bullet be precisely seated against the lands. T.J. Jackson reported this fact in the May 1987 issue of Precision Shooting. In a letter to the Editor, T.J. wrote, ‘…in all our testing in that Houston warehouse… and the dozens and dozens of groups that Virgil King shot in there ‘in the zeroes’… he NEVER fired a single official screamer group when he was ‘jumping’ bullets. All his best groups were always seated into the lands, or at the very least… touching the lands. Virgil said his practice was to seat the bullets so the engraving was half as long as the width of the lands. He noticed an interesting phenomenon with rifles that could really shoot: if the bullets were seated a little short and the powder charge was a bit on the light side, the groups formed vertically. As he seated the bullets farther out and increased the powder charge, the groups finally became horizontal. If he went still farther, the groups formed big globs. He said the trick is to find the midway point between vertical and horizontal. That point should be a small hole.”
You should definitely read the complete article, as it provides many more fascinating insights, including shooting technique, barrel cleaning, neck-turning, and case prep.
EDITOR: Will the lessons of the Houston Warehouse work elsewhere? Is this repeatable magic? We remind readers that what T.J. Jackson discovered worked for his barrels, his cartridge type, and his choice of bullets. Jumping bullets can definitely produce good results in other cartridge types with bullets such as Berger Hybrids. Still, the Houston results are intriguing. Any time someone shoots in the “zeros” one should pay attention to how that was achieved.
This photo is one of Nightforce’s series of picturesque “Gunscapes”. SEE MORE HERE.
August is National Shooting Sports Month. So be sure to get to the range sometime soon, preferrably outdoors.
We should remember the real reasons many of us enjoy the shooting hobby. Many of us like shooting because it gets us outdoors, away from work pressures. Shooting gives us a chance both to enjoy solitude as well as have fun with friends and family in the outdoors. For this Editor, a solo trip to the range in mid-week was often the perfect antidote to job stress. Going to a scenic venue and sending a few shots downrange was satisfying. And getting out of the hustle and bustle of the city did indeed calm the soul.
Talented 3-position shooter (and trick-shot artist) Kirsten Joy Weiss says that any day at the range is “always a good day”. Here is her photo to prove it. If that shot doesn’t motivate you to spend a day outdoor with rifles, we’re not sure what will. Here’s hoping you’ll have a chance to get in many fun days of shooting and/or hunting this summer and fall. That can be with air rifles, rimfire guns, or centerfire guns — they are all fun to shoot.
With fall approaching soon, hunting season is right around the corner. Long-range hunters may want to add Shooter’s Bible Guide to Rifle Ballistics (2nd Edition, 2022) to their reference library. Written by Dr. Wayne van Zwoll, this 264-page resource focuses on the basic principles of ballistics. While the book concentrates on the many factors that affect bullet trajectories, the book also includes chapters on everything from rifle design to bullet construction and handloading. And there are many helpful tips for long-range hunters.
Gunsmith and long-range shooting school instructor Darrell Holland recommends the book highly. This updated Second Addition was released in July 2022, so it is still quite current. Darrell tells us: “Friend and noted author Wayne van Zwoll has authored another fine book on long range shooting. Wayne is a great shot (probably one of the best sling shooters I’ve been around) and superb hunter in his own right. We applaud his efforts to provide sound and accurate knowledge on long range hunting.”
Van Zwoll is the “real deal” — an experienced outdoorsman, with serious shooting and writing “creds”. Over his career, Van Zwoll worked for the BLM, then Washington’s Department of Game. He worked as a photographer for the U.S. Forest Service, then became one of the Elk Foundation’s first field directors. He has guided hunters in Utah and Wyoming, and has hunted on five continents. Wayne has shot competitively since his days on the Michigan State University rifle team. He qualified for the final Olympic smallbore tryouts in 1972 and later won two state prone titles. For many years he conducted shooting seminars for Safari Club International (SCI). Wayne van Zwoll has authored 14 books, and written more than 2,000 articles for numerous magazines, including Field & Stream, and Outdoor Life. In 2006 he received the Jack Slack Outdoor Writer of the Year award. Wayne now serves as Special Projects Editor for Intermedia Outdoors.
A high ballistic coefficient helped a Creedmoor bullet slice stiff wind 250 yards to this Vaal Rhebok.
Try a club match this summer! Every summer weekend, there are hundreds of local club “fun matches” conducted around the country. One of the good things about club shoots is that you don’t have to spend a fortune on equipment to have fun. But we’ve seen that many club shooters handicap themselves with a few common equipment oversights or lack of attention to detail while reloading. Here are SIX TIPS that can help you avoid these common mistakes, and build more accurate ammo for your club matches.
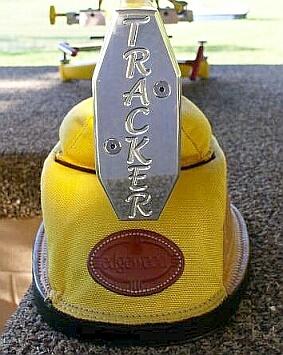
1. Align Front Rest and Rear Bag
We see many shooters whose rear bag is angled left or right relative to the bore axis. This can happen when you rush your set-up. But even if you set the gun up carefully, the rear bag can twist due to recoil or the way your arm contacts the bag. After every shot, make sure your rear bag is aligned properly (this is especially important for bag squeezers who may actually pull the bag out of alignment as they squeeze).
Forum member ArtB adds: “To align my front rest and rear bag with the target, I use an old golf club shaft. I run it from my front rest stop through a line that crosses over my speed screw and into the slot between the two ears. I stand behind that set-up and make sure I see a straight line pointing at the target. I also have a piece of tape that I’ve placed on the golf shaft that indicates how far the back end of the rear bag should be placed from the front rest stop.”
2. Avoid Contact Interference
We see three common kinds of contact or mechanical interference that can really hurt accuracy. First, if your stock has front and/or rear sling swivels make sure these do NOT contact the front or rear bags at any point of the gun’s travel. When a sling swivel digs into the front bag that can cause a shot to pop high or low. To avoid this, reposition the rifle so the swivels don’t contact the bags or simply remove the swivels before your match. Second, watch out for the rear of the stock grip area. Make sure this is not resting on the bag as you fire and that it can’t come back to contact the bag during recoil. That lip or edge at the bottom of the grip can cause problems when it contacts the rear bag. Third, watch out for the stud or arm on the front rest that limits forward stock travel. With some rests this is high enough that it can actually contact the barrel. We encountered one shooter recently who was complaining about “vertical flyers” during his match. It turns out his barrel was actually hitting the front stop! With most front rests you can either lower the stop or twist the arm to the left or right so it won’t contact the barrel.
3. Weigh Your Charges — Every One
This may sound obvious, but many folks still rely on a powder measure. Yes we know that most short-range BR shooters throw their charges without weighing, but if you’re going to pre-load for a club match there is no reason NOT to weigh your charges. You may be surprised at how inconsistent your powder measure actually is. One of our testers was recently throwing H4198 charges from a mechanical measure for his 30BR. Each charge was then weighed twice with a Denver Instrument lab scale. Our tester found that thrown charges varied by up to 0.7 grains! And that’s with a premium measure.
4. Measure Your Loaded Ammo — After Bullet Seating
Even if you’ve checked your brass and bullets prior to assembling your ammo, we recommend that you weigh your loaded rounds and measure them from base of case to bullet ogive using a comparator. If you find a round that is “way off” in weight or more than .005″ off your intended base to ogive length, set it aside and use that round for a fouler. (Note: if the weight is off by more than 6 or 7 grains you may want to disassemble the round and check your powder charge.) With premium, pre-sorted bullets, we’ve found that we can keep 95% of loaded rounds within a range of .002″, measuring from base (of case) to ogive. Now, with some lots of bullets, you just can’t keep things within .002″, but you should still measure each loaded match round to ensure you don’t have some cases that are way too short or way too long.
5. Check Your Fasteners
Before a match you need to double-check your scope rings or iron sight mounts to ensure everything is tight. Likewise, you should check the tension on the screws/bolts that hold the action in place. Even with a low-recoiling rimfire rifle, action screws or scope rings can come loose during normal shooting.
6. Make a Checklist and Pack the Night Before
Ever drive 50 miles to a match then discover you have the wrong ammo or that you forgot your bolt? Well, mistakes like that happen to the best of us. You can avoid these oversights (and reduce stress at matches) by making a checklist of all the stuff you need. Organize your firearms, range kit, ammo box, and shooting accessories the night before the match. And, like a good Boy Scout, “be prepared”. Bring a jacket and hat if it might be cold. If you have windflags, bring them (even if you’re not sure the rules allow them). Bring spare batteries, and it’s wise to bring a spare rifle and ammo for it. If you have just one gun, a simple mechanical breakdown (such as a broken firing pin) can ruin your whole weekend.
Most bolt-action rifle shooters work the bolt with their trigger-pulling hand. This is because most rifles sold to right-handed shooters come with right-side bolts, while “lefty” rifles come with left-side bolts. This “standard” configuration requires the shooter to take his dominant, trigger-pulling hand off the stock to cycle the bolt, then re-position his hand on the stock, and “re-claim” the trigger. Often the shooter must lift or move his head to work the bolt, and that also requires him to re-establish his cheek weld after each and every shot. Not good.
This really doesn’t make much sense for precision shooting with fore-end support*. There is a better way. If you leave your trigger hand in position and work the bolt (and feed rounds) with the opposite hand, then you don’t need to shift grip and head position with each shot. All this requires is a weakside-placed bolt, i.e. a left bolt for a right-handed shooter or a right bolt for a left-handed shooter. The video below shows a “Lefty” working a right bolt. Note how efficient this is:
As our friend Boyd Allen explains: “If you think about it, if you are going to work with a factory action where your options are left bolt and left port or right bolt and right port, and you are building a rifle that will only be shot from a rest, using the left/left for a RH shooter or using a right/right for a LH shooter works better than the conventional configuration”.
Shoot Like a Champ and Work the Bolt with Your Weakside Hand
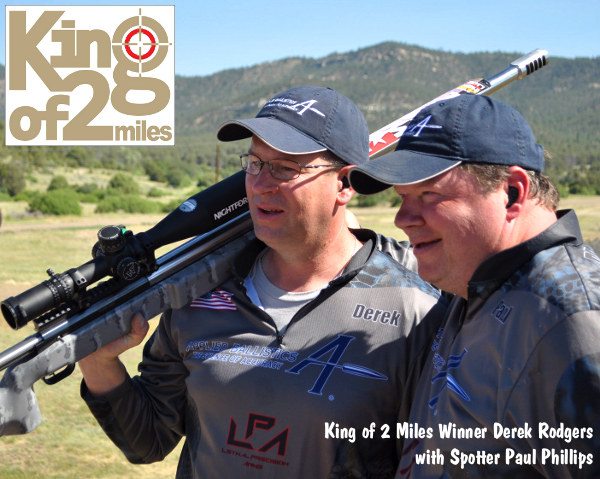
Derek Rodgers is a recent F-TR World Champion, a King of 2 Miles champion, AND is the only person to have won BOTH the U.S. F-Open and the U.S. F-TR National Championships.
And guess what? Derek runs this kind of “opposite” bolt set-up. Yep, Derek shoots right-handed with a left bolt. Though Derek is a right-hander, he shoots with a Left Bolt/Left Port (LBLP) action. He pulls the trigger with his right index finger, while working the left-side bolt with his left (weakside) hand. This allows him to stay in position, and maintain his cheekweld. He places his right hand on the grip, while manipulating the bolt (and feeding rounds) with his non-trigger-pulling hand.
Recent F-TR World Champion and King of 2 Miles Derek Rodgers
This is the rifle with which Derek won the 2013 F-TR National Championship.
*For true standing, off-hand shooting (whether in competition or on a hunt), a conventional strongside bolt placement makes sense, since the non-dominant arm must support the front of the rifle all the time. When shooting from bipod or rest, it’s a different story.
“The pessimist complains about the wind; the optimist expects it to change; the realist adjusts the sails.” — William Arthur Ward
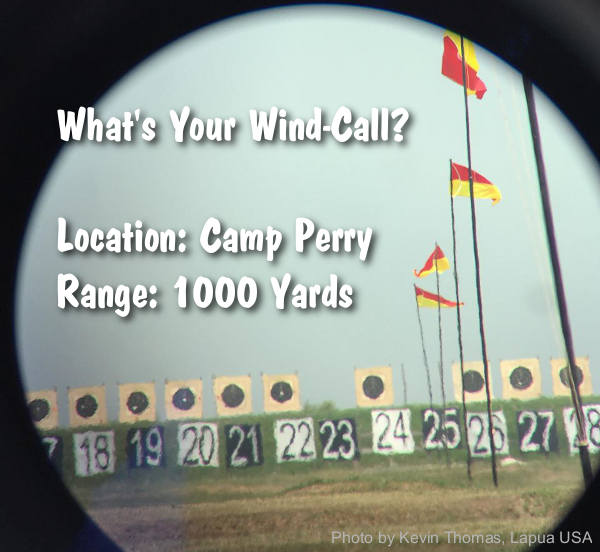
Readers often ask us: “Is there a decent, easy-to-comprehend book that can help my wind-reading?” Many of our Forum members have recommended The Wind Book for Rifle Shooters by Linda Miller and Keith Cunningham.
New Edition — Hardback and eBook
The latest, updated edition of The Wind Book for Rifle Shooters was released in May 2020. This 144-page book, first published in 2007, is a great resource. But you don’t have to take our word for it. If you click this link, you can read book excerpts and decide for yourself. When the Amazon page opens, look below the book cover photo, and click the bar labeled “Read Sample”. This lets you preview chapters from the Wind Book, and view some illustrations. Along with the new hardback edition ($22.99), Amazon offers a Kindle (eBook) edition for $14.99.
Other books cover wind reading in a broader discussion of ballistics or long-range shooting, such as Applied Ballistics for Long-Range Shooting by Bryan Litz. But the Miller & Cunningham book is ALL about wind reading from cover to cover, and that is its strength. The book focuses on real world skills that can help you accurately gauge wind angle, wind velocity, and wind cycles.
All other factors being equal, it is your ability to read the wind that will make the most difference in your shooting accuracy. The better you understand the behavior of the wind, the better you will understand the behavior of your bullet. — The Wind Book for Rifle Shooters
The Wind Book for Rifle Shooters covers techniques and tactics used by expert wind-readers. There are numerous charts and illustrations. The authors show you how to put together a simple wind-reading “toolbox” for calculating wind speed, direction, deflection and drift. Then they explain how to use these tools to read flags and mirage, record and interpret your observations, and time your shots to compensate for wind.
I believe this is a must-have book if you are a long-range sport shooter. I compete in F-Class Open and when I first purchased this book and read it from cover to cover, it helped me understand wind reading and making accurate scope corrections. Buy this book, read it, put into practice what it tells you, you will not be disappointed. — P. Janzso
If you have one book for wind reading, this should be it. Whether you’re a novice or experienced wind shooter this book has something for you. It covers how to get wind speed and direction from flags, mirage, and natural phenomenon. In my opinion this is the best book for learning to read wind speed and direction. — Muddler


As soon as aiming at the target begins, the index finger must move from the trigger-guard to contact the trigger. It is important to get initial pressure on the trigger as soon as aiming begins. Then the shooter must focus on the sight picture and centering the sight picture movements over the aiming point. No one, not even champion shooters, can hold the aligned sights perfectly still. The sights are going to move a little bit or a lot, depending on the shooter’s skill level. The secret is to center those sight picture movements over the aiming point on the target (see trace illustration) before pulling the trigger.









 Dave Scott explains why the Warehouse was so unique:


 Van Zwoll is the “real deal” — an experienced outdoorsman, with serious shooting and writing “creds”. Over his career, Van Zwoll worked for the BLM, then Washington’s Department of Game. He worked as a photographer for the U.S. Forest Service, then became one of the Elk Foundation’s first field directors. He has guided hunters in Utah and Wyoming, and has hunted on five continents. Wayne has shot competitively since his days on the Michigan State University rifle team. He qualified for the final Olympic smallbore tryouts in 1972 and later won two state prone titles. For many years he conducted shooting seminars for Safari Club International (SCI). Wayne van Zwoll has authored 14 books, and written more than 2,000 articles for numerous magazines, including Field & Stream, and Outdoor Life. In 2006 he received the Jack Slack Outdoor Writer of the Year award. Wayne now serves as Special Projects Editor for Intermedia Outdoors.

 1. Align Front Rest and Rear Bag
 5. Check Your Fasteners