The 6.5 Creedmoor cartridge has become extremely popular in the last few years. It is a favored cartridge among PRS and tactical competitors, and has been used successfully by deer hunters and High Power shooters. Notable major manufacturers such as Ruger and Savage are selling popular rifles chambered for this mid-sized cartridge. The availability of affordable factory rifles chambered in 6.5 Creedmoor further fuels its popularity.
To celebrate the 6.5 Creedmoor as 2018’s mid-size popularity contest winner, we’ve sourced five recent videos from YouTube. These videos cover loading for the 6.5 Creedmoor and also test accuracy in both custom and factory rifles. Enjoy this 6.5 Creedmoor Video Fest:
1. Gas Gun Shoot-Out: 6.5 Creedmoor vs. .308 Win
In this TFB TV video, testers put a 6.5 Creedmoor up against a .308 Winchester with AR-10 type rifles. The head-to-head test compares the ballistics, trajectory, recoil, and inherent accuracy of the two popular cartridge types. We can’t call this a definitive test because most 6.5 Creedmoor shooters run bolt-action rifles. The key take-aways are that the 6.5 Creedmoor has significantly less recoil, and a flatter trajectory (at least with typical factory ammo). Still, the video is a good starting point for anyone considering a gas gun in 6.5 Creedmoor.
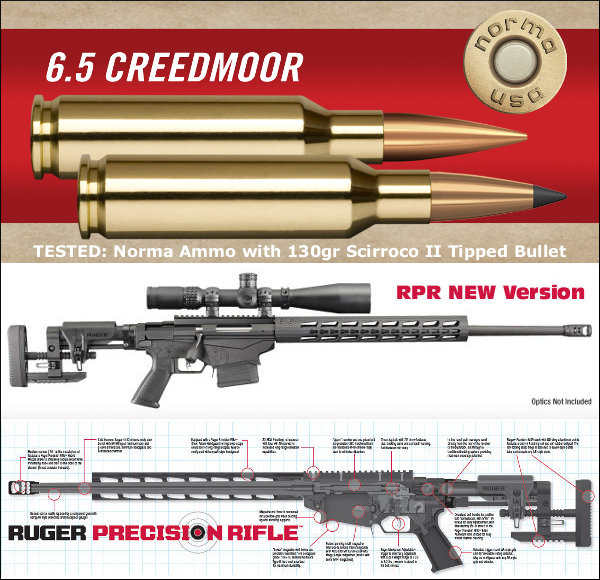
2. Ruger Precision Rifle with Norma 6.5 Creedmoor Ammo
In this video Gavin Gear tests Norma-brand factory ammo in a Ruger Precision Rifle chambered in 6.5 Creedmoor. Gavin reports: “Norma is known for its high-quality brass and ammunition. Recently, I saw that Norma had announced a new addition to their Professional Hunter lineup of ammunition: in 6.5 Creedmoor! I thought I should try some out with the Ruger Precision Rifle. As you saw in the video, this ammunition behaves more like match ammunition.”
3. 6.5 Guys Test Lapua 6.5 Creedmoor Brass in Tactical Rifles
If you have a 6.5 Creedmoor rifle, or are considering getting a gun chambered for this cartridge, we strongly recommend you watch the full 6.5 Guys Video. Ed and Steve spent a lot of time conducting this test, and the video includes helpful summaries of their findings.
4. Reloading for the 6.5 Creedmoor — Gear and Components
If you own a 6.5 Creedmoor rifle, and plan to start hand-loading for the popular cartridge, this video may help you select effective load components. The video examines a wide variety of brass, powder, and bullets options for the cartridge. In addition the reviewer looks at various reloading dies and tools suitable for 6.5 Creedmoor hand-loading.
5. The Springfield Armory M1A — Now Offered in 6.5 Creedmoor
Many folks may not realize that Springfield Armory now makes an M1A chambered in 6.5 Creedmoor. With considerably less recoil, this 6.5 CM version is easier to shoot than the classic 7.62×51 M1A: “Having a 6.5 Creedmoor caliber in the M1A lineup gives long-range shooters more choices with the precision and accuracy they require,” says Springfield Armory CEO Dennis Reese.
As posted in the Calguns.net a few years back, there was a nasty out-of-battery firing incident involving a BOHICA Arms .510 DTC AR15 upper. The cause of the out-of-battery firing is not certain but it appears that the ammo was not sized properly and the firing pin may have been stuck in the extended position. As a result, the round went off before the bolt was closed with the lugs seated. In the process, the bolt handle broke off, as the bolt retracted violently, actually ending up outside the bolt raceway.
The shooter was badly injured, with broken bones and ligament damage to his left hand and tissue damage to his right hand. The shooter was holding the rifle with his left hand near the front of the chamber where a gas vent was located. Gas and shrapnel existed the vent hole causing the severe injuries to the left hand.
From range reports, it appears that the shooter had been struggling to chamber previous rounds, and was having trouble closing the bolt. After talking with one of the rangemasters, a poster on AR15.com reported: “The guy was using new reloads that weren’t exactly fitting well into his chamber. [The shooter] was slamming the bolt handle with his palm trying to get the cases to lock in. The guy was also slamming the bolt forward full force from the rearmost position back and forth trying to ram the cases into chamber in an attempt to squeeze the rounds in so the bolt could close. Finally, on one of the attempts … the possibly stuck firing pin rams into the primer and explodes the round when he slams the bolt forward (zero lug engagement hence the KB) and shooter puts himself into a world of hurt.”
Lessons Learned — Don’t Try to Force Oversize Ammo into a Chamber
By all reports, the shooter’s ammo wasn’t fitting his chamber properly. In an effort to force the ammo into the chamber, he worked the bolt with excessive force. That MAY have caused the firing pin to extend or the hammer to fall without the trigger being pulled. One theory is that the trigger system may have been modified, allowing the hammer to fall from the force of slamming the bolt forward. Others have speculated that the firing pin may have failed to retract because the bolt handle was over-torqued — a safety issue listed in the BOHICA manual.
Whatever caused the out-of-battery firing, it appears that improperly-sized ammo (or a poorly-cut chamber) was the root cause of the problems. If you go to a range and find your bolt does not close easily over the ammo — STOP SHOOTING — don’t try to force the issue. Disaster may result. To paraphrase Johnnie Cochran: “If the ammo doesn’t fit, it’s time to quit”.
Photos by Wildcard, originally posted on Calguns.net.
We’ve used a variety of target cam systems — When you get a good one, they are a great tool for training and load development, and just fun shooting.
Over the past five years we’ve tested many target cam systems. To be frank, some have been disappointing, but we think the Caldwell Target Cam System works well. A number of our Forum members have purchased this system and the reviews have been generally quite positive — image quality is good, reception is good, software is good, and storage cases work well. The only complaint is that the flexible camera arm can droop with time. READ Target Cam Forum Reviews.
Caldwell Target Cam Review by Nando-AS
“I have been using the Caldwell camera for over a year and it works great for me in every respect. I use it mainly at 600 yards, but I have also used it at 1000 yards successfully. In my case, as opposed to the experience posted by Snakepit (see below), the flexible arm that supports the camera is as tight as when it was brand new. The only thing that has broken so far is the plastic top on one of the two stakes supplied to steady the tripods to the ground. Instead of the stakes, I now use a couple of heavy shooting bags. I just place one bag over one of the legs of the tripod, and that is good enough.”
Target Cam Output with camera placed 600 yards from shooter:
Target Cam view at 600 yards: Blue ring is three inches, outer circle is six inches. I use a Samsung Tablet to display the image. I zoom in when actually shooting — so each target fills the screen.
Caldwell Target Cam Review by Shoot4Fun
“Caldwell Target Camera owner here. It comes neatly packed in a soft case and even has two stands for the camera/transmitter and the receiver units. I have only used it to 500 yards though they do call it a one-mile system. The resolution is very good and it has some neat features for capturing and labeling your targets. I did buy two Tallantcell USB packs to power it but it has internal batteries as well. The App works with my iPad or my iPhone and I’m sure there is an Android version too. I see them on sale from time to time at under $375 complete.”
Caldwell Target Cam Review by SnakePit
“I have the Caldwell Target Camera system and it works great. I mainly use it at 600 yards and the transmitter has enough power that I do not have to use the receiver at the bench for my tablet or cell phone. But Caldwell needs to do something with the flexible arm that holds the camera to the tripod. It becomes loose after a while and the camera wants to droop down. Caldwell sent me a replacement flexible arm but it is starting to have the same problem. You can get it to work when this happens but it can be a hassle. Other than that it is a great system for the price and I would buy another one.”
Important Features of a Target Cam System
Key qualities you’ll want in a target cam system are: ease of set-up, good video resolution, effective range (good signal quality/strength), good battery run-time, and the ability to use WiFi-enabled devices for viewing. Caldwell’s new Long-Range Target Camera offers all these things, making it an impressive new product for the price — $359.95 at Midsouth Shooters Supply. Some other target cam systems on the market cost twice as much, yet lack key features of the Caldwell system.
Watch Video, Record Video, Capture Stills, Measure Group Size and more…
The Caldwell LR Target Camera is very versatile, allowing you to both watch and record video and/or stills on any WiFi-enabled device. A free iOS/Android Mobile App allows you to record video, save still pictures, add notes, calculate group size, and save session info. This video shows the complete set-up process and how to use the free App. It shows actual Target Cam output on a WiFi-enabled tablet:
Caldwell LR Target Camera Features:
— High Definition (720p) camera delivers sharp image with good detail.
— WiFi output is compatible with Android, iPhone and most tablets.
— System can stream live HD video, record video, and save still images.
— Camera, transmitter, and receiver are contained in sturdy, waterproof housings.
— Breaks down into custom-fitted storage case for easy transport.
— Rechargeable Lithium-Ion batteries run system for up to 6 hours continuously.
— External power jack for more permanent installation.
— Target Camera Mobile App for iOS and Android devices.
— Includes two collapsible, tripod-base Antenna/router stands.
— Positionable, spring-loaded camera clamp.
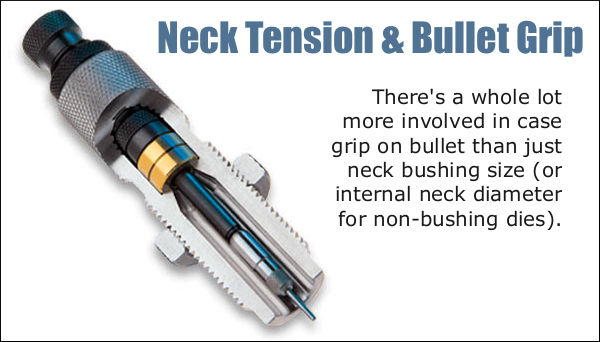
Many novice hand-loaders believe that neck bushing Inside Diameter (ID) size is the only important factor in neck tension. In fact, many different things will influence the grip on your bullet and its ability to release from the case neck. To learn more about neck tension and “case grip”, take the time to read this article carefully. We bet you’ll gain knowledge that will let you load more accurate ammo, with better ES/SD.
Neck Tension (i.e. Grip on Bullets) Is a Complex Phenomenon
While we certainly have considerable control over neck tension by using tighter or looser bushings (with smaller or bigger Inside Diameters), bushing size is only one factor at work. It’s important to understand the multiple factors that can increase or decrease the resistance to bullet release. Think in terms of overall brass-on-bullet “grip” instead of just bushing size (or the internal neck diameter in non-bushing full-length sizing dies).
Bullet grip is affected by many things, such as:
1. Neck-wall thickness.
2. Amount of bullet bearing surface (shank) in the neck.
3. Surface condition inside of neck (residual carbon can act as a lubricant; ultrasonic cleaning makes necks “grabby”).
4. Length of neck (e.g. 6mmBR neck vs. 6mm Dasher).
5. Whether or not the bullets have an anti-friction coating.
6.The springiness of the brass (which is related to degree of work-hardening; number of firings etc.)
7. The bullet jacket material.
8. The outside diameter of the bullet and whether it has a pressure ridge.
9. Time duration between bullet seating and firing (necks can stiffen with time).
10. How often the brass is annealed.
11. Amount (length) of neck sized (e.g. you can size only half the neck).
12. Interior diameter of bushing, or neck section of non-bushing die.
— and there are others…
One needs to understand that bushing size isn’t the beginning and end of neck tension questions, because, even if bushing size is held constant, the amount of bullet “grip” can change dramatically as the condition of your brass changes. Bullet “grip” can also change if you alter your seating depth, and it can even change if you ultrasonically clean your cases.
In our Shooters’ Forum a reader recently asked: “How much neck tension should I use?” This prompted a Forum discussion in which other Forum members recommended a specific number based on their experience, such as .001″, .002″, or .003″. These numbers, as commonly used, correspond to the difference between case-neck OD after sizing and the neck OD of a loaded round, with bullet in place. In other words, the numbers refer to the nominal amount of interference fit (after sizing).
While these commonly-used “tension numbers” (of .001″, .002″ etc.) can be useful as starting points, neck tension is actually a fairly complex subject. The actual amount of “grip” on the bullet is a function of many factors, of which neck-OD reduction during sizing is just one. Understanding these many factors will help you maintain consistent neck tension as your brass “evolves” over the course of multiple reloadings.
Seating Depth Changes Can Increase or Decrease Grip on Bullet
You can do this simple experiment. Seat a boat-tail bullet in your sized neck with .150″ of bearing surface (shank) in the neck. Now remove the bullet with an impact hammer. Next, take another identical bullet and seat it with .300″ of bearing surface in another sized case (same bushing size/same nominal tension). You’ll find the deeper-seated bullet is gripped much harder.
Neck-Wall Thickness is Important Too
I have also found that thinner necks, particularly the very thin necks used by many PPC shooters, require more sizing to give equivalent “grip”. Again, do your own experiment. Seat a bullet in a case turned to .008″ neckwall thickness and sized down .003″. Now compare that to a case with .014″ neckwall thickness and sized down .0015″. You may find that the bullet in the thin necks actually pulls out easier, though it supposedly has more “neck tension”, if one were to consider bushing size alone.
In practical terms, because thick necks are less elastic than very thin necks, when you turn necks you may need to run tighter bushings to maintain the same amount of actual grip on the bullets (as compared to no-turn brass). Consequently, I suspect the guys using .0015″ “tension” on no-turn brass may be a lot closer to the guys using .003″ “tension” on turned necks than either group may realize.
Toward a Better Definition of Neck Tension
As a convenient short-cut, we tend to describe neck tension by bushing size alone. When a guy says, “I run .002 neck tension”, that normally means he is using a die/bushing that sizes the necks .002″ smaller than a loaded round. Well we know something about his post-sizing neck OD, but do we really have a reliable idea about how much force is required to release his bullets? Maybe not… This use of the term “neck tension” when we are really only describing the amount of neck diameter reduction with a die/bushing is really kind of incomplete.
My point here is that it is overly simplistic to ask, “should I load with .001 tension or .003?” In reality, an .001″ reduction (after springback) on a thick neck might provide MORE “grip” on a deep-seated bullet than an .003″ reduction on a very thin-walled neck holding a bullet with minimal bearing surface in the neck. Bushing ID is something we can easily measure and verify. We use bushing size as a descriptor of neck tension because it is convenient and because the other important factors are hard to quantify. But those factors shouldn’t be ignored if you want to maintain consistent neck tension for optimal accuracy.
Consistency and accuracy — that’s really what this all about isn’t it? We want to find the best neck tension for accuracy, and then maintain that amount of grip-on-bullet over time. To do that you need to look not only at your bushing size, but also at how your brass has changed (work-hardened) with time, and whether other variables (such as the amount of carbon in the neck) have changed. Ultimately, optimal neck tension must be ascertained experimentally. You have to go out and test empirically to see what works, in YOUR rifle, with YOUR bullets and YOUR brass. And you may have to change the nominal tension setting (i.e. bushing size) as your brass work-hardens or IF YOU CHANGE SEATING DEPTHS.
Remember that bushing size alone does not tell us all we need to know about the neck’s true “holding power” on a bullet, or the energy required for bullet release. True bullet grip is a more complicated phenomenon, one that is affected by numerous factors, some of which are very hard to quantify.
If the battery on your safe’s electronic lock is more than a year old, or if it is not giving you the right voltage, replace it today!
This time of year, many of our readers are putting their guns away in a safe for the winter. It’s easy to just tuck the guns away and forget about them. But there’s something you should do before you shut the safe door. If you have a safe with an electronic keypad, you should replace the battery every year as a precautionary measure. Trust us, you don’t want to come back in a few months and find that the keypad memory is kaput, and you’re locked out. That can lead to frustration and an expensive locksmith visit.
Here’s a true story. I have one safe with a Sargent & Greenleaf (S&G) keypad. A couple years back, in early December, I went to get into the safe. I punched in the correct combination, but all I got was a rapid “beep, beep, beep, beep” after I finished the last combination entry. I tried again to ensure I entered the combination correctly (I did). But again, the locking system responded with multiple rapid beeps indicating something was wrong. And the safe would not open. Now I was worried….
I popped out the battery holder (which slides in from the bottom of the keypad housing on the door). I removed the battery and tested it with a volt-meter. The 12-month-old Duracell 9-volt battery only registered 6.1 volts.
Low voltage was the problem. I went down to the store and got a couple new 9V batteries. I tested the new batteries and both measured 9.4 volts output. I slipped one of the new 9V batteries into the keypad housing, punched in the combination and everything worked OK again. Eureka.
Most electronic locks for safes WILL “remember” the combination for a period of time even when the battery is low (and the keypad’s “brain” should retain the combination when you remove the battery for replacement). However, a dead battery, or extended periods of low voltage can give you problems. Don’t rely on wishful thinking…
Many guys getting started in long range shooting are confused about what kind of scope they should buy — specifically whether it should have MIL-based clicks or MOA-based clicks. Before you can make that decision, you need to understand the terminology. This article, with a video by Bryan Litz, explains MILS and MOA so you can choose the right type of scope for your intended application.
You probably know that MOA stands for “Minute of Angle” (or more precisely “minute of arc”), but could you define the terms “Milrad” or “MIL”? In his latest video, Bryan Litz of Applied Ballitics explains MOA and MILs (short for “milliradians”). Bryan defines those terms and explains how they are used. One MOA is an angular measurement (1/60th of one degree) that subtends 1.047″ at 100 yards. One MIL (i.e. one milliradian) subtends 1/10th meter at 100 meters; that means that 0.1 Mil is one centimeter (1 cm) at 100 meters. Is one angular measurement system better than another? Not necessarily… Bryan explains that Mildot scopes may be handy for ranging, but scopes with MOA-based clicks work just fine for precision work at known distances. Also because one MOA is almost exactly one inch at 100 yards, the MOA system is convenient for expressing a rifle’s accuracy. By common parlance, a “half-MOA” rifle can shoot groups that are 1/2-inch (or smaller) at 100 yards.
What is a “Minute” of Angle?
When talking about angular degrees, a “minute” is simply 1/60th. So a “Minute of Angle” is simply 1/60th of one degree of a central angle, measured either up and down (for elevation) or side to side (for windage). At 100 yards, 1 MOA equals 1.047″ on the target. This is often rounded to one inch for simplicity. Say, for example, you click up 1 MOA (four clicks on a 1/4-MOA scope). That is roughly 1 inch at 100 yards, or roughly 4 inches at 400 yards, since the target area measured by an MOA subtension increases with the distance.
MIL vs. MOA for Target Ranging
MIL or MOA — which angular measuring system is better for target ranging (and hold-offs)? In a recent article on his PrecisionRifleBlog.com website, Cal Zant tackles that question. Analyzing the pros and cons of each, Zant concludes that both systems work well, provided you have compatible click values on your scope. Zant does note that a 1/4 MOA division is “slightly more precise” than 1/10th mil, but that’s really not a big deal: “Technically, 1/4 MOA clicks provide a little finer adjustments than 1/10 MIL. This difference is very slight… it only equates to 0.1″ difference in adjustments at 100 yards or 1″ at 1,000 yards[.]” Zant adds that, in practical terms, both 1/4-MOA clicks and 1/10th-MIL clicks work well in the field: “Most shooters agree that 1/4 MOA or 1/10 MIL are both right around that sweet spot.”
Moly — yay or nay? Moly bullet-coating was all the rage in 1998 yet is all but dead in 2018. Glen Zediker, who has considerable experience with moly, provides some reasons why moly coating has fallen from favor.
The Pros and Cons of Moly Coating for Bullets
by Glen Zediker
In a way, I guess nothing really happened to molybdenum-disulfide-coated bullets (“moly-coated”). They’re still for sale, as are means to make up your own. What I mean is why didn’t they attain the sustained popularity they started with about 20 years ago, back when many forecasted they would virtually replace bare bullets? Here’s my take, from my experience, on “what happened.”
I don’t know any shooter who tried them and wasn’t excited about results. I sure was!
Performance-wise, moly has a lot of benefits. A lot. The first and most: take two bullets, one coated and one bare, put the same load behind them, then shoot and chronograph. The coated bullet goes slower. How is that a help? The reason it goes slower is because moly drops chamber pressure (into and through the bore easier). And! That velocity loss (at least 50 fps, usually more) is not, proportionately, nearly as much as the accompanying drop in pressure (usually ballpark 4000+ psi). (These figures vary with the cartridge, but all show similar universal influence.) So. The moly-load can be increased beyond previous “maximum” velocity: the idea is to take the coated load up to normal chamber pressure. It works! It’s common to need at the least 1+ grain more propellant to level the coated load with the original bare-bullet load.
Other advantages: Most see improved velocity consistency, evidently resulting from the coating alone. The coated bullets seem to have no limit to the number of rounds that can be fired with no change in accuracy or impact location. Of course there is a limit, but I knew many going beyond 500 rounds between cleanings. And when I say “many,” I’m talking about serious competitive shooters. Another benefit is increased barrel life (less rapid throat erosion), and this is, I think, due to a faster-accelerating bullet getting into and through the throat more quickly (less intense flame). Moly bullets also release easier from the case neck (additional “tension” is recommended).
I “switched.” (The motivation to write this came from a weekend shop-cleaning where I restacked many boxes of coated bullets, and wondered if I’d ever shoot them…)
I got more bullet speed and zero loss of zero — big benefits to an NRA High Power Service Rifle shooter. 88 rounds per day, and 80gr bullets through a 20-inch barrel trying their best to get to 600 yards in close proximity of one another.
Here was my solution to cleaning up after moly: Kroil penetrating oil and abrasive-type bore paste. This combination worked, and my zero didn’t change in the process.
Cleaning Barrels Used for Moly-Coated Bullets
What is bad, then, about moly-coated bullets? Moly itself! It coats the bore with a layer of residue. This layer traps moisture and will, not can, corrode the steel underneath it. More: molybdenum disulfide outgases (outgas is the release of an occluded gas vapor that was part of the compound; a state change, pretty much) at lower than firing temperatures. That creates a chemical that, when mixed with water (including post-firing condensation), becomes, pretty much, sulfuric acid. That meant that the whole “zillion rounds between cleanings” didn’t really work. I know many who “lost” barrels, expensive barrels.
If the barrel is cleaned (correctly) after each use, no problems. But then another advantage is lost because starting with a clean barrel it takes quite a few rounds to return to zero. The layer has to be recreated.
The residue is difficult to remove from the bore. It doesn’t respond to routine means for bore maintenance, mostly meaning brush-and-solvent. The only way I found to get it gone was using micro-penetrating oil in conjunction with an abrasive paste-type cleaner, such as USP Bore Paste or JB Bore Compound.
Hexagonal Boron Nitride (HBN) bullet coating is an alternative that functions, in my experience, well but with fewer drawbacks. First, BN is “clear”, not as messy. Bullet on the left is HBN coated. Still, though, I think that shooting coated bullets is an “all or nothing” proposition. Good groups are not likely to come “mixing” bare and coated bullets through the same barrel.
Using Coated Bullets Requires Commitment
I no longer use coated bullets. There are other coatings that have fewer disadvantages, such as Hexagonal Boron Nitride (doesn’t outgas). Some of the proprietary baked-on coatings a few major makers (such as Barnes and Winchester) use don’t exhibit the post-firing issues that “conventional” moly-coating creates (which usually was moly powder, followed by wax, which added to the tenacity of the residue).
However, another issue is that accuracy tends to suffer running bare bullets though a residue-coated bore (which results after only a few coated rounds, that are coated with anything). All that means, in short, is that running coated bullets is something that really has to be bought into. It’s a commitment, as I see it, and, as with many such things, pushing the limits on performance requires more attention to detail, more effort. It’s a matter of value.
Here’s an easy way to get bullets coated: Lyman’s Super Moly Kit. Just add a tumbler. The two bowls contain the media, moly, and bullets and then go into a vibratory-type tumbler. The 6 ounces worth of moly powder will coat thousands of bullets. It works well.
Deciding Whether to Use Coated Bullets
Weigh the pros and cons. I honestly cannot, and will not, tell anyone not to use coated bullets. Coating can provide a serious performance increase. I don’t use moly-coating anymore, but that’s because my shooting needs are not so “serious” as they once were. I, yes, have gotten a tad amount lazy. I want to go to the range and enjoy my rifles and not lose sleep over the possibility of creeping corrosion if I didn’t clean up. I also want to be able to shoot different loads, including factory ammo, and maintain accuracy.
CONCLUSION: IF you choose moly, take steps to protect the barrel bore against the potential for damage. At the least, run some petroleum-based oil through the bore after shooting if you can’t clean it soon.
Mirage shields are useful for all shooters, not just hard-core competitors. A mirage shield helps you see your target better, without distortion caused by heat waves coming off your barrel. This isn’t rocket science — it’s a simple, inexpensive way to see better and shoot more accurately. We’ve advocated that varmint shooters give mirage bands a try on those hot summer groundhog and prairie dog expeditions. And we observed that practically every F-Class shooter at the recent Berger SW Nationals was using a mirage shield of some kind.
Make Your Own Mirage Shiels from Venetian Blind
Criterion Barrels shows how you can make your own mirage shield from an ordinary Venetion blind.
A mirage shield is an extremely cost-effective way to eliminate a commonly-encountered problem. Making your own mirage shield is easy. Using old venetian blind strips and common household materials and tools, you can construct your own mirage shield for under one dollar. READ FULL Article
Materials Required:
1. Vertical PVC Venetian blind panel
2. Three 1”x1” pieces adhesive-backed Velcro
3. Ruler or tape measure
4. Scissors or box cutter
5. Pencil or marker
Make Your Own Mirage Shield from X-Ray Film
Forum member Fabian from Germany, whose Sako 6BR rifle was featured as a Gun of the Week, has devised a clever and inexpensive mirage band option. Fabian is a radiologist by trade. He notes that many X-ray machines require a daily test film for calibration. These are normally just discarded in the trash, so you can get them for free.
Fabian explains: “I’m a radiologist, so I handle medical x-ray films every day. Modern X-ray machines use laser-based printers and they need to print a test-film every day. One x-ray film is about 43×35 cm (16.9″ x 13.7″). Made from polyester, the films are very stable and only 0.007″ inches thick. They are light-weight, semi-transparent, and very stable. Using normal scissors, you can easily cut four mirage shields from a single sheet of film. Then glue on some velcro to attach to your barrel. Try it, you will not be disappointed.”
High-Tech Carbon Fiber Mirage Shield
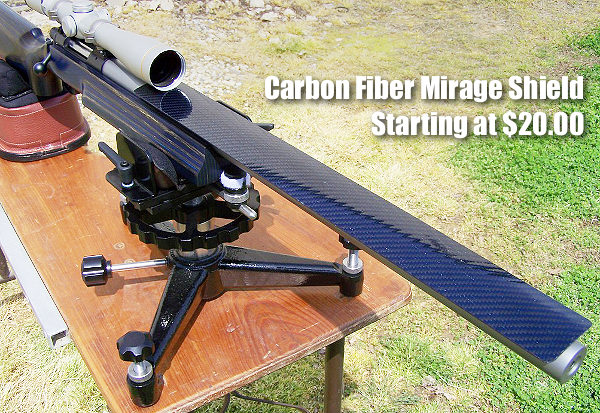
If you’re not into making your own mirage shield, aka “mirage band” or “mirage shade”, you can also purchase a cool carbon fiber mirage shield from Accurateshooter Forum member Mark Nagel. These custom Carbon-Fiber Mirage Shields start at $20.00. GET More INFO HERE.
In the wintertime, it’s common to encounter problems with static electricity when throwing your powder charges. The static can cause powder kernels to cling to the surface of reloading components, and can cause powder clumping. Clumped or sticky powder may make your measure bind or grab in the middle of the cycle, which can throw off your charge weight. Here are a couple simple ways you can minimize the effects of static electricity and improve the consistency of your powder measuring.
Ground Your Powder Measure — If you’re throwing powder charges in the fall or winter and have problems with bridging or sticking powder, use a ground wire. Bullet-smith Victor Johnson (Johnson Precision Bullets) tells us: “I have a 25-foot piece of real small wire with alligator clips on each end. It’s that long so I can run it down the hall to a water pipe. Use the wire tie from a bread bag to hold it in a small roll to put in the range box. When using it at the range use a 6″ nail from the co-op or Lowe’s / Home Depot and just push it into the ground.”
Use Bounce Dryer Sheets — A quick pass with the thin sheets used in dryers will eliminate “static cling” on your plastic reloading parts like powder throwers, powder funnels, and reloading press guides. Thanks to Doc76251 for this tip.
Reduce Electronic Scales’ Drift with Anti-Static Spray
Reloading Tip by GS Arizona from Riflemans Journal
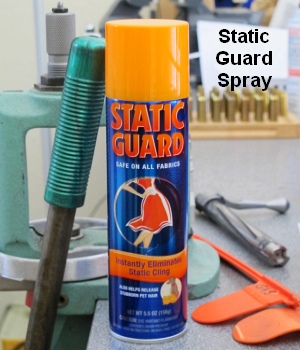
Apparently reducing static charges on and around electronic scales can reduce their propensity to drift, lessening the problem of “wandering zero”. Just how and why static charges interfere with scale performance is unclear, but many shooters have noticed that static electricity can cause electronic scales to behave strangely. So how do you reduce static charges around your digital balance? GS Arizona has found a very simple solution — an anti-static aerosol spray — that, by all indications, actually works. When this “spray-can solution” was suggested by a fellow shooter, GS was skeptical. However, he tried the stuff and he says that it really does help the scale maintain zero over time, with much less observed drift.
GS explains that the use of “Static Guard” spray helped mitigate the problem of a drifting zero on his Ohaus electronic scale: “My electronic scale… suffers from drifting zero (as they all seem to). I’ve read dozens of forum posts about drift and how to minimize its occurrence, so I know this problem isn’t limited to my scale or my workshop. Sometime last year, John Lowther mentioned the use of anti-static spray as a solution to the drift problem. John stated that the spray had virtually eliminated drift for him.”
GS found that the Static Guard actually worked: “The spray works great, just as John said it would. I spray all surfaces that I touch with my hands and arms as well as the pan (top and bottom), the metal tray on which the pan rests and the table under the scale. In six months or so of using the spray I’ve re-applied it about two or three times; it certainly isn’t something that you need to do each time you sit down to load. Before using the spray, it was not uncommon for me to re-zero the scale 10 times in the course of loading 72 rounds; now it might need it once during a session.”
Here’s a simple solution for lumpy front sandbags. Cut a small block the width of your fore-end and place that in the front bag between matches. You can tap it down firmly with a rubber mallet. This will keep the front bag nice and square, without bunching up in the center. That will help your rifle track straight and true. Rick Beginski uses wood (see photo), while our friend John Southwick uses a small block of metal. The metal block might work a little better, but the wood version is easier to make with simple tools. John Loh of JJ Industries offers a slick Delrin block with a built-in bubble level. Loh’s block helps ensure that the actual top surface of your front bag is level, as distinct from the front rest assembly.




 In our
  Neck-Wall Thickness is Important Too
 This time of year, many of our readers are putting their guns away in a safe for the winter. It’s easy to just tuck the guns away and forget about them. But there’s something you should do before you shut the safe door. If you have a safe with an electronic keypad, you should replace the battery every year as a precautionary measure. Trust us, you don’t want to come back in a few months and find that the keypad memory is kaput, and you’re locked out. That can lead to frustration and an expensive locksmith visit.



 Apparently reducing static charges on and around electronic scales can reduce their propensity to drift, lessening the problem of “wandering zero”. Just how and why static charges interfere with scale performance is unclear, but many shooters have noticed that static electricity can cause electronic scales to behave strangely. So how do you reduce static charges around your digital balance? GS Arizona has found a very simple solution — an anti-static aerosol spray — that, by all indications, actually works. When this “spray-can solution” was suggested by a fellow shooter, GS was skeptical. However, he tried the stuff and he says that it really does help the scale maintain zero over time, with much less observed drift.

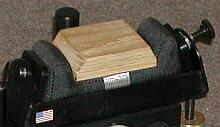 Here’s a simple solution for lumpy front sandbags. Cut a small block the width of your fore-end and place that in the front bag between matches. You can tap it down firmly with a rubber mallet. This will keep the front bag nice and square, without bunching up in the center. That will help your rifle track straight and true. Rick Beginski uses wood (see photo), while our friend John Southwick uses a small block of metal. The metal block might work a little better, but the wood version is easier to make with simple tools. John Loh of


