Precision rifle shooters don’t have to hit a big-league fastball, or launch a top-fuel dragster in the blink of an eye. Nonetheless, reaction times are important in our sport — both for competitive shooters and hunters. Want to catch that prairie dog before he slips down his hole? You’ll need to be quick. Want to win at short-range benchrest? Then you’ll need to watch your windflags and respond quickly to a change. Miss a major wind-shift and you could ruin your whole weekend.
Here’s a fun test of reaction times from HumanBenchmark.com. The way it works is that, after clicking “Start”, you wait until the background color changes from red to green. The instant you see green, immediately click your mouse. The average (median) reaction time is 215 milliseconds. Hint: If you keep your finger “preloaded” in contact with your mouse button you can shave some milliseconds — but don’t “jump the gun”.
Tips for Faster Times
Here are three tips to speed up your reaction times:
1) Respond to the color change (by itself), rather than wait to read the word “CLICK!” after the box shifts to green.
2) Try focusing at the corner of the box, rather than the center. This may help you react “without thinking”.
3) Have your index finger “poised and ready” over the left button–you can shave milliseconds by very slightly depressing the button before you actually click.
In order to promote safe and secure firearms storage, the National Shooting Sportz Foundation (NSSF) has launched its S.A.F.E. Summer Campaign. S.A.F.E. stands for:
Secure your firearms when not in use.
Aware of those around you who should not have unauthorized access to guns.
Focus on your responsibility as a firearm owner.
Educate yourself and others about safe firearm handling and storage.
NSSF has pledged $1 million to provide firearms safety kits (with a gun lock) to gun owners nationwide. Several lock-distribution events will be announced in the coming weeks. Safety information will be provided through social media and the Project ChildSafe website. NSSF reminds us that firearms owners have many ways to safely store their firearms when not in use. Here are some of your options:
Our IT guy, Jay (aka JayChris in the Forum), was having some issues with his .260 AI. A load with known accuracy had suddenly and mysteriously stopped shooting well. Jay couldn’t figure out what was going wrong. Then he remembered he had cleaned his brass using a powerful ultrasonic machine.
He inspected his brass carefully and saw that the ultrasonically-cleaned necks were so “squeaky clean” that he was actually scratching the jackets on his bullets when seating them. As well, Jay noticed that it took more force to seat the bullets and the seating force became less uniform case to case. Jay solved the problem by applying NECO Moly dry-lube inside the necks of his brass before seating the bullets.
The Perils of Ultrasonic Brass Cleaning by JayChris
I rotate my brass so that I can keep track of each firing, so I keep a “clean/ready to load” bin and a “fired” bin. I have 400 pieces of .260 AI brass. So, all of it was on its first firing (after doing a Cream of Wheat fire-forming) until I hit the 400-round mark. To my surprise, things went south at the 500-round mark. The first time I noticed it (according to my range log) was at a match last year, when I dropped several points and had some vertical stringing issues. After that match, I had 400 rounds through the barrel and all of my brass had a single firing on it. So, it was time to clean.
I have used an ultrasonic cleaner for a while now. I recently got a more powerful Ultrasonic cleaner, although I don’t know if that makes a difference. My brass comes out dry and squeaky. Emphasis on the “squeaky”.
I found that my new US machine may have been getting the necks TOO clean. After ultrasonically cleaning my brass, I had noticed that it required a little more force to seat the bullets, but I didn’t really think too much about it. But then, after going over my ordeal with a shooting buddy and going over my process in minutiae, we had an “AH HA” moment when it came to cleaning (he uses good ol’ vibratory cleaning).
So, I used some moly dry-lube to pre-lube the case necks and took some rounds out to test at 200 yards. I used my last known good load and sure enough, the vertical flyers disappeared! I shot two, 10-rounds groups with .335 and .353 MOA vertical dispersion, which is consistent with the results I was originally getting.
Other folks have suggested necks may get “too clean” after ultrasonic cleaning. It was pretty sobering to actually witness, first hand, what can happen when brass is “too clean”. I had read some discussions of issues with neck friction/bullet seating after ultrasonic cleaning, but, frankly, I dismissed the idea. Now I understand. The “too clean” effect doesn’t seem to affect my Dasher at all (perhaps because Dasher necks are very short), but on the bigger .260 AI, it definitely does.
Close-Up Photos of Case-Necks
Here are photos Jay took with a microscope. You can see the difference between tumbled brass and ultrasonically-cleaned brass. Jay says: “Here, in sequence, are the Ultrasound-squeaky-clean case neck, a case neck after treatment with NECO moly dry-lube (you can see the particles that will help coat the neck during seating), and, finally, the neck from a case cleaned with corncob media in a vibratory tumbler. You can clearly see how much smoother the inside of the tumbled neck is. Yes, it’s dirty, but it’s also very, very smooth.
Close-Up of Scratched Bullet
Here is a close-up of a bullet that was seated in an ultrasonically-cleaned (“squeaky clean”) neck, with no lubrication. You can clearly see the damage done to the jacket — in fact, in a couple spots you can see the lead core through the scratches! Jay also observed that quite a bit more seating force was required to seat the bullet in a “squeaky clean” neck.
NOTE: The bullet jacket is naked — NOT coated in any way. It looks a little dark because of the shadow from the microscope lens, and the high contrast.
Hunters and tactical shooters need scopes with good low-light performance. For a scope to perform well at dawn and dusk, it needs good light transmission, plus a reasonably large exit pupil to make maximum use of your eye’s light processing abilty.* And generally speaking, the bigger the front objective, the better the low-light performance, other factors being equal. Given these basic principles, how can we quickly evaluate the low-light performance of different makes and models of scopes?
Here’s the answer: ScopeCalc.com offers a FREE web-based Low-Light Performance Calculator that lets you compare the light gain, perceived brightness, and overall low-light performance of various optics. Using this scope comparison tool is pretty easy — just input the magnification, objective diameter, exit pupil size, and light transmission ratio. If the scope’s manufacturer doesn’t publish an exit pupil size, then divide the objective diameter in millimeters by the magnification level. For example a 20-power scope with a 40mm objective should have a 2mm exit pupil. For most premium scopes, light transmission rates are typically 90% or better (averaged across the visible spectrum). However, not many manufacturers publish this data, so you may have to dig a little.
ScopeCalc.com’s calculator can be used for a single scope, a pair of scopes, or multiple scopes. Once you’ve typed in the needed data, click “Calculate” and the program will produce comparison charts showing Light Gain, Perceived Brightness, and Low-Light Performance. In the example below, we compared a “generic” 5-18×50 Tactical scope with a “generic” 8-32 Benchrest scope.
Though the program is easy to use, and quickly generates comparative data, assessing scope brightness, as perceived by the human eye, is not a simple matter. You’ll want to read the annotations that appear below the generated charts. For example, ScopeCalc’s creators explain that: “Perceived brightness is calculated as the cube root of the light gain, which is the basis for modern computer color space brightness scaling.” In addition, the way ScopeCalc measures Low-Light Performance is pretty sophisticated: “Low Light Performance [is calculated] as the average of light gain and resolution gain through magnification, as a measure of target image acuity gain in low light similar to Twilight Performance specified by scope manufacturers. Low Light Performance calculated here is much more useful than Twilight Performance, as Twilight performance is the average of the just the objective lens diameter times magnification, while Low Light Performance is the average of the actual Perceived Brightness times magnification, which also includes the exit pupil/eye pupil relation, light transmission, approximated diffraction, as well as the perception of relative light gain. Just as with Twilight Performance, this Low Light Performance calculation does not yet include lens resolution and contrast as factors. Therefore lower quality optics will yield relatively less gains at higher magnifications.” Got that?
*In low light, the human eye can typically dilate to 5mm – 7mm. The exact amount of dilation varies with the individual, and typically declines, with increasing age, from 7mm (at age 20) to a dark-adapted pupil of about 5.5mm by age 65. To take full advantage of a scope’s light-gathering capacity, the diameter of an eyepiece exit pupil should be no larger than the max diameter of your eye’s dark-adapted pupil, so that all of the light collected by the scope enters your eye, rather than falling on the iris. A large 8mm exit pupil may seem good, but it would be partly “wasted” on a shooter in his 60s.
Here’s a clever tip from Theodor Pettersen, one of our readers from Norway. Theodor writes: “I am an Norwegian shooter and reloader with 40 years of experience and practice. I would like to pass on a tip on how to improve the kinetic bullet puller (also known as an ‘impact puller’). Most of them use a 3-section collet which has three jaws held together with a rubber ring. It is very time-consuming when they pull apart, and have to be put together.
The three-piece collet can be exchanged with a shell holder that fits the cartridge from which you need to remove a bullet. The shell holder fits right into my RCBS bullet puller, and is much easier to use. I think it also will fit other makes of impact pullers.”
Thanks for the tip Theodore. We’ve tried it with a MidwayUSA-brand impact bullet puller and it works. We agree that the collets can be awkward to use, as the jaws can flip over when you’re installing the rubber retaining ring. Still, this editor normally prefers to use the collet, because it seems to be faster than a shellholder — so long as the rubber ring stays in place. The shellholder method is a good alternative though — if you’ve lost your collets or don’t have one that fits your brass.
Quick TIP: For ballistic tip bullets or bullets with tightly-pointed meplats, try putting a small wad of paper (or closed-cell foam) in the bottom of the impact puller chamber. This will cushion the bullet tip, preventing damage when the bullet drops out of the case.
Kinetic Bullet Puller in Operation
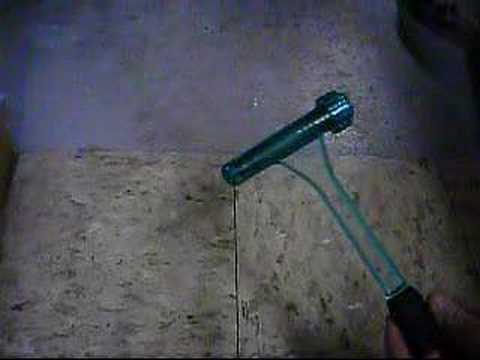
Never used a kinetic bullet puller before? Here’s a video that shows you the proper technique. The best surface for the impact is something like a linoleum floor — very firm but not so hard that the plastic head cracks on impact. Note: In this video demo, there is no powder in the cartridge. If you are pulling bullets, powder will come out and you’ll want to have a pan to pour that into, as you recover the bullet.
Sometimes you’ll get a barrel that doesn’t stabilize bullets the way you’d anticipate, based on the stated (or presumed) twist rate. A barrel might have 1:10″ stamped on the side but it is, in truth, a 1:10.5″ twist or even a 1:9.5″. Cut-rifled barrels, such as Kriegers and Bartleins, normally hold very true to the specified twist rate. With buttoned barrels, due to the nature of the rifling process, there’s a greater chance of a small variation in twist rate. And yes, factory barrels can be slightly out of spec as well.
Before you purchase a bunch of bullets and set off to develop loads it’s wise to determine the true twist rate of your new barrel. Sinclair International, in its Reloading Press Blog provides a simple procedure for determining the actual twist rate of your barrel. Read on to learn how….
How Twist Rate Affects Bullet Stability
Most of you know that the twist of the rifling in the barrel is what puts spin on the bullet. As a bullet is pushed down the barrel and compressed into the rifling, the bullet follows the path or twist of the rifling. The combination of velocity and bullet spin is what stabilizes the bullet. Finding the twist rate for your barrel will help you in selecting appropriate weight bullets for your firearm. Remember, the general rule is that the faster the twist rate for a given caliber, the longer the bullet (of that caliber) you will be able to stabilize. (Generally speaking, a longer bullet will also be a heavier bullet, but the bullet geometry dictates the needed twist rather than the weight per se.)
Determining Barrel Twist Rate Empirically
Twist rate is defined as the distance in inches of barrel that the rifling takes to make one complete revolution. An example would be a 1:10″ twist rate. A 1:10″ barrel has rifling that makes one complete revolution in 10 inches of barrel length. Rifle manufacturers usually publish twist rates for their standard rifle offerings and custom barrels are always ordered by caliber, contour, and twist rate. If you are having a custom barrel chambered you can ask the gunsmith to mark the barrel with the twist rate.
Sinclair’s Simple Twist Rate Measurement Method
If are unsure of the twist rate of the barrel, you can measure it yourself in a couple of minutes. You need a good cleaning rod with a rotating handle and a jag with a fairly tight fitting patch. Utilize a rod guide if you are accessing the barrel through the breech or a muzzle guide if you are going to come in from the muzzle end. Make sure the rod rotates freely in the handle under load. Start the patch into the barrel for a few inches and then stop. Put a piece of tape at the back of the rod by the handle (like a flag) or mark the rod in some way. Measure how much of the rod is still protruding from the rod guide. You can either measure from the rod guide or muzzle guide back to the flag or to a spot on the handle. Next, continue to push the rod in until the mark or tape flag has made one complete revolution. Re-measure the amount of rod that is left sticking out of the barrel. Use the same reference marks as you did on the first measurement. Next, subtract this measurement from the first measurement. This number is the twist rate. For example, if the rod has 24 inches remaining at the start and 16 inches remain after making one revolution, you have 8 inches of travel, thus a 1:8 twist barrel.
This rifling illustration was created by Danish graphic artist Erik Dahlberg. It is published here courtesy FireArmsID.com, an excellent website for forensic firearms examiners.
Here’s a Ballistics Trivia challenge, put together by Bryan Litz of Applied Ballistics LLC. Bryan is Berger Bullets’ Ballistician and the author of Applied Ballistics for Long Range Shooting. Bryan posed the following Ballistics Question about Kinetic Energy and Aerodynamic Drag:
Consider a .30 caliber 175 grain bullet with a G7 BC of .259 (Berger 175 OTM) fired level at a muzzle velocity of 2650 fps in standard (ICAO) sea level conditions.
As this bullet flies downrange, it loses velocity due to aerodynamic drag. As the velocity of the bullet decays, so does its Kinetic Energy (in ft-lbs). The Kinetic Energy lost by the bullet in a given amount of time can be defined in terms of power.
Another way to think about this is that the aerodynamic drag on the bullet can be expressed in terms of power, calculated from the projectile’s change in Kinetic Energy over flight time.
Question: How much power (expressed in Watts) is applied to the bullet by aerodynamic drag on average over:
A) 500 yards?
B) 1000 yards?
C) 1500 yards?
Guesses are welcome, but this one can be calculated exactly.
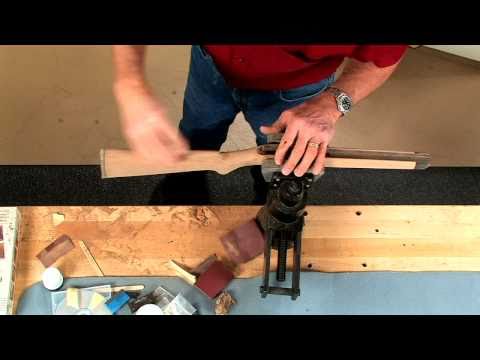
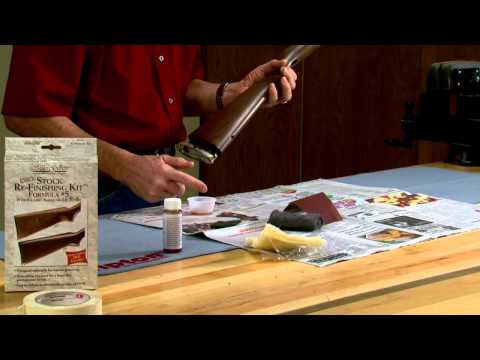
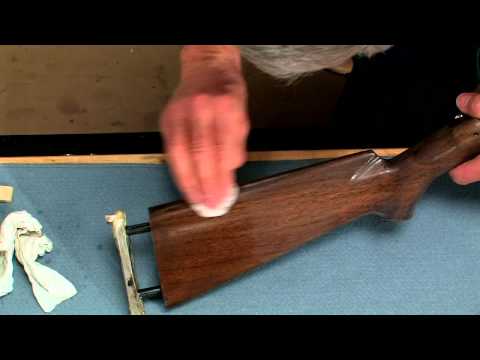
In a series of YouTube videos, Larry Potterfield of MidwayUSA shows how to prepare, finish, and polish a wood gunstock. The first video covers sanding, sealing, and filling. The second video shows how to apply a multi-coat finish by hand, with light sanding between coats. In the third video, Larry applies a final polish to his project stock. The principles illustrated in these videos can be applied to most types of stocks. However, keep in mind that Larry is working with a hardwood stock.
By contrast, with a typical Rutland laminated stock, the finishing process is somewhat different and (usually) more time consuming. You’ll probably have to do more aggressive sanding, and the sealing process can be more time-consuming because laminates typically have very porous surfaces that soak up a lot of sealant. You may have to do multiple sealant passes with aggressive sanding in-between. Alternatively, you can use multiple coats of high-solids clear coat to fill the pores.
How to Prepare a Riflestock for Finishing
How to Apply a Multi-Coat Finish
How to Polish the Finish on a Riflestock
Clear-Coating Your Stock
While you can put an oil-type finish on a Rutland laminate, we think these often look best finished with an automotive clear coat. Rub-on finishes can cause small changes in stock coloration. If you want to preserve the colors in your laminated stock, a quality, spray-on clear-coat is probably the best way to go. CLICK HERE for expert tips on how to prep and clear-coat a laminated stock.
If you own an RCBS ChargeMaster 1500 electronic powder scale/dispenser, or are thinking about purchasing one, here are a few tips that can cut your loading times and eliminate some petty annoyances.
Mute That Annoying Beep
Some ChargeMaster users complain about the loud beep at the end of each cycle. There’s a simple way to silence the beep — and you don’t have to cut any wires or permanently disable the speaker. To mute the beep, simply hold down the Zero button until “beep off” displays. Repeat this procedure to restore the beep function.
Activating the Auto-Dispense Mode
You can set the ChargeMaster to automatically dispense your pre-programmed charge as soon as you put the pan back on the scale. Simply press and hold the “Enter” button. The code “Auto” should then appear on the display. At this point, push “Disp” to dispense the first charge. When you replace the pan, the unit will automatically dispense the same charge. For some people this is an added convenience. You can always go back to the default manual dispense method by changing the dispense mode using the “Enter” button again.
Use a McDonald’s Straw to Reduce Over-Throws
Jaco Brink provided another useful tip to avoid “over-throws” (excess charge weight): “The RCBS employee advised me to take a McDonnell’s straw (because it is thicker than a normal straw), cut off about a half inch piece and put it into the tube where the powder exits. This caused the last part of an extruded powder to cluster less, and reduced the amount of overthrows dramatically.”
Instructional Video
The video below shows how to set up and calibrate a Chargemaster 1500. Be sure to level the unit carefully, both left to right and front to back. Starting at the 1:44 mark in the video you can see the unit dispense a 50-grain charge in 30 seconds. The slow, final trickle stage takes about half of the total time.
How to Shorten Dispensing Times
The last tip is for advanced users only. You can alter the programming settings to speed up powder dispensing dramatically. One user reported that, by re-programming his machine, his cut his dispensing time for a 30-grain load from 22 to 13 seconds “with no overthrows”. WARNING: once you change the parameters, there is no “restore” command to set everything back to the defaults. So proceed carefully. The speed enhancement procedure is described on the pages linked below:
Olin’s Winchester Division has issued a Recall Notice for one (1) lot of its 5.56x45mm M855 62 grain PENE centerfire rifle ammunition. This notice applies only to Symbol Number ZGQ3308 with Lot Number WCC10M106-004. Other Symbol Numbers or Lot Numbers are not subject to this recall.
Symbol Number: ZGQ3308
Lot Number: WCC10M106-004
Winchester states: “Through extensive evaluation Winchester has determined the above lot of 5.56mm M855 ammunition may contain incorrect propellant. Incorrect propellant in this ammunition may cause firearm damage, rendering the firearm inoperable, and subject the shooter or bystanders to a risk of serious personal injury when fired.”
The ammunition Symbol Number and Lot Number are ink stamped on the outside of the 900-round shipping container, and on the outside of the 30-round carton as shown at right:
If you have Winchester Ammo with Symbol Number ZGQ3308 and Lot Number WCC10M106-004 immediately discontinue use and contact Winchester toll-free at 866-423-5224 for free UPS pick-up of the recalled ammunition. Upon receipt of your recalled ammunition, Winchester will ship replacement ammunition directly to you.
If you have any questions concerning this 5.56mm M855 ammunition recall please call toll-free 866-423-5224, write to Winchester (600 Powder Mill Road, East Alton, IL 62024 Attn: 5.56mm M855 Recall), or visit www.winchester.com.
Notice tip by EdLongrange. We welcome reader submissions.


 Our IT guy, Jay (aka JayChris in the Forum), was having some issues with his .260 AI. A load with known accuracy had suddenly and mysteriously stopped shooting well. Jay couldn’t figure out what was going wrong. Then he remembered he had cleaned his brass using a powerful ultrasonic machine.
 I have used an ultrasonic cleaner for a while now. I recently got a more powerful Ultrasonic cleaner, although I don’t know if that makes a difference. My brass comes out dry and squeaky. Emphasis on the “squeaky”.


 Hunters and tactical shooters need scopes with good low-light performance. For a scope to perform well at dawn and dusk, it needs good light transmission, plus a reasonably large exit pupil to make maximum use of your eye’s light processing abilty.* And generally speaking, the bigger the front objective, the better the low-light performance, other factors being equal. Given these basic principles, how can we quickly evaluate the low-light performance of different makes and models of scopes?

 *In low light, the human eye can typically dilate to 5mm – 7mm. The exact amount of dilation varies with the individual, and typically declines, with increasing age, from 7mm (at age 20) to a dark-adapted pupil of about 5.5mm by age 65. To take full advantage of a scope’s light-gathering capacity, the diameter of an eyepiece exit pupil should be no larger than the max diameter of your eye’s dark-adapted pupil, so that all of the light collected by the scope enters your eye, rather than falling on the iris. A large 8mm exit pupil may seem good, but it would be partly “wasted” on a shooter in his 60s.

 Sometimes you’ll get a barrel that doesn’t stabilize bullets the way you’d anticipate, based on the stated (or presumed) twist rate. A barrel might have 1:10″ stamped on the side but it is, in truth, a 1:10.5″ twist or even a 1:9.5″. Cut-rifled barrels, such as Kriegers and Bartleins, normally hold very true to the specified twist rate. With buttoned barrels, due to the nature of the rifling process, there’s a greater chance of a small variation in twist rate. And yes, factory barrels can be slightly out of spec as well.
 Consider a .30 caliber 175 grain bullet with a G7 BC of .259 (Berger 175 OTM) fired level at a muzzle velocity of 2650 fps in standard (ICAO) sea level conditions.

 If you own an RCBS ChargeMaster 1500 electronic powder scale/dispenser, or are thinking about purchasing one, here are a few tips that can cut your loading times and eliminate some petty annoyances.
 Winchester states: “Through extensive evaluation Winchester has determined the above lot of 5.56mm M855 ammunition may contain incorrect propellant. Incorrect propellant in this ammunition may cause firearm damage, rendering the firearm inoperable, and subject the shooter or bystanders to a risk of serious personal injury when fired.”


