|
|
October 8th, 2012
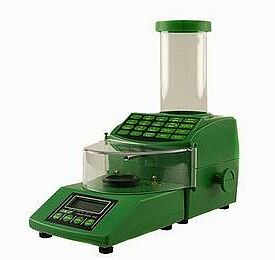 The RCBS ChargeMaster 1500 electronic powder scale and dispenser is the most popular product of its kind on the market. In our original Electronic Powder Dispenser Comparison Test, the ChargeMaster normally dispensed most kinds of powder faster than competitive units from Lyman and PACT. However, after the initial release of the ChargeMaster 1500, RCBS “tweaked” the software a bit to achieve more consistent charge-throws. This slowed down the process somewhat. Some owners have wanted to speed up their ChargeMaster. This IS possible with a relatively simple reprogramming. Most of the internal parameters of the Chargemaster can be modified, under guidance from the tech staff at RCBS. The RCBS ChargeMaster 1500 electronic powder scale and dispenser is the most popular product of its kind on the market. In our original Electronic Powder Dispenser Comparison Test, the ChargeMaster normally dispensed most kinds of powder faster than competitive units from Lyman and PACT. However, after the initial release of the ChargeMaster 1500, RCBS “tweaked” the software a bit to achieve more consistent charge-throws. This slowed down the process somewhat. Some owners have wanted to speed up their ChargeMaster. This IS possible with a relatively simple reprogramming. Most of the internal parameters of the Chargemaster can be modified, under guidance from the tech staff at RCBS.
Gunsmith and Forum member NAT Lambeth reports: “I thought My RCBS ChargeMaster 1500 Combo was fast enough. But I still called RCBS and asked for the programing changes to see if I could speed it up. It was a lot easier than I thought. My 1500 Combo was taking from 15-30 seconds to dispense the powder to the tenth of a grain. I reprogrammed the numbers and now it takes between 7 and 15 seconds to dispense to a tenth. This effectively doubled my loading speed. I only changed the HSB_A1, HSB_B1, and BSP_C1 settings.”
Key ChargeMaster Parameters with Default Settings
HSB_A1 (15.68) Grains under target weight to go from full to high speed
HSB_B1 (3.42) Grains under target weight to go from high to slow speed
BSP_C1 (1.08) Grains under target weight to go from slow to final trickle speed
Nat cautions that you should talk to a RCBS tech before attempting to re-program your ChargeMaster: “You will benefit from talking to the RCBS tech. I have now gone back and played with the numbers a couple of times. (The numbers given to me by the tech at RCBS were still a little conservative.) I think each machine may have its own likes and dislikes. If you get too aggresive with lowering your numbers it will over-throw your intended load.”
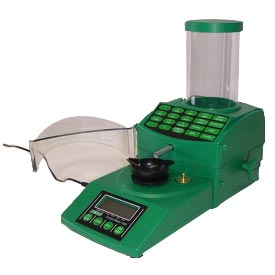 Source for ALL the Parameters Source for ALL the Parameters
There is an extensive discussion of RCBS ChargeMaster programming on the South Africa Hunting Rifle Shooting Assn. (SAJSV) Forum. In this SAJSV Forum ARTICLE, Jaco Brink lists virtually all the programming codes. Importantly, Jaco also provides the default values for various parameters. This is very important, because the ChargeMaster does not have a “return to default” option. Once you change any value, if you want to return to the original value you must enter it manually.
Jaco cautions: “I have to advise you to only make changes to your scale if you are confident to do so, and remember that there is not a ‘return to default’ setting in the scale. If all else fails return your scale to the default settings [I have listed].”
CLICK HERE for list of RCBS ChargeMaster Default Programming Values
Use a McDonald’s Straw to Reduce “Over-Throws”
Jaco Brink provided another useful tip to avoid “over-throws” (excess charge weight): “The RCBS employee advised me to take a McDonnell’s straw (because it is thicker than a normal straw), cut off about a half inch piece and put it into the tube where the powder exits. This caused the last part of an extruded powder to clutter less, and reduced the amount of overthrows dramatically.”
CLICK HERE for more ChargeMaster 1500 optimization TIPS.
October 4th, 2012
Choosing the right-diameter bullet can have a big effect on accuracy in match rifles. “Wait a minute”, you might say, “doesn’t one simply choose a 6mm bullet for a 6mm barrel and a 7mm bullet for a 7mm barrel, what’s the big deal?” Well… it’s not that simple. Not all bullets of the same nominal caliber actually have the same true diameter. We’ve seen different-brand 6mm bullets vary by as much as a full thousandth (.001″) in diameter. We have seen undeniable evidence that a poor “fit” of bullet diameter to bore dimensions can result in a poor-shooting gun, even one with a high-grade barrel.
Conversely, if you find the bullet diameter you barrel likes, that may instantly improve your accuracy. The accuracy gain may be more significant than making changes to the bullet seating depth or even powder charge. The importance of bullet diameter is compounded by the fact that 6mm match barrels are available with both .236″ and .237″ land diameters. Some barrels prefer “fat” bullets while other barrels prefer “skinny” bullets.
Last year, Jason Baney measured 12 different sets of 6mm Match Bullets, including a couple different lots of the same bullet design. Interestingly, Jason did measure the “old” Berger 105 VLD, the new-generation Berger 105 VLD (first lot from the new die), and the “new, improved” Berger 105 VLD from the new die, after it was polished. Ten (10) Bullets were measured per type. Each bullet was measured three times (3X) around the largest circumference, normally where a pressure ring would be located (some bullets have a pronounced pressure ring, others do not). NOTE: We provide the numbers from Jason’s tests, but remember that bullets from different production runs may have slightly different dimensions. You should augment our findings with your own measurements from later-produced bullets.

Download this CHART as an MS Word Document.
The first two columns of the chart show the smallest and largest bullet diameters measured for each 10-bullet sample. The third column shows the extreme spread over each 10-bullet set. Note, these numbers are NOT averages, but represent the “low” and “high” diameters for each set. (FYI: Jason noted that while the Lapua Scenars were very consistent, an earlier 2005 “JEVDAK” lot had smaller meplats than 2007 and 2008 lots.) A Mitutoyo Micrometer was used, zero-checked for each bullet.
September 30th, 2012
 It seems like every week, readers send us questions about gun safes. They want to know how much they should spend and who has the best deals. They also have numerous hardware questions, such as: “What’s better — digital keypad vs. rotary (spin dial) lock?”, and “Should I look for a safe with internal or external hinges?”. We answer many of these questions in our comprehensive Gun Safe Buyers Guide, which is definitely worth reading. It seems like every week, readers send us questions about gun safes. They want to know how much they should spend and who has the best deals. They also have numerous hardware questions, such as: “What’s better — digital keypad vs. rotary (spin dial) lock?”, and “Should I look for a safe with internal or external hinges?”. We answer many of these questions in our comprehensive Gun Safe Buyers Guide, which is definitely worth reading.
After reading our Gun Safe Buyers Guide, if you still have more questions, tune in to Tom Gresham’s Gun Talk Radio Show this Sunday, September 30th. On this Sunday’s broadcast, Liberty Safe’s Jamey Skousen talks about the important features of gun safes and security vaults, and Skousen explains what to look for when shopping for a safe. As an added bonus, Liberty Safe is offering a special rebate in connection with this Gun Talk broadcast. To save money on your next safe, click the graphic at right to download the rebate form. Or, go to LibertySafe.com and click on the photo of Tom Gresham in the upper right hand corner. On a $1500.00 Liberty Safe you’ll get a $50.00 instant rebate plus a $50.00 mail-in rebate, for $100.00 total savings.
 In its 18th year of national syndication, Tom Gresham’s Gun Talk Radio airs live on Sundays from 2:00 pm to 5:00 pm Eastern. Gun Talk Radio runs on more than 135 stations, plus XM (Ch. 165) Satellite Radio. The Gun Talk Minute on XM also airs on XM 165, 166, 168 and Fox Sports every day. Gun Talk shows can be downloaded as FREE Podcasts via Gun Talk’s Podcast Archive. In its 18th year of national syndication, Tom Gresham’s Gun Talk Radio airs live on Sundays from 2:00 pm to 5:00 pm Eastern. Gun Talk Radio runs on more than 135 stations, plus XM (Ch. 165) Satellite Radio. The Gun Talk Minute on XM also airs on XM 165, 166, 168 and Fox Sports every day. Gun Talk shows can be downloaded as FREE Podcasts via Gun Talk’s Podcast Archive.
August 30th, 2012
Even if you don’t shoot competitively, you can benefit from having a mirage shield on your barrel. The shield helps prevent barrel heat from “cooking” the air in front of your scope, which can distort the view you see through the optic. Barrel heat creates a mirage effect that can blur the target image and actually shift your apparent aiming point up and down. Competitors know that a mirage shield helps them shoot smaller groups and better scores. Mirage shields can likewise benefit Varmint shooters on those hot summer groundhog and prairie dog expeditions.
Make a Mirage Shield from Discarded X-Ray Film
Forum member Fabian from Germany, whose Sako 6BR was featured as a Gun of the Week, has devised a clever and inexpensive mirage band option. Fabian is a radiologist by trade. He notes that many X-ray machines require a daily test film for calibration. These are normally just discarded in the trash, so you can get them for free.

Fabian explains: “I’m a radiologist, so I handle medical x-ray films every day. Modern X-ray machines use laser-based printers and they need to print a test-film every day. One x-ray film is about 43×35 cm (16.9″ x 13.7″). Made from polyester, the films are very stable and only 0.007″ inches thick. They are light-weight, semi-transparent, and very stable. Using normal scissors, you can easily cut four mirage shields from a single sheet of film. Then glue on some velcro to attach to your barrel. Try it, you will not be disappointed.”

More Do-It-Yourself Ideas
Other forum members have made mirage shields out of common, inexpensive materials such as old venetian blinds, thin plastic edging strips, and even cardboard reinforced with strapping tape. There’s no “magic material”. However many shooters have found that wider shields (extending well past the barrel sides) work better than narrow shields, particularly in hot weather.
Mirage Shields with Printed Designs
If you prefer to purchase a mirage shield, Shotmaster 10X offers a wide variety of shields starting at just $5.00 for a plain white 18″ shield. Patterned shields (including camo designs) are priced by length: $8.50 (18″), $9.50 (20″), $11.00 (24″). All Shotmaster shields come with two (2) velcro patches with self-stick adhesive.

July 27th, 2012
 How long will a barrel last before the accuracy “goes south”? There are so many variables involved (powder type, bore diameter, bullet coatings etc.) that it’s hard to predict. You might say “Well, my buddy has a .243 and he got 1500 rounds before the throat was shot out” — those kind of comparisons can be useful, but they’re not very scientific, and they won’t help much if you’ve got a gun in a new chambering (such as the 6.5×47) for which long-term test results are lacking. How long will a barrel last before the accuracy “goes south”? There are so many variables involved (powder type, bore diameter, bullet coatings etc.) that it’s hard to predict. You might say “Well, my buddy has a .243 and he got 1500 rounds before the throat was shot out” — those kind of comparisons can be useful, but they’re not very scientific, and they won’t help much if you’ve got a gun in a new chambering (such as the 6.5×47) for which long-term test results are lacking.
Is there a more reliable way to predict barrel life — one that will work for a broad range of calibers? Well, Forum member MikeCr has developed an Excel spreadsheet that accounts for a number of variables, and gives a pretty good estimate of useful barrel life, whether you’re shooting a .223 Rem or a 338 Lapua Magnum. Mike’s program predicts barrel life using five variables: 1) Bullet Diameter; 2) Powder Charge weight; 3) Powder Heat Potential (KJ/kg); 4) Pressure (in psi); and 5) Bullet Coating (yes/no). Mike provides a table with Heat Potential ratings for most popular powder types. The user needs to know the pressure of his load. This can be estimated with QuickLOAD.
You can download the lastest version of Mike’s spreadsheet below. You’ll need Excel or an Excel viewer to open the file.
Click to Download Spreadsheet: Barrel Life Spreadsheet (Latest Version)
Shown below is Mike’s Spreadsheet, with variables for a 6BR shooting 105gr “naked” bullets with 30.3 grains of Hodgdon Varget powder. The formula predicts 2401 rounds of barrel life. That corresponds pretty well to what we’d expect for a 6BR — about 2500 rounds.
 
Mike observes: “There has been alot of discussion lately related to cartridge design and resulting barrel life. This is a really important factor to consider amongst a myriad of choices. Barrel life is controversial, and subjective. There are no clear-cut standards for comparison. But a few years ago, I put together a spreadsheet based on Bart Bobbit’s rule of thumb. It worked pretty good, only occasionally failing some tests when validated against posted barrel lives.
According to Ken Howell, I had to account for pressure. And Henry Child’s powder temperature testing provided another piece needed. So, I’ve tweaked it here and there to pass more tests. From 223rem to 300 UltraMagnum. Another element added, but turned off is shot interval. I would need way more tests to lock in on this. But everyone knows, the faster you shoot, the worse the barrel life.
Anyway, another factor hard to define is ‘accurate’ barrel life. This cannot be quantified without standards. Barrels are replaced when expectations are no longer met. I feel that a [barrel] passes peak potential in a finite period due to throat erosion. But that don’t mean it’s toast, if it still shoots well enough. It’s just as likely that many of us never see that peak potential anyway. It’s a slippery thing. Point-blank BR competitors will toss a barrel when it leaves the 1s. I could get another 4000 rounds from it, and be content with its performance, I’m sure.”
NOTE: Mike says: “This spreadsheet may show a lower barrel life than you prefer. But it pretty well spotlights cartridges to stay away from if you plan much time at the range or in dog town.”
Editor’s Comment: We want to stress that Mike’s spreadsheet is a helpful tool, but it is not a definitive “take-it-to-the-bank” indicator of barrel life. Mike cautions that predicting barrel life involves so many different factors (including how hot the barrel is run), that the task is a bit like predicting tread life on car tires. Still, the spreadsheet is very helpful. It can certainly put shooters on notice that some chamberings (such as the 6-284) are likely to be a barrel burners. That can help you make a smart decision when choosing a chambering for your next rifle.
July 11th, 2012
Report by Birdog
Forum member John S. aka “Voldoc”, came over Sunday to check the elevation come-ups on his new March scope. At my home range, dubbed the ‘Dasher Dome’, we had either a gong or paper target at 100-yard intervals to 800 yards. Voldoc wanted to check his ballistic chart against real world conditions. Voldoc will use this test to verify his come-ups for a “quick-view” BDC tape that will be applied to his elevation turret. He was running his “go to”, tried and true “red mist load”, an 87gr Hornady V-Max. The rifle was a Nesika-action 6mm Dasher with 1:12″-twist HV-contour Krieger. Doc has doubles with this combination out to 700 yards and many kills past 1,000. [Editor’s Note: We featured Voldoc’s varmint rifles in our Tennessee Triple Threat story, a Gun of the Week article on this site. Notably, Voldoc made a 1,000-yard plus prarie dog kill with a 20BR shooting 55gr Bergers.]

My ‘Dasher Dome’ is a good place for testing. Dirt berms have just been completed at 100, 300, 600, 700, an 780 yards. Voldoc started at 100 and shot at 100-yard intervals recording his elevation at each interval. His ballistic chart was within a click or two at each distance. When he reached 780 yards, he repeated the test at each distance down to 300 yards. Dead on!

 Custom BDC Turret Tapes Custom BDC Turret Tapes
Doc already has ballistics tapes fitted to his Nightforce-equipped rigs. But Doc’s new Dasher has a March so he need to confirm the come-ups. The tapes, made by Forum member Dominic (aka “Xterminator”), show rotation clicks for various yardages. There are versions for both standard and “High-Speed” Nightforce turrets, as well as some other scope brands. For more info, send email to: media-banc [at] videotron.ca . Learn more about Dominic’s custom come-up tapes in this Forum Thread.
| Doc at the ‘Dome’
Confirmed results at 780 yards
Sub-Quarter MOA group on Steel Prairie Dog
The photo at right confirms that VolDoc has his zeroes confirmed at 780 yards. Look closely. That’s about a 1.5″ center-mass group on ‘Chico’ the prairie dog (lower right). Nice Shooting Doc! Chico’s buddy, ‘Chuckie’ the steel ground-hog, took many hits. Show in photo are three hits in the throat zone.
Good Friends, Good Rifles Make for the Best of Times
Birdog reports: “Overall, this was a great way to spent a Sunday. Temps reached 103° F, but Doc got to the ‘Dasher Dome’ at 5:30 a.m. and we beat the heat. After testing was completed, we walked two miles with temps in the 90s. What can I say — good friends, good BRs — this was the best of times! |
 |

Serious Rangefinders:
Very high-quality laser rangefinders permitted the shooters to confirm target distances with great precision. Birdog uses a Vectronix LRF while Voldoc uses a Leica GeoVid rangefinding binoculars.

June 17th, 2012
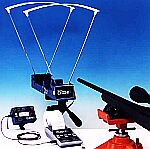 How to Avoid Shooting your Chrono: There is nothing more frustrating (or embarassing) than sending a live round into your expensive new Chronograph. When setting up a chrono, we always first remove the bolt and bore-sight to ensure that the path of the bullet is not too low. When bore-sighting visually, set up the rifle securely on the sandbags and look through the bore, breech to muzzle, lining up the barrel with your aim point on the target. Then (during an appropriate cease-fire), walk behind the chronograph. Looking straight back through the “V” formed by the sky-screens, you should be able to see light at the end of the barrel if the gun is positioned correctly. How to Avoid Shooting your Chrono: There is nothing more frustrating (or embarassing) than sending a live round into your expensive new Chronograph. When setting up a chrono, we always first remove the bolt and bore-sight to ensure that the path of the bullet is not too low. When bore-sighting visually, set up the rifle securely on the sandbags and look through the bore, breech to muzzle, lining up the barrel with your aim point on the target. Then (during an appropriate cease-fire), walk behind the chronograph. Looking straight back through the “V” formed by the sky-screens, you should be able to see light at the end of the barrel if the gun is positioned correctly.
Adjust the height, angle and horizontal position of the chronograph so the bullet will pass through the middle of the “V” below the sky-screens, no less than 5″ above the light sensors. We put tape 5″ up on the front sky-screen supports to make it easy to align the bore to the right height over the light sensors. Make sure the chrono housing is parallel to the path of the bullet. Don’t worry if the unit is not parallel to the ground surface. What you want is the bullet to pass over both front and rear sensors at the same height. Don’t try to set the chrono height in reference to the lens of your scope–as it sits 1″ to 2″ above your bore axis. To avoid muzzle blast interference, set your chronograph at least 10 feet from the end of the muzzle (or the distance recommended by the manufacturer).
IRON SIGHT Rifles: A common mistake, particularly with newbie AR15 shooters, is to use the iron sights when setting the height of the chronograph. All too often, people forget that AR sights are positioned roughly 2.4″ above the bore axis (at the top of the front sight blade). If you set your bullet pass-through point using your AR’s front sight, the bullet will actually be traveling 2.4″ lower as it goes through the chrono. That’s why we recommend bore-sighting and setting the bullet travel point about 5-8″ above the base of the sky-screen support shafts. (Or the vertical distance the chronograph maker otherwise recommends).

TARGET AIM POINT: When doing chrono work, we suggest you shoot at a single aiming point no more than 2″ in diameter (on your target paper). Use that aiming point when aligning your chrono with your rifle’s bore. If you use a 2″ bright orange dot, you should be able to see that through the bore at 100 yards. Using a single 2″ target reduces the chance of a screen hit as you shift points of aim. If you shoot at multiple target dots, place them in a vertical line, and bore sight on the lowest dot. Always set your chron height to set safe clearance for the LOWEST target dot, and then work upwards only.
June 3rd, 2012
Building your own portable shooting bench is a great winter do-it-yourself project. You can build a sturdy bench for well under $100 in materials. Compare that to some deluxe factory-built benches which may cost $450.00 or more.
A wide assortment of home-built shooting bench designs have been featured on the internet. Renovation Headquarters has put together a web page with plans for eleven (11) different shooting benches. Each bench is illustrated with a photo and link to FREE Plans and building instructions. You’ll find all-wood designs as well as benches that combine a wood top with a metal sub-frame or legs.
CLICK HERE for Shooting Bench FREE Plans Webpage
Among Renovation HQ’s eleven featured shooting benches, here are four designs we liked:
April 17th, 2012
Shaving bullet jackets is a problem reloaders encounter from time to time. It can be caused by excessive neck tension, burrs on the case mouth, or over-aggressive chamfering that leaves a ragged edge on the case mouth. Larry Medler discovered some rounds where the bullet jackets were getting shaved. Diagnosing the problem, he found that this was caused by his outside neck chamfer. He was using a powered screwdriver to rotate the case, and over-cutting plus tool chatter was causing the case neck to roll inwards. This created a thin, sharp edge that actually cut into the bullet jacket as the bullet was being seated.
 
Larry has a Load Force 250 measuring instrument that records the dynamic bullet seating force and displays the results on a computer screen. Larry noted that spikes in seating force were associated with the cases where the bullets were shaved. Inspecting the cases, Larry realized what was happening. Chamfering the outside after doing the inside allowed his tools to cut too much. Combined with tool chatter, this actually created a sharp, ragged edge that rolled inward towards the bullet: “I discovered I had rolled the case mouth rim inward while deburring the outer edge. When deburring the case mouth on the outside edge, every now and then I could hear some tool chatter. The effects of this chatter really show in the picture.”

The above chart shows the dynamic bullet seating force for the bullet with the shaved jacket. Note the large initial force used to cut and scratch the bullet outer surfaces. The final seating force of 47 pounds is just before the Wilson Seating Die bottoms out and the force on the load cell jumps. The chart below shows normal bullet seating force.

As a fix, Larry decided to reverse the neck deburring operations. Now he deburrs the outside first. This reduces tool chatter and prevents the edge from rolling over, because the neck thickness has not been thinned by inside chamfering. While Larry uses a powered screwdriver to speed his case processing, the lesson applies to those who chamfer manually as well–do the outside first and never overcut.
Remember, you simply want to remove burrs and create a slight chamfer. You don’t want to thin the brass significantly at the case mouth. This is why it is important to be very careful when using a deep-angle cutter such as the K&M inside neck chamferer. Click HERE to read Larry’s full report on neck chamfering, with more details on use of the Load Force 250 measuring instrument. Using device such as this, or a K&M arbor press equipped with a seating force gauge, will help you diagnose problems with your neck tension and reloading procedures.
April 8th, 2012
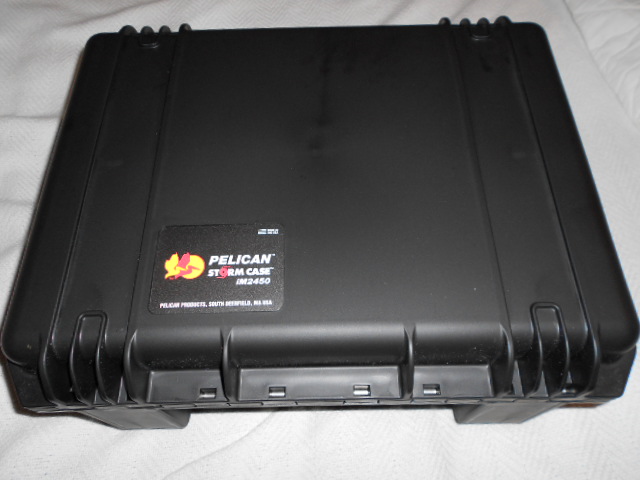
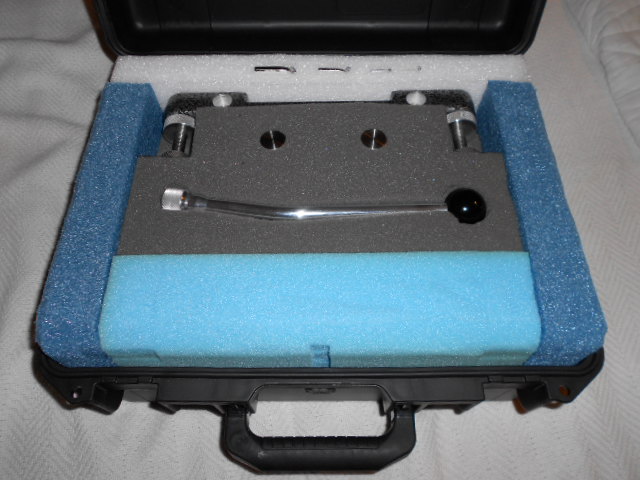
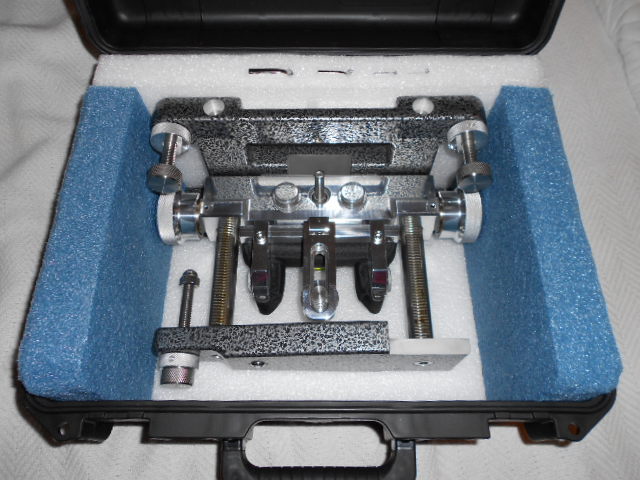
 Forum member Ed L. (aka itchyTF) owns one of the beautifully-crafted SEB NEO front joystick rests. These units are in short supply — creator Seb Lambang can’t keep up with demand. Anyone lucky enough to own a SEB NEO would naturally would want to keep it in perfect condition, and Ed is no exception. Ed put together a system to cradle and protect his SEB NEO during transport and storage. Ed tells us: “I decided to give my NEO its own home. I only wanted to remove the leg before storage so I decided on an empty Pelican Storm IM2450 case and added my own foam. This IM2450 case is a little wider than it needs to be, but I couldn’t find anything closer and still fit the other dimensions. The blue and white foam is more rigid than the typical gray foam. The Allen wrenches are placed in the rear piece of white foam.” Forum member Ed L. (aka itchyTF) owns one of the beautifully-crafted SEB NEO front joystick rests. These units are in short supply — creator Seb Lambang can’t keep up with demand. Anyone lucky enough to own a SEB NEO would naturally would want to keep it in perfect condition, and Ed is no exception. Ed put together a system to cradle and protect his SEB NEO during transport and storage. Ed tells us: “I decided to give my NEO its own home. I only wanted to remove the leg before storage so I decided on an empty Pelican Storm IM2450 case and added my own foam. This IM2450 case is a little wider than it needs to be, but I couldn’t find anything closer and still fit the other dimensions. The blue and white foam is more rigid than the typical gray foam. The Allen wrenches are placed in the rear piece of white foam.”
Ed found the Pelican Storm IM2450 case on the internet for $103 with free shipping. This same case is sold as the Hardigg IM2450 Storm Case. All-up weight, with the SEB NEO rest in the case, is 32 pounds. CLICK Thumbnails below to view larger images.

|