The 30BR is an amazing little cartridge. However, 30BR shooters do have to neck-up 6mmBR brass and then deal with some issues that can arise from the expansion process. One of our Forum members was concerned about the donut that can form at the new (expanded) neck-shoulder junction. Respected bullet-maker Randy Robinett offers tips on how to deal with the “dreaded donut”.
The Forum member was concerned about thinning the brass if he turned his 30BR necks after expansion: “Everything I have found on 30BR case-forming says to simply turn off the bulge at the base of the neck caused by the old 6BR shoulder. I expanded my first case and measured the neck at 0.329″ except on the donut, where it measures 0.335″. Looking inside the case… reveals a groove inside the case under the donut. Now, it is a fact that when I turn that neck and remove the donut, the groove is still going to be there on the inside? That means there is now a thin-spot ring at the base of the neck that is .005 thinner than the rest of the neck. Has anyone experienced a neck cracking on this ring?”
Randy Robinett, who runs BIB Bullet Co., is one of the “founding fathers” of the 30BR who help prove and popularize the 30 BR for benchrest score shooting. Randy offers this advice on 30BR case-forming:
While the thinner neck-base was one of our original concerns, unless one cuts too deeply INTO the shoulder, it is not a problem. For my original 30BR chamber, thirty (30) cases were used to fire 6,400 rounds through the barrel. The cases were never annealed, yet there were ZERO case failures, neck separations, or splits. The case-necks were turned for a loaded-round neck diameter of .328″, and, from the beginning, sized with a .324″ neck-bushing.
The best method for avoiding the ‘bulge’ is to fire-form prior to neck-turning (several methods are successfully employed). Cutting too deeply into the shoulder can result in case-neck separations. I have witnessed this, but, with several barrels and thousands to shots fired, have not [personally] experienced it. The last registered BR event fired using that original barrel produced a 500-27x score and a second-place finish. [That’s] not bad for 6K plus shots, at something over 200 firings per case.
Check out the 30BR Cartridge Guide on AccurateShooter.com
You’ll find more information on 30BR Case-forming in our 30 BR Cartridge Guide. Here’s a short excerpt from that page — some tips provided by benchrest for score and HBR shooter Al Nyhus:
30BR Case-Forming Procedure by Al Nyhus
The 30BR cartridge is formed by necking-up 6BR or 7BR brass. You can do this in multiple stages or in one pass. You can use either an expander mandrel (like Joe Entrekin does), or a tapered button in a regular dies. Personally, I use a Redding tapered expander button, part number 16307. This expands the necks from 6mm to .30 cal in one pass. It works well as long as you lube the mandrel and the inside of the necks. I’ve also used the Sinclair expander body with a succession of larger mandrels, but this is a lot more work and the necks stay straighter with the Redding tapered button. This button can be used in any Redding die that has a large enough inside diameter to accept the BR case without any case-to-die contact.
Don’t be concerned about how straight the necks are before firing them the first time. When you whap them with around 50,000 psi, they will straighten out just fine! I recommend not seating the bullets into the lands for the first firing, provided there is an adequate light crush-fit of the case in the chamber. The Lapua cases will shorten from approx. 1.550″ to around 1.520″ after being necked up to 30-caliber I trim to 1.500″ with the (suggested) 1.520 length chambers. I don’t deburr the flash holes or uniform the primer pockets until after the first firing. I use a Ron Hoehn flash hole deburring tool that indexes on the primer pocket, not through the case mouth. — Al Nyhus
Do you know what the inside of a rifle chamber (and throat zone) really looks like? Do you understand the concept of headspace and why it’s important? If not, you should read the Brownells GunTech article Gauging Success – Minimum Headspace and Maximum COL. This article explains the basics of headspace and shows how to measure headspace (and length to lands) in your barrels with precision. The article also explains how to adjust your full-length sizing dies to “bump the shoulder” as needed.
Why is headspace important? The article explains: “Controlling headspace and setting proper C.O.L. also represent improved safety and reduced cost of handloading. Excessive headspace can cause case head separation and gases in excess of 60,000 PSI escaping from a rifle’s chamber. Too little headspace can result in a chamber forced bullet crimp and a bullet that becomes an obstruction more than a properly secured projectile. Excessive C.O.L. can result in a rifling-bound bullet, a condition that could result in spikes of excessive pressure.” [Editor’s NOTE: It is common for competitive benchrest shooters to seat bullets into the rifling. This can be done safely if you reduce your loads accordingly. With some bullets we often see best accuracy .010″ (or more) into the lands. However, this can generate more pressure than the same bullet seated .010″ away from initial lands contact. As with all reloading, start low and work up gradually.]
How is headspace specified? Most cartridges used within the United States are defined within ANSI/SAAMI Z299.3-4. Brownells explains: “In the case of the .243 Winchester, as an example, there are pressure specifications, cartridge drawings and, as pictured above, chamber drawings. Armed with a chamber drawing, each manufacturer producing a firearm for the .243 Winchester knows the proper standard dimension to cut chambers and set headspace. Notice there are two headspace reference dimensions for the chamber. The upper is a place in the chamber where the shoulder is .400″ in diameter; the “datum” or “basic” line. The lower is the 1.630″~1.640″ minimum – maximum dimension from the breech face (bolt face) to that point in the chamber that measures .400″.”
The actual headspace of any firearm is the distance from the breech face to the point in the chamber that is intended to prevent forward motion of a cartridge.
Finding Cartridge Length to Lands with OAL Gauge
Using a comparator on a set of calipers, you can quickly determine cartridge base-to-ogive length. This is the measurement from the base of the case to the forward-most full diameter section of the bullet, typically called the ogive. Shown here, that ogive is 0.243″ diameter.
The next step is using a modified (threaded) case with a Hornady OAL tool to determine Length-to-Lands (LTL) in your rifle’s chamber. During this measurement process, the modified case, with a bullet in its neck, is inserted in the chamber. Go slow, take your time. Here are 5 tips that will help you get repeatable and reliable LTL measurements:
1. Start with a clean chamber and clean barrel throat.
2. Make sure the modified case is fully screwed down and seated on the OAL Gauge. It can sometimes unscrew a bit during repeated measurements.
3. Insert the modified case slowly and gently, but ensure the shoulder of the modified case is fully seated on the end of the chamber.
4. Push the gray plastic rod GENTLY. It is common for the bullet to be tilted a bit. You want to allow the bullet to self-center in the throat BEFORE you apply much pressure. Then tap a couple times and push until you feel resistance. Do NOT push too hard — that will jam the bullet in the lands.
5. Repeat the measurement at least 3 more times. If you follow our instructions, you should, typically, get a repeatable measurement, within 0.0015″ or so, 3 out of 4 times.
More and more shooters are “wet-tumbling” their brass (in liquid) with reusable polishing media, rather than using dry media in a vibratory tumbler. The “wet-cleaning” method works best with a rotary tumbler fitted with a water-tight, horizontal drum to hold your brass, cleaning solution, and stainless, pin-type media. The rotary tumbler of choice has been the Thumler’s Tumbler Model B Heavy-Duty. That is a great, sturdy machine, but now you have a more affordable option.
Frankford Arsenal offers “Platinum Series” rotary tumblers designed to clean cartridge brass with liquid and stainless media. The watertight, polymer drum rides on four rollers which rotate the drum around its horizontal axis. Two filters are provided so you can quickly separate your brass and media. A built-in timer allows you to set tumbling sessions up to three hours. There is a large, 7-liter unit and a smaller, 3.3-liter tumbler. Frankford Arsenal says the big version will clean up to 1000 cases of .223 Rem brass. That’s impressive capacity.
Rotary Tumbler Sources Online
The Frankford Arsenal Platinum Series rotary tumblers are sold by major retailers including Grafs.com, Midsouth, and Cabela’s. Shop multiple vendors to find the best current pricing.
Amazon often has very competitive pricing on the Frankford Arsenal Tumblers, both the 7-liter unit and the smaller, 3.3-liter tumbler.
How to Wet-Clean Your Brass in a Rotary Tumbler On our main Accurateshooter.com website, you’ll find a comprehensive review of the STM system for cleaning cartridge brass with stainless media. To clean brass with stainless media, start with five pounds of small stainless pins sold by StainlessTumblingMedia.com. Place these along with a gallon of water, a little liquid cleaner, and two pounds of cartridge brass in a rotary tumbler, and run the machine for one to four hours. After cleaning be sure to inspect all your primer holes. CLICK HERE for Brass Cleaning System Review.
Forum Member Tests STM System
Our reviewer, Forum member Jason Koplin, purchased the STM media and a new Thumler’s Tumbler. He then tested the STM cleaning procedure on his own brass, including some extremely dirty and tarnished “range pick-up” brass. Jason was thoroughly impressed with how well the STM process worked — as you can see from the “before and after” photos below. Brass which looked like it was ready for the scrap heap was restored to “like-new” appearance. The process works equally well on both rifle brass and pistol brass. Jason observed that one surprise benefit of the STM cleaning procedure is a big reduction in noise. Jason said the water-filled rotary tumbler was much quieter than his vibratory tumblers. One tip though — you should always inspect every cartridge carefully after wet-tumbling with stainless media. With large-flash-hole brass it is possible to have a pin stuck in a flash hole. This is rare, but it CAN happen.
If the battery on your safe’s electronic lock is more than a year old, or if it is not giving you the right voltage, replace it today!
Replace Your Safe’s Keypad Battery Every Year
This time of year, many of our readers are putting their guns away in a safe for the winter. It’s easy to just tuck the guns away and forget about them. But there’s something you should do before you shut the safe door. If you have a safe with an electronic keypad, you should replace the battery every year as a precautionary measure. Trust us, you don’t want to come back in a few months and find that the keypad memory is kaput, and you’re locked out. That can lead to frustration and an expensive locksmith visit.
Here’s a true story. I have one safe with a Sargent & Greenleaf (S&G) keypad. A couple years back, in early December, I went to get into the safe. I punched in the correct combination, but all I got was a rapid “beep, beep, beep, beep” after I finished the last combination entry. I tried again to ensure I entered the combination correctly (I did). But again, the locking system responded with multiple rapid beeps indicating something was wrong. And the safe would not open. Now I was worried….
I popped out the battery holder (which slides in from the bottom of the keypad housing on the door). I removed the battery and tested it with a volt-meter. The 12-month-old Duracell 9-volt battery only registered 6.1 volts.
Low voltage was the problem. I went down to the store and got a couple new 9V batteries. I tested the new batteries and both measured 9.4 volts output. I slipped one of the new 9V batteries into the keypad housing, punched in the combination and everything worked OK again. Eureka.
Most electronic locks for safes WILL “remember” the combination for a period of time even when the battery is low (and the keypad’s “brain” should retain the combination when you remove the battery for replacement). However, a dead battery, or extended periods of low voltage can give you problems. Don’t rely on wishful thinking…
Seating primers is a key part of the reloading process. You need to seat primers consistently to achieve best accuracy. There are many different tools offered for seating primers, both hand-held and bench-mounted. Deluxe premium hand-held seaters may hold just a single primer, while a variety of handheld units employ trays to hold more primers. With bench-mounted primer seaters there are a variety of feeding systems — vertical tubes, angled trays, and even a strip feeder — the APS system pioneered by RCBS.
Today’s Saturday at the Movies feature covers a variety of primer seater options, from low-cost hand tools to the $600.00 Primal Rights unit. We also cover the innovative Lee Automated Case Primer (ACP) system which even feeds your brass, increasing your processing rate.
Forster Co-Ax Bench-Mounted Priming Tool
The Forster Co-Ax® Primer Seater is a trusted bench-mounted priming tool that works very well. Set the jaws for a particular rim size, load the tube, and you’re ready to seat primers. The tool has good “feel” plus plenty of leverage. Forster says that the tool’s “unique design allows the operator to eliminate all slop when working with a specific cartridge, translating into perfect seating, reliable ignition, and reduced misfires.” This Forster tool requires no separate shell holders. The spring-loaded jaws close to securely grip most modern rifle and pistol cases with a rim thickness of .045″ to .072″. And Forster provides a primer flipper tray that makes it easy to load the provided small and large tubes. If you shoot a large variety of cartridge types with various rim sizes, this Forster Co-Ax primer seater is a good choice.
Primal Rights Competition Priming Seater (CPS) Review
If there is a Ferrari of priming tools, it has to be the Primal Rights Competition Primer Seater (CPS). This impressive bench-mounted tool allows very precise control over primer seating depth. A vertical tube holds primers ready for insertion. The action is smooth and precise. Seating depth control is as good as you can get. That precise, repeatable control, and the tool’s smooth operation, are the tool’s major selling points. Video reviewer F-Class John believes that Primal Rights machine is definitely the best priming tool on the market, though it may not be for everyone given its premium $600.00 price.
Frankford Arsenal Perfect Priming Tool
Our friend Jim See of Elite Accuracy LLC has tested the depth-adjustable hand priming tool from Frankford Arsenal. This product, called the Platinum Series Perfect Seat Hand Primer, has some unique features. Primer seating depth can be adjusted with a handy wheel in the tool’s center handgrip. Each “click” of the wheel moves the primer post .001″ (one one-thousandth of an inch). Additionally, the design of the case-holder allows quick and easy removal of a primed case. The unit ships with a full set of shell-holders to match all types of cases. Like many other hand priming units, the primers are loaded into a flip tray that attaches to the head of the tool.
Accuracy Variances and Priming Tool Types
The above video compares the performance of the Frankford Arsensal adjustable priming tool with a Sinclair Int’l hand priming tool — a unit used for many years by top benchrest shooters.
LEE Automatic Case Priming (ACP) System
The LEE Automatic Case Primer (ACP) is the world’s first automatic-feeding priming tool that does not need shell-holders. Cases are guided into position by a sliding “finger guide”. The “dead length” priming device ensures that primers are seated uniformly without “feel” or adjustments required. This is very efficient and relatively easy, once the primers are loaded into the triangular tray. This ACP tool is on sale at Midsouth for $84.99, 16% off the regular price. We’ve tested the product and it works well, but sometimes needs a little fiddling with the primer feed guide.
Gavin Gear of UltimateReloader.com has reviewed Lee Precision’s new lever-operated, bench-mounted priming tool. The Lee Auto Bench Prime features a hopper-style primer feeder set at an angle. Gavin likes the tool, reporting that primers feed well and seat fully with very little effort. And switching from large to small primer size (or vice-versa) is quick and easy. Overall, Gavin says the Lee Auto Bench Prime has earned a place in his reloading room: “The Lee Auto Bench Prime is easier to use than a hand priming tool, and more efficient.”
How the Lee Auto Bench Prime Performs
Gavin had three important “take-aways” from his initial loading sessions with the Lee Auto Bench Prime:
1. I was surprised by the low effort needed to prime cases — it’s pretty amazing.
2. You can quickly and easily install shellholders and change primer sizes.
3. The folding primer tray works very well. It’s a great setup from my testing so far.
Are there any negatives with the tool? Gavin noted that, in the course of loading 100+ rounds, once or twice he had to tap the triangular tray to get the primer to feed: “That’s not a big deal, and may smooth out with time”.
RCBS APS Strip Priming System — Bench Tool and Strip Loader
RCBS pioneered an innovative priming system that held primers in handy horizontal strips. This video shows primers being placed in strips, and then cases being primed using an RCBS bench-mounted APS strip-priming system. Many years ago, this Editor acquired an RCBS Pro 2000 progressive press, which employed the APS strip priming system. Primers were held in strips which could be easily connected for continuous feeding — no tubes to load! I liked the system so much I then acquired an APS hand priming tool (photo right), an APS bench-mounted tool, and an APS strip priming tool that fits on a single stage press. I loaded many thousands of rounds successfully with the APS system with not one inverted primer ever. I still use the APS hand primer tool to prime most of my rifle rounds.
Unfortunately, RCBS has discontinued sales of most APS priming tools, but you can still get primers pre-packaged in APS strips, and you can still buy the Strip Loader tool for placing primers into strips.
BONUS Video — K&M Primer Pocket Correction Tool
K&M offers a handy tool for optimizing primer pocket depth. K&M’s Primer Pocket Correction Tool uses a carbide cutter with a preset depth, allowing consistent depth squaring of the primer pocket bottom. Designed with a drive shank to be used with your cordless screwdriver and/or a K&M handle, these tools are available in four types: Small Rifle/Pistol; Large Pistol; Large Rifle; and .50 BMG.
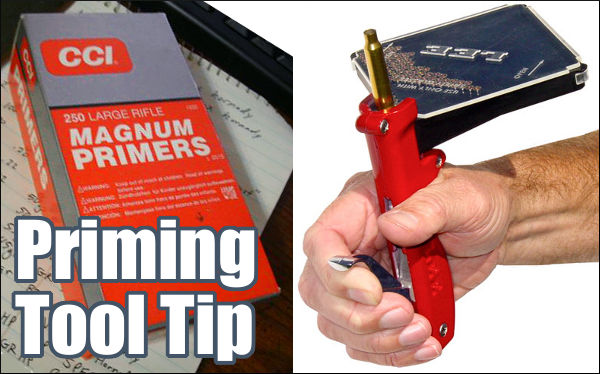
Priming Tool Tip — Check Your Primer Seater for Wear
From time to time, we all encounter a primer that doesn’t go off. It’s normal to attribute the problem to a bad primer. But sometimes there are other explanations. George S., one of our Forum members, experienced a couple failures to fire, but he learned that the issue was his priming TOOL, not his primers. Here’s what George told us. There’s a lesson to be learned:
“I had issues with CCI 450s when I had my first 6BR barreled. I had probably three or four out of 20 rounds that failed to fire. the primers were dented but didn’t fire. I called CCI since I had bought a case of them. The tech was decent enough but had the audacity to tell me I was not seating the primers all the way in the pocket. I proceeded to let him know I had been reloading longer than he had been alive and I knew how to seat a primer.
Turns out that I did and I didn’t! I was using the RCBS primer tool I had used for years and the primers felt just fine to me. I finally decided to check the tool and since I had a new one I took the seating pins out and measured them. The seating pin on the tool I had been using for years was shorter by a few thousandths! I then used the pin from the new primer tool and darned if the primers that didn’t seat down to the bottom of the cup.
Jerry Miculek is the best action revolver shooter who has ever lived. Miculek is also a true master with rifle and shotgun. This guy shoots hundreds of thousands of rounds every year in all types of firearms. Through that process, he has discovered common mistakes many shooters make. Those mistakes can harm the guns, or threaten the safety of the operator. Here Jerry offers some vital gun handling and safety advice in his “Never Do This” video series.
Jerry Miculek has won multiple revolvers championships, and has set amazing records for revolver speed shooting (with reloads). Yes Jerry, “Mr. Revolver”, knows a thing or two about wheelguns. In this video, Jerry explains how you can damage your revolver by using the wrong methods to open and close the cylinder and extract ammo. Jerry shows what NOT to do, and then he very carefully explains the proper procedure to release the cylinder, and swing it out of the frame. In addition, Jerry shows how best to swing a loaded cyclinder back into place. If you own a revolver, ANY revolver, you should definitely watch this video.
In this second video, Jerry explains common mistakes people make when handling and shooting three classic, semi-auto firearm types — the M1 Garand, the SKS carbine, and the M1911 pistol. Jerry shows handling faults that can cause out-of-battery detonation or early primer strikes, or cause jams in the Garand and SKS. Then Jerry explains why you should never release the slide on a M1911 pistol with a round already in the chamber. This is a must-watch video for Garand owners.
Here Jerry demonstrates of the most common jams that can happen with AR-platform rifles. Miculek reveals the cause of the issue and then shows how to prevent it. Jerry notes: “This is one of those malfunctions that you won’t see coming! I’ve seen it … on the range and it can be devastating to your time in a match. All ammo used in the video were dummy rounds and intentionally loaded for training without powder or primers.”
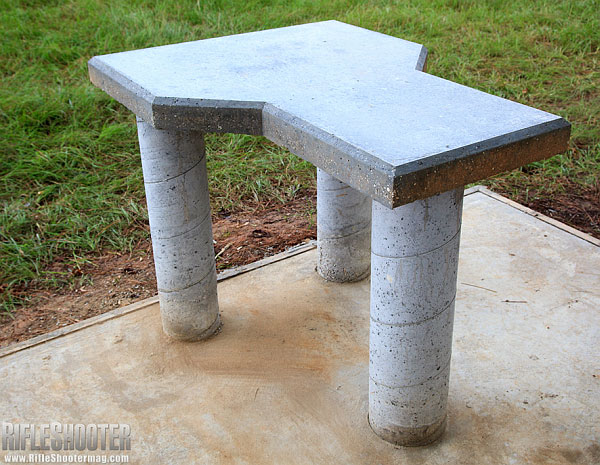
Who hasn’t dreamed of having a professional-quality, permanent shooting bench on their own property? Well here’s an article that can help you make that dream come true. This “how-to” feature from the archives of RifleShooter Magazine shows how to build a quality concrete shooting bench step-by-step.
All aspects of the construction process are illustrated and explained. The author, Keith Wood explains: “Construction happened in three phases — first creating the slab foundation, then the support pillars (legs), and finally the table.”
Click image below to load article with slide show.
Each step in the process is illustrated with a large photo and descriptive paragraph. Starting with framing the foundation (Step 1), the article illustrates and explains the 15 Steps that produce the finished, all-concrete bench (see top photo).
Sinclair International has created a series of instructional videos illustrating the basics of metallic cartridge reloading. The 8-Part series starts with reloading basics and provides step-by-step, how-to instructions that will help new reloaders get started. Detailed, animated illustrations show you what happens inside the chamber when shooting, and inside the dies during each step of reloading. The videos can be viewed on Sinclair International’s YouTube channel. Shown below is the first video in the series:
Each of the Sinclair videos is hosted by then Sinclair Int’l President Bill Gravatt (now with Creedmoor Sports). Bill doesn’t just show you “how”, he tells you “why”. The how-to segments cover case inspection, proper die set up, case sizing, primer installation, powder measuring, bullet seating, crimping, and even goes into the record keeping needed for the handloader. “We wanted to give shooters who haven’t reloaded a look at all the advantages of creating your own ammo and how easy it is to get started,” said Gravatt, “without telling them they had to have any certain brand or type of equipment to do the job.”
The Eight Video Topics Are:
Part 1 — Intro to Video Series
Part 2 — Intro to Reloading Safety
Part 3 — Metallic Cartridge Components
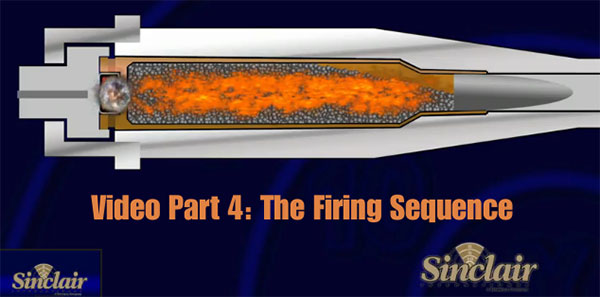
Part 4 — The Firing Sequence
Part 5 — Tools for Reloading
Part 6 — Loading Bottle-Neck Cartridges (2 videos)
Part 7 — Loading Straight Wall Cartridges
Part 8 — Reloading Series Conclusion
Reloading Tools
Shown below is Part 5 of the video series, covering the tools used for precision reloading.
We also strongly recommend the Part 4 Video to readers who are getting started in reloading. This “How Things Work” segment covers the sequence of events inside the chamber (and barrel) when the cartridge is fired. The video includes helpful graphics that show what happens to the primer, powder, cartridge, and bullet when the round is fired. The video also illustrates “headspace” and explains how this can change after firing. We think this video answers many common questions and will help reloaders understand the forces at work on their brass during the firing process.
Our friend Robert Whitley of ARX Enterprises LLC has learned, through careful measurement and testing, that some barrels threaded 5/8″ x 24 TPI at the muzzle may not deliver optimal accuracy. The reason is that the end of the barrel can bell out slightly, like a trombone, because too much steel has been removed. This is particularly true with .30-caliber barrels, but it can also be a problem with smaller caliber barrels (even 6mm). Robert demonstrates this phenomenon in the video below. All gunsmiths, and anyone considering threading a barrel, should watch the video. At 1:00 – 1:30 Robert gauges a 5/8″ x 24-threaded .30-Caliber barrel. You can see the belling effect clear as day.
“When setting up a commercial barrel in the lathe, we noticed that the maximum-sized bushing that would fit in the bore at the chamber end was almost .0015” smaller [than what would fit] at the muzzle. That precipitated my pin-gauging of a number of different commercial barrels that were threaded for 5/8” x 24 TPI. What I found is what’s shown on the video.” – R. Whitley
Solve Problem with a Larger Thread Diameter
If 5/8″ x 24 threading is potentially harmful to accuracy, is there a solution? Yes, you simply need to leave a little more steel on the barrel. (See Video starting at 02:40.) Frank Green of Bartlein barrels states: “We get these questions all the time. I say run the largest thread diameter that is possible.” Robert Whitley has found that a 3/4″ x 28 TPI threading does not cause the “belling effect”. Accordingly Robert recommends 3/4″ x 28 if you need to thread your barrel for a muzzle brake or suppressor. Robert explains: “We only make 3/4” x 28 TPI muzzle brakes and that’s what we recommend to customers.”
“See how much meatier the 3/4″ threading is vs. the 5/8″. The 3/4″ threading offers a lot more metal around the bore. There’s a lot less opportunity for the bore to become bell-mouthed…” – Robert Whitley
Barrel Threading Diameter — What’s Important to Know
By Robert Whitley
In truth, the 5/8″ x 24 TPI threading never came out of any accuracy-based think tank or set-up, it’s a military .30-Cal threading for barrels that someone has to carry around (they needed to keep the barrel weight down so it was smaller in diameter and the threading had to work with that situation). People have somehow assumed because the military uses that threading for certain things that it must mean that it’s also fine for a highly accurate rifle too, but that’s not really correct.
I don’t think there is any better and realistic option than the 3/4″ muzzle threading, and we also do it so there is no relief cut behind the threads on the barrel (i.e. put the relief cut on the brake or jam nut, don’t chop down on the muzzle of the barrel). For some reason many have a hard time grasping that the metal at the muzzle end of a rifle is “sacred” and you should not cut it down any more than absolutely necessary. A little threaded pencil diameter nub on the end of a barrel is not ideal for accuracy especially if it’s threaded and you need to torque on it. I cringe when I see a barrel with something like an MTU or Heavy Varmint contour, only to have an itty-bitty pencil thin threaded nub right at the muzzle so someone can “screw on a can” or a muzzle brake.
Lessons Learned Over the Years
A number of years ago I did a 30BR rifle project with Craig Kostyshyn who was big in the 30BR game and he made some of the best 30BR rifle barrels for benchrest competition. When I did the project I wanted a medium-heavy Palma type contour barrel I could use and also have a muzzle turndown for a front sight band. When he found out I was going to have the muzzle turned down he said “whoa, I need to provide for that when I make the barrel because if you turn the front down later you’ll be shooting a trombone” (i.e. the muzzle bore dimension would open up).
What he did was rough contour the barrel with the turndown (about .010” oversize) before he lapped the barrel, then when he lapped the barrel he took it easy in the muzzle area and worked the back of the barrel more. I thought he was a little bit excessive in his concerns but the barrel shot great and I wasn’t going to argue with him, after all he was shooting groups in the ones. I kind of just filed that away and never thought about it until recently when I went to have Fred from Sabreco do some chamber re-work on a commercial .30-caliber barrel I had. When setting up the barrel in the lathe and indicating things Fred noticed that the maximum-sized bushing that would fit in the bore at the chamber end was almost .0015″ smaller [than what would fit] at the muzzle and he mentioned it to me. That precipitated my pin-gauging of a number of different commercial barrels I had that were threaded for 5/8” x 24 TPI. What I found is what’s shown on the video.
NOTE: This is a copyrighted article. Do not reproduce or re-link more than 75 words without written permission from AccurateShooter.com.
Bryan Litz and The Science of Accuracy Academy has released a new Podcast with vital information for all handloaders. This Podcast examines the effects of humidity variances on powder. Bryan notes: “If you want to know how much this can matter, we’re talking up to 200 fps difference for the same load of H4350 in 6.5 Creedmoor” at opposite extremes of humidity.
Bryan adds that “Most shooters don’t realize what a big deal this can be — it overshadows many of our efforts to make consistent velocity and hit targets. This can happen in loaded rounds not just for hand loading where you expose powder to ambient humidity. This is especially important for hunters considering the range of environments hunting ammo goes through.”
25% Off Sale on The Science of Accuracy Academy Products
As a Black Friday/Cyber Monday promotion, The Science of Accuracy Academy is running a 25% OFF Sale on everything in the store, now through Monday, November 28, 2022. Save on Bryan Litz’s six impressive books about Ballistics, Bullet Performance, and Long Range Shooting. The Berger Bullets Reloading Manual is also discounted. Use Discount Code BF2022.
In addition you can get your own subscription to the Academy, allowing you to access all podcasts, exclusive videos, learning resources, and bullet data sheets.


 The 30BR is an amazing little cartridge. However, 30BR shooters do have to neck-up 6mmBR brass and then deal with some issues that can arise from the expansion process. One of our Forum members was concerned about the donut that can form at the new (expanded) neck-shoulder junction. Respected bullet-maker Randy Robinett offers tips on how to deal with the “dreaded donut”.

 Finding Cartridge Length to Lands with OAL Gauge


 On our main


 Replace Your Safe’s Keypad Battery Every Year

 RCBS pioneered an innovative priming system that held primers in handy horizontal strips. This video shows primers being placed in strips, and then cases being primed using an RCBS bench-mounted APS strip-priming system. Many years ago, this Editor acquired an RCBS Pro 2000 progressive press, which employed the APS strip priming system. Primers were held in strips which could be easily connected for continuous feeding — no tubes to load! I liked the system so much I then acquired an APS hand priming tool (photo right), an APS bench-mounted tool, and an APS strip priming tool that fits on a single stage press. I loaded many thousands of rounds successfully with the APS system with not one inverted primer ever. I still use the APS hand primer tool to prime most of my rifle rounds.