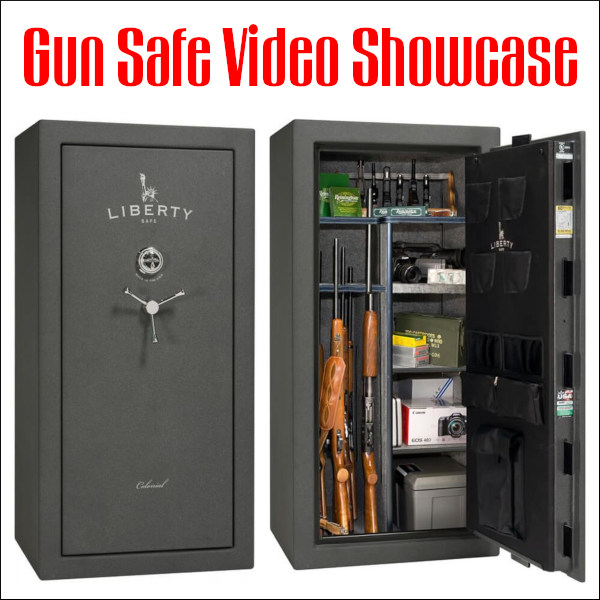
Today’s Saturday Showcase covers gun safes. Every firearms owner should have a secure, quality gun safe with ample capacity. There are numerous choices in gun safes — but we have one key bit of advice — buy BIGGER than you think you need, because your gun collection will likely grow over time. Also you should consider the fire rating of your safe. There are other key factors to consider, such as wall thickness, lock type, shelf and storage layout, and humidity control. We recommend that all Bulletin readers read our detailed, Gun Safe Buyers Guide. This in-depth 9400-word article covers ALL these topics:
Anti-Corrosion
Budget Safes
Bolt Layout
Door Seals
Fire Proofing
Handgun Storage
Hinges
Humidity Control
Installation Tips
Interior Layout
Interior Lighting
Locks–Dial vs. Digital
Modular Safes
Rotary Racks
Size and Weight
Temperature Control
Wall Thickness
Water Proofing
Technical Features of Gun Safes — What You Need to Know
This is a very sensible, informative video that examines the technical features of gun safes. You’ll learn about the steel “gauge” or thickness, the different types of hinges, lock controls, and fire-proofing options. We think anyone contemplating purchase of a large home safe should watch this video, prepared by a respected safe retailer in Las Vegas.
Assembly of SnapSafe Titan XXL Double Door Modular Safe
In this video Gavin Gear of UltimateReloader.com shows the unpacking and assembly of a large, twin-door SnapSafe modular safe. This video shows how individual panels are assembled one by one, and how the twin doors are attached. Gavin also shows the process of installing the interior insulation panels which provide basic fire protection. Remarkably, this entire XXL modular safe can be put together with simple tools in less than an hour. SEE Full Article HERE.
Features of a Quality Safe under $1000
Even if you already have a safe, this video is well worth watching. The host shows a variety of accessories and upgrades that all gun safe owners should consider. The host explains why you should have a dehumidifier or Golden Rod. He also shows how to install handy interior lights that activate automatically when the door is opened.
The Gun Vault — The Next Step Beyond a Jumbo Gun Safe
If you have a very large gun collection and are building a new custom home, you may want to consider a Gun Vault. This is essentially a large, secure room, with a very heavy door and thick walls. In this interesting video, Atlas builds a large walk-in gun vault using the Gallow Tech Shelving System and a Fort Knox Gun Vault door.
After the Fire — What Actually Happens in a Burned Safe
In this video, the hosts open a “fireproof” gun safe that went through an actual house fire. See what happens when a gun safe that is supposed to be fireproof actually is exposed to a major fire. The results are surprising to say the least. This video shows that you need to do your homework before buying a “fireproof” safe. Understand how the fire rating systems work, and learn how the interior materials and construction make a big different in real world fire protection.
Mechanical Locks vs. Electronic Locks — What You Need to Know
One important decision when buying a gun safe is the choice of locking mechanism. Should you go with a mechanical lock or an electronic lock? There are pros and cons to both dial locks and e-locks, and as long as you get a quality lock, neither is a bad choice. To help you make your decision, This video explains the differences between the two, and reasons why you might choose one over the other.
How to Assemble a Modular Safe with Simple Tools
For gun owners who move frequently, or who may live in an upstairs apartment or condo, a modular safe makes sense. Steelhead Outdoors, based in Minnesota, offers three different safes: Nomad 26, 32, and Nomad 38. The video below shows how to assemble a Steelhead Outdoors Nomad series safe. If you have basic skills, these safes can be assembled easily in 60-90 minutes. Steelhead recommends having two people to do the job. The entire safe ships in four (4) boxes. Wrenches are included with the safe.
This time-lapse video shows the entire process of assembling the safe, start to finish.
Guide to Quick Access Handgun Safes
A quick access safe can keep your pistol secure, but also readily accessible. But not all of these devices are created equal. This video explains the features you need in a small pistol safe. The video also examines the pros and cons of seven different handgun safes. We recommend that you do NOT keep your handgun safe in plain view, such as on a bedside table. There are other locations where you still have quick access, without tempting home intruders.
Wireless Hygrometer Reports Temperature and Humidity Inside Safes
The Hornady Security® Wireless Hygrometer monitors temperature and humidity in real-time, all without opening the gun safe. The wireless hygrometer employs a remote sensor inside your safe, which measures temperature and humidity data. This data is then sent to an external base display. Wireless technology eliminates the need to open the safe and check the storage environment, preventing temperature and humidity spikes from the outside air.
The display features a large touchscreen that shows current high/low data from both the base and remote units in Fahrenheit or Celsius. The hygrometer pairs with Hornady Security’s in-safe dehumidifiers to combat oxidation-causing moisture.
Gun Safe Installation Recommendations
Every safe, when possible, should be anchored in place with heavy-duty fasteners. Ideally, use multiple bolts in the bottom of the safe, anchored to concrete or solid foundation. Choose the appropriate lag bolts or anchors for the material below your safe. If you can’t mount to the floor, bolt the safe to wall studs. You can locate the position of the studs with an inexpensive electronic “Stud Sensor” available at home supply stores.
Check the thickness of your safe floor. If the steel on the bottom of your safe is fairly thin, place a steel backing strip between the bolt heads and the safe bottom. (Large washers will work, but a backing strip is better.) Without such reinforcement, the bolt heads may pull right through thin-gauge steel if the safe is rocked, or levered from the bottom with a pry-bar.
Locate your safe in the corner of a room or in a recess that blocks access to one or more sides of the safe. On many gun safes, the steel on the top, sides, and rear is thinner than on the door. Blocking access to the sides makes it much more difficult to use power tools on the sides, where the safe is most vulnerable. It’s also wise to place the safe in a relatively tight space with limited room to maneuver. Anything that makes the safe harder to move helps deter would-be thieves.
Many people place their safe in a garage or basement. That’s not necessarily a bad idea, but people also tend to store their tools in the same locations. Don’t store your power tools next to the safe. One safe-maker told us how a customer’s safe was defeated using the owners’ own cutting torch which was stored right next to the safe!
Inspect the area around the safe. Avoid locations where there are a lot of wood beams, paint cans, or other combustible material nearby. In the event of a serious house-fire, these items will fuel the flames, increasing the likelihood that items inside your safe will be heat-damaged. Chris Luchini, co-author of Rec.Gun’s Guide to Gun Safes, offers some practical advice: “Get an alarm system. If the burglars hear an alarm go off, they are less likely to stick round to finish the job. Alarms on both the house and the safe area are a good idea.”
What anti-corrosion products really fight rust effectively? You’ll hear many opinions, but what do actual field tests reveal? One rifle shooter, who posts on YouTube as BlueonGoldZ, wanted to separate myth (and marketing claims) from reality, so he completed his own long-term rust test using metal samples. First he used ordinary tap water spray, and then he did a second, longer-duration test with a salt-spray solution. Nine different products were tested: Break Free CLP, Corrosion-X, Frog Lube, M-Pro 7, Outers, Pro-Shot Zero Friction, Rem Oil, Slip 2000, and Tetra Gun Triple Action CLP.
BlueonGoldZ initially examined each product for its “beading” properties with a normal tap water spray. But the main test involved many multiple weeks of exposure after a “dense” salt-water spray. (No rust formed after two weeks tap water exposure, so the test was accelerated with salt-water exposure).
The clear winners in the test, as shown by the screen shot above, were Corrosion-X (Best), and Frog-Lube (Second Best). The photo shows the test samples two weeks after being sprayed with salt water. The results are pretty dramatic — you can see with your own eyes what happened. We think this is a very useful bit of real-world research.
Results from Similar Long-Term Salt Exposure Test
Unfortunately, BlueonGoldZ’s test did NOT include Eezox, which we have found to be extremely effective (on a par with Corrosion-X). In another long-term test of corrosion preventatives, the two best rust fighters were Eezox and Corrosion-X in that order. Since that test was completed, Corrosion-X, already an excellent product, has been enhanced. CLICK HERE for Long-Term Salt Exposure Test Report.
Top to bottom: Remington firing pin assembly with ISS, Tubb SpeedLock alloy-composite system without ISS (current versions have dual, opposite-wound springs), and Remington short action firing pin assembly without ISS.
The U.S. Army Marksmanship Unit regularly publishes technical articles on the USAMU Facebook page. One informative USAMU article covered mechanical issues and related ignition irregularities that can cause vertical fliers even with good ammunition in an otherwise excellent rifle. We highly recommend you read this article, which offers some important tech tips.
Vertical Dispersion: Mechanical/Ignition Issues?
Poor or inconsistent ignition has long been known to be one of the “usual suspects” when one encounters vertical fliers that just shouldn’t be there. By having a sense of some of the basic principles involved, and a few basic areas to check, the shooter may avoid colsiderable frustration, not to mention time, expensive loading components and barrel wear.
Is your well-built rifle of high-quality components plagued with vertical fliers across more than 1-3 handload combinations? Consider the bedding, crown and scope/sight mounts. Are they correct? If so, then you might check for ignition issues before boldly undertaking an extensive, expensive, and quite possibly fruitless quest for the “magic handload”.
SEEING IS BELIEVING: While the author had been aware for many years that poor ignition should be considered and ruled out when dealing with vertical fliers in an otherwise-excellent rifle, actually seeing the problem and its almost instantaneous cure really drove the lesson home.
He was working with a “dot” rifle – a .22 LR match rifle that really stacked bullets into little piles at 50 yards and beyond. With one lot of ELEY Tenex, it produced consistent “bughole” groups at 50, but with another, selected lot of Tenex, similar groups were regularly ruined by single, vertical fliers that did not appear in other rifles. Rather than spending days burning up expensive, select ammunition looking for “magic lots”, he contacted a well-respected rimfire gunsmith and explained the situation.
Without so much as batting an eye, the highly-experienced ‘smith tore into the rifle’s action, and quickly found the cause(s) of the problem. He discovered a demonstrably weak firing pin spring, plus a chip out of the face of the firing pin where it contacted the cartridge rim.
After replacing and tuning the offending parts, the rifle immediately began shooting tiny, bughole groups with the previously “unacceptable” lot of Tenex. Centerfire rifles can also benefit from ensuring positive, consistent ignition. A wise riflesmith is literally worth his weight in gold!
So, what are some issues we as shooters can inspect in our rifles to help determine if ignition woes could be part of our problem? At the club level, ask yourself if that “experienced” Remington, Winchester 70, or even Springfield-based match bolt gun you’re using is still running its’ original 40-80 year-old factory striker spring? If so, a new replacement is cheap insurance against current or future problems. (And BTW, it might be best to stick to the normal, factory-spec spring weight. A super-powerful spring can cause vertical, just as a weak one one can.) Along with that, a routine check for proper firing-pin protrusion is a quick preventive measure that can rule out potential issues.
Other areas to consider are the centering and consistency of the firing pin’s operation in the bolt. Admittedly, with the increasing use of precision-machined custom actions, this is becoming less an issue every day. Below is the firing pin assembly from a custom BAT action:
However, particularly with factory actions, a very quick and easy check is to remove the bolt, let the firing pin go forward, and look at the firing pin tip through the firing pin hole. Is the tip off-center in the hole, and possibly striking it as it moves forward? Is the hole out-of-round or burred from being struck repeatedly? If so, a trip to the riflesmith is likely in order.
Similarly, machining issues in the bolt/firing pin system can lead to rough and erratic firing pin movement, in which the firing pin drags against an internal surface of the bolt. In high-quality rifles these issues are relatively rare, but not unheard-of, and it takes mere minutes to rule them out. It may be worthwhile to remove the cocking piece/firing pin/spring assembly and look for any unusual gouges, dings, peening, burrs or signs of abnormal wear.
This task is especially easy with Winchester 70s, Springfields, and the similar Mauser 98s, involving little more than the push of a button and unscrewing the cocking piece assembly. This is just one of the many reasons these tried-and-true actions have earned such a loyal following in the field, among hunters who must maintain their rifles away from a shop.
Particularly with older rifles, watch for and remove excess grease (or even Cosmoline!) from both the firing pin assembly and inside the bolt. This can help improve firing pin speed and consistency. Other bolt-action designs may need a take-down tool or other measures.
As part of this inspection, AFTER ENSURING THE RIFLE IS UNLOADED, slowly cock the rifle, dry-fire, and repeat several times. Listen carefully near the action for inconsistency in the sounds it generates. Does the striker falling make the same sound each time? Do you hear or feel grinding upon operation? If so, where?
Be sure to check the operation of the cocking piece (bolt shroud), firing pin within the bolt shroud, the cocking piece cam and the rear of the bolt body where the cocking piece cam operates. As with our examination for abnormal wear marks discussed above, look for marks indicating roughness or a possible need for light polishing. Then, clean and lightly grease the bearing surfaces while you’re at it.
Remington 700 bolt shroud and cocking cam
These are relatively easy checks that shooters can undertake to perform a preliminary inspection on their own. Other mechanical issues can also cause ignition issues, chiefly centered around the action of the trigger, sear and sear spring. If these are suspected, a trip to an experienced, qualified riflesmith for diagnosis is recommended. We hope you find this information helpful! Join us again next week, and in the meantime, enjoy the shooting sports safely!
Do you know which one of your eyes is dominant? It’s easy to determine eye dominance with a simple exercise. Pick an object about 6-10 feet away (a light switch or door knob works well). Make an “OK” sign with your right hand (see photo) and hold that about 18″ from your face. Now, with both eyes open, look through the circle formed by your thumb and index finger. Center the circle on the object, so you can see the object in the middle.
Now, here’s the important part — while still holding your hand up, centered on the object, first close your right eye. If you don’t see the object anymore, then your right eye is dominant. If you still see the object, then repeat the procedure with the left eye shut and right eye open. If you don’t see the object when your left eye (only) is closed, then you are left-eye dominant.
The digital archives of Shooting Sports USA contain many interesting articles. A while back, Shooting Sports USA featured a “must-read” expert Symposium on Eye Dominance, as it affects both rifle and pistol shooting. No matter whether you have normal dominance (i.e. your dominant eye is on the same side as your dominant hand), or if you have cross-dominance, you’ll benefit by reading this excellent article. The physiology and science of eye dominance is explained by Dr. Norman Wong, a noted optometrist. In addition, expert advice is provided by champion shooters such as David Tubb, Lones Wigger, Dennis DeMille, Julie Golob, Jessie Harrison, and Phil Hemphill. NOTE: If the story doesn’t open at the links, go to the ssusa.org home page first, indicate you are over 18, and then CLICK HERE.
Top Rifle Champions Talk About Eye Dominance:
David Tubb — 11-Time National High Power Champion
I keep both eyes open, always. Some use an opaque blinder in rifle or shotgun shooting. If you close your non-dominant eye, you will not get as good a sight picture. If your aiming eye is not your dominant eye, you have even more of a problem to overcome.
Lones Wigger — World, National and Olympic Champion Rifleman
Shooters should try to use the dominant eye unless the vision is impaired and the non-dominant eye has better vision. You should always shoot with both eyes open since this will allow the shooting eye to function properly.
Dennis DeMille — National Service Rifle Champion
I close my non-shooting eye initially. Once I pick up my sight picture, it’s not something I focus on. For those that use a patch, I recommend that they use something white to block their view, rather than cover the eye.
Bruce Piatt — 2025 World Action Pistol Team Championship — Member of Winning Team CMP-USA
Some shooters, especially those with nearly equal or cross-dominance, will naturally find themselves squinting one eye. When anyone does this, you are also closing your dominant eye to some extent and adding stress to your face.
If you want to compete in top handgun competitions such as the CMP matches at Camp Perry, you’ll need good ammo that has low ES, consistent powder charge, uniform cartridge OAL, and consistent crimp. Every with action pistol matches you’ll want ammo that is very uniform. One miss on steel can mean losing a match. The following USAMU article provides rock-solid pistol reloading advice, explaining how to load accurate, reliable handgun ammo.
The U.S. Army Marksmanship Unit (USAMU) fields pistol teams as well as rifle and shotgun competition squads. Consequently the USAMU’s Reloading Shop loads tens of thousands of pistol rounds every year. In this article, the USAMU’s handgun experts talk about reloading for handguns — with smart tips on how to achieve superior accuracy with 100% reliability. This article, which offers important insights on COAL, primers, crimps and more.
Precision Pistol Reloading — Recommended Methods
Optimize the Taper Crimp
One often-overlooked aspect of handloading highly-accurate pistol ammunition is the amount of crimp and its effect on accuracy. Different amounts of taper crimp are used with various handloads to obtain best accuracy. The amount is based on bullet weight, powder burn rate and charge, plus other factors. It is not unusual for our Shop to vary a load’s crimp in degrees of 0.001″ and re-test for finest accuracy.
Use Consistent Brass
Brass is also important to pistol accuracy. While accurate ammunition can be loaded using brass of mixed parentage, that is not conducive to finest results, particularly at 50 yards. It is important for the serious competitor/handloader to use brass of the same headstamp and ideally one lot number, to maximize uniformity. Given the volumes of ammunition consumed by active pistol competitors, using inexpensive, mixed surplus brass for practice, particularly at the “short line” (25 yards), is understandable. However, for the “long line” (50 yards), purchasing and segregating a lot of high-quality brass to be used strictly for slow-fire is a wise idea.
Importance of Uniform COAL
Uniformity of the Case Overall Length (COAL) as it comes from the factory is also important to achieving utmost accuracy. More uniform case lengths (best measured after sizing) contribute to greater consistency of crimp, neck tension, ignition/burn of powder charge, and so on. Cartridge case-length consistency varies from lot to lot, as well as by maker. Some manufacturers are more consistent in this dimension than others. [Editor’s note: It is easy to trim pistol brass to uniform length. Doing this will make your taper crimps much more consistent.]
Primers and Powders — Comparison Test for Accuracy
Pay attention to primer brands, powder types and charges. Evaluating accuracy with a Ransom or other machine rest at 50 yards can quickly reveal the effect of changes made to handload recipes.
Bullet Selection — FMJ vs. JHP
Bullets are another vital issue. First, there is the question of FMJ vs. JHP. A friend of this writer spent decades making and accuracy-testing rifle and pistol bullets during QC for a major bullet manufacturer. In his experience, making highly-accurate FMJ bullets is much more difficult than making highly-accurate JHPs, in large part due to the way the jackets are formed. Small die changes could affect accuracy of FMJ lots dramatically.
The CMP now allows “safe, jacketed ammunition” in Excellence-in-Competition (EIC) Service Pistol matches, although wadcutter ammunition is prohibited. Thus, the option to use very accurate JHP designs simplifies the life of CMP Service Pistol shooters in pursuit of the Distinguished Pistol Shot badge.
Hopefully, these tips will be helpful to any pistol shooters interested in accurate handloads, not just “Bullseye” shooters. Small tweaks to one’s normal routine can pay big dividends in improved accuracy and make practice and competition more rewarding. Stay safe, and good shooting!
Many visitors to the site ask us, “I’ve got a .223 and .308. What will a 6mmBR Norma (6BR) give me that I’m not getting already?” Well first you will probably average consistently smaller groups than your current .223 or .308 rifle (assuming the 6BR has a quality barrel and trigger). A good .308 Winchester can be superbly accurate, no question about that, but the lesser recoil of the 6BR works in the shooter’s favor over a long string of fire. Even with a Rem 700 or Savage action factory action, a 6BR with a benchrest stock, premium barrel, and a high-quality chambering job should deliver 5-shot groups in the high twos to mid-threes, provided you do your job. We have one 6BR rifle that shoots Lapua factory-loaded 6BR ammunition in the low twos and high ones. That’s exceptional, we admit, but it still shows how the 6BR is an inherently accurate cartridge, even with factory loads.
Compared to a .223, the 6BR offers a much better selection of high-BC projectiles, and will deliver considerably more power on the target. So it’s a better choice for hunters and 600-yard benchrest shooters. Compared to the .308 Win shooting 168gr MatchKings, a 6BR shooting 105-107gr bullets offers better ballistics all the way out to 1000 yards. Plus, for most people, the 6BR is just easier to shoot than a .308 Win. Recoil is less than half of the .308 Win cartridge. Both the .308 and 6BR chamberings offer good barrel life, but the 6BR uses 15-18 grains less powder, saving you money. On the other hand the .308 Win is the designated cartridge for F-TR and Palma shooting, so it may be a more versatile chambering for Long-Range competition. So which would we choose between the 6BR and the .308? Actually we think you should have both. The 6BR is a favorite cartridge out to 500 yards, and we like the .308 Win for F-TR. The .308 Win has shown outstanding accuracy, as displayed last week at the NRA F-class Nationals in Arizona.
Sierra and Barnes Bullets have released a new FREE Ballistic Calculator App, called TrueData™. With Doppler-verified ballistics, precise environmental inputs, and tools that match real-world performance, TrueData™ equips hunters and shooters with the ability to make confident shot decisions and achieve data-driven accuracy. The TrueData App has many notable features including the ability to access atmospheric data reports and a unique Virtual Rangefinder that helps you estimate distances. The App also holds multiple rifle profiles. Visit Sierrabullets.com or Barnesbullets.com to learn more.
This impressive new TrueData App is available for both Android and Apple (iOS) mobile devices. The TrueData App is FREE on Android and Apple stores and can be found by searching for “TrueData Ballistics” in the App stores.
Doppler-Verified Ballistic Library: Instant access to accurate Doppler-verified data for Sierra and Barnes Bullets. Select from multiple drag models, including Doppler-measured curves for supported bullets. These curves capture true bullet behavior across the flight path far beyond the approximations of G1 or G7. With 80+ Doppler profiles and ongoing expansion, the solver adapts to exact projectiles. G1/G7 values autofill for all bullets where Doppler data is not yet available.
Ballistic Coefficient (BC) and Velocity Truing: BC and velocity truing tools to align ballistic predictions with real-world impacts.
Multiple Rifle Profiles: Stores multiple rifle profiles so users can switch guns without re-entering data.
Intuitive Heads-up Display: A unified interface brings together trajectory data, environmental updates, and shot solutions in an intuitive HUD. Every adjustment is instantly reflected on screen.
Bluetooth Connectivity: Automatically imports precise atmospheric data from external meters like WeatherFlow and Skywatch BL for shooters who demand exact inputs without manual entry.
Virtual Rangefinder: App helps users estimate distance when scouting terrain or setting targets without a physical laser rangefinder.
Target Card: Build and store preset targets with their distances and holds, helping the shooter move efficiently between known landmarks or steel targets.
Live Environmental Inputs: Pulls real-time atmospheric data from current locations to keep ballistic solution aligned with actual conditions.
Ammunition Library: App has detailed ballistic profiles for Barnes factory-loaded ammunition.
Stage Timer: Simple countdown timer for practicing transitions, positional shooting or timing drills.
About the Creation of the TrueData App — and Future Updates
“2025 was a big year for product development at both Sierra and Barnes. The TrueData app has been a long time coming — we built, we tested, we refined and we think this App is the most complete and user-friendly ballistic calculator available. We ask that everyone download it, put it through the paces and submit feedback to help us make this thing even better.” — Andrew Sparks, Sierra V.P. of Marketing & Business Development.
The Cartridge Comparison Guide is a remarkably comprehensive 340-page, spiral-bound book. Covering over 250 cartridges, the Second Edition of the Cartridge Comparison Guide is the product of many years of labor by Andrew Chamberlain, a Utah-based hunter. Andrew says his Guide “compares every factory available cartridge from the 17 calibers up to the 50 caliber cartridges”. (Sorry, most wildcat cartridges are not covered.) Chamberlain’s Guide also compiles cartridge data from major ammunition manufacturers such as Barnes, Federal, Hornady, Norma, Nosler, Remington, Sierra, Swift, Weatherby, and Winchester. It shows the optimal velocity achieved for each bullet weight and calculates bullet energy, recoil, and powder efficiency. Large color photos illustrate handgun and rifle cartridges.
The Cartridge Comparison Guide provides data for thousands of cartridge/bullet/velocity combos. Quick reference sheets and ballistics charts cover Trajectory, Velocity, and Energy out to 500 yards. The Cartridge Comparison Guide also offers a firearms lexicon, plus Appendices covering Cartridge Selection for Game Animals, Bullet Selection/Design, Bullet Expansion, and Wound Channel Characteristics.
New Content in Second Edition of Cartridge Comparison Guide
The Cartridge Comparison Guide (Second Edition) costs $39.99 plus shipping and tax. CLICK HERE to visit the Online Store where you can order the 340-page book. Here’s what’s new in the Second Edition:
Addition of Shotgun Ammunition (Both Slug and Shot loads).
Momentum Calculation for all Rifle, Shotgun and Handgun loads.
Integration of Shotgun Slug Ammunition with Center Fire Rifle Data Tables.
Factory Load Summary Added (Shows manufacturers and loads produced).
One factory load and one hand load for every bullet weight available in each cartridge.
Over 90 pages of additional ballistics content (roughly 35% more than in First Edition).
Great Resource for Hunters
One of Chamberlain’s main goals in creating the Cartridge Comparison Guide was to help hunters select the right cartridge for the job: “This started as a personal project to gather information on the more popular cartridges commonly used for hunting. I wanted to find the best all-around performing cartridge and rifle that a guy on a budget could shoot. I began comparing cartridge performance, versatility, bullet selection, powder efficiency, recoil generation vs. energy produced, standing ballistic data for different environments….”
Giant Cartridge Poster for Computer Wallpaper (1665×1080 pixels)
Here’s a great illustration of hundreds of cartridges and shotshell types. For dedicated reloaders, this would work great as desktop “wallpaper” for your computer. CLICK HERE for full-size image.
The type of targets you use can make a difference during load development and training — helping you align your crosshairs, estimate group size visually, and also record load data/gun type. Here we provide selection of FREE printable precision and training targets. This selection includes popular load development targets AccurateShooter created as well as other useful grid targets. You can download ALL these targets as PDF files and then print them out on 8.5×11″ heavy paper.
AccurateShooter.com offers a cool page with over 50 FREE downloadable targets. You’ll find all types or FREE targets — sight-in targets, varmint targets, rimfire targets, bullseye targets, tactical targets, load development targets and more. CLICK HERE for all our free targets, including our LOAD DEV target.
We created the above target a decade ago. Since then it has been used by tens of thousands of shooters. It has proven very popular as a load development target, since all your load data fits neatly in the boxes under each target. In fact this target is being employed by both rifle-makers and barrel-makers (including Criterion) to test their products. The target was designed for aiming efficiency. The diamonds have 1/2″ sides and you can align your cross-hairs on the horizontal and vertical lines. It is a clean design that is easy to see even at 200 yards with a 20X scope. When we test, we usually crank in a little elevation, setting the point-of-impact higher, so that our shots fall in the gray circles. That way you leave the squares intact for precise aiming.
Versatile Targets with Multiple Aiming Points
We use the two targets below for load development and precision practice. For the left target, use the corners of the diamonds to align your cross-hairs precisely. The circle dot target (on the right) can also be used for informal rimfire competition at 50 yards. Right-Click Each Target to Download Printable PDFs.
Know-Your-Limits Target for Rimfire Training & Fun Matches
Here’s a rimfire training target with “big to small” target circles. Start with the largest circles, then move to the smaller ones in sequence. This systematic drill provides increasing challenge shot-by-shot. Novices often are quite surprised to see their accuracy improve as they move from bigger to smaller aiming points. That provides positive feedback — always a good thing.
Right Click and “Save as” to download printable PDF versions of target.
Five Diamond Grid Targets
Here’s a popular grid target with multiple red diamond aiming points. The background includes a grid pattern with 1″ squares — that helps to quickly estimate group size through your scope. We recommend using a color printer for this target so the diamonds and grid lines are bright red.
Here’s a NRA-type target for pistol shooting. The bright red center helps when shooting indoors because well-placed bullet holes are much more visible. This target includes data entry boxes to record gun type, score, and load data. This is one of many good free targets available at Targets4free.com.
Image Courtesy NSSF. This story is based on an NSSF Article.
‘Tis the season of gift-giving (Christmas Day is just a week away). Perhaps you’re considering giving a a first rifle to your grandson or perhaps a carry pistol to a spouse. When making a gun gift to a friend or family member, however, there are some very important legal considerations. Also the rules on firearms gift transfers vary from state to state. Bottom line here — you need to know the law BEFORE you deliver that shiny new firearm to a family member, close friend, or relative.
The first thing to remember if you’re thinking about giving someone a gun is that … it’s a gun! You already know that ownership of a firearm brings with it some serious legal and ethical obligations that other consumer products don’t. So let’s look at some questions you may have about giving a firearm as a gift.
Image Courtesy NSSF
The first question you have to ask is whether the intended recipient can legally own the firearm where he or she lives. With more than 20,000 different gun laws on the books, even the kinds of firearms that law-abiding citizens can own vary from place to place. For example, juveniles (under age 18) generally speaking are precluded by law from possessing a handgun. Check out the Bureau of Alcohol, Tobacco, Firearms and Explosives (ATF) website for an overview of local laws and, whatever you do, don’t forget that you can never under any circumstances transfer a firearm to someone you know — or have reasonable cause to believe — legally can’t own one. That’s a federal felony, so be careful.
There’s no federal law that prohibits a gift of a firearm to a relative or friend who lives in your home state. Many states — including California, Colorado, Connecticut, Delaware, New York, Oregon, Rhode Island, Washington State and the District of Columbia — require you to transfer a firearm through a local FFL-holder so an instant background check will be performed to make sure the recipient is not legally prohibited from owning the gun. Maryland and Pennsylvania require a background check for private party transfer of a handgun. There are exceptions, so it’s important to check the law of your state or ask your local firearms retailer.
Consider a Gift Card Instead of Direct Gift
The ATF recommends that if you want to give someone a new firearm, rather than going to a gun store and buying the gun on your own, consider instead purchasing a gift certificate/card from your favorite gun retailer. Then give that gift card as the present. That way the recipient can choose the exact gun he or she wants, and there’s no question about who is “the actual buyer of the firearm”, which is a question any purchaser must certify on the Federal Form 4473 at the time of purchase. The Gift Card option avoids any “straw purchaser” issues. Many reputable vendors offer gift cards, including Brownells and MidwayUSA.
Intra-Family Transfers and Antique Arms
What if you want to give “Old Betsy,” your favorite old deer rifle, to your son or daughter as a college graduation gift? Again, in some states, there’s no law that says you can’t, but many states require even intra-family transfers to go through a licensed dealer. Remember, you can never transfer a firearm directly to another person who is a resident of a different state. In that case, you must transfer the firearm through a licensed dealer in the state where the person receiving the gift resides.
Using a gift certificate from a firearms retailer near where the recipient lives might be a good solution. Be safe and check with an in-state FFL dealer before you give any firearm to a friend or family member.


 Every safe, when possible, should be anchored in place with heavy-duty fasteners. Ideally, use multiple bolts in the bottom of the safe, anchored to concrete or solid foundation. Choose the appropriate lag bolts or anchors for the material below your safe. If you can’t mount to the floor, bolt the safe to wall studs. You can locate the position of the studs with an inexpensive electronic “Stud Sensor” available at home supply stores.
 Locate your safe in the corner of a room or in a recess that blocks access to one or more sides of the safe. On many gun safes, the steel on the top, sides, and rear is thinner than on the door. Blocking access to the sides makes it much more difficult to use power tools on the sides, where the safe is most vulnerable. It’s also wise to place the safe in a relatively tight space with limited room to maneuver. Anything that makes the safe harder to move helps deter would-be thieves.


 Is your well-built rifle of high-quality components plagued with vertical fliers across more than 1-3 handload combinations? Consider the bedding, crown and scope/sight mounts. Are they correct? If so, then you might check for ignition issues before boldly undertaking an extensive, expensive, and quite possibly fruitless quest for the “magic handload”.


 Do you know which one of your eyes is dominant? It’s easy to determine eye dominance with a simple exercise. Pick an object about 6-10 feet away (a light switch or door knob works well). Make an “OK” sign with your right hand (see photo) and hold that about 18″ from your face. Now, with both eyes open, look through the circle formed by your thumb and index finger. Center the circle on the object, so you can see the object in the middle.


 Use Consistent Brass
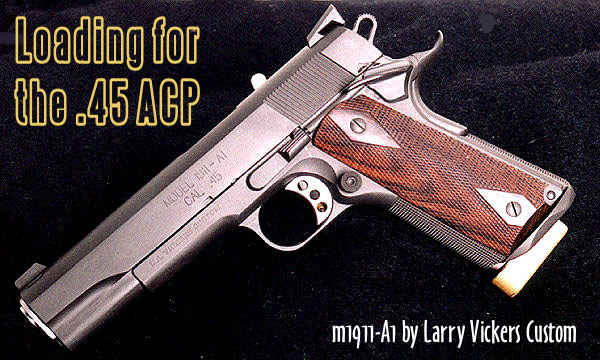

 Many visitors to the site ask us, “I’ve got a .223 and .308. What will a 6mmBR Norma (6BR) give me that I’m not getting already?” Well first you will probably average consistently smaller groups than your current .223 or .308 rifle (assuming the 6BR has a quality barrel and trigger). A good .308 Winchester can be superbly accurate, no question about that, but the lesser recoil of the 6BR works in the shooter’s favor over a long string of fire. Even with a Rem 700 or Savage action factory action, a 6BR with a benchrest stock, premium barrel, and a high-quality chambering job should deliver 5-shot groups in the high twos to mid-threes, provided you do your job. We have one 6BR rifle that shoots Lapua factory-loaded 6BR ammunition in the low twos and high ones. That’s exceptional, we admit, but it still shows how the 6BR is an inherently accurate cartridge, even with factory loads.
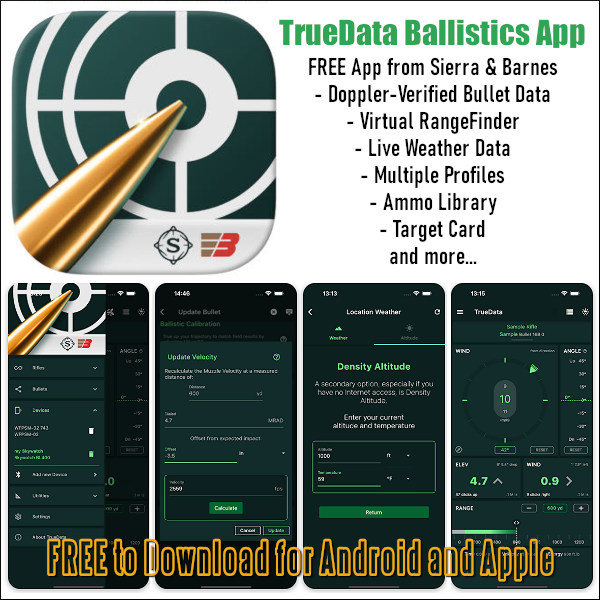


 The
The 


 The first question you have to ask is whether the intended recipient can legally own the firearm where he or she lives. With more than 20,000 different gun laws on the books, even the kinds of firearms that law-abiding citizens can own vary from place to place. For example, juveniles (under age 18) generally speaking are precluded by law from possessing a handgun. Check out the
  Consider a Gift Card Instead of Direct Gift


