Photo by SFC Brandon Green, 2018 National High Power Champion.
The prestigious CMP National Matches will be held at Camp Perry, Ohio this summer, July 12 through August 9, 2026. The President’s 100 Match runs Monday, July 27th, followed by Individual and Team Trophy Matches. And the Garand and Modern Military events kick off on August 1st, while 600-yard Mid-Range rifle matches run August 3-4, with Long Range following, concluding with the Palma Team match on August 9.
For those competing at Camp Perry this summer, we offer some insights from Tyrel Cooper, a multi-time National Champion. A past member of the USAMU, Cooper’s shooting resume includes five national championships (one each in 2008, 2011, 2012, and two in 2013). He won the 2013 NRA National Long Range Championship, as well as the 2013 NRA National Service Rifle Championship. In this article, written in 2014, Cooper explains the mental preparation that helped him win National Titles in 2013.
Below is a 2012 file photo of Ty Cooper shooting a service rifle. Cooper won the 2013 Long Range Championship using a Nesika-actioned bolt gun chambered in 7mm SAUM.
Mental Preparation by Tyrel Cooper Getting focused mentally is an important part of preparation for Perry. In 2011 I was chasing Sherri Gallagher, since then I have been chasing Brandon Green[.] If I get beat by a Service Rifle I am going to make him or her work for it. So there is your peak into my mental process. I go for the top and if I am hanging with them then the Service Rifle National Championship will come, Kind of like how I shoot for X’s and Tens will come.
Now I understand everyone is at different levels. You have to figure out what your goals are and then lie to yourself that you’ve already achieved them. Here is a trick that I used back in 2008: When I was a kid just starting out, my Dad made me read several books on shooting. One of them being With Winning In Mind by Lanny Bassham. One of the things I remember from his book is that he would make notes and place them where he would see them often. They contained his goals or stated he was already a world champion. I took a page from his book and did the same thing.
I made 3×5 cards and wrote my personal best 500 and 800 aggregate scores and taped on the horn of my truck, above the radio in my truck, on my laptop and a few other places I would see them often. Every time I saw those I would tell myself that I average those scores and I would get used to seeing them. By doing this you are lying to yourself to overcome the mental blocks the subconscious mind lays out for you.
I went from my worst year in 2007 to winning my first National Championship in 2008. I kind of slacked off in 2009 because I had reached my goals and didn’t set new ones and it showed, so I had to find new goals and motivation which I did and that pushed me back to the top.
Long story short, this is a mental sport and you have to figure out what you need to do to perform at your highest levels and breaking through those mental road blocks. You have to figure out how to get yourself to relax and control your mind keeping calm when you are shooting a personal best, either standing or on the day.
Here is a tip from my mental process from shooting. First I shoot for Xs, I took the line from the movie The Patriot and applied it to my shooting, “Aim small, miss small” and it is true. If you accept wide shots then you will keep shooting wide shots.
Winning Techniques for Rifle Competition
Slow, Solid, Smooth, Center
Always focus on the positive and good shots, and what you did physically and mentally, when you shot them. When I am nervous and need to calm myself down I tell myself: slow, solid, smooth, center.
Slow
I want my movement to be slow…
I can shoot Tens and Xs all day with slow movement.
Solid
Solid like a rock, a rock doesn’t move and that’s how I want my positions. By saying solid it reminds me to go through my little checks to make sure I am doing what I need to do make that happen.
Smooth
Smooth — that is my trigger word for smooth movement. You don’t want fast choppy movement but slow and smooth. This also reminds me to be smooth on the trigger. You can be smooth-fast or you can be smooth-slow but you have to be smooth and most people aren’t when they think they are. Just before leaving the USAMU, I walked up and down the line of five shooters during a rapid fire string and only one of them was smooth with their trigger control. It’s the second most important thing when it comes to shooting.
Center
This reminds me that I want my shots in the middle. It is just a positive reinforcement of where I want my shots to go. I shoot a reverse flat tire so it also kind of reminds me as to what I am looking for.
Countdown to CMP National Matches:
Story Tip from ELR Researcher. We welcome reader submissions.
Want to learn the basics of position shooting? Then you should check out an article by Gary Anderson, DCM Emeritus, in On the Mark digital magazine (Summer 2014, pp. 6-13). This article covers all the key elements: body position (prone, sitting, standing), sling use/adjustment, sight picture, aiming process, and trigger control. While this 8-page article was specifically written for Rimfire Sporter shooters, the techniques described by Anderson apply to all types of position shooting, whether you shoot air rifles, smallbore rifles, or centerfire rifles.
Here’s what Anderson says about aiming — how to keep your sights steady and get them centered on the middle of the target:
Trigger Contact and Center As soon as aiming at the target begins, the index finger must move from the trigger-guard to contact the trigger. It is important to get initial pressure on the trigger as soon as aiming begins. Then the shooter must focus on the sight picture and centering the sight picture movements over the aiming point. No one, not even champion shooters, can hold the aligned sights perfectly still. The sights are going to move a little bit or a lot, depending on the shooter’s skill level. The secret is to center those sight picture movements over the aiming point on the target (see trace illustration) before pulling the trigger.
When the sight picture movements on the target are centered, the last step in firing the shot is to add… smooth pressure on the trigger until the shot breaks.
Anderson also discusses the 5 Basics of Shot Technique:
BONUS: Olympic Gold Medalist Jamie Gray
Here’s an interesting video about three-position shooting. Produced by GOnra Media, this video demonstrates rifle hold and body alignment for prone, standing, sitting, and kneeling positions. Olympic Gold Medalist Jamie Gray demonstrates the proper stance and position of arms and legs for each of the positions. Ideally, in all of the shooting positions, the shooter takes advantage of skeletal support. The shooter should align the bones of his/her arms and legs to provide a solid foundation. A shooter’s legs and arms form vertical planes helping the body remain stable in the shooting position.
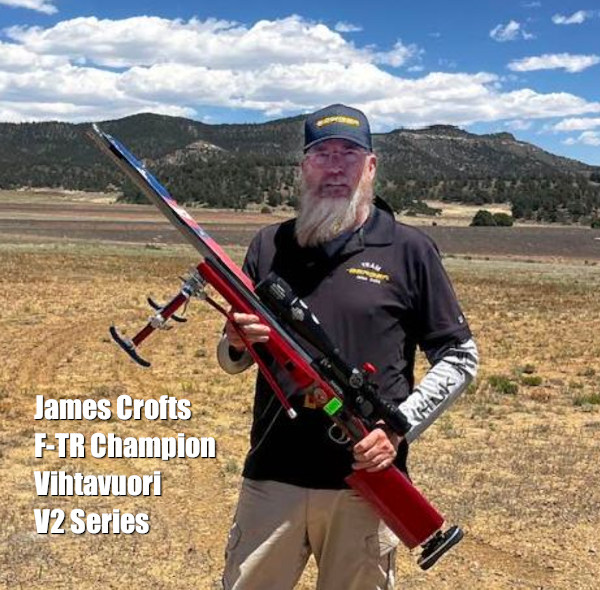
James Crofts of Team Berger has been crowned the 2026 F-TR Vihtavuori V2 Series Champion following an outstanding performance in Raton, New Mexico. Held May 13–16 at the NRA Whittington Center, the Vihtavuori V2 Finale is an invitation-only, long-range championship. The 3-day event features two, 32-shooter brackets in both F-TR and F-Open disciplines. Competitors earn their place in Ratopn by participating in F-Class Points Series qualifying matches, accumulating points based on their finishes. The top 32 shooters in each division advance to the Finale, where they compete in a double-elimination bracket to determine the champion.
Crofts competed in the F-Class Target Rifle (F-TR) category, which has strict equipment requirements. Rifles must weigh no more than 18 pounds, and competitors are limited to standard .308/7.62 NATO or .223/5.56 NATO chambers with no modifications. Crofts loads his .308 Win match ammo with Vihtavuori N150 powder in Lapua .308 Winchester Palma brass. His bullet choice is the Berger 208gr Long Range Hybrid Target, with a 0.689 G1 BC and 0.354 G7 BC.
“With the continued use and support of Berger and their components, I had 100% confidence in my ammunition,” said Crofts. “I knew if I missed or had a bad shot, it wasn’t the ammo — it was the conditions. Berger bullets, Lapua brass, and Vihtavuori powder are hands down the best.”
Berger congratulates James Crofts on his impressive V2 Series win at Raton, NM. What’s next? James will compete with Team USA this fall at the 2026 F-Class World Championships in Bisley, England.
At the request of our readers, we provide select “Deals of the Week”. Every Sunday afternoon or Monday morning we offer our Best Bargain selections. Here are some of the best deals on firearms, hardware, reloading components, optics, and shooting accessories. Be aware that sale prices are subject to change, and once clearance inventory is sold, it’s gone for good. You snooze you lose.
NOTE: All listed products are for sale to persons 18 years of age or older. No products are intended for use by minors.
Palmetto SA — Hot Trending Sale on ARs, Optics, Ammo
⏺️ » Huge discounts on guns and optics
This week there is a Major Sale at Palmetto State Armory. You’ll find great deals on AR lowers, complete ARs, Vortex optics and more. If you are looking to build an AR-based service rifle or varmint rig, this is an excellent opportunity. And there are great deals on ammo also.
MidwayUSA — Case Cleaning & Preparation SALE
⏺️ » Big savings on case prep tools and products
Brass prep is one of the most critical steps when it comes to reloading. If you need to step up your prep game, check out the Case Cleaning & Preparation Sale over at MidwayUSA. A wide variety of quality case prep products are on sale at significant savings — 15% to 30%. From tumblers to trimmers you’ll find everything you need to get your brass in tip-top shape.
As an Amazon affiliate, this site can earn revenues through sales commissions.
Gun Storage Check Week is the time to ensure your firearms are stored safely and securely. NSSF, the Firearm Industry Trade Association, is promoting Gun Storage Check Week, June 1-7, 2025, to remind gun owners to review their storage practices to prevent accidents, suicides and thefts. During this week, check your gun safe(s), and ensure your firearms are stored correctly and locked down properly. Also use secure gun cases when transporting firearms to the range. When traveling by air, use proper TSA-approved gun cases and comply with transport rules.
“Securely storing guns when they’re not in use can save lives. It’s really that simple,” said Joe Bartozzi, President and CEO of NSSF. “No one wants their gun in the hands of an unsupervised child, a person in crisis, someone who does not understand how to safely operate firearms, or a thief. If something bad happens because your gun isn’t stored securely, you’ll regret it, probably forever.”
This video covers gun safety rules and secure storage of firearms.
Gun Storage Check Week’s safety resources highlight many options to store firearms securely so that guns are off limits to unauthorized persons. Secure gun storage devices include:
Cable Locks — Available free of charge through NSSF’s Project ChildSafe® program Lock Boxes — Secure storage solution for guns kept for home security and in vehicles Lockable Gun Cases — for security, portability, and travel Full-size Gun Safes — For owners with multiple firearms to protect against fire and theft.
Enter to Win a Biometric Pistol Lock
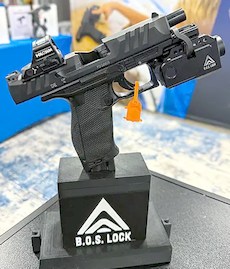
Visitors to GunStorageCheck.org can enter the Gun Storage Check Week Sweepstakes to win a B.O.S. Lock Fusion. This innovative firearm safety device mounts to a handgun’s accessory rail, combining a biometric slide lock with an integrated tactical light and green laser.
The B.O.S. Lock Fusion is the world’s first biometric slide lock that integrates a tactical light and laser into a single, high-performance locking device. Go to GunStorageCheck.org to register. One winner will be chosen.
NOTE: Gain 5 extra entries by watching any of the firearm safety or suicide prevention videos after you complete the entry form.
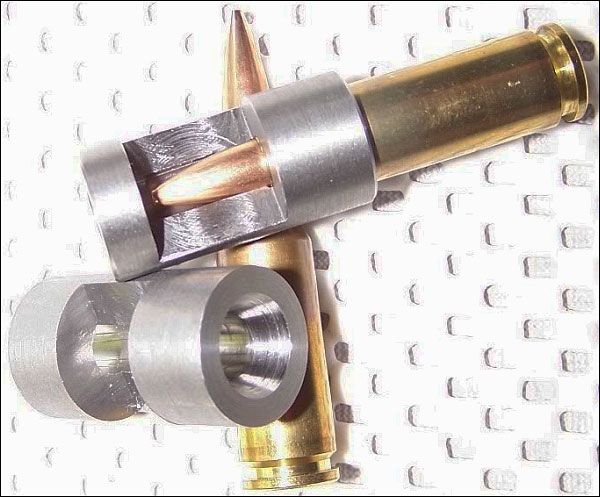
How and Why to Create a Dummy Round
When you have a new custom rifle built, or a new barrel fitted to an existing rifle, it makes sense to create a dummy round. This should have your preferred brass and bullet types, with the bullet positioned at optimal seating depth. A proper dummy round helps the gunsmith set the freebore correctly for your cartridge, and also ensure the proper chamber dimensions.
Respected machinist, tool-maker, and gunsmith Greg Tannel of Gre-Tan Rifles explains: “I use the dummy round as a gauge to finish cut the neck diameter and throat length and diameter so you have [optimal] clearance on the loaded neck and the ogive of the bullet just touches the rifling.” He recommends setting bullet so the full diameter is just forward of the case’s neck-shoulder junction. “From there”, Greg says, “I can build you the chamber you want… with all the proper clearances”.
Greg Tannel has created a very helpful video showing how to create a dummy round. Greg explains how to measure and assemble the dummy and how it will be used during the barrel chambering process. Greg notes — the dummy round should have NO Primer and No powder. We strongly recommend that every rifle shooter watch this video. Even if you won’t need a new barrel any time soon, you can learn important things about freebore, leade, and chamber geometry.
Must Watch Video — This has been viewed over 810,000 times on YouTube:
This has been a very popular video, with over 810,000 views! Here are actual YouTube comments:
That is the best explanation I’ve ever seen. Thank you sir. — P. Pablo
Nice video. You do a very good job of making this easy for new reloaders to understand. I sure wish things like this were available when I started reloading and having custom rifles built. Once again, great job, and your work speaks for itself. — Brandon K.
Beautiful job explaining chambering clearances. — D. Giorgi
Another Cool Tool — The Stub Gauge
When you have your gunsmith chamber your barrel, you can also have him create a Stub Gauge, i.e. a cast-off barrel section chambered like your actual barrel. The stub gauge lets you measure the original length to lands and freebore when your barrel was new. This gives you a baseline to accurately assess how far your throat erodes with use. Of course, as the throat wears, to get true length-to-lands dimension, you need take your measurement using your actual barrel. The barrel stub gauge helps you set the initial bullet seating depth. Seating depth is then adjusted accordingly, based on observed throat erosion, or your preferred seating depth.
With the 6mm Dasher cartridge becoming popular with PRS/NRL competitors as well as the benchrest crowd, we thought it was time to re-visit a special rifle chambered for the 6mm Dasher wildcat. This gun has a great story behind it. Forum member Bob A. (aka “Killshot”) used his “Forum Classifieds Special” to beat all comers in the F-Class Division in the American-Canadian Match and the Long Range Regional Match in 2013 in Sacramento, CA.
Bob’s 6mm Dasher sports a blue-printed Rem 700 action. Who says you need a high-dollar custom action to run with the big dogs? In fact, this same gun, built with components sourced from AccurateShooter Forum Classified Ads, set a Sacramento F-Class range record of 200-17X a few years back. In this story, Bob talks about the build, and he explains his methods for loading ultra-accurate Dasher ammo.
Bob’s Budget-Build Dasher F-Classer
I wanted to build a proper rifle for F-Open but needed to keep it simple and, well, cheap. I found a solid “base” to build on in the form of a Dave Bruno-built, “pre-owned” 6-6.5×47 Lapua that I located in the AccurateShooter Forum classifieds in late 2011. The base action was a trued and blue-printed Remington 700 receiver circa 1971 with a spiral-fluted bolt. It was in a Shehane ST1000 stock painted sky blue and had a Jewell 1.5-oz BR trigger. I sent the bolt to Greg Tannel (Gretanrifles.com) to have the firing pin hole bushed and sleeved, the ejector removed and the hole filled and the face trued. I upgraded to Tannel’s Light Steel firing pin assembly while it was out.
Having the working bits completed, I needed a barrel. So I went to the AccurateShooter classifieds again and found a 1:8″-twist, 30″ x 1.25″ (diam.) Bartlein with a 0.236″-land bore. I called Dave Kiff and explained my pursuit and he recommended his PT&G “world record” 6 Dasher reamer (.2704″ no-turn neck and .104″ freebore). A month or so later the reamer and gauges arrived.
I had the barrel chambered by Marc Soulie of Spartan Precision Rifles (510-755-5293, Concord, CA). Marc is a great builder and I’m pleased to call him a friend.
The rifle got its good looks from a Pennsylvania artist named Kenny Prahl. His Prahl Designs shop (724-478-2538) added the white ghost-flames over the existing sky blue metallic paint.
Looks Great, Shoots Better
Fire-forming showed great promise — ten-shot groups of half an inch at 200 yards were typical. I lost only one case to a split neck and the “blow lengths” are good and consistent. This was followed up with load development which saw 100-yard, five-shot groups in the .1s and .2s as the rifle showed its preference for Reloder 15 over Varget powder, and for CCI 450s over all other primers. The bullet of choice was the ever-popular Berger 105gr Hybrid Target.
In February 2012 I began shooting the Dasher in monthly club matches at the Sacramento Valley Shooting Center, the home range of a number of excellent F-Class, Benchrest and High Power shooters. Using a Farley Coaxial rest up front (also picked up from a WTB ad on AccurateShooter’s Forum) and an Edgewood bag in the back, I gradually improved my gun-handling to the point where I could shoot a respectable score. This was very different from the bipod shooting I’d done in the past in F/TR.
Dasher Loading Tips
My chamber is set up for blue box Lapua 6mmBR brass. My case preparation is straight-forward. I fire-form with virgin cases right out of the box. I don’t size them but I will give the primer holes a good look and clean up the flash hole with a .058″ bit in a pin vise. To fire-form, I seat a Berger 108gr BT .030″ into the lands over a standard 6mmBR load of Varget.
For match loads, I use Alliant Reloder 15. While Varget is less sensitive to temp changes, RL15 has given me lower extreme spreads and better long range control. [Bob acknowledges that every barrel is unique, so a different powder, such as H4895 might work better for you.]
I clean my fired cases with stainless steel media in a Thumler’s rotary tumbler after every firing. I anneal after every other firing using a Bench-Source machine which is very well made and easy to operate. I use a Whidden full length bushing die with Redding bushings for sizing.
After sizing, I chamfer the inside of the neck with the K&M tool which has a pilot rod centered in the flash hole. Then I’ll give the neck and mouth a “once over” with some 0000 steel wool. I finish loading off with a Redding Competition Seating Die with the micrometer top.
I use a carbide ball on the expander rod of the full length sizing die. I use a .266″ TiN-coated bushing and the ball just kisses the inside walls of the sized neck. I get very consistent neck tension this way and have had no issue with split necks.
Seating Depth Considerations
With fire-formed brass, the junction of the bullet’s bearing surface and boat-tail is above the neck/shoulder junction of the case, so I have no issues with donuts. You can see how a loaded round looks in the photo at left. For occasional trimming, I use a very nice little Possum Hollow trimmer that indexes on the case shoulder.
Do you know how gun primers are made — how the explosive elements are applied into those tiny cups? Find out by watching this video filmed at a Federal ammunition factory. It starts out with empty primer cups loaded, 1000 at a time, into trays using vibration (0:05 time-mark). While much of the process is automated, there is still a significant role played by production workers who apply a green, paste-like charging compound to the inside of hundreds of primer cups.
At the 0:17-second time-mark you can see the factory worker “charging” the primers with the priming compound. After the cups are filled, then the plate of cups “mates up with a plate of anvils” (0:40 time-mark). Then the primers are unloaded from trays and inspected.
Primer “Mysteries and Misconceptions” Article
There is an excellent article about primers on the Shooting Times website. This authoritative Shooting Times article explains the fine points of primer design and construction. The author reveals some little-known facts about primers and corrects common misconceptions. Here are some highlights:
Size Matters
Useful Trivia — even though Small Rifle and Small Pistol primer pockets share the same depth specification, Large Rifle and Large Pistol primers do not. The standard pocket for a Large Pistol primer is somewhat shallower than its Large Rifle counterpart, specifically, 0.008 to 0.009 inch less.
Magnum Primers
There are two ways to make a Magnum primer — either use more of the standard chemical mix to provide a longer-burning flame or change the mix to one with more aggressive burn characteristics. Prior to 1989, CCI used the first option in Magnum Rifle primers. After that, we switched to a mix optimized for spherical propellants that produced a 24% increase in flame temperature and a 16% boost in gas volume.
Foiled Again
Most component primers have a little disk of paper between the anvil and the priming mix. It is called “foil paper” not because it’s made of foil but because it replaces the true metal foil used to seal early percussion caps. The reason this little disk exists is strictly a manufacturing convenience. Wet primer pellets are smaller than the inside diameter of the cup when inserted and must be compacted to achieve their proper diameter and height. Without the foil paper, the wet mix would stick to the compaction pins and jam up the assembly process.
Box to Bench Precision (B2B) has developed an oversize (23.5″ x 30″) precisely-scaled target designed for Load Development and Scope Testing. This waterproof target is very innovative. On the target you’ll find clusters of aim points for various tasks. Upper left are orange aiming spots for testing various powder charges. In the upper right quadrant are more red aim points to be used when testing bullet seating depth. Running down the center of the target is a vertical line with horizontal marks showing precise MOA and Mil heights at 100 yards — use this feature to verify your click values. ORDER HERE.
And there’s more. In the lower right quadrant (far right) are three black targets to be used for chrono work. With these you can record cold velocity, hot barrel velocity and a “Final Velocity”. Over in the lower left quadrant, in the left-most column, are three dot targets for zeroing and recording group size with load data. Finally, four more black/white targets can be used for a scope box test (aka “shooting the square”). With a box test, you move from target to target, clicking in sequence to each corner of the square in sequence, eventually returning to your original aim point. If your scope tracks correctly, the last box test shot should end up right on top of the first shot.
Record the Entire Load Development Process on One Target
For those used to shooting at conventional bulleyes or benchrest targets, this target may seem confusing, but it can really help organize and simplify the process of load development. We like the idea of having a single, durable target that performs double-duty — serving for load development as well as scope checking. And we like the fact that the target is pretty strong — the maker says: “The target is Tear-Resistant and Water-Proof”. We’d expect a maker based in the Pacific NW to design a target that can handle wet weather.
Previous version of target shown. Current version has some minor enhancements.
How to Order
So how much does all this target technology cost? A pack of three 23.5″ x 30″ targets costs $27.00, a five-target pack is $40.00, a seven-target pack is $49.00, while a ten-target pack runs $55.00. These targets ship FREE in a durable cardboard tube. To order these targets, visit the Box To Box Precision Online Store.
Are you looking to get started in tactical/practical competitions? Or perhaps you already have have some PRS/NRL experience but want to upgrade your equipment and enhance your match results. Here are eight videos that can help you improve your game. These videos feature top PRS/NRL competitors and knowledgeable manufacturers’ representatives. You’ll find other related videos on the Long Range Precision Shooters YouTube channel.
Shooting a PRS Match for the First Time
Here’s an amusing video from the land Down-Under — Australia. The video covers a club PRS match, showing various shooting positions. Around the world, the PRS discipline is growing rapidly, particularly with younger marksmen under 35. The matches are fun and fast-paced and the sport is much more dynamic and physically challenging than benchrest or F-Class competition.
Building a Custom PRS/NRL Rig
Action, trigger, barrel, chassis, rails, and optics — this video from Burris covers all the key components of the modern PRS/NRL rifle. This video discusses the pros/cons of various configurations and the explains what to look for in a PRS/NRL riflescope.
How Accurate Are the Top PRS Shooters?
In this video, MDT put three top centerfire PRS shooters to the test, running them through some of the most difficult stages. The goal? To showcase the level of accuracy and precision these top shooters can achieve. From shooting off barricades to hitting targets from rooftops and rocks, these shooters demonstrate why they are considered among the best in the world. Top-tier modern PRS/NRL rifles when shot prone from a bipod at 100 yards can do 1/3-MOA or better for three shots.
Cartridge Choice for PRS and Tactical Competition
This video reviews many of the different cartridge options popular for PRS-style competition. The video examines pros and cons of various cartridge choices, focusing on accuracy, recoil, mag-feeding, and value for money. This segment features G.A. Precision owner/founder George Gardner.
Most top PRS shooters are using 6mm cartridges these days. These deliver excellent accuracy with lower recoil and cheaper bullet cost. Popular choices include 6 Dasher, 6 BRA, 6mm Creedmoor, 6XC, and the new 6GT cartridge, which is sort of a stretched version of a 6mmBR. It has a bit more case length for better feeding, and greater case capacity than a 6BR so you can shoot 105-108 grain bullets at 2950 fps with ease. That’s a popular Dasher accuracy node that the 6GT can achieve at somewhat lower pressures.
CLICK HERE for a full write-up on a 6GT rifle build by Mike McCasland (Texas Precision). This includes load development suggestions and a 6GT reamer print. The popular 0.120″ freebore chamber allows for the majority of high-BC 6mm projectiles. Mike had good luck with the pointed 107gr Sierra Match Kings (SMK), as well as the 110gr Hornady A-Tips in his rifle.
Road to the PRS
This video from Kestrel offers good advice on getting started in PRS/NRL shooting. Experts demonstrate multiple shooting positions and offer advice on shooting from barricades. Topics covered include rate of fire, scope use, and equipment selection.
PRS Tactical Division Explained
In this video MDT Shooter Matt Stiner explains the basics of competition in the PRS Tactical division. The video covers rifle, cartridge choice, optics, and key accessories. He also explains how to set up your PRS Tactical rig for best results. In addition Matt talks about bullet and brass options.
Savage 110 Elite Precision — Good Production Class Choice
This Alabama Arsenal video shows the Savage 110 Elite Precision on PRS Match stages using bags, tripods, and bipods, firing from stone barriers, field frames, and wood platform supports. If you are in the market for a PRS rifle, this video, which now has 355,000 views, is well worth watching. It covers specific features including trigger, chassis, magazines, and Atlas attachment. NOTE: The price limit for Production Class has risen significantly over the years, with a current MSRP max of $3000 for the rifle and $2500 for the optic.
PRS on a Budget — Converting a Basic Rifle for PRS Use
Top of the line rifles for competition are exceedingly expensive, but there is another option if you have a rifle in the safe that doesn’t get much use. Top F-Class shooter and wind coach Keith Glasscock notes: “I converted my .223 Remington varmint rifle into a Tactical class/PRS training rifle to save costs on ammunition and barrels so I can get better, faster.” Keith shows a very logical way to get started in the PRS/NRL game.


 Getting focused mentally is an important part of preparation for Perry. In 2011 I was chasing Sherri Gallagher, since then I have been chasing Brandon Green[.] If I get beat by a Service Rifle I am going to make him or her work for it. So there is your peak into my mental process. I go for the top and if I am hanging with them then the Service Rifle National Championship will come, Kind of like how I shoot for X’s and Tens will come.


 As soon as aiming at the target begins, the index finger must move from the trigger-guard to contact the trigger. It is important to get initial pressure on the trigger as soon as aiming begins. Then the shooter must focus on the sight picture and centering the sight picture movements over the aiming point. No one, not even champion shooters, can hold the aligned sights perfectly still. The sights are going to move a little bit or a lot, depending on the shooter’s skill level. The secret is to center those sight picture movements over the aiming point on the target (see trace illustration) before pulling the trigger.


 Dasher Loading Tips
 I use a carbide ball on the expander rod of the full length sizing die. I use a .266″ TiN-coated bushing and the ball just kisses the inside walls of the sized neck. I get very consistent neck tension this way and have had no issue with split necks.