Have you recently purchased a new scope? Then you should verify the actual click value of the turrets before you use the optic in competition (or on a long-range hunt). While a scope may have listed click values of 1/4-MOA, 1/8-MOA or 0.1 Mils, the reality may be slightly different. Many scopes have actual click values that are slightly higher or lower than the value claimed by the manufacturer. The small variance adds up when you click through a wide range of elevation.
In this video, Bryan Litz of Applied Ballistics shows how to verify your true click values using a “Tall Target Test”. The idea is to start at the bottom end of a vertical line, and then click up 30 MOA or so. Multiply the number of clicked MOA by 1.047 to get the claimed value in inches. For example, at 100 yards, 30 MOA is exactly 31.41 inches. Then measure the difference in your actual point of impact. If, for example, your point of impact is 33 inches, then you are getting more than the stated MOA with each click (assuming the target is positioned at exactly 100 yards).
How to Perform the Tall Target Test
The objective of the tall target test is to insure that your scope is giving you the proper amount of adjustment. For example, when you dial 30 MOA, are you really getting 30 MOA, or are you getting 28.5 or 31.2 MOA? The only way to be sure is to verify, don’t take it for granted! Knowing your scopes true click values insures that you can accurately apply a ballistic solution. In fact, many perceived inaccuracies of long range ballistics solutions are actually caused by the scopes not applying the intended adjustment. In order to verify your scope’s true movement and calculate a correction factor, follow the steps in the Tall Target Worksheet. This worksheet takes you thru the ‘calibration process’ including measuring true range to target and actual POI shift for a given scope adjustment. The goal is to calculate a correction factor that you can apply to a ballistic solution which accounts for the tracking error of your scope. For example, if you find your scope moves 7% more than it should, then you have to apply 7% less than the ballistic solution calls for to hit your target.
NOTE: When doing this test, don’t go for the maximum possible elevation. You don’t want to max out the elevation knob, running it to the top stop. Bryan Litz explains: “It’s good to avoid the extremes of adjustment when doing the tall target test.I don’t know how much different the clicks would be at the edges, but they’re not the same.”
Should You Perform a WIDE Target Test Too?
What about testing your windage clicks the same way, with a WIDE target test? Bryan Litz says that’s not really necessary: “The wide target test isn’t as important for a couple reasons. First, you typically don’t dial nearly as much wind as you do elevation. Second, your dialed windage is a guess to begin with; a moving average that’s different for every shot. Whereas you stand to gain a lot by nailing vertical down to the click, the same is not true of windage. If there’s a 5% error in your scope’s windage tracking, you’d never know it.”
Verifying Scope Level With Tall Target Test
Bryan says: “While setting up your Tall Target Test, you should also verify that your scope level is mounted and aligned properly. This is critical to insuring that you’ll have a long range horizontal zero when you dial on a bunch of elevation for long range shots. This is a requirement for all kinds of long range shooting. Without a properly-mounted scope level (verified on a Tall Target), you really can’t guarantee your horizontal zero at long range.”
NOTE: For ‘known-distance’ competition, this is the only mandatory part of the tall target test, since slight variations in elevation click-values are not that important once you’re centered “on target” at a known distance.
Each Wednesday, the U.S. Army Marksmanship Unit publishes a reloading “how-to” article on the USAMU Facebook page. This past week’s “Handloading Hump Day” article, the latest in a 7-part series, relates to chronograph testing and statistical samples. We highly recommend you read this article, which offers some important tips that can benefit any hand-loader. Visit the USAMU Facebook page next Wednesday for the next installment.
Chronograph Testing — Set-Up, Sample Sizes, and Velocity Factors
Initial Chronograph Setup
A chronograph is an instrument designed to measure bullet velocity. Typically, the bullet casts a shadow as it passes over two electronic sensors placed a given distance apart. The first screen is the “start” screen, and it triggers an internal, high-speed counter. As the bullet passes the second, or “stop” screen, the counter is stopped. Then, appropriate math of time vs. distance traveled reveals the bullet’s velocity. Most home chronographs use either 2- or 4-foot spacing between sensors. Longer spacing can add some accuracy to the system, but with high-quality chronographs, 4-foot spacing is certainly adequate.
Laboratory chronographs usually have six feet or more between sensors. Depending upon the make and model of ones chronograph, it should come with instructions on how far the “start” screen should be placed from one’s muzzle. Other details include adequate light (indoors or outdoors), light diffusers over the sensors as needed, and protecting the start screen from blast and debris such as shotgun wads, etc. When assembling a sky-screen system, the spacing between sensors must be extremely accurate to allow correct velocity readings.
Statistics: Group Sizes, Distances and Sample Sizes
How many groups should we fire, and how many shots per group? These questions are matters of judgment, to a degree. First, to best assess how ones ammunition will perform in competition, it should be test-fired at the actual distance for which it will be used. [That means] 600-yard or 1000-yard ammo should be tested at 600 and 1000 yards, respectively, if possible. It is possible to work up very accurate ammunition at 100 or 200 yards that does not perform well as ranges increase. Sometimes, a change in powder type can correct this and produce a load that really shines at longer range.
The number of shots fired per group should be realistic for the course of fire. That is, if one will be firing 10-shot strings in competition then final accuracy testing, at least, should involve 10-shot strings. These will reflect the rifles’ true capability. Knowing this will help the shooter better decide in competition whether a shot requires a sight adjustment, or if it merely struck within the normal accuracy radius of his rifle.
How many groups are needed for a valid test? Here, much depends on the precision with which one can gather the accuracy data. If shooting from a machine rest in good weather conditions, two or three 10-shot groups at full distance may be very adequate. If it’s windy, the rifle or ammunition are marginal, or the shooter is not confident in his ability to consistently fire every shot accurately, then a few more groups may give a better picture of the rifle’s true average.
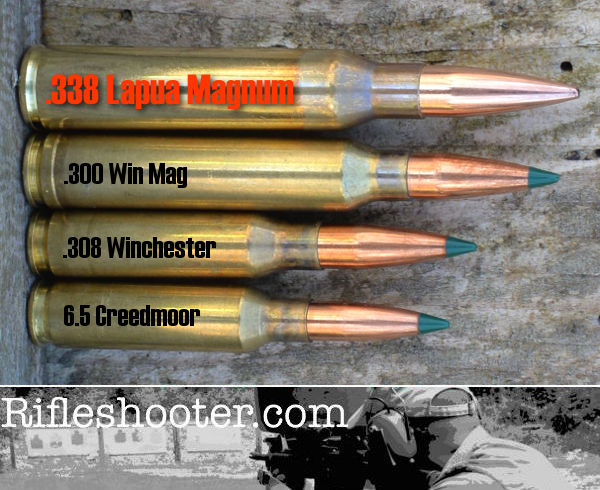
Shooters contemplating purchase of a .338 LM rifle often ask: “What length barrel should I get?” Rifleshooter.com recently performed a test that provides interesting answers…
Our friends at RifleShooter.com like to slice and dice — barrels that is. They have done barrel length cut-down tests for popular calibers like the .223 Rem, 6.5 Creedmoor, and .308 Winchester. But now they’ve tackled something way bigger — the .338 Lapua Magnum, a true “Big Boomer”. Starting with a beefy 30″-long Pac-Nor Barrel, RifleShooter.com chopped the tube down in one-inch increments all the way down to 17 inches (that’s 14 different lengths). At each new (shorter) barrel length, velocity was measured with a MagnetoSpeed chronograph using two different loads, 250gr SMKs with H4831sc and 300gr SMKs with Retumbo. Four shots were fired at each length with each load, a total of 112 rounds.
Load #1: 250gr Sierra MK, Lapua brass, CCI #250 primer, H4831SC, OAL 3.720″.
Load #2: 300gr Sierra MK, Lapua brass, Win WLRM primer, Retumbo, OAL 3.720″.
The .338 Lapua Magnum is a jumbo-sized cartridge, that’s for sure…
Donor Barrel Sacrificed for Science
Rifleshooter.com’s Editor explains: “Brandon from Precision Addiction offered to send us his .338 barrel for our .338 Lapua Mag test. I took him up on his offer and he sent me his used Pac-Nor chrome-moly barrel with about 600 rounds though it. This thing was a beast! A heavy 1.350″ shank that ran straight for 6″, until tapering to 1″ at 30″ in length.”
Results Summary
.338 Lapua Magnum with 250gr Sierra MatchKings
After shortening the barrel from 30″ to 17″, total velocity reduction for the 250-grainers was 395 FPS, an average loss of 30.4 FPS per 1″ cut. The amount of velocity loss per inch rose as the barrel got shorter, with the biggest speed reduction, a loss of 55 FPS, coming with the cut from 18″ to 17″.
Start Velocity: 2942 FPS | End Velocity: 2547 FPS | Average Loss Per Inch: 30.4 FPS
.338 Lapua Magnum with 300gr Sierra MatchKings
Shooting the 300-grainers, total velocity reduction was 341 fps, an average of 26.2 FPS loss per 1″ cut (30″ down to 17″). However, the speed actually increased with the first cut from 30 inches to 29 inches. The tester noted: “The 300 SMK load showed a slight increase from 30″ to 29″. I’ve recorded this in other tests and it seems to be more common with a heavier load. I suspect it is primarily due to the small sample sizes being used along with the relative proximity of muzzle velocities in adjacent lengths.”
Start Velocity: 2833 FPS | End Velocity: 2492 FPS | Average Loss Per Inch: 26.2 FPS*
*Velocity rose with first cut. Velocities ranged from 2,871 FPS (29″) to 2,492 FPS (17″) for a total velocity loss of 341 FPS.
RifleShooter.com crunched the velocity numbers in some interesting ways. For example they analyzed rate of velocity loss, concluding that: “after the initial rate change, the rate of the change in velocity is fairly consistent.” (View Rate of Change Graph)
How Velocity Loss Alters Long-Range Ballistics
The testers wanted to determine how the velocity reductions “affect our ability to hit targets downrange”. So, Rifleshooter.com plotted changes in elevation and wind drift at all barrel lengths. This revealed something interesting — drift increased significantly below 26″ barrel length: “Above 26″ things look pretty good, below 22″ they change quickly.”
We highly recommend you read the whole story. Rifleshooter.com put in serious time and effort, resulting in solid, thought-provoking results. The data is presented in multiple tables and graphs, revealing inch-by-inch velocities, change “deltas”, and SDs at each length.
Applied Ballistics has produced a series of YouTube videos about precision long range shooting. Featuring ace long-range shooter and professional ballistician Bryan Litz, these videos address various topics of interest to long-range marksmen. This featured video looks at Long Range mistakes — Bryan Litz reveals the most common ballistics-related shooting errors at Long Range. And then Bryan explains how to improve your shooting (and wind reading) to eliminate those common errors.
Watch Applied Ballistics Video about Common Mistakes in Long Range Shooting:
Bryan Litz of Applied Ballistics often hears the question: “What are the main reasons people miss their target at long range?” To answer that question, in this video, Bryan explains the most important variables in Long Range shooting. Bryan says: “Probably the number one thing is range — you have to have a [precise] range to your target because your bullet is dropping, and to hit the target you need to correct for bullet drop.” Distance may be indicated on the target bay (or berm), but for open ranges you should ascertain distance-to-target with a quality laser rangefinder. Even when the distance to target is shown with a sign or marker, you may want to confirm the distance with your rangefinder. (You may be surprised — we’ve seen marked target distances at commercial ranges off by 25+ yards!) Bryan says: “Get a good laser range to the target and you’ll be within a couple yards”.
After distance to target, the most important variable is the wind. This is the most challenging factor because the wind is constantly changing. Bryan explains: “After 300 or 400 yards, the wind [will] move your shots off the target if you don’t correct for it. The best way to account for the wind is to measure it at your location with a Kestrel. The Kestrel can give you the speed and direction of the wind at your location, which can baseline your wind call for your long-range shot.” Bryan acknowledges that there will still be variables: “The wind isn’t always blowing the same downrange as at your location… and the wind is always changing”. Bryan notes that you need to account for variances in wind between the time you gauge the wind angle and velocity and the time you actually you take your shot.
Shoot 101 Quiz
How much of an expert are you when it comes to firearms and ballistics? Test your knowledge with this interactive test. Vista Outdoors (formerly ATK Sporting Group) has launched a new multi-platform media campaign called Shoot 101, which provides “how to” information about shooting, optics, and outdoor gear.
On the Shoot 101 website, you’ll find a Ballistics Quiz. The questions are pretty basic, but it’s still fun to see if you get all the answers correct.
You don’t need a lot of technical knowledge. Roughly a third of the questions are about projectile types and bullet construction. Note, for some reason the layout doesn’t show all the possible answers at first. So, for each question, be sure to scroll down using the blue scroll bar on the right.
At the Berger SW Nationals this week in Phoenix, the nation’s top long-range shooters will try to put all their shots in the 10-Ring at 800, 900, and 1000 yards. A good foundation in ballistics is vital if you want to succeed in the long-range game.
How much do you know about BCs, Bullet Shapes, Trajectories, Wind Drift, and other things in the realm of External Ballistics? You can test your knowledge of basic Ballistics principles with this interactive quiz. The questions and answers were provided by Ballistics Guru Bryan Litz of Applied Ballistics LLC. Bryan is the author of Applied Ballistics for Long-Range Shooting and other popular resources in print, DVD, and eBook format. Have fun with our Quiz.
The Quiz contains ten (10) questions. When you complete all ten questions, you can see your results, along with the correct answers.
For you guys competing at the Berger SW Nationals this week, we’re repeating an excellent article by Steven Blair on wind reading. Steven, a top F-Class shooter, talks about mirage, topography effects, tail winds, and other subtle factors that can cause frustration for shooters. Steve explains that wind effects can be complex — there’s more going on than just velocity and angle. You need to notice things like berm locations and effects of temp changes over the course of the day.
Wind Reading Tips for Competitive Shooters by Steven Blair, 2012 California State Long Range F-Open Champion
Assess the Terrain and How the Wind Will Interact with It
Before you begin a match, take a few minutes to look around the range at the terrain, any obstructions, range topography (berms and backstop), and trees, buildings or structures that could affect wind flow over the range. Imagine what might happen if the wind was from the left or right, headwind or tailwind. Depending upon the direction, significant effects may be seen on range. A head or tail wind may ripple across the berms, causing elevation changes, both high and low. A tall side berm, like the east side berm at Ben Avery, may cause turbulence when the wind comes from that direction. Blocking features might shield most of the wind but a break along the range can funnel strong gusts through the gap with no other indications. Take a few notes about the effects of different wind directions and refer to them if the prevailing direction changes. (Tip courtesy Tony Robertson.)
Use a Spotting Scope, Even When Shooting a Scoped Rifle
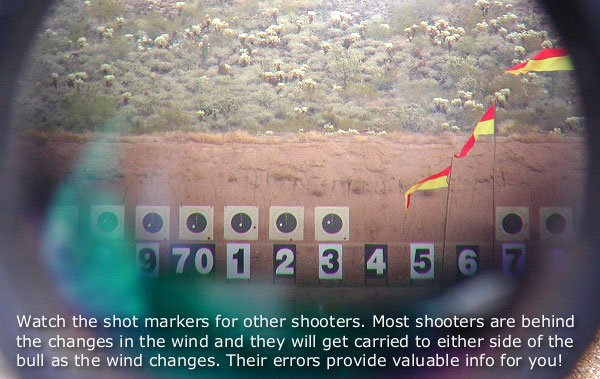
A good spotting scope can “see” mirage much more clearly than even an expensive rifle scope. Take your spotting scope to the line and position it as sling shooters do, close enough to use without much movement. Focus the scope approximately 1/3 of the way down range or where the most significant wind effects are likely to occur. Take a quick look while waiting for pit service, glance at the flags and compare to your scope sight picture. I often see ambiguous indications at the target through the rifle scope, but see a clear indication of wind direction and speed through the spotting scope at the shorter distance. When shooting the Arizona Palma Championship at Ben Avery last weekend, I was scoring while the wind was coming from the east. Shooters up and down the line were out to the left, losing points. Mirage at the target looked moderate and the flags weren’t indicating strong wind. As I focused the spotting scope back, the mirage suddenly looked like it was flowing twice as fast around 500 yards than it was closer or farther. It wasn’t until I realized that the access road cut through the berm there that I understood what was happening. (Tip courtesy Gary Eliseo.)
Don’t Over-React to Something That May Be an Anomaly
On ranges with sizable berms, a headwind or tailwind can cause significant elevation problems. It is generally not possible to see or predict when this will occur. When the conditions exist that cause elevation changes and other competitors are experiencing the same problem, the best strategy is to ignore it. Certainly, avoid shooting when the head or tail wind is gusting, the same as you would in a crosswind. But, if you react to random, range-induced elevation changes, the only likely result is to make it worse. Whether the problem is caused by range or ammunition, maintain your waterline hold until you have evidence that something has fundamentally changed.
My .284 Shehane will usually require a click or two down during a string as the barrel warms. That is normal and manageable. But, if your shots are just bouncing up and down in the 10 ring, leave it alone. The same is also true of an occasional gust pushing a shot into the 9 ring. If the conditions have not changed and one shot just went out, it may be the result of a random occurrence that was not predictable. (Tip courtesy “School of Hard Knocks”.)
Adjust Spotting Scope Focus and Magnification as Needed to View Mirage vs. Target Details
In F-Class we only need to see mirage, spotters, and scoring disks. That does not take a lot of magnification. My scope is a Nikon 25-75x82mm ED. It is a superb scope for the money and makes it trivial to see minor variations in mirage. It is good to have the high magnification available, and it can always be reduced if necessary. I use different power settings for different situations.
Setting Magnification Levels
During a match, in very good viewing conditions, I set my spotting scope at 75X, full power. The mirage is more subtle in the morning and greater magnification is needed.
During a match with heavy mirage I set my spotting scope at about 40X. I have no problem seeing mirage, even at this magnification.
When practicing at 300 yards or closer I set my spotting scope at max power (75X) so I can see the little 6mm holes from my 6BR rifle. I usually need to focus back and forth between shots to see both bullet holes and mirage.
Steven Blair, 2012 California State Long Range F-Open Champion, has been shooting since childhood and competing for over 30 years. Before retiring, Steve spent 16 years in Engineering and IT with General Atomics. He has held Engineering and Marketing positions with several firearms companies and worked on projects from pistols to 155mm howitzers.
Applied Ballistics has created a series of YouTube videos about precision long range shooting. Featuring ace long-range shooter and professional ballistician Bryan Litz, these videos will address various topics of interest to long-range marksmen. In this video, the first in the series, Bryan Litz answers the question, “Just What Is Long Range Shooting?” Bryan discusses how we define “long range” and the key factors shooters need to consider.
Applied Ballistics Video — What Is Long Range Shooting?
Bryan states: “I don’t think there is a clear definition of where Long Range starts.” But he offers this practical guideline: “The way I think of it, any time you’re making major adjustments to your zero in order to hit a target, due to gravity drop and wind deflection, THEN you’re getting into ‘Long Range’. For example, if you are zeroed at 100 yards and need to shoot to 600 yards, you have many feet of elevation [drop] to account for, and to me, that’s where it becomes Long Range.”
Extended Long Range and the Transonic Zone
Bryan adds a second concept, namely “Extended Long Range”. Litz says that: “Extended Long Range starts whenever the bullet slows to its transonic range. As the bullet slows down to approach Mach 1, it starts to encounter transonic effects, which are more complex and difficult to account for, compared to the supersonic range where the bullet is relatively well-behaved.” Bryan notes that bullets start to encounter transonic effects at about 1340 fps, quite a bit faster than the speed of sound, which is about 1116 fps at sea level in normal conditions (59° F).
With the Berger Southwest Nationals coming up soon (Feb. 6-12), we thought we would share some tips from a past Champion who really knows the Ben Avery range in Phoenix. In 2015, Bryan won the F-TR Mid-Range AND Long-Range National Championships hosted at Ben Avery. And at the 2014 Berger SW Nationals (SWN), Bryan took top honors among all sling shooters. If you only know Bryan Litz from his Applied Ballistics Books and DVDs, you may not realize that this guy is a great marksman (along with being an actual rocket scientist). This guy can shoot.
Given his impressive track record at Ben Avery, we asked Bryan if he had any advice for other long-range competitors. First Bryan provided three tips concerning Ballistics, his special area of expertise. Next Bryan offered three more general tips about long-range competition — how to analyze your shooting, how to choose your ‘wind strategy’, and how to avoid the most costly mistakes, i.e. how to avoid the “train-wrecks”.
Here is the sleek F-TR Rig Bryan Litz used to win the 2015 F-TR Mid-Range and Long-Range Championships at Ben Avery:
Litz Ballistics Tips
Ballistics TIP ONE. If you’re having trouble getting your ballistic software to match actual drops, you need to look at a number of possible reasons. Here are some common issues that can cause problems.
Click Values Are Not Exact. Scopes and iron sights don’t always produce accurate adjustments. In other words, if your ballistics program predicts 30 MOA of drop, and you dial 30 MOA but hit low, it might be that your sight actually only moved 28 MOA (for example). To see if your sight is adjusting accurately, shoot a tall target at 100 yards and measure group separation when dialing your sight.
Barometric vs. Station Pressure. This is a commonly misunderstood input to ballistics programs. You can avoid this pitfall by remembering the following: station pressure is the actual measured pressure at your location, and you don’t need to tell the program your altitude when using station pressure. Barometric pressure is corrected for sea level. If you’re using barometric pressure, you also have to input your altitude.
Muzzle Velocity. Chronographs are not always as accurate as shooters think they are — your true MV may be off by 10-20 fps (or more). If your drop is different than predicted at long range, it might be because your muzzle velocity input is wrong.
Mixing Up BC (G1 vs. G7). Knowledgeable long range shooters know that the G7 standard is a more representative standard for modern LR bullets. However, using G7 BCs isn’t just a matter of clicking the ‘G7′ option in the program. The numeric value of the BC is different for G1 and G7. For example, the G1 BC of the Berger 155.5 grain Fullbore bullet is .464 but the G7 BC is .237. If you were to enter .464 but click on G7, the results would be way off.
Ballistics TIP TWO. A properly installed level is absolutely essential for long range shooting. Without a good level reference, your long range wind zero will be off due to minor canting of the rifle from side to side. You can verify that your level is installed correctly on a 100-yard ‘tall target’. Draw a plumb line straight up the target and verify that your groups track straight up this line as you go up in elevation.
Ballistics TIP THREE. If your long range ballistic predictions aren’t tracking, always come back and verify your 100-yard zero. Sometimes a simple zero shift can be misconstrued as errors in long range ballistics predictions.
Litz Competition Shooting Tips
Competition TIP ONE. Improving your scores in long range competition is a constant process of self-assessment. After each match, carefully analyze how you lost points and make a plan to improve. Beginning shooters will lose a lot of points to fundamental things like sight alignment and trigger control. Veteran shooters will lose far fewer points to a smaller list of mistakes. At every step along the way, always ask yourself why you’re losing points and address the issues. Sometimes the weak links that you need to work on aren’t your favorite thing to do, and success will take work in these areas as well.
Competition TIP TWO. Select your wind shooting strategy carefully. For beginners and veterans, most points are typically lost to wind. Successful shooters put a lot of thought into their approach to wind shooting. Sometimes it’s best to shoot fast and minimize the changes you’ll have to navigate. Other times it’s best to wait out a condition which may take several minutes. Develop a comfortable rest position so you have an easier time waiting when you should be waiting.
Competition TIP THREE. Actively avoid major train wrecks. Sounds obvious but it happens a lot. Select equipment that is reliable, get comfortable with it and have back-ups for important things. Don’t load on the verge of max pressure, don’t go to an important match with a barrel that’s near shot out, physically check tightness of all important screws prior to shooting each string. Observe what train wrecks you and others experience, and put measures in place to avoid them.
“Must-Watch” SWN Video has aerial view of Ben Avery plus highlights from Saturday
Get ready for a revolution in the F-Open, ELR, and Long-Range Benchrest games. Sierra just introduced a new 7mm bullet with a stunning 0.780 G1 BC. This new 197-grain HPBT MatchKing is one of the highest-BC, jacketed .284-caliber projectiles ever offered to the public. By comparison, Sierra’s own advanced 183-grain 7mm Matchking has a .707 G1 BC. That means the new 197-grainer has a 10% higher BC than the already slippery 183-grainer. That’s an impressive achievement by Sierra.
We expect top F-Open and long-range shooters will be trying the new 197-grainer as soon as they can get their hands on this new projectile. They may need new barrels however, as Sierra states: “This bullet requires a barrel twist rate of 1:7.5″ or faster”. Sierra expects to start shipping these slippery 7mm 197s very soon. You can order directly from Sierra’s website, stock code #1997, $54.20 for 100 bullets.
Factory Uniformed Bullet Tips
Sierra has officially announced that the 197gr SMK will come “pointed” from the factory. These impressive new 197s will have a “final meplat reducing operation” (pointing). This creates a higher BC (for less drag) and also makes the BC more uniform (reducing vertical spread at long range). Our tests of other factory-pointed Sierra MKs have demonstrated that Sierra does a very good job with this pointing operation. The “pointed” MatchKings we’ve shot recently had very nice tips, and did hold extremely “tight waterline” at 1000 yards, indicating that the pointing process does seem to enhance BC uniformity. Morever, radar-derived “real-world” BCs have been impressively uniform with the latest generation of pointed Sierra MKs (such as the new 110gr 6mm MatchKing).
Here is the statement from Sierra about the new bullets:
Shooters around the world will appreciate the accuracy and extreme long range performance of our new 7mm 197 grain HPBT (#1997). A sleek 27-caliber elongated ogive and a final meplat reducing operation (pointing) provide an increased ballistic coefficient for optimal wind resistance and velocity retention. To ensure precise bullet to bore alignment, a unique bearing surface to ogive junction uses the same 1.5 degree angle commonly found in many match rifle chamber throats.
While they are recognized around the world for record-setting accuracy, MatchKing® and Tipped MatchKing® bullets are not recommended for most hunting applications. Although MatchKing® and Tipped MatchKing® bullets are commonly used for varmint hunting, their design will not provide the same reliable explosive expansion at equivalent velocities in varmints compared to their lightly jacketed Hornet, Blitz BlitzKing, or Varminter counterparts.
New product tip from EdLongrange. We welcome reader submissions.


 Verifying Scope Level With Tall Target Test




 Shoot 101 Quiz



 Setting Magnification Levels


 With the


