Robert Whitley of AR-X Enterprises, LLC builds match-grade uppers for AR-platform rifles. Many of Robert’s favorite chamberings are based on the 6.5 Grendel case necked-down to 6mm. Until 2011, Lapua was the only source for 6.5 Grendel brass. As you’d expect, Lapua’s Grendel brass is truly excellent, but it is also pricey, and sometimes hard to find. Now Hornady is producing USA-made 6.5 Grendel brass. Robert Whitley has worked with the Hornady 6.5 Grendel brass for over a year now and he is able to assess its performance compared to the original Lapua version. Writing in our Shooters’ Forum, Robert reveals: “It’s decent brass but hot loads will loosen the primer pockets fast. With moderate loads you will get good case life and service from the brass and it can deliver excellent accuracy as well. Not Lapua but not bad either.”
Robert reports: “I was able to get my hands on some of Hornady’s 6.5 Grendel brass. My big question was how it would measure up, particularly the loaded necks, and whether it would be compatible with our existing 6mmAR and Turbo 40 die sets. As it turns out, this brass looks like a perfect fit for our existing die sets (and obviously 6.5 Grendel die sets too). Accordingly, folks with existing die sets will be able to use the Hornady brass without any issues.” However, as the loaded neck on the Hornady brass is .001″ (one-thousandth) slimmer than Lapua brass, you may want to try a smaller bushing when sizing Hornady Grendel brass.
The Hornady 6.5 Grendel brass has a LARGE Flash Hole, about .078″ versus .0591″ for Lapua brass. Dimensionally, the biggest difference is the shoulder diameter, with the Hornady brass measuring 0.428″ vs. 0.424″ for the Lapua brass. The Hornady is actually a better fit for 6mmAR chambers which are about 0.432″ at the shoulder. Interestingly, case H20 capacity is virtually identical. Water capacity of new, unfired Hornady 6.5 Grendel brass is 35.1 grains, while new, unfired Lapua Grendel brass holds 35.0 grains of H20. Both brands of Grendel brass increase to about 36.0 grains H20 capacity after firing and full-length sizing.
Here are some of the particulars of the Hornady cases:
Hornady 6.5 Grendel Brass
Lapua 6.5 Grendel Brass
Flash hole diameter: ~ .078″
OAL of brass: Average 1.515″
Weight of cases: 111.7 to 113.0 grains
Web diameter, unfired: 0.4375″
Shoulder diameter, unfired: 0.428″
Loaded neck diameter: 0.2895″
6mmAR loaded neck: 0.270″
Flash hole diameter: 1.5mm (0.0591″)
OAL of brass: Average 1.515″
Weight of cases: 111.0 to 112.5 grains
Web diameter, unfired: 0.4385″
Shoulder diameter, unfired: 0.424″
Loaded neck diameter: 0.290″
6mmAR loaded neck: 0.271″
At SHOT Show, we had the chance to meet with German software engineer Hartmut Broemel, creator of QuickLOAD software. This software program, while not a substitute for conventional load manuals, allows shooters to evaluate a wide range of powders and bullets, comparing potential loads on the basis of predicted pressures, velocities, load density and projectile in-barrel time.
We took the opportunity, in the video below, to explain some of the fine points of QuickLOAD for our members. QuickLOAD, sold by Neconos.com, helps reloaders understand how changing variables can affect pressures and velocities. It can predict the effect of changes in ambient temperature, bullet seating depth, and barrel length.
In the video below we explain how to adjust the program for true case capacity, bullet seating into the lands, and other important factors. If you are a new QuickLOAD user, or are contemplating buying the $152.95 program, you should watch the video. The program isn’t perfect, but it can accelerate the load development process, and it can save you money by narrowing down the list of appropriate powders for your cartridge.
No other product currently available to serious reloaders offers as much predictive power as QuickLOAD, and you’ll find your money well spent just for the vast collection of data on bullets and cartridges. With a couple mouse-clicks you can instantly get the specifications of hundreds of bullets and cartridges. Likewise, in a matter of seconds, you can compare load density for a half-dozen powders, or compare the projected velocities of one cartridge versus another.
Here’s a clever product that provides visual feedback of your aim on the target while you dry-fire. LaserLyte, makers of laser pistol sights and bore-sighting tools, has come up with a smart new application of a miniature laser system. The new caliber-specific Laser Trainer Cartridge fits inside the pistol chamber and features a firing-pin activated switch that indicates bullet impact with a bright red laser dot. To practice, simply cock the hammer or striker, and pull the trigger as you would normally. When the firing pin hits the Laser Trainer Cartridge, a bright red laser displays on your target for 100 milliseconds. Available for 9mm, .40 S&W, and .45 ACP, the $99.95 (MSRP) Laser Training Cartridges are rimless so you can work the slide without ejecting the Laser Cartridges.
With a Laser Trainer Cartridge in the chamber of your 9mm, .40 S&W, or .45 ACP pistol, you can practice your trigger pull and sight acquisition. But unlike traditional dry-firing, you can see your point of aim when you “break the shot”. This modified cartridge is rimless, so the Laser Trainer Cartridge is not expelled during dry fire, which allows for tap, rack, bang or malfunction training drills. A hardened rubber plunger on the laser also acts as a built-in snap cap to protect the firing pin. The Laser Trainer Cartridge requires three #377 batteries, good for approximately 3,000 shots. For more info on Laser Training Cartridges visit LaserLyte.com.
German Salazar has posted an informative article about concentricity-checking tools on his Rifleman’s Journal Blog. In that article, German provides a detailed review of the impressive new Bruno Concentricity Checker which features a high-grade dial indicator and an innovative system for holding both loaded cartridges and empty brass in place during the measurement process. German gives the Bruno tool high marks and it is now his favored concentricity gauge, replacing on older Sinclair tool (also reviewed in the article).
German writes: “When measuring a seated bullet, the Bruno [tool] is simple and intuitive in use: adjust the length of the tip holder, set up the indicator to bear on the ogive and get to it. I usually slip a Sinclair hex nut comparator over a bullet to make a faint mark right at the ogive to help me in determining where to set the indicator. I then set the indicator tip about 0.010″ behind the mark so that I am definitely on the bearing surface even if some of the bullets have a bit of variance. It’s a handy way to get set up consistently from one session to another.”
German continues: “Reading an empty case requires a little more effort, but not much…. Once the case mouth is smooth, the readings are in line with those of the Sinclair tool, although easier to read to a fine level of precision due to the finer gradations on the indicator and its horizontal mounting. The Bruno tool has become my principal tool for checking the concentricity resulting from different die setups and for comparing the results of one loading process to another. I simply have more confidence in my ability to get an accurate reading from it. After many years of service, I’ve decided to retire the old Sinclair and make the Bruno tool my primary concentricity tool. It is simply a better made, easier-to-use, more accurate tool and those are the qualities I value in any tool.”
MidwayUSA now offers milspec 5.56x45mm Lake City brass (item 197849) at $114.99 per 500 cases. That works out to just $23.00 per hundred. Shooters report this brass is “very uniform” and shoots great in AR-type rifles. It can also be used in rifles chambered for the .223 Remington. MidwayUSA reports: “This is true 5.56x45mm mil-spec, new, unfired, heavy duty brass with the LC 09 headstamp. It is the same brass supplied to our fighting forces in Iraq and Afghanistan. We made a special buy on a limited supply and it will not last long. Cases should be sized, neck-chamfered, and deburred before loading. With this brass, there is no primer crimp to remove.”
User Report: “Brand new Lake City brass made to 5.56 NATO spec, fresh annealed necks and no primer crimp. It cycles perfectly fine in my AR, loads with no fuss, and I’ve had NO issues with it.” — J.H. from Abilene, TX
Since it was first released in 1965, Cartridges of the World by Frank Barnes, has been considered the definitive print resource on firearm cartridges. The current 12th Edition, edited by Holt Bodinson, was released late last year. The 568-page 12th Edition now describes over 1500 cartridges (from 0.1 inch to 0.95 inch caliber). This edition has interesting new articles on cartridge design and performance. The book includes dimensions, illustrations, a short history, and sample loading data for over 1500 different cartridges, including virtually every significant cartridge introduced since the early 1870s, with separate chapters on rimfires, shotgun shells, sporting rifle cartridges from the United States and Canada, Britain, and Europe, plus handgun cartridges, military cartridges, and limited production “wildcat” and “proprietary” cartridges. You won’t find all the narrow-focus or obscure wildcats, but the book is still a useful resource, well worth owning. It’s a “must-have” item for any serious cartridge collector.
Frank C. Barnes (1918-1992) began collecting information on handgun cartridges at the early age of 12, thanks to his father, a police officer. Frank Barnes was an innovative cartridge designer, who invented the original 308 x 1.5″ Barnes, predecessor of the 30BR case. Before Frank began a law enforcement career, he was a college professor. Frank was also a pilot, and a race-car driver.
Cartridges of the World was first published in 1965. It’s lived through 12 editions and can be found on many reloaders’ bookshelves today. Suggested retail for the book is $32.99, but MidwayUSA currently sells the 12th Edition for $19.99 plus shipping (Midway item 242319). Amazon.com offers the book for $21.77 with free shipping on combined orders over $25.00.
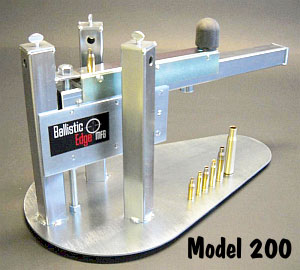
Forum member and long-range shooter Jerry Brandon has launched a new company, Ballistics Edge Mfg., which produces cartridge annealing machines for use by home reloaders. Brandon, a talented designer and fabricator, first tried annealing to maintain the quality of his own match brass. Brandon then built and tested a series of prototype annealing machines, working with a variety of brass sizes. Now Ballistics Edge Mfg. offers a full line of four annealing machines: the manually-operated Model 200 ($250), the motorized twin-torch Model 300 ($345), the motorized triple-torch Model 350 ($395), and the motorized Model 400 ($475), a beautifully-machined carousel design.
Brandon’s most versatile machine, and the one he recommends for annealing both normal- and magnum-sized cases, is the Model 350. Like the Model 300, the Model 350 features all-metal construction and motorized case transport. The Model 350 uses three torches rather than the Model 300’s two. The triple-torch system does a better job heating the large-diameter necks on .338, .416 and .50-caliber cases. The triple-torch design also ensures fast, uniform heating of the case-necks on smaller cases. The video below shows the Model 350 in action, annealing jumbo-sized .50 BMG cases.
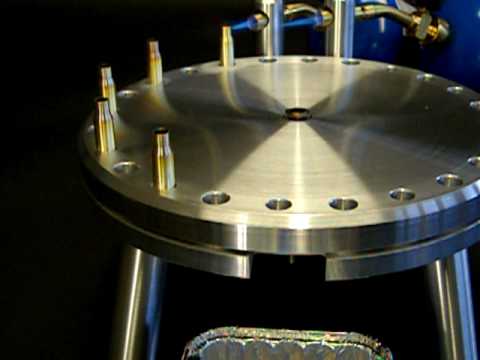
For PPC, 6mmBR, and .308-sized cases, you can use the Model 200, the Model 300, or the Model 400. The Model 200 is a simple, one-at-a-time annealer that works remarkably well using a sliding arm. Simply slide the case into the flame, then slide it out after the required dwell time. For the average reloader, the Model 200 may be more than adequate. If, however, you plan to anneal hundreds of cases a week, you may want to consider the beautifully-machined Model 400 carousel, which will anneal 100 cases in less than 15 minutes. The Model 400 features both .308-size and magnum/ultra magnum-size holes to accept both .47X and .56X diameter cases. Just choose the correct size hole and adjust the torch height to match your case. The .75″-thick shell-plate top acts as a heat-sink to protect the lower case body. View the Model 400 carousel annealer in the video below.
Ballistics Edge Website Offers Good Technical Advice on Annealing
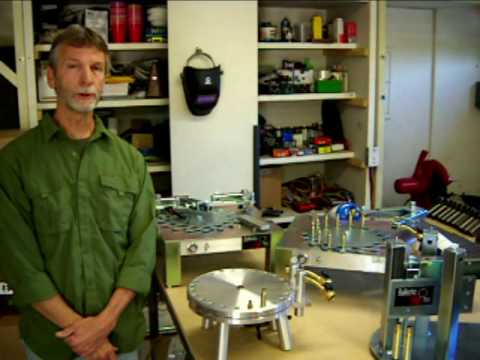
Anyone interested in learning about cartridge annealing should visit www.AnnealingMachines.com, Jerry Brandon’s website. There you’ll find a helpful, authoritative discussion of annealing, including the all-important factors of time and temperature. As Brandon observes, much MISinformation about annealing can be found. Brandon will set you straight. Read Brandon’s How to Anneal article and you can avoid making costly (and potentially dangerous) mistakes, whether you anneal manually or use an annealing machine. In the video below, Jerry Brandon reviews the features of Ballistics Edge annealing machines. He also provides some good, basic advice for shooters who are looking to try their hand at annealing for the first time.
Darrell Jones, a talented benchrest shooter from Tennessee, has launched a new business that will provide a much-needed service for precision shooters. Darrell’s company, DJ’s Brass Restoration Service, will take your old, many-times-fired brass, and help bring them back to life. Darrell first cleans the cases inside and out using an ultrasonic bath. Then Darrell carefully anneals each case, employing temp indicators to insure the correct amount of heat is applied for the proper duration.
Combined Ultrasonic Cleaning and Case Annealing
The Basic Service starts at $20.00 per hundred cases — and that includes ultrasonic cleaning AND annealing. (Flat rate USPS shipping is extra.) Note: very large cases (such as the .338 Lapua) or damaged, dented cases may cost more. In addition to the Basic Service, Darrell offers a 4-Step Full Service starting at $25.00 per hundred cases (plus shipping). Full Service brass restoration includes:
• Uniform primer pockets
• Chamfer case mouths
• Ultrasonic cleaning and polishing
• Anneal case necks
Ultrasonic Muzzle Brake Cleaning
In addition to cleaning and annealing cartridge brass, Darrell offers Ultrasonic Cleaning for muzzle brakes. This removes carbon buildup to restore critical bullet clearance requirements. The price is $15.00 per brake (plus shipping).
Restoring Your Brass Can Save Time and Money
Your match-quality brass represents a significant investment of money and prep/sorting time. With 100 pieces of new premium brass costing as much as $100.00, we think Darrell’s service is a great deal for shooters who want to extend the life of their brass. We expect his cleaning/annealing service will soon be in high demand. (In addition, on a custom-order basis, for an additional fee, Darrell can trim cases to a specified OAL.) Also, if you have spent many hours turning necks or forming wildcat cartridges, DJ’s Brass Restoration can save you the hassle of trimming, sorting, turning and prepping new cases. You have a lot of time invested in those turned necks and fire-formed cases… you don’t want to toss the brass after a few firings.
For more information, visit DJsBrass.com, or call Darrell at (901) 826-1503. As a special benefit for AccurateShooter.com members, Darrell is now offering free return shipping on any order over 500 pieces (limited time offer). IMPORTANT: Contact Darrell for shipping instructions BEFORE sending any brass for processing. ALL BRASS MUST BE DE-PRIMED before you send it.
A couple months back, we announced that Eric Kennard had started producing snap caps for match cartridges such as the 6mmBR and 6XC. They say that necessity is the mother of invention, and that was true here. Eric started making snap caps because nobody produced such a product for the match chamberings that he shoots. Eric’s match-cartridge snap caps have been so popular that he has expanded his product line to include 12 different cartridges. Plus Eric has recently launched a new website, HarbourArms.com, that features a handy shopping-cart system, so you can easily order all the snap caps you need.
12 Cartridge Types Now Offered
Harbour Arms Precision Snap Caps are available in .223 Rem, 6mmBR, 6BRX, 6mm Dasher, 6XC, 6-6.5 x 47 Lapua, 6.5 x 47 Lapua, 6.5 x 284, .260 Remington, .308 Win, .300 Win Mag, and .338 Lapua Magnum. Each set of two snap caps is precision-crafted from aluminum and costs $12.95 for two snap caps.
Cartridges Offered:
.223 Rem
6mmBR
6BRX
6mm Dasher
6XC
6-6.5 x 47 Lapua
6.5 x 47 Lapua
6.5 x 284
.260 Remington
.308 Win
.300 Win Mag
.338 Lapua Mag
Who needs a Snap Cap? Anyone who dry fires. It has been said that dry-firing is the best form of practice. Dry-firing allows one to check for proper natural point of aim, position, and trigger control. Many of the custom rifle actions use two piece, thin, or titanium firing pins. These pins are susceptible to fracture or breaking when dry-fired too much. Shotgunners using custom trap or skeet guns would never dry-fire their expensive arms without a Snap Cap to protect their firing pins. Nothing is worse than your firing pin breaking during a match!
[This item last appeared a year ago in our Daily Bulletin, generating considerable interest among readers. By popular request, we’re reprinting this story, in case you missed it the first time around. — Editor]
Precision shooters favor premium brass from Lapua, Norma, or RWS. (Lake City also makes quality brass in military calibers.) Premium brass delivers better accuracy, more consistent velocities, and longer life. Shooters understand the importance of good brass, but many of us have no idea how cartridge cases are actually made. Here’s how it’s done.
The process starts with a brass disk stamped from strips of metal. Then, through a series of stages, the brass is extruded or drawn into a cylindrical shape. In the extrusion process the brass is squeezed through a die under tremendous pressure. This is repeated two or three times typically. In the more traditional “draw” process, the case is progressively stretched longer, in 3 to 5 stages, using a series of high-pressure rams forcing the brass into a form die. While extrusion may be more common today, RWS, which makes some of the most uniform brass in the world, still uses the draw process: “It starts with cup drawing after the bands have been punched out. RWS cases are drawn in three ‘stages’ and after each draw they are annealed, pickled, rinsed and subjected to further quality improvement measures. This achieves specific hardening of the brass cases and increases their resistance to extraordinary stresses.” FYI, Lapua also uses a traditional draw process to manufacture most of its cartridge brass (although Lapua employs some proprietary steps that are different from RWS’ methods).
After the cases are extruded or drawn to max length, the cases are trimmed and the neck/shoulder are formed. Then the extractor groove (on rimless cases) is formed or machined, and the primer pocket is created in the base. One way to form the primer pocket is to use a hardened steel plug called a “bunter”. In the photos below you see the stages for forming a 20mm cannon case (courtesy OldAmmo.com), along with bunters used for Lake City rifle brass. This illustrates the draw process (as opposed to extrusion). The process of draw-forming rifle brass is that same as for this 20mm shell, just on a smaller scale.
River Valley Ordnance explains: “When a case is being made, it is drawn to its final draw length, with the diameter being slightly smaller than needed. At this point in its life, the head of the draw is slightly rounded, and there are no provisions for a primer. So the final drawn cases are trimmed to length, then run into the head bunter. A punch, ground to the intended contours for the inside of the case, pushes the draw into a cylindrical die and holds it in place while another punch rams into the case from the other end, mashing the bottom flat. That secondary ram holds the headstamp bunter punch.
The headstamp bunter punch has a protrusion on the end to make the primer pocket, and has raised lettering around the face to form the headstamp writing. This is, of course, all a mirror image of the finished case head. Small cases, such as 5.56×45, can be headed with a single strike. Larger cases, like 7.62×51 and 50 BMG, need to be struck once to form a dent for the primer pocket, then a second strike to finish the pocket, flatten the head, and imprint the writing. This second strike works the brass to harden it so it will support the pressure of firing.”
Thanks to Guy Hildebrand, of the Cartridge Collectors’ Exchange, OldAmmo.com, for providing this 20mm Draw Set photo. Bunter photo from River Valley Ordnance, RVOW.com.


 At SHOT Show, we had the chance to meet with German software engineer Hartmut Broemel, creator of QuickLOAD software. This software program, while not a substitute for conventional load manuals, allows shooters to evaluate a wide range of powders and bullets, comparing potential loads on the basis of predicted pressures, velocities, load density and projectile in-barrel time.


 Since it was first released in 1965,
 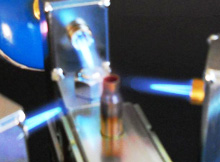 Forum member and long-range shooter Jerry Brandon has launched a new company,
 For PPC, 6mmBR, and .308-sized cases, you can use the Model 200, the Model 300, or the Model 400. The Model 200 is a simple, one-at-a-time annealer that works remarkably well using a sliding arm. Simply slide the case into the flame, then slide it out after the required dwell time. For the average reloader, the Model 200 may be more than adequate. If, however, you plan to anneal hundreds of cases a week, you may want to consider the beautifully-machined Model 400 carousel, which will anneal 100 cases in less than 15 minutes. The Model 400 features both .308-size and magnum/ultra magnum-size holes to accept both .47X and .56X diameter cases. Just choose the correct size hole and adjust the torch height to match your case. The .75″-thick shell-plate top acts as a heat-sink to protect the lower case body. View the Model 400 carousel annealer in the video below.