This popular video, viewed 3.9 million times on YouTube, provides a clear explanation of Minute of Angle (MOA) and how that angular measurement is used. Among novice shooters, there is much confusion over this term. In this NSSF Video, Ryan Cleckner, a former U.S. Army Sniper Instructor, defines the term “Minute of Angle” (MOA) and explains how you can adjust for windage and elevation using 1/4 or 1/8 MOA clicks on your scope. This allows you to sight-in precisely and compensate for bullet drop at various distances.
For starters, Ryan explains that, when talking about angular degrees, a “minute” is simply 1/60th. So a “Minute of Angle” is simply 1/60th of one degree of a central angle, measured either up and down (for elevation) or side to side (for windage). At 100 yards, 1 MOA equals 1.047″ on the target. This is often rounded to one inch for simplicity. Say, for example, you click up 1 MOA. That is roughly 1 inch at 100 yards, or roughly 4 inches at 400 yards, since the target area measured by 1 MOA increases in linear fashion with the distance.
More Minute of Angle (MOA) Explanatory Videos
This Gunwerks video explains that Minute of Angle subtends approximately 1″ for each 100 yards (well, 1.047″ to be more precise). That means a Minute of Angle increases in actual measured size the greater the distance of the target from the shooter.
This lengthy (24-minute) video defines Minute of Angle, and uses multiple diagrams to illustrate how MOA angular measurements works. The video also how MOA-based click values translate to point-of-impact changes at various distances.
This popular video, viewed 3.8 million times on YouTube, provides a clear explanation of Minute of Angle (MOA) and how that angular measurement is used. Among novice shooters, there is much confusion over this term. In this NSSF Video, Ryan Cleckner, a former Sniper Instructor for the 1st Ranger Battalion, defines the term, “Minute of Angle” (MOA) and explains how you can adjust for windage and elevation using 1/4 or 1/8 MOA clicks on your scope. This allows you to sight-in precisely and compensate for bullet drop at various distances.
For starters, Ryan explains that, when talking about angular degrees, a “minute” is simply 1/60th. So a “Minute of Angle” is simply 1/60th of one degree of a central angle, measured either up and down (for elevation) or side to side (for windage). At 100 yards, 1 MOA equals 1.047″ on the target. This is often rounded to one inch for simplicity. Say, for example, you click up 1 MOA. That is roughly 1 inch at 100 yards, or roughly 4 inches at 400 yards, since the target area measured by 1 MOA increases in linear fashion with the distance.
More Minute of Angle (MOA) Explanatory Videos
This Gunwerks video explains that Minute of Angle subtends approximately 1″ for each 100 yards (well, 1.047″ to be more precise). That means a Minute of Angle increases in actual measured size the greater the distance of the target from the shooter.
This lengthy (24-minute) video defines Minute of Angle, and uses multiple diagrams to illustrate how MOA angular measurements works. The video also how MOA-based click values translate to point-of-impact changes at various distances.
A good riflescope is essential for many types of competition, and the vast majority of hunters have scoped rifles. Some F-Class and benchrest competitors are now using optics with up to 60X magnification. Over the past 30 years, scopes have continued to evolve with improved glass, more reticle types, vastly increased elevation travel, bigger main tubes, FFP and SFP options, and even built-in electronics.
When shopping for a riflescope, it’s useful to understand how scopes work — how the internal mechanisms control windage and elevation, how parallax controls work, and how magnification levels are controlled.
Basics of How Riflescopes Work
This Burris video (above) covers the key aspects of scope function: zoom magnification, windage control, elevation control, parallax control (front or side mount), and ocular lens focus. There are some tips on getting a new scope running smoothly — it’s wise to rotate the power control a few times as well as both windage and elevation knobs. The video below also explains how to set ocular focus controls optimally.
Scope Break-In Methods and Diagnosing Issues — Great Video
We recommend that all serious shooters watch this video start to finish. A very knowledgeable scope engineer, Leupold’s Mike Baccellieri, explains the fine details of scope operation — with very useful recommendations on how to ready a new scope for use (See 36:50 time-mark). With a new optic he advises to run the controls multiple times to full travel. Also, take your time to get the diopter control just right (See 26:40 time-mark).
The video also explains why, with a new scope or one that hasn’t been used much, it is sometimes effective to rotate the elevation PAST the desired setting then come back a click (See 35:40 time-mark). In addition, near the end of the video, the expert explains how you can use a mirror to determine if the scope mount (base and/or rings) is NOT aligned with the bore axis, forcing excess travel to get on target (See 42:00 time-mark). We have seen this caused by scope rails attached slightly off axis.
Large diameter turrets make windage and elevation markings easier to see, and the click “feel” may be more noticeable given the greater diametrical travel between clicks.
First Focal Plane (FFP) vs. Second Focal Plane (SFP)
The main visual difference between First Focal Plane (FFP) and Second Focal Plane (SFP) scopes is the appearance of the reticle (and its hash marks) at different magnification levels. With a FFP scope, the reticle increases in visible size (and line thickness) with increased magnification. This is so the angular hash marks remain constant (in Mils or MOA angular span) at all magnification levels. So, on a 10-30X FFP scope, a 0.1 Mil hash mark represents the SAME angular measurement at 10X, 20X, or 30X (or any magnification). The downside of the FFP system is that the reticle lines can appear very thick at high magnification. But for a PRS/NRL match, with targets at multiple distances, it is important that the hash marks represent the same angular measurement at all power settings.
On a Second Focal Plane (SFP) scope, by contrast, the reticle lines (and hash marks) appear visually (in thickness) the same at all magnification levels. This means the hash mark divisions will only be precise at one magnification level, as designed by the manufacturer. For example, you could have exact 1 MOA Hash marks at 10X. But zoom the scope to 20X and the same reticle hash mark would then cover 2 MOA. SFP scopes are popular with competition shooters who shoot at specific known distances. Not having thick reticle lines at 25X to 50X is an advantage when aiming at precise benchrest and F-Class targets.
ZEISS now makes excellent FFP Scopes with both MOA and Milrad options
Minute of Angle (MOA) vs. Milliradian (MILRAD or MIL)
This video also explains MOA vs. MRAD (Milliradian) controls. A Minute of Angle (MOA) is an angular measurement that represents 1.047″ at 100 yards. Modern MOA scopes are typically configured with 1/4 MOA or 1/8 MOA clicks. A Milliradian (MRAD) is another angular measurement defined as one-thousandth of a radian. Milrad scopes are commonly configured with 0.1 Milrad clicks. How much is a 0.1 mil at 100 yards? One mil equals 3.6 inches at 100 yards; therefore, 1/10th of that, 0.1 Mil, equals 0.36” – roughly a third of an inch – at 100 yards. That’s pretty close to the common quarter-inch (1/4 MOA) increment found on MOA riflescopes.
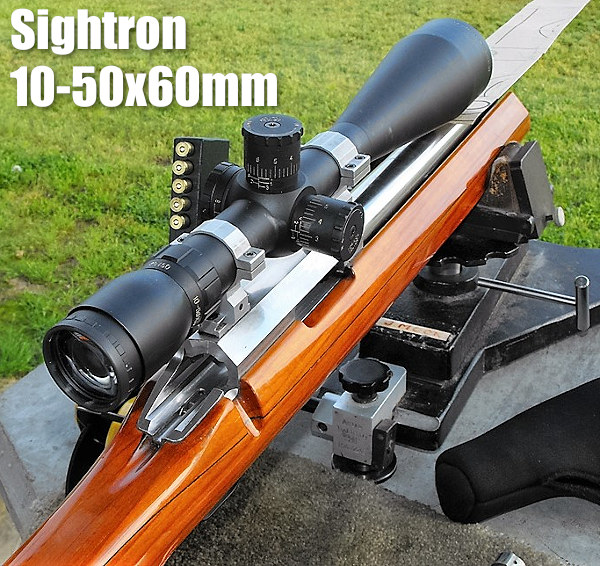
Sightron makes excellent high-magnification SFP zoom scopes favored by many competitors. These have proven quite reliable and offer very good performance for the price.
Scope Mounting Method and Alignment
When mounting a scope, you want to make sure the scope is aligned properly, so that vertical travel is precisely up and down, not offset. Begin by supporting the rifle with a good front and rear rest. Use a portable level to ensure the rifle is not tilting slightly left or right around the barrel bore axis. Then you want to align your scope’s vertical axis. For this, we recommend setting up a plumb bob — a weighted line that hangs straight down. This can be set up indoors or outdoors. Align your reticle’s vertical axis precisely with the plumb bob line, making sure not to move the rifle.
One caution — we have seen some riflescopes that are internally off-axis by up to 4 degrees. In this case, you can align the reticle’s vertical axis with the plumb bob line but then find that your turrets are slightly titled. That is a scope manufacturing fault that will result in some error when you input a large click value (e.g. 10+ MOA up or down).
When mounting your scope, a key factor to consider is the eye relief — the distance of the rear “ocular” lens to your eye. When mounting the scope, put your head in the position at which you normally shoot. NOTE: As your optimal head position may be quite a bit different when shooting prone vs. shooting from a bench, you may want to adjust the scope placement for different shooting positions. This Editor had to move his comp rifle scope about an inch rearward when local club matches changed from prone to bench.
Many guys getting started in long range shooting are confused about what kind of scope they should buy — specifically whether it should have MIL-based clicks or MOA-based clicks. Before you can make that decision, you need to understand the terminology. This article, with a video by Bryan Litz, explains MILS and MOA so you can choose the right type of scope for your intended application.
You probably know that MOA stands for “Minute of Angle” (or more precisely “minute of arc”), but could you define the terms “Milrad” or “MIL”? In a helpful video, Bryan Litz of Applied Ballitics explains MOA and MILs (short for “milliradians”). Bryan defines those terms and explains how they are used. One MOA is an angular measurement (1/60th of one degree) that subtends 1.047″ at 100 yards. One MIL (i.e. one milliradian) subtends 1/10th meter at 100 meters; that means that 0.1 Mil is one centimeter (1 cm) at 100 meters. Is one angular measurement system better than another? Not necessarily… Bryan explains that Mildot scopes may be handy for ranging, but scopes with MOA-based clicks work just fine for precision work at known distances. Also because one MOA is almost exactly one inch at 100 yards, the MOA system is convenient for expressing a rifle’s accuracy. By common parlance, a “half-MOA” rifle can shoot groups that are 1/2-inch (or smaller) at 100 yards.
What is a “Minute” of Angle?
When talking about angular degrees, a “minute” is simply 1/60th. So a “Minute of Angle” is simply 1/60th of one degree of a central angle, measured either up and down (for elevation) or side to side (for windage). At 100 yards, 1 MOA equals 1.047″ on the target. This is often rounded to one inch for simplicity. Say, for example, you click up 1 MOA (four clicks on a 1/4-MOA scope). That is roughly 1 inch at 100 yards, or roughly 4 inches at 400 yards, since the target area measured by an MOA subtension increases with the distance.
MIL vs. MOA for Target Ranging
MIL or MOA — which angular measuring system is better for target ranging (and hold-offs)? In a recent article on his PrecisionRifleBlog.com website, Cal Zant tackles that question. Analyzing the pros and cons of each, Zant concludes that both systems work well, provided you have compatible click values on your scope. Zant does note that a 1/4 MOA division is “slightly more precise” than 1/10th mil, but that’s really not a big deal: “Technically, 1/4 MOA clicks provide a little finer adjustments than 1/10 MIL. This difference is very slight… it only equates to 0.1″ difference in adjustments at 100 yards or 1″ at 1,000 yards[.]” Zant adds that, in practical terms, both 1/4-MOA clicks and 1/10th-MIL clicks work well in the field: “Most shooters agree that 1/4 MOA or 1/10 MIL are both right around that sweet spot.”
A varmint shooter’s target is not conveniently placed at a fixed, known distance as it is for a benchrester. The varminter must repeatedly make corrections for bullet drop as he moves from closer targets to more distant targets and back again. Click HERE to read an interesting Varmint Forum discussion regarding the best method to adjust for elevation. Some shooters advocate using the scope’s elevation adjustments. Other varminters prefer to hold-over, perhaps with the assistance of vertical markers on their reticles. Still others combine both methods–holding off to a given yardage, then cranking elevation after that.
Majority View — Click Your Scope
“I zero at 100 yards — I mean really zero as in check the ballistics at 200 and 300 and adjust zero accordingly — and then set the scope zero. For each of my groundhog guns I have a click chart taped into the inside of the lid of the ammo box. Then use the knobs. That’s why they’re there. With a good scope they’re a whole lot more accurate than hold-over, with or without hash marks. This all assumes you have a good range finder and use it properly. If not, and you’re holding over you’re really just spraying and praying. Try twisting them knobs and you’ll most likely find that a 500- or 600- or 700-yard groundhog is a whole lot easier than some people think.” — Gunamonth
“I have my elevation knob calibrated in 100-yard increments out to 550. Range-find the critter, move elevation knob up…dead critter. The problem with hold-over is that it is so imprecise. It’s not repeatable because you are holding over for elevation and for wind also. Every time you change targets 50 yards, it seems as if you are starting over. As soon as I got completely away from the hold over method (I used to zero for 200), my hit ratios went way up.” — K. Candler
“When I first started p-dog shooting, I attempted to use the hold-over method with a 200-yard zero with my 6mm Rem. Any dog much past 325-350 yards was fairly safe. I started using a comeups table for all three of my p-dog rifles (.223 Rems and 6mm Rem). 450-yard hits with the .223s are fairly routine and a 650-yard dog better beware of the 6mm nowadays. An added benefit (one I didn’t think of beforehand) with the comeups table (elevation only), is that when the wind is blowing, it takes half of the variables out of the equation. I can concentrate on wind, and not have to worry about elevation. It makes things much more simple.” — Mike (Linefinder).
“I dial for elevation and hold for wind. Also use a mil-dot reticle to make the windage holds easier. For windage corrections, I watch for the bullet strike measure the distance it was “off” with the mil-dot reticle, then hold that much more the other way. Very fast once you get used to it.” — PepeLP
Minority View — Hold-Over is Better
“I try to not touch my knobs once I’m zeroed at 200 meters. Most of my varmint scopes have duplex reticles and I use the bottom post to put me on at 300 meters versus turning knobs. The reason I try to leave my knobs alone is that I have gone one complete revolution up or down [too far] many times and have missed the varmint. This has happened more than once and that is why I try not to change my knobs if at all possible.” — Chino69
“I have been using the hold over method and it works for me most of the time but the 450 yards and over shots get kinda hard. I moved to a 300 yard zero this year and it’s working well. I do want to get into the click-up method though; it seems to be more fool-proof.” — 500YardHog
Compromise View — Use Both Methods
“I use both [methods] as well — hold over out to 250, and click up past that.” — Jack (Wolf)
“I use the target knobs and crank-in elevation. I also use a rangefinder and know how far away they are before I crank in the clicks. I have a scope with drop dots from Premier Recticle and like it. No cranking [knobs] out to 600.” –Vmthtr
A good riflescope is essential for many types of competition, and the vast majority of hunters have scoped rifles. Some F-Class and benchrest competitors are now using optics with up to 60X magnification. Over the past 30 years, scopes have continued to evolve with improved glass, more reticle types, vastly increased elevation travel, bigger main tubes, FFP and SFP options, and even built-in electronics.
When shopping for a riflescope, it’s useful to understand how scopes work — how the internal mechanisms control windage and elevation, how parallax controls work, and how magnification levels are controlled.
Basics of How Riflescopes Work
This Burris video (above) covers the key aspects of scope function: zoom magnification, windage control, elevation control, parallax control (front or side mount), and ocular lens focus. There are some tips on getting a new scope running smoothly — it’s wise to rotate the power control a few times as well as both windage and elevation knobs. The video below also explains how to set ocular focus controls optimally.
Scope Break-In Methods and Diagnosing Issues — Great Video
We recommend that all serious shooters watch this video start to finish. A very knowledgeable scope engineer, Leupold’s Mike Baccellieri, explains the fine details of scope operation — with very useful recommendations on how to ready a new scope for use (See 36:50 time-mark). With a new optic he advises to run the controls multiple times to full travel. Also, take your time to get the diopter control just right (See 26:40 time-mark).
The video also explains why, with a new scope or one that hasn’t been used much, it is sometimes effective to rotate the elevation PAST the desired setting then come back a click (See 35:40 time-mark). In addition, near the end of the video, the expert explains how you can use a mirror to determine if the scope mount (base and/or rings) is NOT aligned with the bore axis, forcing excess travel to get on target (See 42:00 time-mark). We have seen this caused by scope rails attached slightly off axis.
Large diameter turrets make windage and elevation markings easier to see, and the click “feel” may be more noticeable given the greater diametrical travel between clicks.
First Focal Plane (FFP) vs. Second Focal Plane (SFP)
The main visual difference between First Focal Plane (FFP) and Second Focal Plane (SFP) scopes is the appearance of the reticle (and its hash marks) at different magnification levels. With a FFP scope, the reticle increases in visible size (and line thickness) with increased magnification. This is so the angular hash marks remain constant (in Mils or MOA angular span) at all magnification levels. So, on a 10-30X FFP scope, a 0.1 Mil hash mark represents the SAME angular measurement at 10X, 20X, or 30X (or any magnification). The downside of the FFP system is that the reticle lines can appear very thick at high magnification. But for a PRS/NRL match, with targets at multiple distances, it is important that the hash marks represent the same angular measurement at all power settings.
On a Second Focal Plane (SFP) scope, by contrast, the reticle lines (and hash marks) appear visually (in thickness) the same at all magnification levels. This means the hash mark divisions will only be precise at one magnification level, as designed by the manufacturer. For example, you could have exact 1 MOA Hash marks at 10X. But zoom the scope to 20X and the same reticle hash mark would then cover 2 MOA. SFP scopes are popular with competition shooters who shoot at specific known distances. Not having thick reticle lines at 25X to 50X is an advantage when aiming at precise benchrest and F-Class targets.
ZEISS now makes excellent FFP Scopes with both MOA and Milrad options
Minute of Angle (MOA) vs. Milliradian (MILRAD or MIL)
This video also explains MOA vs. MRAD (Milliradian) controls. A Minute of Angle (MOA) is an angular measurement that represents 1.047″ at 100 yards. Modern MOA scopes are typically configured with 1/4 MOA or 1/8 MOA clicks. A Milliradian (MRAD) is another angular measurement defined as one-thousandth of a radian. Milrad scopes are commonly configured with 0.1 Milrad clicks. How much is a 0.1 mil at 100 yards? One mil equals 3.6 inches at 100 yards; therefore, 1/10th of that, 0.1 Mil, equals 0.36” – roughly a third of an inch – at 100 yards. That’s pretty close to the common quarter-inch (1/4 MOA) increment found on MOA riflescopes.
Sightron makes excellent high-magnification SFP zoom scopes favored by many competitors. These have proven quite reliable and offer very good performance for the price.
Scope Mounting Method and Alignment
When mounting a scope, you want to make sure the scope is aligned properly, so that vertical travel is precisely up and down, not offset. Begin by supporting the rifle with a good front and rear rest. Use a portable level to ensure the rifle is not tilting slightly left or right around the barrel bore axis. Then you want to align your scope’s vertical axis. For this, we recommend setting up a plumb bob — a weighted line that hangs straight down. This can be set up indoors or outdoors. Align your reticle’s vertical axis precisely with the plumb bob line, making sure not to move the rifle.
One caution — we have seen some riflescopes that are internally off-axis by up to 4 degrees. In this case, you can align the reticle’s vertical axis with the plumb bob line but then find that your turrets are slightly titled. That is a scope manufacturing fault that will result in some error when you input a large click value (e.g. 10+ MOA up or down).
When mounting your scope, another key factor to consider is the eye relief — the distance of the rear “ocular” lens to your eye. When mounting the scope, put your head in the position at which you normally shoot. NOTE: As your optimal head position may be quite a bit different when shooting prone vs. shooting from a bench, you may want to adjust the scope placement for different shooting positions. This Editor had to move his comp rifle scope about an inch rearward when local club matches changed from prone to bench.
This popular video, viewed 3.4 million times on YouTube, provides a clear explanation of Minute of Angle (MOA) and how that angular measurement is used. Among novice shooters, there is much confusion over this term. In this NSSF Video, Ryan Cleckner, a former Sniper Instructor for the 1st Ranger Battalion, defines the term, “Minute of Angle” (MOA) and explains how you can adjust for windage and elevation using 1/4 or 1/8 MOA clicks on your scope. This allows you to sight-in precisely and compensate for bullet drop at various distances.
For starters, Ryan explains that, when talking about angular degrees, a “minute” is simply 1/60th. So a “Minute of Angle” is simply 1/60th of one degree of a central angle, measured either up and down (for elevation) or side to side (for windage). At 100 yards, 1 MOA equals 1.047″ on the target. This is often rounded to one inch for simplicity. Say, for example, you click up 1 MOA. That is roughly 1 inch at 100 yards, or roughly 4 inches at 400 yards, since the target area measured by 1 MOA increases in linear fashion with the distance.
More Minute of Angle (MOA) Explanatory Videos
This Gunwerks video explains that Minute of Angle subtends approximately 1″ for each 100 yards (well, 1.047″ to be more precise). That means a Minute of Angle increases in actual measured size the greater the distance of the target from the shooter.
This lengthy (24-minute) video defines Minute of Angle, and uses multiple diagrams to illustrate how MOA angular measurements works. The video also how MOA-based click values translate to point-of-impact changes at various distances.
For decades, Shooting USA has been a leading video resource for the shooting sports and hunting. This popular cable TV show covers shooting matches, and provides expert information on precision shooting, gun maintenance, optics, and defensive firearms use. Here are five interesting videos all worth watching. Learn about wind-reading, gun maintenance, and optics.
1. Reading the Wind — SGT Sherri Jo Gallagher of USAMU
Sergeant Sherri Jo Gallagher formerly of the U.S. Army Marksmanship Unit (USAMU) shows us how to read the wind in given conditions, and how to apply your wind assessment when aiming down-range. During her time with the USAMU, Sherri won the National High Power Championship, and was the first woman in history to earn the U.S. Army “Soldier of the Year” honors. Sherri comes from a legendary family of shooters — she was raised by Ace Marksman Mid Tompkins and mother Nancy Tompkins, the first female to win the NRA National High Power Championship.
2. Field-Stripping and Cleaning AR-Platform Rifles
Let’s face it — Black Rifles run dirty. On AR-platform rifles, the gas system blows carbon and powder residues back into the action and bolt carrier group. Accordingly, you need to clean ARs early and often, and you should fully disassemble the bolt carrier to access parts and recesses which accumulate greasy lube and hard carbon. This helpful video shows how to field-strip and clean AR-platform rifles. If you own an AR, this is definitely worth viewing. With over 2.7 million views, this is the second most-watched video on Shooting USA’s YouTube Channel.
2. MOA Defined — Jim Scoutten Explains Minute of Angle
Minute of Angle (MOA) — this is the most common measurement of group size, and hence rifle accuracy. You hear about shooters hoping to shoot 1 MOA or “half-MOA”, but many folks could not give you a precise definition. In fact MOA is an angular measurement that equates to one-sixtieth of one degree of Arc. In this video, host John Scoutten defines MOA. He then demonstrates how MOA translates to accuracy on target. He demonstrates one-half-MOA accuracy with a Les Baer Custom rifle. This company offers a three-shot, half-MOA guarantee for its rifles.
4. How to Adjust for Parallax
Most precision rifle scopes have parallax adjustment, typically a knob on the left side of the scope. but what exactly is “Parallax” and why do you need to adjust optics to ensure the parallax setting is optimal? In this Shooting USA video, John Paul of JP Rifles defines parallax and explains why you need to set parallax correctly for the distance to your target. The video then shows how to adjust parallax correctly, a process which should start with the scope’s ocular focus.
5. How to Mount a Riflescope
When mounting a scope you want to use quality rings, and ensure that the scope is leveled properly. In addition, you need to adjust the fore/aft position of the scope so that eye relief is correct. Ideal scope position may be different when shooting from the bench vs. shooting prone. In this Shooting USA video John Paul of JP Rifles reviews scope mounting basics.
A varmint shooter’s target is not conveniently placed at a fixed, known distance as it is for a benchrester. The varminter must repeatedly make corrections for bullet drop as he moves from closer targets to more distant targets and back again. Click HERE to read an interesting Varmint Forum discussion regarding the best method to adjust for elevation. Some shooters advocate using the scope’s elevation adjustments. Other varminters prefer to hold-over, perhaps with the assistance of vertical markers on their reticles. Still others combine both methods–holding off to a given yardage, then cranking elevation after that.
Majority View — Click Your Scope
“I zero at 100 yards — I mean really zero as in check the ballistics at 200 and 300 and adjust zero accordingly — and then set the scope zero. For each of my groundhog guns I have a click chart taped into the inside of the lid of the ammo box. Then use the knobs. That’s why they’re there. With a good scope they’re a whole lot more accurate than hold-over, with or without hash marks. This all assumes you have a good range finder and use it properly. If not, and you’re holding over you’re really just spraying and praying. Try twisting them knobs and you’ll most likely find that a 500- or 600- or 700-yard groundhog is a whole lot easier than some people think.” — Gunamonth
“I have my elevation knob calibrated in 100-yard increments out to 550. Range-find the critter, move elevation knob up…dead critter. The problem with hold-over is that it is so imprecise. It’s not repeatable because you are holding over for elevation and for wind also. Every time you change targets 50 yards, it seems as if you are starting over. As soon as I got completely away from the hold over method (I used to zero for 200), my hit ratios went way up.” — K. Candler
“When I first started p-dog shooting, I attempted to use the hold-over method with a 200-yard zero with my 6mm Rem. Any dog much past 325-350 yards was fairly safe. I started using a comeups table for all three of my p-dog rifles (.223 Rems and 6mm Rem). 450-yard hits with the .223s are fairly routine and a 650-yard dog better beware of the 6mm nowadays. An added benefit (one I didn’t think of beforehand) with the comeups table (elevation only), is that when the wind is blowing, it takes half of the variables out of the equation. I can concentrate on wind, and not have to worry about elevation. It makes things much more simple.” — Mike (Linefinder).
“I dial for elevation and hold for wind. Also use a mil-dot reticle to make the windage holds easier. For windage corrections, I watch for the bullet strike measure the distance it was “off” with the mil-dot reticle, then hold that much more the other way. Very fast once you get used to it.” — PepeLP
Minority View — Hold-Over is Better
“I try to not touch my knobs once I’m zeroed at 200 meters. Most of my varmint scopes have duplex reticles and I use the bottom post to put me on at 300 meters versus turning knobs. The reason I try to leave my knobs alone is that I have gone one complete revolution up or down [too far] many times and have missed the varmint. This has happened more than once and that is why I try not to change my knobs if at all possible.” — Chino69
“I have been using the hold over method and it works for me most of the time but the 450 yards and over shots get kinda hard. I moved to a 300 yard zero this year and it’s working well. I do want to get into the click-up method though; it seems to be more fool-proof.” — 500YardHog
Compromise View — Use Both Methods
“I use both [methods] as well — hold over out to 250, and click up past that.” — Jack (Wolf)
“I use the target knobs and crank-in elevation. I also use a rangefinder and know how far away they are before I crank in the clicks. I have a scope with drop dots from Premier Recticle and like it. No cranking [knobs] out to 600.” –Vmthtr
This popular video, viewed nearly 1.9 million times on YouTube, provides a clear explanation of Minute of Angle (MOA) and how that angular measurement is used. Among novice shooters, there is much confusion over this term. In this NSSF Video, Ryan Cleckner, a former Sniper Instructor for the 1st Ranger Battalion, defines the term, “Minute of Angle” (MOA) and explains how you can adjust for windage and elevation using 1/4 or 1/8 MOA clicks on your scope. This allows you to sight-in precisely and compensate for bullet drop at various distances.
For starters, Ryan explains that, when talking about angular degrees, a “minute” is simply 1/60th. So a “Minute of Angle” is simply 1/60th of one degree of a central angle, measured either up and down (for elevation) or side to side (for windage). At 100 yards, 1 MOA equals 1.047″ on the target. This is often rounded to one inch for simplicity. Say, for example, you click up 1 MOA. That is roughly 1 inch at 100 yards, or roughly 4 inches at 400 yards, since the target area measured by 1 MOA increases in linear fashion with the distance.
More Minute of Angle (MOA) Explanatory Videos
This Gunwerks video explains that Minute of Angle subtends approximately 1″ for each 100 yards (well, 1.047″ to be exact). That means a Minute of Angle increases in actual measured size the greater the distance of the target from the shooter.
This lengthy (24-minute) video defines Minute of Angle, and uses multiple diagrams to illustrate how MOA angular measurements works. The video also how MOA-based click values translate to point-of-impact changes at various distances.


 A varmint shooter’s target is not conveniently placed at a fixed, known distance as it is for a benchrester. The varminter must repeatedly make corrections for bullet drop as he moves from closer targets to more distant targets and back again.
 Minority View — Hold-Over is Better


