Whidden Gunworks makes great sizing and seating dies. The Whidden full-length sizing die with neck bushing is very popular because it allows you to “tune” the neck tension by using different bushings, with larger or smaller inside diameters. In this video, John Whidden explains how to choose a the right bushing size for use with your neck-sizing and full-length sizing bushing dies.
For most applications, John suggest starting with the caliper-measured outside diameter of a loaded cartridge (with your choice of bullet), and then SUBTRACT about three thousandths. For example, if your loaded round mics at .333, then you would want to start with a 0.330 neck bushing. John notes, however, that you may want to experiment with bushings, going down a thousandth and up a thousandth. With thin In addition, as your brass ages and the necks harden, you may want to change your bushing size.
Quick Tip: Try Flipping Your Bushings
You may also want to experiment with “flipping” your neck bushings to alternate the side that first contacts the neck of the case. (One side of the bushing is usually marked with the size, while the other side is unmarked.) So try “number side up” as well as “number side down”.
Some folks believe that one side of the bushing may allow a smoother entry, and that this can enhance concentricity. Other people think they can get very slightly more or less neck tension depending on how the bushing is oriented. This is a subtle effect, but it costs nothing to experiment.
If one bushing orientation proves better you can mark the “up” side with nail polish so that you can always orient the bushing optimally. NOTE: We have confirmed that some bushings are actually made with a slight taper. In addition, bushings may get distorted slightly when the brand name and size is stamped. Therefore there IS a reason to try both orientations.
Forum member Danny Reever and this Editor have discussed how novice reloaders can struggle with the fine points of reloading, making errors in seating depth, neck-bushing choice, or sizing their cases. We agreed that a good resource covering more than “Reloading Basics” is sorely needed. Danny reminded me that Glen Zediker’s excellent Handloading for Competition book has been available since 2002. Danny says this may still be the best guide in print for those getting started in precision reloading, though the book is not without flaws.
Danny observed: “I consider this still the best book out there on the subject. I’ve bought a lot of other books only to be sorely disappointed after spending $30-$40 of my hard-earned cash. This book is not one of those! I’ve read and re-read Zediker’s treatise at least four times and refer to it often for advice while reloading. My number one suggestion for those who buy the book is to sit down with a highlighter and read it cover to cover. It’s well-written with a bit of humor and it is not boring.”
Extremely comprehensive, Zediker’s book covers nearly all of the key factors involved in accurate reloading: case sorting, brass prep, load development, neck-sizing, full-length sizing, bushing selection/use, tool selection, priming, powder measurement, and bullet seating. The book also explains how to test and evaluate your ammo, and how to monitor and interpret pressure signs.
There are many “must-read” sections in Zediker’s book, according to Danny: “The section beginning on page 161 dealing with concentricity (and how to achieve it) is excellent. Likewise the Load Limits section discussing pressures offers very valuable advice and info. You should also read Zediker’s commentaries about load testing, powders (burn characteristics etc.), and the effects of temperature.”
Zediker has conveniently provided a detailed summary of his book on the web, complete with table of contents, sample pages (PDF format), and dozens of illustrations. Shown above is just one small section that covers ejectors.
Overall, we recommend Glen Zediker’s Handloading for Competition, though the book definitely could use some updating. Danny says: “Plunk down the [money] and buy this book, you won’t be sorry.” Zediker’s book is available from Amazon.com ($34.99), Midsouth Shooters ($33.49), and Zediker Publishing ($36.95).
RCBS has introduced a new series of MatchMaster Competition Dies. These are available in Full-Length Sizing, Neck Sizing, and Seating configurations. These new MatchMaster dies are notable for four features:
1. The Competition Seating Die has a “view-port” for the bullet.
2. The Competition Seating Die features a free-floating, self-centering bullet-seating stem.
3. Expanders are titanium-nitride coated for reduced friction. Both the Neck-Sizing and FL-Sizing dies come with TiN expanders for smoother case extraction and reduced brass build-up on the expander.
4. RCBS is offering its own precision-machined Neck Bushings.
No More Mashed Fingers When Seating Bullets
RCBS notes: “Reloaders will love that they can end smashed fingers and misaligned bullets with the specially-designed bullet window [on the Seating Die]. And users can fine-tune any load … with the micrometer-adjustable, free-floating, self-centering bullet seating stem.”
RCBS Product Manager Will Hemeyer explained that the new Competition Seater is a game-changer. “What sets the MatchMaster Seating Die apart from the competition is a bullet-seating window with bullet-retaining system. Simply place the bullet in the window and raise the case into the die to seat the bullet. Couple this with a micrometer-adjustable, free-floating, self-centering bullet-seating stem and the MatchMaster Seating Die is easily the most accurate bullet seating die on the market.”
Why Use Expander with Bushing Dies?
Some viewers of Gavin’s video asked if an expander is superfluous when using neck-bushing dies. The answer is “it depends”. The bushings reduce neck diameter from the OUTSIDE. The expander should make the INSIDE of the neck perfectly round. Some hand-loaders prefer to take the necks down a couple thousandths below final loading diameter, then finish the job with an expander. That ensures the INSIDE of the case neck is perfectly concentric. This can be particularly useful for brass that has somewhat inconsistent neck-wall thickness. Bottom line, you can run these dies without expanders if you want, but that option is available. The expander is also removable so the assembly can be used for de-capping only.
MactchMaster Neck-Sizing Only Die
The MatchMaster Neck Sizing Die Set also uses RCBS neck bushings to control neck tension while not changing the body dimensions of fired cases. Frankly we strongly recommend that you full-length size your rifle rounds, but we acknowledge that some hand-loaders prefer to neck size for some applications. The MatchMaster Neck Sizing Dies do include a titanium-nitride coated expander, just like the FL-sizing MatchMaster dies.
Do you use bushings to size your case-necks? Are you assuming that your bushings are actually round on the inside, with a hole that’s centered-up properly? Well you may be in for an unpleasant surprise, based on what our friend Jim de Kort recently discovered. Jim was concerned about the run-out on his brass. His cases went into his bushing-equipped FL die pretty straight, but came out of the die with up to .004″ run-out. “What gives?”, Jim wondered. “Could the problem be the bushings themselves?”
To answer that question, Jim decided to examine his bushings. Using an Accuracy One Wheel-drive concentricity gauge, Jim checked out some of his neck bushings. What he discovered may surprise you…
Neck Bushing Flaws Revealed
Trust no one… — Jim de Kort
Jim writes: “I measured the concentricity of my 6BR rounds today. I noticed they went into the neck-bushing equipped full-length sizing die with less than .001″ deviation but came out with .003-.004″. The culprit, it appears, was the bushing itself. Without it the cases stayed within .0005″ to .001″ deviation, so something was happening with the bushing.
One bushing had .00025″ deviation on the outside, yet almost .003″ on the inside, so it is crooked. But even when using a bushing that is within .001″ I still get .003″ runout after sizing. I repeated the same procedure for my 6×47 and got the same results. When using the bushing, concentricity suffers a lot.”
Before we bash the bushing-makers, we must acknowledge that many different things can contribute to excessive run-out and/or mis-alignment of case-necks. We don’t have all the answers here, and Jim would be the first to say that some mysteries remain. Still, these are interesting results that give all precision hand-loaders something to think about.
Jim Borden of Borden Accuracy also offers this tip: “Check the trueness of the face of the die cap. That has more to do with trueness than the bushing. Also check perpendicularity of hole in bushing to top surface. When I was making dies, the cap was made by threading and facing the threaded tenon in same setup.”
Editor’s Comment: Many people have great results with neck-bushing dies, but Jim isn’t the only fellow who has seen some very odd results. I personally employ honed, non-bushing dies for many of my chamberings. These non-bushing dies (with the necks honed for .002-.003″ neck tension) produce extremely straight ammo, with run-out consistently under .0015″.
Many novice hand-loaders believe that neck bushing Inside Diameter (ID) size is the only important factor in neck tension. In fact, many different things will influence the grip on your bullet and its ability to release from the case neck. To learn more about neck tension and “case grip”, take the time to read this article carefully. We bet you’ll gain knowledge that will let you load more accurate ammo, with better ES/SD.
Neck Tension (i.e. Grip on Bullets) Is a Complex Phenomenon
While we certainly have considerable control over neck tension by using tighter or looser bushings (with smaller or bigger Inside Diameters), bushing size is only one factor at work. It’s important to understand the multiple factors that can increase or decrease the resistance to bullet release. Think in terms of overall brass-on-bullet “grip” instead of just bushing size (or the internal neck diameter in non-bushing full-length sizing dies).
Bullet grip is affected by many things, such as:
1. Neck-wall thickness.
2. Amount of bullet bearing surface (shank) in the neck.
3. Surface condition inside of neck (residual carbon can act as a lubricant; ultrasonic cleaning makes necks “grabby”).
4. Length of neck (e.g. 6mmBR neck vs. 6mm Dasher).
5. Whether or not the bullets have an anti-friction coating.
6.The springiness of the brass (which is related to degree of work-hardening; number of firings etc.)
7. The bullet jacket material.
8. The outside diameter of the bullet and whether it has a pressure ridge.
9. Time duration between bullet seating and firing (necks can stiffen with time).
10. How often the brass is annealed.
11. Amount (length) of neck sized (e.g. you can size only half the neck).
12. Interior diameter of bushing, or neck section of non-bushing die.
— and there are others…
One needs to understand that bushing size isn’t the beginning and end of neck tension questions, because, even if bushing size is held constant, the amount of bullet “grip” can change dramatically as the condition of your brass changes. Bullet “grip” can also change if you alter your seating depth, and it can even change if you ultrasonically clean your cases.
In our Shooters’ Forum a reader recently asked: “How much neck tension should I use?” This prompted a Forum discussion in which other Forum members recommended a specific number based on their experience, such as .001″, .002″, or .003″. These numbers, as commonly used, correspond to the difference between case-neck OD after sizing and the neck OD of a loaded round, with bullet in place. In other words, the numbers refer to the nominal amount of interference fit (after sizing).
While these commonly-used “tension numbers” (of .001″, .002″ etc.) can be useful as starting points, neck tension is actually a fairly complex subject. The actual amount of “grip” on the bullet is a function of many factors, of which neck-OD reduction during sizing is just one. Understanding these many factors will help you maintain consistent neck tension as your brass “evolves” over the course of multiple reloadings.
Seating Depth Changes Can Increase or Decrease Grip on Bullet
You can do this simple experiment. Seat a boat-tail bullet in your sized neck with .150″ of bearing surface (shank) in the neck. Now remove the bullet with an impact hammer. Next, take another identical bullet and seat it with .300″ of bearing surface in another sized case (same bushing size/same nominal tension). You’ll find the deeper-seated bullet is gripped much harder.
Neck-Wall Thickness is Important Too
I have also found that thinner necks, particularly the very thin necks used by many PPC shooters, require more sizing to give equivalent “grip”. Again, do your own experiment. Seat a bullet in a case turned to .008″ neckwall thickness and sized down .003″. Now compare that to a case with .014″ neckwall thickness and sized down .0015″. You may find that the bullet in the thin necks actually pulls out easier, though it supposedly has more “neck tension”, if one were to consider bushing size alone.
In practical terms, because thick necks are less elastic than very thin necks, when you turn necks you may need to run tighter bushings to maintain the same amount of actual grip on the bullets (as compared to no-turn brass). Consequently, I suspect the guys using .0015″ “tension” on no-turn brass may be a lot closer to the guys using .003″ “tension” on turned necks than either group may realize.
Toward a Better Definition of Neck Tension
As a convenient short-cut, we tend to describe neck tension by bushing size alone. When a guy says, “I run .002 neck tension”, that normally means he is using a die/bushing that sizes the necks .002″ smaller than a loaded round. Well we know something about his post-sizing neck OD, but do we really have a reliable idea about how much force is required to release his bullets? Maybe not… This use of the term “neck tension” when we are really only describing the amount of neck diameter reduction with a die/bushing is really kind of incomplete.
My point here is that it is overly simplistic to ask, “should I load with .001 tension or .003?” In reality, an .001″ reduction (after springback) on a thick neck might provide MORE “grip” on a deep-seated bullet than an .003″ reduction on a very thin-walled neck holding a bullet with minimal bearing surface in the neck. Bushing ID is something we can easily measure and verify. We use bushing size as a descriptor of neck tension because it is convenient and because the other important factors are hard to quantify. But those factors shouldn’t be ignored if you want to maintain consistent neck tension for optimal accuracy.
Consistency and accuracy — that’s really what this all about isn’t it? We want to find the best neck tension for accuracy, and then maintain that amount of grip-on-bullet over time. To do that you need to look not only at your bushing size, but also at how your brass has changed (work-hardened) with time, and whether other variables (such as the amount of carbon in the neck) have changed. Ultimately, optimal neck tension must be ascertained experimentally. You have to go out and test empirically to see what works, in YOUR rifle, with YOUR bullets and YOUR brass. And you may have to change the nominal tension setting (i.e. bushing size) as your brass work-hardens or IF YOU CHANGE SEATING DEPTHS.
Remember that bushing size alone does not tell us all we need to know about the neck’s true “holding power” on a bullet, or the energy required for bullet release. True bullet grip is a more complicated phenomenon, one that is affected by numerous factors, some of which are very hard to quantify.
by Sierra Bullets Ballistic Technician Paul Box
One thing that plays a major role in building an accuracy load is neck tension. I think a lot of reloaders pretty much take this for granted and don’t give that enough thought.
So, how much neck tension is enough?
Thru the years and shooting both a wide variety of calibers and burn rates of powder, I’ve had the best accuracy overall with .002″ of neck tension. Naturally you will run into a rifle now and then that will do its best with something different like .001″ or even .003″, but .002″ has worked very well for me. So how do we control the neck tension? Let’s take a look at that.
First of all, if you’re running a standard sizing die with an expander ball, just pull your decapping rod assembly out of your die and measure the expander ball. What I prefer is to have an expander ball that is .003″ smaller than bullet diameter. So for example in a .224 caliber, run an expander ball of .221″. This allows for .001″ spring back in in your brass after sizing, and still gives you .002″ in neck tension. If you want to take the expander ball down in diameter, just chuck up your decapping rod assembly in a drill and turn it down with some emery cloth. When you have the diameter you need, polish it with three ought or four ought steel wool. This will give it a mirror finish and less drag coming through your case neck after sizing.
Tips for Dies With Interchangeable Neck Bushings
If you’re using a bushing die, I measure across the neck of eight or ten loaded rounds, then take an average on these and go .003″ under that measurement. There are other methods to determine bushing size, but this system has worked well for me.
Proper Annealing Can Deliver More Uniform Neck Tension
Another thing I want to mention is annealing. When brass is the correct softness, it will take a “set” coming out of the sizing die far better than brass that has become to hard. When brass has been work hardened to a point, it will be more springy when it comes out of a sizing die and neck tension will vary. Have you ever noticed how some bullets seated harder than others? That is why.
Paying closer attention to neck tension will give you both better accuracy and more consistent groups.
Do you use bushings to size your case-necks? Are you assuming that your bushings are actually round on the inside, with a hole that’s centered-up properly? Well you may be in for an unpleasant surprise, based on what our friend Jim de Kort recently discovered. Jim was concerned about the run-out on his brass. His cases went into his bushing-equipped FL die pretty straight, but came out of the die with up to .004″ run-out. “What gives?”, Jim wondered. “Could the problem be the bushings themselves?”
To answer that question, Jim decided to examine his bushings. Using an Accuracy One Wheel-drive concentricity gauge, Jim checked out some of his neck bushings. What he discovered may surprise you…
Neck Bushing Flaws Revealed
Trust no one… — Jim de Kort
Jim writes: “I measured the concentricity of my 6BR rounds today. I noticed they went into the neck-bushing equipped full-length sizing die with less than .001″ deviation but came out with .003-.004″. The culprit, it appears, was the bushing itself. Without it the cases stayed within .0005″ to .001″ deviation, so something was happening with the bushing.
One bushing had .00025″ deviation on the outside, yet almost .003″ on the inside, so it is crooked. But even when using a bushing that is within .001″ I still get .003″ runout after sizing. I repeated the same procedure for my 6×47 and got the same results. When using the bushing, concentricity suffers a lot.”
Before we bash the bushing-makers, we must acknowledge that many different things can contribute to excessive run-out and/or mis-alignment of case-necks. We don’t have all the answers here, and Jim would be the first to say that some mysteries remain. Still, these are interesting results that give all precision hand-loaders something to think about.
Jim Borden of Borden Accuracy also offers this tip: “Check the trueness of the face of the die cap. That has more to do with trueness than the bushing. Also check perpendicularity of hole in bushing to top surface. When I was making dies, the cap was made by threading and facing the threaded tenon in same setup.”
Editor’s Comment: Many people have great results with neck-bushing dies, but Jim isn’t the only fellow who has seen some very odd results. I personally employ honed, non-bushing dies for many of my chamberings. These non-bushing dies (with the necks honed for .002-.003″ neck tension) produce extremely straight ammo, with run-out consistently under .0015″.
Whidden Gunworks makes great sizing and seating dies. The Whidden full-length sizing die with neck bushing is very popular because it allows you to “tune” the neck tension by using different bushings, with larger or smaller inside diameters. In this video, John Whidden explains how to choose a the right bushing size for use with your neck-sizing and full-length sizing bushing dies.
For most applications, John suggest starting with the caliper-measured outside diameter of a loaded cartridge (with your choice of bullet), and then SUBTRACT about three thousandths. For example, if your loaded round mics at .333, then you would want to start with a 0.330 neck bushing. John notes, however, that you may want to experiment with bushings, going down a thousandth and up a thousandth. With thin In addition, as your brass ages and the necks harden, you may want to change your bushing size.
Quick Tip: Try Flipping Your Bushings
You may also want to experiment with “flipping” your neck bushings to alternate the side that first contacts the neck of the case. (One side of the bushing is usually marked with the size, while the other side is unmarked.) So try “number side up” as well as “number side down”. Some folks believe that one side of the bushing may allow a smoother entry, and that this can enhance concentricity. Other people think they can get very slightly more or less neck tension depending on how the bushing is oriented. This is a subtle effect, but it costs nothing to experiment. If one bushing orientation proves better you can mark the “up” side with nail polish so that you can always orient the bushing optimally. NOTE: We have confirmed that some bushings are actually made with a slight taper. In addition, bushings may get distorted slightly when the brand name and size is stamped. Therefore there IS a reason to try both orientations.
There is a new player in the field of elite die-makers: Whidden Gunworks. John Whidden’s Georgia-based company is producing outstanding full-length sizing dies and micrometer-top seater dies for 7/8-14 thread presses. The dies look great, work great, and produce very straight and accurate ammo. The Whidden dies are finished beautifully inside and out. They are priced competitively and they are available for popular “extreme accuracy” cartridges such as the 6PPC, 6mmBR, 6mmBRX, 6 Dasher, 6XC, 6.5×47, .260 Rem, .284 Win, and .308 Win (and more). If you are looking for a die set for your new precision rifle, you should definitely check out the Whidden dies. Two-die set, FL Sizer and Micrometer-top Seater, costs $184.99. Sizer die alone is $74.99, while Seater die alone is $109.99.
Many of our Forum members have started using Whidden dies — and they are reporting very positive results. I personally own and use a set of Whidden dies, and I am very, very impressed with them. Here’s my report:
Editor’s Report on Whidden Dies I have a set of Whidden Gunworks dies for my personal 6BRDX (a chambering similar to 6 Dasher but with longer neck). The dies are excellent and they produce very straight ammo. My loaded rounds (made with a Whidden bushing-type FL sizer and Whidden micrometer-top seater) are showing less than .0015″ run-out measured on the bullet, with the majority closer to .001″ run-out. (This is with Lapua Scenar L bullets, which have great jacket uniformity and concentricity.)
One thing I immediately noticed about the Whidden seater die is that there is a very close correspondence between the seater “hash marks” and true changes in seating depth. By this I mean when you dial a value change of 10 on the micrometer scale, you get very close to a .010″ change in seating depth. It is not perfect, but it is definitely more precise than most other micrometer-top seater dies I’ve used (both hand dies and 7/8-14 thread screw-in types).
Cartridges loaded with my Whidden sizer and seater dies have proved very accurate. My 6BRDX is shooting in the mid-ones for five shots at 100 yards. I also have a micrometer-top Wilson inline seater die that was custom-bored with my chamber reamer. As far as I can tell, the ammo loaded with the screw-in Whidden seater is every bit as accurate as rounds loaded with the Wilson die using an arbor press. Additionally, with the Whidden micrometer die, I can hold extremely tight tolerances on base-to-bullet-ogive lengths.
In the past, with my 6mmBR, I favored an inline die because I thought it offered better control over seating depth. But given how well the Whidden seater works, I’m not sure I’d gain anything with my Wilson hand die. At least when used with a quality Harrell’s benchrest press, the Whidden seater gives up little or nothing to the hand die, and that’s big news in my experience.
You will like the look and feel of these Whidden dies. The finish inside and out is very, very good — the dies have a quality feel and run very smoothly. Both the sizer and seater have a fluted section — this offers a better “grip” when you’re screwing in the dies. The outside of the seater has a smooth, gloss-anodized finish — it exudes quality. The markings on the seater’s micrometer ring are crisp and very legible, with large, high-contrast white-on-black lines and numbers.
One other very cool feature of the Whidden sizing dies is that custom-sized tapered expanders will soon be offered. Whidden plans to offer expanders in .0005″ (one-half thousandth) increments. This is great if you have, say, a .265 bushing and a .266 bushing but you want just a little less neck tension than the .265 offers. With the tapered expander, I can use a 0.265 bushing followed by an 0.2655 expander — allowing more precise control of neck “grip”.
Whidden Die Features
Die Dimensions well-matched to PT&G reamers used for match chambers.
Sizing dies spec’d for easy chambering and extraction without overworking brass.
All sizers include shoulder datum collar to measure shoulder “bump” and headspace.
Neck bushing or no-neck bushing configurations.
Bushing dies use standard Redding/Wilson type bushings.
Neck diameter of non-bushing FL sizers can be set to customer specification.
Extended threads on short cartridge sizer dies such as BRs.
Coming soon: custom expander balls (in half-thousandth increments) to adjust neck tension and provide minimum working of the case neck.
Seater: Floating sleeve on micrometer seater enhances concentricity of loaded rounds.
Seater: Large, high-contrast markings for easy adjustment.
Custom Dies for Wildcats or Your Cartridge
Custom-made for your wildcat or standard cartridge.
Can work from fired brass or a chamber drawing to match your chamber exactly.
Neck-bushing die, or no-bushing die with neck diameter bored to customer specification.
Available Die Sets
Here is the current caliber list. Micrometer seaters are available in all calibers listed below except 22BR and 22 BRX.
John Whidden Talks about Sizers, Seaters, and Expanders
There are two sides to our die business. First we are stocking dies in many calibers that are of interest to those who visit this website (such as the 6PPC, 6mm Dasher, 6.5×47 Lapua, .260 Rem, 7mm Shehane, .308 Winchester). These dies are a good fit to the “match chamber” reamers and very few people with these calibers should have to have “Pure Custom” dies made. We have both sizers and micrometer-top seaters ready to go for the many cartridge types listed above. The sizer dies will include a shoulder datum collar that makes it easy to measure shoulder “bump” during the full-length sizing process. This is important to control headspace precisely.
On the “Pure Custom” side, we have a huge amount of flexibility. We can make one-of-a-kind sizers and seaters for wildcats in a short period of time and at an excellent price. We can work with the customer to make full-length sizers, neck sizers, shoulder bump dies, small base dies, or most anything else they can need. We can of course provide micrometer-top seaters for these cartridges as well. We can make non-bushing sizers with specific neck inside diameters tailored to customer specifications.
We will also be offering custom-sized expanders. These expanders will fit our dies as well as Redding dies. Our tapered expanders will be available in .0005” (one-half thousandth) increments for the common calibers. In our shop we have had excellent results using expanders in the dies as long as the expanders provided the correct amount of neck tension and didn’t overwork the brass. Expanders have gotten a bad reputation in recent years but we find them to be excellent tools when the same precision is applied to their use that careful handloaders apply to the rest of their process. Expanders can be most valuable for those who choose not to neck-turn their brass (because the expander pushes neckwall variations to the outside).
One last thing — many gunsmiths with their own wildcats (or “specialty” chambers) have asked us to provide dies for their customers. We gladly do batches of custom dies and encourage gunsmiths to contact us. — John Whidden
In this feature, Bill Gravatt, President of Sinclair International, explains how to clean and maintain precision reloading dies. This article first appeared in Sinclair’s online Blog, The Reloading Press, where you’ll find many other useful Product Spotlights and ‘How-to’ articles.
Reloading dies if taken care of properly will provide years of service to their owner. Most dies are hardened and then micro-polished for that mirror internal finish many of the dies exhibit. Many of them are also treated with some type of rust preventative before they leave the factory floor. But dies still need some attention before they are put to use.
Clean Your Dies Before First Use
The first step in taking care of your dies starts when you receive them. We advocate cleaning all new dies before you begin to use them. Beginning with your sizing dies; take the decapping assembly completely out of the die body. Flush the decapping assembly with a good degreaser (such as Hornady One-Shot Cleaner & Dry Lube, Birchwood Casey Gun Scrubber or Shooter’s Choice Quickscrub III) and wipe the expander ball clean.
The only part of the decapping assembly that should come in contact with your brass is the expander ball and the decapping pin. Pay particular attention to the decapping ball as it determines the final interior dimension (bullet grip) of your case neck. Make sure you inspect it after cleaning to make sure that the surface is clean and free of burrs.
Next, flush the interior of the die body out with some more degreaser. Using a pistol cleaning rod or a dowel rod, push a couple of wet patches all the way through the die. Then run a couple of dry patches through. Reassemble your sizing die and you should be good to go.
Seating Die Cleaning and Maintenance
Taking apart your seater is fairly simple depending on the complexity of your seating die. A standard seater just requires you to turn the seating stem out of the die body exposing the interior of the seater. Flush and clean both the body and seater as described above. Benchrest sliding sleeve seaters such as Forster or Redding Competition Dies have a few more parts involved. Just make sure as you take them apart you know how the spring is oriented and how any other parts such as chamber sleeves or seating plugs are arranged. Any springs or threads can be wiped down with a very rag or patch lightly coated with a fine oil. Make sure you inspect the opening in the seating stem for debris. You can twist a patch and use the end to clean out the smaller caliber stems/plugs.
Regular Cleaning and Storage Advice
Regular maintenance of your dies should include their routine cleaning. Sizing dies collect excess lube off the cases and this lube can begin to build up. We have seen dents formed in the case shoulder from the hydraulic compression of the excess lube in the die when the case was sized. We recommend cleaning the dies every 500 to 1000 rounds depending on how frequently they are used and the cleanliness of your reloading area. For longer term storage of your dies, I recommend putting a light oil or rust preventative on them, especially if you have a shop that has a humid environment.
My reloading area is in the same building (different room) as my woodshop and I have to watch the dust so I keep most of my reloading dies covered or stored away. I keep a cover over my press and scales as well.


 Quick Tip: Try Flipping Your Bushings
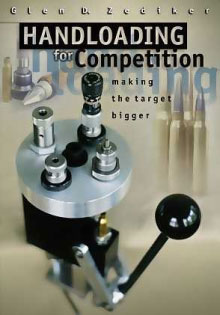 Forum member Danny Reever and this Editor have discussed how novice reloaders can struggle with the fine points of reloading, making errors in seating depth, neck-bushing choice, or sizing their cases. We agreed that a good resource covering more than “Reloading Basics” is sorely needed. Danny reminded me that Glen Zediker’s excellent


 In our
  Neck-Wall Thickness is Important Too


 I have a set of Whidden Gunworks dies for my personal 6BRDX (a chambering similar to 6 Dasher but with longer neck). The dies are excellent and they produce very straight ammo. My loaded rounds (made with a Whidden bushing-type FL sizer and Whidden micrometer-top seater) are showing less than .0015″ run-out measured on the bullet, with the majority closer to .001″ run-out. (This is with Lapua Scenar L bullets, which have great jacket uniformity and concentricity.)


 Available Die Sets
 There are two sides to our die business. First we are stocking dies in many calibers that are of interest to those who visit this website (such as the 6PPC, 6mm Dasher, 6.5×47 Lapua, .260 Rem, 7mm Shehane, .308 Winchester). These dies are a good fit to the “match chamber” reamers and very few people with these calibers should have to have “Pure Custom” dies made. We have both sizers and micrometer-top seaters ready to go for the many cartridge types listed above. The sizer dies will include a shoulder datum collar that makes it easy to measure shoulder “bump” during the full-length sizing process. This is important to control headspace precisely.
 In this feature, Bill Gravatt, President of
  The only part of the decapping assembly that should come in contact with your brass is the expander ball and the decapping pin. Pay particular attention to the decapping ball as it determines the final interior dimension (bullet grip) of your case neck. Make sure you inspect it after cleaning to make sure that the surface is clean and free of burrs.
 Regular Cleaning and Storage Advice


