I have seen it time and time again, shooters on the line wrestling with their rifle trying to get the bolt closed while the wind is switching. They were too focused trying to get their bolt to close and getting their rifle settled back on the bags that they missed the wind switch. Bang… Eight! The straw that broke the camel’s back for me was at the 2017 Canadian Nationals. I was paired up with a young girl and she would try really hard to close the bolt on her rifle. The majority of the time she would get it to close, but often times she could not even get the round to chamber. She was focused on her rifle the entire time rather than on the conditions. When we completed our strings, she had five rounds that did not chamber our of 15! That is way too many!. I told her she needed to think about Full-length sizing with 0.002″ shoulder bump, or Controlled Full-length Sizing like I call it. I told her not to worry about losing accuracy. I told her that I full-length size all my rounds and asked if she noticed how smooth my bolt was and noticed my score. She said yes, they were both great!
Controlled Full-length Sizing Does NOT Harm Accuracy
I have found that Controlled Full-length Sizing does NOT hurt accuracy or shorten brass life. I find that I can focus much more on the conditions when I don’t have to think about chambering a round nor extracting it. It has become second nature. After firing, I keep my head welded to the stock, I open the bolt by placing my thumb on top of stock and rotating hand upwards. I reach in and retrieve spent case, place it back in ammo box, and pick up another loaded round and put in chamber. I verify conditions and when ready, I push the bolt in and close it with my index and middle finger.
With Controlled Full-length Sizing you “bump” the shoulder around .002″ for bolt guns.* Image courtesy Sinclair International which carries a variety of Full-length dies.
Whidden Full-Length Sizing Dies by AccurateShooter.com Editor
For proper Full-length sizing, you want a quality die that’s a very good match to your chamber. For our project rifles we usually turn to Whidden Gunworks which offers both bushing and non-bushing FL dies. And if you want the hot new option, check out Whidden’s patent-pending, click-adjustable FL-sizing die. This gives instant, precise control over shoulder bump. It works great.
*With gas guns, such as the AR10, you may want to increase shoulder bump to .003″ or more. With some benchrest cartridges, .0015″ bump may prove optimal. But .002″ is a good starting point.
Editor’s NOTE: We generally recommend full-length sizing your cases. But there may be some situations where you may want to body-size your brass in one operation, and then neck-size the case as a final operation for reduced run-out. Or, perhaps you have a non-bushing FL sizing die and you want to modify the neck sizing. This article explains how to use a Lee Collet Die to size case-necks.
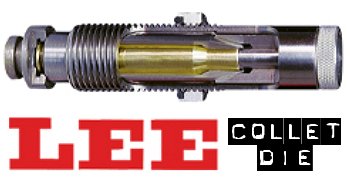
For those who prefer to neck-size their brass (rather than full-length-size), the LEE Collet Die is a popular, inexpensive option. It works by having collet tangs or “fingers” press the neck against a central mandrel. A collet squeezes the case neck against a precision mandrel for a perfect fit with minimum run-out. The benefit is that you get a very straight neck, which is sized consistently from top to bottom. Canadian shooter Jerry Teo explains: “LEE Collet Dies produce sized cases with very low runout (measured runout is under .001″ using a Sinclair concentricity gauge). You also don’t get the build-up of brass at the base of the neck, as can happen with bushing neck dies. The neck-shoulder junction stays nice and crisp.”
Here’s a good video that explains how to use a Lee Collet Die to Neck-Size .243 Win brass:
UPDATE to LEE Collet Dies — Neck Protrusion Change
The Lee Precision website notes a small design change: “If you’re a long-time user of Lee Collet Neck Sizing Die you may notice we have modified the Collet so a small portion of the neck protrudes through the end of the Collet-sizing portion. This often-requested modification was implemented in 2019. This change allows the portion of the neck that protrudes above the Collet to remain in its fire-formed condition. This provides a natural flare to the case neck allowing easy and concentric seating of bullets. This is especially important when seating cast bullets or low-drag coated bullets.”
TIP ONE — Adjusting Tension
LEE Collet dies don’t have a specific mechanical adjustment for neck tension. But you CAN easily modify the die to provide more or less tension. If you want to adjust the neck tension using a Lee Collet die, you can simply chuck the mandrel in a drill and reduce the diameter with some sand-paper (to increase neck tension) or you can order a mandrel the next caliber larger and turn it to whatever diameter you want (the larger the mandrel diameter, the less the neck tension). You can also order custom mandrels from Lee sized to any diameter you want.
Regarding neck tension, Boyd Allen makes an important point: “The only way to properly get more neck tension with collet dies is to either reduce the diameter of the mandrel, or order a smaller-diameter mandrel from Lee. I remind folks that adjusting the die position to have more toggle at the top of the ram stroke (not the factory recommended method), or leaning on the press handle with more force than recommended will NOT increase neck tension.”
No Custom Lee Collet Dies For Now
In years past, Lee also offered Custom Collet Dies, made from two fired cases. Hopefully these will be available in the future. However, earlier this year, Lee announced it had suspended sale of most custom dies including Collet Dies: “March 17, 2021: Due to unprecedented order volume, we have suspended custom services for Collet Necksizing Dies, Full-Length Sizing Die Sets, Quick Trim Dies, Case Length Gauges, Factory Crimp Dies, and Bullet Molds until we are able to meet the required volume of our standard products.”
TIP TWO — Polish and Tune for Easy Case Removal
Some users have complained that their Collet Dies grab the case-neck too firmly, making the case hard to remove. There are solutions to this problem. First inspect the collet fingers and smooth the inner surface up a bit with polishing compound or an extra-fine sanding pad. Second, you can open up the fingers a little bit. LEE recommends that if your Collet Die is sticking, take a steel punch and tap the fingers apart a little bit so that the natural “unloaded” position is wider. Lastly, you should lightly lubricate the outside of the collet fingers (see arrows) before you re-assemble the die. This will ensure they slide smoothly. Also, to prevent the collet fingers from closing too tight, never load up the die with your press without putting a case in place first. Without a case neck between the collet fingers and the mandrel, the collet can clamp itself too tight as you raise the ram.
TIP THREE — Always Have a Case Inside When Operating Collet Die
Our friend Boyd Allen tells us that you need to follow directions and NEVER operate the die without a case inside. Boyd explains: “This is because doing so will spring the quadrents of the collet inward so that they interfere with the insertion of a case, and the user will have to figure out how to undo the damage if the die is to operate properly. This advice would not be needed if everyone read the instructions before using the die…. but many times, they don’t. Another thing that I tell new users is to take the die apart so that they will have a better chance of understanding how it works.”
TIP FOUR — Size Twice and Spin Your Case 1/8th Turn
After reaching fully “down” on your press handle, withdraw the case about an inch and manually rotate it about 1/8th (NOT 1/4 or 1/2) turn while still in the shell-holder, then size again. This will place the die’s collet petals on the four “high spots” of the case neck and will result in a rounder, more evenly-sized neck with slightly more bullet tension. This takes only about one second more per case and is well worth the slight extra effort. (We thank reader Stonecreek for this smart tip).
Sinclair International has created a series of helpful articles on rifle cartridge reloading. Today’s feature lists ten basic steps for precision hand-loading, with links to longer, detailed Sinclair Int’l technical articles providing more complete information. There’s a lot of helpful info here guys, if you click all the links to access the ten “long form” articles.
Tying It All Together: 10 Steps To Precision Handloads
Feature based on article by Roy Hill, Brownells/Sinclair Copywriter
Sinclair International offers a series of detailed articles on hand-loading precision rifle ammunition. The articles are included in Sinclair’s GunTech Articles Archive, but sorting through the index to find each article takes time. To help you access all these articles quickly, here’s a handy summary of ten key topics, with links to longer articles covering each subject in detail.
Part 1: The first step in making high-quality handloads is to carefully choose the best brass for your application. You need to know how to identify the different types of brass and how to choose the best kind for the ammo you want to load. CLICK HERE for Part 1.
Part 2: Even high-quality brass can have burrs around the flash hole that can interfere with the primer flame and cause inconsistent ignition – which can lead to shot groups opening up. Flash hole deburring is a critical step in making sure primers ignite powder consistently. CLICK HERE for Part 2.
Part 3: The next step is to make sure the primer pockets are square and uniform. Like flash hole deburring, primer pocket uniforming may reduce variations in primer ignition by ensuring more consistent primer seating. CLICK HERE for Part 3.
Part 4: Making sure all your cases are precisely the same length is crucial, especially when you use cases that have been fired before. Case trimming is the way to get there. CLICK HERE for Part 4.
Part 5: After trimming, cases still have to be resized. In order for them to work through the resizing die, they have to be lubricated. The case lube method you choose is crucial to making precision handloads. CLICK HERE for Part 5.
Part 6: Now it’s time to choose the dies that will resize your cases. There are several important options to consider in selecting the right sizing dies. CLICK HERE for Part 6.
Part 7: Wait! You’re not quite ready to start sizing yet. There’s yet more to consider before you start cranking cases through the press. Learn more about setting up and adjusting your sizing dies. CLICK HERE for Part 7.
Part 8: Once the cases are completely prepped, it’s time to start putting fresh components back into them. We start off by seating primers. CLICK HERE for Part 8.
Part 9: After the primers are seated, it’s time to drop in the powder. There are several tools that will help you handle powder for precision handloads. CLICK HERE for Part 9.
Part 10: The final step in the process is carefully seating the bullet to just the right depth. And then… you’re ready to try your loads at the range. CLICK HERE for Part 10.
This article is part of Sinclair Int’l Step-By-Step Reloading Series. Most of the products mentioned in this article are sold through Brownells.com.
by Roy Hill, Brownells/Sinclair Copywriter
Making your own precision handloads is a meticulous journey with many steps, many important matters to consider, and many sets of measurements to calculate. For those who pursue the perfect group, the highest score, the really long accurate shot, the rewards more than outweigh the effort. Choosing the right cases, deburring the flash holes, making the primer pockets uniform, trimming the cases, and lubricating them are all familiar – and critical – steps along the journey. And now that your brass preparation is complete, you are at last ready to start running the cases through your press and fill them with primers, powder, and bullets. The very first die the brass encounters is the sizing die. You insert the case, work the press’s lever to return the case to its correct pre-fired dimensions – and the journey continues.
There are three types of sizing dies to think about: neck, full-length, and small base. All three have specific benefits and potential drawbacks, and you should choose the type of die you use by thinking very carefully about what kind of shooting you plan to do with your handloads. No matter which type you select, most sizing dies will also punch out the old spent primer with some sort of decapper assembly that uses a hardened steel rod. Many types of sizing dies use an expander ball inside the die to make sure the neck of the case will accommodate a bullet after being sized. With some size dies, the expanders are easily removable and interchangeable, letting you get exactly the neck tension you want. If you are reloading for pistol cartridges, carbide sizing dies allow you to quickly resize without applying any lube to the case. But rifle cases always need lube.
Neck-Sizing Dies Neck-sizing dies resize only the neck of the case. The benefit of sizing only the neck is that the brass is “worked” very little, letting you reuse the same cases many times over. Also, cases that have already been fired in your rifle are perfectly fireformed to fit that rifle’s chamber, which can help accuracy. However, neck-sized cases will fit only the specific rifle they were originally fired in, and may still require a little extra force to chamber or extract.
Sinclair recommends that neck-sized-only cartridges should not be used any in other rifle besides the one they were originally fired from [unless they are also FL-sized], or in any action other than a bolt-action. Neck-sized-only rounds are great for the target range or the benchrest but should not be used in critical situations like military or police operations, or hunting. And if you fire them enough times, neck-sized cases will still need to be full-length sized periodically for you to keep using them.
Full-Length Sizing Dies Full-length sizing dies do exactly what their name says: resize the full length of the case, not just the neck. Full-length sizing helps create handloads that will function in any rifle, not just the one from which the cases were originally fired. The potential downside of full-length sizing is that it may shorten case life because it works the brass more than neck sizing. But it’s possible to “tune” today’s full-length sizing dies so they barely work the brass at all, as this article by Sinclair Reloading Tech Ron Dague shows.
Illustration Shows How a Full-Length Sizing Die Works
Another way to reap the benefits of full-length sizing is to use Redding’s full-length bushing dies, which size the full length of the case but use a system of interchangeable bushings that enable you give the case neck the bare minimum of resizing needed. To see how finely adjustable bushing dies are, and how they resize the case while fully supported, CLICK HERE for Video. The neck bushing helps you precisely control the neck tension to help increase the consistency and accuracy of your handloads.
Small Base Dies
A Small Base Die is just another type of full-length sizing die, but one that is typically used when reloading for semi-automatic rifles, like the AR-15, M14, or AR-style .308 rifles. (It may also work well for bolt guns that need extra sizing on the lower section of the case.) A small base die works exactly like a full-length sizing die, only it compresses the brass just a bit more, usually about .001″ more, and may even push the case shoulder back just a hair. Small base dies give that extra bit of compression to the brass to help make sure the case will properly extract from a semi-automatic firearm. The upside is that you get precision handloads that should work flawlessly in your semi-automatic. The downside is case life is really shortened, especially compared to brass used only in one bolt-action rifle, because the brass is worked more.
Shoulder Bump Gauges
A handy tool for setting up your full-length sizing dies as close as possible to your rifle’s chamber is the Sinclair bump gauge. The bump gauge lets you resize the case as little as possible, to extend case life and help your handloads fit your rifle almost like a neck-sized only die. You use deprimed cases fired in your rifle and bump gauge inserts to help you set up the die so it resizes the case only about .001″ to .004″, depending on what type of rifle you’re shooting.
Video shows how to use a shoulder bump gauge to set up your full-length dies
Article Find by EdLongrange. We welcome reader submissions
Do you use bushings to size your case-necks? Are you assuming that your bushings are actually round on the inside, with a hole that’s centered-up properly? Well you may be in for an unpleasant surprise, based on what our friend Jim de Kort recently discovered. Jim was concerned about the run-out on his brass. His cases went into his bushing-equipped FL die pretty straight, but came out of the die with up to .004″ run-out. “What gives?”, Jim wondered. “Could the problem be the bushings themselves?”
To answer that question, Jim decided to examine his bushings. Using an Accuracy One Wheel-drive concentricity gauge, Jim checked out some of his neck bushings. What he discovered may surprise you…
Neck Bushing Flaws Revealed
Trust no one… — Jim de Kort
Jim writes: “I measured the concentricity of my 6BR rounds today. I noticed they went into the neck-bushing equipped full-length sizing die with less than .001″ deviation but came out with .003-.004″. The culprit, it appears, was the bushing itself. Without it the cases stayed within .0005″ to .001″ deviation, so something was happening with the bushing.
One bushing had .00025″ deviation on the outside, yet almost .003″ on the inside, so it is crooked. But even when using a bushing that is within .001″ I still get .003″ runout after sizing. I repeated the same procedure for my 6×47 and got the same results. When using the bushing, concentricity suffers a lot.”
Before we bash the bushing-makers, we must acknowledge that many different things can contribute to excessive run-out and/or mis-alignment of case-necks. We don’t have all the answers here, and Jim would be the first to say that some mysteries remain. Still, these are interesting results that give all precision hand-loaders something to think about.
Jim Borden of Borden Accuracy also offers this tip: “Check the trueness of the face of the die cap. That has more to do with trueness than the bushing. Also check perpendicularity of hole in bushing to top surface. When I was making dies, the cap was made by threading and facing the threaded tenon in same setup.”
Editor’s Comment: Many people have great results with neck-bushing dies, but Jim isn’t the only fellow who has seen some very odd results. I personally employ honed, non-bushing dies for many of my chamberings. These non-bushing dies (with the necks honed for .002-.003″ neck tension) produce extremely straight ammo, with run-out consistently under .0015″.
You can benefit from these precision mandrels, trust us…
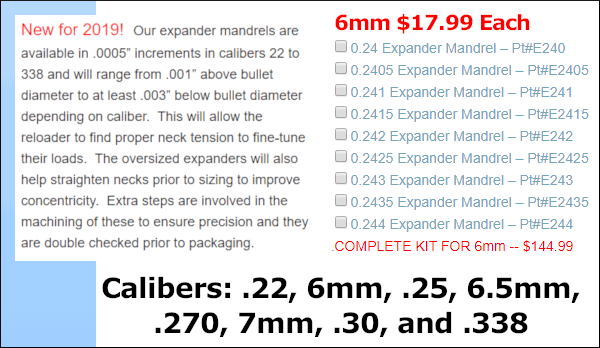
Controlling cartridge neck tension is a critical aspect of accurate reloading. A very small change in the amount of grip on the bullet can actually have a noticeable effect on accuracy (and group size). You can tune neck tension with different size bushings used with FL-sizing or neck-sizing dies. You can also adjust neck “grip” by annealing your brass, or turning your necks for reduced neck-wall thickness.
But perhaps the most precise way to tune neck grip on the bullet is to use Precision Expander Mandrels. Many top shooters size their case necks down pretty far with a full-length sizing die then use a precision neck mandrel as a final step. This expands the neck back to the precisely-desired neck diameter. Because you are working from the “inside out”, variances in neck-wall thickness become less important. This also ensures you have a perfectly-round internal neck geometry for seating your bullet. (Yes, unfortunately some neck bushings are not perfectly round inside.)
For guys who want ultra-precise control over neck tension (and “grip” on the bullet), 21st Century Shooting now offers Precision Expander Mandrels in .0005 (one-half thousandth) increments. These will be available for most popular match calibers including: .224, 6mm, .25, 6.5mm, .270, 7mm, .308, and .338 calibers. These mandrels cost $17.99 each, or you can get a complete set of nine mandrels in .0005 increments (for one caliber) for $144.99. Listed below are the nine 6mm mandrels:
John Perkins, owner of 21st Century tells us: “Finally! We have our expander mandrels up and ready to order on our website here: http://www.xxicsi.com/expander-mandrels.html.” This is a big deal. James Crofts, past National F-TR Champion, says “WooHoo — great news!”
To get best results with these precision mandrels, John recommends using the 21st Century Expander Die Body, part #904. Watch video for set-up tips:
John adds: “We are still in the midst of turning all of these so some calibers will ship when they are completed. Should have them all done by end of next week or so! Thanks for your patience while we got these set up and in process!”
Our friend Erik Cortina is at Raton, NM this week at the F-Class Nationals. When he’s not shooting (or working) Erik produces YouTube videos. One of his most popular videos explained why you should full-length size cartridge brass. In no uncertain terms Erik says: “Quit Neck Sizing!!!” Watch the Video:
Why It’s Smart to Full-Length Size Your Brass
Commentary by Erik Cortina
Should You Full-Length Size Your Cartridge Brass?
Absolutely. Let Me Explain Why…
I have seen it time and time again, shooters on the line wrestling with their rifle trying to get the bolt closed while the wind is switching. They were too focused trying to get their bolt to close and getting their rifle settled back on the bags that they missed the wind switch. Bang… Eight! The straw that broke the camel’s back for me was at the 2017 Canadian Nationals. I was paired up with a young girl and she would try really hard to close the bolt on her rifle. The majority of the time she would get it to close, but often times she could not even get the round to chamber. She was focused on her rifle the entire time rather than on the conditions. When we completed our strings, she had five rounds that did not chamber our of 15! That is way too many!. I told her she needed to think about Full-length sizing with 0.002″ shoulder bump, or Controlled Full-length Sizing like I call it. I told her not to worry about losing accuracy. I told her that I full-length size all my rounds and asked if she noticed how smooth my bolt was and noticed my score. She said yes, they were both great!
Controlled Full-length Sizing Does NOT Harm Accuracy
I have found that Controlled Full-length Sizing does NOT hurt accuracy or shorten brass life. I find that I can focus much more on the conditions when I don’t have to think about chambering a round nor extracting it. It has become second nature. After firing, I keep my head welded to the stock, I open the bolt by placing my thumb on top of stock and rotating hand upwards. I reach in and retrieve spent case, place it back in ammo box, and pick up another loaded round and put in chamber. I verify conditions and when ready, I push the bolt in and close it with my index and middle finger.
With Controlled Full-length Sizing you “bump” the shoulder around .002″ for bolt guns.* Image courtesy Sinclair International which carries a variety of Full-length dies.
Whidden Full-Length Sizing Dies by AccurateShooter.com Editor
For proper Full-length sizing, you want a quality die that’s a very good match to your chamber. For our project rifles we usually turn to Whidden Gunworks which offers both bushing and non-bushing FL dies. And if you want the hot new option, check out Whidden’s patent-pending, click-adjustable FL-sizing die. This gives instant, precise control over shoulder bump. It works great.
*With gas guns, such as the AR10, you may want to increase shoulder bump to .003″ or more. With some benchrest cartridges, .0015″ bump may prove optimal. But .002″ is a good starting point.
For those who prefer to neck-size their brass (rather than full-length-size), the LEE Collet Die is a popular, inexpensive option. It works by having collet tangs or “fingers” press the neck against a central mandrel. The benefit is that you get a very straight neck, which is sized consistently from top to bottom. Canadian shooter Jerry Teo explains: “LEE Collet Dies produce sized cases with very low runout (measured runout is under .001″ using a Sinclair concentricity gauge). You also don’t get the build-up of brass at the base of the neck, as can happen with bushing neck dies. The neck-shoulder junction stays nice and crisp.”
TIP ONE — Adjusting Tension
LEE Collet dies don’t have a specific mechanical adjustment for neck tension. But you CAN easily modify the die to provide more or less tension. If you want to adjust the neck tension using a Lee Collet die, you can simply chuck the mandrel in a drill and reduce the diameter with some sand-paper (to increase neck tension) or you can order a mandrel the next caliber larger and turn it to whatever diameter you want (the larger the mandrel diameter, the less the neck tension). You can also order custom mandrels from Lee sized to any diameter you want.
Regarding neck tension, Boyd Allen makes an important point: “The only way to properly get more neck tension with collet dies is to either reduce the diameter of the mandrel, or order a smaller-diameter mandrel from Lee. I remind folks that adjusting the die position to have more toggle at the top of the ram stroke (not the factory recommended method), or leaning on the press handle with more force than recommended will NOT increase neck tension.”
Lee also offers Custom Collet Dies, made from two fired cases. Lee offers custom standard collet dies for $70.00 (plus S/H) and custom large collet dies for $160.00 (plus S/H). CLICK HERE to ORDER.
TIP TWO — Polish and Tune for Easy Case Removal
Some users have complained that their Collet Dies grab the case-neck too firmly, making the case hard to remove. There are solutions to this problem. First inspect the collet fingers and smooth the inner surface up a bit with polishing compound or an extra-fine sanding pad. Second, you can open up the fingers a little bit. LEE recommends that if your Collet Die is sticking, take a steel punch and tap the fingers apart a little bit so that the natural “unloaded” position is wider. Lastly, you should lightly lubricate the outside of the collet fingers (see arrows) before you re-assemble the die. This will ensure they slide smoothly. Also, to prevent the collet fingers from closing too tight, never load up the die with your press without putting a case in place first. Without a case neck between the collet fingers and the mandrel, the collet can clamp itself too tight as you raise the ram.
TIP THREE — Always Have a Case Inside When Operating Collet Die
Our friend Boyd Allen tells us that you need to follow directions and NEVER operate the die without a case inside. Boyd explains: “This is because doing so will spring the quadrents of the collet inward so that they interfere with the insertion of a case, and the user will have to figure out how to undo the damage if the die is to operate properly. This advice would not be needed if everyone read the instructions before using the die…. but many times, they don’t. Another thing that I tell new users is to take the die apart so that they will have a better chance of understanding how it works.”
TIP FOUR — Size Twice and Spin Your Case 1/8th Turn
After reaching fully “down” on your press handle, withdraw the case about an inch and manually rotate it about 1/8th (NOT 1/4 or 1/2) turn while still in the shell-holder, then size again. This will place the die’s collet petals on the four “high spots” of the case neck and will result in a rounder, more evenly-sized neck with slightly more bullet tension. This takes only about one second more per case and is well worth the slight extra effort. (We thank reader Stonecreek for this smart tip).
Here’s a good video that explains how to use a Lee Collet Die to Neck-Size .243 Win brass:
Have you ever expanded a .22 or 6mm cartridge all the way up to .30-caliber? If so, you know this can be a difficult procedure that stresses the case necks and neck-shoulder junction. A significant neck-size expansion done in one big jump can increase run-out, cause doughnuts, or worse yet, even split the brass. Therefore you want to proceed in increments, increasing the neck diameter in stages. One smart way to do that is to use a Progressive Press. This article explains how…
The most successful short-range brenchrest-for-score cartridge is the 30 BR. That cartridge, as well as 30 BR variants such as the 30 BRX, all start with the 6mmBR Norma parent cartridge, typically with Lapua 6mmBR brass. To get a nice 30 BR case you want to expand in stages, increasing the inside neck diameter incrementally from .243 to .308.
Darrell Jones of DJ’s Brass Service creates thousands of 30 BR cases each year. He has found a clever way to speed up the process — Darrell uses a Progressive Press. He runs his 6BR brass through four (4) separate Hornady neck-sizing dies with expander mandrels. First there is a .257 die, followed by .264 (6.5mm), .284 (7mm), and then .308. Then a fifth and final K&M die provides one last, slight expansion so the newly-fashioned 30 BR cases perfectly fit the arbor of Darrell’s neck-turning tool.
So to repeat, the case starts as .243 (6mm), then moves in up stages .257, .264, .284, and .308, with a final “finishing” step prior to neck-turning. You can see the expansion in this video, which starts with 6mmBR brass that was first hydro-formed to 6 BRX:
Watch 6mm Cases Expanded to 30-Caliber (6BRX to 30 BRX)
For this demo video, Darrell expands just one case at a time. However, he can also put multiple cases in the progressive — one per station. This takes a little more effort, Darrell says, but the results are still excellent. Darrell tells us: “I do put multiple cases in the progressive to save time. The results are the same — I just wanted to show a single-step process and how it reduces run-out by not stressing the shoulder with one big expansion from 6mm straight to 30 caliber. Doing the operation in multiple stages avoids binds and helps keep the shoulders concentric.”
This same multi-stage procedure can be use to expand other cartridge types. For example you could take .221 Fireball brass in stages up to .308 to create 300 Blackout brass.
Darrell uses caliber-specific, Hornady neck-sizing-only dies with elliptical expanders. Darrell tells us: “The Hornady elliptical expander has a reduced bearing surface that puts less strain on the brass when expanding the necks to the next size.” The fitting at the bottom of the die is the Lock-N-Load die bushing that allows fast die changes.
These particular cases used in the video were first hydro-formed to 6BRX then expanded to 30 BRX before neck turning. DJ’s Brass offers hydro-forming for many popular wildcat cartridges such as 6 PPC, 6mm Dasher, and .284 Shehane.
by Sierra Bullets Ballistic Technician Paul Box
One thing that plays a major role in building an accuracy load is neck tension. I think a lot of reloaders pretty much take this for granted and don’t give that enough thought.
So, how much neck tension is enough?
Thru the years and shooting both a wide variety of calibers and burn rates of powder, I’ve had the best accuracy overall with .002″ of neck tension. Naturally you will run into a rifle now and then that will do its best with something different like .001″ or even .003″, but .002″ has worked very well for me. So how do we control the neck tension? Let’s take a look at that.
First of all, if you’re running a standard sizing die with an expander ball, just pull your decapping rod assembly out of your die and measure the expander ball. What I prefer is to have an expander ball that is .003″ smaller than bullet diameter. So for example in a .224 caliber, run an expander ball of .221″. This allows for .001″ spring back in in your brass after sizing, and still gives you .002″ in neck tension. If you want to take the expander ball down in diameter, just chuck up your decapping rod assembly in a drill and turn it down with some emery cloth. When you have the diameter you need, polish it with three ought or four ought steel wool. This will give it a mirror finish and less drag coming through your case neck after sizing.
Tips for Dies With Interchangeable Neck Bushings
If you’re using a bushing die, I measure across the neck of eight or ten loaded rounds, then take an average on these and go .003″ under that measurement. There are other methods to determine bushing size, but this system has worked well for me.
Proper Annealing Can Deliver More Uniform Neck Tension
Another thing I want to mention is annealing. When brass is the correct softness, it will take a “set” coming out of the sizing die far better than brass that has become to hard. When brass has been work hardened to a point, it will be more springy when it comes out of a sizing die and neck tension will vary. Have you ever noticed how some bullets seated harder than others? That is why.
Paying closer attention to neck tension will give you both better accuracy and more consistent groups.


 Whidden Full-Length Sizing Dies
 TIP ONE — Adjusting Tension
 TIP TWO — Polish and Tune for Easy Case Removal