If you hand-load pistol ammunition, you should definitely have a case gauge (aka “gage”) for each cartridge type you reload. Caliber-specific, precision-machined cylindrical gauges perform many important functions. They will instantly reveal if your rounds are too long or have excessive headspace. They will also show if your case is bulged or otherwise too fat to chamber easily. You can use the gauge with sized brass as well as loaded rounds.
Case gauges are a “must-have” for anyone loading handgun ammunition, particularly if you crank out large quantities of pistol ammo with a progressive press. An oversize round can cause a misfeed, jam, or other problem. That can ruin your day if you are in the middle of a shooting match. If you are relying on your handgun for self-defense, the last thing you want is a malfunction of any kind. This Editor personally runs every pistol round through a gauge before it goes into the ammo box.
UltimateReloader.com Video Shows How to Use Pistol Case Gauges:
Our friend Gavin Gear of UltimateReloader.com has prepared an excellent video that explains the benefits of pistol case gauges and shows how to use them. Gavin uses the quality gages produced by L.E. Wilson. These are available for the most popular handgun cartridges, both autoloader cartridges, and rimmed revolver cartridges. Gavin demonstrates gage use with .40 SW and .44 magnum cases.
Gavin states: “Using a case gage is very simple, and I would recommend that you add one of these gages to your reloader’s tool chest for each of the pistol cartridge types you reload. It may just save you a lot of time and hassle. Peace of mind is hard to put a price on!”
Creedmoor Sports is a leading vendor of products for competitive shooters and serious hand-loaders. Along with great gear, Creedmoor Sports provides informative content for its customers. The Creedmoor InfoZone provides Reloading Tips, Gear Reviews, Shooting News, and basic gunsmithing information.
Bill Gravatt, President of Creedmoor Sports, is an expert on reloading processes and gear. He developed many of the popular tools marketed by Sinclair Int’l, and he brings that expertise to Creedmoor Sports. Bill hosts a series of “how-to” videos produced for the Creedmoor InfoZone.
In this video, Bill Gravatt demonstrates several methods to clean your cases. Bill tells us: “Powder residue should be removed before you insert your cases into your reloading dies. There are several ways to clean your cases. Many shooters use a combination of various methods…”
1. Manual Cleaning — You can use 0000 Steel wool for the outside of the case and a Case Neck brush for the inside. A paper towel can remove any remaining residue. This is a handy way to clean if you load at the range.
2. Vibratory Tumbling — This traditional method works well, particularly for pistol brass. Experiment with both Corn Cob and Walnut media. You can get a brighter shine by putting a small amount of liquid brass polish in the media.
3. Wet Tumbling with Stainless Media — This process can get your brass clean inside and out. Do check to ensure no pins are stuck in the flash-holes. Watch for peening of case mouths that can occur over time.
4. Ultrasonic Cleaning — Ultrasonic cleaning works great for small parts as well as brass. The ultrasonic process removes all carbon and traces of lube, which can leave the inside of case necks too dry. To smooth bullet seating, try putting a tablespoon of Ballistol in the cleaning solution.
Cleaning Reloading Dies
Cleaning your reloading dies is something that many hand-loaders neglect. In this 60-second Tech Tip, Bill Gravatt provides some smart advice on cleaning your dies. Bill notes: “After heavy use, case lube and carbon can build up in your reloading dies. It’s important to keep them clean. Also, with new dies, give them a good cleaning before first use, because they ship with a corrosion inhibitor.”
1. Step 1 — Prior to cleaning, disassemble the die and spray it with a good degreaser. Do this with brand new dies too.
2. Step 2 – Take a patch and run it in the die to remove old lube and gunk. Don’t forget the decapping assembly and other internal parts.
3. Step 3 — After cleaning the die, but before reassembly, spray the die with a good corrosion inhibitor, such as Corrosion-X or Starrett M1.
Here are two different bullet types, seated to the same CBTO length, but different COAL. Note the shiny scratches on the bullets made by the comparator tool which indicates a point on the bullet ogive near where the ogive will engage the rifling.
Effects Of Cartridge Over All Length (COAL) And Cartridge Base To Ogive (CBTO) – Part 2 by Bryan Litz forBerger Bullets. Part One of this series focused on the importance of COAL in terms of SAAMI standards, magazine lengths, seating depths, and pressure levels. Another measure of length for loaded ammunition is highly important to precision, namely Cartridge Base to Bullet Ogive Length (CBTO).
Figure 2. Chamber throat geometry showing the bullet jump to the rifling or lands.
Look at Figure 2. Suppose the bullet was seated out of the case to the point where the base of the bullet’s nose (ogive) just contacted the beginning of the riflings (the lands) when the bolt was closed. This bullet seating configuration is referred to as touching the lands, or touching the riflings and is a very important measurement to understand for precision hand-loading. Due to the complex dynamics of internal ballistics which happen in the blink of an eye, the distance a bullet moves out of the case before it engages the riflings is highly critical to precision potential. Therefore, in order to systematically optimize the precision of his handloads, it’s critically important that the precision hand-loader understands how to alter bullet seating depth in relation to the barrel rifling. Part of the required knowledge is understanding how to accurately and repeatably measure the Cartridge Base To Ogive (CBTO) dimension. This is explained in the FULL ARTICLE.
Bryan Litz offers an extended discussion on how to measure CBTO using different tools and methods, including the Hornady OAL gauge. You can read this discussion in the full article found on the Berger Bullets website. CLICK HERE to Read Full Article.
Why Not Use CBTO as a SAAMI Standard?
If CBTO is so important to rifle accuracy, you might ask, “Why is it not listed as the SAAMI spec standard in addition to COAL?” There is one primary reason why it is not listed in the standard. This is the lack of uniformity in bullet nose shapes and measuring devices used to determine CBTO.
Benefits of Having a Uniform CBTO
There is another aspect to knowing your CBTO when checking your COAL as it pertains to performance. With good bullets, tooling, and carefully-prepared cases you can easily achieve a CBTO that varies less than +/- .001″ but your COAL can vary as much as .025″ extreme spread (or more with other brands). This is not necessarily bad and it is much better than the other way around. If you have a CBTO dimension that varies but your COAL dimension is tight (within +/- .002″) then it is most likely that your bullet is bottoming out inside the seater cone on the bullet tip. This is very bad and is to be avoided. It is normal for bullets to have precisely the same nose shape and it is also normal for these same bullets to have nose lengths that can vary as much as .025″.
Summary of Cartridge Base To Ogive (CBTO) Discussion
Here are four important considerations regarding bullet seating depth as it relates to CBTO:
1. CBTO is a critical measurement to understand for handloaders because it’s directly related to precision potential, and you control it by simply setting bullet seating depth.
2. Tools and methods for measuring CBTO vary. Most of the measurement techniques have pitfalls (which may give rise to inconsistent results) that you should understand before starting out.
3. A CBTO that produces the best precision in your rifle may not produce the best precision in someone else’s rifle. Even if you have the same rifle, same bullets, same model of comparator gauges, etc. It’s possible that the gauges are not actually the same, and measurements from one don’t translate to the same dimension for another.
4. Once you find the CBTO that produces the best precision in your rifle, it’s important to allow minimal variation in that dimension when producing quality handloads. This is achieved by using quality bullets, tooling, and properly preparing case mouths and necks for consistent seating.
The Tactical Rifle Shooters Facebook Group recently showcased tools used to measure case headspace before and after “bumping” the shoulder. After a case is fired, hand-loaders who full-length size their cases will typically bump the shoulders back anywhere from .001″ to .0035″, depending on the rifle and application. With our 6mmBR and Dasher cases we like about .0015″ bump.
You want the amount of case sizing and bump to be the same for all your brass. To ensure uniformity, it makes sense to measure your cases before and after the FL sizing process. When we have time, we check every case. Other folks will simply check the first 3-4 cases coming out of the FL sizing die to ensure the FL die setting is correct and delivering desired headspace/bump.
1. Whidden Gunworks Shoulder Bump Gauge
There are a variety of tools that can be used to measure shoulder bump. Our favorite is a special cartridge-specific bushing made by Whidden Gunworks. The Whidden Shoulder Bump Gauge enables you to adjust your sizing die to the desired measurement. The bump gauge is attached to your calipers with a set screw and determines the measurement from the base to the shoulder of the case. The photo below, from Tactical Rifle Shooters, shows the Whidden Bump Gauge for the .375 CheyTac cartridge.
2. Dave Manson Vertical Comparator with Dial Read-Out
Dave Manson states: “This tool was designed to make life easier for the advanced shooter and re-loader by allowing precise measurement of ammunition, case, and chamber headspace. With this information, the re-loader will be able to fine-tune clearances and fits between his ammunition and chamber, with resultant improvements in accuracy and case life.” The functions of the Manson Comparator are:
1. Measure headspace of factory or reloaded ammunition
2. Quantify chamber headspace by measuring headspace of a fired case
3. Ensure minimal shoulder set-back when setting up re-loading dies
4. Compare base-to-ogive length to ensure consistent bullet-to-rifling relationship.
Hornady’s Lock-N-Load Headspace Comparator system is easy-to-use and handy. You can get a kit with Red bushing-holder body and 5 bushings for $39.99 at Midsouth. Hornady explains: “The Lock-N-Load® Headspace Comparator… gauge measures variations in brass before and after firing or re-sizing. It allows for headspace comparison between fire-formed brass and re-sized brass.” IMPORTANT: Hornady states: “To determine the proper bushing diameter for your cartridge, simply add the neck diameter and the shoulder diameter and divide that number by two. Use the bushing closest to that number.” Hornady offers five: .330″, .350″, .375″, .400″, and .420″.
One tip — We have found the Hornady gauges may vary a little from unit to unit even with the same nominal size. If you have more than one gauge for the same cartridge, test each on your brass — you may then note a slight difference in your bump measurements. Mark one and use that consistently. There is also an Anvil Base Kit that mounts to the opposite blade on the caliper. This provides a more stable surface for the base of your case.
4. L.E. Wilson Case Gage Depth Micrometer
If you are looking for precise “bump” measurements without having to mess with calipers and clamp-on gauge blocks, you may want to consider the L.E. Wilson Case Gage Depth Micrometer (currently $130.00). This takes very precise, repeatable measurements, but you need to know your starting point. The manufacturer explains: “Every reloader should know exactly how much your Full Length Sizing Die is pushing back the shoulder. With the NEW Case Gage Depth Micrometer you can do just that! It has never been easier to measure you cases headspace before and after sizing. The Depth Mic allows you to slip the micrometer perfectly over the top of the Gage with your case inserted into the Gage and take a measurement. Micrometer has graduations of .001″. The Case Gage Depth Micrometer is set to a zero of .100″ on the scale at our factory. Because of differences in ‘feel’ and temperature, we include a the Gage Block for you to test Zero and to adjust if necessary.”
5. Pistol Brass Case DIY Bump Gauge
Last is a “field expedient” set-up if you do not have any of the comparator tools shown above. A sized .45 ACP case (or other suitable pistol case) can be used to measure shoulder bump. The mouth of the pistol case sits on the shoulder of your rifle cartridge brass.
Make sure the .45 ACP case is trimmed square and that it is round. We recommend you first run it through an expander, then size it, trim it and chamfer. Next, take the .45 ACP case and slip it over the neck of a fired, unsized rifle case with the primer removed. Align the two cases between the jaws of your calipers and note the length from rim to rim (See left photo below).
OK, now you have the length for a fired rifle case BEFORE sizing. Next, take a full-length sized rifle case (without primer) and do the same thing, placing the .45 ACP case over the neck of the FL-sized case (Right Photo). The difference between the two numbers is the amount of “bump” or set-back you are applying to the shoulder. Here the difference is .0015″. The amount of bump you need varies with your chamber and your load, but .0015-.002″ is a good initial setting.
SSG Greg Markowski of the USAMU at Camp Perry, Ohio.*
The U.S. Army Marksmanship Unit (USAMU) fields pistol teams as well as rifle and shotgun competition squads. Consequently the USAMU’s Reloading Shop loads tens of thousands of pistol rounds every year. In this article, the USAMU’s handgun experts talk about reloading for handguns — with smart tips on how to achieve superior accuracy with 100% reliability. This article, which offers important insights on COAL, primers, crimps and more.
This video shows .45 ACP centerfire pistol competitors at Camp Perry
Precision Pistol Reloading — Recommended Methods
Optimize the Taper Crimp
One often-overlooked aspect of handloading highly-accurate pistol ammunition is the amount of crimp and its effect on accuracy. Different amounts of taper crimp are used with various handloads to obtain best accuracy. The amount is based on bullet weight, powder burn rate and charge, plus other factors. It is not unusual for our Shop to vary a load’s crimp in degrees of 0.001″ and re-test for finest accuracy.
Use Consistent Brass
Brass is also important to pistol accuracy. While accurate ammunition can be loaded using brass of mixed parentage, that is not conducive to finest results, particularly at 50 yards. It is important for the serious competitor/handloader to use brass of the same headstamp and ideally one lot number, to maximize uniformity. Given the volumes of ammunition consumed by active pistol competitors, using inexpensive, mixed surplus brass for practice, particularly at the “short line” (25 yards), is understandable. However [at 50 yards], purchasing and segregating a lot of high-quality brass to be used strictly for slow-fire is a wise idea.
Importance of Uniform COAL
Uniformity of the Case Overall Length (COAL) as it comes from the factory is also important to achieving utmost accuracy. More uniform case lengths (best measured after sizing) contribute to greater consistency of crimp, neck tension, ignition/burn of powder charge, and so on. Cartridge case-length consistency varies from lot to lot, as well as by maker. Some manufacturers are more consistent in this dimension than others. [Editor’s note: It is easy to trim pistol brass to uniform length. Doing this will make your taper crimps much more consistent.]
Primers and Powders — Comparison Test for Accuracy
Pay attention to primer brands, powder types and charges. Evaluating accuracy with a Ransom or other machine rest at 50 yards can quickly reveal the effect of changes made to handload recipes.
Bullet Selection — FMJ vs. JHP
Bullets are another vital issue. First, there is the question of FMJ vs. JHP. A friend of this writer spent decades making and accuracy-testing rifle and pistol bullets during QC for a major bullet manufacturer. In his experience, making highly-accurate FMJ bullets is much more difficult than making highly-accurate JHPs, in large part due to the way the jackets are formed. Small die changes could affect accuracy of FMJ lots dramatically. The CMP now allows “safe, jacketed ammunition” in Excellence-in-Competition (EIC) Service Pistol matches, although wadcutter ammunition is prohibited. Thus, the option to use very accurate JHP designs simplifies the life of CMP Service Pistol shooters in pursuit of the prestigious Distinguished Pistol Shot badge.
Hopefully, these tips will be helpful to any pistol shooters interested in accurate handloads, not just “Bullseye” shooters. Small tweaks to one’s normal routine can pay big dividends in improved accuracy and make practice and competition more rewarding. Stay safe, and good shooting!
TOP IMAGE: SSG Greg Markowski, a shooter/instructor with the USAMU, fires his pistol during the 2018 Civilian Marksmanship Program’s National Pistol Matches at Camp Perry, Ohio. At that event, Markowski claimed the General Mellon Trophy, General Patton Trophy and the General Custer Trophy. U.S. Army photo by Maj. Michelle Lunato/released by Defense Visual Information Distribution Service.
Photo 1: Three Near-Equal-Weight 7mm Bullets with Different Shapes
TECH TIP: Bullets of the same weight (and caliber) can generate very different pressure levels due to variances in Bearing Surface Length (BSL).
This article, from the USAMU Facebook Page, concerns reloading safety. In the relentless quest for more speed and flatter ballistics, some hand-loaders load way too hot, running charges that exceed safe pressure levels. Hint: If you need a mallet to open your bolt, chances are your load is too hot. Stay within safe margins — your equipment will last longer, and you won’t risk an injury caused by over-pressure. In this article, the USAMU explains that you need to account for bullet shape, diameter, and bearing surface when working up a load. Don’t assume that a load which is safe for one bullet will be safe for another even if both bullets are exactly the same weight.
How Bullet Profile and Bearing Surface Affect Pressure Levels
Today, we continue our handloading safety theme, focusing on not inadvertently exceeding the boundaries of known, safe data. Bullet manufacturers’ loading manuals often display three, four, or more similar-weight bullets grouped together with one set of load recipes. The manufacturer has tested these bullets and developed safe data for that group. However, seeing data in this format can tempt loaders — especially new ones — to think that ALL bullets of a given weight and caliber can interchangeably use the same load data. Actually, not so much.
However, bullet designs include many variables such as different bearing surface lengths, hardness, and even slight variations in diameter. In fact, diameters can occasionally range up to 0.001″ by design. Thus, choosing untested bullets of the same weight and caliber, and using them with data not developed for them can yield excess pressures.
This is only one of the countless reasons not to begin at or very near the highest pressure loads during load development. Always begin at the starting load and look for pressure signs as one increases powder charges.
Bullet Bearing Surface and Pressure
Bullet bearing surface length (BSL) is often overlooked when considering maximum safe powder charges and pressures. In Photo 1, note the differences in the bullets’ appearance. All three are 7 mm, and their maximum weight difference is just five grains. Yet, the traditional round nose, flat base design on the left appears to have much more BSL than the sleeker match bullets. All things being equal, based on appearance, the RN/FB bullet seems likely to reach maximum pressure with significantly less powder than the other two designs.
TECH TIP: Bullets of the same weight (and caliber) can generate very different pressure levels due to variances in Bearing Surface Length (BSL).
Bullet 1 (L-R), the RN/FB, has a very slight taper and only reaches its full diameter (0.284 inch) very near the cannelure. This taper is often seen on similar bullets; it helps reduce pressures with good accuracy. The calculated BSL of Bullet 1 was ~0.324″. The BSL of Bullet 2, in the center, was ~0.430″, and Bullet 3’s was ~ 0.463″. Obviously, bullets can be visually deceiving as to BSL!
Some might be tempted to use a bullet ogive comparator (or two) to measure bullets’ true BSL for comparison’s sake. Unfortunately, comparators don’t typically measure maximum bullet diameter and this approach can be deluding.
Note: Due to time constraints, the writer used an approximate, direct measurement approach to assess the bullets’ different BSLs. While fairly repeatable, the results were far from ballistics engineer-grade. Still, they are adequate for this example.
Photo 2: The Perils of Measuring Bearing Surface Length with Comparators
In Photo 2, two 7mm comparators have been installed on a dial caliper in an attempt to measure BSL. Using this approach, the BSLs differed sharply from the original [measurements]. The comparator-measured Bullet 1 BSL was 0.694” vs. 0.324” (original), Bullet 2 was 0.601” (comparator) vs. 0.430” (original), and Bullet 3 (shown in Photo 2) was 0.602” (comparator) vs. 0.463” (original). [Editor’s comment — Note the very large difference for Bullet 1, masking the fact that the true full diameter on this bullet starts very far back. You can use comparators on calipers, but be aware that this method may give you deceptive reading — we’ve seen variances just by reversing the comparators on the calipers, because the comparators, typically, are not perfectly round, nor are they machined to precision tolerances.]
Thanks to the U.S. Army Marksmanship Unit for allowing the reprint of this article.
If you asked a group of shooters to explain the difference between CUP and PSI, the majority would probably not be able to give a precise answer. But, for safety reasons, it’s very important that all hand-loaders understand these important terms and how they express cartridge pressures.
The ANSI / SAAMI group, short for “American National Standard Institute” and “Sporting Arms and Ammunition Manufacturers’ Institute”, have made available some time back the voluntary industry performance standards for pressure and velocity of centerfire rifle sporting ammunition for the use of commercial manufacturers. [These standards for] individual cartridges [include] the velocity on the basis of the nominal mean velocity from each, the maximum average pressure (MAP) for each, and cartridge and chamber drawings with dimensions included. The cartridge drawings can be seen by searching the internet and using the phrase ‘308 SAAMI’ will get you the .308 Winchester in PDF form. What I really wanted to discuss today was the differences between the two accepted methods of obtaining pressure listings. The Pounds per Square Inch (PSI) and the older Copper Units of Pressure (CUP) version can both be found in the PDF pamphlet.
CUP Pressure Measurement
The CUP system uses a copper crush cylinder which is compressed by a piston fitted to a piston hole into the chamber of the test barrel. Pressure generated by the burning propellant causes the piston to move and compress the copper cylinder. This will give it a specific measurable size that can be compared to a set standard. At right is a photo of a case that was used in this method and you can see the ring left by the piston hole.
PSI Pressure Measurement
What the book lists as the preferred method is the PSI (pounds per square inch or, more accurately, pound-force per square inch) version using a piezoelectric transducer system with the transducer flush mounted in the chamber of the test barrel. Pressure developed by the burning propellant pushes on the transducer through the case wall causing it to deflect and make a measurable electric charge.
Q: Is there a standardized correlation or mathematical conversion ratio between CUP and PSI values?
Mahin: As far as I can tell (and anyone else can tell me) … there is no [standard conversion ratio or] correlation between them. An example of this is the .223 Remington cartridge that lists a MAP of 52,000 CUP / 55,000 PSI but a .308 Winchester lists a 52,000 CUP / 62,000 PSI and a 30-30 lists a 38,000 CUP / 42,000 PSI. It leaves me scratching my head also but it is what it is. The two different methods will show up in listed powder data[.]
So the question on most of your minds is what does my favorite pet load give for pressure? The truth is the only way to know for sure is to get the specialized equipment and test your own components but this is going to be way out of reach for the average shooter, myself included. The reality is that as long as you are using printed data and working up from a safe start load within it, you should be under the listed MAP and have no reason for concern. Being specific in your components and going to the load data representing the bullet from a specific cartridge will help get you safe accuracy. [With a .308 Winchester] if you are to use the 1% rule and work up [from a starting load] in 0.4 grain increments, you should be able to find an accuracy load that will suit your needs without seeing pressure signs doing it. This is a key to component longevity and is the same thing we advise [via our customer service lines] every day. Till next time, be safe and enjoy your shooting.
Hodgdon Powder Company (Hodgdon) offers a series of professionally-produced, “how-to” instructional videos on its online Reloading Data Center. These 3.5-minute videos present rifle, pistol, and shotshell reloading basics in an easy-to-understand, step-by-step format. These mobile-friendly, informative videos can also be viewed on a smart phone or tablet.
Along with these videos, you’ll find a ton of useful information on Hodgdon’s updated Reloading Data Center at hodgdon.com. From the landing page choose rifle, pistol, shotgun, or muzzle-loader, and then click “Get Details”. This will launch a page where you can find loads by selecting Cartridge, Bullet Weight, Powder Maker, and Powder Type (such as Varget or H4350).
Click to Watch Hodgdon Rifle Reloading Video:
Click to Watch Hodgdon Pistol Reloading Video:
In addition to these videos, Hodgdon’s Reloading Data Center (RDC) provides a wealth of information on Hodgdon®, IMR®, Accurate, Ramshot®, and Winchester® propellants. Along with reliable load data, you’ll find explanations of reloading basics, safety procedures, plus answers to frequently asked questions (FAQ).
Creedmoor Sports has recently expanded and updated the Creedmoor Sports InfoZone. This web resource contains valuable information about reloading, rifle maintenance, marksmanship skills, and gunsmithing. In addition, the InfoZone has Competition Reports, numerous Gear Reviews, and general Shooting Sports News.
For this Saturday Showcase, you’ll find five InfoZone Videos hosted by Bill Gravatt, President of Creedmoor Sports. There are over 85 other videos on the Creedmoor Sports YouTube Channel. Bill Gravatt is an expert on reloading processes and gear. He developed many of the popular tools for Sinclair Int’l, and now he directs operations for Creedmoor Sports.
Reloading Procedures with Bill Gravatt
Here are five helpful videos Bill Gravatt created for the Creedmoor Sports InfoZone. These videos cover a variety of essential processes for handloading. In addition Bill Shows how to find the exact twist rate in your rifle barrels.
How to Determine a Barrel Twist Rate
Bill Gravatt of Creedmoor Sports demonstrates an easy method to determine your barrel’s twist rate. Knowing the twist rate is essential to selecting suitable bullets for your discipline.
How to Seat Bullets with Inline Press
Many top Benchrest and F-Class shooters favor inline presses for bullet seating. With good hand dies (such as Wilson) and a inline Arbor press (such as a 21st Century), you can get great results with super seating depth consistency and very low run-out.
How to Trim Cases with L.E. Wilson Trimmer
There are many ways to trim cartridge brass. If you need to trim hundreds of cases it may pay to have a dedicated power trimmer. However, for most rifle shooters, a good hand trimmer will do the job very well. We regularly use a Wilson trimmer to trim our cases, as demonstrated in this video.
How to Clean Cartridge Cases
It is important to regularly clean cartridge brass. There are many different means. Wiping the outside with a solvent is a good start. For more thorough cleaning inside and out tumbling or wet-tumbling will do the job. After tumbling in media, you should always check the primer pockets and flash holes before loading.
How to Clean Reloading Dies
Cleaning your reloading dies is something that many who reload often neglect. In this 60-second Tech Tip, Bill Gravatt provides some tips on cleaning your reloading dies.
BONUS Video: How to Fine Tune Seating Depth
Now that you’ve learned Reloading Basics from the Creedmoor Sports videos, here’s a great video from our friend Keith Glasscock that will help you get optimal results when seating bullets. Keith is one of America’s greatest F-Class competitors, with multiple podium finishes at F-Class National Championships. With over 213,000 views, this is the most popular video Keith has created for his Winning in the Wind YouTube Channel.
About Creedmoor Sports — 45 Years of Service to Marksmen
For the past 45 years, since 1979, Creedmoor Sports has been supplying quality equipment and supplies to avid shooters in a wide variety of disciplines: Rimfire, F-Class, PRS/NRL, Silhouette, Service Rifle, Benchrest, and more. Specializing in competitive centerfire, smallbore, and air rifle accessories, as well as reloading components and tools, Creedmoor Sports seeks to provide its customers with the right gear to help them achieve their personal shooting goals.
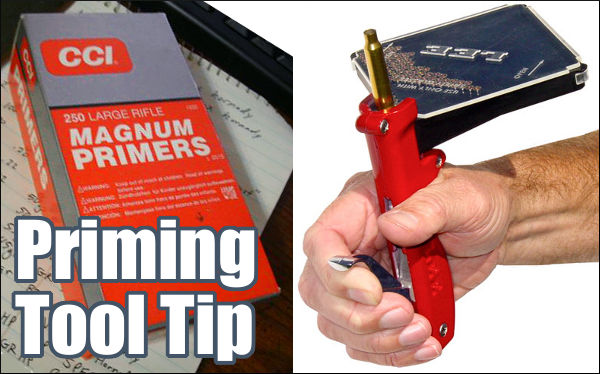
From time to time, we all encounter a primer that doesn’t go off. It’s normal to attribute the problem to a bad primer. But sometimes there are other explanations. George S., one of our Forum members, experienced a couple failures to fire, but he learned that the issue was his priming TOOL, not his primers. Here’s what George told us. There’s a lesson to be learned:
“I had issues with CCI 450s when I had my first 6BR barreled. I had probably three or four out of 20 rounds that failed to fire. the primers were dented but didn’t fire. I called CCI since I had bought a case of them. The tech was decent enough but had the audacity to tell me I was not seating the primers all the way in the pocket. I proceeded to let him know I had been reloading longer than he had been alive and I knew how to seat a primer.
Turns out that I did and I didn’t! I was using the RCBS primer tool I had used for years and the primers felt just fine to me. I finally decided to check the tool and since I had a new one I took the seating pins out and measured them. The seating pin on the tool I had been using for years was shorter by a few thousandths! I then used the pin from the new primer tool and darned if the primers that didn’t seat down to the bottom of the cup.
I switched to a K&M primer tool for seating the CCI primers and have not had a problem since. It was the combination of harder cup and lack of proper seating. I did call the CCI tech back and apologized for being an idiot.”
Another Forum member witnessed a problem cause by misuse of a priming tool: “I did … see a failure to fire on a Rem 9 1/2 primer only a week ago. That was in the new Rem muzzleloader that uses a primed case to ignite the pellets. After watching the muzzleloader’s owner seat his primers, I believe that it was operator error not the primer. He was seating the primer and then squeezing the priming tool so hard that his hands hurt after a few. We got that corrected.”


 Effects Of Cartridge Over All Length (COAL) And Cartridge Base To Ogive (CBTO) – Part 2


 Use Consistent Brass

 Bullet 1 (L-R), the RN/FB, has a very slight taper and only reaches its full diameter (0.284 inch) very near the cannelure. This taper is often seen on similar bullets; it helps reduce pressures with good accuracy. The calculated BSL of Bullet 1 was ~0.324″. The BSL of Bullet 2, in the center, was ~0.430″, and Bullet 3’s was ~ 0.463″. Obviously, bullets can be visually deceiving as to BSL!

 CUP Pressure Measurement