Do you know which one of your eyes is dominant? It’s easy to determine eye dominance with a simple exercise. Pick an object about 6-10 feet away (a light switch or door knob works well). Make an “OK” sign with your right hand (see photo) and hold that about 18″ from your face. Now, with both eyes open, look through the circle formed by your thumb and index finger. Center the circle on the object, so you can see the object in the middle.
Now, here’s the important part — while still holding your hand up, centered on the object, first close your right eye. If you don’t see the object anymore, then your right eye is dominant. If you still see the object, then repeat the procedure with the left eye shut and right eye open. If you don’t see the object when your left eye (only) is closed, then you are left-eye dominant.
The digital archives of Shooting Sports USA contain many interesting articles. A while back, Shooting Sports USA featured a “must-read” expert Symposium on Eye Dominance, as it affects both rifle and pistol shooting. No matter whether you have normal dominance (i.e. your dominant eye is on the same side as your dominant hand), or if you have cross-dominance, you’ll benefit by reading this excellent article. The physiology and science of eye dominance is explained by Dr. Norman Wong, a noted optometrist. In addition, expert advice is provided by champion shooters such as David Tubb, Lones Wigger, Dennis DeMille, Julie Golob, Jessie Harrison, and Phil Hemphill. NOTE: If the story doesn’t open at the links, go to the ssusa.org home page first, indicate you are over 18, and then CLICK HERE.
Top Rifle Champions Talk About Eye Dominance:
David Tubb — 11-Time National High Power Champion
I keep both eyes open, always. Some use an opaque blinder in rifle or shotgun shooting. If you close your non-dominant eye, you will not get as good a sight picture. If your aiming eye is not your dominant eye, you have even more of a problem to overcome.
Lones Wigger — World, National and Olympic Champion Rifleman
Shooters should try to use the dominant eye unless the vision is impaired and the non-dominant eye has better vision. You should always shoot with both eyes open since this will allow the shooting eye to function properly.
Dennis DeMille — National Service Rifle Champion
I close my non-shooting eye initially. Once I pick up my sight picture, it’s not something I focus on. For those that use a patch, I recommend that they use something white to block their view, rather than cover the eye.
Bruce Piatt — 2025 World Action Pistol Team Championship — Member of Winning Team CMP-USA
Some shooters, especially those with nearly equal or cross-dominance, will naturally find themselves squinting one eye. When anyone does this, you are also closing your dominant eye to some extent and adding stress to your face.
Do you know which one of your eyes is dominant? It’s easy to determine eye dominance with a simple exercise. Pick an object about 6-10 feet away (a light switch or door knob works well). Make an “OK” sign with your right hand (see photo) and hold that about 18″ from your face. Now, with both eyes open, look through the circle formed by your thumb and index finger. Center the circle on the object, so you can see the object in the middle.
Now, here’s the important part — while still holding your hand up, centered on the object, first close your right eye. If you don’t see the object anymore, then your right eye is dominant. If you still see the object, then repeat the procedure with the left eye shut and right eye open. If you don’t see the object when your left eye (only) is closed, then you are left-eye dominant.
The digital archives of Shooting Sports USA contain many interesting articles. A while back, Shooting Sports USA featured a “must-read” expert Symposium on Eye Dominance, as it affects both rifle and pistol shooting. No matter whether you have normal dominance (i.e. your dominant eye is on the same side as your dominant hand), or if you have cross-dominance, you’ll benefit by reading this excellent article. The physiology and science of eye dominance is explained by Dr. Norman Wong, a noted optometrist. In addition, expert advice is provided by champion shooters such as David Tubb, Lones Wigger, Dennis DeMille, Julie Golob, Jessie Harrison, and Phil Hemphill. NOTE: If the story doesn’t open at the links, go to the ssusa.org home page first, indicate you are over 18, and then CLICK HERE.
Top Rifle Champions Talk About Eye Dominance:
David Tubb — 11-Time National High Power Champion
I keep both eyes open, always. Some use an opaque blinder in rifle or shotgun shooting. If you close your non-dominant eye, you will not get as good a sight picture. If your aiming eye is not your dominant eye, you have even more of a problem to overcome.
Lones Wigger — World, National and Olympic Champion Rifleman
Shooters should try to use the dominant eye unless the vision is impaired and the non-dominant eye has better vision. You should always shoot with both eyes open since this will allow the shooting eye to function properly.
Dennis DeMille — National Service Rifle Champion
I close my non-shooting eye initially. Once I pick up my sight picture, it’s not something I focus on. For those that use a patch, I recommend that they use something white to block their view, rather than cover the eye.
Bruce Piatt — 2015 World Shooting Championship Winner
Some shooters, especially those with nearly equal or cross-dominance, will naturally find themselves squinting one eye. When anyone does this, you are also closing your dominant eye to some extent and adding stress to your face.
Every serious shooter should have some kind of anti-cant device fitted to his or her rifle. When you tilt your rifle to one side or the other from shot to shot, even a little bit, this can alter your point of impact. Unless the direction and angle of tilt (or cant) is exactly the same for each shot, canting your rifle will open up your groups. And the effects of inconsistent cant* become more extreme the farther you shoot. READ MORE about rifle canting.
Jackson Hole Shooting Experience Instructional Video features scope-mounted Wheeler level.
In this video, Bryce Bergen of Long Range Shooters of Utah explains the key reasons you should fit a bubble level (anti-cant device, ACI) to your rifle. Bergen explains why inconsistent canting alters impact at long range. Bergen also offers tips on mounting your anti-cant device and working with bipods.
You don’t need to spend a lot of money on your bubble level. While there are fancy levels that cost more than $130.00, you can get a functional level for a tenth that cost. This Discovery scope level is CNC-machined to close tolerances for a good fit. It is available with three diameters to fit scopes with 1″, 30mm, or 34mm main tubes. The 1″ version is just $12.99 while the 30mm model is $13.95 and the large 34mm version is $15.95. This unit will do the job, and user reviews are very positive.
Scope-Mount Vs. Rail-Mounted Levels
Some “experts” recommend a scope-mounted bubble level rather than a rail-mounted level. The reason is that you can easily orient the position of a scope-mounted level. With the scope’s vertical cross-hair aligned with a plumb line, simply rotate the bubble level mount until the bubble is centered. It’s not so easy to adjust a rail-mounted level. If your rail is slightly off, or if the rail-mounted anti-cant device doesn’t sit perfectly horizontal when clamped on the rail, the bubble may not center in the view port.
Combo Anti-Cant + Angle Degree Indicator System Flatline Ops sells a smart, scope-mounted leveling device with an optional vertical Strong Arm™ accessory for mounting an Angle-Degree-Indicator (ADI), which allows the shooter to make quick “true range” corrections for up-angle and down-angle shots.
As a combined unit, the Accu/Level™ (fitted with Strong Arm and ADI) is a great set-up for the tactical shooter or long-range hunter. The bubble level rotates inward for protection, then kicks out to the left for easy visibility. The ADI is held in plain view on the left, under the bubble level. On LongRangeHunting.com, Jim See explains how the Accu/Level works in the field and how he employed the ACI during a hunt. CLICK HERE for Accu/Level™ Field Test.
We like the combined Level + ADI system that Flatline Ops has developed. But it is very expensive: The 30mm Accu/Level™ costs $139.99 and the Strong Arm (for ADI mounting) is $58.99. So you’ve got two hundred bucks invested before adding the $110.00 ADI. That’s a significant chunk of change that could be invested in your scope instead.
* By itself, canting the rifle does not hurt accuracy as long as the angle is exactly the same for every shot. Many sling/irons shooters, including David Tubb, cant their rifles. With scoped rifles, if you do prefer a cant, you should mount the scope so that the cross-hairs are plumb with your rifle at your preferred cant angle. You want that vertical cross-hair straight up and down always. The key is to never change the cant of your rifle from shot to shot.
There are many benefits to shooting with both eyes open especially when shooting shotguns and handguns, but training yourself to do it can be challenging for some. For many, it is a struggle to fight the natural instinct to close one eye. So how do you train yourself to kick that habit?
How to Train to Keep Both Eyes Open
The first step is to determine if you can see the sights with both eyes. If you can’t get a clear sight picture on target with both eyes open, or if you see two front sights or some other strange configuration that is nearly impossible to decipher, then shooting with both eyes open may not work for you. It’s not the end of the world. It’s more important that you acquire a proper sight picture and hit your target.
If you are a competition shooter that struggles with this you can get a little help from some frosted tape. In most cases it; just a matter of determining your eye dominance and placing a piece of tape on your eye protection on the lens in front of your non-dominant eye. The tape blocks this eye from seeing the sights, but still allows you full access to your peripheral vision.
An effective way to prevent yourself from closing an eye is to spend a good amount of time dry firing. (Dry fire means NO AMMO!) Practice acquiring the sights with both eyes open. Start with the firearm at low ready with both eyes on the target. Bring the gun up to your line of sight and acquire the proper sight picture on your target. The repetition of presenting the gun will help train you to keep those eyes open when you transition to live fire. As with any habit, you’ll need to train yourself to stop — this means more than just a few times dry firing.
When you hit the shooting range, you may find that despite all that dry-fire practice, you still close an eye. It might be a matter of sympathetic reaction to recoil. Using .22 caliber, airsoft guns and light loads can help you transition to larger calibers and full power ammunition. Just as you had to concentrate keeping both eyes open in dry fire, it’s likely you will have to do the same during your live fire training as well.
In our Shooters Forum, one newcomer wanted some advice on selecting a reticle for F-Class optics. He wondered about the advantage of Forward Focal Plane (FFP) vs. conventional scopes and also wondered if one type of reticle was better for “holding off” than others.
In responding to this question, Forum regular Monte Milanuk provided an excellent summary of aiming methods used in F-Class. For anyone shooting score targets, Monte’s post is worth reading:
Aiming Methods for F-Class Shooting — by Monte Milanuk
F-Class is a known-distance event, with targets of known dimensions that have markings (rings) of known sizes. Any ‘holding off’ can be done using the target face itself. Most ‘benefits’ of forward focal plain (FFP) optics are null and void here — they work great on two-way ranges where ‘minute of man’ is the defining criteria — but how many FFP scopes do you know of in the 30-40X magnification range? Very, very few, because what people who buy high-magnification scopes want is something that allows them to hold finer on the target, and see more detail of the target, not something where the reticle covers the same amount of real estate and appears ‘coarser’ in view against the target, while getting almost too fine to see at lower powers.
Whether a person clicks or holds off is largely personal preference. Some people might decline to adjust their scope as long as they can hold off somewhere on the target. Some of that may stem from the unfortunate effect of scopes being mechanical objects which sometimes don’t work entirely as advertised (i.e. one or two clicks being more or less than anticipated). Me personally, if I get outside 1-1.5 MOA from center, I usually correct accordingly. I also shoot on a range where wind corrections are often in revolutions, not clicks or minutes, between shots.
Some shooters do a modified form of ‘chase the spotter’ — i.e. Take a swag at the wind, dial it on, aim center and shoot. Spotter comes up mid-ring 10 at 4 o’clock… so for the next shot aim mid-ring 10 at 10 o’clock and shoot. This should come up a center X (in theory). Adjust process as necessary to take into account for varying wind speeds and direction.
Others use a plot sheet that is a scaled representation of the target face, complete with a grid overlaid on it that matches the increments of their optics — usually in MOA. Take your Swag at the wind, dial it on, hold center and shoot. Shot comes up a 10 o’clock ‘8’… plot the shot on the sheet, look at the grid and take your corrections from that and dial the scope accordingly. This process should put you in the center (or pretty close), assuming that you didn’t completely ignore the wind in the mean time. Once in the center, hold off and shoot and plot, and if you see a ‘group’ forming (say low right in the 10 ring) either continue to hold high and left or apply the needed corrections to bring your group into the x-ring.
Just holding is generally faster, and allows the shooter to shoot fast and (hopefully) stay ahead of the wind. Plotting is more methodical and may save your bacon if the wind completely changes on you… plotting provides a good reference for dialing back the other way while staying in the middle of the target. — YMMV, Monte
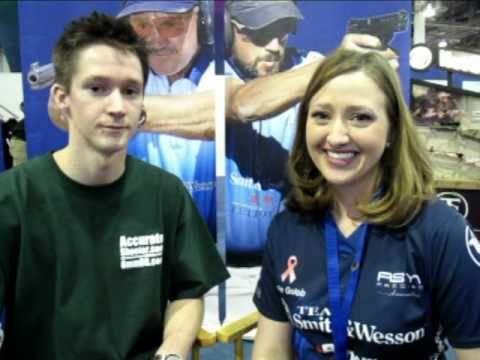
We had a chance to chat with Team Smith & Wesson Captain Julie Golob at SHOT Show. Julie is one of the finest action pistol shooters in the world, so she knows a thing or two about shooting competitively on the clock.
Kelly Bachand, our SHOT Show correspondent, is primarily a Palma shooter. In that discipline there’s ordinarily plenty of time between shots. But Kelly, a popular contestant on the TOP SHOT TV series, hopes to branch out into action shooting and multi-gun competition.
Julie gives Kelly some great advice on how to succeed in speed games by finding the “acceptable” sight picture. Julie explains that you need to abandon the “pursuit of perfection” and find a zone of “acceptable” accuracy that lets you to score points while running the stage as fast as possible. As Kelly puts it, you need to find out “what you can get away with” in terms of sight picture. Kelly and Julie also discuss equipment for 3-Gun matches and the differences between open and tactical classes.
In the view of many handgun aficionados, the SIG P210 Pistol is one of the finest semi-auto pistols ever made. It is, without question, one of the most accurate self-loading handguns, and probably the most accurate factory 9mm semi-auto. Originally created as a police and service pistol, the single-action P210 has not been sold in the USA for quite some time. However, Sig-Sauer recently re-introduced an updated model P210 in Europe as the “Sig Legend”.
Sig P210 Legend To Be Unveiled at SHOT Show 2011
Now here’s the good news — according to the GunsForSale.com Blog, the updated Sig P210 Legend will be released to the U.S. market at SHOT Show 2011. No price has yet been set (but it won’t be cheap). GunsforSale.com states: “The new 9mm, single-action P210 will come in two basic models, with one having drift adjustable post and notch sights. The other model will feature adjustable target sights (see photo). Both version of the new P210 will feature the Sig black Nitron [QPQ] finish, manual safety, and a “US-style” [thumb-activated] magazine release. The original P210 utilized a heel mag release.” The new rear target sight has a 3-position slider that adjusts for three different target distances. According to Sig Sauer, this suits “static-precision disciplines or PPC 1500″, because the shooter can quickly re-zero the P210 for three different ranges. That’s a smart feature we’d like to see on other target pistols.
Experienced marksmen know they should keep their rifles level when shooting. But they may not understand exactly what happens if they allow their rifle to be canted (tilted left or right), even a few degrees. While the physics are complicated to explain, here’s what you need to know: if you cant your rifle to the left, your shots will impact to the left, and lower, than your point of aim. Likewise, if you cant your rifle to the right, your bullets will impact low and right.
Effects of Rifle Canting
The effects of rifle canting are explained in great detail on the Long Shot Products Ltd. website. There, you’ll find a technical discussion of the Physics of Rifle Canting, plus a page with Sample Targets shot with canted rifles.
Referring to the above illustration, the Long Shot Products article explains: “Notice how the trajectory of the vertical hold stays within the vertical plane, so when the projectile drops, it drops into the line of sight and down to the center of the target. The trajectory of the cant hold does not achieve the same height as the trajectory of the vertical hold and the projectile diverges from the line of sight, thereby missing the target.”
The Long-Shot article makes two other important points. First, cant error increases with distance, and second, cant-induced windage errors are worsened by mounting your scope high above the bore axis:
“This component of cant error becomes more significant at more distant targets due to the increased original included angle between the line of sight axis and the bore axis (more elevation compensation) at the vertical hold.”
“Use of large-diameter objective scopes, mounted high off the barrel, exacerbates the cant error problem. To keep the scope elevation knobs centered for maximum adjustment, precision shooters sometimes use elevation-compensated scope mounting rings or bases. Although this solves the adjustment problem, it greatly exaggerates cant error because the distance between the bore axis and the line of sight axis increases and the included angle between the sight axis and the bore is larger, producing more windage error when canting.”
Test Targets Reveal Cant Errors
The Long Shot Products Ltd. website also displays actual Test Targets showing the effects of canting error. These targets were shot with air rifles and rimfire rifles, but the same effects can and will occur with centerfire rifles. Shown below is a target shot at 50 yards with a Feinwerkbau .22LR match rifle using RWS Match ammo (1012 fps MV). As you can see, canting the rifle 20 degrees to the left produced a huge movement of the point of impact. The shots from the canted rifle impacted 1.81″ Left, and 0.6″ below the point of aim.


 Do you know which one of your eyes is dominant? It’s easy to determine eye dominance with a simple exercise. Pick an object about 6-10 feet away (a light switch or door knob works well). Make an “OK” sign with your right hand (see photo) and hold that about 18″ from your face. Now, with both eyes open, look through the circle formed by your thumb and index finger. Center the circle on the object, so you can see the object in the middle.
 The digital archives of Shooting Sports USA contain many interesting articles. A while back, Shooting Sports USA featured a “must-read” expert Symposium on Eye Dominance, as it affects both rifle and pistol shooting. No matter whether you have normal dominance (i.e. your dominant eye is on the same side as your dominant hand), or if you have cross-dominance, you’ll benefit by reading this excellent article. The physiology and science of eye dominance is explained by Dr. Norman Wong, a noted optometrist. In addition, expert advice is provided by champion shooters such as David Tubb, Lones Wigger, Dennis DeMille, Julie Golob, Jessie Harrison, and Phil Hemphill. NOTE: If the story doesn’t open at the links, go to the ssusa.org home page first, indicate you are over 18, and then CLICK HERE.


 There are many benefits to
 F-Class is a known-distance event, with targets of known dimensions that have markings (rings) of known sizes. Any ‘holding off’ can be done using the target face itself. Most ‘benefits’ of forward focal plain (FFP) optics are null and void here — they work great on two-way ranges where ‘minute of man’ is the defining criteria — but how many FFP scopes do you know of in the 30-40X magnification range? Very, very few, because what people who buy high-magnification scopes want is something that allows them to hold finer on the target, and see more detail of the target, not something where the reticle covers the same amount of real estate and appears ‘coarser’ in view against the target, while getting almost too fine to see at lower powers.
 Others use a
  We had a chance to chat with Team Smith & Wesson Captain