How to "Bump" Your Cases the Right Amount when Sizing
 Harrell’s Precision sells “semi-custom” full-length bushing dies for the PPC and 6BR chamberings. While the Harrell brothers do not cut the die to spec, they carry a large selection of dies made with slightly different internal dimensions. When you send in your fired brass, the Harrells choose a die from inventory with just the right amount of sizing (diameter reduction) at the top and bottom of the case. Given the quality, and precise fit, Harrell’s full-length dies are a good value at $70.00 plus shipping.
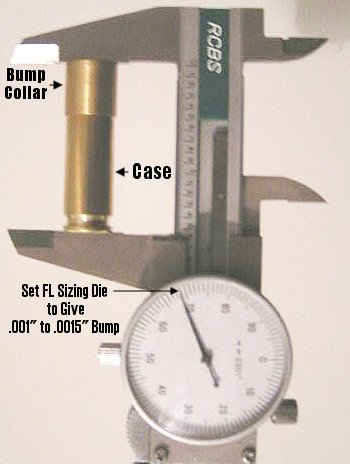
 Bump Measuring Collar
The Harrell brothers provide a nice bonus item with each full-length die — a neat, little shoulder bump measuring device as shown in the photo at right. Hornady/Stoney Point sells a stand-alone tool that does the same job, but the Harrell’s bump collar is simpler and faster. To measure your shoulder bump, simply place the Harrell’s bump collar over the front of your deprimed case (before sizing) and measure the OAL with your calipers. Then size the case in your full-length die, replace the collar and repeat the measurement. You want to set your die so the shoulder moves back about .001″ to .0015″ for most applications. (With semi-auto guns you may want more bump.)
When measuring for shoulder bump, you need to remove the primers first. Our friend Boyd Allen explains: “Use a decapping tool or die to remove the fired primer before taking the initial measurement. When working to thousandths, even the raised edge of a crater or a slightly raised primer can throw you off by a significant amount.”


