Spotting scopes are important tools for hunters and target shooters, but until now you had to position your head close to the eye-piece and look directly through the lens. LongShot Target Camera (aka TargetVision) has changed how we can use our spotting scopes with the company’s innovative Hawk Smart Scope Spotting Scope Camera. The Hawk employs a digital camera that “sees” through the lens of your spotting scope and then wirelessly transmits the real-time view to your mobile devices. This allows you to position the spotting scope anywhere you like, and then use a tablet or phone to observe exactly what the scope “sees” down-range. Priced at just $249.00, the advanced Hawk Spotting Scope Camera is a great value.
Hawk Review by F-Class John
As a frequent user of spotting scopes, I often find myself struggling to position my scope close enough without it interfering with my shooting setup. During a match this isn’t a big deal, but when I’m out doing load development or practicing there are plenty of times I’d like to set up my spotting scope out of the way but still see what it’s looking at. I’ve tried other digiscope systems but they’ve all required me to use a cell phone directly over the eyepiece. That can work but it still forces me to position the scope within my shooting space. All of these frustrations ended when I got the Hawk. Now I can put the Hawk anywhere I want, plus a shooting buddy (or coach) can watch the view through the spotter remotely.
Setting Up the Hawk is Easy — WiFi Connection
The Hawk comes in a nice hard-sided case that is big enough to fit the unit and charging cable and easily fits in a range bag for transport. Once its battery is charged, simply slide the Hawk over your eye-piece, tighten the screw clamp down and then turn the Hawk on. To pair, go to WiFi settings, select the HAWK IP address, and then open the TargetVision App. You’ll be asked to enter the provided passcode (only required the first time) and then you’ll automatically begin to see what your spotting scope sees. I like that it connects using WiFi because that frees up my Bluetooth for other items such as a LabRadar. This allows me to use the HAWK alongside other devices without competing for functionality.
Hawk Offers Shot-Marking System — GREAT Feature!
For use while target shooting, the Hawk has one outstanding built-in feature. The digital view from the scope can mark your shots! The Hawk’s shot marking software allows the Hawk to track and identify shots on target. The Hawk has a couple settings that allow you to change the color and size of the marked shots as well as showing your groups and group size. This is really a huge value-added feature of the Hawk. The shot-marking functionality turns your spotting scope into a highly capable shot-marker system. That’s especially great when doing load development.
Rotating Camera Head Adds Versatility
Another ingenious feature of the HAWK is that you can rotate the head unit without affecting your actual scope set-up. This allows you to easily “level up” the output image on your device while leaving your scope tight in its mount after zooming in or out. I found this to be a really useful at my local range which has uneven ground. As I moved the scope around, I simply turned the head and kept watching. With variable-power spotting scopes, the Hawk’s rotating head really helps you adjust the picture output quickly after adjusting the zoom power on the eyepiece.
SUMMARY — Excellent Product with Multiple Functions
Overall the HAWK exceeded my expectations. The image quality was clear and in general matched what my eye would see through the scope itself. In testing I found it worked equally well on my iPad and iPhone with gallery photos and videos easily transferred from the App to my device files. The HAWK is easy to install and configure for your devices. The ability to see downrange remotely — without having to stare through the lens — makes this device a great accessory for any spotting scope.
Great for Training — This unit is especially useful for training purposes. The coach can be watching the shooter’s position/technique, while keeping an eye on target and windflags downrange using the streamed image from the Hawk camera. Overall, we think Longshot Target Camera (TargetVision) has built a winner, and the Hawk is unquestionably a superb value at $249.00.
Hawk Owners Also Praise This Spotting Scope Camera:
“Image quality is outstanding and the camera is very easy to attach, set up, and use. No more straining at the eyepiece of my spotting scope. I love it!” Ned T., Verified Buyer
“The unit is extremely easy to setup. The App has great features and the unit has endless applications. A great addition to a nice spotting scope.” Evan D., Verified Buyer
“Hawk is built very well and works perfect. The App is easy to operate. Marks shots on steel out to 935 yards at the range … would definitely recommend this item.” Brett D., Verified Buyer
This Video Shows the Features of the Hawk Spotting Scope Camera:
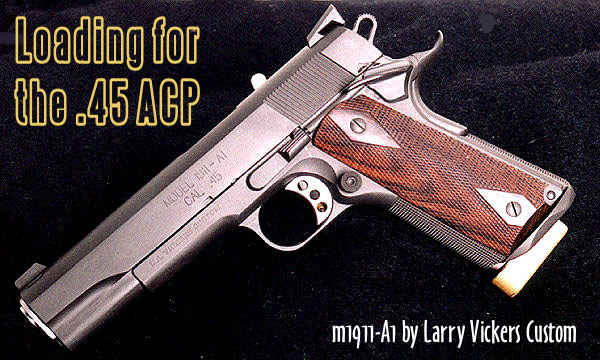
There’s an interesting thread in our Shooters Forum right now — all about good choices for a .45 ACP handgun. If you’re considering getting your first .45 ACP pistol, you should read that thread. If you already own one or more .45 ACP handguns, this article offers some good tips on handloading options.
Good Powder Choices for the .45 ACP
We know that many of our readers own .45 ACP handguns and load for this extremely accurate “classic” cartridge. When selecting a powder for the .45 ACP, there are many good options. All the major powder manufacturers make propellants with appropriate density and burn rate characteristics for the .45 ACP. Popular choices include: AA #5 (Accurate Powder); Bullseye (Alliant); Clays, HP-38, and Titegroup (Hodgdon); VV N310 and N320 (Vihtavuori); and WW 231 and WST (Winchester). We’ve tried all those powders in a variety of .45 ACP handguns. When we consider all the factors that make for a good pistol powder, we think N320 is one of the best available propellants for the .45 ACP.
Vihtavuori N320 is very accurate, it meters well, and it burns clean, with minimal smoke and flash. If you haven’t tried VV N320 yet, you should.
Pros and Cons of Different Powders for the .45 ACP
This Editor has personally tried out eight or more different powders for the .45 ACP. Bullseye works but it is very dirty (both smoke out the barrel and sooty powder fouling on case). Though it otherwise burns clean, Titegroup leaves a singular (and nasty) high-temp flame streak on your brass that is hard to remove. AA #5 is a good choice for progressive press newbies as you use more powder so a double charge will (usually) be obvious. I like AA #5 but N320 was more accurate. Clays burns clean but some powder measures struggle with flake powders like this. WW 231 offered excellent accuracy and metered well, but it kicked out sparks with little pieces of debris that would hit me in the face. Who wants that?
I personally tried all the powders listed above with lead, plated, and jacketed bullets. After testing for accuracy, consistency, and ease of metering, I selected VV N320 as the best overall performer.
Vihtavuori N320
No powder tested was more accurate (WW 231 was equally accurate).
Meters very well in all kinds of powder measures.
Produces very little smoke from muzzle.
Does not put nasty burn streak on brass like Tite-Group does.
Low Flash — you don’t get particles and sparks flying out like WW 231.
Cases come out from gun very clean — so you can tumble less often.
Forum member and gunsmith Michael Ezell agrees that N320 is a good choice for the .45 ACP. Mike has also found that WW 231, while accurate, produces sparks and a large flash. Mike writes: “I first started using N320 after my first night shoot, while shooting IDPA/IPSC matches. It was astonishing how much of a fireball the WW 231 created. I was literally blinded by the flash while trying to shoot a match. As you can imagine, that didn’t work out very well. I went from WW 231 to N320 and never looked back…and the flash from it was a fraction of what a kid’s sparkler would give off. I have nothing but good things to say about [N320] after using both. Night shoots are a real eye-opener! When it comes to a personal protection… there is, statistically, a very high chance that if you ever have to use a gun to protect yourself or your family, it’ll be in the darkness[.] Being blinded by muzzle flash (and deafened by the noise) are things that should be considered, IMO.”
This Editor owns a full-size, all-stainless S&W 1911. After trying numerous powders, I found VV N320 delivered the best combination of accuracy, easy metering, consistency, clean burning qualities, and low muzzle flash. My gun has proven exceptionally accurate using N320 with bullets from 180 grains to 230 grains — it will shoot as accurately as some expensive customs I’ve tried. At right is 5-round group I shot offhand at 10 yards with my 5″ S&W 1911.
NOTE: The bullet hole edges are sharp because I was using semi-wad-cutters, and the target paper is thick. Rounds were loaded with Vihtavuori N320 and 200-grain SWCs from Precision Bullets in Texas. We shoot Precision’s coated bullets in many of our pistols. These projectiles are accurate and they seem to reduce fouling in our pistol barrels. You can learn about them in this video:
Some of our readers have questioned how to set up their body dies or full-length sizing dies. Specifically, AFTER sizing, they wonder how much resistance they should feel when closing their bolt.
Forum member Preacher explains:
“A little resistance is a good, when it’s time for a big hammer it’s bad…. Keep your full-length die set up to just bump the shoulder back when they get a little too tight going into the chamber, and you’ll be good to go.”
To quantify what Preacher says, for starters, we suggest setting your body die, or full-length sizing die, to have .0015″ of “bump”. NOTE: This assumes that your die is a good match to your chamber. If your sizing or body die is too big at the base you could push the shoulder back .003″ and still have “sticky case” syndrome. Also, the .0015″ spec is for bolt guns. For AR15s you need to bump the shoulder of your cases .003″ – .005″, for enhanced reliability. For those who have never worked with a body die, bump die, or Full-length sizing die, to increase bump, you loosen lock-ring and screw the die in further (move die down relative to shell-holder). A small amount (just a few degrees) of die rotation can make a difference. To reduce bump you screw the die out (move die up). Re-set lock-ring to match changes in die up/down position.
That .0015″ is a good starting point, but some shooters prefer to refine this by feel. Forum member Chuckhunter notes: “To get a better feel, remove the firing pin from your bolt. This will give you the actual feel of the case without the resistance of the firing pin spring. I always do this when setting up my FL dies by feel. I lock the die in when there is just the very slightest resistance on the bolt and I mean very slight.” Chino69 concurs: “Remove the firing pin to get the proper feel. With no brass in the chamber, the bolt handle should drop down into its recess from the full-open position. Now insert a piece of fire-formed brass with the primer removed. The bolt handle should go to the mid-closed position, requiring an assist to cam home. Do this several times to familiarize yourself with the feel. This is how you want your dies to size your brass, to achieve minimal headspace and a nearly glove-like fit in your chamber.”
We caution that, no matter how well you have developed a “feel” for bolt-closing resistance, once you’ve worked out your die setting, you should always measure the actual amount of shoulder bump to ensure that you are not pushing the shoulder too far back. This is an important safety check. You can measure this using a comparator that attaches to your caliper jaws, or alternatively, use a sized pistol case with the primer removed. See Poor Man’s Headspace Gauge.


 Rotating Camera Head Adds Versatility
 Good Powder Choices for the .45 ACP
 This Editor owns a full-size, all-stainless S&W 1911. After trying numerous powders, I found VV N320 delivered the best combination of accuracy, easy metering, consistency, clean burning qualities, and low muzzle flash. My gun has proven exceptionally accurate using N320 with bullets from 180 grains to 230 grains — it will shoot as accurately as some expensive customs I’ve tried. At right is 5-round group I shot offhand at 10 yards with my 5″ S&W 1911.
 To quantify what Preacher says, for starters, we suggest setting your body die, or full-length sizing die, to have .0015″ of “bump”. NOTE: This assumes that your die is a good match to your chamber. If your sizing or body die is too big at the base you could push the shoulder back .003″ and still have “sticky case” syndrome. Also, the .0015″ spec is for bolt guns. For AR15s you need to bump the shoulder of your cases .003″ – .005″, for enhanced reliability. For those who have never worked with a body die, bump die, or Full-length sizing die, to increase bump, you loosen lock-ring and screw the die in further (move die down relative to shell-holder). A small amount (just a few degrees) of die rotation can make a difference. To reduce bump you screw the die out (move die up). Re-set lock-ring to match changes in die up/down position.


