The faster a benchrester can send his rounds down-range, the better his chances to complete his 5- or 10-shot group in the same conditions before a major change. Shooting fast is NOT always the best strategy, but many world records have been set using this technique. Even if you’re a “picker”, there are times when you’ll benefit from shooting fast. With current benchrest hardware you still have to manually load each cartridge, even if you have a drop-port action or if you have an ejector that kicks out the fired case. To speed up the loading process, benchrest shooters employ elevated loading blocks that place the cartridges inches away from the loading port. That speeds things up, but you still have to manually pluck your cartridge and stuff it in the action… until now. Get ready for a major new technology that could change the benchrest game.
External Horizontal Benchrest Magazine
Carlos Gonzales, a benchrest shooter (and Professor of Engineering) from Argentina, has perfected a horizontal, external “floating” magazine that can reliably feed PPC cartridges as fast as you can work the bolt. This is interesting because, in 2009, this Editor discussed an attached horizontal feeding tray with three different action makers. All of them dismissed the idea as impractical or too radical. Well guys, it looks like Carlos pulled it off.
The Gonzales “magazine” is actually an open-ended, covered metal tray situated on the left side of the action (but it does not touch the gun — it is supported by the rest). This feeds into the left-side loading port. The cases are gravity-fed, but the shooter has positive control over feeding. A cable with a push-button control runs from the magazine down to the rear foot of the pedestal rest. You just push the button to drop one cartridge from the magazine. We don’t know exactly how the cartridge is released in the magazine itself, but in the video below you can see how the push-button works.
You push the button as soon as a spent cartridge ejects (watch Carlos’s left hand in the video above). It is a clever set-up, and as you can see, the magazine system works very, very fast. The video shows Carlos running five cartridges through his action in just 9 seconds (time marker 00:31 – 00:40). That’s fast! On a repeat viewing focus on Carlos’s left hand to see how he works the push-button cartridge dispensing control.
Kudos to Carlos for his great new invention. According to Pascale Fishbach: “Everything Carlos makes is of extreme quality. The magazine loader will be available just after the world championships in France, where hopefully a couple of them should be put to work.”
Now the question remains… will the official benchrest “powers that be” allow this device, or will they, fearing change, say it is forbidden under current rules. We would like to see the Gonzales magazine ruled legal for both domestic (American) and International competition. But, we acknowledge that Carlos’s invention could raise the cost of competition. The Gonzales mag would be one more “go-fast” item that serious benchresters would have to purchase.
Credit to Pascale Fischbach for sourcing this story and video link.
Last weekend, the first annual Father’s Day Fun Match and Egg Shoot was held at the Original PA 1000-yard Benchrest Club in Williamsport. One of the challenges was hitting hard-boiled eggs placed on the berm at 1040 yards. Most “egg shoots” are conducted at considerably shorter distances — but at Williamsport, “fun begins at 1000″.
The video below shows the egg “shoot-off” at 1040 yards. The eggs were suspended with fishing line so they bounce a bit — adding to the challenge.
Near the end of the video, at the 1:06″ mark, you can see a hit on the #7 egg target. (That’s our Asst. Editor Jason Baney calling the hit — the shooter was using a 6mmBR). It all goes to show that, with enough rounds downrange, a good shooter can nail an egg at 1000 yards.
This video has highlights and interviews from the 2011 Tactical Bolt Rifle Challenge (TBRC) in Northern California. Some 66 shooters competed in a multi-stage event held May 27-29, 2011 by the Nor Cal Practical Precision Rifle Club (NCPPRC). You’ll see the latest tactical hardware and shooting techniques in this lengthy (35 minute) video.
The video shows bolt guns being shot from a variety of positions: prone, kneeling, sitting, standing, and off barricades. Match Director Vu Pham explains some of the more interesting courses of fire in the match. There are also interviews with many of the competitors. If you The last 10 minutes or so of the video covers the awards ceremony at the end of the match. If your time is limited, you may want to skip that section.
Quite a few of our hunter friends have praised the DNZ Products (aka DedNutz) “Game Reaper” scope mounting system. This is a unitized one-piece base AND ring system. Because the rings are integral with the scope base, there’s no potential misalignment between the front and rear base. You also eliminate the need to keep separate rings torqued securely on an action-top rail. The rigid DNZ design has no moveable parts between the firearm and the scope.
Made of milled, anodized aluminum, the one-piece DNZ scope mounting system is one-third the weight of most other one-piece base and ring mounts and it can’t rust. For rifles with a Weaver or Picatinny-style base, we still advocate the use of Burris Signature Zee rings. However, if you are looking for a sturdy, low-profile set-up that attaches directly to the receiver, the DNZ system fits the bill. It would be a good choice for a walk-around varminter or a deer rifle. Because DNZ “Game Reaper” front and rear rings are precision CNC-machined, DNZ claims that it’s not necessary to lap the rings. We still recommend you inspect the ring edges and lightly debur as necessary. If you choose to lap the rings, do it gently as the inside should be very concentric already and you don’t want to grind through the anodizing.
One DNZ scope mount user, writing on huntingnet.com, comments: “I bought a pair of DedNutz for a Browning A-Bolt and a pair of Talley Lightweights for the same gun. I have to tell you that I think these DedNutz rings are some of the most rugged rings I have seen and yet are very lightweight. The [DedNutz] have a superior finish to the Talley lightweights … and they are better machined. I put a lapping bar on both and the Talleys needed it but not the DNs.” DedNutz scope mounts are are offered in 1″ and 30mm sizes, in matte silver, matte black, or Realtree Camo finishes.
DNZ scope mounts start at about $54.00 and can be purchased from MidwayUSA.com, or direct from DNZProducts.com. (You’ll probably find MidwayUSA’s prices to be considerably lower.)
Here’s your chance to see a wide selection of interesting new products from SHOT Show 2011. Today, Wednesday June 8th, ShootingUSA re-broadcasts its hour-long SHOT Show Special, originally filmed on-site at the Sands Convention Center in January. This 60-minute telecast features nearly 50 new products, including Colt Centennial 1911s, Smith & Wesson 1911s and Performance Center Hunting Revolvers, new Die Sets from RCBS, Les Baer Monolith AR10s, Mossberg Tactical Shotguns, Ruger Mark III Pistols, Hogue stocks for Savages, new Wood LaserGrips from Crimson Trace, and Thompson Center’s new Venture hunting rifles.
Shooting USA’s hour-long SHOT Show Special airs on the Outdoor Channel on June 8, 2011 at the following times:
At the IWA Trade Show in Germany earlier this year, a correspondent for The Firearm Blog interviewed Woody Woodall, who runs Lothar Walther’s USA operation. While many shooters assume that Walther hammer-forges most of its barrels like some other European barrel-makers, in fact Lothar Walther USA uses the button rifling technique for most of its US-made barrels.
In the video below, created for The Firearm Blog, Woodall explains that button rifling involves some extra steps to ensure a good result: “The extra work that goes into it is that you’ve got to make rifling, stress relieve it, and have it come out the right size. And it takes a lot of skill to do that. Lothar Walther invented button rifling in 1925, if a better way of making rifling came out, we’d be glad to go to it.”
Woodall explains that hammer forging is a good method for mass production, but it is costly to set up: “Hammer forging is relatively new, it came out in 1934, but did not come into prominence until the 1950s…. But the cost of [hammer forging] in the world today is getting above what the market will bear for barrels. [Hammer forging] is more complicated. As the hammers hit the barrel the barrel gets longer, but the hammers have to hit uniformly so the barrel [stays] straight. There’s a higher failure rate in that. There’s also some surface delamination that can occur, and some other issues. So if you’re hammer forging, you really have to pay attention to the details. So, it’s like button rifling, only ten times more complicated. It’s for super-high-volume production… The large companies tend to use the hammer forging, intermediate size companies tend to use the buttoning, and craft companies tend to use the cut rifling. All three [methods] can make an equally accurate barrel.”
While a few specialty events will be held this afternoon prior to tonight’s Awards Ceremony, the 2011 Bianchi Cup category winners have been named. Congratulations to Doug Koenig, the 2011 Bianchi Cup Overall Champion. Jessie Abbate of Team Smith & Wesson won the Women’s Division, while Rob Leatham was the Production Champion. Other divisional Champions are listed below:
2011 Bianchi Cup Champion: Doug Koenig
Production Champion: Rob Leatham
Womens’ Champion: Jessie Abbate
Metallic Champion: Rob Vadasz
Junior Champion: Tiffany Piper
Senior Champion: Chuck Thomey
Service Champion: Kevin Worrell, USMC
Lawman Champion: Bruce Piatt
Newcomer: Nigel Gordon
In the video below you can watch John Pride, four-time Bianchi Cup champion, shoot the Moving Target Event yesterday. Pride shot a 474-28x in the event and went on to finish with a 1822-133x overall in this year’s Bianchi Cup. (Warning: Loud volume — turn down your speakers in work setting.)
In the next video (below), Heribert Bettermann and teammate Dirk Borchardt of the German National Team compete in the Falling Plate event. Heribert finished with an excellent 480-66x. The Bianchi Cup draws many competitors from outside the United States. Teams from Australia, New Zealand, Japan and Germany made the long journey to Columbia, Missouri to compete in this prestigious competition.
At most American shooting facilities, you’re lucky to have running water and an electrical hook-up. Those Germans, with their penchant for advanced engineering, have created an amazingly high-tech (and even luxurious) indoor shooting facility that is truly state-of-the art. The NRA is proud of its modern indoor range in Fairfax, Virginia, but the NRA range can’t hold a candle to the advanced Müller Schiess Zentrum facility in Ulm, Germany. This vast complex features an indoor benchrest range with video monitors, a full-sized trap/skeet hall, pistol ranges, and a “running game” hunting simulator that actually displays (in 3D view) the placement of your bullet strike in the moving animal prey. On top of this, the Müller Schiess Zentrum Ulm (MSZU) has a cafe, a restaurant, and a large shopping/retail facility.
We still prefer shooting outdoors, but for a country like Germany, where long, cold winters limit the opportunities for outdoor shooting, a deluxe indoor facility like this makes sense. German reader JPeelen adds: “The problem in Germany is not [just] the weather but density of population. Noise problems led to the closure of many outdoor ranges. Ulm is unique because it offers a 300 meter indoor range, not just 100 meters[.]” Overall, you have to hand it to the Germans for “raising the bar” to a whole new level. View the Müller Schiess Zentrum’s amazing facilities in the video below. The editor of The Firearm Blog wrote: “I have seen the future… and it is in Germany. If you don’t do anything else today, just make sure you watch this video.”
by Ian Kenney A week before the fall Allegheny Sniper Challenge (ASC), I first saw Adaptive’s Field Density Altitude Compensator (FDAC). I was impressed by its capabilities and compact size and I managed to take one home from the ASC prize table the very next weekend. The FDAC comes from Adaptive Consulting and Training Services in Stafford, VA. The guys at Adaptive know a thing or two about long-range shooting — many of them are former USMC Scout Snipers. Their long-range shooting and combat experience helped them perfect the FDAC.
At first glance the $39.95 FDAC appears to be just another data card. However, in a number of ways, it is completely different than traditional data cards. The FDAC was designed to be simple and accurate, so that any military or civilian shooter could pick it up and, within minutes, effectively employ it. Anyone familiar with a Midot Master should find the FDAC simple and intuitive. Another plus is that, unlike electronic gadgets, the FDAC doesn’t need batteries or shielding from the elements. You don’t have to carry around extra batteries, chargers, and “ruggedized” weather-proof cases.
FDAC Offers Multiple Cards for More Precise Solutions
The FDAC is quite different than traditional data cards that calculate trajectories based on a single muzzle velocity in a given set of conditions. The problem with those traditional data cards is that, as soon as one variable changes, the card’s ballistic solution becomes less valid. The FDAC solves this problem by employing several cards for different muzzle velocities and using Density Dltitude to compensate for the differences in environmental conditions. For the uninitiated, Density Altitude combines the temperature, humidity, barometric pressure, and elevation figures into one number that is more easily used over a wider range of conditions. Density Altitude can be obtained with a portable weather station (such as a Kestrel). If a portable weather meter is not available, the basic chart printed on the card itself works pretty well even when guessing at the physical altitude and temperature.
FDAC Ballistic Solutions Deliver First-Round Hits in the Field
I first tested the FDAC at Reade Range in Pennsylvania, shooting from 500 to 1000 yards. I used the 2700 fps velocity card that came with my FDAC for the 175 Sierra Match King since that most closely matched what I had loaded up. Starting out with a cold bore shot from the 500-yard line, I obtained the density altitude using my Brunton ADC Pro, and slid the card over until the proper density altitude column was showing. With 3.2 mils of elevation and .2 mils of left wind dialed into my Nightforce 3.5-15×50 (first focal plane) scope, I went for my cold bore shot, hoping the FDAC would put me close. I was happily rewarded with a first round, center mass hit, just a little left of center.
The FDAC continued to shine at longer ranges. FDAC solutions gave me first-round hits at 600 and 800 yards, a second round hit at 1000 yards. Several weeks later I found myself in a field in rural North Carolina once again putting the FDAC to good use this time without any electronic aids. To my surprise, my guestimate of about 500’ for density altitude was pretty darn close to what the Kestrel my friend had was saying also. Just like at Reade Range, the FDAC values delivered cold bore hits that were nearly point of aim = point of impact. That demonstrated how well the FDAC worked in warm weather.
This winter I was able to see how the FDAC performed in cold conditions. In cooler, denser air, a bullet requires more elevation correction to get on target than it would need in warmer temps. So I went out one chilly January morning and confirmed that the FDAC can handle cold conditions. The FDAC solutions once again gave me first round hits from 250 yards to 730 yards. The little DA chart put me in the right vicinity for density altitude just by knowing my altitude and making a guess for the air temperature. Since I’ve started using the FDAC I’ve found that the data is either spot on or within about .2 mils of the correct dope at nearly all distances when using the correct density altitude column. This is very impressive. I found that the FDAC delivered practically the same data as popular digital PDAs and field ballistic calculators. But the FDAC can be even faster in use (once you become familiar with its operation), and, at $39.95, it costs a fraction of what a dedicated electronic ballistics solver would cost. The FDAC is practical, very accurate, inexpensive, compact, lightweight and never needs batteries — what’s not to like?
Below is a SnipersHide Video Review of the FDAC Tool
New Enhanced Milspec FDAC Released this Year
Adaptive has put much R&D into the FDAC and it shows. Thousands of Field Density Altitude Compensators have been provided to soldiers and marines, who are making good use of the devices. At the 2011 SHOT Show, Adaptive unveiled an enhanced FDAC, the MILSPEC-XR. This new version includes a new Density Altitude calculator, extended range dope for the .338LM and .300WM, as well as tools for slope dope and moving targets. Adaptive also offers conversion tables and compatibility charts so that the FDAC can be used with other bullets besides the original FDAC default projectiles. (For FDAC owners, the conversion charts are FREE!) The FDAC is truly one of those few products that I wish I had when I was deployed to Afghanistan. I highly recommend it to any long-range shooter using .308 Win, .300WM or .338LM cartridges (with a mil-based optic). For more information, or to order an FDAC tool, visit the Adaptive website, ACTSVirginia.com, or call (540) 657-8541.
The Drop Port is a great feature for benchrest shooters. You can run a bolt without an ejector, yet your cartridge will extract smoothly and reliably each time you pull the bolt back. Stiller’s Precision Firearms pioneered the Drop Port design, and Jerry Stiller offers this as a popular option with his Cobra, Viper, Python, D-Back, and Diamondback actions. The Drop Port is amazing in its simplicity (watch video below). As you pull the bolt rearwards, the fired case slides downward into a funnel. As it tilts nose-down, the case rotates free of the six-o’clock extractor, falls nose first down the funnel, and finally exits through a hole in the bottom of the stock. Gravity does all the work.
S&S Panda Drop Port Conversion
Until recently, if you wanted a Drop Port, your only option was to purchase a Stiller action or engineer a conversion yourself. Now the owners of Kelbly Panda actions can enjoy drop-port functionality via a conversion performed by S&S Precision Rifles in Texas. The folks at S&S will mill a slot in the bottom of your action, and then install a drop funnel in your stock. The conversion work is done so well you’d think the Pandas were originally made as Drop Ports by Kelbly. Drop Port conversions will be available for popular small match cartridges including 22 PPC, 6 PPC, 6mmBR, 6BRX, 6 Dasher, 6.5 Grendel, and 30 BR (plus other wildcats in the BR family).
Conversion Will Be Costly — New Actions Are Best Candidates
This conversion will not be cheap. Because Drop Ports require a six o’clock extractor, you’ll probably need a replacement bolt for your Panda. S&S is in discussion with Pacific Tool & Gauge to provide these bolts. You can probably resell your existing bolt, but the upfront conversion cost could approach $400 with new bolt and labor. S&S hopes to announce firm pricing in 4-6 weeks. Don “Stick” Starks, S&S’s lead gunsmith, also cautions that this conversion is most cost-effective with Panda actions that have not yet been installed, or which are set up with pillars (as opposed to glue-ins). Stick explained: “If your Panda is already glued in, then we have to remove the action, mill the port, install the funnel, and then re-bed the whole thing. That’s going to substantially increase your cost. It’s more logical to do this on a Panda that has not yet be put in a rifle.”
In the video above, you can watch S&S Precision convert a Stolle Panda action to a Drop Port, and then see how the converted Panda functions. The rifle is a 30BR owned by FORUM member Truckincars, who also created the video.


 Last weekend, the first annual Father’s Day Fun Match and Egg Shoot was held at the Original PA 1000-yard Benchrest Club in Williamsport. One of the challenges was hitting hard-boiled eggs placed on the berm at 1040 yards. Most “egg shoots” are conducted at considerably shorter distances — but at Williamsport, “fun begins at 1000″.

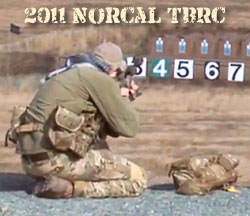 This video has highlights and interviews from the 2011
 Made of milled, anodized aluminum, the one-piece DNZ scope mounting system is one-third the weight of most other one-piece base and ring mounts and it can’t rust. For rifles with a Weaver or Picatinny-style base, we still advocate the use of Burris Signature Zee rings. However, if you are looking for a sturdy, low-profile set-up that attaches directly to the receiver, the DNZ system fits the bill. It would be a good choice for a walk-around varminter or a deer rifle. Because DNZ “Game Reaper” front and rear rings are precision CNC-machined, DNZ claims that it’s not necessary to lap the rings. We still recommend you inspect the ring edges and lightly debur as necessary. If you choose to lap the rings, do it gently as the inside should be very concentric already and you don’t want to grind through the anodizing.
 One DNZ scope mount user, writing on huntingnet.com, comments: “I bought a pair of DedNutz for a Browning A-Bolt and a pair of Talley Lightweights for the same gun. I have to tell you that I think these DedNutz rings are some of the most rugged rings I have seen and yet are very lightweight. The [DedNutz] have a superior finish to the Talley lightweights … and they are better machined. I put a lapping bar on both and the Talleys needed it but not the DNs.” DedNutz scope mounts are are offered in 1″ and 30mm sizes, in matte silver, matte black, or Realtree Camo finishes.

 Shooting USA’s hour-long SHOT Show Special airs on the
  At the
  At most American shooting facilities, you’re lucky to have running water and an electrical hook-up. Those Germans, with their penchant for advanced engineering, have created an amazingly high-tech (and even luxurious) indoor shooting facility that is truly state-of-the art. The NRA is proud of its modern indoor range in Fairfax, Virginia, but the NRA range can’t hold a candle to the advanced Müller Schiess Zentrum facility in Ulm, Germany. This vast complex features an indoor benchrest range with video monitors, a full-sized trap/skeet hall, pistol ranges, and a “running game” hunting simulator that actually displays (in 3D view) the placement of your bullet strike in the moving animal prey. On top of this, the Müller Schiess Zentrum Ulm (MSZU) has a cafe, a restaurant, and a large shopping/retail facility.

 A week before the fall Allegheny Sniper Challenge (ASC), I first saw Adaptive’s
 S&S Panda Drop Port Conversion


