Our friend Robert Whitley of ARX Enterprises LLC has learned, through careful measurement and testing, that some barrels threaded 5/8″ x 24 TPI at the muzzle may not deliver optimal accuracy. The reason is that the end of the barrel can bell out slightly, like a trombone, because too much steel has been removed. This is particularly true with .30-caliber barrels, but it can also be a problem with smaller caliber barrels (even 6mm). Robert demonstrates this phenomenon in the video below. All gunsmiths, and anyone considering threading a barrel, should watch the video. At 1:00 – 1:30 Robert gauges a 5/8″ x 24-threaded .30-Caliber barrel. You can see the belling effect clear as day.
“When setting up a commercial barrel in the lathe, we noticed that the maximum-sized bushing that would fit in the bore at the chamber end was almost .0015” smaller [than what would fit] at the muzzle. That precipitated my pin-gauging of a number of different commercial barrels that were threaded for 5/8” x 24 tpi. What I found is what’s shown on the video.” – R. Whitley
Solve Problem with a Larger Thread Diameter
If 5/8″ x 24 threading is potentially harmful to accuracy, is there a solution? Yes, you simply need to leave a little more steel on the barrel. (See Video starting at 02:40.) Frank Green of Bartlein barrels states: “We get these questions all the time. I say run the largest thread diameter that is possible.” Robert Whitley has found that a 3/4″ x 28 TPI threading does not cause the “belling effect”. Accordingly Robert recommends 3/4″ x 28 if you need to thread your barrel for a muzzle brake or suppressor. Robert explains: “We only make 3/4” x 28 TPI muzzle brakes and that’s what we recommend to customers.”
“See how much meatier the 3/4″ threading is vs. the 5/8″. The 3/4″ threading offers a lot more metal around the bore. There’s a lot less opportunity for the bore to become bell-mouthed…” – Robert Whitley
Barrel Threading Diameter — What’s Important to Know
By Robert Whitley
In truth, the 5/8″ x 24 TPI threading never came out of any accuracy-based think tank or set-up, it’s a military .30-Cal threading for barrels that someone has to carry around (they needed to keep the barrel weight down so it was smaller in diameter and the threading had to work with that situation). People have somehow assumed because the military uses that threading for certain things that it must mean that it’s also fine for a highly accurate rifle too, but that’s not really correct.
I don’t think there is any better and realistic option than the 3/4″ muzzle threading, and we also do it so there is no relief cut behind the threads on the barrel (i.e. put the relief cut on the brake or jam nut, don’t chop down on the muzzle of the barrel). For some reason many have a hard time grasping that the metal at the muzzle end of a rifle is “sacred” and you should not cut it down any more than absolutely necessary. A little threaded pencil diameter nub on the end of a barrel is not ideal for accuracy especially if it’s threaded and you need to torque on it. I cringe when I see a barrel with something like an MTU or Heavy Varmint contour, only to have an itty-bitty pencil thin threaded nub right at the muzzle so someone can “screw on a can” or a muzzle brake.
Lessons Learned Over the Years
A number of years ago I did a 30BR rifle project with Craig Kostyshyn who was big in the 30BR game and he made some of the best 30BR rifle barrels for benchrest competition. When I did the project I wanted a medium-heavy Palma type contour barrel I could use and also have a muzzle turndown for a front sight band. When he found out I was going to have the muzzle turned down he said “whoa, I need to provide for that when I make the barrel because if you turn the front down later you’ll be shooting a trombone” (i.e. the muzzle bore dimension would open up).
What he did was rough contour the barrel with the turndown (about .010” oversize) before he lapped the barrel, then when he lapped the barrel he took it easy in the muzzle area and worked the back of the barrel more. I thought he was a little bit excessive in his concerns but the barrel shot great and I wasn’t going to argue with him, after all he was shooting groups in the ones. I kind of just filed that away and never thought about it until recently when I went to have Fred from Sabreco do some chamber re-work on a commercial .30-caliber barrel I had. When setting up the barrel in the lathe and indicating things Fred noticed that the maximum-sized bushing that would fit in the bore at the chamber end was almost .0015” smaller [than what would fit] at the muzzle and he mentioned it to me. That precipitated my pin-gauging of a number of different commercial barrels I had that were threaded for 5/8” x 24 TPI. What I found is what’s shown on the video.
NOTE: This is a copyrighted article. Do not reproduce or re-link more than 75 words without written permission from AccurateShooter.com.
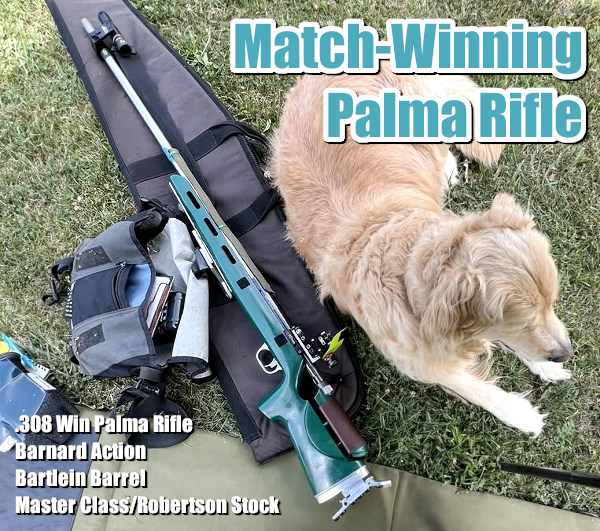
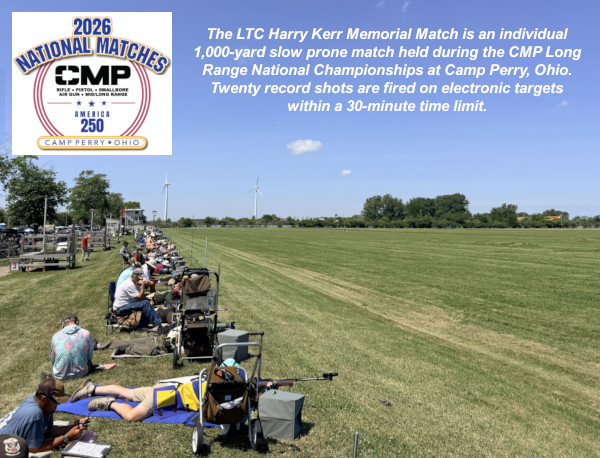
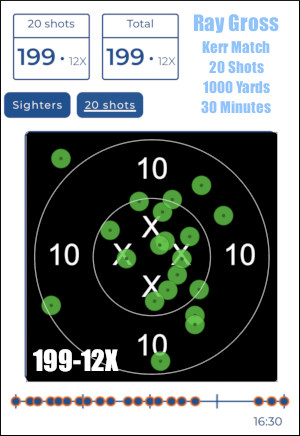
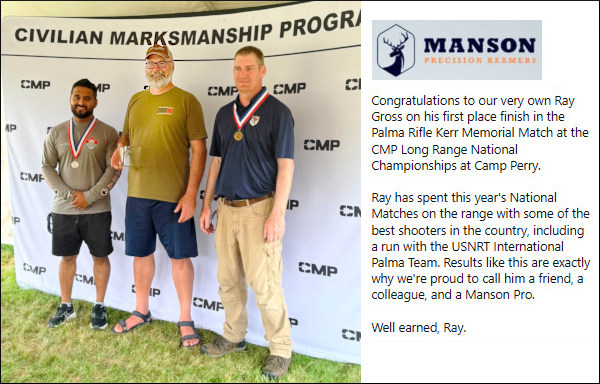
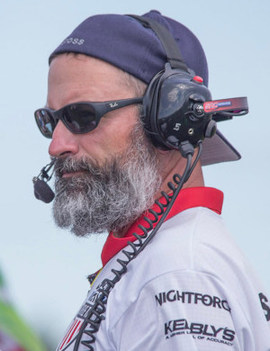
This Sunday GunDay story celebrates an impressive victory by Raymond (“Ray”) Gross, one of America’s most skilled marksmen and a top team coach. Ray has mastered many disciplines including Service rifle, Palma rifle, and F-Class (both F-TR and F-Open). Recently Ray notched another notable victory at the CMP’s 2026 National Matches at Camp Perry, Ohio, winning the Kerr Memorial Match (Palma Rifle division).
Report by Ray Gross
I had a successful trip to Camp Perry this year, winning the Palma Rifle division of the 1000-yard Kerr Memorial Match and winning two Golds and a Silver coaching in the three team events. This is actually my first time back at Camp Perry for Long Range since 2015. I really enjoyed my time there this year.
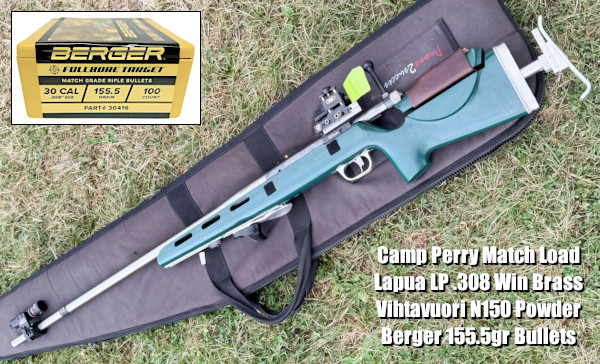
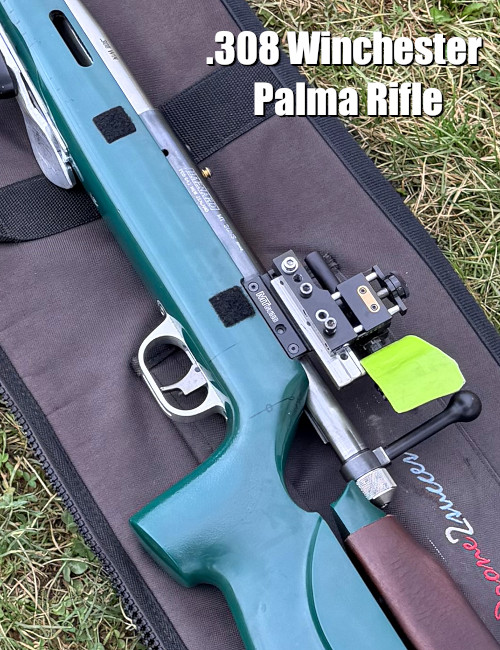
For the Kerr match, I used my standard Palma rifle. My Barnard action and Master Class / Robertson stock have been with me for 21 years now and have seen numerous barrels and a few upgrades to the stock. The stock has a bedding block and originally I had two Barnard actions that I would swap in and out. I currently use the standard Barnard P Trigger, set to 1.5 kg.
This rifle has a Warner rear sight with true 1/4 MOA clicks. It is fitted with a Gehmann 530-0 rear diopter. The front sight is a Doug Beach 22mm ladder sight with a Centra 5.0-7.0mm adjustable aperture. For my eyesight (-2.75 x -0.75 in my aiming eye), I will generally run 5.1 to 5.6 on the 1000-yard target. At that size, I am more or less cutting the corners off the 6×6 target. Most of the ranges I shoot at have a large, dark-colored safety berm behind the target.
Camp Perry has a rather unique sight picture at 1000 yards, with the target surrounded on three sides with open sky, but with the dark pit safety berm below. It took a little bit to get used to that. The dark pit berm was prominent inside my aperture, even when turned down to 5.0. Next year, I plan to swap out the from aperture to allow me to get down to about a 4.7-4.8mm size.
The barrel is a Bartlein 5R 300×308 Light Palma taper. Chad Heckler of 5×5 Precision chambered this barrel for me. I recently troll-posted some bore pics on Facebook of this barrel at about 750 rounds. I work at Manson Reamers primarily as a chamber designer and tech support role and get to hear many stories about chambers and barrels. I think a lot of people really misjudge what they are seeing with borescopes causing a lot of worry and anxiety. The real measure of a target rifle is how it performs in competition.
Leaving Camp Perry it has about 1500 rounds down the tube and is shooting plenty good enough to win at the National Championships. By the way, I showed up with about 30 rounds fired since the previous thorough cleaning and did not clean once while there. I am not necessarily recommending that, but this barrel shoots fine dirty.
I am on my 16th firing of the Lapua large primer .308 Win brass. I have a bunch of new small primer brass that I want to use, but the lot I have been using just won’t wear out, so I keep reloading it. My Perry ammo was loaded with Vihtavuori N150 powder, but I started the year with N140 to use up that particular jug of powder. My bullet of choice for long range with the Palma rifle is the Berger 155.5 gr FullBore Target Rifle bullet seated about .035″ off the lands. Editor: The video below provides a comparison of Lapua large primer .308 Win brass vs. Lapua small primer .308 Win brass.
Most of my recent Palma barrels have the Manson 308 Win 2019 Fullbore T30 chamber (that I designed). That is a very widely-used chamber designed to pass Bisley Rule 150 inspection. It is a ‘Bisley Reamer’. Bisley reamers tend to have fairly long throats. I have a collection of various ‘Bisley Reamer’ prints from all over the world. The Manson 2019 Fullbore T30 is not the longest, but it is among the longer throated designs. SEE Diagram below (click to zoom):
Since 2019 I have had a number of competitors request a shorter-throated chamber in hopes of achieving higher velocities with the NRAUK Bisley issued ammo, currently made by GGG*. The issue ammo is essentially old school Palma ammo with a Sierra 2155 seated to 2.80″ COL. The Sierra 2155 is a very accurate bullet, but it does not have the BC of more modern 155gr designs. I love shooting them at 300 and 600 yards. If you want to learn to read the wind, practice with them at long range.
The chamber in this rifle is a ‘prototype’ shorter-throated reamer designed with the help of Brandon Green and measurements of the GGG 2025 issued ammo*. The reamer is the GGG25 reamer. On the print I have a big disclaimer that the chamber probably will eventually fail the rule 150 test as bullets change over the years, but it did pass with the 2026 issued ammo. My recommendation is to stick with the 2019 Fullbore design if you plan to go to Bisley.
Video shows first 2.5-3″ of another one of Ray’s Palma barrels, with an estimated 2800 rounds.
Ray reports that approximately 70 rounds had been shot in this barrel since it was last cleaned.
Ray says his Palma rifles shoot well even with high round count between cleanings.
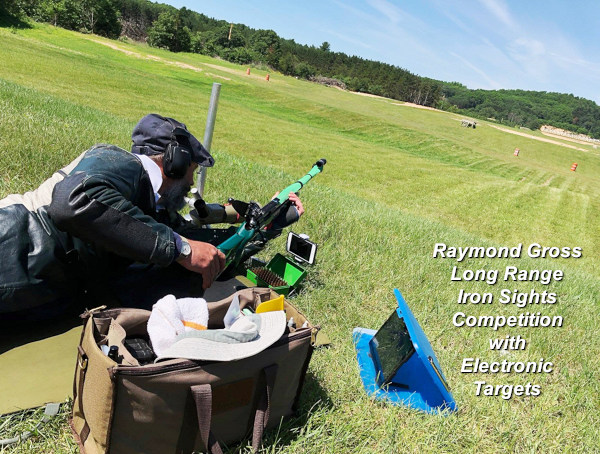
Here is Ray shooting his Palma rifle at Winnequah Gun Club Range in Lodi, Wisconsin.
Ray Gross Marksmanship/Coaching Biography Ray’s shooting career began early in life hunting with his Dad. He began competing in NRA matches in 1991 as a Service Rifle shooter and earned a place on the Michigan Rifle team in 1993 and 1994. He earned his Distinguished Rifleman’s Badge in 1995 and began competing in the Palma class that year.
Ray has represented the USA as a Shooter or Coach on two Palma teams, two Australia Match Teams, and eight America Match teams. He has been the winning team coach on numerous events in Canada and the USA over the last decade. His international accomplishments include a Silver medal as a shooter on the 2003 U.S. Palma Team, a Silver medal as coach on the 2015 U.S. Palma Team, two Gold medals as a coach on the 2008 and 2014 U.S. America Match Team. The 2014 team set a new record for team aggregate score. He was Captain of the 2016 Gold medal America Match F-Class Team.
In F-Class, he was the F-TR individual Silver medalist at the first F-Class Nationals in 2004 and has coached the F-TR National Championship Team squad in 2004, 2008, 2011, 2012, 2014 and 2016, the latter five as part of Team Sinclair.
* GGG ammo is high-grade rifle ammunition produced by Giraitės Ginkluotės Gamykla, a state-owned Lithuanian manufacturer established in 2000. It is the largest military and civilian small-caliber ammunition producer in the Baltic states, supplying strict NATO-specification rounds like 5.56x45mm and 7.62x51mm, alongside commercial .223 Rem and .308 Win loads for civilian shooters.
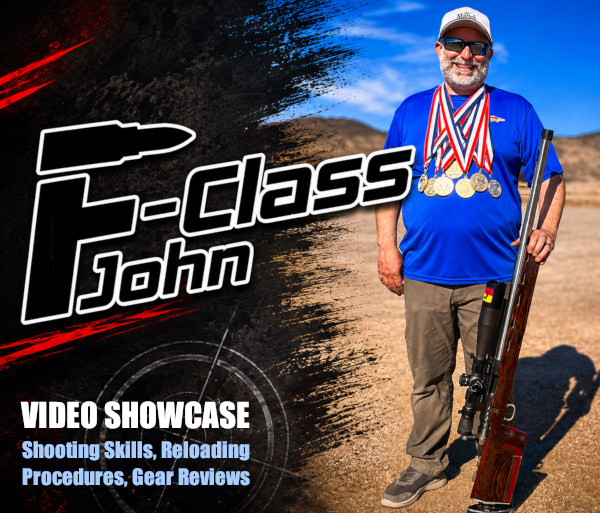
Today we showcase seven videos from video producer, skilled marksman, and Forum Member F-Class John. A talented F-Class competitor (and past Mid-Range National Champion), John analyzes product features with a smart, technically-focused mind. John has created hundreds of videos about reloading and precision tools, along with rifle and shooting accessories. And John also has created many videos showing how to improve your rifle handling and wind-calling. Many of John’s product review videos are very detailed and thorough. You’ll find over 920 informative videos on F-Class John’s popular YouTube Channel.
Many folks getting started in the cartridge reloading game are not fully familiar with seating depth options. They may only be looking to achieve a listed Overall Length (OAL) from base to bullet tip. But, for optimal accuracy and safe functionality, you need to look at the position of the bullet’s ogive relative to the start of the barrel’s rifling (i.e. the point where bullet jacket contacts the barrel rifling). Before you start reloading you want to measure the distance to the lands. Then, for most applications you want to start with the ogive’s contact point at least .010″ or more back away from the lands — that is called “jumping”.
For some benchrest applications you may want to actually have the bullets seated longer so the bullet actually contacts the lands. That is called “jam” seating. But there are variations in that. There is both a “mild” jam — a few thousands into the lands — as well as a full jam where the bullet is seated very long (and may even push back if case neck tension is light). Be very cautious with a full jam as this can significantly increase case pressure.
How to Improve Accuracy
In this video, F-Class John explains some key techniques on optimizing match ammo. He explains how to get very precise powder loads. In the video he respond to multiple questions from his Patreon subscribers. One topic is how to avoid the outliers in a 10-shot group. If those “flyers” are consistently coming at the end of a long string, John explains the problem is not likely the ammunition. Rather it could be a variety of factors such as “driver fatigue”, wind changes, barrel heating or other issues. For competitive shooters, this video is worth watching start to finish.
Patriotic July 4 Accuracy Target
The USA’s 250th birthday is behind us, having been celebrated on July 4, 2026. In this video F-Class John shows a fun 5-star red, white, and blue patriotic target and explains some of the challenges in getting an optimal score. There is a black bull inside the center star. Another feature of this target is that you can use the points on the stars to precisely aim your cross-hairs. This is a good target for centerfire at 100 yards, rimfire at 50 yards, and handguns at closer ranges.
Rear Bag Filling — Tips for Best Results
In benchrest and F-Class disciplines, you need a good rear bag to optimize accuracy and scores. A quality rear bag both supports and stabilizes the rifle and helps the rifle track properly during recoil. To get the best, most consistent performance from rear bags, you need to optimize the fill. In this video F-Class John discusses fill options and shows the process to fill your rear bag properly. He also talks about notable bag features including bag weight, footprint, and ear height/material.
Budget-Priced Arken EPL-4 Scope That Performs Well
Top competitors may spend $2500 or more on a top-quality, high-magnification rifle scope. But for those on a tighter budget, the Arken EPL-4 offers pretty impressive performance for under $350.00. In this video John tests this optic from the bench and shows that it has good glass and functions well. The EPL-4 combines Japanese ED glass with illuminated VPR or VHR FFP reticles. The Arken EPL-4 is offered in two sizes: 4-16x44mm ($299.99 at MidwayUSA) and 6-24x50mm ($329.99 at MidwayUSA).
Advanced AMP Press for Precision Bullet Seating
The AMP Electronic Bullet Seating Press is a state-of-the-art bullet seating press that tracks seating force round by round. The AMP Press combines a motor driven ram, a distance sensor, and a load cell to deliver extremely accurate and precise bullet seating measurements. It is designed for use with inline bullet seating dies. With this press you can quickly and easily change seating depths, which is useful during load development. In addition, the AMP press outputs data from the seating process to a linked computer. This allows you to see if there is an unusual seating value. You can mark those “outlyer” rounds and use them for fouling or warm-up shots.
F-Class Front Rests Reviewed
This is a great summary of multiple quality front rests. This is a must-watch video for all F-Open and Benchrest shooters! If you are shopping for a front rest, definitely watch this comprehensive 42-minute video from start to finish. This is probably the most informative video about premium shooting rests available on YouTube. Top F-Class shooter and video-maker F-Class John covers a wide selection of front rests, with some observations about coaxial bipods as well. John covers the impressive new SEB NEO-X, the easy-to-transport SEB Mini-X, the excellent Rodzilla Rest, the innovative 21st Century Hybrid Rest, the sleek Italian Lenzi Rest. At the end of the video John reviews the very affordable Caldwell Fire Control Rest ($289.99 at MidwayUSA), explaining how it can be a decent choice for shooters on a limited budget.
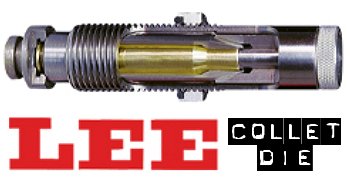
For those who prefer to neck-size their brass (rather than full-length-size), the LEE Collet Die is a popular, inexpensive option. It works by having collet tangs or “fingers” press the neck against a central mandrel. The benefit is that you get a very straight neck, which is sized consistently from top to bottom. Canadian shooter Jerry Teo explains: “LEE Collet Dies produce sized cases with very low runout (measured runout is under .001″ using a Sinclair concentricity gauge). You also don’t get the build-up of brass at the base of the neck, as can happen with bushing neck dies. The neck-shoulder junction stays nice and crisp.”
NOTE: For most handloading, we recommend FULL-LENGTH sizing of cases. You should always have a good Full-length sizing die for your brass. But there are some situations where neck-sizing may be useful. This article explains how to neck-size effectively with a LEE Collet Die.
Here’s a good video that explains how to use a Lee Collet Die to Neck-Size .243 Win brass:
TIP ONE — Adjusting Tension
LEE Collet dies don’t have a specific mechanical adjustment for neck tension. But you CAN easily modify the die to provide more or less tension. If you want to adjust the neck tension using a Lee Collet die, you can simply chuck the mandrel in a drill and reduce the diameter with some sand-paper (to increase neck tension) or you can order a mandrel the next caliber larger and turn it to whatever diameter you want (the larger the mandrel diameter, the less the neck tension). You can also order custom mandrels from Lee sized to any diameter you want.
Regarding neck tension, Boyd Allen makes an important point: “The only way to properly get more neck tension with collet dies is to either reduce the diameter of the mandrel, or order a smaller-diameter mandrel from Lee. I remind folks that adjusting the die position to have more toggle at the top of the ram stroke (not the factory recommended method), or leaning on the press handle with more force than recommended will NOT increase neck tension.”
TIP TWO — Polish and Tune for Easy Case Removal
Some users have complained that their Collet Dies grab the case-neck too firmly, making the case hard to remove. There are solutions to this problem. First inspect the collet fingers and smooth the inner surface up a bit with polishing compound or an extra-fine sanding pad. Second, you can open up the fingers a little bit. LEE recommends that if your Collet Die is sticking, take a steel punch and tap the fingers apart a little bit so that the natural “unloaded” position is wider. Lastly, you should lightly lubricate the outside of the collet fingers (see arrows) before you re-assemble the die. This will ensure they slide smoothly. Also, to prevent the collet fingers from closing too tight, never load up the die with your press without putting a case in place first. Without a case neck between the collet fingers and the mandrel, the collet can clamp itself too tight as you raise the ram.
TIP THREE — Always Have a Case Inside When Operating Collet Die
Our friend Boyd Allen tells us that you need to follow directions and NEVER operate the die without a case inside. Boyd explains: “This is because doing so will spring the quadrants of the collet inward so that they interfere with the insertion of a case, and the user will have to figure out how to undo the damage if the die is to operate properly. This advice would not be needed if everyone read the instructions before using the die…. but many times, they don’t. Another thing that I tell new users is to take the die apart so that they will have a better chance of understanding how it works.”
TIP FOUR — Size Twice and Spin Your Case 1/8th Turn
After reaching fully “down” on your press handle, withdraw the case about an inch and manually rotate it about 1/8th (NOT 1/4 or 1/2) turn while still in the shell-holder, then size again. This will place the die’s collet petals on the four “high spots” of the case neck and will result in a rounder, more evenly-sized neck with slightly more bullet tension. This takes only about one second more per case and is well worth the slight extra effort. (We thank reader Stonecreek for this smart tip).
Getting started in the shooting sports can be intimidating, especially for women. Thankfully, there are many training resources available. NSSF has compiled a series of target shooting tips for women, by women. These tips, presented by instructors Deb Ferns, Kay Miculek, and Lena Miculek-Afentul, cover basic shooting methods and safety. Topics include pistol grip, stance, eye dominance, and ear protection. These tips can benefit any novice shooter, not just the ladies.
Rifle Stance and Hold (for Action Shooting)
Champion 3-Gun shooters Kay Miculek and Lena Miculek-Afentul demonstrate rifle stance basics and how to properly hold an AR-platform rifle for action shooting.
Grip and Stance for Pistol Shooting
Mother/daughter team Kay Miculek and Lena Miculek-Afentul demonstrate proper grip and stance for shooting semi-automatic pistols in action disciplines.
Eye Dominance (and Hand/Eye Cross-Dominance)
Learn how to identify your dominant eye. Kay Miculek, a cross-dominant shooter, explains how other cross-dominant individuals can maintain a proper sight picture.
Ear Protection — Double-Up for Safety
Babes with Bullets Director Deb Ferns says the most common complaint among new shooters is, “It’s too loud!” Deb recommends “doubling up” — wearing muffs OVER soft foam earplugs. That’s “sound advice” for any shooter.
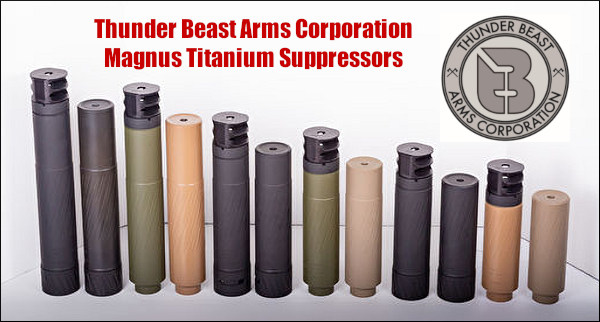
You’d like to protect your hearing, and maybe you’re a little curious about how your rifle might shoot suppressed. So you’re thinking of buying a suppressor (aka “can”, “moderator”, “silencer”). The good news is that suppressor ownership is now legal in 42 of the 50 American states — that’s 84%! And 41 states allow their use for hunting. So for most American adults, getting a suppressor is legal, provided the owner passes required background checks. But you can’t just get one off the shelf at Walmart. Acquiring a suppressor still requires filling out ATF paperwork. Plus there is typically a pretty long wait. But, thankfully, you no longer have to pay for a $200 Federal Tax Stamp (thanks to recent Federal legislation).
States Where Suppressors Are Allowed
Currently, these 42 states allow private ownership of suppressors/silencers: AL, AK, AZ, AR, CO, CT, FL, GA, ID, IN, IA, KS, KY, LA, ME, MD, MI, MN, MS, MO, MT, NE, NV, NH, NM, NC, ND, OH, OK, OR, PA, SC, SD, TN, TX, UT, VT, VA, WA, WV, WI, WY.
Note: Even if you live in one of the states listed, you should still verify that owning a suppressor is legal in your area. Some states may have municipal- or county-based restrictions.
States Where Suppressor Ownership is Prohibited
Unfortunately, there are still eight (8) States that forbid private ownership of suppressors. The eight No-Go States are: California, Delaware, Hawaii, Illinois, Massachusetts, New Jersey, New York, Rhode Island. In these eight states, private ownership of suppressors (aka “silencers”) is forbidden. Hopefully some of those eight hold-out states will change their laws in the months ahead.
How to Acquire a Suppressor/Silencer
As of January 1, 2026, the federal transfer and manufacturing tax for silencers, short-barreled rifles, and short-barreled shotguns was reduced to $0. While the previous $200 ATF fee is gone, all the underlying regulatory requirements remain fully active.
Still Required When Buying a Suppressor:
— Paperwork: You must still submit an ATF eForm or Form 4 through a licensed dealer.
— Background Check: ATF background check and approval are mandatory before taking possession.
— Identification: Fingerprints and passport-style photos must still be provided with your application.
Looking Inside a Suppressor in Action
Popular YouTube Channel Smarter Every Day recently released a cool video featuring rifle suppressors with see-through acrylic sleeves. The team filmed shots through the suppressors using ultra-high-speed (110,000 frame per second) cameras. When played back in super-slow-motion, you can see the flame propagate through the suppressor and the bullet move through each baffle before it exists the muzzle. Watch the results in the video below — it’s mesmerizing:
See Through Suppressor in Super Slow Motion (110,000 fps) — Click Arrow to Watch:
Suppressors, On Average, Reduce Noise Levels about 30 Decibels
In an article for Ammoland, gunwriter Sam Hoober says that you can expect about 30 decibels (dB) of noise reduction from the average suppressor: “Looking at a few different products, SilencerCo attests their suppressors reduce the sound pressure of a 9mm gunshot to anywhere from 125.7 dB to 131.5 dB, depending on the model. Advanced Armament Co, another popular supplier, attests a 23 dB to 33 dB reduction or down to 127 dB. Liberty Suppressors, another manufacturer, attests a reduction of 24 dB to 38 dB, depending on model and other factors. In short, we can presume something on the order of 30 dB of attenuation as an average.”
Using that 30 dB number you can quickly discern that you’ll still need hearing protection — good hearing protection — when shooting any suppressed firearm (even a .22 LR). “Spikes of 130 dB and more can result in permanent hearing damage instantly”. Source: NRA Blog.
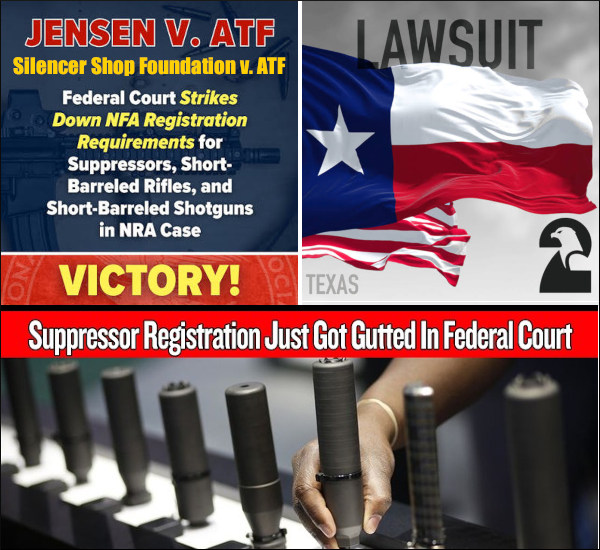
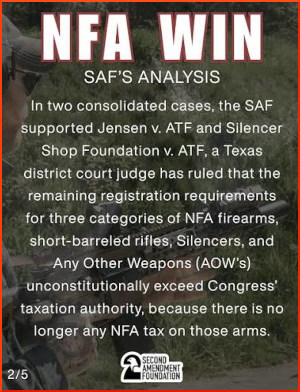
There has a been a notable federal legal holding regarding the National Firearms Act of 1934 (NFA). Two consolidated lawsuits — Jensen v. ATF and Silencer Shop Foundation v. ATF — had challenged the NFA’s regulation of now-untaxed firearms, such as suppressors, short-barreled rifles, and short-barreled shotguns. In a memo for the cons the judge held the registration requirements are no longer valid. U.S. District Court Judge James Wesley Hendrix ruled that “[b]y zeroing out the transfer and making taxes for most NFA firearms, Congress eliminated the constitutional basis for the regulations that formerly supported the taxes for those firearms.”
Gun reviewer and attorney Colion Noir explained: “For ninety years, the government defended NFA registration by tying it to Congress’s taxing power. Then the tax disappeared, and suddenly the government tried to argue the same paperwork could be justified another way. The judge didn’t buy it. And honestly, the way the gun groups set this up was borderline masterful. They beat the NFA at its own game.”
The Court’s injunction applies to “the plaintiffs and, where applicable, the plaintiffs’ agencies, political subdivisions, members, and customers—both current and future,” but does not take effect for 7 days “to allow the defendants to seek relief, if any, at the appellate level.”
The Jensen v. ATF plaintiffs included three individuals, Hot Shots Custom LLC, the Texas State Rifle Assoc., FPC Action Foundation, and the Citizens Committee for the Right to Keep and Bear Arms. NOTE: This Jensen Case had been consolidated with a similar legal challenge entitled Silencer Shop Foundation v. ATF, with plaintiffs Silencer Shop Foundation, Silencerco, Firearms Regulatory Accountability Coalition, Gun Owners Foundation, Gun Owners of America, Inc., Brady Wetz, B&T USA, and Palmetto State Armory.
The opinion was issued on August 5, 2026, in the U.S. District Court for the Northern District of Texas. READ Memorandum Opinion and ORDER.
Because Congress eliminated the NFA’s making and transfer taxes for most regulated firearms in 2025, the District Court held the Act’s remaining registration and recordkeeping mandates lack any valid constitutional foundation.
“This is a massive win and an important step forward in our strategic plan to end the NFA. We cannot wait to fully and finally eliminate this unconstitutional scheme so people can exercise their rights when, where, and how they choose.” — Brandon Combs, FPC President
This 12″ Bullseye Pistol Diagnostic Target helps improve handgun marksmanship. The target diagnoses common problems with one-handed shooting based on shot impact zones. While this target is designed for righties, left-handed shooters can use the target too. Just observe the opposite tips.
Do you know someone who wants to get started in pistol shooting? Here’s a helpful resource. The NRA now offers its Basics of Pistol Shooting Course in an online format. That makes it easy to cover the “classroom” phase of the course on your own time. The $60.00 online course includes 11 step-by-step lessons (to be followed by live range training). CLICK HERE to enroll in online Pistol Training Course.
Train Online, Then Register for a Range Session
For the NRA Basics of Pistol Shooting course, Phase 1 is conducted in an online environment, completed on your own time (cost is $60.00, non-refundable). After successfully completing the online exam, students can register for Phase 2, the instructor-led training session. Phase 2 is conducted at your local range with an NRA-Certified Instructor. NOTE: There will normally be an additional fee for Phase 2. You must successfully complete BOTH Phase 1 and Phase 2 in order to receive your NRA Basics of Pistol Shooting course certificate.
Designed and developed by experts to accommodate busy schedules, the web-based course takes a blended learning approach to firearms training with both online and physical components. Students have 90 days to work through 11 online lessons before registering for Phase 2, the NRA Certified Instructor-led phase at a local range.
“Thanks to our online courses and network of more than 125,000 NRA Certified Instructors, it has never been easier to learn basic firearm skills,” said Kyle Weaver, NRA General Operations Exec. Director. The NRA offers other online training courses at Onlinetraining.nra.org. Along with pistol course, these offerings include Rifle Training, Shotgun Training, a Range Safety Office (RSO) course, and a Range Development and Operations course.
Know someone getting started with handguns? Here is a useful video focusing on safety:
For today’s Saturday Movie showcase we present six videos with .22 LR rimfire ammunition testing. Most of the videos include a wide variety of ammunition types, from bargain ammo, to high-end .22 LR match ammo. If you want to learn more about the properties of .22 LR rimfire ammo, you’ll find a good .22 LR ammo analysis on the Widener’s Blog. That article discusses .22 LR Bullet Design/Stability, Primer Ignition, Velocity Consistency, and Quality Control. In addition, 100-yard test results are provided for five (5) ammo types: Norma Xtreme LR-22, SK Rifle Match, ELEY Match, Lapua Long Range, and CCI Standard.
Big .22 LR Rimfire Ammo Comparison Test
This Backfire Channel Video features an accuracy comparison test of 13 .22 LR ammo types from multiple manufacturers. This includes low-priced ammo, such as Aquila, as well as more costly match ammo from ELEY, Lapua, and SK. Various types of ammo were tested in an outdoor range with three different NRL22-suitable rifles with slightly different chamber specs. Take note — this was NOT a benchrest rifle test conducted indoors. The most accurate ammunition overall was Lapua Center-X. NOTE: Different ammo may shoot better or worse in different rimfire guns. For example a round that works in an Anschutz rifle may not be the best choice for a .22 LR revolver. But this review can help you get started in ammo selection.
Testing Rimfire Ammo at New Whidden Gunworks Test Center
Whidden Gunworks operates an impressiv Rimfire Test Center in Nashville, Georgia. In this video, long-range champion John Whidden shows the Whidden Gunworks test range developed with ELEY Ammunition. The facility features two testing lanes — one for testing ELEY ammo and a second for testing other brands. On the second test lane, customers can test Lapua, SK, Norma, and RWS. Testing on this lane occurs at 50 meters and 100 meters simultaneously, registering results for BOTH distances. For more info, visit Whiddengunworks.com/ammunition-testing.
CLICK HERE to schedule a test at the Whidden facility.
.22 LR Ammo Buyers Guide
The Pursuit of Accuracy YouTube Channel has 420 videos, nearly all involving .22 LR rimfire rifles. The host tests different ammo in a variety of rimfire rifles. In this particular video, the host explains the key considerations in selecting .22 LR ammunition — how to choose the most cost-effective ammo for your rimfire rifle and discipline. You don’t need $14/box ammo to hit large steel plates at 20 yards. But you do need very consistent high-quality ammo for .22 LR Rimfire ELR Matches.
Testing Lapua Long Range Ammo at 400 Yards
With the emergence of long-range .22 LR rimfire matches, with targets at 100, 200, and 300 yards, the long-range capabilities of .22 LR have been pushed to the limits in recent years. In 2023 Lapua announced two new .22 LR rimfire ammo types — Long Range and Super Long Range. These are both specifically designed to optimize .22 LR performance past 100 yards. In this video, Gavin Gear of UltimateReloader.com tests the new Lapua ammo types on his range, with steel targets placed at 400 yards.
Subsonic vs. Supersonic .22 LR Ammunition
Here is another Pursuit of Accuracy Channel .22 LR ammo test. This specifically compares the performance of supersonic ammunition vs. subsonic ammo. What offers better accuracy? What is the best option for long range? The video addresses these questions.
Cheap .22 LR Ammo Tested with a $4000 Custom Rifle
Can relatively inexpensive ammo shoot well in $4000 rimfire rifle? This Midwest Long Range video seeks to answer that question. The results are interesting, with some surprisingly good results with CCI (8:03 time-mark) and Fiocchi (11:25 time-mark) Standard Velocity ammo. If you’re shooting NRL22 or PRS Rimfire matches on a tight budget, this video may steer you to some accurate yet affordable ammo options.
BONUS — Rimfire Ammunition Test with 31 Types
If watching today’s showcased videos has wet your appetite for .22 LR ammo comparison testing — here’s a “must-read” related article. The October 2018 issue of Shooting Sports USA (SSUSA) includes a great article with data on thirty-one (31) different types of popular .22 LR rimfire ammunition. The line-up includes low-speed, standard, and Hi-Velocity types, plus choices for plinking, varminting, and target applications. Brands tested include: Aguila, American Eagle, CCI, Federal, Fiocchi, Lapua, Remington, and Winchester. The ammo types ranged in speed from 727 FPS to 1735 FPS.
For each ammo type, SSUSA lists the bullet weight, velocity (FPS), and average of two, 5-shot groups at fifty yards. The most accurate ammo was Lapua Center-X LRN, with a 0.37″ average 50-yard group size. Second best was Lapua X-ACT LRN at 0.42″. Ammo was tested from a bench with a Cooper Model 57-M rifle fitted with 3-9x33mm Leupold VX-2 scope. The ammo offerings were grouped into three categories: (1) Varmints/Small Game; (2) Target; and (3) Plinking.
August is National Shooting Sports Month, a time when many new shooters are introduced to the fun of rifle, shotgun, and pistol shooting. To help serve America’s many new gun owners, Winchester offers an online information site for first-time ammunition and firearms buyers as well as those just getting started in the shooting sports and hunting. Winchester’s New Shooters Site has many helpful articles plus a series of informative videos.
Winchester’s New Shooters Site also links to the NSSF’s WHERE-To-SHOOT Resource, the internet’s most comprehensive listing of gun ranges. The Where-to-Shoot section makes finding a local range easy. Simply input your location and max desired distance, and the site will generate a list of nearby indoor and outdoor ranges with a Google map.


 The barrel is a Bartlein 5R 300×308 Light Palma taper. Chad Heckler of 5×5 Precision chambered this barrel for me. I recently troll-posted some bore pics on Facebook of this barrel at about 750 rounds. I work at Manson Reamers primarily as a chamber designer and tech support role and get to hear many stories about chambers and barrels. I think a lot of people really misjudge what they are seeing with borescopes causing a lot of worry and anxiety. The real measure of a target rifle is how it performs in competition.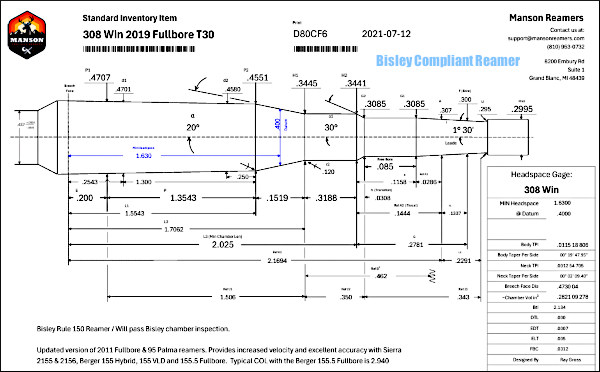
 Ray’s shooting career began early in life hunting with his Dad. He began competing in NRA matches in 1991 as a Service Rifle shooter and earned a place on the Michigan Rifle team in 1993 and 1994. He earned his Distinguished Rifleman’s Badge in 1995 and began competing in the Palma class that year.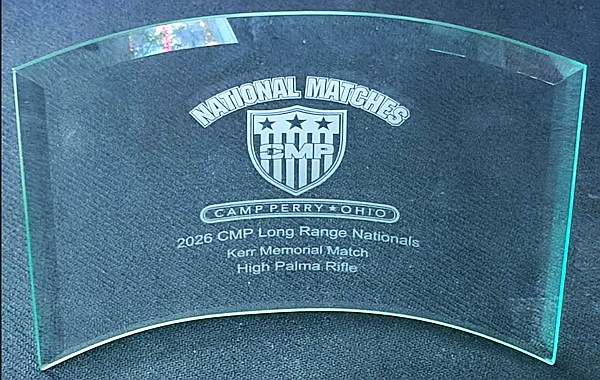


 TIP ONE — Adjusting Tension
 TIP TWO — Polish and Tune for Easy Case Removal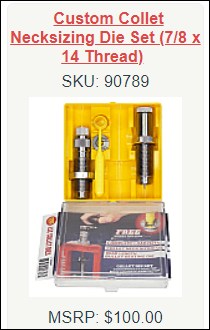



 The Court’s injunction applies to “the plaintiffs and, where applicable, the plaintiffs’ agencies, political subdivisions, members, and customers—both current and future,” but does not take effect for 7 days “to allow the defendants to seek relief, if any, at the appellate level.”


