Barrel nut system allows “Pre-Fit” barrel installation on a Remington action. CLICK photo to zoom.
REMAGE Project Report by Bill, Rifleshooter.com Editor
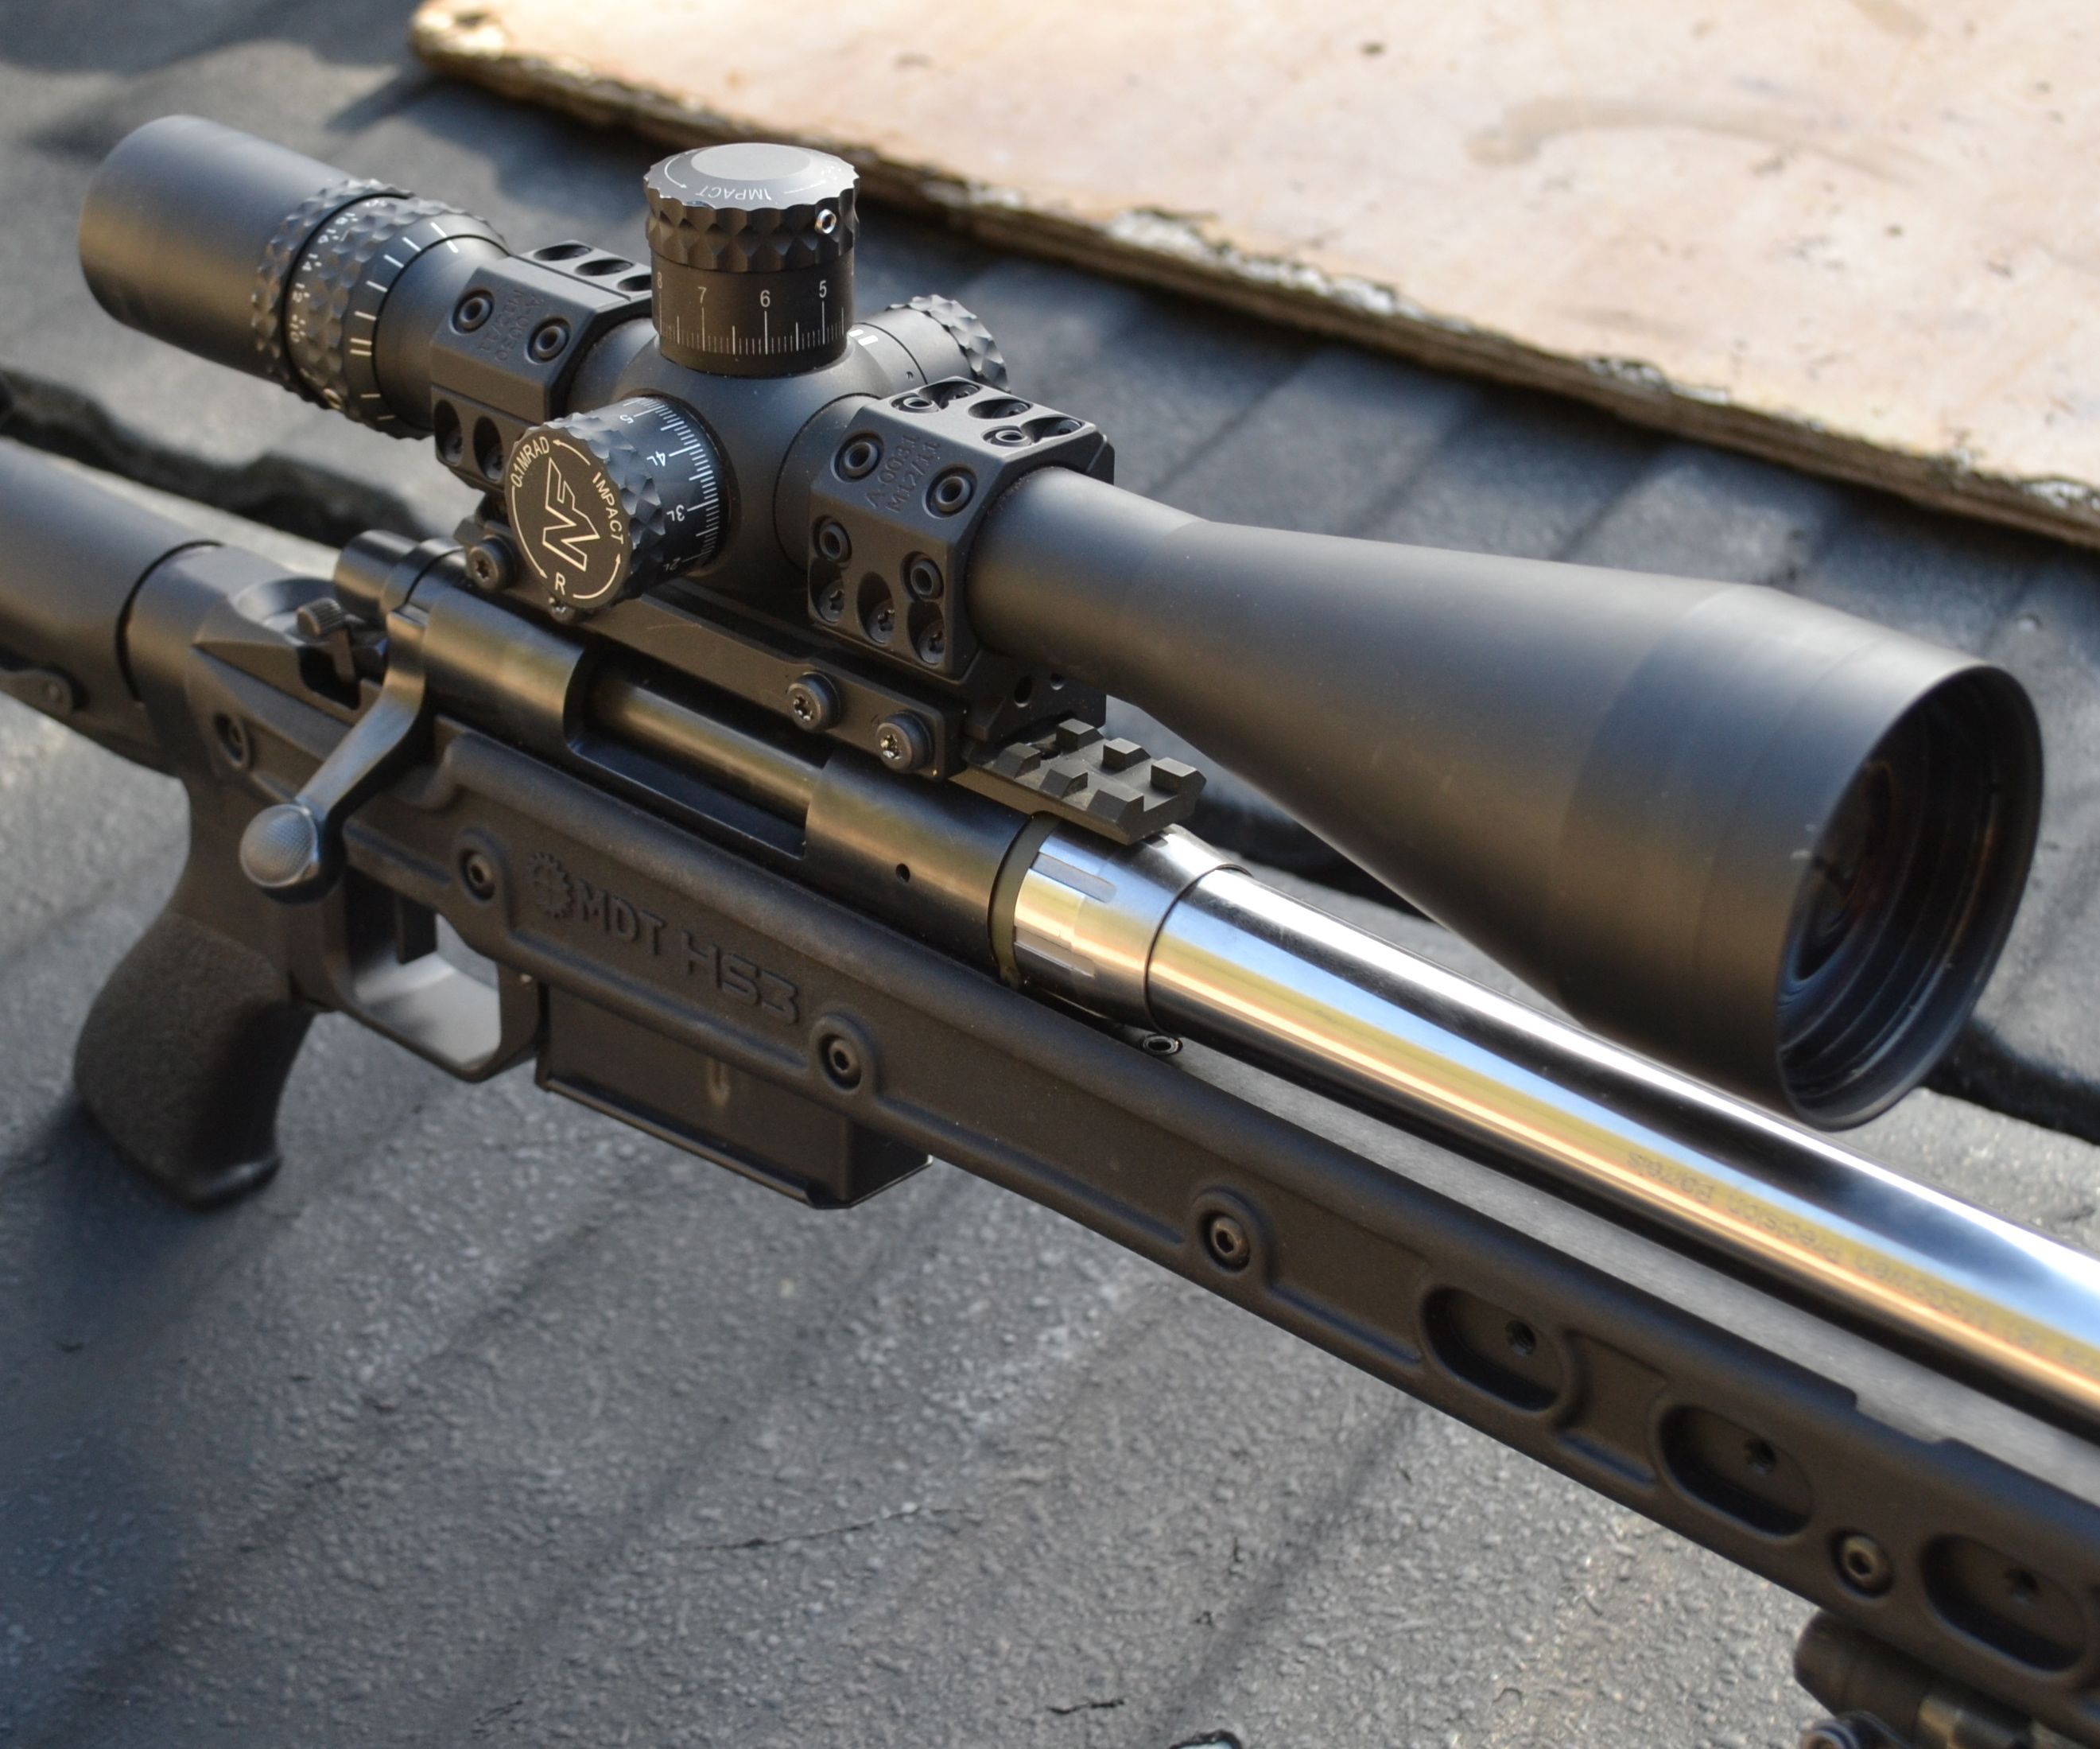
Installing a new barrel on your Remington 700 (especially without a lathe) may seem like a daunting task, but thanks to companies like McGowen Precision Barrels, there are easier alternatives. By adopting a Savage-style barrel nut on a 1 1/16″ thread for a Remington 700 receiver, pre-chambered (aka “pre-fit”) barrels can be easily swapped with just a few hand tools. This system is sometimes called a REMAGE conversion (for “REMington savAGE”). With simple tools a “Pre-fit” 6mmBR-chambered barrel was installed on the author’s Remington action — no machining or lathe-work required.
The existing barrel is simply removed from the action (normally the hardest part) and the new barrel is screwed on with the Go Gauge in place. After headspace is verified with the Go Gauge, the barrel nut is tightened against the action and you are off to the range. It takes all of the machine work out of the barreling process.
Note: Because barrel nut has a slightly larger diameter, some stocks may require minor inletting. Also, if you are shooting fired brass from another rifle with the same chambering, you should FL-size the brass before loading it for your new pre-fit barrel. And always check the set-up with a dummy round loaded to normal cartridge length BEFORE you head to the range. With Pre-Fits, the freebore should be adequate for your cartridge, but always check and adjust your seating depth as needed.
Bill has been a serious shooter for over 20 years. A former Marine Corps Sergeant, he’s competed and placed in High Power Rifle, ISPC, USPSA, IDPA, 3-Gun, F-Class, and precision rifle disciplines. In addition to being an NRA-certified firearms instructor and range officer, Bill has hunted big game in North America, South America, and Africa. Bill writes extensively about gunsmithing, precision rifles, and the shooting sports on his blog, Rifleshooter.com.
If you are in the market for a new handgun of any type, you should check out a recent product summary from Shooting Illustrated magazine. The SI staffers have compiled an illustrated list of 63 new handguns released in 2018. There are big guns and small, semi-autos and revolvers. Each entry includes a photo with graphics showing the handgun’s notable features. The list includes some “pistols” that really look like rifles because they have a short stock for use as a “fore-arm brace” (wink-wink).
There is a good selection of carry pistols, small revolvers, and long-barreled target pistols. For each “handgun”, there is a descriptive paragraph plus a table listing: Caliber, Magazine Capacity, Barrel Length, OAL, Weight, and MSRP.
Here is one of our favorite new handguns, a 9mm Heckler & Koch VP9 with built-in Crimson Trace laser. We’ve owned multiple H&Ks and they have all been very accurate.
Shooting Illustrated’s Complete List of New-for-2018 Handguns:
Alchemy Custom Weaponry Brimstone
American Tactical FXH Hybrid
Arex Rex Alpha
Arex Rex Zero 1 Tactical Compact
Bersa TPR9C
Cabot Guns Gentleman’s Carry
Cabot Guns Icon Government Model
Canik TP9SA Mod 2
Century Int’l Arms C39v2 Pistol, Shockwave Brace
Century Int’l Arms Draco NAK9
Charles Daly 1911 Superior Grade
Charter Arms Bulldog pistol
Charter Arms Chic Lady Magenta
Charter Arms Undercover
Chiappa Firearms Rhino 30DS OD Green
CMMG Inc. Banshee
Colt Custom Competition Pistol
Colt Night Cobra
Coonan MOT 10 Compensated
CZ-USA P-10C Urban Grey Suppressor-Ready
CZ-USA Scorpion EVO 3 S1 Pistol, Folding Brace
Daniel Defense DDM4V7 P
European American Armory Witness P Match Pro
FN America FN 15 Pistol
Glock G19X
Glock Gen5 G26
Grand Power Q1S
Grand Power Stribog
Heckler & Koch VP9 with Crimson Trace Laserguard
Heckler & Koch VP9SK in NATO Green
Honor Defense Captain America Honor Guard
Kahr ST9
Kimber K6s CDP
Kimber KHX Pro (OR)
Kimber Micro 9 Desert Night (DN)
Les Baer Thunder Ranch 25th Ann. Ltd. Ed.
Magnum Research Mark XIX L5
MG Arms Wraithe 1911
Nigthawk Custom Custom Agent 2
Nighthawk Custom Chairman
Nighthawk Custom Lady Hawk 2.0
PTR Industries 9CT
Remington R1 1911 Ultralight Executive Pistol
Remington RP45
Roberts Defense Rogue 1911
Rock River Arms 1911 Poly 4.25″
Ruger EC9s
Ruger GP100
Ruger Security-9
SAR USA SAR 9
SIG Sauer P226 Legion SAO RX
SIG Sauer P365
Smith & Wesson M&P380 Shield EZ
Smith & Wesson M&P9 Threaded Barrel
Springfield Armory 911
Springfield Armory Saint Pistol
Springfield Armory XD-E 45
Springfield Armory XD-S Mod.2
Taurus 692
Taurus 856
Taurus 1911 Commander
Walther PPQ SC
Walther PPS M2
Shooting Illustrated notes: “Handguns are some of the hottest-selling firearms in today’s market, with concealed-carry guns leading the way as more citizens arm themselves against potential threats. However, micro-sized pistols aren’t the only new releases out for this year. Manufacturers have added dozens of new guns of many styles and designs, all built for different purposes. Is your next buy on our comprehensive list?” See all the new handguns released in 2018 in THIS FEATURE ARTICLE.
Field Test and Review by Colton Reid
For years my “go-to” optic for hunting mule deer has been a high-quality set of Swarovski porro prism binoculars. They offer a sharp image, good low light performance, and were about half the price of a comparable roof prism design. I also carry a small, handheld laser rangefinder in my pocket while hiking. This setup has been “good enough” for a long time despite the inconvenience of separate optics and having to scramble for the rangefinder every time I spotted a buck.
But as I get older this setup becomes less favorable and my reasons for upgrading to binoculars with rangefinding capability are outweighing my reasons against. Accordingly, I decided to test if rangefinder (RF) binoculars could really deliver an improvement over separate binoculars and LRF. Fortunately, AccurateShooter.com acquired a new Zeiss Victory 10×42 RF and let me field test it. This is a premium unit, with a premium price tag. The 10×42 Victory RF currently sells for $3399.99.
First impressions were good. The Victory RF employs an Abbe-Koenig roof prism with a comfortable-to-hold black body that has a padded soft-touch surface. The Victory RF is marginally heavier than my older porro prism binocs. The central focus wheel is large, easy to turn, and is positioned to allow index and middle fingers to simultaneously work the focus wheel and rangefinder.
Great Glass with Excellent Low-Light Performance
Diopter adjustment was a bit more complicated due to the built-in rangefinder display, but once set didn’t require further adjustment. When all knobs were adjusted, optical performance was excellent. Compared with my tried and true Swarovski Habicht 10×40 porro prism binoculars, the Zeiss Victory RF exhibited an equally sharp image that was also brighter in the fading daylight. Additionally, the Victory RF had a narrower depth of field than the old Swaro porro. This produced a noticeable “3D” effect that helped the target pop out of its surroundings. The optics alone make the Victory RF an excellent product, but the Victory RF’s built-in rangefinder made these binoculars truly exceptional.
Testing the Victory RF Laser Rangefinder Capability
Having rangefinder functionality inside quality optics was remarkably convenient. This allowed spotting and ranging targets without having to re-acquire an image using separate optics. It also ensured that the image for ranging was the same magnification and quality as the binoculars. Beyond just convenience, the Victory’s ranging capability was superb.
During one testing session at dusk, distances out to an astonishing 2600 yards could be repeatedly measured. To dispel my skepticism I verified all ranges with Google Earth (Google earth image + range image). Ranging game-sized objects beyond 800 yards required a stable surface (or tripod) to hold the red dot on target. However, the rangefinder had no problem ranging trees or large boulders at longer distances by hand. Measurement to measurement variation was within about 5 yards, which is likely due to movement from the user, especially at long distances.
In most outdoor environments I’ve hunted, ranging nearby vegetation or rocks gives enough accuracy in distance to obtain a satisfactory ballistic solution. In my experience, the vast majority of hunters are taking their shots inside 300 yards. At that distance or closer, hand-holding the Victory RF works well. For shots that exceed 300 yards, where bullet drop is a concern for hunters, the rangefinder is able to incorporate ballistics profiles from the Zeiss Hunting App running on a smart-phone, and deliver a precise ballistic solution visible IN the binoculars.
[Editor: Press a button and right in the glass you can see the calculated elevation correction in inches or cm, with clicks in MILS or MOA. A Long-Range Only video review confirmed how well this works: “The sync was almost immediate. Gives you custom drop right in your binoculars, with one push of a button.” The Zeiss RF also calculates true horizontal distance for angled shots.]
The Victory RF was able to range larger objects at 2000 yards and beyond with the unit placed on tripod or solid support. In the example above, the Victory RF was targeted on a specific object on a ridge over one mile away. The Victory RF’s 1928-yard read-out was confirmed with a Google Earth GPS trace.
Smart RF Binoculars with Built-in Ballistics Solver
Customized ballistics data can be transferred to the Victory HF’s display via a Bluetooth connection with the Zeiss Hunting Application*.
The Zeiss Hunting App deserves its own full review. But I can say the interface is clean, minimal, and FREE. There is much to be desired from the notes section, but the Ballistics Calculator makes it one of the better hunting apps I’ve used. Because ballistics data can be transferred to the rangefinder display, the App is a “must-have” accessory for the Victory RF.
KEY FEATURES: Ballistics Solver, GPS Tagging, Weather Forecast, Field Notes with Photos
Comments on Zeiss Victory RF
Despite the Victory RF’s excellent optics and impressive ranging performance, there is some room for improvement in this product. The red rangefinder display proved difficult to see against a tan/brown backdrop during bright daylight hours. Also I noted that, if you look away from the center of the field of view, the read-out seems to dim. At full LED brightness the red dot target was always visible but still showed a tendency to blend in with a tan backdrop. [Editor: The Zeiss RF does offer 11 brightness curves, and the manufacturer notes the unit features an automatic brightness control.]
Setting the dual eyepiece diopters was also a bit more complex than a single diopter system. The “trick” was to first focus the rangefinder display using the right diopter wheel. After that the central wheel and left diopter could be focused as needed. The accompanying neck strap and binocular case were well made and may work well for birding or nature hikes, but would not be preferred for hunting. When performing extreme physical activity, a shoulder harness or chest pack carrying case such the Badlands Bino X (shown below) is needed for support and fast extraction.
CONCLUSION — Superb Binoculars with Outstanding Rangefinding Capability
All together the Victory 10×42 RF is one of the finest binoculars I have had the pleasure of using. The crisp image coupled with a reliable long-distance rangefinder gave me the confidence to spot and stalk game over a mile away. As a hunter who spends 70% of his time behind optics I am convinced that with the Victory RF my ability to observe and plan in the field has dramatically improved. And with a little bit of care, these binoculars will be a reliable field favorite for years to come.
Zeiss Victory RF Binoculars Features:
– Laser Ranging capability from 16 to 2,500 yards
– On-board B.I.S. II ballistic calculator with integrated sensors
– Custom ballistics input via smartphone or tablet
– Bluetooth connectivity
– Holds custom ballistic profiles
– Measures angle, temperature, and air pressure
– Calculates equivalent horizontal distance
– Displays holdover in inches/cm, MOA, MIL and clicks
– Features Scan and Target modes
– Automatic LED brightness adjustment (11 brightness curves)
– User-Programmable ontrol buttons and display
– One-touch ranging (right or left hand)
– Syncs personal settings and ballistic profiles to and from the RF
– Large focusing wheel for minimal rotation
– FL glass, ZEISS T and LotuTec® coatings
About the Author, Colton Reid, Ph.D.
Colton Reid is a hunter and outdoorsman, who is also an optics expert. A Ph.D. engineer in the high-tech industry, Colton works with high-resolution electro-optical measuring devices for microchips. Raised in Colorado, Colton’s favorite activity is a backcountry hunting adventure. AccurateShooter.com is fortunate to have Colton review optics products.
* The Zeiss Hunting App integrates many useful features — ballistics solver, compass, GPS tagging, hunt history. The “Field Notes” function can record a wide variety of info — save photos, record shots and hits, log animal sightings, and even plot game locations on a map. Shots can be tagged via GPS through the shooter’s and the target’s position, and then displayed on a map. The Field Notes hunt diary shows all entries in chronological order.
From the late ’70s through 1983, a huge, concrete-walled warehouse in Houston was used for benchrest testing. Virgil King and Bob Fisher set up a bullet-catching backstop at the end of a 30-yard-wide, 325-yard-long fire lane that remained unobstructed even when the warehouse was in use. This allowed accuracy tests in virtually perfect “no wind” conditions. Over a six-year period, about 30 shooters were invited to test their rifles. The results were amazing, with numerous “zero groups” being shot in the facility. Many of the lessons learned in the legendary Houston Warehouse still help benchresters achieve better accuracy today.
Dave Scott explains why the Warehouse was so unique:
“Over a period of six years, the levels of accuracy achieved in the Houston Warehouse went beyond what many precision shooters thought possible for lightweight rifles shot from sandbags and aimed shot-to-shot by human eye. For the first time, a handful of gifted, serious experimenters — armed with the very best performing rifles (with notable exceptions) — could boldly venture into the final frontiers of rifle accuracy, a journey made possible by eliminating the baffling uncertainties of conditions arising from wind and mirage. Under these steel skies, a shooter could, without question, confirm the absolute limits of accuracy of his rifle, or isolate the source of a problem. In the flawlessly stable containment of the Houston Warehouse … a very few exceptional rifles would display the real stuff, drilling repeated groups measuring well below the unbelievably tiny .100″ barrier. The bulk of rifles, however, embarrassed their owners.”
Scott’s article also reveals some interesting technical points: “One thing that IS important is that the bullet be precisely seated against the lands. T.J. Jackson reported this fact in the May 1987 issue of Precision Shooting. In a letter to the Editor, T.J. wrote, ‘…in all our testing in that Houston warehouse… and the dozens and dozens of groups that Virgil King shot in there ‘in the zeroes’… he NEVER fired a single official screamer group when he was ‘jumping’ bullets. All his best groups were always seated into the lands, or at the very least… touching the lands. Virgil said his practice was to seat the bullets so the engraving was half as long as the width of the lands. He noticed an interesting phenomenon with rifles that could really shoot: if the bullets were seated a little short and the powder charge was a bit on the light side, the groups formed vertically. As he seated the bullets farther out and increased the powder charge, the groups finally became horizontal. If he went still farther, the groups formed big globs. He said the trick is to find the midway point between vertical and horizontal. That point should be a small hole.”
You should definitely read the complete article, as it provides many more fascinating insights, including shooting technique, barrel cleaning, neck-turning, and case prep.
Have you ever expanded a .22 or 6mm cartridge all the way up to .30-caliber? If so, you know this can be a difficult procedure that stresses the case necks and neck-shoulder junction. A significant neck-size expansion done in one big jump can increase run-out, cause doughnuts, or worse yet, even split the brass. Therefore you want to proceed in increments, increasing the neck diameter in stages. One smart way to do that is to use a Progressive Press. This article explains how…
The most successful short-range brenchrest-for-score cartridge is the 30 BR. That cartridge, as well as 30 BR variants such as the 30 BRX, all start with the 6mmBR Norma parent cartridge, typically with Lapua 6mmBR brass. To get a nice 30 BR case you want to expand in stages, increasing the inside neck diameter incrementally from .243 to .308.
Darrell Jones of DJ’s Brass Service creates thousands of 30 BR cases each year. He has found a clever way to speed up the process — Darrell uses a Progressive Press. He runs his 6BR brass through four (4) separate Hornady neck-sizing dies with expander mandrels. First there is a .257 die, followed by .264 (6.5mm), .284 (7mm), and then .308. Then a fifth and final K&M die provides one last, slight expansion so the newly-fashioned 30 BR cases perfectly fit the arbor of Darrell’s neck-turning tool.
So to repeat, the case starts as .243 (6mm), then moves in up stages .257, .264, .284, and .308, with a final “finishing” step prior to neck-turning. You can see the expansion in this video, which starts with 6mmBR brass that was first hydro-formed to 6 BRX:
Watch 6mm Cases Expanded to 30-Caliber (6BRX to 30 BRX)
For this demo video, Darrell expands just one case at a time. However, he can also put multiple cases in the progressive — one per station. This takes a little more effort, Darrell says, but the results are still excellent. Darrell tells us: “I do put multiple cases in the progressive to save time. The results are the same — I just wanted to show a single-step process and how it reduces run-out by not stressing the shoulder with one big expansion from 6mm straight to 30 caliber. Doing the operation in multiple stages avoids binds and helps keep the shoulders concentric.”
This same multi-stage procedure can be use to expand other cartridge types. For example you could take .221 Fireball brass in stages up to .308 to create 300 Blackout brass.
Darrell uses caliber-specific, Hornady neck-sizing-only dies with elliptical expanders. Darrell tells us: “The Hornady elliptical expander has a reduced bearing surface that puts less strain on the brass when expanding the necks to the next size.” The fitting at the bottom of the die is the Lock-N-Load die bushing that allows fast die changes.
These particular cases used in the video were first hydro-formed to 6BRX then expanded to 30 BRX before neck turning. DJ’s Brass offers hydro-forming for many popular wildcat cartridges such as 6 PPC, 6mm Dasher, and .284 Shehane.
Many of the nation’s top 100/200-yard Benchrest Shooters came to central Pennsylvania this month for the IBS Group Nationals, held August 13-18 at the Union County Sportsmen’s Club. This major event encompassed six days of shooting, making this one of the lengthiest benchrest matches of the year. There were nearly 90 registered competitors, plus competitors’ spouses and kids were able to shoot in a fun match on Wednesday afternoon. This is a prestigious match — with National titles up for grabs in four classes: Sporter, Light Varmint, Heavy Varmint, and Heavy Bench. CLICK HERE for Full Results.
IBS Group Benchrest Nationals 2018
Report by Jeff Stover, IBS President The Range and Conditions
This year’s venue was a return to one of the premier benchrest rifle ranges in the country. Union County Sportsmen’s Club is located near the center of Pennsylvania. It gets its name from the nearby village of Weikert. The range faces east, not ideal, but that is what the topography dealt the club. This week of competition had the usual prevailing conditions: mostly from the west, meaning from 4 o’clock to 8 o’clock. A switch green to orange and back again, with changing velocities. Sometimes readable. Many times, however, conditions are confounding.
The Course of Fire
The IBS Group Nationals event is a bit of an endurance test as it spans six days for those shooting. The sequence of competition groups has 100-yard targets shot the first three days followed by three days at 200 yards. It is done this way to require only one change of wind flags. Nationals competition requires “full rotation”. That means that every time a shooter goes to the line for the next match target, he or she must move a requisite number of benches to the right. At the end of the day a shooter will shoot across the full width of the line. Some ranges offer unique properties that render some parts of the range harder or easier to shoot small groups. Bench rotation is important to even out those factors.
Hall of Famer Jeff Gaidos taking aim. Note both eyes are open. Jeff picked up two more HOF points at Weikert this year.
Light Varmint, Heavy Varmint, Sporter, and Heavy Bench Equipment
It takes thirty targets of five shots each and ten targets of 10-shot groups to win a “4 Gun Nationals”. That would be the classes of Light Varmint, Heavy Varmint, Sporter, and Heavy Bench. For all practical purposes, the first three are known as “bag guns” while the Heavy Bench rifles are “rail guns”. In fact, most competitors shooting a bag gun opt for a single rifle, which has been the benchrest standard for decades: a 10.5-pound rifle chambered in 6 PPC.
Peinhardt Wins 2-Gun & 3-Gun, Costa Wins 4-Gun, and Mitchell Smashes HB Record
Jeff Peinhardt won the 2-Gun and 3-Gun to dominate the “bag guns” (Light Varmint, Heavy Varmint, and Sporter). Larry Costa won the 4-Gun, with the top combined Agg for all four classes. Paul Mitchell turned in the notable railgun performance in the Heavy Bench division. Mitchell posted a 200-yard Agg of 0.1687 MOA. That should smash the old record of .2224 MOA set by Ed Watson way back in 1990! Note those figures are for MOA at 200 yards. Mitchell’s average 10-shot group size was 0.3374” (MOA x 2). That is only slightly larger than the Aggregate record for 5-shot groups with a rail gun. Mitchell said his rail has a superb Krieger barrel: “My rail gun was originally built by Bud Welch in the early ’90s. I took about ten years off from shooting from the late ’90s until 2008. When I got back I had Bruce LaChapelle take the action out of a sleeve and clamp the barrel in a Delrin sleeve. Dwight Scott chambered this Krieger barrel in January of 2017 and let me know that he thought it could be one of the hummers we all dream of and don’t waste it. This is the fourth 10-Shot teen Agg I have shot with it. It will be a sad day when it’s shot out!”
Click links below for Day-by-Day Results. Complete results may be found at the IBS Match Report Page.
Multi-Gun Results:
There are awards for combined results in multiple classes. Jeff Peinhardt won the both the 2-Gun (HV-LV) and 3-Gun (LV-HV-SP). Long time top shooter Larry Costa won the overall 4-Gun. Both Costa and Wayne Campbell (4-gun runner-up) are Hall of Famers. 4-Gun 3rd-place finisher Hugh Williamson, a Canadian, is also a barrel-maker.
The 3-Gun Top Three (from left): Jeff Peinhardt, Larry Costa, and Ronald Burdick:
IBS Score Benchrest Nationals Multi-Gun Results
2-Gun Top Three
3-Gun Top Three
4-Gun Top Three
1. Jeff Peinhardt
2. Ronald Burdick
3. Larry Costa
.2104
.2138
.2148
1. Jeff Peinhardt
2. Larry Costa
3. Ronald Burdick
.2035
.2040
.2164
1. Larry Costa
2. Wayne Campbell
3. Hugh Williamson
.2191
.2238
.2331
On Wednesday Afternoon first timers/novices (including spouses and children) were allowed to shot a group with the assistance of a coach. Here is PowderPuff winner Dena Wise with Coach David Halblom. Note Dena’s impressive 0.148 group. Dena is sister to Dale and Russ Boop.
Benchrest State of the Art — Equipment
Want to know what the Top Guns were shooting at Weikert? Here is a complete Top Ten Equipment list for all four classes: Sporter, LV, HV, and Heavy Bench (Railgun):
Thanks to the Hard Working Team at Weikert
The IBS is indebted to Nancy Scarbrough who did a fabulous job as match director. Mark Trutt, once again, devoted a full week as range officer and getting the range and grounds ready. The target crew was very efficient under the experienced direction of Steve Dodge.
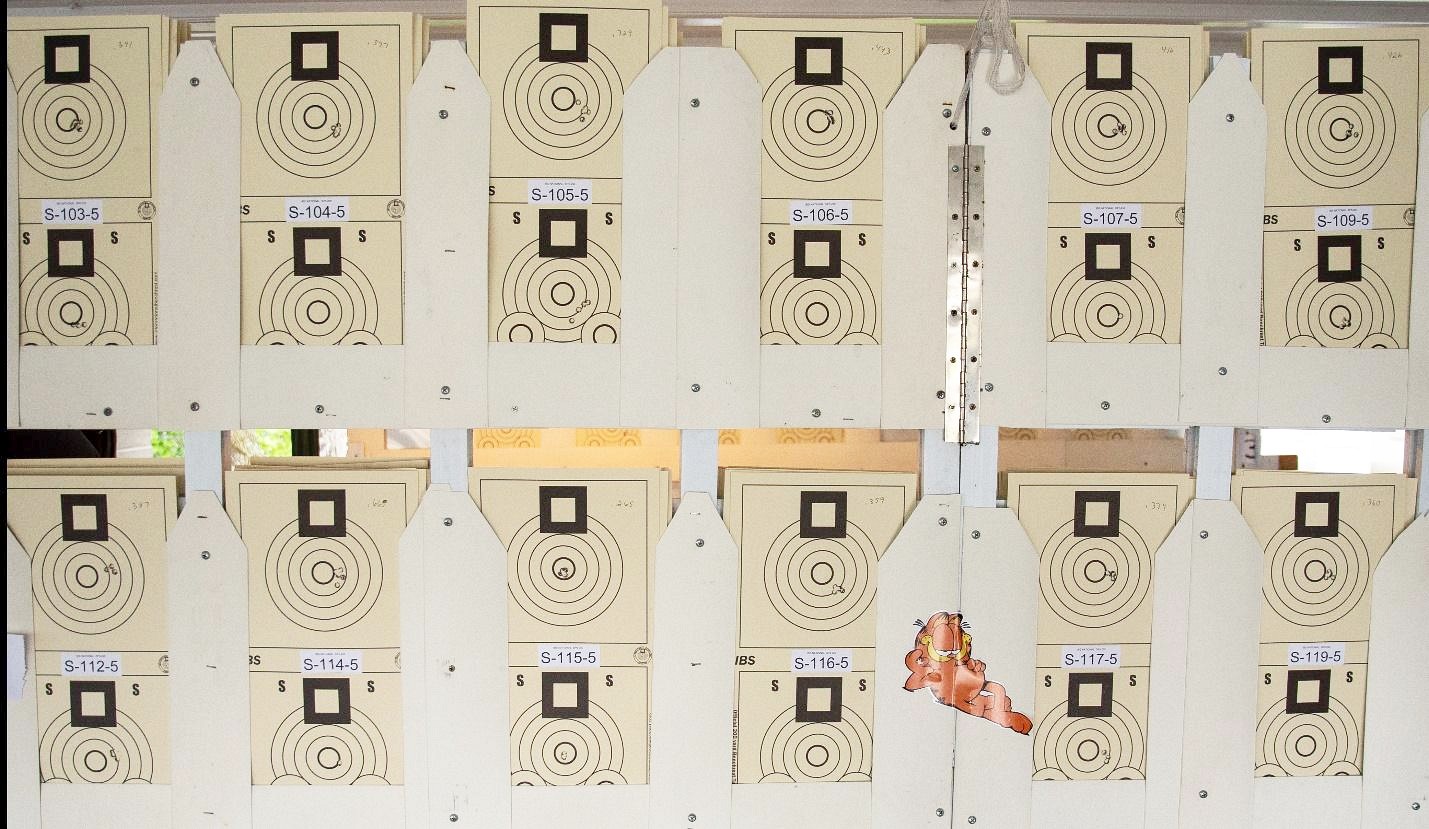
Target Analysis from the “Wailing Wall”
This photo shows 200-yard targets for one of the relays in the Sporter Class (10.5-lb riles, all 6 PPC). At the match, the scored, 5-shot targets are put up on a board, euphemistically called the “Wailing Wall”. These groups are revealing. Note that almost all the groups are located below and to the right of the moth ball (the 10 Ring in the center). The second set of target rings denoted by an “S” are for sighters, and are not scored.
Click photo to view large image
These targets were shot in a left to right drift (flags showing GREEN due to convention) drift. The targets show that most of the shooters sighted in during dead calm with point of impact at or below the 10 ring (mothball) for easier holding. So in a “green” condition the groups will move to the right of dead calm. These targets also demonstrate what modern benchrest bag guns can do at 200 yards! Some of those would be 100-yard ‘wallet groups’ for non-benchrest shooters. Remember these are 10.5-lb rifles, not heavy, “unlimited” rail guns. Mighty impressive precision.
IBS Shooter Profile — Bill Brawand
by Jeff Stover There are few “characters” left in the benchrest world, but Bill Brawand is one of them. He is still competing at age 84. He started in the game way back in 1973 and has been a stalwart on both the IBS and NBRSA circuits ever since.
He grew up on a dairy farm in north central PA near the town Wilcox. In the early days he earned $100 per week. That was not near enough to support a family and a competitive benchrest habit. That was one reason he got into bullet making. If he wanted to attend a match he had to do extra farm and dairy work to justify being gone for a weekend. Those chores were in addition to making bullets to both shoot and sell. He has worked hard his entire life and earned everything he has achieved.
Some time ago, oil and gas were discovered on the large Brawand farm. With production underway, many years ago the dairy was closed so Bill could focus on real estate and managing his wells. The oil/gas boom resulted in a dramatic change in his economic fortunes but Bill did not change at all. Before he finally got a small RV, he was known to sleep on a clubhouse couch.
Benchrest is now a family affair for Bill. One of Bill’s daughters, Sam, usually meets him at the shoots to assist him as needed. His knee problems keep him in a motorized scooter to get around the range. Sam memorialized Bill’s shooting accomplishments by sewing his many patches earned in shooting onto both a quilt and his shooting jacket (above). Check it out — that represents many decades of trigger pulling!
Hunting season is around the corner. We know many readers will be zeroing their hunting rigs in the next few weeks. Here is a very simple but effective way to zero any scoped rifle in a few minutes, with just four shots.
Follow this simple procedure to get a solid zero for a hunting rifle in just four shots. Of course you probably want to fire a few more rounds to confirm your zero before you head off to your hunting grounds, but this will let you get on-target with a minimum amount of time and ammo expended. (This assumes your scope is securely mounted, and the bases are not drastically out of alignment.)
QUICK-TIP: The Key to this procedure is Dialing to Shot One Point of Impact (POI). Re-aim at center of target after SHOT ONE. Then with the rifle motionless, use the turrets to put the middle of the cross-hair on the first shot location.
1. First, remove the bolt and boresight the rifle. Adjust the position of the rifle so that, looking through the bore, you can see the center of the target with your eyes. Secure the rifle in the rests to maintain its position as boresighted. Then, without moving the rifle, center the reticle. That should get you on paper. With the rifle solidly secured in front and rear rests or sandbags, aim at the center of a target placed at your zeroing distance (50 or 100 yards). Confirm there are no obstructions in the barrel! Then load and fire SHOT ONE. Then, return the gun to the exact position it was when you pulled the trigger, with the cross-hair centered on the target as before.
2. Locate, in the scope, where your first bullet landed on the target. Now, while you grip the rifle firmly so it doesn’t move, have a friend adjust the turrets on your scope. While you look through the scope, have your friend turn the windage and elevation turrets until the cross-hairs, as viewed through the scope, bisect the first bullet hole on the target. In other words, use the turrets to move the center of the reticle to the actual position of shot number one. IMPORTANT: Dial the crosshairs to the hole — don’t move the rifle.
3. After you’ve adjusted the turrets, now re-aim the rifle so the cross-hairs are, once again, positioned on the target center. Keep the rifle firmly supported by your rest or sandbag. Take the SECOND SHOT. You should find that the bullet now strikes in the center of the target.
4. Take a THIRD SHOT with the cross-hairs aligned in the center of the target to confirm your zero. Make minor modifications to the windage and elevation as necessary.
5. Finally, shoot the rifle from a field rest (shooting sticks, bipod, or rucksack) as you would use when actually hunting. Confirm, with SHOT FOUR, that your zero is unchanged. You may need to make slight adjustments. Some rifles, particularly those with flexy fore-arms, exhibit a different POI (point of impact) when fired from a bipod or ruck vs. a sandbag rest.
If you recently cleaned your rifle, you may want to fire two or three fouling shots before you start this procedure. But keep in mind that you want to duplicate the typical cold bore conditions that you’ll experience during the hunt. If you set your zero after three fouling shots, then make sure the bore is in a similar condition when you actually go out hunting.
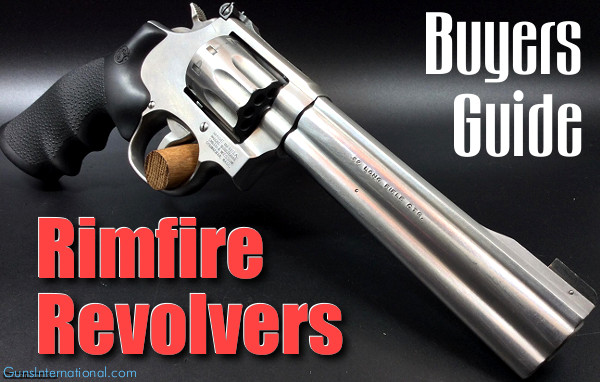
Don’t own a quality .22 LR wheelgun yet? Well start saving those pennies. Every serious gun aficionado should have a quality rimfire revolver. A rimfire wheelgun is also very good choice for a first handgun. Indeed, a strong argument could be made that a .22 LR revolver is THE best choice for a new shooter’s first handgun. A .22 LR revolver is easy to shoot, easy to maintain, and will last a lifetime. Once you have mastered the basics of shooting with a .22 LR, you can move on to larger caliber handguns suitable for self-defense.
TOP FIVE Reasons to Own a Rimfire Revolver:
1. Rimfire .22 LR Ammunition is cheap, and now plentiful again.
2. A good, full-size .22 LR revolver will be MORE ACCURATE than the vast majority of semi-auto rimfire handguns. With no magazines to jam, a good wheelgun will also be more reliable than most self-loading rimfires.
3. A rimfire revolver can shoot tens of thousands of rounds, with just routine maintenance. This gun can last a lifetime and then you can pass it on to your kids.
4. On a S&W revolver, it is very easy to tune the pull weight. You can have a safe double-action pull with a very light, crisp single-action release.
5. It is easy to change grips and sights to suit your preference. You can also mount a scope on the top-strap.
TOP FIVE Rimfire Revolvers (Current Production)
1. Smith & Wesson Model 617, 6″ or 4″ BBL, $829.00 MSRP
10-Shot, Stainless Steel, 44.1 Oz. (6″ barrel), 39 Oz. (4″ barrel)
Smith & Wesson’s Model 617, offered with either 6″ or 4″ barrels, is extremely accurate, with a very crisp trigger, and good sights. Accuracy is better than most shooter can hold. You can learn all the fundamentals with this ultra-reliable K-Frame handgun, shooting inexpensive .22 LR ammo. The 6″ version has a longer sight radius, so it’s superior for bullseye work. But the 4″ version balances much better. The choice is yours.
The Model 617 is rugged, durable, and can give you a lifetime of shooting fun. Your Editor has owned a 4″ ten-shot Model 617 for over 20 years, and it’s still going strong. Here is a video showing the 4″-barrel version of Smith & Wesson’s popular model 617.
Hickok 45 Demos “Wonderful revolver”, a 4″ Model 617. See also Hickok 45 m617 Part 2:
Ruger introduced the .22 LR GP100 two years ago. Since then, it has become a good seller. This 10-shot revolver with 5.5″ barrel has a comfortable grip and triple-locking cylinder (locked into the frame at the front, rear and bottom). Many shooters like the fact that the 5.5″-barrel GP100 carries its heft more to the rear than S&W’s 6″ 617. However, we’d give the edge to the 617’s trigger. NOTE: Davidson’s also has a limited edition GP100 with shorter 4″ barrel. This Davidson’s exclusive edition 4″ GP100 is handier to carry and balances better.
3. Smith & Wesson Model 17 Masterpiece, 6″ BBL, $989.00 MSRP
6-Shot, Carbon (Blued) Steel, 39.9 Oz., 6″ Barrel
Smith & Wesson recently re-introduced its Model 17 Masterpiece revolver. This Blued 6-shot classic has been “re-released” with a retro-style grip. It still offers outstanding accuracy and a sweet trigger pull. For those who like the look of the original K-22 revolvers this can fill the bill. With a non-underlug 6″ barrel, this is 4.2 ounces lighter than the 6″ Model 617. The price, $989.00 MSRP, is pretty steep. It you look around you may be able to find an original K-22 for a few hundred dollars less. We’ve seen some decent examples on Gunbroker in the $700 range, but pristine K-22s are selling for over $1000 now.
4. Smith & Wesson Model 63, 3″ BBL, $769.00 MSRP
8-Shot, Stainless Steel, 25.8 Oz., 3″ barrel
The 8-Shot Smith & Wesson Model 63 may be one of the most versatile revolvers on the market. With a 3″ barrel, it balances well and is easy to hold. This makes this a great training pistol for a new shooter, even a junior or a lady with small hands. The latest 8-shot version offers nice big sights with fiber-optic front insert. While we consider this a great training and plinking handgun, it can also do double-duty for concealed carry. No the .22 LR won’t match the stopping power of a .357 Magnum, but better armed than not.
The new Ruger LCRx Revolver combines traditional wheelgun features with modern composite construction. The 3″ barrel and cylinder are steel. The “frame” housing the barrel and cylinder are aerospace-grade aluminum. The rear/lower section of the pistol, what Ruger calls the “fire control housing”, is made of polymer. This cuts weight and tames felt reoil. That fire control housing holds the hammer/trigger assemblies and provides a mount for the interchangeable grips. This is really a very innovative pistol. Thanks to its weight-saving features, Ruger’s LCRx is 8.5 ounces lighter than S&W’s Model 63, though both have 3″-long barrels.
With all the buzz about the 6.5 Creedmoor and its 6mm Creedmoor little brother, some folks forget that we’ve had an outstanding mid-sized, Across-the-Course cartridge for a long time — the 6XC. Pioneered by 11-time National High Power champion David Tubb, the 6XC has won national High Power championships, excelled in mid-range prone matches, and performed great in the varmint fields. It has also been used successfully by many Precision Rifle Series competitors. It’s no wonder — the 6XC has less recoil than a 6.5mm Creedmoor, there is a great selection of superb 6mm bullets, and Norma-made 6XC brass is high-quality and reasonably priced from DavidTubb.com.
PRS Rifle with Modern 6XC II Chamber
Forum member Grimstod posted this new 6XC II rifle in our long-running Pride and Joy Rifle Thread. Grimstod notes: “These 6XC Gen IIs seam to be a hot commodity lately. This one is for PRS. It features a Premier Accuracy Atlas action made by Kelbly. The bolt and heavy-taper, fluted barrel are Ceracoted to match. I really like the ejectors on these Atlas actions. The stock is a KRG X-Ray painted in Premier Accuracy exclusive colors. The Kelbly Atlas action does not have any modifications. So far every Kelbly action we have tried has had perfect timing and trigger fall. We have been supper pleased with them. I look forward to using a lot more of these excellent actions.”
What is the 6XC II you may ask? That designates a 6XC with a chamber dimension optimized for Norma brass. It turns out that Norma brass is a bit bigger at the bottom than the 22-250 brass from which the 6XC originated. Robert Whitley of 6mmAR.com has created two new JGS reamer specs that fit the Norma brass perfectly, improving feeding and extraction. Here is Robert’s Report:
The 6XC II Chamber — Upgraded for Today’s Norma 6XC Brass
by Robert Whitley of 6mmAR.com
The 6XC II Chamber works perfectly with the Norma 6XC brass and resolves the “sticky bolt lift” issue. The original 6XC chambering was designed based off the usage of 22-250 brass which typically has a web diameter in the range of .461″-.463″. The area of the chamber just forward of the web on the original 6XC chambering was .4695″ which left plenty of clearance.
When Norma 6XC brass became available Norma appears to have developed the base of the case from the .308 Winchester line of cases which have a larger web diameter. The web diameter of the Norma brass typically measures right around .4685″ which leaves almost no diameter clearance.
As shooters would use Norma 6XC brass in an original 6XC chamber they typically would experience “sticky bolt lift” due to the lack of clearance and the fact that the large web diameter of the brass prohibited the re-size dies (no matter how small the base diameter was) from squeezing the brass down enough to create sufficient clearance. The 6XC II chamber resolves this issue. You can order 6XC II sizing dies from 6mmAR.com that work perfectly with this re-designed chambering. 6XC II die sets are in stock now — call (215) 348-8789 to order.
6XC II Long Range Reamer (Throated long for 105-115gr Bullets):
The 6XC II-LT reamer below is throated long to keep the full bearing surface of 110-115gr bullets forward of the neck/shoulder junction of the case. Note, 6mmAR.com has also developed a shorter-freebore version for 6mm bullets with shorter bearing surface. SEE shorter 6XC II Reamer Print.
6XC II Chamber and Sizing Die Combo:
– Resolves the “sticky bolt lift” problem shooters experienced using the Norma 6XC Brass in the original 6XC chambers.
– Chamber accepts all 6XC brass or ammo with no modification. Take your existing 6XC brass or ammo and use it without issues.
– Works well with existing Norma 6XC brass, or 6XC brass made from re-formed Winchester and Remington 22-250 brass.
– 6XC II Sizing dies and die sets are available from 6mmAR.com and in stock.
If you are looking for someone to chamber your rifle or re-barrel an existing rifle in the 6XC II chamber, Fred at Sabreco, Inc. in Skippack, PA, (610) 584-8228 can help you. He has the reamers for the cartridge as well as the head space gauges for the cartridge, and has had extensive experience chambering many barrels and rifles.
GRS stocks are produced in Norway. These stocks are known for their comfortable fit and ergonomics, but they are also strong and durable — thanks to attention to detail, careful construction, and premium materials. While GRS Riflestocks AS now produces excellent composite stocks, the majority of its products are still crafted from laminated wood. That’s not surprising because the GRS stock business evolved from a family furniture company.
This excellent video shows every stage of GRS Stock production. Worth Watching — Honest! Sawing Blanks: 0:15 | CNC Milling 0:20 | Surface Sanding 0:30 | Dip Finishing 1:00
Making a GRS Laminated Stock
GRS stocks start off with blocks of laminated wood. There are potentially 1700 combinations given the number of colors, models, and inlets. The first stage employs a band saw to shape the rough outer shape and dimensions. Then each stock goes into a computer-controlled CNC machine for precision milling. From the CNC-machine, the rifle stock is handed over to GRS craftsmen who hand-finish the stock (photo below). Depending on design, GRS stocks can be delivered with up to 40 different inlets.
GRS Stocks — Ergonomically Designed Good ergonomics have always been a key GRS design objective: “All our rifle stocks are adjustable, because people are different. If you make a fixed stock, it will always be a compromise for your shooting position. Also, your ergonomics change in different shooting positions. There is a big difference between standing, sitting and laying on the ground. It’s not rocket science, but we recognized this a long time ago. And that is why we made the adjustment system the way it is. Obviously, having the correct length of pull, and a full contact with the cheek-piece, adds a lot of stability into the shooting position.”
When you handle a GRS stock, and get into shooting position, you notice it feels comfortable immediately. And the LOP and cheek-piece height can be adjusted easily, without tools.
The GRS grip design is distinctive — for important reasons: “The grips that we have (which off-centered and angled out) remove tension in your arms. So when you shoot you are more relaxed. And the recoil transfers neatly in your body.”
About GRS Riflestocks AS — A Family Company Run by Serious Shooters
GRS Riflestocks AS is run by two brothers, Håvard and Oscar Haugen. Oscar served in the Norwegian military for a decade as a QRF Sharpshooter (sniper) and Sharpshooter Team Leader. Oscar’s military experience has helped GRS design better rifle stocks: “I was a Sharpshooter for the Norwegian army for a long time, both as a soldier and instructor. So we knew what worked in the field. And we knew production. So we took something traditional, as a rifle stock is, and introduced something new into it. This way, the ergonomics and the adjustment systems became key features of the GRS rifle stocks.”
Håvard Haugen (L) and Oscar Haugen (R), founders of GRS Riflestocks AS.
GRS Riflestocks AS has become very successful. The company now ships stocks to 45 countries worldwide. Oscar Haugen says: “I smile every day knowing more and more hunters and shooters gets to know GRS. We make them shoot more accurately because their rifles fit them better [with our stocks]. What more could we ask for?”
GRS Stocks are produced in Hornindal, Norway. Watch the video to see beautiful Norwegian scenery: “A short walk from the factory, you’re in the woods. You can go fishing, hunting … whatever you like”.


 Dave Scott explains why the Warehouse was so unique:


 There are few “characters” left in the benchrest world, but Bill Brawand is one of them. He is still competing at age 84. He started in the game way back in 1973 and has been a stalwart on both the IBS and NBRSA circuits ever since.


 Smith & Wesson’s


 Good ergonomics have always been a key GRS design objective: “All our rifle stocks are adjustable, because people are different. If you make a fixed stock, it will always be a compromise for your shooting position. Also, your ergonomics change in different shooting positions. There is a big difference between standing, sitting and laying on the ground. It’s not rocket science, but we recognized this a long time ago. And that is why we made the adjustment system the way it is. Obviously, having the correct length of pull, and a full contact with the cheek-piece, adds a lot of stability into the shooting position.”


