If you plan to attend the 2025 SHOT Show in Las Vegas, now is the time to register and book your hotel. Official event registration has opened for attending vendors, exhibitors, buyer representatives, and approved Media members. CLICK HERE for official Registration Page.
SHOT Show 2025 welcomes industry personnel, retail/vendor representatives, and media staffers. NSSF members can take advantage of member benefits during SHOT Show week. The NSSF encourages attendees to book their hotel reservations and airline flights soon — book early to save money.
The 2025 SHOT Show will host over 2,500 exhibitors in multiple adjacent buildings. The 2025 SHOT Show will have over 800,000 net square feet of exhibit space across The Venetian Expo and Caesars Forum. This is equivalent to more than 18 acres.
The latest SHOT Show Insider INFO page is ready. Exhibitors can get the latest need-to-know information on hotel bookings, print publication opportunities, booth information and more.
TIPS for Getting Ready for SHOT Show 2025 in January:
➢ Plan ahead: Lock in better hotel and airline rates early. There are multiple shows happening in Vegas during SHOT Week, so don’t delay.
➢ Supplier Showcase hours will be 8:30 am – 4:30 pm on Monday and 8:30am – 4:00 pm on Tuesday.
➢ SHOT University will provide 18 educational sessions aimed to help retailers and shooting ranges enhance management and improve business in competitive and regulated marketplaces.
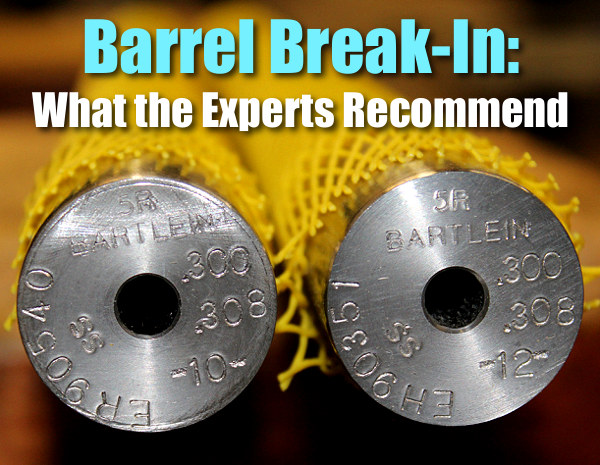
The question of barrel break-in is controversial. Some folks advocate an elaborate, lengthy cycle of shooting and brushing, repeated many times — one shot and clean, two shots and clean and so on. This, it is argued, helps barrels foul less and shoot more accurately. Others say minimal break-in, with patching and brushing after 10-15 rounds, is all you need. Still others contend that break-in procedures are a total waste of time and ammo — you should just load and shoot, and clean as you would normally.
We doubt if there will ever be real agreement among shooters concerning barrel break-in procedures. And one must remember that the appropriate break-in procedure might be quite different for a factory barrel vs. a custom hand-lapped barrel. This Editor has found that his very best custom barrels shot great right from the start, with no special break-in, other than wet patches at 5, 10, and 15 rounds. That said, I’ve seen some factory barrels that seemed to benefit from more elaborate break-in rituals.
What’s the best barrel break-in procedure? Well our friend Eric Mayer of Varminter.com decided to ask the experts. A while back Eric interviewed representatives of three leading barrel manufacturers: Krieger, Lothar-Walther, and Shilen. He recorded their responses on video. In order of appearance in the video, the three experts are:
Do I Need to Break-In a New Rifle Barrel?
Eric Mayer of Varminter.com says: “That is a simple question, [but it] does not necessarily have a simple answer. Instead of me repeating my own beliefs, and practices, on breaking-in a new rifle barrel, I decided to answer this one a bit differently. While we were at the 2016 SHOT Show, we tracked down three of the biggest, and most popular, custom barrel makers in the world, and asked them what they recommend to anyone buying their barrels, and why they recommend those procedures. We asked the question, and let the camera run!” Launch the video above to hear the answers — some of which may surprise you.
Long-Term Barrel Care — More Experts Offer Opinions
Apart from the debate about barrel break-in, there is the bigger question of how should you clean and maintain a barrel during its useful life. Some folks like aggressive brushing, other shooters have had success with less invasive methods, using bore foam and wet patches for the most part. Different strokes for different folks, as they say. In reality, there may not be one solution for every barrel. Different fouling problems demand different solutions. For example, solvents that work well for copper may not be the best for hard carbon (and vice-versa).
“Why worry about a little barrel fouling when the throat is subjected to a brutal 5,600° F volcano at 55,000 PSI? To investigate these and other questions about taking care of a match barrel, we spoke with a dozen experts and share their knowledge in this first of a series of articles.
After listening to folks who shoot, build barrels or manufacture cleaning solvents for a living, we concluded that even the experts each have their own unique recommendations on how to care for a match barrel. But they all agree on one thing — the gun will tell you what it likes best. Because the life expectancy of a match barrel is about 1,500 to 2,500 rounds, the objectives of cleaning one should include: preserve accuracy, slow the erosion, and remove fouling — all without damaging the gun. This article doesn’t claim that one cleaning method is better than the next. Rather, we set out to interject a little science into the discussion and to share some lessons learned from experts in the field.” — Chip Lohman
Scary stuff — AK-74 after firing corrosive ammo and not being cleaned for a week.
Image courtesy ADCOFirearms.com.
No doubt you’ve heard the term “corrosive” used with respect to ammunition. But what exactly is “corrosive ammunition” (and how does it different from non-corrosive ammo)? What is the chemistry that leads to corrosion, and what cleaning procedures should you follow if you shoot corrosive ammunition? Brownells has come up with answers to these and other questions in a helpful TECH TIP video about corrosive ammo.
In this informative video, Brownells gun tech Steve Ostrem explains the primer-related chemistry that makes some ammo corrosive. The video then reviews suggested cleaning procedures you should follow after you have fired corrosive ammo through any firearms.
What Is “Corrosive” Ammunition?
What makes ammo “corrosive”? Generally speaking, primers are the problem. When corrosive ammunition is fired, the ignited primers leave a residue of corrosive salts. Typically these primers contain potassium chlorate, or sodium petrochlorate which, when burned, change into potassium chloride or sodium chloride. Sodium chloride is also known as common table salt.
Potassium chloride and sodium chloride are both very hygroscopic (i.e. they attract water). Because of that, these alkalis are rust generators. When exposed to the hydrogen and oxygen in the air (and moisture) potassium chloride and sodium chloride can form an acid that quickly causes metal rifle parts to rust and pit.
Given a choice, you may wish to avoid corrosive ammo altogether. However, for some types of fire-arms, particularly older military-style rifles, the most affordable ammunition may be corrosive. If you choose to use corrosive ammo, it is important to clean the gun thoroughly after use. After firing, you want to use an element that will neutralize the primer salts. Brownells suggests a water soak (see video above). Alternatively, Windex with ammonia can help neutralize the salts, but that doesn’t finish the job. After the salts have been neutralized and flushed away, basic anti-corrosion protectant (such as Eezox or other gun oil) should be applied to all metal parts.
This video ahows the effects of Corrosive Ammo after one month without cleaning:
Paul Markel, host of the popular Student of the Gun TV series, offered smart advice on the proper procedures for cleaning rifles exposed to corrosive ammo: “Windex (with ammonia) is the Corrosive Ammo shooter’s best friend. After you are done shooting your corrosive ammunition for the day, squirt the window cleaner liberally from the chamber down the barrel. Pull the bolt / bolt carrier / op rod if there is one and douse them as well. A couple of old cotton t-shirts will come in handy. A cotton barrel swab is a nice accessory but you can make do with patches. Some folks will rinse all of the ammonia and loosened corrosive salts off with hot water. Others prefer to wipe it all down and let the ammonia evaporate. Either way, once the corrosive salts have been tackled with the window cleaner, it is time for an all-purpose brush (old toothbrush) and some gun oil.”
Video Tip from EdLongrange. We welcome reader submissions.
With our inflationary economy, ammo continues to go up in price every year. Smart shooters can benefit by price-shopping to get the best deals on factory-loaded ammunition, particularly for popular cartridge types such as .22 LR, 9x19mm (9mm Luger), .357 Mag, .223 Rem (5.56×45), and 6.5 Creedmoor. It this article we list 15 reliable online sources for factory-loaded ammo. You may want to bookmark this page so you can quickly scan and price-check multiple vendors. In addition, you can use a service such as AmmoSeek.com.
Why Should You Shop for Ammo Online?
By shopping online for ammo, you can save money, get a wider selection, and get bulk discounts. GunDeals.com explains: “Online purchases [can] save you a lot of money [and can] also save your time… one of the most important advantages is definitively the huge selection.” With online retailers you can quickly compare prices, and you will often get a discount on a large order (300 rounds or more) that is not available in local stores. Note, with some large vendors such as Cabela’s and Sportsman’s Warehouse you can order online then pick up in a local store.
Are There Restrictions on Online Ammo Purchasing?
In most (but not all) U.S. states is it legal to order ammunition online to be shipped to your residence. However, you MUST check your State and local laws and regulations. In some states and/or cities, it is ILLEGAL to purchase ammunition online for shipment across state lines with direct delivery. For example, in California, all ammo must be purchased from a licensed ammo dealer/vendor with a state background check (so much for the Second Amendment)*. Likewise Washington DC, and Hawaii do not allow online ammunition purchases. And there are restrictions in New York City. In Alaska there are multiple shipping regulations that impact ammo deliveries from online sales so many vendors do not ship to Alaska.
*In some instances ammo can be purchased online from an out-of-state seller who will then ship to an authorized, in-state California vendor who may transfer the ammo for a fee with background checks as required by CA law.
Protect Your Hearing — Wear Protection Whenever You Shoot
Noise-induced hearing loss and tinnitus are two of the most common afflictions for recreational shooters and hunters. Everyone knows that gunfire is loud, but very few people understand the repercussions that shooting can have on their hearing until it’s too late.
The better quality suppressors can reduce the noise of a gunshot by 20 to 35 decibels (dB). Good muffs or plugs will reduce sound by 23 to 33 dB. By decreasing the overall sound signature, suppressors help to preserve the hearing of recreational shooters and hunters. Even the most effective suppressors, on the smallest and quietest calibers (.22 LR) reduce the peak sound level of a gunshot to between 110 to 120 dB. To put that in perspective, according to the National Institute for Occupational Safety and Health (NIOSH), that is as loud as a jackhammer (110 dB) or an ambulance siren (120 dB). For normal caliber handguns and rifles, suppressed sound levels routinely exceed 130 dB, just shy of OSHA’s “hearing safe” threshold of 140 dB.
According to Dr. William W. Clark, the current Director of the Washington Univ. School of Medicine’s Audiology/Communication Sciences Program, a “serious threat to hearing comes from recreational hunting or target shooting”. This is in large part due to the fact that many people choose not to use traditional hearing protection devices like earplugs and earmuffs because they want to be able to hear their surroundings. Multiple studies have found that between 70 to 80% of hunters never wear earplugs or earmuffs, and nearly half of all target shooters don’t consistently wear traditional hearing protection. Thus, it should come as no surprise that for every five years of hunting, hunters become seven percent more likely to experience high frequency hearing loss.
This article is based on information from the American Suppressor Association (ASA). Since the ASA’s formation in 2011, three additional states have legalized suppressor ownership and 18 states have legalized suppressor hunting. For more information, visit www.AmericanSuppressorAssociation.com.
Halloween (originally “All Hallows Eve”) is just nine days away. Throughout the country, there will be youngsters (and parents) making the rounds on October 31st, trick-or-treating. U.S. LawShield has provided Halloween safety tips for homeowners and families with kids. These tips are designed to keep kids safe/secure and to help adults supervise the young ones and avoid potential liabilities as homeowners. READ Full Article HERE.
Halloween Safety Tips for Adults (Parents and Homeowners) Drive Carefully – Drive slowly and watch for people crossing the street. Avoid distractions like phones or food so you can be ready to stop quickly. (But it’s best to just avoid driving after dark on Halloween[.]) Clear the Way – Clear your front steps, driveway, and lawn of any potential safety hazards. If any injuries happen on your property, you could be held liable! Leave a Light On – If you leave the house, keep a few visible lights on inside to discourage criminals. However, leave your porch light off to let trick-or-treaters know you aren’t giving out candy! Verify Insurance – Are you turning your home into a neighborhood haunted house? Are you charging admission? Make sure to check your local laws and verify your homeowners insurance coverage! Something like this could be considered a business activity, and accidents or injuries typically are not covered. (You should also verify your self-defense insurance coverage!) Go Flameless – Use electric lights in your jack-o-lanterns and other décor. House fires are one of the more common accidents reported by homeowners on Halloween.
Halloween Safety Tips for Kids Adult Supervision – All children aged 13 and under should be accompanied by an adult when trick-or-treating. Older kids without an adult should be in groups of three or more. Create a Route – Only trick-or-treat in familiar neighborhoods and at houses with porch lights on. Be aware of and avoid the addresses of local sex offenders. Street Smart – Walk only on sidewalks, and cross streets only at crosswalks or corners. Make eye contact with drivers before crossing to help prevent accidents. Take extra caution with costume masks, as they greatly reduce a child’s ability to see their surroundings. High Visibility – Carry glow sticks or flashlights when out after dark, and avoid wearing costumes that are dark-colored or aren’t reflective. Treat Smart – Check your kids’ candy! The CDC Halloween Safety Guide highly recommends throwing away any unwrapped or unsealed pieces.
U.S. LawShield also strongly recommends not having toy guns — even Nerf guns or squirt guns — as part of costumes. At night toy guns can cause confusion, with potential bad reactions.
About U.S. LawShield
Founded in 2009, U.S. LawShield now has 700,000+ members and 6,000+ industry partners. The goals are to help members handle critical, life-threatening situations and prevent potential injustices in the legal system after acts of self-defense. For more information on U.S. LawShield visit USLawshield.com.
For today’s Sunday Gunday feature, we present a splash of color — the beautiful blue 7mm-270 WSM of Forum member Ian B. (aka “Elwood”) from Great Britain. A very knowledgeable guy, Ian has been one of the UK’s top F-Class shooters. And he’s the proud owner of a very “Flash” F-Class rig.
About the Shooter — Ian’s Background
Ian tells us: “I started shooting F-Class Open [many] years ago when a good friend invited me to Bisley to shoot with the Dorset Riflemen. I found it very enjoyable and a real challenge. The next year I attended the GB F-Class league’s Introduction to F-Class course, and soon afterwards started to compete in the GB F-Class league, while still shooting once a month with the Dorset Riflemen. In this short time frame, I’ve managed to finish 8th in the league last year, 12th in the Europeans, and I was a part of the GB squad that won the team event at the European Championship. I was then selected for the GB F-Open World Championship Team. Unfortunately, due to work commitments, I have had to withdraw.”
Ian’s Beautiful Blue 7mm-270 WSM F-Class Rifle
Report by Ian B. (aka “Elwood”)
Having spent my first year competing with a magazine-fed 7mm WSM tactical/sporting rifle (Surgeon action and AICS mag) and doing reasonably well with it, I then moved on to a .284 Shehane (.284 Winchester Improved). I love the Shehane and still use it but … I wanted something for those windy long-range days and so there was only one logical choice, the 7 WSM. This time I chose a 7mm-270 WSM as I quite enjoy case prep (just kidding). Actually, there’s not much to do really. The quality of Norma brass is well known and the Norma 270 WSM brass is quite easy to obtain in the UK.
The action is a Right Bolt, Left Port (RBLP) Stolle Panda F-Class action, with Jewell trigger. There wasn’t any particular reason behind the RBLP configuration — it was more of a case of that’s what I could get at the time. I had a 1.250″-diameter, straight-profile Bartlein barrel finished at 32 inches and chambered for the Berger 180gr VLD with a .313″ neck diameter. All my metal work and quite a bit of the wood work is done by the excellent Neil McKillop of McKillop Engineering. As with all top gunsmiths, Neil is meticulous to a point of obsessiveness and he’s the name behind quite a few winning rifles including several used by the GB Open and F-TR teams. Neil also inletted the stock from a blank and did the bedding for the action and the front bag runners.
Loading for the 7mm-270 WSM
I have one “tried and tested” load: 7mm Berger 180gr VLDs, seated .020″ into the lands, Vihtavuori N165 powder and CCI BR2 primers. This load is supremely accurate, but at 2990 FPS it’s a bit slow. To get more speed, I’m currently testing H1000 with good results, but it looks like I may have a slow barrel. I have another Bartlein barrel chambered and ready to screw on when the weather gets warmer. If that new barrel shoots well, the current barrel will probably be used as a practice barrel.
Loading Procedure
I do full case prep, neck-turning, uniforming primer pockets after the first firing, chamfering necks inside and out, and removing burrs around flash holes. Even the best brass sometimes suffers from imperfect quality control. I try to use Redding dies if possible, and will use bump dies, neck bushing dies, and competition seating dies.
I use an RCBS ChargeMaster 1500 to throw a charge just slightly under my desired weight and then trickle-up to final weight using the superb Dandy trickler and a Gem Pro 250 scale.
I anneal every other firing using a Bench-Source machine. Before this I used a Ken Light and also did them by spinning them in a drill. Never again will I do that after using the Bench-Source. After I have annealed, I always run a nylon brush wrapped in 0000 wire wool into the neck to remove any debris.
I keep to the same lot numbers of primers, powders, and bullets. Even the Bergers can vary from lot to lot — I have two different lots of 7mm 180gr VLDs that vary .020″ from bullet base to the ogive. I trim and point my bullets. Pointing may be a mental thing — I had a fantastic shoot while using trimmed and pointed bullets so I do it all the time now. ( A fellow GB team shot refers to them as “Pointless Dies” — I have witnessed him shoot a 99-14V at 1000 yards with bullets that weren’t trimmed or pointed). My next move will be to start measuring bearing surface…where does it all end?
Custom Wood Stock Was Modified by Ian and Treated to a Fancy Paint Job
The stock is a custom-made design crafted by Joe and Simon West of Joe West Rifle Stocks. I had several modifications done to one of their existing stock designs. Having done a lot of my shooting with the AICS, I was quite used to a thumbhole stock, so thought I would try one in F-Class. I told Simon what I wanted and he sent me down a prototype made from very inexpensive Tulip wood. We had a few discussions and then made some more mods..
I made two main changes to the stock. First, I removed the lip at the bottom of the pistol grip because I felt I might rest my hand on this and possibly disturb the rifle. Second, I had the protruding pistol grip base removed so that the bottom of the stock was completely flat like the Precision Rifle & Tool F-Class stock. Simon also made the finger grips to fit my hand and flattened them off to allow for a bit more movement. The stock was then sent to Hydro Graphics in the UK to have a custom exterior finish. The paint color is a Marbleized Candy Oriental Blue. As always, Hydro Graphics did a great job.
Optics and Rings
The scope is the excellent 5-50x56mm March with the MTR-2 reticle — far and away the best reticle I have used for F-Class. March makes great optics. During the 2012 European individual F-Class event, using another March (my 8-80x56mm), I could see my shooting partner’s impacts in the white V-Bull at 800 yards! And just recently at a club match I called two V-Bulls at 900 yards using the 8-80X (not at full power). Granted the light has to be perfect to be able to do this, but my highest praise for the Deon Optics glass is that it rivals that of Schmidt & Bender. Having owned both March and S&B scopes and compared them side-by-side, I feel that I can make this statement fairly.
UK-based Third Eye Tactical made the nice, 34mm rings. The UK is now producing some excellent products. We now have UK-made custom actions, rings, rails, stocks and more. It would be nice to think we could have a 100% British-made rifle, and not rely completely on USA-made products. I think all we need is the trigger? But I can’t see there ever being a UK-made scope!
PASS or FAIL? Where does your U.S. Representative and U.S. Senator stand when it comes to supporting the Second Amendment, the firearm industry, hunting, and target shooting sports? NSSF has released its 2024 Congressional Report Card. You can view it here: CLICK HERE for Full REPORT CARD.
The Firearm Industry Trade Association (NSSF), released its 2024 Congressional Report Card, grading U.S. Representatives and U.S. Senators on key legislation relating to the firearm industry, to hunting and recreational shooting, and to the Second Amendment rights of U.S. citizens.
“This report card will be critical for voters to do their research as we head into … the November elections just six weeks from now. NSSF’s 2024 Congressional Report Card tells voters exactly where their lawmakers stand on issues including defending the firearm industry’s ability to engage in the lawful commerce of firearms and ammunition and safeguarding the Second Amendment rights of customers, as well as promoting hunting and recreational target shooting”, said Lawrence G. Keane, NSSF Senior VP and General Counsel. “This nonpartisan report card reflects the level of support of each lawmaker on firearm industry priority legislation during the 118th Congress, between 2023 and 2024. These grades indicate their public voting record as well as their sponsorship and co-sponsorship of key legislation, their work on committees, letters signed to support firearm industry issues, and their overall leadership[.]”
NSSF awarded 29 U.S. Senators and 123 U.S. Representatives the rating of “A+”. Of those, 8 Senators and 24 House Members attained the new NSSF distinction of being named to the Dean’s List. To earn this special recognition, members needed to have a 100-percent voting and co-sponsorship record.
» CLICK HERE for Complete U.S. Senate and House Report Card
This nonpartisan scorecard reflects the voting record of each legislator. These grades indicate their public voting record as well as the weight and importance of these lawmakers sponsoring and co-sponsoring key legislation, their work on committees, letters signed to support issues and leadership to stand for our industry. “This scorecard is of vital importance to voters as we head into November elections. This tells voters exactly where their lawmakers stand on issues they care about like recreational shooting and hunting and the right to keep and bear arms” said Lawrence G. Keane, NSSF VP and General Counsel.
NRA publication Shooting Sports USA (SSUSA) has thousands of articles online, all free for the reading. Many of these stories have been written by top competitors, including National and Olympic Champions. You will find SSUSA articles spotlighted every week on the NRA Competitive Shooting Facebook page. We recommend you bookmark that page as a valuable resource. Here are four notable SSUSA articles that have been featured on Facebook this month. Go to SSUSA.org to see even more current articles, with new content every day.
Here is an insightful, fairly lengthy 1850-word article about the phenomenon we call mirage. The article explains how and why mirage appears, how it can best be monitored, and how mirage can indicate both wind velocity and direction. Top competitors follow the adage “Mirage is your friend”, because mirage can often be the most important indicator of wind variables — sometimes even more important than wind flags. “The mirage is more sensitive than the flags since it has less inertia and momentum”, wrote Desmond T. Burke, in his book, Canadian Bisley Shooting, an Art and a Science.
Well worth reading, this SSUSA article talks about the properties of mirage. Here is a sample:
“Mirage — can make all the difference between a shot landing squarely in the X-ring or being victimized by an undetected downrange breeze. The true power of mirage is found in its ability to betray the subtlest of breezes downrange. Its fluid movement… can not only provide wind direction, but speed as well.
Typically, the ability to detect mirage is maximized on warm, sunny and sultry days. Expect mirage to be most pronounced in mid-morning or early afternoon, although it ignores these rules with regularity[.]
Mirage is extremely powerful at identifying winds of less than 12 mph, particularly those gentle breezes subtle enough to not even bother moving the flags.
When there is no wind, or a gentle head or tail wind, mirage will appear to be ‘bubbling’ directly up from the ground. Many call this ‘boiling’, and it is probably the easiest of all to detect.
As a general rule of thumb, when wind speed increases, overall height of the waves produced by the mirage is reduced. Large peaks and valleys in the waves mean that particular mirage is being driven by a very slight breeze. Conversely, crest size is reduced with wind speed, making it harder and harder to detect, until the mirage disappears entirely at somewhere around 12 miles per hour. In other words, the taller mirage’s waves appear, the slower the breeze.”
Authored by the late Glen Zediker, this article covers barrel break-in procedures. It is particularly useful for dealing with factory barrels. We CAUTION readers — with outstanding, hand-lapped custom barrels from top barrel-makers, you may want to do very little break-in — clean sparingly and keep barrel heat low. Do NOT use abrasives aggressively. On our Krieger and Brux barrels, we simply wet-patched every 2-3 rounds for 20 rounds and the barrels shot superbly from the start with minimal fouling. But for factory barrels, a moderate break-in process may prove beneficial.
Zediker explains: “Lesser, lower-cost barrels are going to have more pronounced … imperfections within the bore[.] These imperfections are largely tool marks resulting from the drilling and rifling processes. And if it’s a semi-automatic, like an AR-15, there might be a burr where the gas port was drilled. The goal of break-in is to knock down these imperfections, thereby smoothing the interior surface.”
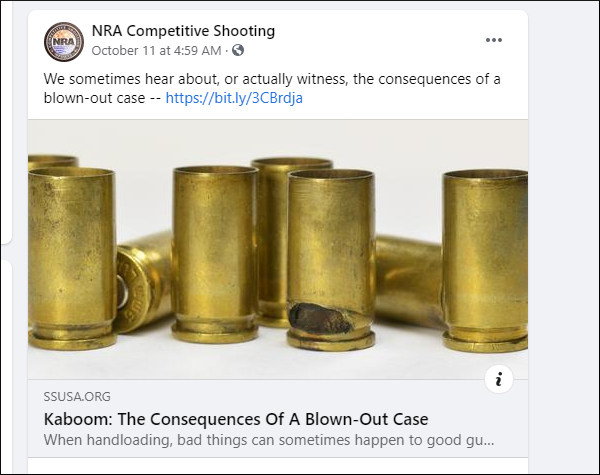
As one who has experienced a cartridge case-head blow-out with a 9mm pistol, this Editor is very conscious of the risks involved and the damage a blow-out can do to the pistol, to the magazine, and (worst of all) to the shooter. Even with new brass, the possibility of a case failure is always present. And even if the case remains intact, we’ve seen primer failures that create a dangerous jet back towards the pistol shooter. That’s why shooters should always employ protective eyewear whenever they shoot.
We love our wheelguns, but there’s no doubt that forcing cone damage can occur, particularly with hot loads and if your cylinder-to-barrel gap is excessive. This article explains how to inspect your revolvers, and how to mitigate the likelihood of forcing cone damage. The article also explains how to clean your revolvers properly. This is very important to avoid build-up of lead and powder residues.
Reader Mike Etzel has come up with a simple, cost-effective way to apply moly or danzac coatings to your bullets. And you won’t need any expensive gear other than your regular vibratory tumbler and some small plastic containers.
Mike explains: “For a number of years I have been using a very convenient way of coating my projectiles with DANZAC in a tumbler. Instead of using a separate tumbler filled with DANZAC and stainless steel balls for coating applications, use small resealable plastic cake or pudding cups filled with stainless balls and DANZAC. Each cup will accommodate between 20 to 70 projectiles depending on caliber once the polishing balls and DANZAC are added. When I need to polish some cases, I insert the sealable plastic container(s) into the polishing material in the tumbler, add cases to the media, and in the process clean cases and coat the projectiles simultaneously in one tumbler. This does two operations in one session, saving on time and resources.”
While Mike uses DANZAC (Tungsten DiSulfide or WS2), you can use the same impact-tumbling-in-a-cup method to moly-coat your bullets, or to apply HBN (Hexagonal Boron Nitride).
TIPS for COATING your BULLETS, by “GS Arizona”
1. Start with Clean Bullets. This is simple enough, but some people overlook it and others overdo it. Get the bullets out of the box, wash them with warm water and dish soap and dry them. No need for harsh chemicals, after all, we’re only removing some surface dirt from shipping and maybe some left over lanolin from the forming process. Don’t handle them with bare hands once they’re clean, your skin oils will contaminate them.
2. Get Everything Hot — Real Hot. This is probably the single most important element in producing good-looking moly-coated bullets. I put the tumbler, the drum and the bullets out in the sun for at least 30 minutes before starting and then do all the tumbling in direct sunlight. On a summer day in Arizona, everything gets to the point that its uncomfortably hot to handle. If you are tumbling in the winter, you should heat the bullets in some form, a hair dryer can be useful, but they will cool off in the drum if you’re tumbling in cold temperatures. Your best bet is to plan ahead and do your coating in the summer. I coated about 3000 bullets in a couple of days recently to see me through our winter season (we’re a bit reversed from the rest of the country in terms of shooting season).


 Do I Need to Break-In a New Rifle Barrel?

 No doubt you’ve heard the term “corrosive” used with respect to ammunition. But what exactly is “corrosive ammunition” (and how does it different from non-corrosive ammo)? What is the chemistry that leads to corrosion, and what cleaning procedures should you follow if you shoot corrosive ammunition? Brownells has come up with answers to these and other questions in a helpful TECH TIP video about corrosive ammo.


 Optics and Rings



 Reader Mike Etzel has come up with a simple, cost-effective way to apply moly or danzac coatings to your bullets. And you won’t need any expensive gear other than your regular vibratory tumbler and some small plastic containers.
 2. Get Everything Hot — Real Hot. This is probably the single most important element in producing good-looking moly-coated bullets. I put the tumbler, the drum and the bullets out in the sun for at least 30 minutes before starting and then do all the tumbling in direct sunlight. On a summer day in Arizona, everything gets to the point that its uncomfortably hot to handle. If you are tumbling in the winter, you should heat the bullets in some form, a hair dryer can be useful, but they will cool off in the drum if you’re tumbling in cold temperatures. Your best bet is to plan ahead and do your coating in the summer. I coated about 3000 bullets in a couple of days recently to see me through our winter season (we’re a bit reversed from the rest of the country in terms of shooting season).


