Photo shows Bryan Litz (on right) and tester Mitchell Fitzpatrick. Bryan said: “Only 2,445 rounds to go! We’re testing over 50 ammo types in five different twist barrels… science can be exhausting!”
Do you know the actual BC (Ballistic Coefficient) of your rimfire ammunition? Well Applied Ballistics has the data, thanks to a comprehensive, marathon ammo testing session. Some years back, in an effort to determine the “real world” BCs of various rimfire ammo types, Bryan Litz and his team at Applied Ballistics did an extraordinary, in-depth shooting test. Litz and company tested over fifty types of .22 LR ammo, using five different twist-rate barrels. This was one of the most comprehensive and through rimfire ammo tests ever done.
Bryan tolds us: “We tested many types of .22 rimfire ammo for the 2nd Edition of the Ballistic Performance of Rifle Bullets book. We used a pair of Oehler chronographs to measure velocity at the muzzle (MV) and velocity at 100 yards.” With these numbers (average and SD) Bryan can calculate G1 BCs for all the 50+ types of rimfire ammo. What’s more, because every sample is shot through five different barrels (each with a different twist rate) Bryan can also determine how velocity is affected by twist rate.
The tests are primarily to determine velocities for BC calculations — this was not an accuracy test. Bryan explains: “Our tests are not really looking at accuracy, mainly because that’s so subjective to different rifles. Our testing is primarily focused on measuring the BC of rimfire rounds from different twist-rate barrels. The MVs and BCs from the different twist test barrels was then published by Applied Ballistics in print books. Bryan Litz told us: “The .22 LR Rimfire data was originally published in Ballistic Performance of Rifle Bullets, 2nd Edition, which is now out of print. The 3rd Edition of that book doesn’t have rimfire data. The rimfire testing results and data were re-published in Modern Advancements in Long Range Shooting – Volume II (along with many other topics).
Bringing Science to the Rimfire World
Bryan’s goal with this project was to increase the rimfire knowledge base: “We hope to give the world of .22 LR rimfire a good dose of science. How is the BC of .22 rimfire ammo affected by barrel twist? Do subsonic rounds have more consistent BCs than supersonic or transonic rounds? What brands have the highest BCs? What brands have the most consistent MVs?”
Data from two Oehler chronographs is recorded in a computer. Ammo samples were tested in five (5) different barrels (of varying twist rates). Give credit to Dane Hobbs who supplied a test rifle, multiple barrels, and most of the ammo types for the test.
.22 LR at 300 Yards?
Bryan also conducted some longer range rimfire tests. His interesting findings have appeared in the Modern Advancements in Long Range Shooting book series. Bryan notes: “While .22 rimfire isn’t typically considered ‘long range’, we were able to consistently hit a two-MOA steel target at 300 yards with the trajectory predicted by AB software and the measured BC of some standard .22 LR rimfire ammo. The info we’’re generating may make it possible to push the range of target engagement for a round that’s not seen much advancement in many decades.”
These days, online gun Auctions and Classifieds attract more attention than ever. With so many folks accessing the internet daily, many gun owners find it easier to sell their firearms online rather than in the local gun store. Online selling opens up a much larger audience. With 80,800+ members in the AccurateShooter Forum, we have a very active gun Classifieds area. And then of course, there are the big dogs — Gunbroker and GunsAmerica. You’ll find tens of thousands of guns for sale on those big sites, but there are significant sale fees.
Before selling your stuff online, you should survey the major online sales and auction sites, comparing their fees and features. The costs are NOT all the same. For example, though you can list an item on Gunbroker for free, if the gun sells you may end up paying a LOT of money. Confirm this with the Gunbroker FEE Calculator. Using Gunbroker’s Fee Calculator we determined that, for a $3000.00 gun, the seller will pay $128.00 in fees! Yes, that’s for a single sale.
That’s why many sellers prefer to list their rifles on Benchrest.com, or on the AccurateShooter.com FORUM Classifieds. Currently, basic Accurate Forum members get two (2) free adverts in a 12-month period, while Gold and Silver members get unlimited classifieds for 12 months. A $30 Silver membership is less than you’d pay to sell one single $600 item on Gunbroker ($32.00 fee).
SEVEN TIPS for Selling Your Gear Online
1. Include Good, Sharp Photos: A custom rifle or expensive optic will sell two to three times as quickly, at a higher price, if you include good sharp photos. We can’t over-emphasize the importance of good photos. For all products, show multiple angles, and include the original boxes if you still have them. For a rifle, include detail shots as well as a photo of the complete gun.
2. Resize Your Photos Before Posting: Half of users will probably be viewing your ads with a smartphone. So you don’t need huge photos. We recommend you size your photos down to 1000 pixels wide. This will make uploads more efficient and ensure the Forum server can handle the file sizes.
3. Be Fair and Complete in Your Description: Buyers appreciate honesty and thoroughness in product descriptions. Potential buyers want details. For a rifle, list the gunsmith, barrel-maker, round count, and provide the specifications. If the rifle has a winning competition history, say so. Always highlight the positives in your description, but you should disclose significant flaws. A buyer will be more willing to purchase if he thinks the seller is 100% honest.
4. Don’t Forget Contact Info: We’re amazed by how many adverts omit key contact info. In a forum classified ad, include a first name, e.g. “Ask for Dan.” We also suggest you list your residence city and state. Some buyers will prefer to buy from a seller in their home state. When communicating with a buyer, provide your phone number and email address. We recommend that all buyers and sellers actually talk live on the phone before concluding high-value deals.
5. Make the Price Attractive: Buyers, everywhere, are looking for good deals. If you want your item to move quickly, set the price accordingly and don’t expect top dollar. Check comparable listings and then discount by 10-15% if you want the item to move fast.
6. Include a Call to Action: Advertisements can be twice as effective if they include a “Call to Action”, i.e. a statement that directly inspires the potential buyer to respond. Sample calls to action are: “Free Shipping — today only.” Or, you can use a time limit: “Special Sale Price good ’til the end of the month”.
7. Always Follow ALL Applicable Laws: Even in states where private face-to-face gun sales are allowed, we recommend ALWAYS using an FFL for firearms transfers. This will protect YOU the seller. In addition, do your homework. Don’t sell to a buyer in a city or state (such as California) state or city where the particular firearm (such as an AR15) may be restricted
Classified Advert vs. Auctions For benchrest, F-Class, Silhouette, Tactical or High Power rifles, you may get the best results posting a For Sale ad on a Forum that caters to the right discipline. You want your ad to reach the right audience. On the other hand, a GunBroker.com auction will have tens of thousands of potential buyers. Realistically, however, if you price your rig attractively, it should sell quickly in a Forum Classified Advert. Plus with conventional Classifieds, you can sell immediately — you don’t have to wait for the auction to end. For scopes and reloading equipment (but not firearms, actions, barrels etc.), also consider eBay, which still allows many gun-related items.
A while back, Shooting Times released an article entitled “Ten Most Common Reloading Mistakes”. Listed below are the Top Ten mistakes hand-loaders can make, at least according to Shooting Times. What do you think of this list — does it overlook some important items?
Top Ten Reloading Mistakes According to Shooting Times:
1. Cracked Cases — Reloaders need to inspect brass and cull cases with cracks.
2. Dented Cases — Dents or divets can be caused by excess case lube.
3. Excessive Powder Charge — Overcharges (even with the correct powder) can be very dangerous.
4. Primers Not Seated Deep Enough — “High” primers can cause functioning issues.
5. Crushed Primers — Some priming devices can deform primers when seating.
6. Excess Brass Length — Over time, cases stretch. Cases need to be trimmed and sized.
7. Bullets Seated Too Far Out — If the bullet is seated too long you may not even be able to chamber the round. Also, with hunting rounds, bullets should not engage the rifling.
8. Burrs on Case Mouths — Ragged edges on case mouths can actually shave bullet jackets.
9. Excess Crimp — This is a common problem with pistol rounds loaded on progressives. If case lengths are not uniform some cases will get too much crimp, others too little.
10. Inadequate Crimp — This can be an issue with magnum pistol cartridges in revolvers.
Do you agree with this list? We think some important things are missing, such as not adjusting full-length sizing dies properly. This can cause the shoulder to be pushed back too far (or not far enough). Another common mistake is using brass that is worn out, i.e. stretched in the case-head area from multiple cycles of hot loads. We also think the #1 error a reloader can make is using the wrong powder altogether. That can be a fatal mistake. See what happens when you load pistol powder in a rifle.
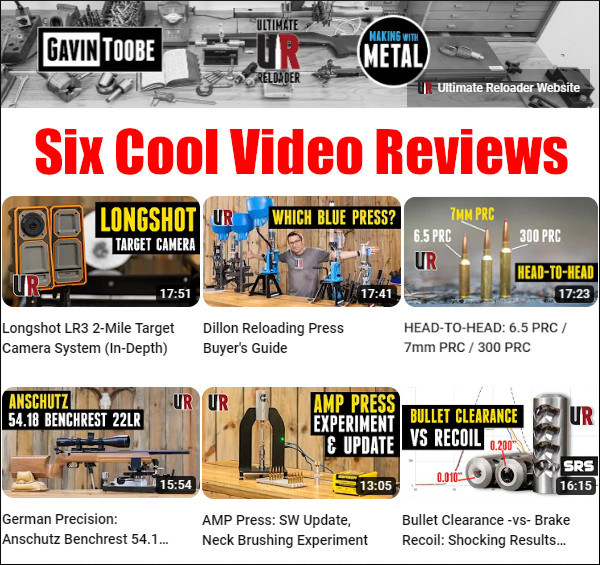
UltimateReloader.com offers some of the most thorough firearms and reloading tool tests on the internet. And UltimateReloader’s YouTube Channel has hundreds of great videos that showcase reloading tools, accurate firearms, precision optics, gunsmithing methods, and top-tier reloading components. For today’s Saturday at the Movies feature, we showcase six great videos recently created by Gavin Gear and his UltimateReloader team. These videos highlight a superb Long-Range Target Camera, the remarkable AMP Press, the new Hornady PRC cartridges, and other interesting topics. On this final day of 2022, enjoy our Saturday Video Showcase.
With the high price of centerfire powders, bullets, and brass, everyone should have an accurate .22 LR rimfire rifle for marksmanship training and competition at 25 to 200 yards. In this video, Ultimate Reloader’s Gavin Gear tests the impressive Anschutz 54.18 BR50-U7 match rifle using a quality Sinclair Int’l front rest. Anschutz offers several versions of the 54.18 and BR-50. There are two barreled actions available: 20″ threaded and 25.9″ non-threaded. Gavin tested the 20″ threaded model with the U7 stock. In this video, Gavin tested the trigger with a sophisticated TriggerScan TS-11. The trigger was superbly repeatable at a measured 3.8 ounces. Gavin also did a bore examination. He then tested the Anschutz with a variety of premium ammo. In this rifle, Lapua Midas+ producing the smallest groups. FULL STORY HERE.
This video features the impressive, high-tech AMP Bullet Seating Press. The AMP Press combines a motor driven ram, a distance sensor, and a load cell to deliver extremely accurate and precise force/distance bullet seating measurements. The AMP Press offers unrivaled consistency in the bullet seating process. And as the AMP Press is linked to a computer, seating data can be stored and you can chart variations in seating resistance. A wealth of precise data is collected during the bullet seating process. This helps you optimize your brass prep and annealing for the best, most consistent results. FULL STORY HERE.
Past 400 yards or so, it can be difficult to see bullet holes on paper, even with spotting scopes. That’s why we recommend a high-quality wireless target camera. The best long-range target cameras on the market are produced by Longshot Camera Systems. The Longshot Target Cam provides a live WiFi camera feed. This comes back to your shooting station and you can view the image with a laptop or mobile device. You don’t need internet coverage and no separate tall antennas are required. Simply place the camera unit next to your target and the receiver unit close to your rifle or bench. The Longshot system is completely self-contained. Longshot produces a variety of cameras starting at $449.00 for the LongShot Marksman. We recommend the $899.00 LR-3 unit which works out to two miles! In this video Gavin Gear of UltimateReloader tests the LR-3 at long range. PRODUCT INFO HERE.
This video examines how muzzle brakes reduce recoil. Just how important is bore clearance for a muzzle brake? Should you have an exit diameter that’s just slightly larger than bullet diameter, or will a larger diameter work well also? Along with no brake at all (bare muzzle), Ultimate Reloader tested multiple different brake bore clearances on a 6.5 Creedmoor rifle: 0.010″ over bullet diameter, 0.020″, 0.030″, 0.050″, 0.100″, and 0.200″. The testers expected to get the best recoil reduction with the tightest fit. Surprisingly, this wasn’t quite the case.
Using all brake configurations (all bore clearances) Ultimate Reloader saw a significant reduction in recoil, almost half, as compared to a bare muzzle: “What we didn’t expect was how close together the rest of the clearances would cluster. All of the clearances that we tested had good recoil reduction.” FULL STORY HERE.
Dillon Precision continues to be the leader among progressive press makers. Dillon offers the largest variety of progressives, the most accessories, and legendary customer service. In this video, Gavin Gear of Ultimate Reloader looks at a variety of Dillon machines to help buyers decide which progressive best suits their needs. Featured Dillon progressives include: Square Deal B, Xl750, and RL1100. Along with basic press feature, Gavin shows the operation of Dillon’s automated bullet feeder and case feeder accessories. The video also provides pricing summaries with various configurations. FULL STORY HERE.
Hornady’s PRC (Precision Rifle Cartridge) family of cartridges are becoming quite popular. The 6.5 PRC fits in a short action, while the 7mm PRC and 300 PRC both require a long action. The 7mm PRC is a long-action centerfire hunting cartridge designed to shoot 180gr bullets at 2950+ FPS. The 6.5 PRC is a good hunting cartridge that can fit a standard-length action. And, a number of top F-Open shooters are necking up the 6.5 PRC for 7mm bullets. This 7-6.5 PRC wildcat has shown excellent F-Class accuracy with a higher velocity node than the .284 Winchester. Along with these two cartridges, Hornady has a 300 PRC that can shoot the big .308-caliber bullets. In this video, Ultimate Reloader analyzes and compares each of the three PRC cartridge types. FULL STORY HERE.
Christmas Day is just 13 days away. We know many of our readers and Forum members will be traveling to spend the holidays with friends and families. If you will be transporting any firearms when traveling by air over the holidays you need to know the rules.
If you will be flying with firearms this holiday season, you should read this article. You need to familiarize yourself with current Federal Regulations on gun transport before you get anywhere near an airport. Thankfully, the Transportation Security Administration (TSA) has a web page that states the important requirements for airline passengers traveling with firearms and/or ammunition.
You’ll want to visit the TSA Firearms and Ammunition webpage, and read it start to finish. In addition, before your trip, you should check the regulations of the airline(s) with which you will fly. Some airlines have special requirements, such as weight restrictions.
Here are the TSA’s key guidelines for travel with firearms:
TSA FIREARM Guidelines
1. When traveling, comply with the laws concerning possession of firearms as they vary by local, state and international governments.
2. If you are traveling internationally with a firearm in checked baggage, please check the U.S. Customs and Border Protection website for information and requirements prior to travel.
3. Declare each firearm each time you present it for transport as checked baggage. Ask your airline about limitations or fees that may apply.
4. Firearms must be unloaded and locked in a hard-sided container and transported as checked baggage only. As defined by 49 CFR 1540.5, a loaded firearm has a live round of ammunition, or any component thereof, in the chamber or cylinder or in a magazine inserted in the firearm. Only the passenger should retain the key or combination to the lock unless TSA personnel request the key to open the firearm container to ensure compliance with TSA regulations. You may use any brand or type of lock to secure your firearm case, including TSA-recognized locks.
5. Bringing an unloaded firearm with accessible ammunition to the security checkpoint carries the same civil penalty/fine as bringing a loaded firearm to the checkpoint. You may find information on civil penalties at the Civil Enforcement page.
6. Firearm parts, including magazines, clips, bolts and firing pins, are prohibited in carry-on baggage, but may be transported in checked baggage.
7. Replica firearms, including firearm replicas that are toys, may be transported in checked baggage only.
8. Rifle scopes are permitted in carry-on and checked baggage.
TSA Ammunition Guidelines
1. Ammunition is prohibited in carry-on baggage, but may be transported in checked baggage.
2. Firearm magazines and ammunition clips, whether loaded or empty, must be securely boxed or included within a hard-sided case containing an unloaded firearm. Read the requirements governing the transport of ammunition in checked baggage as defined by 49 CFR 175.10 (a)(8).
3. Small arms ammunition (up to .75 caliber and shotgun shells of any gauge) must be packaged in a fiber (such as cardboard), wood, plastic, or metal box specifically designed to carry ammunition and declared to your airline.
4. Ammunition may be transported in the same hard-sided, locked case as a firearm if it has been packed as described above. You cannot use firearm magazines or clips for packing ammunition unless they completely enclose the ammunition. Firearm magazines and ammunition clips, whether loaded or empty, must be boxed or included within a hard-sided, locked case.
5. Please check with your airline for quantity limits for ammunition.
More Airline Travel Tips from Tom McHale
A while back, Tom McHale wrote an excellent article for the Beretta Blog, entitled Ten Things You Need to Know about Flying with Guns. Here are two of Tom McHale’s Travel Tips from that article:
Weigh your gun case and ammunition
Most airlines will allow up to 11 pounds of ammunition. And, like any luggage, you will be charged more for any baggage weighing more than 50 pounds. This sounds like a lot, but when traveling to the Crimson Trace Midnight 3 Gun competition last year, my case with shotgun, rifle, pistol and ammunition tipped the scale past the 50 pound mark.
Pack ammo in the same locking case
This is another area that’s misunderstood and full of internet myth. Your ammo just needs to be stored in some type of safe container and not loose. Technically, you can keep ammunition in magazines, but I wouldn’t recommend it. It meets the letter of the law storage requirement, but too many airline and TSA agents will give you grief. Use a plastic ammo box or original cardboard packaging and you’ll be fine carrying that in the same lockable case as your gun.
*Please see, United States Code, Title 18, Part 1, Chapter 44 for information about firearm definitions.
Who hasn’t dreamed of having a professional-quality, permanent shooting bench on their own property? Well here’s an article that can help you make that dream come true. This “how-to” feature from the archives of RifleShooter Magazine shows how to build a quality concrete shooting bench step-by-step.
All aspects of the construction process are illustrated and explained. The author, Keith Wood explains: “Construction happened in three phases — first creating the slab foundation, then the support pillars (legs), and finally the table.”
Click image below to load article with slide show.
Each step in the process is illustrated with a large photo and descriptive paragraph. Starting with framing the foundation (Step 1), the article illustrates and explains the 15 Steps that produce the finished, all-concrete bench (see top photo).
Winter solstice — December 21, 2025 — is ten days away. We’re seeing extremely cold temperatures throughout many northerly states, with lots of snow falling on the ground. And some very cold weather is predicted this coming weekend. For American firearms fans in those colder climes, indoor training is the only realistic option this time of year.
AccuWeather forecasters warn that very cold temperatures with significant snowfall will hit the Northeast in the next few days. CLICK HERE for Accuweather Weather Report.
This article explains some key points to remember when shooting at indoor ranges. Always remember — safety first. Be especially careful to follow ALL the rules of safe gun handling. And even before you get to the range, make sure your guns are transported safely and in compliance with all local laws. In some states firearm(s) and ammunition must be kept in separate containers during transport.
This Video Covers Basic Gun Range Safety Rules and Etiquette
FIVE IMPORTANT SAFETY PROCEDURES for Indoor Ranges
1. Follow the Three Fundamental Rules for Safe Gun Handling
ALWAYS keep the gun pointed in a safe direction. ALWAYS keep your finger off the trigger until ready to shoot. ALWAYS keep the gun unloaded until ready to use.
2. Follow ALL Range Officer Instructions
ROs are the first and final authority on any range and their decisions are generally final. Arguing with a Range Officer may just get you thrown out.
3. Don’t Bother Others or Touch Their Guns
Respect other shooters’ privacy unless a safety issue arises. Do NOT engage other shooters to correct a perceived safety violation unless absolutely necessary – inform the RO instead. NEVER handle or touch another shooter’s firearm without their permission!
4. Know Your Range’s Rules
Review and understand any and all range rules and requirements/expectations. For example, what is the range’s maximum rate of fire? Are you allowed to collect your brass?
5. Know What To Do During a Cease Fire
IMMEDIATELY set down your firearm, pointed downrange, and STEP AWAY from the shooting booth (or bench). Range Officers do not want shooters trying to “secure/unload” their firearms in a cease fire situation — they want the shooters separated from their guns instantly.
BAD RANGE BEHAVIOR — Five Things NOT to Do at the Range
Here are the five worst behaviors we’ve seen at indoor ranges. These behaviors are both dangerous and inconsiderate. Any one of these behaviors can get you permanently banned from an indoor range.
1. Sweeping other individuals after loading a weapon behind the firing line is very bad. All your weapons should be empty until you reach your shooting station.
2. Turning the handgun sideways while trying to clear a malfunction or insert/remove a magazine. This will point the muzzle at a fellow shooter. Or, after shooting a gun, the shooter fails to clear the weapon and then places the gun somewhere near the shooting station with the muzzle in an unsafe position.
3. Reacting unpredictably when firing a high recoil handgun. We’ve seen people take a second shot by accident with the muzzle way off target.
4. Not obeying range commands — in particular continuing to shoot during called cease-fires.
5. Poorly aimed shooting that hits target frames or carriers, causing ricochets.
Double-Up on Hearing Protection When Shooting Indoors
When shooting indoors we recommend quality muffs with earplugs underneath, offering double protection. When inside an enclosed range, with other shooters blasting away right next to you, you really need effective hearing protection. But you also need to hear range commands and be able to communicate. That’s why we recommend electronic muffs with plugs underneath.
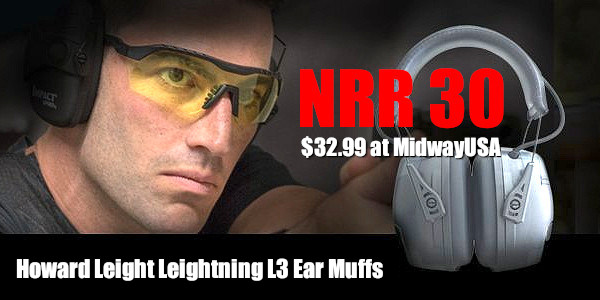
For indoor rifle and pistol shooting, we like the latest Howard Leight Leightning L3 Ear Muffs. These offer an outstanding 30 dB Noise Reduction Rating (NRR). In addition, these muffs are pretty comfortable. These muffs are now $32.99 at MidwayUSA (great deal) and $37.41 on Amazon with FREE Delivery.
“Science tells us that exposure to continuous noise of 85 dB for eight hours is enough to cause permanent hearing loss, and worse, spikes of 130 dB and more can result in permanent hearing damage instantly.” Source: NRA Blog.
The Risk of Hearing Loss
Hearing loss can be progressive and irreversible. If you are a shooter, this is serious business. As the NRA Blog cautions: “You may not even realize you’re harming your hearing. Hearing loss occurs gradually, and can go effectively unnoticed until symptoms become severe. By then, the damage is done.”Effective hearing protection is a must whenever you are shooting firearms or when you are in the vicinity of gun-shots. For ultimate protection, we recommend a good set of tapered foam earplugs, topped by ear-muffs. However, there are situations when you may prefer lighter-weight hearing protection that can be quickly removed. For example, if you are standing well behind the firing line as an observer, or if you are working as a rangemaster or waddie some distance away from the shooters.”
Sound Levels for Common Noises:
9mm Luger pistol: 160 dB
Jet aircraft engine (near): 140 dB
.22 LR pistol: 134 dB
Normal human pain threshold: 120 dB
Noisy Nightclub: 110 db
Riding Motorcycle at 65 mph: 103 db
Power Lawnmower: 95 dB
Hearing damage possible: 85 dB (sustained for 8+ hours)
Ringing Telephone: 80 dB
Normal conversation: 60 dB
What about suppressors? If you use a suppressor is it OK to dispense with hearing protection? Not really. Even the most effective suppressors, on the smallest and quietest calibers (.22 LR), reduce the peak sound level of a gunshot to between 110 to 120 dB. To put that in perspective, according to the National Institute for Occupational Safety and Health (NIOSH), that is as loud as a jackhammer (110 dB) or an ambulance siren (120 dB). For normal caliber handguns and rifles, suppressed sound levels routinely exceed 130 dB, just shy of OSHA’s “hearing safe” threshold of 140 dB. Accordingly, we recommend use of hearing protection even when shooting suppressed.
1. Ear Muffs — Max Protection and Compact Options
The highest current USA Noise Reduction Rating is 34 dB NRR. To get that kind of protection, you need pretty big muffs, but thankfully, you don’t have to spend big bucks. For under $15.00 you can buy quality ANSI-approved muffs with a 30+ dB Noise Reduction Rating. Chose the big 34 NRR G&F Pro Muffs at $15.99 or the more comfortable 30 NRR Walker EXT Range Muffs for $14.97. Both products have padded head-bands which retract.
Many hunters and competitive shooters prefer low-profile ear muffs. As these typically have a lower Noise Reduction Rating, perhaps NRR 22-24, we recommend running earplugs under muffs, particularly when you are at a busy range or shooting a match. If you use low-profile electronic muffs, such as Howard Leight Impact Sport Muffs, you should still be able to hear range commands even with plugs underneath.
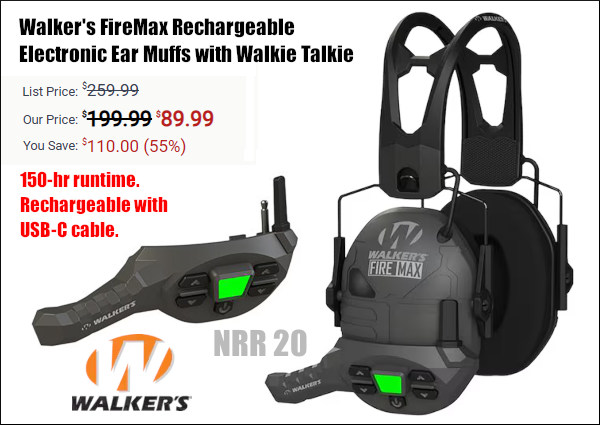
If you need to talk to your shooting buddies or hear range commands during matches, there are a variety of good electronic muffs on the market. Some of these even have “Walkie-Talkie” functionality so you can talk to team-mates or coaches at matches. We like these 2-way electronic muffs, but be aware that they offer much less max noise protection — typically in the NRR 20-22 range. Here is a good deal currently at MidwayUSA for Walker Electronic Muffs with Walkie-Talkie functionality. This NRR 20-rated unit has slim pads with removable microphone unit. It is now on sale at a 55% discount.
2. Foam Earplugs — Small, Inexpensive, But VERY Effective
Quality foam earplugs offer great hearing protection at low cost. These Howard Leight NRR33 Max plugs are your Editor’s favorite foam earplugs. Between shooting, motorcycling and mowing lawns, I probably have Max plugs in my ears 3-4 days a week. These Leight Max plugs are very effective, easy to insert/remove (with the flared ends), and they seem to be less abrasive in the ear canal than some other brands. Right now you can get 20 pairs of these NRR33 Leight Max plugs for just $8.41.
If you prefer thin, light-weight earmuffs, we do recommend running earplugs underneath for double protection while shooting firearms (or when you’re on the firing line). Sound experts tell us that running plugs and muffs together can improve your effective noise reduction by 4-7 dB NRR.
Howard Leight MAX NRR 33 Earplugs, Just $8.41 for 20 Pairs
Hearing bands are inexpensive, lightweight, and are handy for special situations, such using hedgetrimmers and noisy power tools, when you may need to frequently remove the protection. These banded products are a also a very good form of hearing protection for hunters. You can keep them handy around the neck while spotting game, and then insert the plugs before shooting. We have tried two types of banded hearing protection, the Howard Leight QB2 Quiet Band (shown above) (25 dB NRR), and the Radians Rad-Band (23 dB NRR). The Leight Quiet Band is quite durable and the plugs can be replaced. It is a bargain at just $5.44 from MDI Safety.
Radians Rad-Band is very light-weight, with Jelli™ Plugs that are comfortable, washable, and reusable — all for just $12.13 on Amazon. Peltor also offers Sport Banded Earplugs. These conveniently ship with 3 pairs of ear buds, all for $11.99 on Amazon.
4. Electronic Plugs — New Technology with Adjustable Volume
For maximum hearing protection we still recommend good muffs over quality foam ear plugs, there is a new option available. A variety of companies now offer electronic ear buds that include small speakers so you can hear range commands and conversations. Please note — these MUST be specially-designed protective in-ear devices. Do NOT just use ear-buds designed for music playback!
Howard Leight recently introduced new Impact Sport In-Ear plugs with an impressive 29 dB Noise Reduction Rating (NRR). That NRR is better than most compact ear muffs. The plugs automatically compress amplification when loud impulse sounds (like gunshots) exceed 85dB. Internal amplification allows you to hear range commands and conversations. The cord connecting the plugs includes twin, handy volume controls. These plugs come with moldable earhooks with 3 different ear tip sizes. The deluxe model with quick-connect BlueTooth is available for $89.98 on Amazon. With this high-tech BlueTooth version you can take phone calls.
As an Amazon affiliate, this site can earn revenues through sales commissions.
Sierra BulletsBallistic Technician Gary Prisendorf has written a nice essay about how reloading can become a life-time hobby, a rewarding pastime that can bring together a father and son…
Memories of My Father — Reloading As a Life-Time Hobby
by Gary Prisendorf
For as long as I can remember I have been around reloading. I have tons of childhood memories of my father reloading and shooting. I remember how he would let me help him load his ammunition, by letting me clean primer pockets or wipe the sizing lube off of his cases. I really thought I was doing something. Well, I guess I was, I was spending quality time with my father doing something that would become a great hobby and eventually land me a great job working for Sierra Bullets.
If you are a reloader, teach someone. You may just give them a hobby for the rest of their life and who knows, you could help them find an enjoyable career, doing something that they love.
— Gary Prisendorf
I remember watching my father sizing cases on his Herters press, dropping his powder charges with a Belding & Mull powder measure and weighing powder charges with his Texan scales. Heck, I can even remember when he would buy powder at a local pawn shop, and they would weigh it out and put it in a paper sack. He would save his empty powder cans, wrap them with masking tape and write what the powder was on them with a black magic marker.
When I was in Junior High, I got my first shotgun, a 20 gauge Mossberg 500 and within a couple of weeks my father came home with a 20 gauge Lee Load-All and a pound of Blue Dot. He gave me a crash course on how to use it, and got me up and running with a couple of safe loads. I put a lot of shells through that old 20 gauge.
From that day forward I was hooked. If I got a new gun, I was loading ammunition for it. I don’t buy factory ammunition unless I just want to shoot it up so I can get some once fired brass. I reload everything that I shoot, except for rimfire stuff, and if I could figure out how to do that safely, I would probably load that too.
Through the years I have learned to appreciate things — such as once-fired military .30-06 cases that can be converted to obscure cartridge types. And I know the value of a five-gallon bucket of lead wheel weights that will be melted down and cast into bullets.
I remember finding 19 once-fired Norma 7.7×58 Arisaka cases laying on the ground at a public shooting range, and it was like Christmas came early. I must have looked for that 20th case for about thirty minutes, but I never did find it.
I can’t thank my father enough for getting me started in reloading, he gave me a great hobby, many wonderful memories and taught me the skills that gave me a career doing something that I love.
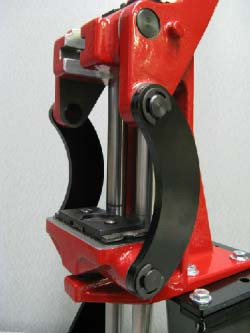
Forum member Erik Cortina has produced a series of YouTube videos about reloading hardware and precision hand-loading. Here we feature Erik’s video review of the Forster Co-Ax® reloading press. The red-framed Co-Ax is unique in both design and operation. It boasts dual guide rods and a central handle. You don’t screw in dies — you slide the die lock ring into a slot. This allows dies to float during operation.
Erik does a good job of demonstrating the Co-Ax’s unique features. At 1:00 he shows how to slide the dies into the press. It’s slick and easy. At the two-minute mark, Erik shows how sliding jaws clasp the case rim (rather than a conventional shell-holder). The jaws close as the ram is raised, then open as it is lowered. This makes it easy to place and remove your cases.
At the 5:20 mark, Erik shows how spent primers run straight down into a capture cup. This smart system helps keep your press and bench area clean of primer debris and residues.
While many Co-Ax users prime their cases by hand, the Co-Ax can prime cases very reliably. The priming station is on top of the press. Erik demonstrates the priming operation starting at 4:20.
Smart Accessories for the Co-Ax from Inline Fabrications
Forum member Kevin Thomas also owns a Co-Ax press, which he has hot-rodded with accessories from Inline Fabrication. Kevin tells us: “Check out the add-ons available from Inline Fabrication for the Co-Ax. I recently picked up a riser mount and a set of linkages for mine and love the results. The linkages are curved. When you replace the original straight links with these, the work area opens up substantially and the the press becomes much easier to feed.” CLICK HERE for Co-Ax Accessories.
Inline Fabrications Forster Co-Ax Accessories
Forster Co-Ax Curved Side Linkage (For Better Access)


 Bryan tolds us: “We tested many types of .22 rimfire ammo for the 2nd Edition of the Ballistic Performance of Rifle Bullets book. We used a pair of Oehler chronographs to measure velocity at the muzzle (MV) and velocity at 100 yards.” With these numbers (average and SD) Bryan can calculate G1 BCs for all the 50+ types of rimfire ammo. What’s more, because every sample is shot through five different barrels (each with a different twist rate) Bryan can also determine how velocity is affected by twist rate.

 These days, online gun Auctions and Classifieds attract more attention than ever. With so many folks accessing the internet daily, many gun owners find it easier to sell their firearms online rather than in the local gun store. Online selling opens up a much larger audience. With 80,800+ members in the
 For benchrest, F-Class, Silhouette, Tactical or High Power rifles, you may get the best results posting a For Sale ad on a Forum that caters to the right discipline. You want your ad to reach the right audience. On the other hand, a GunBroker.com auction will have tens of thousands of potential buyers. Realistically, however, if you price your rig attractively, it should sell quickly in a Forum Classified Advert. Plus with conventional Classifieds, you can sell immediately — you don’t have to wait for the auction to end. For scopes and reloading equipment (but not firearms, actions, barrels etc.), also consider eBay, which still allows many gun-related items.


 The Risk of Hearing Loss


 Quality foam earplugs offer great hearing protection at low cost. These Howard Leight