Jim Borden, the very knowledgeable owner of Borden Accuracy, provided an interesting historical insight about barrel fitting and the term “blueprinting”. Jim has posted on his Borden Accuracy Facebook page an explanation of the term “blueprinting” as it originally was used with respect to barrel/shoulder/lug fitting.
Barrel/Shoulder Fit and Blue-Printing
Jim told us: “Something often overlooked on barrel installation is the shoulder fit. Many are so overly obsessed with doing a crank-on fit of threads that the shoulder contact is overlooked. Full, solid barrel shoulder to recoil lug or action face is critical to optimum accuracy and precision.
Many years ago part of the ‘blueprinting’ of an action was the use of Prussian blue to ‘blueprint’ lug fit, thread fit, and barrel shoulder fit. It was a colloquial expression that had nothing to do referring to a blueprint or drawing of the action.” Bet you didn’t know that!
About the photo below, Jim noted: “the fuzzy look on the threads is a liberal coating of Never-Seez thread lubricant.”
Look carefully to see the Prussian Blue applied to the barrel shoulder, plus Never Seez on threads.
Today’s Saturday video showcase includes multiple video reviews of some of new rifle and pistols introduced in recent months. There are some impressive new rifles, and a score of new pistols both for CCW and competition.
Ten New Guns Revealed for 2025
This video features an interesting collection of new rifles and new handguns. Rimfire rifle fans should check out the Bergara BMR .22 LR rifle, while hunters will like the fast-cycling Beretta BRX1 straight-pull rifle. Among the pistols covered in this video, the Kimber KD9SC has nice features and 1911-style ergonomics.
Notable covered guns shown in the above video:
Best New Bolt-Action Rifles in Review
If you are looking for a new affordable hunting or varmint rifle, this video is a good place to start. It features 14 bolt-action rifles from a wide variety of manufacturers including Barrett, Bergara, Browning, CVA, Ruger, Savage and more. There is good video footage showing rifle details and features.
1. Dark Mountain Arms (DMA) Stowaway
2. Bergara MG Micro Lite
3. Taurus USA Expedition
4. CVA Cascade SR-80
5. Stag Arms Pursuit
6. Barrett MRAD ELR
7. Browning X-Bolt 2 Pro McMillan
8. Bergara B14 Wilderness Sierra
9. Beretta BRX1
10. Savage Arms KLYM
11. Ruger American Rifle Gen 2
12. Bespoke Gun Phantom
13. CVA Cascade LRH
14. Best of the West Stealth
New Rifles and Shotguns
This video covers both rifles and shotguns. Featured first is the CMM BR4 semi-auto rifle that complies with state restrictions while offering AR-style functionality. This is followed by a report on the Browning X-Bolt 2 rifle with muzzle brake. Next is the SIG Sauer MCX military-style rifle, followed by a Browning A5 shotgun. There are five other featured long guns reviewed by this video for nine in total (see list below). NOTE: The video title claims 13 guns are reviewed, but there are really only 9 specific stories:
Smith & Wesson M15
HM Defense HM 50B
Beretta BRX 1
Wilson Combat AR
(multiple models)
New Handguns including CZ Shadow 2 and Taurus 608 Revolver
This video is mostly manufacture-supplied PR material but it does cover a variety of interesting new handguns: CZ Shadow 2 Target; Savage Stance XR; Kimber CDS9; Taurus 608 Competition Revolver; and Tisa PX 5.7. That CZ Shadow 2 Target pistol has attracted much attention, with some good reviews. The Firearm Blog says the new Shadow 2 Target may be the most accurate CZ pistol ever made. With a $2600 price it better be good! If you compete in action pistol matches, the CZ Shadow 2 could take you to the next level… but that price is daunting.
Best New Lever-Action Rifles for 2025
Lever-action rifles are enjoying a significant growth in popularity. For 2025 Savage has introduced the Revel Classic and Revel DLX rimfire lever-action rifles in .22 LR, .22 WMR, and .17 HMR chamberings. This video covers other new lever guns including: Bishop Firearms 1895 GBL (01:00), Smith & Wesson 1854 (02:22), POF USA Tombstone (03:54); Browning BLR (05:26); Winchester 1892 DLX Octagon (06:50); Henry Big Boy X (08:25); Marlin 1895 Dark Series (10:00).
Leading New Air Rifles for 2025
Whether you’re a hunter, target shooter, or just love high-quality air guns, this video is worth watching. The title refers to five rifles but it actually covers six notable, recently-introduced air rifles, showcasing performance, accuracy, and features. From budget-friendly options to high-end precision models, the video covers six air rifles with performance stats and real-world testing. The reviews include pros/cons and features of each model: BRK Pathfinder XR Green (00:55); FX Impact X4 (02:20); Gamo Riser Punisher (03:56); Umarex Zelos PCP (05:20); BRK Ghost Silver (06:54); and Hatsan Jet 3 (08:19).
One Shooters’ Forum member asked: “What makes an AR accurate? What parts on an AR can really affect accuracy — such as free-floating handguards, barrels, bolts, bolt carriers?” He wanted an honest, well-informed answer, not just sales pitches. Robert Whitley posted a very detailed answer to this question, based on his experience building/testing scores of AR-platform rifles. Robert operated AR-X Enterprises, which produced match-grade uppers for High Power competitors, tactical shooters, and varminters.
Building an Accurate AR — What is Most Important
by Robert Whitley
There are a lot of things that can be done to an AR to enhance consistent accuracy, and I use the words “consistent accuracy” because consistency is a part of it (i.e. plenty of guns will give a couple great 5-shot groups, but won’t do a very good 10- or 20-shot groups, and some guns will shoot great one day and not so good on others).
Here are 14 key things we think are important to accuracy.
1. Great Barrel: You’ll want a premium match-grade barrel, well-machined with a good crown and a match-type chambering, true to the bore and well cut. The extension threads must also be cut true to the bore, with everything true and in proper alignment.
2. Rigid Upper: A rigid, heavy-walled upper receiver aids accuracy. The typical AR upper receiver was made for a lightweight carry rifle and they stripped all the metal they could off it to make it light to carry (which is advantageous for the military). The net result are upper receivers that are so thin you can flex them with your bare hands. These flexible uppers are “strong enough” for general use, but they are not ideal for accuracy. Accuracy improves with a more rigid upper receiver.
3. True Receiver Face: We’ve found that truing the receiver face is valuable. Some may argue this point but it is always best to keep everything related to the barrel and the bore in complete alignment with the bore (i.e. barrel extension, bolt, upper receiver, carrier, etc.).
4. Barrel Extension: You should Loctite or glue the barrel extension into the upper receiver. This holds it in place all the way front to back in the upper receiver. Otherwise if there is any play (and there typically is) it just hangs on the face of the upper receiver completely dependent on the face of the upper receiver as the sole source of support for the barrel as opposed to being made more an integral part of the upper receiver by being glued-in.
5. Gas Block: You want a gas block that does not impose pointed stress on the barrel. Clamp-on types that grab all the way around the barrel are excellent. The blocks that are pinned on with tapered pins that wedge against the barrel or the slip on type of block with set screws that push up from underneath (or directly on the barrel) can deform the bore inside of the barrel and can wreck the accuracy of an otherwise great barrel.
6. Free-Float Handguard: A rigid, free-float handguard (and I emphasize the word rigid) really makes a difference. There are many types of free-float handguards and a free-float handguard is, in and of itself, a huge improvement over a non-free-float set up, but best is a rigid set-up. Some of the ones on the market are small diameter, thin and/or flexible and if you are shooting off any type of rest, bipod, front bag, etc., a rigid fore-end is best since ARs want to jump, bounce and twist when you let a shot go, as the carrier starts to begin its cycle before the bullet exits the bore.
7. Barrel Contour: You want some meat on the barrel. Between the upper receiver and the gas block don’t go real thin with a barrel (we like 1″ diameter if it’s workable weight-wise). When you touch off a round and the bullet passes the gas port, the gas system immediately starts pressuring up with a gas impulse that provides vibrations and stress on the barrel, especially between the gas block back to the receiver. A heavier barrel here dampens that. Staying a little heavier with barrel contour through the gas block area and out to the muzzle is good for the same reasons. ARs have a lot going on when you touch off a round and the gas system pressures up and the carrier starts moving (all before the bullet exits the bore) so the more things are made heavier and rigid to counteract that the better — within reason (I’m not advocating a 12-lb barrel).
8. Gas Tube Routing Clearance: You want a gas tube that runs freely through the barrel nut, through the front of the upper receiver, and through the gas key in the carrier. Ensure the gas tube is not impinged by any of them, so that it does not load the carrier in a stressed orientation. You don’t want the gas tube bound up so that when the gas tube pressures up it immediately wants to transmit more force and impulse to the barrel than would normally occur. We sometimes spend a lot of time moving the gas block with gas tube on and off new build uppers and tweaking gas tubes to get proper clearance and alignment. Most gas tubes do need a little “tweaking” to get them right — factory tubes may work OK but they typically do not function optimally without hand-fitting.
9. Gas Port Tuning: You want to avoid over-porting the gas port. Being over-gassed makes the gas system pressure up earlier and more aggressively. This causes more impulse, and increases forces and vibration affecting the top end and the barrel. Tune the gas port to give the amount of pressure needed to function properly and adequately but no more.
10. Front/Back Bolt Play: If accuracy is the game, don’t leave a lot of front/back bolt play (keep it .003″ but no more than .005″). We’ve seen factory rifles run .012″ to .015″ play, which is OK if you need to leave room for dirt and grime in a military application. However, that amount of play is not ideal for a high-accuracy AR build. A lot of front/back bolt play allows rounds to be hammered into the chamber and actually re-formed in a non-consistent way, as they are loaded into the chamber.
11. Component Quality: Use good parts from a reputable source and be wary of “gun show specials”. All parts are NOT the same. Some are good, some are not so good, and some aftermarket parts are simply bad. Don’t be afraid to use mil-spec-type carriers; by and large they are excellent for an accuracy build. Also, remember that just because a carrier says “National Match” or something else on it does not necessarily mean it’s any better. Be wary of chrome-plated parts as the chrome plating can change the parts dimensionally and can also make it hard to do hand-fitting for fit and function.
12. Upper to Lower Fit: A good upper/lower fit is helpful. For quick and dirty fit enhancement, an Accu-Wedge in the rear helps a lot. The ultimate solution is to bed the upper to a specific lower so that the upper and lower, when together, are more like one integral unit. For the upper receivers we produce, we try to get the specs as close as we can, but still fit the various lowers in the market place.
13. Muzzle Attachments: Don’t screw up the muzzle (literally). Leave as much metal on the barrel at the muzzle as you can. People like to thread the muzzle for a flash hider, suppressor, muzzle brake, or some other attachment, but if you really want accuracy, leave as much metal as you can there. And, if you have something that screws on, set it up so that it can be put on and have it stay there without putting a lot of torque and stress on it right where the bullet exits the bore. If you are going to thread the end of the barrel, make it concentric with the bore and make sure what you screw on there is as well. For all muzzle attachments, also ensure that the holes through which the bullet passes through are dead true to the bore. Many aftermarket screw-on things are not so good that way. Anything that vents gas should vent symmetrically (i.e. if it vents left, it should vent equally right, and likewise, if it vents up, it should vent down equally). Uneven venting of gas can wreck accuracy.
14. Quality Ammunition: Ammo is a whole story by itself, but loads that are too hot typically shoot poorly in an AR-15. If you want accuracy out of an AR-15, avoid overly hot loads. Shown below are test groups shot with four (4) different uppers, all with moderate loads. These four uppers all pretty much had the same features and things done to them as explained in this article, and they all shot great.
Gun-maker Bear Creek Arsenal has a good article on its website about rifling barrels. The article explains four common methods of rifling the interior of barrels: Cut Rifling, Broach Rifling, Button Rifling, and Hammer Forging. In addition, the article describes a new (and somewhat radical) method, Cation Rifling, which employs acid to etch rifling. READ Full Article.
The main focus of the article is on Cold Hammer Forging of barrels. This requires massive, expensive tooling, but the results can be very consistent. Many top gun-makers, such as FN, HK, and Ruger, have used the hammer forging process. And now Bear Creek Arsenal also offers hammer-forged barrels. Bear Creek recently acquired two state-of-the-art cold hammer forging machines. With hammer forging, a chamber can be formed and barrel contour shaped at the same time. This process produces some of the most consistent barrels available today. Here is a summary of how Cold Hammer Forging works:
Cold Hammer Forging — Machinery and Process
A cold hammer-forged barrel starts life… as a short and fat blank with a polished hole running through the center. A hardened mandrel of proper width (caliber) and rifling pattern — again reversed/inverted — is placed into the smooth bore. The pair go into a forging machine that compresses the steel against the mandrel, hammering it into final shape. The barely detectable external spiral patterns that remain on some barrels are imprints from those hammers at work. Some companies polish them out, however.
Cold hammer forging machinery is very expensive, representing a significant investment for companies. However, when the hammer forging process is done and the mandrel removed, the resulting barrel is the proper length and profile with rifling that is consistent and butter smooth. No lapping is required — a time and expense saver — although a stress-relief step often follows.
The process takes place at room temperature, despite the misleading “cold” terminology. There is a hot hammer forging process, but the equipment is even more expensive and the slight improvement in grain consistency hasn’t proven advantageous enough for a return on that investment. Performance is impressive and consistent.
One of the biggest advantages of a cold hammer forged barrel is longevity. They… survive abuse and last longer. The manufacturing process adds those enviable virtues with each strike of those hammers — strengthening the metal in a work-hardening process employed by blacksmiths for centuries.
Comparing Popular Rifling Methods
What rifling process should you choose? If long-distance is your passion and you home brew custom cartridges to print tiny groups in the next zip code, cut rifling is the optimum choice. Button rifling is a solid second choice, but not always the Holy Grail long-distance shooters dream about. Cold hammer forged barrels, however, last longer and [offer great performance for the price.]
Savage offers an innovative, versatile version of its popular A22 rimfire rifle. The Savage A22 Takedown separates quickly and easily into two units, with a simple quarter-turn (90-degree) rotation of the fore-end. This allows the A22 Takedown to easily transport in a pack when camping or hunting. Or stow the gun conveniently in your vehicle. Separating this A22 Takedown into two parts is as simple as a twist.
The Savage A22 Takedown ($479.99 MSRP, $370 average sales price) has some other cool storage features. The cheek-piece lifts up to provide storage for three, (3) 10-round rotary-style magazines. In addition, the A22 Takedown has a dry storage compartment in the pistol grip that can hold patches or other small accessories, such as earplugs.
What Are the Advantages of a Takedown Rifle?
The first big advantage of a takedown rifle is that it can be stored in a smaller space and you don’t need a long case to carry in the field. Fully assembled, the Savage A22 Takedown is 36.875″ long. As separated into two sections, each section is about 18″ long, so each segment can fit inside a small day-pack. When transported in a vehicle, the two segments may fit in an on-board storage area, or even in the spare tire compartment (with appropriate padding).
The Savage A22 Takedown rifle can also be transported in an ultra-short 24″ Discrete Carry Case that doesn’t look like a typical rifle case.
Assembly and Disassembly of Savage A22 Takedown
The Savage A22 Takedown can be separated into two sections in a matter of seconds. First make sure the gun is unloaded, the magazine is removed, and the bolt is pulled back and locked. Make sure the muzzle is pointed away from you, and the safety is activated. Double-check to make sure there is no round in the chamber! Then holding the gun horizontally, grab the fore-end and rotate one-quarter turn clockwise. Then ease the barrel/fore-arm section forward gently. This will expose the front of the action and reveal the .22 LR chamber in the fore-end section. You can see how this works in the video below.
To re-assemble the A22 Takedown, bring the fore-end towards the action with the rear sight at the 3 0’clock position (right of center looking towards muzzle). Push the fore-end back gently until is seats properly. Then rotate the fore-end 90-degrees counter-clockwise. Again, watch the above video to see this re-assembly procedure, starting at 00:27 time-mark.
NOTE: Savage provided these studio photos, but the magazine should be REMOVED before disassembly.
On-Board Storage Under Cheek-Piece and in Grip Section
The Savage A22 Takedown has two very innovative and unique storage systems built into the synthetic stock. First the cheekpiece is hinged at the front, and lifts up to reveal a special compartment that holds three (3) of the A22’s rotary magazines. This is a very clever design — unique among rimfire rifles we believe. In addition, there is storage area INSIDE the pistol grip. This is accessed by removing a detachable plastic cover that snaps into the bottom of the grip section.
Performance in the Field
With an 18″ barrel, expect your .22 LR rimfire ammo to deliver good velocities in the A22 Takedown. After some adjustment of the Accutrigger, other A22s we have shot have performed well and been reliable so long as you make sure to fully seat the rotary magazines. This would be a good starter rifle, and has unmatched versatility for easy packing. The weight, before optics, is just 6.3 pounds. One nice design feature is a sight channel in the Picatinny rail. The adjustable rear sight is attached to the barrel immediately forward of the action.
Rifleshooter.com does some great original research — providing “hard data” you can’t find anywhere else. Here are the eye-opening results of Rifleshooter.com’s 6.5 Creedmoor barrel cut-down test. You may be surprised at the results. Read on…
What do you get when you cut a 6.5 Creedmoor-chambered barrel down to just over 16 inches? A lot more velocity than you might think. Our friends at Rifleshooter.com conducted a remarkable barrel cut-down test with 6.5 Creedmoor test rifle, shortening the barrel from 27 to 16.1 inches in one-inch increments. Surprisingly, with a 142gr Sierra MK, the total velocity loss (as measured with a Magnetospeed) was just 158 FPS, an average of 14.4 FPS per inch of barrel length. With the lighter 120gr A-Max bullet, the total velocity loss was 233 FPS, or 21.8 FPS average loss per inch of barrel.
Test Procedure
Five (5) rounds of each type of cartridge were fired at each barrel length and the velocity data was recorded with a MagnetoSpeed V3 barrel-mounted chronograph. The rifle was then cleared and the barrel was cut back one inch at a time from 27″ to just over 16″. NOTE: During this winter test, the air temperature was a very chilly 23° F. One would expect higher velocities across the board had the outside temperature been higher.
The photo below shows how the barrel was cut down, inch-by-inch, using a rotary saw. The barrel was pre-scored at inch intervals. As the main purpose of the test was to measure velocity (not accuracy) the testers did not attempt to create perfect crowns.
6.5 Creedmoor vs. Other Mid-Sized 6.5mm Cartridges
The 6.5 Creedmoor is a very popular cartridge with the tactical and PRS crowd. This mid-size cartridge offers good ballistics, with less recoil than a .308 Winchester. There’s an excellent selection of 6.5mm bullets, and many good powder choices for this cartridge. When compared to the very accurate 6.5×47 Lapua cartridge, the 6.5 Creedmoor offers similar performance with less expensive brass. For a tactical shooter who must sometimes leave brass on the ground, brass cost is a factor to consider. Here’s a selection of various 6.5mm mid-sized cartridges. Left to right are: 6.5 Grendel, 6.5×47 Lapua, 6.5 Creedmoor with 120gr A-Max, 6.5 Creedmoor with 142gr Sierra MK, and .260 Remington.
When asked to compare the 6.5 Creedmoor to the 6.5×47 Lapua, Rifleshooter.com’s editor stated: “If you don’t hand load, or are new to precision rifle shooting, get a 6.5 Creedmoor. If you shoot a lot, reload, have more disposable income, and like more esoteric cartridges, get a 6.5×47 Lapua. I am a big fan of the 6.5×47 Lapua. In my personal experience, the 6.5×47 Lapua seems to be slightly more accurate than the 6.5 Creedmoor. I attribute this to the quality of Lapua brass.” Now that Lapua offers 6.5 Creedmoor brass with small primer pockets, the 6.5 Creedmoor is even more attractive.
The creator of Rifleshooter.com also operates a Custom Rifle Building enterprise and gun shop in Long Island, New York: 782 Custom Guns Ltd.. He tells us: “We offer an unparalleled level of gunsmith machine shop services in the Long Island region. From precision rifles (USMC M40A3/A5/A6 XM3 clones) to customized Remington 870 and Mossberg 590 shotguns, and customized 1911s, chances are if you can dream it, we can build it!”
While devotees of this site are hard-core accuracy addicts, who normally shoot tiny groups with sophisticated Benchrest and Varmint rifles, we should not overlook the pure fun of shooting a classic iron sights lever-action rifle at reactive targets. Lever guns are fun to shoot, easy to transport, AND they require a lot less maintenance than your modern black rifle.
Drilling a tight 1/4-MOA group is very satisfying. But for simple, basic shooting fun, it’s hard to beat a slicked-up, “race-ready”, Winchester-clone lever gun. In fact, this Editor’s favorite rifle for “fun shooting” is my 20″ Uberti Model 1866 “Yellowboy” Lever gun. Shooting low-recoil .38 Special rounds at steel targets from a standing position offers old-fashioned shooting satisfaction. When I invite a new shooter to the range, I usually bring the 1866 Yellowboy, and let the newbie shoot steel at 50 yards. New shooters (of all ages) love the look and feel of the rifle, and the low recoil. The typical response is: “Wow, that was fun!”.
My rifle features a slicked-up action and lightened trigger. After a “CodyMatic” action job by cowboy gunsmith Cody Conagher, my Yellowboy’s lever can be cycled with just one finger. Trigger pull is about a pound and a half. The high-gloss, blued octagonal barrel is very accurate and the mirror-finish bore cleans up easily.
Based on the Model 1866 Winchester, Uberti’s Yellowboy, and its Model 1873 “older brother”, feature a toggle-link action that is extremely smooth. The toggle action design also keeps the linkages separate from the chamber so the gun runs extremely clean. After firing 100 rounds or more, all you need to do is wipe off the bolt and breech-face with some solvent and run a bore-snake down the bore a few times. To be honest, the Yellowboy is more fun to shoot at steel than my AR Carbine. And maintenance-wise, for every five minutes I spend cleaning the 1866, I’ll spend an hour detail-stripping and cleaning the AR. The shooting-to-cleaning ratio favors the lever gun by orders of magnitude.
These Italian-made Winchester clones are very handsome, with nicely figured wood under a durable clearcoat. You can polish the brass receiver to keep it shiny, or leave it alone to develop an authentic, dulled patina. Uberti’s Model 1873 features a steel receiver with gorgeous color case-hardening.
After the fun factor, what’s the best thing about Uberti lever guns? Resale value. I can sell my 1866 for quite a bit more than I paid for it. Over the past decade, the price of Italian-made Uberti lever guns has been steadily rising. This means that older rifles fetch a premium on the used market.
Jewell triggers are still the most-used triggers on competition benchrest and F-Class rifles and they are also popular for hunting, varmint, and tactical rifles (with or without safeties). While a Jewell trigger can work for years with minimal maintenance, if the trigger becomes gunked up, it may be necessary to disassemble the trigger for a thorough cleaning. Our friends Ed and Steve, aka the 6.5 Guys, have produced a helpful video that shows how to disassemble and then reassemble a Jewell trigger.
Why You May Need to Disassemble Your Jewell Trigger — the 6.5 Guys
Jewell triggers are a popular choice in the sport of long range precision shooting, and like everything else require regular cleaning and maintenance. In most cases they can be cleaned with charcoal lighter fluid or dropped into an ultrasonic cleaner. Should the situation require, they can be completely disassembled according to the Jewell Trigger Manual.
We ran into a situation where we had to dissemble a trigger due to the entrapment of some sticky dirt that couldn’t be removed with an ultrasonic cleaner. Our first step was to find some step-by-step instructions but we couldn’t find anything.
Recognizing that other shooters might be in the same situation we produced a step-by-step guide and video, published in full on 65Guys.com. These instructions will work with a left- or right-handed trigger. In our case we worked with a left-handed BR model trigger with safety and bolt release.
Step-by-Step Instructions are provided on 65Guys.com website. We recommend you read all the instructions carefully before you even think about disassembling your trigger. This video explains the process so you can get a sense of what is involved.
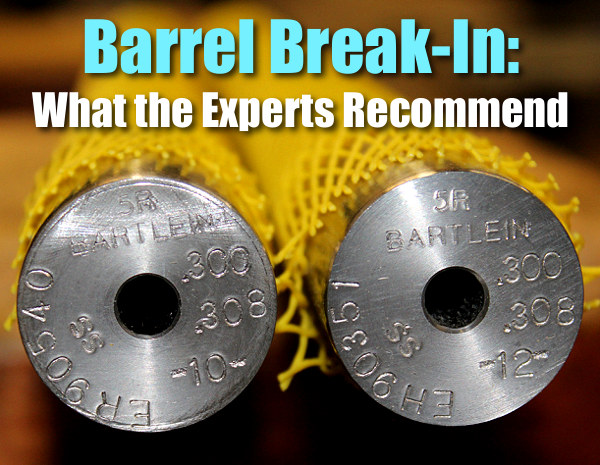
The question of barrel break-in is controversial. Some folks advocate an elaborate, lengthy cycle of shooting and brushing, repeated many times — one shot and clean, two shots and clean and so on. This, it is argued, helps barrels foul less and shoot more accurately. Others say minimal break-in, with patching and brushing after 10-15 rounds, is all you need. Still others contend that break-in procedures are a total waste of time and ammo — you should just load and shoot, and clean as you would normally.
We doubt if there will ever be real agreement among shooters concerning barrel break-in procedures. And one must remember that the appropriate break-in procedure might be quite different for a factory barrel vs. a custom hand-lapped barrel. This Editor has found that his very best custom barrels shot great right from the start, with no special break-in, other than wet patches at 5, 10, and 15 rounds. That said, I’ve seen some factory barrels that seemed to benefit from more elaborate break-in rituals.
What’s the best barrel break-in procedure? Well our friend Eric Mayer of Varminter.com decided to ask the experts. A while back Eric interviewed representatives of three leading barrel manufacturers: Krieger, Lothar-Walther, and Shilen. He recorded their responses on video. In order of appearance in the video, the three experts are:
Do I Need to Break-In a New Rifle Barrel?
Eric Mayer of Varminter.com says: “That is a simple question, [but it] does not necessarily have a simple answer. Instead of me repeating my own beliefs, and practices, on breaking-in a new rifle barrel, I decided to answer this one a bit differently. While we were at the 2016 SHOT Show, we tracked down three of the biggest, and most popular, custom barrel makers in the world, and asked them what they recommend to anyone buying their barrels, and why they recommend those procedures. We asked the question, and let the camera run!” Launch the video above to hear the answers — some of which may surprise you.
Long-Term Barrel Care — More Experts Offer Opinions
Apart from the debate about barrel break-in, there is the bigger question of how should you clean and maintain a barrel during its useful life. Some folks like aggressive brushing, other shooters have had success with less invasive methods, using bore foam and wet patches for the most part. Different strokes for different folks, as they say. In reality, there may not be one solution for every barrel. Different fouling problems demand different solutions. For example, solvents that work well for copper may not be the best for hard carbon (and vice-versa).
“Why worry about a little barrel fouling when the throat is subjected to a brutal 5,600° F volcano at 55,000 PSI? To investigate these and other questions about taking care of a match barrel, we spoke with a dozen experts and share their knowledge in this first of a series of articles.
After listening to folks who shoot, build barrels or manufacture cleaning solvents for a living, we concluded that even the experts each have their own unique recommendations on how to care for a match barrel. But they all agree on one thing — the gun will tell you what it likes best. Because the life expectancy of a match barrel is about 1,500 to 2,500 rounds, the objectives of cleaning one should include: preserve accuracy, slow the erosion, and remove fouling — all without damaging the gun. This article doesn’t claim that one cleaning method is better than the next. Rather, we set out to interject a little science into the discussion and to share some lessons learned from experts in the field.” — Chip Lohman
With inflation, the increased cost of .223 Rem centerfire ammo has driven more folks to shooting .22 LR rimfire ammo, both for fun and practice. Thankfully, handy conversion kits will let you shoot .22 LR ammo from your existing .223/5.56 AR-15 platform rifle. This allows low-cost training with no change in rifle balance, ergonomics, and/or optics.
The CMMG Bravo .22 LR Conversion Kit provides a replacement bolt/bolt carrier along with three 25-round magazines with special .22 LR-fitted followers and ammo slots. This allows you to shoot rimfire ammo from any AR-15 chambered for the .223 Rem (5.56×45). The CMMG Bravo has an integrated extension that fits into your current chamber. The rimfire bullet passes through this extension and then enters the barrel. This conversion kit is now on sale at Brownells for $172.99 with three 25-rd mags.
The CMMG Bravo conversion Kit comes with blowback-operated .22 LR bolt carrier, rubber protector for bolt carrier tip, and three 25-round polymer magazines. To use, simply replace the rifle’s .223 Rem bolt and carrier with the Bravo .22 LR conversion unit and load up the included magazine(s) with rimfire ammo.
To use the CMMG Kit, simply remove the centerfire bolt/bolt carrier, and replace it with the CMMG silver colored bolt shown above. CMMG states: “For best performance use a round-style hammer as notched hammers can cause function issues.” Testers have stated that high-velocity .22 LR ammo works best, and CMMG notes that “36gr plated-nose bullets have proven to be the best choice for function.” The copper-plated bullets help reduce fouling.
Ultimate Reloader Tests CMMG .22 LR Conversion Kit
Our friend Gavin Gear of UltimateReloader.com recently tested the CMMG .22 LR AR Conversion Kit. He observed that installation was very straight-forward and the CMMG magazines worked well. He and fellow tester Travis Fox shot the unit both slow-fire and rapid-fire successfully.
Gavin and Travis found the CMMG Kit easy to install and fun to use. With an AR that can shoot both .223 Rem and .22 LR, it’s like having “two guns in one”. Travis was impressed with the ease of use: “It is so simple to change over to the CMMG .22 LR AR kit! It took me about 68 seconds the very first time I tried. Each time after that it took me about 40 seconds — it’s that simple. It takes longer to fully load one of the mags than it does to switch over from .223/5.56 to .22 LR and back.”
The AR shot very well with the higher-velocity ammo types. 100% functioning was achieved with both 40gr Federal Game Shok ammo and American Eagle High Velocity 38gr Copper-plated HP ammo. NOTE: CMMG does recommend high-velocity Copper-plated rimfire ammunition.
Maintenance Tip — After converting back to your centerfire .223 Rem (5.56), Travis says “make sure to clean the gas tube and components as .22 LR tends to run dirty”. READ Full Test on UltimateReloader.com.
CMMG Bravo Conversion Kit Gets Thumbs Up from Gavin and Travis
“Does this conversion kit get the Ultimate Reloader stamp of approval? Absolutely! In these times of ammunition/component scarcity this gives options to shooters. Finding bulk .22 LR can sometimes be easier than 223/5.56. This kit gives that option at a great price. Any chance to keep skills up and familiarize new shooters to a platform is a good thing. Basically two rifles for a lot less than another rifle.”
How to Install CMMG Bravo .22 LR Conversion Kit
The Brownells video below shows the installation process step-by-step:
In this instructional video, a Brownells gunsmith demonstrates (step by step) how to install, disassemble, clean, lubricate, and reassemble the CMMG AR-15 .22 LR Conversion Kits. Clear the rifle and make safe before you start the conversion. Separate the upper and lower, remove the standard bolt carrier group. You then install the conversion bolt and connect the upper and lower as normal.
Details of CMMG .22 LR Conversion Kit
“For years I’ve had a CMMG conversion kit. It’s a drop-in system that’s … very reliable and it’s accurate. The [CMMG conversion] has lower recoil [and is] great for training. Even though ammo prices have gone through the roof, .22 LR is still cheaper to shoot than anything else.” — SootchGear


 Barrel/Shoulder Fit and Blue-Printing


 5. Gas Block: You want a gas block that does not impose pointed stress on the barrel. Clamp-on types that grab all the way around the barrel are excellent. The blocks that are pinned on with tapered pins that wedge against the barrel or the slip on type of block with set screws that push up from underneath (or directly on the barrel) can deform the bore inside of the barrel and can wreck the accuracy of an otherwise great barrel.


 Savage A22 Takedown Key Features:


 Do I Need to Break-In a New Rifle Barrel?


