Powder and primers are still very pricey but (thankfully) we are starting to see the price of factory-loaded ammunition slide down a bit. Here is a great deal for rimfire shooters. You can now get CCI .22 LR Standard Velocity 40gr Target Ammo for just $4.99 per box, with flat-rate shipping. This is good, reliable ammo for plinking, practice, and rimfire pistol work. And it will probably be good enough for NRL22 competition if the targets are not too far out.
Save $1.40 per Round or More by Training/Competing with Rimfire
The ammo price differential is why many PRS/NRL competitors are now doing more rimfire matches than centerfire matches. At $4.99 per 50-round box, this CCI ammo runs just $0.10 (ten cents) per round. Compare that to handloaded 6mm Creedmoor ammo. These days, you might pay close to $1.00 per round just for bullet, powder, and primer. And then you must figure in brass costs and barrel depreciation. A good 6mm barrel may lose its competitive edge after 1500 rounds. That means each centerfire shot could cost you $0.40 (forty cents) or more just in barrel depreciation, assuming the cost of your new chambered/fitted barrel is $600. So you see why rimfire makes sense from a budget standpoint.
AIM SMALL, MISS SMALL: At 25 yards, this is a fun rimfire plinking target. At longer distances it can be a great training target for precision centerfire shooters.
With NRL22 and the new PRS Rimfire Series, interest in rimfire tactical competition is growing fast. There is also great interest in .22 LR rimfire tactical cross-training. With a rimfire rig, you can practice regularly for a fraction of the cost of centerfire training. That way you can build your skill set without breaking the bank. Decent rimfire ammo can be had for five cents a round. Compare that to fifty cents (or more) for handloads and maybe $1.20 per round for factory ammo.
To help with rimfire cross-training, here are some of our favorite rimfire tactical targets, all in easy-to-print PDF format. Click each target image to download the FREE target. You’ll find more free targets for load development, precision practice, and fun shooting on our AccurateShooter FREE Targets Page
Targets for Rimfire Training and Fun Matches
Here’s a rimfire training target with “big to small” target circles. Start with the largest circles, then move to the smaller ones in sequence. This systematic drill provides increasing challenge shot-by-shot. Novices often are quite surprised to see their accuracy improve as they move from bigger to smaller aiming points. That provides positive feedback — always a good thing.
Right Click and “Save as” to download printable PDF versions of target.
Rimfire Practice Targets
SPECIAL BONUS–Rimfire Tactical Precision Targets
These FREE targets by DesertFrog are offered in Adobe Acrobat format for easy printing. CLICK HERE to download all six targets as a .ZIP archive.
More Free Targets…
These and many other free targets are available at MyTargets.com.
At the request of our readers, we provide select “Deals of the Week”. Every Sunday afternoon or Monday morning we offer our Best Bargain selections. Here are some of the best deals on firearms, hardware, reloading components, optics, and shooting accessories. Be aware that sale prices are subject to change, and once clearance inventory is sold, it’s gone for good. You snooze you lose.
1. Midsouth — LEE Challenger Single-Stage Press, $72.99
⏺ Good basic or back-up press at really low price — great bargain
New to reloading and nee a simple but effective single-stage press? Or perhaps you wan to add a secondary press for repetitive chores such as primer decapping. Then the LEE Challenger Breech Lock Press. This LEE Press has a large opening for easy Case access while loading. The smart primer ejections system drops removed primers through a tube straight down into your trash big — that’s smart. The Challenger Breech Lock Press comes is fully compatible with LEE’s Breech Lock Quick Change die system. That allows you to swap dies in seconds.
⏺ Very good price on a major mfg. ultrasonic cleaning machine
Using ultrasonic technology to clean your brass is a fast and effective way to get both the case outside/inside plus the primer pockets clean. The Hornady Lock-N-Load Sonic Case Cleaner is on sale now at Graf & Sons for just $109.99, a 26% savings. This machine features a one quart stainless steel tank that removes carbon residue from the inside and outside of cartridge cases with high-frequency ultrasonic energy and a cleaning solution. The L-N-L Sonic Cleaner™ effectively cleans the inner surfaces of cartridge cases as well as the primer pockets.
3. Titan Reloading — LEE Load-Master Progressive Press, $214.99
⏺ Solid 5-station progressive — add powder measure + other features later
Are you looking to upgrade from a single stage to an affordable progressive press? The LEE Load-Master offers great performance for the price — just $214.99 on sale (less that you’d pay for some single-stage presses). Start with the basic auto-indexing unit with five stations. Then, as your budget permits, you can add a LEE Powder measure, Bullet Feeder, Case Feeder, Primer Feeder, and other Lee accessories. This is a solid starter set-up that you can upgrade over time. For pistol reloaders in particular the LEE Load-Master offers good performance for the price.
4. Taurus G3c 9mm Pistol, $209.99 after Mfg. Rebate
⏺ Good 9mm carry pistol for under $210 with Rebate that ends 4/15/22
Looking for a slim, compact carry pistol but have a tight budget? Here’s one of the best deals we’ve seen in many months. The compact 9mm Taurus G3c is on sale now for just $234.99 at LockedandLoaded.com. Plus this Taurus 63c pistol qualifies for a $25 Taurus factory rebate through 4/15/2022. That lowers your net cost to a crazy-low $209.99! This pistol features a tough Tenifer-finish slide plus Teflon coatings on all operational controls. Buyer reviews have been positive: “The pistol is easy to operate, clear, and the re-strike capability is nice. Great gun and not just for the money.”
5. Amazon — Quality Clamp for ARCA Rail Attachments, $23.99
⏺ Use to clamp rifle ARCA rails to bipods, tripods, and bagriders
Need an inexpensive way to fit accessories to a rifle’s forearm ARCA Rail? We found this 70mm Quick Release ARCA Swiss Clamp for only $23.99 — much cheaper than high-end ARCA Swiss clamps. This can be used to fit a benchrest bag-rider, or PRS accessory bag. Or, you can clamp Atlas-type bipods. And yes, you can mount your rifle to a tripod with this clamping unit (which secures to the top of the tripod). One of our Editors uses this model and finds it’s a solid mount with two handy built-in levels. NOTE: This is not a true “quick release” clamp. It takes nearly a full rotation on the knob to loosen the clamp, so this may not be ideal for rapid accessory-swapping in tactical competitions.
6. KYGUNCO — Savage .22 LR Mark II FV-SR Rifle, $259.99
⏺ Inexpensive rifle has shown good accuracy for NRL22
Looking for a fun .22 LR rifle that offers good accuracy for a very affordable price? Grab the Savage Mark II FV-SR. A good starter for NRL22 work, this rifle boasts a multi-Cam synthetic stock plus 5-round detachable box magazine. This Mark II FV-SR includes a one-piece scope rail, plus user-adjustable AccuTrigger for crisp trigger pulls. The heavy, button-rifled, 16.5″ barrel is fluted, and is threaded at the muzzle.
⏺ Amazing value for a good 80mm objective spotting scope
Need a spotting scope but have a very tight budget? Consider the Athlon Talos Spotting scopes. These are now on sale at EuroOptic for just $139.99, 53% off the regular $299.99 price. These Athlon Talos spotters feature a large, 80mm objective lens with multi-coating treatment for excellent light transmission. Buyers report that the general clarity and sharpness are surprisingly good for the money. The Athlon Talos features a rotating ring, so you can easily adjust the viewing angle when mounted on a tripod.
⏺ Very good set of Torque control fastener tools now on sale
For many years Wheeler’s FAT Wrench has been a popular tool for working on firearms. Now Wheeler Engineering has introduced the excellent Wheeler FAT Stix set. This includes 12 Screwdriver Bits, 5 Torque Limiters, and fitted Storage Case. Use this FAST Stix set for for firearm assembly, maintenance, and installing accessories. Along with the bits and torque limiters, Wheeler includes a comfortable T-handle all wrapped up in a convenient case. With the FAT Stix kit you can ensure your actions and scope rings are attached properly.
9. Amazon — Caldwell Steady Rest, $24.64
⏺ Works as front/rear rifle support or detach to use as separate pistol rest
The Caldwell Steady Rest is a sturdy yet inexpensive modular rest design. At $24.64 on Amazon you can’t go wrong with this Caldwell Steady Rest, even if you use it just for pistols, or sighting in hunting rifles. Use the front section by itself as a pistol rest, or connect both units for rifle use. We’ve used this for pistols and it worked very well — the design provides a nice handrest below the pistol grip. Lightweight yet stable, the Caldwell Steady Rest is easy to store, easy to transport, and ultra-affordable.
The 2022 Federal Tax Deadline is coming very soon. This year, Federal and (most) State tax returns must be filed on or before Monday, April 18, 2022. That’s a few days later than usual, because this year April 15, the normal deadline, is recognized as Emancipation Day, a holiday in the nation’s capital.
If you haven’t finished your taxes yet, and could use some help maximizing your deductions and following all the rules, you may want to consider using the Tax Act Program. This is certainly NOT the only good online tax program available, and you may want to go to a tax specialist. However, Tax Act is currently offering 25% Off Savings for NRA Members.
So as an NRA member, and a patriotic supporter of the Second Amendment, you can enjoy significant savings on expert tax guidance and filing support. For example, the most popular DELUXE Plan is $35.21 for NRA Members, instead of the regular $46.95 price. And there is even a FREE program for basic filers with simple returns. NOTE: State tax prep fees are separate.
* Check to determine the exact deadline for state tax filing. Some states have filing deadlines AFTER 4/18/2022. Click here for a list of deadlines for ALL 50 States: 2022 STATE Income Tax Filing Deadlines.
At the request of our readers, we provide select “Deals of the Week”. Every Sunday afternoon or Monday morning we offer our Best Bargain selections. Here are some of the best deals on firearms, hardware, reloading components, optics, and shooting accessories. Be aware that sale prices are subject to change, and once clearance inventory is sold, it’s gone for good. You snooze you lose.
1. Palmetto SA — S&W M&P15-22 Sport Rimfire Package, $449.99
⏺ Good, reliable rimfire AR clone for NRL22 and cross-training
This Smith & Wesson AR-style M&P15-22 provides the fun of an AR15 with the low cost of rimfire ammo. This can work well for cross-training or NRL22 matches. The S&W M&P15-22 SPORT features a slim M-LOK handguard that easily accepts a variety of accessories without removing the handguard. The M&P15-22 SPORT comes standard with removable Magpul MBUS front and rear folding sights. This $449.99 package includes 3 magazines and a nice gun case.
2. Midsouth — Lapua Brass in Stock, Many Types
⏺ Good prices on long-lasting, top-quality Lapua brass
Lapua is a top cartridge brass choice for competition, varminting, and hunting. Lapua cartridge brass has set world records in Benchrest, F-Class, and High Power competition. Right now Midsouth has a wide variety of top-quality Lapua brass at attractive prices. Lapua brass in stock now includes: .223 Rem, 6.5×47 Lapua, 6.5 Creedmoor, 6.5-284, .308 Win, .300 Norma Magnum, 8×57 IS/IRS, .338 Lapua Magnum, and more.
3. Precision Reloading — Hornady Auto Charge, $299.99
⏺ Good performance with convenient raised control panel
Every handloader needs a good, automated powder dispenser. The new-generation Hornady Auto Charge has many good features, including a smaller footprint, and adjustable trickle rates. This was you can customize the dispensing speed to your choice of powder. Haveing the control panel on top of the scale/dispenser also is handy. This is a very good deal — the same Hornady Auto Charge currently sells for $359.49 on Amazon.
4. Amazon — Universal Gun Cleaning Kit, $39.50
⏺ Great value for cleaning kit for pistols, rifles, and shotguns
This Universal Gun Cleaning Kit has just about everything you need to clean any firearm, all packed in a handy transport case. The kit includes jags, brushes, bore mops, slotted tips, and lots more. The fitted jags and slotted tips are made from solid brass and marked by caliber. The cleaning rods and accessory adapters are also made from brass. Included in this easy-to-carry kit are: 6 gun rods, 13 gun jags, 4 slotted tips, 9 gun mops, 14 bore brushes, 3 muzzle guards, 3 utility brushes, 3 accessory adapters, 4 polishing cloths, 100 cleaning patches, 2 oil bottles (empty), and even a gun cleaning mat. NOTE: For competition rifles, we recommend using high-quality ONE-PIECE cleaning rods.
5. EuroOptic — Vortex Close-Outs, Save Hundreds on Top Optics
⏺ Incredible bargains on Vortex scopes — save $300-$500
Shown above are just three (3) of the 15 Vortex scopes on sale, including red dots, 1-6X tactical models, hunting scopes, and both FFP MRAD and SFP MOA competition models. CLICK HERE to see all the Vortex close-out optics.
6. KYGUNCO — Turkey Season Shotgun Bargains, $210 and Up
⏺ Great low prices on shotguns for spring turkey season
7. MidwayUSA — Electronic Muffs with Walkie-Talkie, $54.83
⏺ Dual-function electronic muffs — great for range communications
Electronic earmuffs protect your hearing while allowing you to hear range commands. With these Walkie-Talkie muffs you also get 2-way communication capabilities. That lets you talk to folks in the pits or at a different section of your shooting club. The Walker Razor Slim Low Profile Electronic Earmuffs (NRR 23dB) with Walkie Talkie allows you to communicate with other FRS radios. That lets you give range commands or talk with friends without the need for a second radio. If you don’t need the two-way functionality, MidwayUSA also has the NRR 26 Walker’s Alpha Power Electronic Muffs for $39.99, and the slimmer NRR 23 Razor PRO Electronic Muffs for $39.99. All these options are excellent bargains.
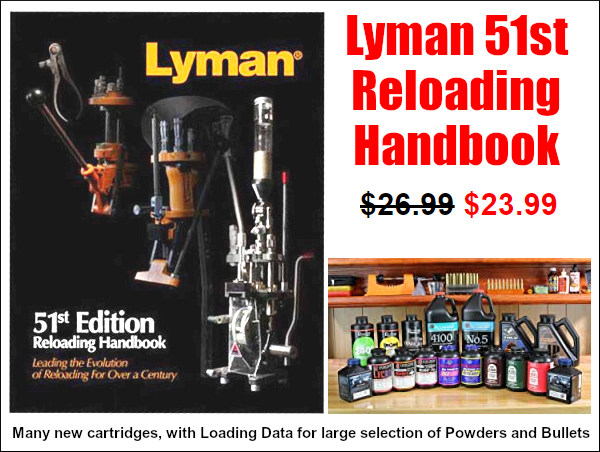
⏺ Excellent, up-to-date resource with good powder/bullet data
Lyman has released its new 51st Edition Reloading Handbook. This big, full-color edition includes both reloading guidance and extensive load data. New cartridges include: 224 Valkyrie, 22 Nosler, 24 Nosler, 6mm ARC, 6mm Creedmoor, 6.5 PRC, 6.8 Western, 300 PRC, and more. The book includes powders from Accurate, Alliant, Hodgdon, IMR, Norma, Ramshot, VihtaVuori, and Winchester. This Lyman Handbook also covers a huge selection of bullets from Barnes, Berger, Hornady, Lapua, Sierra, Speer, Swift and Winchester plus cast bullets. This latest 51st Edition has a new section about Progressive Presses along with How-To articles for single-station and turret presses. This soft-cover Handbook is on sale for $23.99 at Midsouth.
9. Locked&Loaded, CMMG .22 LR Conversion Kit for ARs, $129.99
⏺ Quick, easy .22 LR conversion kit for AR-platform rifles
Here’s a great way to save money when shooting your AR15. Shoot .22 LR at a fraction of the cost of .223 Rem ammo. Swapping your bolt carrier group with a CMMG Bravo Conversion .22 Bolt Group takes only seconds to install. This .22 Conversion Kit operates on direct blowback, so it does not need the gas tube for function. The Bravo Conversion Bolt Group system includes the stainless steel conversion bolt group along with one 25-round .22 LR magazine. If you need more mags, Palmetto State Armory sells the CMMG Bravo .22 Conversion Kit with THREE Magazines for $179.99.
10. Amazon — Large Digital Display Timer, $12.95
⏺ Use in Matches — Count-Down or Count-UP, handy big buttons
If you shoot in a discipline with time limits, or you time your firing strings during practice, having a reliable and easy-to-read timer is critical. One of our favorite timers is this very affordable Digital Display Timer with both count-up and count-down functions. It boasts an easy-to-read display and LARGE buttons making it perfect for F-Class, Palma, and other matches. This timer comes with both a built-in stand AND a strong magnet so you can position the timer conveniently.
Richard Franklin’s Step-by-Step Guide to Pillar Bedding
The Art of Stress-Free Stock Bedding
by Richard Franklin Richard Franklin prepared this article for our readers. Richard tells us: “I’m happy to do pillar-bedding work, but this is a job which many shooters can do themselves, with some practice and the right components. I do suggest you practice first on an old ‘beater stock’. When done right, you end up with a perfect fit of receiver to action, with no twisting, stretching, or compression forces being applied to the receiver through mis-alignment. That’s what I mean by ‘stress-free’.”
This article covers all the steps in the process. If you want to see more, Richard has a 200-minute DVD, Stress-Free Pillar Bedding, that shows the entire job–from start to finish–and contains many tips to help you achieve perfect results. Richard shows how to properly relieve the bedding area, how to make pillars, how to set up the barreled action, and how to test your work to ensure it is truly “stress-free”. In the DVD, Richard does a complete pillar bedding job on both a finished custom stock and a Remington stock. You can order the Pillar Bedding DVD by visiting the Instructional Video page on RichardsCustomRifles.com.
[Editor’s Note: This article was first published a decade ago. So, some of the listed bedding materials may have been enhanced slightly, or the product names may have changed. But the procedures described by Richard are still valid and still achieve great results.]
Before You Begin — Some Comments About Inletting
Richard told us: “You can’t do a great bedding job unless you start with really good inletting. Unfortunately, many ‘inletted stocks’ really require quite a lot of work to get the inletting right. You cannot inlet a stock 100% correctly just using a stock duplicator. That’s one reason I do bedding jobs only on the stocks I make. If the inletting isn’t right, you can have a myriad of problems–such as the holes for the action bolts being in the wrong place, or the stock not having enough clearance for the barrel or the trigger hanger. So, BEFORE you start your bedding job, make sure the inletting is really right. Don’t assume the inletting is really complete (and correct) just because the manufacturer claims that to be the case. This applies to both wood and fiberglass stocks.”
Pillars For Bedding
The BAT action featured in this article has three pillars, with the middle pillar sitting under the front of the trigger guard, and the third pillar at the rear of the guard. More typical installations will use two pillars. For either system, the installation procedures are the same.
In Photo 1, you will see part A, the bottom part of the front pillar which we call the “escutcheon”. Part B, which is a 1/4″ X 28 action bolt that is slightly longer than part C which is the top part of the front pillar. The two parts of the front pillar were machined as one piece and then the escutcheon was cut off just below the shoulder that is inside. This shoulder is for the head of the action bolt to tighten up against. I’ve found that a two-piece pillar has many advantages, particularly for hunting stocks where the underside of the stock is angled (i.e. not parallel with bore axis). I make the pillars I use, machining them from cut-off stainless barrel stubs.
Part D is a 1/4″ X 28 hex-head bolt with the head turned down to 1/4″ which permits the insertion of a hex-head driver to tighten and remove the bolt. This headless bolt will be inserted in the rear tang hole of the action and part E, the rear pillar will be placed on it.
STEP ONE — Getting Started
Photo 2 shows tape on recoil lug, pillars bolted in place and putty in voids. Release agent is polished to a very thin layer. The top half of the front pillar (part C) is placed on the action receiver ring and the bolt (part B) is inserted thru the pillar and tightened against the action. This bolt must have a tapered head on the underside so that, when it is tightened, it will center the top half of the front pillar around the action bolt hole. (This is also true for the middle pillar if the action has a middle bolt.)
PHOTO 2
The headless bolt is inserted into the rear tang hole of the action and the rear pillar is slipped down on it. You will notice in Photo 3, below, that the pillars have the hole drilled oversize so that a 1/4″ bolt has a little space around it. (I like to drill the pillars with a .260″ bit inside.)
The above scenario is the placement of the pillars prior to applying the bedding compound, which I call “Mud”. Devcon 10110 is my bedding compound of choice (and the only product I use) as the mud must set up as hard as concrete and most other epoxies will not do this. Also Devcon shrinks very little if at all. My comments on other bedding compounds are in the sidebar below.
STEP TWO — Relieving the Stock Before Bedding Relieving the right amount of wood in the area to be bedded–not too much, not too little–is very important to achieving the best results. You need to create some space for the mud to fill around the action, but you don’t want to alter the inletting too much.
PHOTO 3
Photo 3 shows the wood removed from the inside of the stock bedding area. Remove enough wood everywhere except along the top sides of the stock to allow at least 1/8″ to 3/16″ of room for the mud. Remove 1/4″ of wood behind the recoil lug. I like about .012″ clearance on the top inside edges.
NOTE: Leave a small area of original wood just behind the rear tang bolt hole as this wood will determine the elevation of the bedded action in the stock.
Photo 4 shows the tang area of the stock. Note the elevation wood left at tang. Be sure to leave some original wood for the action tang to sit on. This is very important.
STEP THREE — Wrapping Tape on the Barrel Photo 5 shows the barreled action in the vise. It also shows black electrical tape wrapped around the barrel just behind the front of the stock forearm. Wrap enough tape to hold the front of the barreled action at the proper elevation in the stock.
The idea is that the barreled action does not touch anything except the bit of original “elevation” wood left at the rear tang (behind the pillar) and the forearm resting on the electrical tape. This is very important to obtain 100% stress-free bedding. You want the bore of the barrel to be parallel with the top edge of the stock so wrap just the right amount of tape to ensure this. The tape also centers the barrel in the fore-arm. Done right, the barreled action will be contacting just at two points (tape in front, tang in rear) and the barrel’s bore will be parallel with the top of the fore-arm’s sidewalls.
Comments on Alternative Components and Methods
Bedding Compounds
There are at least a dozen popular products used for rifle bedding. At one time or another, Richard has tried most of them. Devcon 10110 “Plastic Steel® Putty” is the only compound he currently uses and the only product he endorses whole-heartedly. “The Devcon 10110 is expensive, but it is the best bedding product I’ve found. First, it sets up extremely hard. That is very important to the performance and longevity of the bedding job. You want it to get it as hard as concrete. You need it really hard so when you tension the action screws it doesn’t squish down or migrate. Some of the brown stuff other folks use is way too soft. Marine Tex is also too soft. Many products will shrink. Any compound that shrinks is useless in my book. Devcon has absolutely near-zero shrinkage. Acra-Glass I keep in my shop, as it is useful for stock repairs. However I would never bed with Acra-Glass.
Devcon also has just the right consistency — about that of peanut butter. So, it is easy to apply but not runny. It stays in place when I turn the stock upside-down. Devcon is also relatively forgiving to mix–the proportions of the two elements are not super-critical like some other products. I know Marine-Tex can give real problems if you don’t use just the right amount of catalyst. Overall, Devcon does everything you need it to do, and does it exceptionally well. Some other smiths think it’s too expensive–and yes I’ll use $10-$15 worth of Devcon in doing a typical bedding job. But I think the customer deserves the best possible, longest-lasting bedding, and that means Devcon. Among the products I’ve used, Bisonite is my second choice, but I think Devcon will last longer.”
Release Compounds
Richard tells us: “People use all sorts of release compounds and I’ve tried many. I strongly prefer Kiwi shoe polish (neutral color). With the Kiwi, I’ve never had an action stick in the stock. It goes on easy, and you can use a paper towel to polish it very thin and that’s a big benefit. If you have a thin layer of release compound the finished bedding is that much closer to the exact dimensions of the action. I’ve heard of guys using PAM spray. I don’t trust that stuff. The Brownells release compound goes on too thick. Car wax is not a great choice either because it can separate and it gets dusty as it dries. Go with the Kiwi stuff–a little can will last for years. But be sure to use the clear (neutral) kind so you don’t stain your stock or action.”
Clamping and Tension Materials
Read a few articles on pillar bedding and you’ll see many different systems for holding the barreled action to the stock when the bedding compound cures. We’ve seen surgical tubing used, or strips of bicycle inner tube. Some writers have even advocated using mechanical clamps (a bad idea). Richard has tried various tensioning set-ups over the years, and electrical tape is his strong recommendation: “First, let me say it’s crazy to use a C-Clamp or something like that. The clamp will cause a point-load where it attaches and that is just the opposite of what you want.”
Richard has tried many materials: “Surgical tubing I’ve found to be cumbersome to use, and it tends to loosen up during the curing time. Same thing with strips of inner tube. That’s bad news because any loosening or stretching will allow the action to shift. It’s absolutely critical that the action not move one bit while the bedding cures. Once you’ve bedded the action if it dries the wrong way you’ve screwed everything up. Using the electrical tape that isn’t an issue. The tape goes on very tight, doesn’t stretch (if you use enough turns) and I have no fears that the action will shift while curing. Just follow my advice and put a strip of paper towel under the electrical tape so you don’t mar the finish of the barrel or stock.”
Contoured vs. Straight (Flat-top) Pillars
Many factory rifles come with contoured (radiused) pillars, and many gunsmiths prefer to use these. The idea is that the contour provides a better fit with the bottom of round actions. Richard has tried contoured pillars and doesn’t recommend them. He explains: “Most of the contoured pillars don’t really match the contour of the action anyway. And every action is slightly different. Even some of the most favored custom actions aren’t exactly the same from one unit to another. What happens when the contour or curve of the pillar is too narrow is that the action touches just the extended top edges of the pillar (left and right of center). That is not as solid as when the action contacts the center of the pillar where the action screw runs. (And those sharp sides of curved pillars tend to point-load and dig into your action.) Also I feel you get a better match of the Devcon to the action with flat-top pillars. What you want is the bedding compound to cradle the action all the way around. I’ve found this works best with flat-top pillars and a very strong, hard compound like Devcon that doesn’t squish down or shrink.”
STEP FOUR–Applying Release Agent and Plumbers Putty
Failure to apply release agent (and putty) properly is a recipe for disaster. One of the most common mistakes novices make when doing bedding jobs is locking in the action. This happens by not covering enough of the action with release agent, not taping off the lug correctly, and not adding putty to plug any slots or spaces into which the mud can migrate. Remember, you are doing a bedding job, not a glue-in job! When you’ve completed the process, you want to be able to pop the action loose without difficulty.
PHOTO 6 — Showing putty and release agent before polishing, tape on lug.
First, remove the trigger, bolt release and spring, and anything else from the bottom of the action. Then, clean the action and recoil lug area with brake cleaner or parts degreaser. Apply plumbers’ putty to any hole or crevice that you don’t want the mud to get into. Wrap two layers of masking tape on the outside edges of the lug and trim with a razor blade. Do not apply tape to the front or back of the lug. (Apply tape to the front of the lug only if you do not have a way to remove the hardened mud). Let this tape go right around to the top of the action. Wipe the putty smooth with the brake parts cleaner. I highly recommend neutral Kiwi shoe polish as release agent. Apply liberally to the entire action using a Q-tip to get in around the lug (including front and rear of lug), bolt handle slot and loading port edges. Let the shoe polish dry for 10 minutes and then use a paper towel and buff and polish the release agent as thin as possible. You want any release agent to be as thin as possible so as to let the action set as close as possible to your bedding. You also want to apply release agent to the rear (headless) bolt.
STEP FIVE — Installing the Pillars
Now is the time to place the pillars. Screw the top half of the front pillar and middle pillar (if the action has a middle bolt) to the action with the tapered head bolt. Screw in the headless bolt and slip the pillar down around it. Apply release agent to the area of the guard around the rear bolt hole (and to the rear headless bolt). Apply top and bottom and from the inside out. We don’t want the guard stuck to the bedding. (This guard sits on the bolt head that is secures the middle pillar to the action. We need the guard in place to align the action in the stock.)
Install the trigger guard back in place on the stock as the guard is used to align the barreled action in the stock. Now is the time to make a trial run to ensure that everything fits properly. Slip the upside-down stock down over the pillars with the headless bolt coming up through the rear bolt hole in the guard. See Photo 7. Ensure that the stock is resting on two spots only–the tape you’ve wrapped around the barrel, and the little bit of wood you left behind the tang bolt. Ensure there is room everywhere around the action to accept the mud. The barreled action cannot be touching anywhere except the tape and the tang. Not even on the top edges of the stock.
STEP SIX — Applying the Mud
Mix up a generous portion of the Devcon 10110 Mud and apply to the pillars as shown in Photo 8. Do not get mud on top of the bolt head and front pillar(s). Do apply a little mud on top of the rear pillar and if a little gets on the headless bolt that is OK as you should have applied release agent to this bolt. This will properly bed the guard to the rear pillar. The front bolt that holds the front pillar need not have release agent applied to it. Note, as shown in Photo 8, each pillar has a bolt inserted.
PHOTO 8 — Showing mud on the pillars.
You cannot use too much mud as the hydraulic action of pressing the stock down on the barreled action is going to squeeze the mud everywhere it need to go and the excess will be forced out (falling on the floor for you to step in).
PHOTO 9 — Showing mud applied to stock.
Now apply the mud very generously to the stock as shown in Photo 9 above. If I am not bedding any portion of the barrel shank I will only apply a little mud behind the recoil lug area.
STEP SEVEN — Assembly and Compression
Now slip the upside-down stock down over the pillars as you did in the trial run. Ensure the stock is bottomed-out on the tape at the front end. Squeeze slowly, pressing the rear of the stock down and squeeze out the excess mud. After pressing the stock down, the action area should appear as in Photo 10. During the compression stage, stop a few times and use Q-tips to clean off the excess mud that is squeezing out between action and stock.
PHOTO 10 — Rifle right side up, with the mud squeezed out.
Cut a piece of paper towel about two inches wide by the length of the towel. Lay this on the stock 1.5″ in front of the action. Wrap black electrical tape around the stock and barrel, running the tape over the strip of paper towel. (The towel is to protect the stock finish.) Squeeze the stock and action together while taking wraps with the tape. If you have a skinny, pencil-thin barrel don’t apply too much pressure with the tape as the weak barrel can be curved slightly. That can cause the barrel to touch the stock when everything is done (not good). If you have a big, fat barrel don’t worry about deflection. With a heavy contour tube, whatever bend you put in the barrel will spring back when the tape is removed.
STEP EIGHT — Mud Removal and Curing Time
Using Q-tips, clean up very thoroughly around the front pillar and the bolt head. You need to be able to unscrew the bolt to separate the stock from the rifle and you do not want the bedding protruding above the pillar. (The escutcheon still has to have room to fit in there without touching the end of the pillar.) Before turning the rifle right-side-up, reach under with a few Q-tips and clean off the mud hanging there as it may get inside the action.
Turn the rifle right side up in the vise and, using lots of Q-tips, clean all of the mud off of everything. Remove the excess mud every place you can see it. Use a paper towel to wipe the stock as there could be some invisible mud hiding somewhere on the stock or action. After using Q-tips, I sometimes use Butch’s Bore Shine solvent. It does a good job of removing the mud residue (other solvents with ammonia would work well also).
When you’ve cleaned off all the excess mud. It’s time to let the bedding cure. Lie the rifle upside down with the weight on the rear of the action and about where the tape is on the barrel. Let the gun sit for about 8 to 10 hours or overnight. IMPORTANT, you should remove ALL the excess mud around the action before you let the rifle cure for this time period. Photo 11 shows the rifle upside down, but you want to have the excess mud cleaned off before curing.
PHOTO 11 — Position for curing the mud–but excess should be removed first.
IMPORTANT: Avoiding Mechanical Lock During Bedding
One major problem that can arise when novices bed their own stocks is mechanical lock. This occurs when some part of the action or barrel is trapped below the bedding. Effectively, the barreled action becomes anchored in the stock and can be very difficult to remove. Richard says avoiding mechanical lock is not that difficult, but you must be careful: “Locks usually occur because the bedding is applied too far up. Never, and I repeat, never, bed above the centerline of the action (bore axis), or the widest point of the action (whichever is lower). You need to leave the edge of the bedding at least 1/16″ below the centerline of the action and centerline of the bore axis. I normally leave about 1/8th of vertical clearance. If the widest point of the action is BELOW the bore axis, you have to keep the bedding below that. The other thing to watch out for are projections and holes in the sides of the action. All holes must be filled with plumbers’ putty. All projections–anything that sticks out–need to be removed. If some little part or fixture sticks out, even if you tape it over, and it is below the top of the bedding, it can lock the action in.”
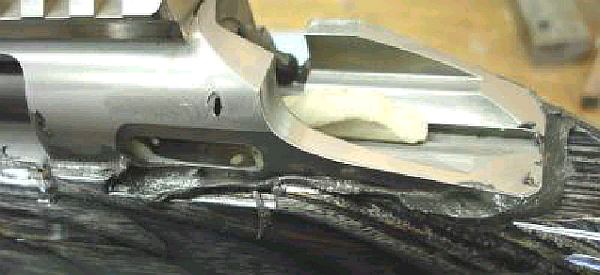
STEP NINE — Popping the Barreled Action Loose
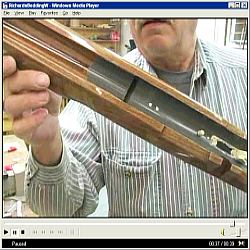
After the required curing time, you need to remove the barreled action to check the beading and fit the pillar escutcheons. If you cleaned away all the excess mud and there are no mechanical locks in the bedding, it should not be difficult to pop the stock loose. You can see how this is done in the short Video Clip from my DVD (Right-Click and “Save As” to download). Here is the procedure.
After the mud has set up and hardened, clamp the barrel in a vise with the gun upside down. The vise should camp just ahead of the forearm. Remove the bolt in the front pillar (and middle pillar) and the headless bolt. Remove the trigger guard.
With the left hand, apply upward pressure to the forearm and then with the right hand slap upward on the forearm. You will hear a crack like you might have busted the stock. Not to worry, that is just the bedding popping free. Now wiggle the stock up off the recoil lug as it is the only thing holding the stock down. [Editors Note: Here’s an older video clip that shows Richard “popping” the stock loose from the barreled action. CLICK HERE to download a 6 Meg Windows media file, or click these links for MPEG (2.3 megs), and Real Media (2.3 megs) versions.]
Remove the tape from the barrel and recoil lug and clean up the putty. Wipe the action down with brake parts cleaner. On the stock, remove the squeezed mud that went into the trigger and bolt release area. Relieve the lug area on both sides and the front. Lay the stock back on the barreled action. Be sure to check under the trigger guard to see if any cleanup of mud is required there. Then re-install the guard and insert the rear action bolt just snug (not tight).
STEP TEN — Installing the Pillar Escutcheons
Pillar escutcheons are a nice extra feature I add to my custom rifles. These are stainless, made from barrel stubs. The two-part front pillar is originally machined as one piece. I believe front pillars with the escutcheons (or outer ring) offer advantages over conventional pillars in terms of strength and alignment.
Before you actually install the escutcheons, you need to do some fit testing. Have a trial run at setting the front bolt to the proper length by placing the escutcheon in the hole and screwing in the bolt. Loosen off the back bolt to see if the bolt that is thru the escutcheon is holding the stock firmly in place. Retighten the rear bolt a wee bit.
Apply release agent to the front bolt, being careful to not get it on the escutcheon. Insert an Allen wrench into the head of the bolt so you can hold it easily. Slip the escutcheon over the bolt. Apply mud to the escutcheon and around the bolt. Photo 12 shows how much mud to put on the escutcheon. You want enough so when you tighten the bolt it will force the mud everywhere it needs to go, even though a bit will be squeezed in around the bolt. Photo 13 shows how the escutcheon should look installed, with the bolt tightened. Photo 14 (below right) shows the escutcheon after the mud has been removed–be sure to remove the excess while the Devcon is still soft.
PHOTOS 13 and 14 — Showing escutcheon before (left) and after mud clean-up (right).
Clean up the excess mud with Q-tips and paper towels. You need to do this before the mud hardens. I used Butch’s Bore Shine as a solvent, once I have removed the excess mud with Q-tips and towels. When the escutcheons are cleaned up, you’ve finished working with the mud. Now let the stock lay for another 8 hours or so to allow the escutcheons to become.
After the mud has hardened around the escutcheon clamp the rifle back in the vise. Remove the back tang bolt first then the front bolt that is through the escutcheon. The bolt will be tight in the hole and sometimes may need to be punched out with a punch unless it has threads right to the head in which case it will screw out. Go in the hole with a .260” bit and clean the mud out of the front pillar. Let the bedding harden for a day or two and then torque the bolts with about 35 inch-lbs of torque on the front bolt and maybe 25 on the tang bolt.
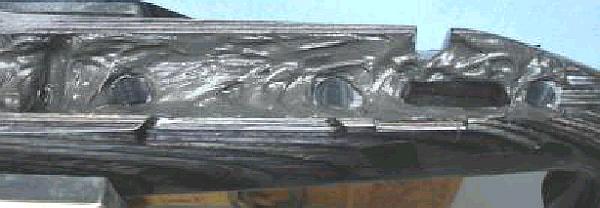
The finished result is an even coat of Devcon with no voids, air pockets, fissures, and perfect stress-free support for the action, as shown in Photo 15.
At the request of our readers, we provide select “Deals of the Week”. Every Sunday afternoon or Monday morning we offer our Best Bargain selections. Here are some of the best deals on firearms, hardware, reloading components, optics, and shooting accessories. Be aware that sale prices are subject to change, and once clearance inventory is sold, it’s gone for good. You snooze you lose.
1. KYGUNCO — RemArms 700 Magpul Rifle starting at $988.99
⏺ Modern Magpul stock, versatile long-range target and hunting rig
Looking for a serious long-range rifle for under $1100? Check out these RemArms 700 Magpul rifles. Starting at just $988.99 for the 6.5 Creedmoor 22″ bbl version (without bipod), these are well-made, reliable, and accurate rifles with a nice modern Magpul stock. For $1054.99 ($66 more), you can get bipod-equipped versions in .308 Winchester or 6.5 Creedmoor, both with fluted 20″ heavy barrels. Currently out of stock is a .300 Win Magnum version with 24″ heavy barrel and bipod ($1054.99). When it becomes available again, we think the .300 Win Mag model would be a great long-range hunting rig for large game.
2. Midsouth — Hornady 168gr BTHP Match, $164.99 for 500
⏺ Great price for quality 168gr .30-Caliber bullets
Do you need affordable .30-cal bullets for an M1 Garand or 1903 Springfield? Or perhaps you want to get started in F-TR with lower cost projectiles? If so, you can now grab 500 168gr BTHP Match grade .30-cal bullets for just $165.99. That works out to just $33 per hundred — a great deal. You could easily pay twice as much (or more) for some other brands. This is a good option if you don’t need the Heavy 185-220 grain bullets. These bullets have a good BC for their weight class.
3. Graf’s — Hornady Ammo Plant Progressive Press, $1299.99
⏺ Excellent progressive press with case feeder and bullet feeder
Do you reload large quantities of pistol ammo, or .223 rifle ammo? Then you can save significant time with a quality progressive press. Right now you can save over $200 on the Hornady L-N-L Ammo Plant Progressive Reloading Press Kit. This is a complete loading system with a 5-station, auto-indexing press plus a brass feeder and bullet feeder. The system uses a precise and easily-adjusted powder measure that we prefer to the Dillon powder system. NOTE: After buying the press kit, you’ll need to purchase the appropriate shell plate and dies for your choice of cartrdige(s). Guys, this is a good deal — the same Hornady Ammo Plant system is currently $1525.99 at MidwayUSA.
4. Sportsman’s WHSE — Leupold SX-4 Pro Guide Spotting Scopes
⏺ Good values on 20-60X and 15-45X Leupold Spotters
Looking for a quality spotting scope at a great price? Then check out the Leupold SX-4 Pro Guide HD spotting scopes on sale at Sportsman’s Warehouse. Chose the 15-45x65mm spotter for $699.99 or the bigger 20-60x85mm spotter for $899.99. Fully waterproof and fogproof, these Leupold spotters feature a rugged magnesium body plus an oversized eyepiece for all-day comfort. Both spotters offer Leupold’s Twilight Max HD Light Management System, which helps in low light conditions, while reducing glare in direct light. The 15-45x65mm SX-4 spotter is hard to beat at that $699.99 price.
5. Amazon — Tipton Compact Range Vise, $24.99
⏺ Good, transportable product for working on hunting/varmint rifles
Here’s a very handy gun cradle that helps you clean and maintain rifles while at the range or at home. The Compact Range Vise folds and collapses to 11-1/4″, so it is easily transported. Two padded “V” brackets hold the rifle while protecting the finish during cleaning/maintenance operations. Made from solvent-resistant polymer, Tipton’s Compact Range Vise is durable and should last for years. NOTE: For typical hunting and varmint rifles this Range Vise works well, though it is not suited for wide-forearm benchrest or F-Open rigs.
⏺ Very comfortable mat — worth the money if you shoot often
If you do a lot of prone shooting you NEED a quality, comfortable mat. One of the best mats on the market today is the Creedmoor Deluxe Folding Mat. This offers double-thick jute padding under the textured elbow pad sections. Carrying handles are provided so equipment can be carried within the fold of the mat. The mat features a waterproof vinyl bottom and a marine finished top. The combination of these materials makes a comfortable and durable mat. NOTE: These mats are custom made by Creedmoor, so, for a modest extra fee, you can order extra knee-zone rubber, or additional padding in the top third.
⏺ Everyone needs a tool like this to set fasteners correctly
When mounting a scope or installing an action, you need to set torque correctly or you risk damaging things. For basic tasks requiring precise torque levels, consider the Sanliang Torque Screwdriver Set. With a range of 10-70 inch pounds, this will perform a multitude of gunsmithing jobs. It’s easy to preset the torque —- simply pull down to unlock, then set the torque you need and push to lock. Includes a set of 10, 1/4’’ bits with convenient storage case.
⏺ Crazy-low price on basic hunting scope with good warranty
Here’s a VERY affordable optic that could be good choice for a youngster’s first rifle, or serve as a back-up for a hunting gun. Right now Natchez offers the Bushnell Banner 3-9x40mm scope for just $29.99. You read that right — $29.99. You could pay more than that for a set of rings. Fitted with a Multi-X Reticle, this scope has a good 3-9X magnification range for hunting. It features Bushnell’s Dusk & Dawn Brightness (DDB) lens coating for enhanced low-light performance.
Midsouth — .22 Caliber Aguila FMJ Bullets, 1000 for $99.99
⏺ Great deal on bulk .224 and 9mm bullets
Need a large supply of budget-priced bullets for your AR15 or varmint rifle? Here’s an amazing deal — get 1000 55gr or 1000 62gr .224-caliber bullets for just $99.99. That’s right, 1000 bullets for under 100 bucks. These won’t rival high-quality Berger or Sierra bullets, but they will be adequate for varmint work, 3-gun practice, or plinking with your AR. If you load 9mm, you can also get 1000 115gr 9mm bullets for $99.99.
10. Amazon — Frankford Arsenal Trickler, $17.99
⏺ Inexpensive, works well, stable, tall enough
Every handloader can use a good powder trickler. However many tricklers are light and unstable, making them frustrating to use. We’ve been impressed with the Frankford Arsenal Trickler . This is a solid unit with some heft, with a hard rubber base. The mass and good design make this easy to use, allowing simple, accurate trickling.
Running out of space in your gun safe? Here’s a clever product that will allow you to store more long guns in your current vault. The plastic Rifle Rods from Gun Storage Solutions slip in long-gun barrels and then grip the shelf above using Velcro pads. This allows you to nestle your rifles and shotguns much closer together than with the conventional racks provided with most gunsafes.
The handy Rifle Rods are offered in bright orange or basic black. We prefer the orange rods (shown above with the Velcro “receiver” shelf liner provided with the Rod Kit).
Rifles with narrow furniture (such as lever guns) can be placed very close together, saving lots of space. For benchrest or varmint rifles with wider fore-ends, you won’t benefit as much. Note that, in the photo above, all of the guns are fairly slim — none have wide fore-ends. Still we think these Rifle Rods could open up 12″ or more horizontal clearance in a medium-sized safe — that could easily allow you to store six (6) more guns in two rows, as shown.
Rifle Rod Kits Starting at $21.95
A kit with 5 Rifle Rods and loop fabric shelf liner costs $21.95 on Amazon.com, while the 10-Rod Kit with liner costs around $34.95. That’s a lot cheaper than buying a new safe. A six-pack of additional Rifle Rods costs $17.95 on Amazon. You can also purchases rods and fabric directly from Gun Storage Solutions.
WARNING: Always REMOVE Rod from barrel before taking gun to the range. Never place live ammunition in a gun with storage Rod in the barrel!
Product tip from EdLongrange. We welcome reader submissions.
Spring is here and that means that a number of companies are offering noteworthy REBATES on products. Here are some good promotions that can save you up to $300 on a rifle, $50 on a pistol, and $75 on optics. You can find other current rebates on the Gun.deals Rebate Page.
1. Christensen Arms — Modern Precision Rifle/Pistol Promotion
CHRISTENSEN ARMS REBATE good through April 30, 2022
DEADLINE for online submission: Activates with MPR/MPP warranty registration CLICK HERE for REBATE Form
Buy a Christensen Arms Modern Precision Rifle (MPR) or Modern Precision Pistol (MPP) between March 11th and April 30th and you will receive a $300 Gift Card to spend at the Christensen Arms webstore. This $300 card can be used to purchase another rifle, barrels, stocks, optics, or accessories. We would consider using the $300 credit for a second factory barrel. That would let you should two calibers with one rifle.
2. Bushnell Red Dot Optic Rebate up to $75
BUSHNELL REBATE good through March 31, 2022
DEADLINE for mail-in or online submission: 4/30/20222 CLICK HERE for REBATE Form
Bushnell is now offering attractive rebates on a variety of Red Dot optics. Savings range from $30 to a maximum of $75 based on the Optic Model. The max $75 rebate is for the AR71XRD Model, while you can get $50 off the AR731306 model.
3. Smith & Wesson $50 Rebate on S&W M&P Shield Plus Pistols
SMITH & WESSON REBATE good through May 16, 2022
DEADLINE for mail-in or online submission: 6/16/2022 CLICK HERE for REBATE Form
Now through May 16, 2022 you can get a $50 S&W factory rebate with the purchase of a Smith & Wesson M&P Shield Plus handgun. Purchasers get a $50.00 USD prepaid card for each eligible pistol. The M&P Shields have good ergonomics (better than Glock for most folks), and are very reliable. S&W’s Shield Plus pistols are offered in a variety of sizes with or without external manual safeties. There are even models fitted with Crimson Trace Red Dot optics. For more info, visit Smith-Wesson.com/rebates.
4. Leupold Promo — Free Duffle with DeltaPoint Pro Red Dot
LEUPOLD DeltaPoint Red Dot DEAL good through April 10, 2022
DEADLINE for mail-in or online submission: 4/10/2022 CLICK HERE for REBATE Entry Page
Purchase any Leupold DeltaPoint Pro Red Dot optic and receive a free Leupold Go Gear Duffle, a claimed $150 value. This offer applies to new DeltaPoint Pro purchases made February 28, 2022 – April 10, 2022 in the USA. NOTE: The promo closes on April 10, 2022 and all claims must be submitted no later than that date. Allow 8-10 weeks for shipping.
Good news for owners of 1903/1903A3 Springfields, M1917 Enfields, and M1 Carbines. The CMP eStore sells brand new chambered, Criterion chrome-moly barrels for these M1903/M1903AC rifles for under $200.00. In addition there are M1 Carbine barrels for $229.50. These authentic-profile barrels are made by Criterion Barrels in Richfield, WI, using the button-rifling process. They are “semi-finished” meaning they come chambered and headspaced within .010″ of finished size, with final fitting to be done by a competent gunsmith. The barrels are also externally Parkerized to match the finish of your vintage ’03, Garand, or M1 Carbine. To order, go to the CMP eStore and click the Barrels Link in the upper left.
NOTE: Final assembly and headspacing by a qualified gunsmith is required!
New 1903 barrels by Criterion Barrels, Inc., 4140 chrome moly steel, button rifled, contoured, and finish lapped after contouring. These comply with CMP competition rules and are legal for the 1903 Matches. Parkerized like the original 1903 and chambered .010″ from finish size to be fitted and headspaced when assembled to fit your receiver and bolt dimensions.
New 1903A3 barrels by Criterion Barrels, Inc., 4140 chrome moly steel, button rifled, contoured, and finish lapped after contouring. These comply with CMP competition rules and are legal for the 1903A3 Matches. Parkerized like the original 1903A3 and chambered .010″ from finish size to be fitted and headspaced when assembled to fit your receiver and bolt dimensions.
New M1917 barrels by Criterion Barrels, Inc., 4140 chrome moly steel, button rifled, contoured, and finish lapped after contouring. These comply with CMP competition rules and are legal for the 1903A3 Matches. Parkerized like the original M1917 Parkerized like the original M1917 and chambered .010″ from finish size to be fitted and headspaced when assembled to fit your receiver and bolt dimensions.
New Carbine barrels by Criterion Barrels, 4140 chrome moly Steel, button rifled, contoured, and finish lapped after contouring. Comply with CMP Competition Rules and are legal for the CMP M1 Carbine Matches. Parkerized like the original M1 Carbine and chambered .010 away from finish size to be fitted and head-spaced when assembled to fit your receiver and bolt dimensions. Barrel is .30 Carbine.


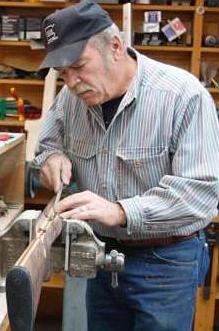 Richard Franklin prepared this article for our readers. Richard tells us: “I’m happy to do pillar-bedding work, but this is a job which many shooters can do themselves, with some practice and the right components. I do suggest you practice first on an old ‘beater stock’. When done right, you end up with a perfect fit of receiver to action, with no twisting, stretching, or compression forces being applied to the receiver through mis-alignment. That’s what I mean by ‘stress-free’.”
 Pillars For Bedding
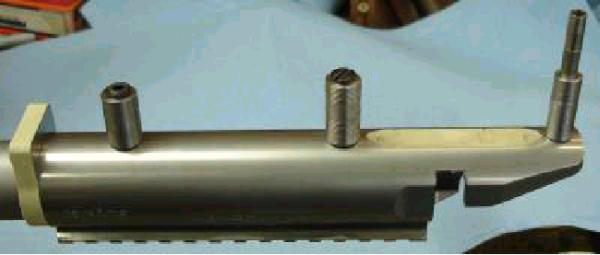

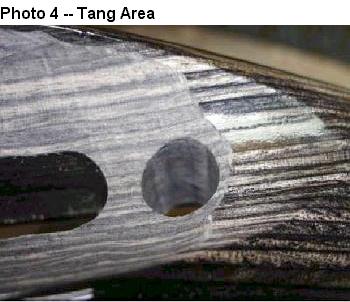 Photo 3 shows the wood removed from the inside of the stock bedding area. Remove enough wood everywhere except along the top sides of the stock to allow at least 1/8″ to 3/16″ of room for the mud. Remove 1/4″ of wood behind the recoil lug. I like about .012″ clearance on the top inside edges.
  The idea is that the barreled action does not touch anything except the bit of original “elevation” wood left at the rear tang (behind the pillar) and the forearm resting on the electrical tape. This is very important to obtain 100% stress-free bedding. You want the bore of the barrel to be parallel with the top edge of the stock so wrap just the right amount of tape to ensure this. The tape also centers the barrel in the fore-arm. Done right, the barreled action will be contacting just at two points (tape in front, tang in rear) and the barrel’s bore will be parallel with the top of the fore-arm’s sidewalls.
 Bedding Compounds
 Contoured vs. Straight (Flat-top) Pillars
 Install the trigger guard back in place on the stock as the guard is used to align the barreled action in the stock. Now is the time to make a trial run to ensure that everything fits properly. Slip the upside-down stock down over the pillars with the headless bolt coming up through the rear bolt hole in the guard. See Photo 7. Ensure that the stock is resting on two spots only–the tape you’ve wrapped around the barrel, and the little bit of wood you left behind the tang bolt. Ensure there is room everywhere around the action to accept the mud. The barreled action cannot be touching anywhere except the tape and the tang. Not even on the top edges of the stock.

 Before you actually install the escutcheons, you need to do some fit testing. Have a trial run at setting the front bolt to the proper length by placing the escutcheon in the hole and screwing in the bolt. Loosen off the back bolt to see if the bolt that is thru the escutcheon is holding the stock firmly in place. Retighten the rear bolt a wee bit.


