|
|
October 29th, 2015

K&M Precision Shooting Products has a very handy tool few hand-loaders know about. This brilliantly simple device lets you actually SEE your case necks as you expand them. This tool can benefit anyone who necks-up brass or who uses an expander to smooth out necks (or reduce tension) before loading.
 K&M Expand Mandrel Window Riser K&M Expand Mandrel Window Riser
This is a simple threaded extension placed between your expander die body (K&M Expand Iron) and the top of your press. It carries the expander mandrel higher, above the press, and has a cut-out view port so you can see the mandrel as it passes through the neck. Smart, eh? This provides visual feedback during the process of expanding your brass. The patent-pending view riser costs $20.00. Will it expand necks faster, or reduce run-out? We doubt it, but we still would like to have one, if only to eyeball the mandrel to control the neck-entry rate more consistently from case to case.
Installation: Thread the Expand Mandrel Window Riser into the top of your loading press, then thread the K&M Expand-Iron (Expander Die Body) fully into the top of the window riser and adjust each so you can stroke out the press completely without driving the case mouth into the press adapter. This allows you to view the expanding operation which is typically blind under the press. The riser also eliminates the need for the stop screw in the expander mandrel. LINK: Expand Window Riser Instructions (PDF).
October 26th, 2015

We’ve all heard the old adage: “Keep your powder dry.” Well, tests by Norma have demonstrated that even normal environmental differences in humidity can affect the way powders burn, at least over the long term. In the Norma Reloading Manual, Sven-Eric Johansson, head of ballistics at Nexplo/Bofors, presents a very important discussion of water vapor absorption by powder. Johansson demonstrates that the same powder will burn at different rates depending on water content.
Powders Leave the Factory with 0.5 to 1.0% Water Content
Johansson explains that, as manufactured, most powders contain 0.5 to 1% of water by weight. (The relative humidity is “equilibrated” at 40-50% during the manufacturing process to maintain this 0.5-1% moisture content). Importantly, Johansson notes that powder exposed to moist air for a long time will absorb water, causing it to burn at a slower rate. On the other hand, long-term storage in a very dry environment reduces powder moisture content, so the powder burns at a faster rate. In addition, Johansson found that single-base powders are MORE sensitive to relative humidity than are double-base powders (which contain nitroglycerine).
 Tests Show Burn Rates Vary with Water Content Tests Show Burn Rates Vary with Water Content
In his review of the Norma Manual, Fred Barker notes: “Johansson gives twelve (eye-opening) plots of the velocities and pressures obtained on firing several popular cartridges with dehydrated, normal and hydrated Norma powders (from #200 to MRP). He also gives results on loaded .30-06 and .38 Special cartridges stored for 663 to 683 days in relative humidities of 20% and 86%. So Johansson’s advice is to keep powders tightly capped in their factory containers, and to minimize their exposure to dry or humid air.”
Confirming Johansson’s findings that storage conditions can alter burn rates, Barker observes: “I have about 10 pounds of WWII 4831 powder that has been stored in dry (about 20% RH) Colorado air for more than 60 years. It now burns about like IMR 3031.”
What does this teach us? First, all powders start out with a small, but chemically important, amount of water content. Second, a powder’s water content can change over time, depending on where and how the powder is stored. Third, the water content of your powder DOES make a difference in how it burns, particularly for single-base powders. For example, over a period of time, a powder used (and then recapped) in the hot, dry Southwest will probably behave differently than the same powder used in the humid Southeast.
Reloaders are advised to keep these things in mind. If you want to maintain your powders’ “as manufactured” burn rate, it is wise to head Johannson’s recommendation to keep your powders tightly capped when you’re not actually dispensing charges and avoid exposing your powder to very dry or very humid conditions. The Norma Reloading Manual is available from Amazon.com.
| Real-World Example — “Dry” H4831sc Runs Hotter
Robert Whitley agrees that the burn rate of the powder varies with the humidity it absorbs. Robert writes: “I had an 8-lb. jug of H4831SC I kept in my detached garage (it can be humid there). 43.5-44.0 gr of this was superbly accurate with the 115 Bergers out of my 6mm Super X. I got tired of bringing it in and out of the garage to my house for reloading so I brought and kept the jug in my reloading room (a dehumidified room in my house) and after a few weeks I loaded up 43.5 gr, went to a match and it shot awful. I could not figure out what was going on until I put that load back over the chronograph and figured out it was going a good bit faster than before and the load was out of the “sweet spot” (42.5 – 43.0 gr was the max I could load and keep it accurate when it was stored in less humid air). I put the jug back in the garage for a few weeks and I now am back to loading 43.5 – 44.0 gr and it shoots great again. I have seen this with other powders too.”
If you have two jugs of the same powder, one kept in a room in your house and one somewhere else where it is drier or more humid, don’t expect the two jugs of the same lot of powder to chrono the same with the same charge weights unless and until they are both stored long enough in the same place to equalize again. |
October 23rd, 2015
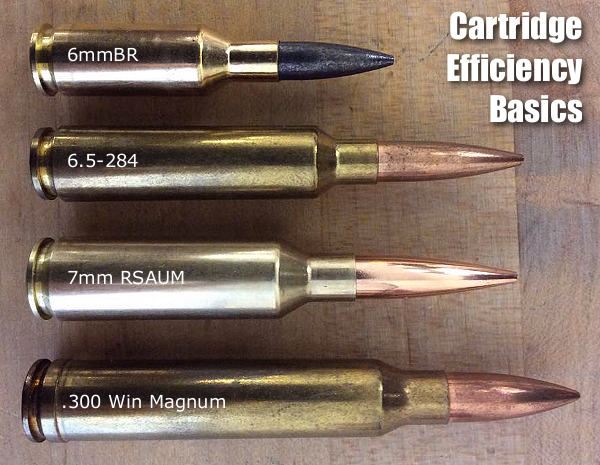
Efficient cartridges make excellent use of their available powder and case/bore capacity. They yield good ballistic performance with relatively little recoil and throat erosion.

Cartridge Efficiency: A Primer (pun intended!) by USAMU Staff
Each week, the U.S. Army Marksmanship Unit (USAMU) publishes a reloading article on its Facebook Page. In this week’s article, the USAMU discusses cartridge case efficiency and its benefits. While this is oriented primarily toward NRA High Power Rifle and Long Range (1000-yard) competition, these factors also apply to medium/big game hunters. Assuming one’s rifle and ammunition are accurate, key considerations include ballistic performance (i.e., resistance to wind effects, plus trajectory), recoil, and throat erosion/barrel life.
Efficient cartridges make excellent use of their available powder and case/bore capacity. They yield good ballistic performance with relatively little recoil and throat erosion. A classic example in the author’s experience involved a featherweight 7x57mm hunting/silhouette rifle. When loaded to modern-rifle pressures, just 43-44 grains of powder pushed a 139gr bullet at 2900 fps from its 22” barrel. Recoil in this light rifle was mild; it was very easy to shoot well, and its performance was superb.
An acquaintance chose a “do everything” 7mm Remington Magnum for use on medium game at short ranges. A larger, heavier rifle, it used ~65 grains of powder to achieve ~3200 fps with similar bullets — from its 26″ barrel. Recoil was higher, and he was sensitive to it, which hampered his shooting ability.
Similarly efficient calibers include the 6mm BR [Norma], and others. Today’s highly-efficient calibers, such as 6mm BR and a host of newer developments might use 28-30 grains of powder to launch a 105-107gr match bullet at speeds approaching the .243 Winchester. The .243 Win needs 40-45 grain charges at the same velocity.
Champion-level Long Range shooters need every ballistic edge feasible. They compete at a level where 1″ more or less drift in a wind change could make the difference between winning and losing. Shooters recognized this early on — the then-new .300 H&H Magnum quickly supplanted the .30-06 at the Wimbledon winner’s circle in the early days.
The .300 Winchester Magnum became popular, but its 190-220gr bullets had their work cut out for them once the 6.5-284 and its streamlined 140-142gr bullets arrived on the scene. The 6.5-284 gives superb accuracy and wind performance with about half the recoil of the big .30 magnums – albeit it is a known barrel-burner.
Currently, the 7mm Remington Short Action Ultra-Magnum (aka 7mm RSAUM), is giving stellar accuracy with cutting-edge, ~180 grain bullets, powder charges in the mid-50 grain range and velocities about 2800+ fps in long barrels. Beyond pure efficiency, the RSAUM’s modern, “short and fat” design helps ensure fine accuracy relative to older, longer cartridge designs of similar performance.
Recent design advances are yielding bullets with here-to-fore unheard-of ballistic efficiency; depending on the cartridge, they can make or break ones decision. Ballistic coefficients (“BC” — a numerical expression of a bullet’s ballistic efficiency) are soaring to new heights, and there are many exciting new avenues to explore.
The ideal choice [involves a careful] balancing act between bullet BCs, case capacity, velocity, barrel life, and recoil. But, as with new-car decisions, choosing can be half the fun!
Factors to Consider When Evaluating Cartridges
For competitive shooters… pristine accuracy and ballistic performance in the wind are critical. Flat trajectory benefits the hunter who may shoot at long, unknown distances (nowadays, range-finders help). However, this is of much less importance to competitors firing at known distances.
Recoil is an issue, particularly when one fires long strings during competition, and/or multiple strings in a day. Its effects are cumulative; cartridges with medium/heavy recoil can lead to shooter fatigue, disturbance of the shooting position and lower scores.
For hunters, who may only fire a few shots a year, recoil that does not induce flinching during sight-in, practice and hunting is a deciding factor. Depending on their game and ranges, etc., they may accept more recoil than the high-volume High Power or Long Range competitor.
Likewise, throat erosion/barrel life is important to competitive shooters, who fire thousands of rounds in practice and matches, vs. the medium/big game hunter. A cartridge that performs well ballistically with great accuracy, has long barrel life and low recoil is the competitive shooter’s ideal. For the hunter, other factors may weigh more heavily.
Cartridge Efficiency and Energy — Another Perspective
Lapua staffer Kevin Thomas explains that efficiency can be evaluated in terms of energy:
“Cartridge efficiency is pretty straight forward — energy in vs. energy out. Most modern single-based propellants run around 178-215 ft/lbs of energy per grain. These figures give the energy potential that you’re loading into the rifle. The resulting kinetic energy transferred to the bullet will give you the efficiency of the round. Most cases operate at around 20-25% efficiency. This is just another way to evaluate the potential of a given cartridge. There’s a big difference between this and simply looking at max velocities produced by various cartridges.”
October 21st, 2015

Redding Reloading is now providing Advanced Handloader’s Data Sheets in printable PDF format. This FREE form allows hand-loaders to document their tool settings, bushing size, powder charge, load specs (COAL etc.), and case prep status. In addition, the form allows you to enter your load testing information, complete with chronograph data, group size, zero range, and wind/temp conditions. With this single, handy form you can document all the vital information for a particular cartridge and load.
We’ve seen various reloading log templates, but this Redding form (shown below) is better than most because it combines both reloading data AND range-test data in one place. You can see all key details of the reloading process (tool settings etc.) plus the end results — how the load actually performed over the chronograph and on paper. This form allows the user to capture a large amount of information for later use, while accurately track load development. Go to Download Page.

FREE Ammunition Box Label Template
 Redding Reloading has also developed a printable template for your ammo boxes (see photo at top of article). This lets you put all vital load info on your ammo boxes. There are fields for: Date, Cartridge, Powder, Grains, Bullet, Weight, Primer, Case type. Designed for Avery 5260 (or similar) label sheets, this template allows you to print 30 labels at one time. You can purchase the Avery 5260 peel-off printable label sheets at any office supply store. Redding Reloading has also developed a printable template for your ammo boxes (see photo at top of article). This lets you put all vital load info on your ammo boxes. There are fields for: Date, Cartridge, Powder, Grains, Bullet, Weight, Primer, Case type. Designed for Avery 5260 (or similar) label sheets, this template allows you to print 30 labels at one time. You can purchase the Avery 5260 peel-off printable label sheets at any office supply store.
October 6th, 2015

When your cases become hard to extract, or you feel a stiff bolt lift when removing a cartridge, it’s probably time to full-length size your cases, and “bump” the shoulder back. With a hunting load, shoulder bumping may only be required every 4-5 loading cycles. Short-range benchrest shooters, running higher pressures, typically full-length size every load cycle, bumping the shoulder .001-.002″. High Power shooters with gas guns generally full-length size every time, and may need to bump the shoulders .003″ or more to ensure reliable feeding and extraction.
Use Shims for Precise Control of Shoulder Bump
Some shooters like to set the “default” position for their full-length die to have an “ample” .003″ or .004″ shoulder bump. When they need less bump, a simple way to reduce the amount of shoulder movement is to use precision shims in .001″ (one-thousandth) increments.
Here are reports from Forum members who use the shims:
“Great product. I have my die lock ring(s) adjusted for the shortest headspace length on my multiple chambers 6BRs and 6PPCs. When needing a longer headspace, I just refer to my notes and add the appropriate shim under the lock ring. Keep it simple.” — F.D. Shuster
Mats Johansson writes: “I’ve been using [shims] since Skip Otto (of BR fame) came out with them. I set up my dies with the .006″ shim, giving me the option of bumping the shoulder a bit more when the brass gets old and hardens while still having room to adjust up for zero headspace, should I have missed the original setup by a thou or two. Hunting rounds can easily be bumped an extra .002-.003″ for positive, no-crush feeding. Being a safety-oriented cheapskate, I couldn’t live without them — they let me reload my cases a gazillion times without dangerous web-stretching. Shims are a must-have, as simple as that.” — Mats Johansson
 Sinclair Int’l offers a seven-piece set of Sizing Die Shims that let you adjust the height of your die (and thereby the amount of bump and sizing) in precise .001″ increments. Sinclair explains: “Some handloaders will set their die up to achieve maximum sizing and then progressively use Sinclair Die Shims between the lock ring and the press head to move the die away from the shellholder. Doing this allows you to leave the lock ring in the same position. These shims are usually available in increments of .001″ and work very well.” Sinclair Int’l offers a seven-piece set of Sizing Die Shims that let you adjust the height of your die (and thereby the amount of bump and sizing) in precise .001″ increments. Sinclair explains: “Some handloaders will set their die up to achieve maximum sizing and then progressively use Sinclair Die Shims between the lock ring and the press head to move the die away from the shellholder. Doing this allows you to leave the lock ring in the same position. These shims are usually available in increments of .001″ and work very well.”
Seven Shims from .003″ to .010″
Sinclair’s $12.49 Die Shim Kit (item 22400) includes seven shims in thicknesses of .003, .004, .005, .006, .007, .008, and .010. For ease of use, shim thickness is indicated by the number of notches cut in the outer edge of each shim. Even without looking you can “count” the notches by feel.
October 5th, 2015

L.E. Wilson, makers of hand dies, case trimmers and other precision reloading tools, has released a series of informational videos. These videos show how to assemble and operate L.E. Wilson tools including the new Wilson stainless steel case trimmer with micrometer adjustment (photo below). The first video explains the operation of the Wilson trimmer and shows how to initially assemble the tool, attach the handle, and set the cut length.
This second video shows how to set up the new stainless Wilson trimmer with micrometer cut-length control. The new micrometer feature allows you to set the cartridge overall trim length with great precision. If you are trimming a variety of different cartridge types, the micrometer cut length control comes in very handy. In seconds you can “dial in” different trim lengths, without messing around with set screw or locking rings. Fine adjustment is in increments of .001″ is done with the the Micrometer. Gross adjustment is done with with the stop screw. If you go from a very short case to a very long case, you will need to reposition the stop screw. Note: In addition to the videos shown here, L.E. Wilson has a video showing how to mount a the trimmer assembly and case holder arm on a base.
KEY FEATURES of L.E. Wilson Stainless Case Trimmer with Micrometer:
- New long-lasting stainless finish with micrometer adjustment.
- New increased width on Stop Nut. This provides for a firm stop.
- Larger stop screw with Black Oxide Coating, adjustment from 3/8″ (old) to 1/2″.
- New 304 Stainless Steel Handle standard on all trimmers shipped after July 2013.
- Made in the U.S.A. with American steel.
Along with its case trimmer video, L.E. Wilson has produced three videos showing how to use Wilson cartridge case gages. This series of Case Gage Videos show how to use the gage to check headspace and properly set shoulder bump with a full-length sizing die.
Videos found by EdLongrange. We welcome reader submissions.
October 3rd, 2015
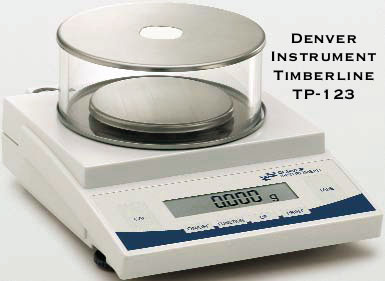
Denver Instrument, maker of the MXX and Timberline Series of precision balances, has created a helpful guide explaining how to get the best performance from a digital scale. Denver Instrument knows that, to achieve and maintain a very high level of accuracy with digital scales, they must be calibrated regularly, leveled properly, and kept away from sources of interference. Unfortunately, some reloaders treat their electronic scales as if the machines were toasters — something to place on a tabletop, plug into an outlet, then “set and forget.” There’s a better way to set up your scale and keep it functioning optimally. Here are ten guidelines provided by Denver Instrument. Follow these “Ten Commandments” and you’ll benefit:

 ONE: Thou shalt choose the best resting spot. The performance of your balance depends greatly on the surrounding environment. Choose a location away from the main traffic flow of the room, especially doors. Also be aware of heating and cooling vents as these produce air movement. You can adjust the environmental settings on your balance to provide the best performance in the chosen location. Balances must be placed away from magnets as they affect the weigh cell performance. ONE: Thou shalt choose the best resting spot. The performance of your balance depends greatly on the surrounding environment. Choose a location away from the main traffic flow of the room, especially doors. Also be aware of heating and cooling vents as these produce air movement. You can adjust the environmental settings on your balance to provide the best performance in the chosen location. Balances must be placed away from magnets as they affect the weigh cell performance.
TWO: Thou shalt avoid vibrations. Vibrations can come from large machinery in production environments and from fume hoods in laboratories. An alternative to fume hoods are Power Safety Workstations which are designed specifically for use with a balance.
THREE: Thou shalt watch temperature changes. On an analytical balance a one degree temperature change can cause a 1 digit (0.0001g) drift. Although Denver balances have temperature correction built-in, it is still important to calibrate your balance when the temperature changes significantly. Choosing to place your balance in a temperature controlled room, away from sunlight, and calibrating often helps minimize the effects of temperature.
FOUR: Thou shalt calibrate often. Upon installation and each time the balance is moved you should calibrate your balance. For example moving an analytical balance to a location that is only 13 feet higher changes the weight reading from 200.0000 g to 199.9997 g; which means the result is 0.0003 g lighter than the actual mass.
FIVE: Remember to check the level. The instrument should be leveled upon installation with all feet (two front feet for round pan units, four feet for square pan units) touching the countertop. If the level changes, the balance should be re-leveled and recalibrated. As an example, a 200g sample would weigh 0.0025 g less when tilted at an angle of 0.3°.
SIX: Honor thy weights. Keep in mind that weights are only as reliable as their quality and certification. Remember, a 1 g does not weigh precisely 1.00000 grams. Weights should be recertified annually. Denver Instrument offers recertification services on all weights 1 mg to 5 kg. Check to make sure you have selected the proper weight class for your balance. The weight tolerance should be better than balance readability. Always use tweezers or gloves when handling weights as smudges and indentations change the value of the weight. Keep weights in cases so they don’t get scratched or dusty.
 SEVEN: Thou shalt always use a small container and weigh in the center of the pan. Especially when using an analytical balance, the effects of air buoyancy increase as the sample container size increases. Using a small sample container will minimize the effects. Items placed on the pan provide a downward force. Placing them directly in the center of the pan keeps corner loading errors at a minimum. SEVEN: Thou shalt always use a small container and weigh in the center of the pan. Especially when using an analytical balance, the effects of air buoyancy increase as the sample container size increases. Using a small sample container will minimize the effects. Items placed on the pan provide a downward force. Placing them directly in the center of the pan keeps corner loading errors at a minimum.
EIGHT: Thou shalt not unplug. To perform within published speci-fications, balances must have power applied for 30 minutes to 48 hours depending on the resolution of the balance. Denver balances have a standby mode which turn the display to standby but keep power cycling through the electronics.
NINE: Thou shalt not ignore static. Static is one of the most common weighing “noises”. It can cause reading to appear too high, too low or just be unstable. Denver balances include grounding methods to reduce the effects of static. However sometimes extra supplies are needed. Consider anti-static weigh dishes, anti-static brushes or low tech ways to increase the humidity of the chamber like placing damp cotton balls or glass wool in a small vial in the corner of the analytical draft shield.
TEN: Thou shalt clean often. Dirty weigh pans and powder in weighing chamber can contribute to static issues and lead to a wide variety of problems. Denver weigh pans are made from stainless steel and can be cleaned using a variety of household and laboratory chemicals. A small paint brush can be used to get power away from the edges of the draft shield for easy clean up.
September 27th, 2015

Image by ModernArms, Creative Common License.
by Philip Mahin, Sierra Bullets Ballistic Technician
This article first appeared in the Sierra Bullets Blog
The ANSI / SAAMI group, short for “American National Standard Institute” and “Sporting Arms and Ammunition Manufacturers’ Institute”, have made available some time back the voluntary industry performance standards for pressure and velocity of centerfire rifle sporting ammunition for the use of commercial manufacturers. [These standards for] individual cartridges [include] the velocity on the basis of the nominal mean velocity from each, the maximum average pressure (MAP) for each, and cartridge and chamber drawings with dimensions included. The cartridge drawings can be seen by searching the internet and using the phrase ‘308 SAAMI’ will get you the .308 Winchester in PDF form. What I really wanted to discuss today was the differences between the two accepted methods of obtaining pressure listings. The Pounds per Square Inch (PSI) and the older Copper Units of Pressure (CUP) version can both be found in the PDF pamphlet.
 CUP Pressure Measurement CUP Pressure Measurement
The CUP system uses a copper crush cylinder which is compressed by a piston fitted to a piston hole into the chamber of the test barrel. Pressure generated by the burning propellant causes the piston to move and compress the copper cylinder. This will give it a specific measurable size that can be compared to a set standard. At right is a photo of a case that was used in this method and you can see the ring left by the piston hole.
PSI Pressure Measurement
What the book lists as the preferred method is the PSI (pounds per square inch or, more accurately, pound-force per square inch) version using a piezoelectric transducer system with the transducer flush mounted in the chamber of the test barrel. Pressure developed by the burning propellant pushes on the transducer through the case wall causing it to deflect and make a measurable electric charge.
Q: Is there a standardized correlation or mathematical conversion ratio between CUP and PSI values?
Mahin: As far as I can tell (and anyone else can tell me) … there is no [standard conversion ratio or] correlation between them. An example of this is the .223 Remington cartridge that lists a MAP of 52,000 CUP / 55,000 PSI but a .308 Winchester lists a 52,000 CUP / 62,000 PSI and a 30-30 lists a 38,000 CUP / 42,000 PSI. It leaves me scratching my head also but it is what it is. The two different methods will show up in listed powder data[.]
So the question on most of your minds is what does my favorite pet load give for pressure? The truth is the only way to know for sure is to get the specialized equipment and test your own components but this is going to be way out of reach for the average shooter, myself included. The reality is that as long as you are using printed data and working up from a safe start load within it, you should be under the listed MAP and have no reason for concern. Being specific in your components and going to the load data representing the bullet from a specific cartridge will help get you safe accuracy. [With a .308 Winchester] if you are to use the 1% rule and work up [from a starting load] in 0.4 grain increments, you should be able to find an accuracy load that will suit your needs without seeing pressure signs doing it. This is a key to component longevity and is the same thing we advise [via our customer service lines] every day. Till next time, be safe and enjoy your shooting.

September 25th, 2015

Powder Valley Inc. (PVI) is now carrying Shooters World-branded powders produced by the Czech enterprise Explosia A.S., which has produced propellants since 1920. Powder Valley will initially be offering four new Shooters World propellants: Clean Shot, Heavy Pistol, Match Rifle, and Blackout. These are canister-packaged forms of the popular Lovex propellants sold in Europe. These powders are very affordable — they cost just $19.95 per pound at PVI. For other pricing and ordering information go to PowderValleyInc.com. Match Rifle, Blackout, and Clean Shot are all currently in stock at PVI.
Shooters World says: “We have received nothing but praise about the quality of these [Lovex] propellants. Because of this, we are very confident in how our canister propellants will fare in the reloading market. We have had many competitive shooters using our product[.]”
Shooters World Reloading Guide (SAAMI) | Lovex Reloading Guide (CIP) | Burn Rate Chart
The following descriptions of Shooters World propellants have been provided by the manufacturer. Since AccurateShooter.com has not tested any of these powders yet, we cannot verify any particular claims:
Shooters World Powders — Manufacturer’s Product Descriptions
Match Rifle propellant is our canister form of Lovex D0 73-06 propellant. It is similar in burn speed to Accurate® 2520 and CFE™223. It holds the broadest utility across all moderate rifle propellants. The propellant gas generation rate is appropriate for cartridges of the light to heavy sectional density .223 Remington and .308 Winchester. It can load the 55 grain .223 Rem, as well as the 77 grain .223 Rem. It loads the 150, 168, and 175 grain .308 Winchester, and loads all .30-30 combinations. It works in .30-06, in 7mm-08, and even in the .22-250.
Blackout propellant is our canister form of Lovex D063-02 reloading propellant. It is slightly slower in burn speed than Accurate 1680®. The propellant gas generation rate is superior for subsonic 300 Blackout, 7.62×39, and some straight-walled rifle cartridges, where rapid transformation from powder to gas is desired. You would be hard pressed to find a subsonic 300 Blackout propellant that will give you the cycling reliability of the Shooters World Blackout.

Clean Shot propellant is the canister form of Lovex D0 32-03 propellant. Ballistic results for this propellant show it to be highly versatile, with low residue in a myriad of pistol cartridges. The burn rate is similar to Accurate No. 2®. Additionally, we have tested this propellant in shot shell, and found it to be exceptionally clean and consistent in velocity. This propellant can be used in virtually all pistol cartridges. A spherical propellant, it meters through charge plates extremely consistently and will work with a high-speed loader with very good flow. This propellant contains flash suppressant and is optimized for .45 ACP, 38 SPL, some standard velocity 9mm, some .40 S&W applications, reduced loads in .357 magnum, .44 magnum, and others.
Heavy Pistol propellant is our canister form of Lovex D0 37-02 propellant. It is similar in burn speed to Accurate® No. 9. The gas generation rate is appropriate for cartridges of the magnum pistol family and the .300 AAC Blackout, supersonic with light bullets. It does contain a level of flash suppression, incorporated into the propellant. A spherical propellant, it meters through charge plates consistently and will work with high-speed loaders with very good flow. This propellant is bracketed on the fast side by D0-37-01 (similar to Accurate® No 7), and on the slow side by D0-63-02 (similar in burn speed to Accurate® 1680).
CLICK HERE for Complete Explosia S.A. Catalog with many more powders.
Technical Information — CIP vs. SAAMI
Shooters World is in the process of developing reloading data based on SAAMI/ANSI standards. This data will be published on the Shooters World website, as it is generated and proofed in SAAMI test barrels, and compared against SAAMI reference ammunition. Hand-loaders can also reference information in the Lovex Reloading Guide, which has data tested to CIP (Commission Internationale Permanente) standards.
 Note that Shooters World has maintained the nomenclature of the Lovex propellants on its reloading canister bottles. Shooters World did this to ensure that reloaders would have maximum access to reloading data — both from European and American standards. Shooters World says: “The charge weights and pressures reported in the Lovex Reloading Guide have been found very reliable”. Note that Shooters World has maintained the nomenclature of the Lovex propellants on its reloading canister bottles. Shooters World did this to ensure that reloaders would have maximum access to reloading data — both from European and American standards. Shooters World says: “The charge weights and pressures reported in the Lovex Reloading Guide have been found very reliable”.
The main difference between CIP data and SAAMI standardization has to do with barrel length. CIP barrel length standards and SAAMI barrel length standards do not necessarily correspond. Therefore, the velocities reported in the Lovex Reloading Guide may not directly relate to USA standards. As is always the case, any reloader should start the load development process at a safe “starting charge”, and slowly increase charge weights to desired performance levels. Never exceed a maximum published load.
September 23rd, 2015

Tech Tip by Doc Beech, Applied Ballistics Support Team
I am going to hit on some key points when it comes to bullet pointing. How much pointing and trimming needed is going to depend on the bullet itself. Specifically how bad the bullets are to begin with. Starting out with better-quality projectiles such as Bergers is going to mean two things. First that you don’t need to do as much correction to the meplat, but also that the improvement is going to be less. NOTE: We recommend you DO NOT POINT hunting bullets. Pointing can affect terminal performance in a bad way.
NOTE the change in the bullet tip shape and hollowpoint size after pointing:

Don’t Over-Point Your Bullets
What is important here is that you never want to over-point. It is far better to be safe, and under-point, rather than over-point and crush the tips even the slightest bit. To quote Bryan Litz exactly: “Best practice is to leave a tiny air gap in the tip so you’re sure not to compress the metal together which will result in crushing. Most of the gain in pointing is taking the bullet tip down to this point. Going a little further doesn’t show on target”. So in essence you are only bringing the tip down a small amount… and you want to make sure you leave an air gap at the tip.

Also keep in mind, bullet pointing is one of those procedures with variable returns. If you only shoot at 100-200 yards, bullet pointing will likely not benefit you. To see the benefits, which can run from 2 to 10% (possibly more with poorly designed bullets), you need be shooting at long range. Bryan says: “Typically, with pointing, you’ll see 3-4% increase in BC on average. If the nose is long and pointy (VLD shape) with a large meplat, that’s where pointing has the biggest effect; up to 8% or 10%. If the meplat is tight on a short tangent nose, the increase can be as small as 1 or 2%.” For example, If you point a Berger .308-caliber 185gr Juggernaut expect to only get a 2% increase in BC.

Should You Trim after Pointing?
Sometimes you can see tiny imperfections after pointing, but to say you “need” to trim after pointing is to say that the small imperfections make a difference. Bryan Litz advises: “If your goal is to make bullets that fly uniformly at the highest levels, it may not be necessary to trim them.” In fact Bryan states: “I’ve never trimmed a bullet tip, before or after pointing”. So in the end it is up to you to decide.
Pointing is Easy with the Right Tools
The process of pointing in itself is very simple. It takes about as much effort to point bullets as it does to seat bullets. We are simply making the air gap on the tip of the bullet ever-so smaller. Don’t rush the job — go slow. Use smooth and steady pressure on the press when pointing bullets. You don’t want to trap air in the die and damage the bullet tip. You can use most any press, with a caliber-specific sleeve and correct die insert. The Whidden pointing die has a micrometer top so making adjustments is very easy.
Bryan Litz actually helped design the Whidden Bullet Pointing Die System, so you can order the Pointing Die and Inserts directly from Applied Ballistics. Just make sure that you pick up the correct caliber sleeve(s) and appropriate insert(s). As sold by Applied Ballistics, the Whidden Bullet Pointing Die System comes with the die, one tipping insert, and one caliber-specific sleeve. To see which insert(s) you need for your bullet type(s), click this link:
|


