Cleaning Rod Rack Costs Just $7.99
Looking to better organize your reloading room (aka “man cave”)? Here’s a handy, affordable product that will help you organize gear in your reloading room or “man cave”. Tipton’s Cleaning Rod Rack (Tipton #100335) can accommodate up to six rods with various size handles. The wall-mounted Rod Rack also has horizontal studs on either end for additional accessories. These are useful for hanging the Tico Tool shotgun cleaning wands that stow in a tube with a plastic hook on the top.
Tipton Cleaning Rod Racks come complete with mounting screws (and screw slots are molded-in). You’ll find Tipton Cleaning Rod racks for under $10.00 at most vendors. They are $7.99 at MidwayUSA, while Amazon.com offers the racks for $14.74 with free shipping for Amazon Prime Members.
Sierra Bullets has released extensive load data for the popular 6.5 Creedmoor cartridge. This medium-sized cartridge has become one of the most popular chamberings for tactical and PRS shooters. The 6.5 Creedmoor combines excellent accuracy, good mag-feeding, good barrel life, moderate recoil, and reasonable component cost. That’s why this cartridge has caught on quickly, and is now one of the most popular chamberings in factory rifles.
Developed in 2007 by Dennis DeMille and Dave Emary, the 6.5 Creedmoor is a shortened and improved 30 TC cartridge case that was inspired by the .308 Winchester design. This short action design was created to maximize case capacity and a wide range of loading lengths, while still fitting in standard short action magazines. With the correct twist barrel, the versatile 6.5 Creedmoor can take advantage of the wide range of bullet weights available in 6.5 mm (i.e. .264 caliber). Reloaders should keep in mind that the 6.5 Creedmoor works best with medium to medium-slow powders such as H4350, Varget, Win 760, and RE-17. The light recoil and adaptability of the efficient 6.5 Creedmoor cartridge has already proven itself in high power, precision rifle series and benchrest competitions. Couple that with respectable barrel life and its intrinsic accuracy potential and you have a recipe for success which should insure its legacy for decades to come.
Here are three tables from the Sierra Bullets Reloading Manual (5th Edition). IMPORTANT — This is just a sample!! Sierra has load data for many other 6.5mm bullet types, including FB, Spitzer, SBT, HPBT, and Tipped MK from 85 grains to 142 grains. To view ALL 6.5 Creedmoor DATA, CLICK HERE.
INDICATES MAXIMUM LOAD – USE CAUTION
LOADS LESS THAN MINIMUM CHARGES SHOWN ARE NOT RECOMMENDED.
INDICATES MAXIMUM LOAD – USE CAUTION
LOADS LESS THAN MINIMUM CHARGES SHOWN ARE NOT RECOMMENDED.
INDICATES MAXIMUM LOAD – USE CAUTION
LOADS LESS THAN MINIMUM CHARGES SHOWN ARE NOT RECOMMENDED.
Two More Great 6.5 Creedmoor Reloading Resources
Want More 6.5 Creedmoor Load Info? View Starline’s 6.5 Creedmoor Guide by Gavin Gear:
PRB 6mm Creedmoor and 6.5 Creedmoor Load Survey
The Precision Rifle Blog compiled Load Data from PRS Competitors, for both 6mm Creedmoor and 6.5 Creedmoor. This is a good place to start. PRB surveyed the match loads for “173 of the top-ranked precision rifle shooters in the country”. CLICK HERE.
Do you own an RCBS electronic powder dispenser? If you do, take the time to watch this ChargeMaster Tuning video from 8541 Tactical. This nine-minute video demonstrates how to re-program your ChargeMaster to “tune” the dispensing process. The video shows the exact programming procedures to follow, step-by-step. Some folks want a faster powder flow — others tune their machines for a more reliable drop (with fewer over-runs). One cheap and popular modification is to insert a 1″-long section of a McDonald’s plastic straw in the ChargeMaster’s silver dispensing tube. This works surprisingly well to smooth kernel drop and prevent “clumping” that can cause an over-charge. The McDonald’s straw MOD is demonstrated in this video, starting at the 6:22 mark.
Large-Diameter Dispensing Tube Mod
Many folks have had success with the McDonald’s straw modification demonstrated in the above video. However, some folks would like to get even better flow performance (with virtually no clumping). Forum Member Frank B. has come up with a new option using a brass hose fitting with a large outside diameter. The hose fitting (with tape wrapped around the barbed nose section) is placed inside the RCBS dispensing tube (have some kind of wrap — you don’t want metal-on-metal). Here’s how the unit looks installed:
Frank tells us: “I have found a cure for the over-throw problem. It is a simple 1/4″ barbed hose nipple. I wrapped a couple layers of tape around the barbed end for a snug fit. With this in place, I have thrown 100+ charges of Varget without a single overthrow. The ID of the barbed end needs to be approximately 3/16″ to feed a steady flow. This works because of the larger ID at the drop.”
Frank adds: “You can see in the photo that the powder is not stacking up. You can watch it drop one grain at a time. Hope this will take the aggravation out of your case charging.” For best performance with this brass fitting MOD, we recommend de-burring and smoothing out the front edge of the brass fitting over which the kernels drop.
Brass fitting mod suggested by Boyd Allen. We welcome reader submissions.
Powder Valley now offers RCBS Reloading tools and components as part of PV’s large selection of shooting sports and reloading products. So now, when ordering powder, primers, brass, ammo, and bullets, you can also add dies, reloading tools, and even a RBCS reloading press. “Powder Valley already offers an extensive line of reloading components, including Federal, Speer, and Remington bullets, CCI and Federal primers, and Alliant powders. The expansion of our Reloading Tools and Equipment line makes perfect sense” said Bill Clinton, CEO of Powder Valley. “This is one more way we can [benefit] our Customers and serve their reloading needs”.
CLICK HERE to see the wide variety of RCBS products now in stock at Powder Valley. You’ll find powder dispensers, priming tools, reloading presses, case prep tools, plus a wide selection of reloading dies.
A Short History of RCBS (And the Origin of the “RCBS” Name) RCBS was founded in 1943 by Fred T. Huntington in Oroville, California. Huntington was a dedicated shooter but found it difficult to obtain quality varmint bullets. However, after reading about making a die to swage .22 rimfire cartridge cases to form jackets for bullets, he began to craft his own dies in the back room of his father’s Oroville laundry and dry-cleaning business. Because the resulting bullets were used to shoot rock chuck varmints, he named them Rock Chuck Bullet Swage dies, later shortened to RCBS.
RCBS soon outgrew this modest beginning. By 1958, RCBS expanded to a 7,500-sq-ft factory that quickly grew to 50,000 square feet. With time, more expansions have occurred, but RCBS stayed near its roots. Oroville is still the major location for RCBS production. RCBS is now a subsidiary of Vista Outdoor, which also produces Federal and CCI ammunition and primers, Alliant powder, and many other products.
When you make a reloading mistake, you may need to “pull down” assembled ammo. The embedded UltimateReloader.com video demonstrates how to use the Hornady Cam-Lock bullet pulling system.
When Reloading Goes Bad — The Danger of Over-Charging
Our friend Gavin Gear of UltimateReloader.com was recently reloading some 9mm pistol ammo with his Hornady progressive press. As part of his reloading procedure, he visually checks the cases — and he noticed that the charges seemed high. Sure enough, his most recently-produced rounds were about two grains over spec. He diagnosed the issue: “I was using a powder measure without a baffle. What happened was, over the course of the loading session, things settled in, and the charge level increased.”
Not knowing just when his powder measure started delivering too much powder, Gavin decided, for safety’s sake, to pull down all the ammo he had just reloaded. Yes that’s time-consuming, but it’s better than the alternative — having a dangerous Kaboom while shooting. With fast-burning pistol powders, a two-grain over-charge could cause a blown case, damaged firearm, and/or serious injury.
Watch Cam-Lock Bullet Puller Used to Remove Bullets from Loaded Ammo:
Use of Bullet Puller starts 4:00 minutes into video.
Gavin says it is vitally important to perform safety checks during the reloading process: “You’ve got to do it — check every single round to make sure there IS powder, and that there’s not too MUCH powder. Double, Triple, Quadruple check your components… and your powder charges. You can’t be too careful.”
To pull down a loaded round, first place the cartridge in the shellholder on your press ram. Then raise the round up into the bullet puller device installed where a die would go. The Hornady Cam-lock bullet puller works by clamping the bullet in a collet when you flip down the red-coated lever. Then, with the case held by the rim in the shell-holder, the bullet exits the cartridge as the press ram is lowered. It takes time, but it’s pretty fool-proof once you get the hang of it. This entire process is illustrated in Gavin’s video, starting near the four-minute mark.
The Hornady Cam Lock Bullet Puller has four (4) key components: 1. Cam-Lock die body; 2. Cam-Lock lever; 3. Stem; and 4. Collet (Caliber-specific).
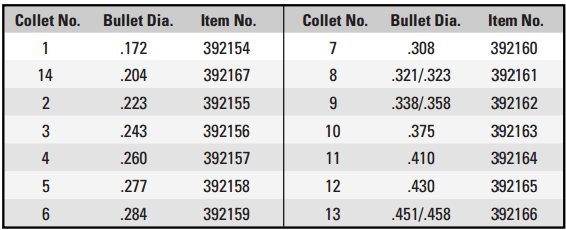
NOTE: In order to use this tool, you’ll need the appropriate collet for each diameter range of bullets you intend to pull. For example use collet #3 for 6mm, collect #6 for 7mm, and collet #7 for .308 Caliber.
RCBS Lock-Out Die
A good safety option for users with progressive presses is the RCBS Lock-Out Die. This has a charge detection rod that dips into each case after powder has dropped. You adjust the die to the proper charge height for your desired load. If the actual dispensed charge is too high or too low, the Lock-Out Die senses the problem and stops the press from advancing to the next case (it does this by preventing the ram/shellplate from fully elevating). We’ve used the Lock-out die with success for both pistol and rifle cartridges. It’s sensitive to about one-half grain with pistol powders.
This Lock-Out Die works with Hornady and Dillon progressives as well as with RCBS progressives. It does take up one die station on the press.
At the request of our readers, we provide select “Deals of the Week”. Every Sunday afternoon or Monday morning we offer our Best Bargain selections. Here are some of the best deals on firearms, hardware, reloading components, optics, and shooting accessories. Be aware that sale prices are subject to change, and once clearance inventory is sold, it’s gone for good. You snooze you lose.
NOTE: All listed products are for sale to persons 18 years of age or older. No products are intended for use by minors.
⏺ Amazing deal — save $190 on semi-auto home defense 12 gauge shotgun
Need a home defense gun? Well, here’s a steal of a deal — get an impressive 12 gauge auto-loading (semi-auto) defensive shotgun for just $209.99. The Emperor Firearms 12ga SR5 features tactical sights, forearm accessory rail, and a 5+1 capacity.
2. Powder Valley — Ginex Small Rifle Primers, $79.00 per 1000
⏺ Very affordable primers — save $20-$30 per 1000
If you need primers but don’t want to break the bank check out these Unis Ginex small rifle primers. Users report dependable ignition and good performance. These Unis Ginex primers have received good reviews from verified purchasers, and they cost less than nearly all other small rifle primers on the market. NOTE: For this deal there is a case quantity minimum of 5000 primers.
3. MidwayUSA — Texas Star Target, $199.99
⏺ Fun, rotating interactive target, now $100 OFF
Here’s a great interactive target for fun at the range — and right now it’s $100 off! The Birchwood Casey Texas Star Target features five plates made from tough AR500 steel. The 48″-tall Texas Star Target is a rotating target system for handguns, rifles, and shotguns. When one of the five, 6″ AR500 plates is hit, the star rotates. The target, which spins on industrial, greaseable bearings, can be disassembled easily for convenient transport. The Texas Star’s metal components feature a durable black powder coating.
4. Sportsman’s Warehouse — Spring Optics Sale
⏺ Great deals on Vortex and Leupold scopes, spotters, rangefinders
Have you been hunting for a new scope, laser rangefinder, or spotting scope? Head over to Sportsman’s Warehouse for the Spring OPTICS SALE. With leading brands such as Leupold, Vortex, and SIG Sauer being heavily discounted, you can grab the new optics you need AND save money.
5. Amazon — BOG Clamping Tripod, $161.45
⏺ Excellent, rugged clamping tripod for hunters and tactical shooters
Taking stable and safe shots while standing can be a struggle without the right gear. Whether for hunting, PRS, or target shooting, consider the BOG DeathGrip Aluminum Tripod. This tripod features a 3-position leg lock for prone, kneeling, sitting, or standing positions. The clamping section at the top holds the rifle securely. This tripod features an adjustment knob allowing up to 25 degrees of tilt adjustment and the tripod can pan 360 degrees. And the clamping head has a tension control that provides a secure grip. For a bit more money ($181-$184), BOG offers this same clamping tripod with high quality Realtree Escape Camo and Realtree Mossy Oak Camo finishes.
6. Natchez — March Madness Sale, Frankford Arsenal
⏺ Big sale with lots of good discounts
Frankford Arsenal offers an extensive line of reloading equipment — tumblers, priming tools, powder dispensers, case prep centers and more. You’ll find a huge selection of Frankford Arsenal gear on SALE this week at Natchez. Save up to 15% on nearly everything Frankford Arsenal makes, including the excellent Priming Tool, Intelli-Dropper, and Case Prep Center.
7. Amazon — Caldwell Stinger Rest, $95.09
⏺ Good choice for sighting-in hunting rifles — big savings right now
The Caldwell Stinger Rest is a good platform for sighting-in hunting rifles. Plus it also works great as a rifle holder for cleaning chores. Now just $95.09 on sale, the Caldwell Stinger Adjustable Ambidextrous Rifle Shooting Rest is a great value. With a “no wobble” rack and pinion front elevation system, cam-over front rest locks, rigid steel tube frame, and rear fine elevation adjustment, this rest provides a solid platform. And with open-center, dual frame design, this Stinger Rest works with ARs and lever action guns.
⏺ 9x19mm carbines are becoming very popular, and this is a quality rig
The Beretta Cx4 Storm 92 Carbine is a compact, ergonomic carbine with many good features. This 9mm Luger (9x19mm) carbine features a 16.6″ barrel and a Picatinny rail for optics. The pistol caliber Beretta Cx4 Storm 92 carbine accepts Beretta 92 handgun magazines — a big plus. That way Beretta pistol owners can use the same ammunition and magazines for both their handgun and rifle. That makes for more fun at the range.
9. Mile-High Shooting — Fix It Sticks AR15 Kit, $96.00
⏺ If you shoot an AR often, you shoot definitely get this tool kit
If you own an AR, you need the right tools. One of the best AR tool kits is the Fix It Sticks AR15 Field Maintenance Kit, now on sale for $96.00. This kit is out-of-stock elsewhere so grab one while you can. The Fix It Sticks AR15 Maintenance Kit includes a wide selection of drivers and accessories expressly made for ARs. And this Kit includes the All-In-One Torque Driver that can tension key parts such as scope mounts to the correct torque levels.
⏺ Superb, well-fitting eye protection at a great price
Every shooter needs high-quality eye protection, which should be used EVERY time one goes to the range. If you need new shooting eyewear, check out these SolidWork shooting glasses for just $12.49. These feature rugged frames and comfortable padding for the nose and temples. Strong and tough, these shooting glasses are USA ANSI Z87+ rated and German DIN EN 166/EN 170 certified. These shooting glasses feature Anti-Scratch, Anti-Fog, and Anti-Glare coatings: “Due to the special coatings, our protective eyewear is highly scratch-resistant, will not fog up, and will protect against harmful UV rays.”
We are re-publishing this article at the request of Forum members who found the information very valuable. If you haven’t read this Safety Tip before, take a moment to learn how you can inspect your fired brass to determine if there may be a potential for case separation. A case separation can be dangerous, potentially causing serious injury.
On the highly-respected Riflemans’ Journal blog, created by our late dear friend German Salazar*, there was an excellent article about Cartridge Case-Head Separation. In this important article, Salazar (aka GS Arizona) examined the causes of this serious problem and explained the ways you can inspect your brass to minimize the risk of a case-head separation. As cases get fired multiple times and then resized during reloading, the cases can stretch. Typically, there is a point in the lower section of the case where the case-walls thin out. This is your “danger zone” and you need to watch for tell-tale signs of weakening.
The photo below shows a case sectioned so that you can see where the case wall becomes thinner near the web. You can see a little arrow into the soot inside the case pointing to the thinned area. This case hadn’t split yet, but it most likely would do so after one or two more firings.
Paper Clip Hack for Detecting Problems
The article provided a great, easy tip for detecting potential problems. You can use a bent paper clip to detect potential case wall problems. Slide the paper clip inside your case to check for thin spots. GS Arizona explains: “This simple little tool (bent paper clip) will let you check the inside of cases before you reload them. The thin spot will be immediately apparent as you run the clip up the inside of the case. If you’re seeing a shiny line on the outside and the clip is really hitting a thin spot inside, it’s time to retire the case. If you do this every time you reload, on at least 15% of your cases, you’ll develop a good feel for what the thin spot feels like and how it gets worse as the case is reloaded more times. And if you’re loading the night before a match and feel pressured for time — don’t skip this step!”
* Sadly, German Salazar passed away unexpectedly on June 21, 2022 at age 62. German was a great inspiration to this site and help guide the creation of the AccurateShooter Forum. A brilliant man, expert attorney, and top-tier marksman, German will be sorely missed in the shooting sports world.
Bolt Action Reloading is a popular YouTube channel that has amassed nearly 75,000 subscribers. For this Saturday Video Showcase we’ve selected six interesting videos. If you’re getting started in reloading, definitely watch the video on Five Common Mistakes. And all handloaders can benefit from the videos which covers affordable tools, all under $50.00.
Five Common Mistakes Made by Novice Handloaders
This video spotlights five (5) common mistakes made by people when they get started hand-loading ammunition. These are some of the most common errors and misconceptions that affect “newbie” reloaders. Here are the five common problems encountered by folks getting started in handloading:
1. Not Using LOAD DATA from a Reliable Source — Use verified, properly developed load data from a powder maker or bullet maker. Don’t trust private social media posts. And always start conservatively.
2. Inconsistent Case Sizing — this can be the result of sloppy die set-ups or not knowing how to measure cases correctly.
3. Cartridge Overall Length (COAL) Variances — Don’t assume that COAL book values apply to your ammo. You should measure your own cases based on your chamber, headspace, and bullet choice. AccurateShooter.com recommends you use QuickLoad or Gordon’s Reloading Tool software to help adjust loads for different COAL.
4. Hand-Loading Is Not Always a Money-Saver — For a cartridge you don’t shoot much (say a .30-06 for hunting only), hand-loading might not save you money once you count the cost of dies and tools.
5. Reloading Kits Are NOT Complete — Don’t assume that the $500 reloading kit you acquired (with press, powder measure, scale etc.) has all the components and tools you actually need. You will still need dies, comparators, and many other tools.
Primer Pocket Uniforming — Is It Worth the Time and Effort?
With Lapua and Peterson brass we have had very good results — great accuracy and with low ES and SD — using brass that has NOT had the primer pockets uniformed with some kind of cutter. We always do check to make sure there are no flakes or obstructions in the flash holes, but we generally do NOT need to cut into the pockets. But with lesser brands of brass you can benefit from uniforming your primer pockets. And yes there are some top shooters who DO uniform pockets even on premium-brand brass. That is up to you. This video explains the process for primer pocket uniforming and looks at some test results.
Developing a Load — OCW vs. 10-Round Ladder
This video talks about two methods of determining an accurate load. We include this video here because many people are curious about Optimal Charge Weight (OCW) load development. Frankly, however, we believe there are better, more reliable ways to find a good load — many people have wasted many hours and much barrel life on the OCW quest. NOTE: With a good cartridge of known accuracy, such as a 6mmBR or 6mm Creedmoor using top-quality brass, we really do NOT advocate either method described in this video. We suggest you do a search to find the best bullet choice and powder choices. Then, if you are shooting from the bench with a custom barrel, consider starting in the lands, about .003-.005 past first touch. NOT full jam!! If you are shooting in conditions where you may have to unload a round during a match, start .020″ back from first touch. Chronograph every round. Shoot three-shot groups at 100 yards, looking to keep all shots touching. Many people doing OCW waste a ton of time (and barrel life). And one bit of advice for people with average factory barrels — it may be pointless to expect anything much under 1 MOA from that barrel no matter what you do.
Handloading Cool Tools — All Under $50.00
Along with powder measure, dies, and reloading press, there are a wide variety of tools that can help achieve good results when handloading ammo. This Bolt Action Reloading video identifies ten (10) tools that can be acquired for $50.00 or less. Here is the list:
1. Check Weights (00:20) — These help ensure your scale is measuring properly.
2. Digital Calipers (00:57) — You can spend $200+ on calipers, but you can get good results from caliper that cost less than $50.00, and every reloader should have a back-up set of calipers.
3. Comparator Sets (01:26) — These are fittings that attach to calipers. Bullet Comparators are sized to fit a bullet diameter to get reliable base-to-ogive measurements. Case comparators fit the neck of the cartridge, allowing you to measure shoulder bump.
4. Stock Case Remover (02:48) — This allows you to remove a brass case that may be stuck in a die.
5. Imperial Sizing Die Wax (03:20) — There are many types of case lubricants, but Imperial Die Wax is still a popular choice and very affordable.
6. LEE Cutter and Lock Stud (03:44) — This is a cheap way to trim cases. We prefer a Forster trimmer or a deluxe power trimmer but LEE system is inexpensive.
7. Chamfering and Deburring Tools (04:38) — After brass is trimmed to length you need to chamfer and deburr the case necks. Good chamfering/deburring tools are “must have” items for hand-loaders.
8. Case Neck Brushes (05:50) — If you don’t tumble your brass it’s a good idea to brush the inside of your fired cases before seating bullets. A couple swipes is all it takes — and you may find you get more consistent seating if you leave a bit of carbon in the necks.
9. Primer Pocket Swage Gauge (Ballistic Tool) (06:24) — These little tools let you check the dimensions of your primer pockets.
10. Decapping Die (06:57) — The decapping die removes spent primers without sizing the case. This is very handy if you want to remove primers before tumbling brass. NOTE: If your cases have small-diameter flash-holes you need to check the diameter of the decapping rod.
11. Powder Trickler (07:40) — A good trickler is an absolute “must have” when manually weighing each charge. The trickler allows you to add a couple grains at a time.
12. Powder Funnel with Drop Tube (08:45) — While most folks have a basic funnel, a deluxe funnel with a drop tube helps to get a full charge and more consistent powder density.
13. Kinetic Bullet Puller (09:36) — This is like a hammer that holds a loaded round. Using kinetic energy this tool can unseat a bullet with a couple of whacks. However, if you must unload a large quantity of rounds you’ll want a cam-lock bullet puller (09:58) that works with your press.
14. Caliber Specific Reloading Trays (10:28) — These are handy if you are loading specific cartridges. There is less wobble for each round.
Setting Neck Tension with Expanders and/or Bushings
There are three main ways (in addition to collet dies), by which you can set the neck diameter on cartridge brass and thereby control neck tension or the “grip” on the seated bullet. First, the sizing die itself can reduce the neck diameter. This can be a fitted die with the neck honed to a precise diameter. Or, the die can take neck bushings, which allow a range of neck tensions via different bushing internal diameters. Because they allow a wide range of tension settings, bushing dies are popular and effective. You can also have a die that takes the neck dimension down a few thousandths, but then have an expander mandrel that brings the neck inside diameter to an exact dimension. This has the advantage of keeping the INSIDE of the neck perfectly round, with any variances in neck-wall thickness pushed to the outside. This Bolt Action Reloading video explains the use of neck bushings and expander mandrels.
Full-Length-Sizing vs. Neck-Sizing of Cases
NOTE: At AccurateShooter.com we recommend that handloaders always full-length size their brass for many important reasons. Virtually all champion shooters in multiple disciplines full-length size their brass. Full-length sizing can achieve record-setting accuracy, and, importantly, it offers consistent shoulder bump with each loading. But we know that people are curious about neck-sizing, so we are including this video.
This video compares identical charge-weight loads tested with full-length-sized 6.5 Creedmoor brass vs. neck-sized 6.5 Creedmoor brass. The tester states: “I use the 142gr Sierra Match King HPBT loaded with Alliant Reloder 16. There is velocity and group data at 150 yards. FYI, we recommend always full-length sizing most cartridge brass, bumping the shoulder about .003″ (or more if required in a semi-auto).”
The February 2013 edition of Shooting Sports USA magazine has an interesting feature by Glen Zediker, who sadly passed away in October 2020. In this Transporting Success, Part I article, Zediker explains the advantages of loading at the range when you are developing new loads or tuning existing loads. Glen, the author of the popular Handloading for Competition book, discusses the gear you’ll need to bring and he explains his load development procedure. In discussing reloading at the range, Glen focuses on throwing powder and seating bullets, because he normally brings enough sized-and-primed brass to the range with him, so he doesn’t need to de-prime, re-size, and then re-prime his cases.
Zediker writes: “Testing at the range provides the opportunity to be thorough and flexible. You also have the opportunity to do more testing under more similar conditions and, therefore, get results that are more telling. Once you are there, you can stay there until you get the results you want. No more waiting until next time.”
Zediker starts with three-shot groups: “I usually load and fire three samples [with] a new combination. I’ll then increase propellant charge… based on the results of those three rounds, and try three more. I know that three rounds is hardly a test, but if it looks bad on that few, it’s not going to get any better.”
Glen reminds readers to record their data: “Probably the most important piece of equipment is your notebook! No kidding. Write it down. Write it all down.”
There’s More to the Story…
Editor’s Note: In Zediker’s discussion of loading at the range, he only talks about throwing powder and seating bullets. In fact, Glen opines that: “There is little or no need for sizing.” Well, maybe. Presumably, for each subsequent load series, Zediker uses fresh brass that he has previously sized and primed. Thus he doesn’t need to de-prime or resize anything.
That’s one way to develop loads, but it may be more efficient to de-prime, re-size, and load the same cases. That way you don’t need to bring 50, 80, or even 100 primed-and-sized cases to the range. If you plan to reload your fired cases, you’ll need a system for de-priming (and re-priming) the brass, and either neck-sizing or full-length sizing (as you prefer). An arbor press can handle neck-sizing. But if you plan to do full-length sizing, you’ll need to bring a press that can handle case-sizing chores. Such a press need not be large or heavy. Many benchresters use the small but sturdy RCBS Partner Press, for sale now at Amazon for $114.99. You may even get by with the more basic Lee Precision Compact Reloading Press, shown in Zediker’s article. This little Lee press, Lee product #90045, currently retails for $44.99 at Midsouth.
The RCBS Lock-Out Die can also be used with some Dillon and Hornady progressive presses.
If you load pistol or rifle ammo with a progressive press, we strongly recommend you get a Lock-Out Die from RCBS. This unique reloading die will prevent your progressive press from advancing if the dispensed powder charge is more or less than about 0.3 grains too high or too low. The Lock-Out Die really works. Your Editor uses it on his RCBS 2000 progressive press. I can affirm that a Lock-Out Die has “saved my bacon” a half-dozen times over the years when there was an over-charge (which could cause a Kaboom) or a low charge (which could cause a squib load).
The Lock-Out Die works by using a central die detection rod that sets its vertical position based on the height of the powder column in the case. Through an ingenious design, if the powder column height is too low or too high, the rod locks in place as you start to pull the press handle. This halts the press before the ram can lift and the cartridge plate can advance. Unlike a beeping alarm system (which can be ignored or defeated), the Lock-Out Die physically stops the movement of the press ram and prevents a bullet being seated in the “problem” case.
It takes a bit of tweaking to get the Lock-Out Die detection rod setting just right, but once it is correctly positioned, the Lock-Out Die works smoothly in the background. The Lock-Out Die won’t interfere with the loading process unless it detects a high or low charge — and then it positively stops the progressive loading cycle.
While crafted for use in RCBS progressive presses, the RCBS Lock-Out Die can also be used on a Dillon XL Progressive (see video below) or Hornady Lock-N-Load progressive — though it does take up one station which could otherwise be used for a final crimp die (after the seating die). The RCBS 2000 has one more station than a Dillon 550/650, so it’s an ideal platform for using the Lock-Out Die.
Learn More at UltimateReloader.com
On the UltimateReloader.com website, run by our friend Gavin Gear, you’ll find an excellent two-part series on the function and set-up of the RCBS Lock-Out Die. Part One explains how the Lock-Out Die functions, using cut-away illustrations. Part Two shows how to install and adjust the Lock-Out Die on various progressive presses. The Ultimate Reloader video at the top of this article shows setup of the RCBS Lock-Out Die on the Dillon XL-650 progressive press, while the Reloading Bench video below shows the Lock-Out Die on a Hornady LnL progressive.


 Developed in 2007 by Dennis DeMille and Dave Emary, the 6.5 Creedmoor is a shortened and improved 30 TC cartridge case that was inspired by the .308 Winchester design. This short action design was created to maximize case capacity and a wide range of loading lengths, while still fitting in standard short action magazines. With the correct twist barrel, the versatile 6.5 Creedmoor can take advantage of the wide range of bullet weights available in 6.5 mm (i.e. .264 caliber). Reloaders should keep in mind that the 6.5 Creedmoor works best with medium to medium-slow powders such as H4350, Varget, Win 760, and RE-17. The light recoil and adaptability of the efficient 6.5 Creedmoor cartridge has already proven itself in high power, precision rifle series and benchrest competitions. Couple that with respectable barrel life and its intrinsic accuracy potential and you have a recipe for success which should insure its legacy for decades to come.


 RCBS was founded in 1943 by Fred T. Huntington in Oroville, California. Huntington was a dedicated shooter but found it difficult to obtain quality varmint bullets. However, after reading about making a die to swage .22 rimfire cartridge cases to form jackets for bullets, he began to craft his own dies in the back room of his father’s Oroville laundry and dry-cleaning business. Because the resulting bullets were used to shoot rock chuck varmints, he named them Rock Chuck Bullet Swage dies, later shortened to RCBS.

 RCBS Lock-Out Die


 On the highly-respected Riflemans’ Journal blog, created by our late dear friend German Salazar*, there was an excellent article about Cartridge Case-Head Separation. In this important article, Salazar (aka GS Arizona) examined the causes of this serious problem and explained the ways you can inspect your brass to minimize the risk of a case-head separation. As cases get fired multiple times and then resized during reloading, the cases can stretch. Typically, there is a point in the lower section of the case where the case-walls thin out. This is your “danger zone” and you need to watch for tell-tale signs of weakening.


 There’s More to the Story…


