The anvil is the tripod-shaped thin metal piece protruding above the bottom of the primer cup. Getting the primer sitting fully flush on the bottom of the case primer pocket, without crunching it too much, requires some keen feel for the progress of primer seating.
Sadly, Glen Zediker passed away on October 1, 2020. But his technical insights and helpful advice live on thanks to his written works — his books and articles. In two informative Midsouth Blog articles, Glen Zediker presented helpful advice on priming. First he examined what happens to the primer itself as it is seated in the cup. Glen then explained why some “crush” is important, and why you never want to leave a high primer.
Glen also reviewed a variety of priming tools, including his favorite — the Forster Co-Ax Bench Primer Seater. Then he offers some key safety tips. Glen provides some “rock-solid” advice about the priming operation. You’ll find more great reloading tips in Glen’s Top-Grade Ammo book.
Priming Precision vs. Speed
Glen wrote: “The better priming tools have less leverage. That is so we can feel the progress of that relatively very small span of depth between start and finish. There is also a balance between precision and speed in tool choices, as there so often is.”
Benchtop Priming Tools — The Forster Co-Ax
Glen believed that the best choice among priming options, considering both “feel” and productivity, may be the benchtop stand-alone priming stations: “They are faster than hand tools, and can be had with more or less leverage engineered into them. I like the one shown below the best because its feeding is reliable and its feel is more than good enough to do a ‘perfect’ primer seat. It’s the best balance I’ve found between speed and precision.”
Load Tuning and Primers
Glen cautioned that you should always reduce your load when you switch to a new, not-yet-tested primer type: “The primer is, in my experience, the greatest variable that can change the performance of a load combination, which is mostly to say ‘pressure’. Never (never ever) switch primer brands without backing off the propellant charge and proving to yourself how far to take it back up, or to even back it off more. I back off one full grain of propellant [when I] try a different primer brand.”
Priming Safety Tips by Glen Zediker
1. Get a good primer “flip” tray for use in filling the feeding magazine tubes associated with some systems. Make double-damn sure each primer is fed right side up (or down, depending on your perspective). A common cause of unintentional detonation is attempting to overfill a stuffed feeding tube magazine, so count and watch your progress.
2. Don’t attempt to seat a high primer more deeply on a finished round. The pressure needed to overcome the inertia to re-initiate movement may be enough to detonate it.
3. Keep the priming tool cup clean. That’s the little piece that the primer sits down into. Any little shard of brass can become a firing pin! It’s happened!
SSG Greg Markowski of the USAMU at Camp Perry, Ohio.
Today is the final day of pistol competition for the National Matches at Camp Perry. Many of the best pistol shooters in the country will be on the firing line, including members of the U.S. Army Marksmanship Unit Service Pistol team. Today, July 18th, the handgun phase of the CMP National Matches concludes with the Oliver Hazard Perry Pop-Up Pistol Match, Military & Police Pistol Match, 1911 As-Issued Pistol Match, and Glock Match. After the last match, trophies and awards will be presented to the top shooters.
If you want to compete in top competitions like this, you’ll need good ammo. The following USAMU article provides rock-solid reloading advice, explaining how to load accurate, reliable handgun ammo.
Camp Perry NM pistol firing line from CMP Photo Archives.
The U.S. Army Marksmanship Unit (USAMU) fields pistol teams as well as rifle and shotgun competition squads. Consequently the USAMU’s Reloading Shop loads tens of thousands of pistol rounds every year. In this article, the USAMU’s handgun experts talk about reloading for handguns — with smart tips on how to achieve superior accuracy with 100% reliability. This article, which offers important insights on COAL, primers, crimps and more.
Precision Pistol Reloading — Recommended Methods
Optimize the Taper Crimp
One often-overlooked aspect of handloading highly-accurate pistol ammunition is the amount of crimp and its effect on accuracy. Different amounts of taper crimp are used with various handloads to obtain best accuracy. The amount is based on bullet weight, powder burn rate and charge, plus other factors. It is not unusual for our Shop to vary a load’s crimp in degrees of 0.001″ and re-test for finest accuracy.
Use Consistent Brass
Brass is also important to pistol accuracy. While accurate ammunition can be loaded using brass of mixed parentage, that is not conducive to finest results, particularly at 50 yards. It is important for the serious competitor/handloader to use brass of the same headstamp and ideally one lot number, to maximize uniformity. Given the volumes of ammunition consumed by active pistol competitors, using inexpensive, mixed surplus brass for practice, particularly at the “short line” (25 yards), is understandable. However, for the “long line” (50 yards), purchasing and segregating a lot of high-quality brass to be used strictly for slow-fire is a wise idea.
Importance of Uniform COAL
Uniformity of the Case Overall Length (COAL) as it comes from the factory is also important to achieving utmost accuracy. More uniform case lengths (best measured after sizing) contribute to greater consistency of crimp, neck tension, ignition/burn of powder charge, and so on. Cartridge case-length consistency varies from lot to lot, as well as by maker. Some manufacturers are more consistent in this dimension than others. [Editor’s note: It is easy to trim pistol brass to uniform length. Doing this will make your taper crimps much more consistent.]
Primers and Powders — Comparison Test for Accuracy
Pay attention to primer brands, powder types and charges. Evaluating accuracy with a Ransom or other machine rest at 50 yards can quickly reveal the effect of changes made to handload recipes.
Bullet Selection — FMJ vs. JHP
Bullets are another vital issue. First, there is the question of FMJ vs. JHP. A friend of this writer spent decades making and accuracy-testing rifle and pistol bullets during QC for a major bullet manufacturer. In his experience, making highly-accurate FMJ bullets is much more difficult than making highly-accurate JHPs, in large part due to the way the jackets are formed. Small die changes could affect accuracy of FMJ lots dramatically.
The CMP now allows “safe, jacketed ammunition” in Excellence-in-Competition (EIC) Service Pistol matches, although wadcutter ammunition is prohibited. Thus, the option to use very accurate JHP designs simplifies the life of CMP Service Pistol shooters in pursuit of the prestigious Distinguished Pistol Shot badge.
Hopefully, these tips will be helpful to any pistol shooters interested in accurate handloads, not just “Bullseye” shooters. Small tweaks to one’s normal routine can pay big dividends in improved accuracy and make practice and competition more rewarding.
Stay safe, and good shooting!
TOP IMAGE: SSG Greg Markowski, a shooter/instructor with the U.S. Army Marksmanship Unit and native of Poland, fires his pistol during the 2018 Civilian Marksmanship Program’s National Pistol Matches at Camp Perry, Ohio July 13, 2018. At that event, Markowski claimed the General Mellon Trophy, General Patton Trophy and the General Custer Trophy. U.S. Army photo by Maj. Michelle Lunato/released by Defense Visual Information Distribution Service.
Good news for serious hand-loaders — a large selection of premium-quality Lapua brass is now IN STOCK at Creedmoor Sports and Grafs.com. You’ll find a wide variety of cartridge types available for purchase today at these two leading vendors. Check the lists below.
We’re happy to report that Lapua Brass is IN STOCK, because finding top quality reloading components (brass, bullets, powder, and especially primers) has been a major challenge over the past year. It looks like both Graf & Sons and Creedmoor Sports have received large shipments of Lapua cartridge brass recently. So if need good brass, check the availability list below, and then place your orders. Sorry, no 6mmBR, 6.5 Grendel, 6.5×55, 7mm-08, or .30-06 brass at either vendor right now.
As of 9:00 am on Saturday July 17, 2021, here are some of the rifle cartridge types we found in stock.
Lapua .220 Russian Brass $128.29
Lapua .223 Rem. Brass $68.99
Lapua 6mm Creedmoor Brass Small Primer Pocket $55.99 (50 ct)
Lapua .243 Win Brass $120.99
Lapua 6.5×47 Lapua Brass $134.99
Lapua 6.5 Creedmoor Brass Small Primer Pocket $103.99
Lapua .260 Rem Brass $120.99
Lapua .284 Winchester Brass $144.99
Lapua 7.62×39 Brass $85.99
Lapua 7.62x54R Russian Brass $158.99
Lapua 7x65R Brass $119.99
Lapua .300 Norma Magnum Brass $226.99
Lapua .338 Norma Magnum Brass $328.99
Lapua .338 Lapua Magnum Brass $321.99
CLICK HERE for Grafs.com Lapua Brass Sales Page
NOTE: On that page, items IN STOCK are listed first. You can Login to be notified when out-of-stock items are back in stock. Prices subject to change.
Forum member F-Class John is an avid F-Class competitor and expert handloader. John reviews reloading hardware and shooting-related products for his popular F-Class John YouTube Channel, which now boasts 220+ videos. John also does important product testing for AccurateShooter.com. Through his YouTube channel, John has reviewed many of the latest and greatest reloading tools and accessories. For today’s Video Showcase, we selected eight F-Class John tool and reloading product reviews.
If you like these selected videos, consider joining F-Class John’s Patreon Channel for live video meetings, more in-depth videos, and detailed explanations.
21st Century Hydro Press and Standard Arbor Press
John notes: “You can’t really talk about precision reloading without taking about inline dies and arbor presses. For my money there’s nothing better than the lineup from 21st Century Shooting. They offer the Hydro Seater which is hands-down the best manual seater out there as well as their standard arbor press which is great for taking on the road to push back bullets as needed.”
Primal Rights Competition Priming Seater (CPS) Review
If there is a Ferrari of priming tools, it has to be the Primal Rights Competition Primer Seater (CPS). This impressive bench-mounted tool allows very precise control over primer seating depth. A vertical tube holds primers ready for insertion. The action is smooth and precise. John believes that this is definitely the best priming tool on the market, though it may not be for everyone given its premium $600.00 price.
Lyman Powered Case Trimmer Review
The Lyman Case Trim Xpress is an efficient, precise unit that allows easy adjustment of trim length with a click-adjustable collar. The trimmer comes with a set of cartridge-specific bushings that index off the case shoulder. One nice feature is a variable speed control. For the price, $154.99 on Amazon, this trimmer delivers excellent performance. F-Class John has another video review of the Lyman Case Trim Xpress which shows set-up and operation.
Dillon 750 Tips and Tricks
The Dillon XL 750 is a favorite of high-volume reloaders. With the optional case feeder, the XL 750 offers high output with great reliability. And Dillon offers one of the best warranties in the business. In this video, F-Class John features upgrades including the Armanov tool-head holders from Europe. These are drilled and tapped for all FIVE stations allowing the user to put threaded dies in any station.
Gunsmithing Torque Wrench Comparisons
When you are working on custom rifles that might cost $5000+, and mounting scopes that can run $3000 (or more), you need to use very high-quality tools. Precise torque settings are essential, both to avoid damage to valuable parts, and to have the rifle and optic perform optimally. In this video, F-Class John looks at a variety of torque wrenches suitable for gunsmithing duties.
Concentricity Checking with Accuracy One Gauge
Every serious hand-loader needs a quality concentricity gauge. The Accuracy One Concentricity Gauge boasts a smart design that delivers precise, repeatable results. We like the unit’s easy adjustability and its ability to work in a variety of configurations. The Accuracy One Gauge measures internal and external neck runout of cartridge cases as well as seated bullet runout. It can also measure the runout of the ogive, bearing surface, and boat-tail of individual bullets. And it can even measure your primer pocket runout.
Teslong Rigid (Shaft) Borescope with Monitor
Seeing inside your barrel can provide clues to how well you’re cleaning and the bore’s overall health. One of the best tools on the market is the Teslong Rigid Borescope. This features a solid rod for easy use in barrels. Plus it comes with a self-contained high-definition viewing monitor so no smartphones or WiFi tablets are needed. If you’re looking for something more portable and a bit more versatile, try the Teslong Flexible Borescope, $99.99 including monitor. John was impressed with the new rigid Teslong he tested, and he likes having a dedicated monitor (no WiFi required).
Zero Turret Press with Whidden Sizing Die
The new Zero Press from Area 419 is arguably the best turret press ever crafted. It offers unrivaled precision, along with the highest-capacity turret head with NINE die/tool stations. Milled from billet aluminum and stainless steel, this press moves with the help of 14 bearings. In this video, F-Class John shows how to use a Whidden Gunworks full-length sizing die on the Zero Press. And John has two other video reviews of the $1200 Zero Press: 1. Zero Press First Thoughts Video; 2. Loading on a Zero Press.
At the request of our readers, we provide select “Deals of the Week”. Every Sunday afternoon or Monday morning we offer our Best Bargain selections. Here are some of the best deals on firearms, hardware, reloading components, optics, and shooting accessories. Be aware that sale prices are subject to change, and once clearance inventory is sold, it’s gone for good. You snooze you lose.
1. EuroOptic — Eliminator III 4-16x50mm LaserScope, $999.00
⏺ Save $400 on popular integrated scope/laser rangefinder
Burris recently released its new, $1699 IV-Series Eliminator LaserScope. That’s good news for bargain hunters because the price of the VERY similar Burris 4-16x50mm Eliminator III is now just $999.00, marked down from $1399.00 ($400 savings). The Eliminator system works great for varmint hunting. Combining optical magnification with laser rangefinding, the Eliminator III ranges out to 1,200 yards with push-button automatic trajectory compensation. You range your target, and the Eliminator III sets a red aiming point. Then just put the red dot on the target and pull the trigger — no drop charts, no knobs to crank. NOTE: EuroOptic also has Demo Model Eliminator IIIs for $899.00.
⏺ Outstanding deal on quality muffs — many color options
Every shooter should have quality ear muffs, both for yourself and any friends/family members you bring to the range. For those on a tight budget, we recommend the Walker’s Razor Slim Passive Earmuffs. These are comfortable and have a good 28dB Noise Reduction rating — very high for slim muffs. These Walker’s Razor Slims are available in a wide variety of colors, starting at just $15.80 on Amazon — a great deal. These muffs fold compactly, making them easy to stow.
⏺ Good press, powder measure plus many tools for crazy-low price
Though reloading tools are in high demand, right now you can get this very complete Lee 50th Anniversary multi-component kit for $147.99, an incredible bargain — the press alone is worth $100! The main attraction is the Lee Breech Lock Challenger Press with quick-change bushing. In addition, you get a Lee Perfect Powder Measure, Safety Scale, Powder Funnel, and Safety Prime. The kit even includes variety of Case Prep tools: Case trimmer, Chamfer Tool, Primer Pocket-Cleaning tool.
4. Midsouth — Hornady .22 Cal Bullet Bulk Packs, 9¢ per bullet
⏺ Get 6000 .22 Caliber bullets for just 9 cents each
5. MidwayUSA — Frankford Large Rotary Tumbler, $143.99
⏺ Big Capacity, Great Deal — save $77 over typical price
If your brass is dirty on the outside or if you want to get it “squeaky clean” before annealing, a Rotary Wet Tumbler is a smart option. Right now the large, full-size Frankford Rotary Tumbler is on sale. Order it now from MidwayUSA for just $143.99 including 5 pounds of 304 stainless media pins and a packet of Frankford Brass Cleaning Solution. NOTE: You must ADD to CART to see that $143.99 price. This a great deal — this tumbler sells elsewhere for $220 or more. Note: if you already have the media, you can also buy the unit by itself from Amazon for $143.99, with free shipping for Prime members.
6. Amazon — Teslong Borescope with Monitor
⏺ Chose Rigid or Flexible model — every rifle shooter needs a good borescope
Seeing inside your barrel can provide clues to how well you’re cleaning and the bore’s overall health. One of the best tools we’ve found is the Teslong Rigid Borescope. This features a solid rod for easy use in barrels. It comes with an self-contained high-definition viewing monitor so no phones or pads are needed. If you’re looking for something more portable and a bit more versatile, try the Teslong Flexible Borescope, $99.99 including monitor. Our Forum members give high praise to both models.
7. Precision Reloading — Hornady Bulk Bullets
⏺ Hornady bullets IN STOCK with great bulk savings
Here’s your opportunity to save big on a huge variety of Hornady bullets in many calibers and various profiles and weights. You’ll find .22, 6mm, and .308 bullets discounted 10-20%. The more you buy the more you save. Precision Reloading is also offering big discounts on a variety of Hornady 9mm and 10mm pistol projectiles.
8. Dunn’s — Norma 9mm Luger Ammo, $18.99/50
⏺ Great Norma 9mm ammo at attractive price in today’s market
9mm Luger ammo remains the most sought-after pistol ammo. Some vendors are charging up to $59.00 for 50 rounds. Now you can get high-quality Norma-brand 9mm ammo for less than one-third that price — just $18.99 for 50 rounds ($0.40/round). Grab it now. If this Norma 9mm ammo sells out, head over to Grafs.com which has Wolf 9mm ammo for $23.49 per 50 rounds. This Wolf ammo features polymer-coated FMJ bullets for reduced copper fouling. NOTE: This steel-cased Wolf ammo is NOT reloadable.
9. Palmetto SA — Taurus 22 Poly 11 oz. Pistol, $279.99
⏺ VERY light and VERY small — for everyday deep concealment
Boasting sleek lines and a lightweight, polymer frame, the 11 oz. Taurus 22 Poly pistol features a blowback action and tip-up barrel for safety/convenience during loading and chambering. Capacity is 8 rounds. The frame is polymer while the barrel and slide are steel. No, this will not run with an 18-round Glock, but is it so small and so light you can literally carry it anywhere in a pants or coat pocket, or a small purse.
⏺ Affordable padded mat rolls up for easy transport
When shooting prone, it’s really important to be comfortable. You need a good mat that offers some padding along with plenty of room for your gear. The Redneck Convent Padded Shooters Mat fits the bill. Measuring 64 inches by 21 inches it boasts plenty of room and features 1/2″ padding top to bottom. This mat rolls up for easy storage/transport (Rolled size is 21″x8″) with handy built-in rolling straps. This is also available in Green for $38.99 or Black for $39.99.
In recent months, Forster Co-Ax® presses have been hard to find, as demand has out-stripped supply. But the folks at Forster Products are working hard to get these excellent presses out to vendors. Be patient, check with multiple sellers, and you should be able to find one.
If you are not yet familiar with the many unique features of the Forster Co-Ax, we recommend you watch the video embedded below. This shows how the press operates and highlights the design elements which set the Co-Ax apart from every other reloading press on the market.
Video Shows Special Features of Forster Co-Ax Reloading Press
Forster Co-Ax Press Video Review
This is a very thorough review of the Forster Co-Ax done by Rex Roach. This 14-minute video shows the key Co-Ax features, explaining how the floating case-holder jaws work (3:30 time-mark), how the dies are held in place (4:40 time-mark), how spent primers are captured (6:10 time-mark), and how to set the primer seating depth (10:00 time-mark). We’ve used a Co-Ax for years and we still learned a few new things by watching this detailed video. If you are considering purchasing a Co-Ax, definitely watch this video start to finish.
The Co-Ax case-holder features spring-loaded, floating jaws. These jaws have two sets of openings, small and large. This allows the system to adapt to various rim diameters. The jaw plates can simply be reversed to switch from small jaw to large jaw. In the photo above, the Co-Ax is configured with the large jaw openings in the center.
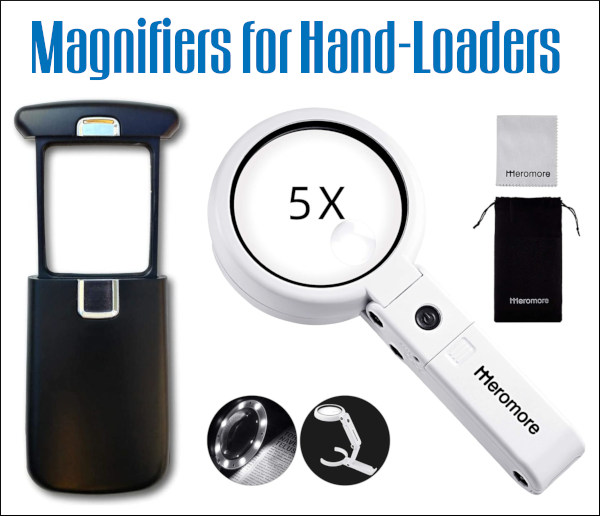
What is the most-used piece of equipment on this Editor’s reloading bench? No it’s not my Rock-Chucker press, my priming tool, or even my calipers. The one item in near-constant use is a small, folding magnifying glass. Mine folds into a square case and offers 4X viewing with an 8X bifocal insert. With this handy tool I can inspect case mouths for burrs, check primer pockets, inspect meplats, and look for flaws on bullet jackets. I also use the magnifier to see rifling marks on bullets seated into the rifling, or check my bolt for galling. The number of uses is nearly endless. I keep one magnifier at my reloading bench and another in my range kit.
Folding magnifiers are so handy yet inexpensive that you should own a couple spares (including one in the range box). I bought my magnifier in a book-store, but you can also find them on Amazon.com and FoldingMagnifier.com starting at under $2.00. To see inside cases and dies and view fine details, consider the 5X Meromore Folding Magnifier with a built-in, battery-powered LED light, plus a 11X high-magnification insert.
With a decent small magnifier, you can easily see any minute flaws in your barrel crowns. That’s important because crown damage can cause hard-to-diagnose accuracy issues. We’ve known guys who spend weeks tinkering with loads, when the real problem was a worn-out or damaged crown.
The slide-out iLumen8, shown at left in top photo, offers 3X power with built-in illumination. An “Amazon’s Choice” item, this palm-sized magnifier is $18.95 on Amazon.
As a cartridge case is reloaded multiple times, burnt powder residue and carbon builds up on the inside of the case. Unless the case interior is cleaned in some fashion, eventually you’ll see a slight reduction in case capacity. One of our Forum members from Australia wonders about the effects of reduced case capacity: “If the capacity of the case decreases as the crud builds up, then it effectively reduces the size of the cartridge (inside). Wouldn’t that change the pressure produced from that of an equivalent clean case?”
Interesting Test of Case Capacity Changes
Forum member Fred Bohl has actual test results that can help answer the above question. Fred proved that, over a 20-reload cycle, the case capacity of uncleaned cases did decline a small amount. However, surprisingly, this did not seem to affect the actual chronographed velocity of the load. Extreme Spread (ES) did increase, but Fred believes the higher ES was due to changes in case-neck tension, rather than due to the slight reduction in case capacity. Fred reports:
“Back when beginning to use ultrasonic case cleaning, part of the motivation was to get the inside clean based on the assumption that allowing burnt residue to build up inside cases would affect capacity, and, ultimately, performance. An experiment was done to test this hypothesis. The load used, 30.5 grains of RL15 behind 107gr SMKs in a 6mmBR, was selected for best group and lowest ES in prior load development. It turned out to be 92% of initial case capacity and neither “full” or compressed. (I would suspect that different powders, load weight, and total case capacity might produce very different results.)
We took 30 cases of identical initial capacity and tracked three lots of 10 each:
LOT 1: No Internal cleaning LOT 2: Cleaned with media in tumbler LOT 3: Cleaned with Ultrasound machine
Each case (in each lot) was shot and reloaded 20 times. The simplified results after 20 reloads of each lot were as follows:
Lot 1 (not cleaned) – 0.3 to 0.4 gr. loss of capacity, 5 to 8 fps greater ES.
Lot 2 (tumble cleaned) – 0.1 to 0.3 gr. loss of capacity, 4 to 6 fps greater ES.
Lot 3 (ultrasonic cleaned) – no loss of capacity, no detectable change in ES.
FINDINGS There was no detectable correlation of velocity change to the lots. An oddity was that on very hot days Lot 1 velocities were, occasionally, slightly higher. From results of another ongoing test, I believe the above differences in ES are probably due more to variance in bullet grip tension than case capacity. The ultrasound cleaned cases (LOT 3) did maintain the lowest ES, but we are not 100% sure of the reasons why. More consistent bullet seating might be the reason.”
Editor’s NOTE: Fred’s results do suggest that carbon build-up inside the uncleaned cases might cause a slight increase in pressure that shows up on hot days. Fred has posted that: “A local shooter reported doing the 20 reload, no-clean test on a .308 that gave a loss of capacity of 2.0 grains, doubled ES and significant velocity changes. However, I don’t have any details on his load weight or powder.” Obviously a lot of carbon can build up with 20 reloads. Many shooters retire their brass before then.
Ultrasonic Cleaning and Neck Lube
Some time ago, Jason Baney did a lengthy test on ultrasonic cleaning. Jason found that with his ultrasonically-cleaned cases, the inside of the necks got so “squeaky clean” that he needed to use dry lube in the necks. Jason uses the $21.50 dry lube kit from Neconos.com. This applies ultra-fine Moly powder to the neck interior using small carbon steel balls.
Did you know that there’s a free online resource that provides key data for thousands of bullet designs? The ShootForum Bullet Database provides profiles with weight, length, SD, and Ballistic Coefficient for nearly 3900 bullet types from all the major manufacturers. You can access all this info for free. This is a great place to start when you’re considering bullet options for a new rifle, or a new chambering for an existing rifle. To be fair, not all the latest, greatest match bullets are listed here. Could the database benefit from updates — yes, but it is still a great info source. You should definitely bookmark this resource for easy access in the future.
The massive ShootForum.com Bullet Database includes over 3900 bullet designs in all. We counted nearly 200 different 6mm bullets! The bullet info comes from the makers of QuickLOAD Software. Access to the online database is FREE. Most database entries include Caliber, Manufacturer, Stated Bullet Weight, True Bullet Weight, Length, Sectional Density (SD), and Ballistic Coefficient. In many cases multiple BCs are provided for different velocity ranges. Having bullet length lets you know right away if your cartridge/bullet combo can fit your magazine.
NOTE: This database has not been fully updated for a few years, so it certainly does not include all the latest and greatest projectiles, such as new match bullets from Sierra and Berger, or the Hornady A-Tips. However, as far as we can determine, this is still the largest bullet-database on the internet. Even without recent updates, this remains a hugely valueable resource.
The database is great if you’re looking for an unusual caliber, or you want a non-standard bullet diameter to fit a barrel that is tighter or looser than spec. You’ll find the popular jacketed bullets from major makers, plus solids, plated bullets, and even cast bullets. For those who don’t already own QuickLOAD software, this is a great resource, providing access to a wealth of bullet information.
by Sierra Bullets Ballistic Technician Paul Box
All of us who have been in reloading and shooting for any period of time have read how sectional density has been regarded as a bullet’s ability to penetrate. Back before high velocity came along and modern bullet design, the easiest way to get more “power” and penetration was by increasing the diameter and mass. After all, a bowling ball will hurt more than a golf ball, right?
Let’s take a closer look at sectional density.
The formula for calculating sectional density is pretty simple and straight forward. Take the bullet weight and divide by 7000. This number is then divided by the bullet diameter squared. Two bullets of equal weight and the same diameter will have equal sectional sectional density. No regard is given to the bullet construction. This is where the fly hits the soup in considering sectional density as far as penetration is concerned.
Section Density Formula: (Bullet Weight divided by 7000) divided by Bullet Diameter squared.
Bullet construction is the biggest factor in how it is able to penetrate. The best example I can think of here is to look at the Sierra .224 55 Gr. FMJBT GameKing #1355 compared to the 55 Gr. BlitzKing #1455. Both are .224 and weigh 55 grs. Both have a sectional density of .157. But there is a huge difference in their construction. The FMJ has a thick jacket and is designed to penetrate. The BlitzKing is designed for fast and rapid expansion with little concern for how deep they will penetrate.
The next time you’re choosing a bullet, look at the construction and less at the sectional density number. It’s all about the construction anyway. If you have any questions or would like to discuss sectional density or bullet penetration further, please give us a call at 800-223-8799 or shoot us an email at sierra@sierrabullets.com.


 Use Consistent Brass
 Good news for serious hand-loaders — a large selection of premium-quality Lapua brass is now IN STOCK at


 In recent months, Forster Co-Ax® presses have been hard to find, as demand has out-stripped supply. But the folks at
 What is the most-used piece of equipment on this Editor’s reloading bench? No it’s not my Rock-Chucker press, my priming tool, or even my calipers. The one item in near-constant use is a small, folding magnifying glass. Mine folds into a square case and offers 4X viewing with an 8X bifocal insert. With this handy tool I can inspect case mouths for burrs, check primer pockets, inspect meplats, and look for flaws on bullet jackets. I also use the magnifier to see rifling marks on bullets seated into the rifling, or check my bolt for galling. The number of uses is nearly endless. I keep one magnifier at my reloading bench and another in my range kit.