There are many tactical-style video producers on YouTube. Many of these guys, to be honest, aren’t very knowledgeable about firearms, nor are they particularly good shooters. By contrast, videos hosted by Tactical Hyve regularly feature top Action Pistol, PRS and 3-gun competitors as well as military SPECOPS veterans. The vets include SEAL team members who really know their stuff. The Tactical Hyve YouTube channel currently hosts over 560 videos! Here are seven of our favorite Tactical Hyve videos featuring highly-skilled instructors.
1. How to Aim a Pistol with Iron Sights or Red Dot
We recommend this video for persons training for a CCW permit, or who are getting started in pistol shooting competition. The video shows proper technique for using iron sights. In addition, it offers some important advice for shooting with Red Dots. Shooting with Red Dot sights can be easier than with iron sights because you only have to put the dot on the target, rather than align front blade with rear notch. But it does take some familiarization to get things right. And persons with astigmatism can have challenges with Red Dot sights.
2. Five Most Common Pistol Shooting Mistakes
In this video, Myles, the founder of Tactical Hyve, talks about the five most common pistol shooting mistakes he sees in classes and how to correct them. Many folks begin pistol shooting without a qualified instructor. Or they try to imitate what they see on TV. This can lead to new pistol shooters forming bad habits. This video helps handgunners correct those bad habits. This popular video has 1.9 million views.
3. Dry-Fire Techniques with Pistol Master Champion J.J. Ricaza
Released on 8/4/22, this is the latest video from the Tactical Hyve YouTube channel. The featured shooter, J.J. Ricaza, a multi-time Steel Challenge champion, is one of the top 10 action pistol shooters in the country. Racaza show how to dry fire like a grandmaster in this video. Dry-firing lets you polish your technique at home, and improve your skills without the cost of live ammunition.
4. Reticle Types Reviewed — MOA and MilRAD
In this video, Billy Leahy, former USCG Precision Marksmanship Instructor, talks about the common optics reticles you’ll encounter. This is a good video to watch if you are shopping for a new scope and are considering a variety of reticle types, both MilRAD (Milliradian) and MOA, SFP and FFP. In this video, Leahy covers the following reticles:
Standard Mil Dot
Leupold TMR
Nightforce Mil-XT
Horus Tremor3
Vortex EBR-7C (MRAD)
Vortex EBR-2C (MRAD)
Vortex EBR-4 (MOA)
5. Use of Tripods for Precision Rifle Competitions
In this video, retired Green Beret and nationally-ranked precision rifle shooter, Scott Satterlee, shares precision rifle tripod shooting tips. This is a “must-watch” video for PRS/NRL shooters who may use tripods in competition. This video can also benefit hunters who might use a tripod in the field.
6. Pistol and Rifle Methods for CROSS-Dominant Shooters
What is “Cross Dominance” and how do you adjust for it? Those questions are answered in this video. If your dominant eye is opposite your dominant hand, then you are cross-dominant. For example, this Editor is right-handed but my LEFT eye is dominant. So I am cross-dominant. This video starts with a simple exercise to determine your dominant eye. Then the video shows how to hold a pistol correctly if you are cross-dominant. Finally, the video shows techniques that benefit cross-dominant rifle shooters.
7. Setting Up an AR-15 for Home Defense
In this video, retired Navy SEAL Mark “Coch” Cochiolo shares how his primary AR for home defense is set up. Coch reviews various optics choices and he also explains how to mount a lamp on your home defense rifle(s). The AR-15 set-ups of ten other tactical experts are revealed in a Tactical Hyve web article. See:
Sherri Jo Gallagher, the second woman in history to win the NRA High Power National Championship, sports Eye Protection at Camp Perry. The first lady High Power Champion was Sherri’s mother, Nancy Tompkins.
In response to a Bulletin article about Protective Eyewear, one of our Canadian readers posted a personal story. His account demonstrates the importance of wearing eye protection whenever you shoot — no matter what type of firearm you are using — even air rifles. We hope all our readers take this to heart. All too often at rifle matches we see shooters, even some top competitors, risking their vision by failing to wear eye protection.
Eye and Hearing Protection are now MANDATORY for Highpower Rifle competitors and Pistol shooters in all CMP-affiliated matches. Starting in 2020 the CMP Highpower Rifle, Pistol, and CMP Games Rulebooks incorporated the following rule: “All competitors and competition officials are required to wear appropriate eye and hearing protection when on shooting range firing lines during highpower rifle or pistol firing. All competitors must comply with this requirement before they can participate in a CMP sponsored or sanctioned competition. Competitors are responsible for selecting their eyewear and hearing protection.”
Eye Protection — Lesson Learned by Nicholas from Canada
As a boy on a mixed farm on the plains the first shooting stick I owned was a Red Ryder BB gun. My Dad bought it for me as I showed a keen interest in the shooting and hunting sports. I was about 9 years old at the time.
We had literally thousands of sparrows in our large farm yard and they liked to roost on the steel railings in the barn loft. I took to slowly thinning out their ranks by flashlight at night as these little winged pests settled in the farm buildings.
One evening as I slayed sparrow after sparrow in the barn loft — with about a dozen farm cats following me to consume these easy meals, I fired at another bird centered in my flashlight beam.
However, my aim was a bit low — and the copper pellet hit the steel beam square on. Instantly I felt a sharp pain as the BB bounced back and hit me squarely between the eyes on the bridge of my nose – drawing blood from the partial penetration into the skin. A half inch either way and I’d have lost an eye!
Never, never, never shoot at any target with a steel background with any firearm, even a BB gun – is the hard lesson I learned, and wear the best shooting glasses that money can buy!
PLEASE REMEMBER THAT!!
Editor’s Comment: Among competitive pistol shooters, the use of safety eyewear is universal. You’ll never see Rob Leatham, Julie Golob, or Jerry Miculek competing without eye protection — for good reason. The handgun sports’ governing bodies effectively enforce mandatory eye protection policies. We wish the same could be said for competitive rifle shooting. We often see benchrest, High Power, and F-Class competitors shooting without eye protection. We’ve heard all the excuses, yet none of them trump the safety considerations involved.
We recommend that all shooters and hunters employ eye protection whenever they use firearms or are at a location where live fire is taking place. You only have two eyes. A tiny bullet fragment or ricochet is all it takes to cause permanent blindness in one or both eyes. As rifle shooters, we place our eyes a couple inches away from a combustion chamber operating at pressures up to 70,000 psi. I know quite a few guys who will religiously put on safety glasses when running a lathe or a drill press, yet the same guys won’t use eye protection when shooting their rifles — simply because it is “inconvenient”. That’s nuts. It doesn’t matter is you are a cub scout or a multi-time National Champion — you should wear eye protection.
I will give you a personal example. A year ago I was shooting a 9mm pistol. One of the cartridges had a primer burst outward blowing small particles, some brass, and a piece of the pistol’s extractor right back into my eyes. Thankfully I was wearing good wrap-around safety glasses. No injuries at all. But without those safety glasses, this could have been very serious. I always wear safety glasses with ALL firearms. Shown below is the same kind of primer blow-out I experienced, but with a .270 Win rifle cartridge.
Be wise — protect your eyes. To learn more about eyewear safety standards, and to learn about the latest options in ANSI Z87-certified protective eyewear, read our article on Eye Protection for Shooters.
We created the above target a decade ago. Since then it has been used by tens of thousands of shooters. It has proven very popular as a load development target, since all your load data fits neatly in the boxes under each target. In fact this target is being employed by both rifle-makers and barrel-makers (including Criterion) to test their products. The target was designed for aiming efficiency. The diamonds have 1/2″ sides and you can align your cross-hairs on the horizontal and vertical lines. It is a clean design that is easy to see even at 200 yards with a 20X scope. When we test, we usually crank in a little elevation, setting the point-of-impact higher, so that our shots fall in the gray circles. That way you leave the squares intact for precise aiming.
We also use these two targets for load development and precision practice. The circle dot target can also be used for informal rimfire competition at 50 yards.
Right-Click Each Target to Download Printable PDFs.
How to Print Your Targets
Most of us have access to a printer at home or at work. That means you can print your own targets. You’ll find hundreds of free target designs online, including dozens of downloadable targets on our AccurateShooter.com Target Page. If you’re feeling creative, you can design your own target with a computer drawing program such as MS Paint.
Paper Stock Is Important
If you want your self-printed targets to show shots cleanly (and not rip when it gets windy), you should use quality paper stock. We recommend card stock — the kind of thick paper used for business cards. Card stock is available in both 65-lb and 110-lb weights in a variety of colors. We generally print black on white. But you might experiment with bright orange or yellow sheets. Forum Member ShootDots report: “They sell cardstock at Fed-Ex Kinko! I use either Orange or Yellow. That makes it easy to see the bullet holes clearly.” On some printers, with the heavier 110-lb card stock, you will need to have the paper exit through the rear for a straighter run.
Here are some Target-Printing Tips from our Forum members:
“Staples sells a 67-lb heavy stock that I have settled on. I use the light grey or light blue, either of these are easy on the eyes on bright days. I have used the 110-lb card stock as well and it works fine. It’s just a little easier to print the lighter stuff.” (JBarnwell)
“Cardstock, as mentioned, works great for showing bullet holes as it doesn’t tear or rip like the thin, lightweight 20-lb paper. I’ve never had a problem with cardstock feeding in the printer, just don’t stick too many sheets in there. If I need three targets, I load only three card stock sheets”. (MEMilanuk)
“20-lb bond works pretty well for me if I use a spray adhesive and stick the entire back of the paper’s surface to the backer board.” (Lapua40X)
Do you know which one of your eyes is dominant? It’s easy to determine eye dominance with a simple exercise. Pick an object about 6-10 feet away (a light switch or door knob works well). Make an “OK” sign with your right hand (see photo) and hold that about 18″ from your face. Now, with both eyes open, look through the circle formed by your thumb and index finger. Center the circle on the object, so you can see the object in the middle.
Now, here’s the important part — while still holding your hand up, centered on the object, first close your right eye. If you don’t see the object anymore, then your right eye is dominant. If you still see the object, then repeat the procedure with the left eye shut and right eye open. If you don’t see the object when your left eye (only) is closed, then you are left-eye dominant.
The digital archives of Shooting Sports USA contain many interesting articles. A while back, Shooting Sports USA featured a “must-read” expert Symposium on Eye Dominance, as it affects both rifle and pistol shooting. No matter whether you have normal dominance (i.e. your dominant eye is on the same side as your dominant hand), or if you have cross-dominance, you’ll benefit by reading this excellent article. The physiology and science of eye dominance is explained by Dr. Norman Wong, a noted optometrist. In addition, expert advice is provided by champion shooters such as David Tubb, Lones Wigger, Dennis DeMille, Julie Golob, Jessie Harrison, and Phil Hemphill. NOTE: If the story doesn’t open at the links, go to the ssusa.org home page first, indicate you are over 18, and then CLICK HERE.
Top Rifle Champions Talk About Eye Dominance:
David Tubb — 11-Time National High Power Champion
I keep both eyes open, always. Some use an opaque blinder in rifle or shotgun shooting. If you close your non-dominant eye, you will not get as good a sight picture. If your aiming eye is not your dominant eye, you have even more of a problem to overcome.
Lones Wigger — World, National and Olympic Champion Rifleman
Shooters should try to use the dominant eye unless the vision is impaired and the non-dominant eye has better vision. You should always shoot with both eyes open since this will allow the shooting eye to function properly.
Dennis DeMille — National Service Rifle Champion
I close my non-shooting eye initially. Once I pick up my sight picture, it’s not something I focus on. For those that use a patch, I recommend that they use something white to block their view, rather than cover the eye.
Bruce Piatt — 2015 World Shooting Championship Winner
Some shooters, especially those with nearly equal or cross-dominance, will naturally find themselves squinting one eye. When anyone does this, you are also closing your dominant eye to some extent and adding stress to your face.
NOTE: There are ten (10) shots in the group, but for simplicity we are only displaying five (5) shot circles. Adding more circles won’t change the measurement because the two most distant shots, which determine group size, ARE included.
What kind of 200-yard accuracy can you get in an enclosed, underground test range? Would you believe 0.162 MOA at 200 yards with a .338? Have a look at these test targets from Sierra Bullets. Like most bullet manufacturers, Sierra does live-fire bullet testing to ensure that Sierra projectiles perform as promised, with repeatable accuracy. Sierra tests bullets in its own underground test complex. Sierra’s 300-meter test range is the longest, privately-owned underground bullet test facility in the Western Hemisphere.*
Day in and day out, various bullet types are tested using a big collection of barreled actions. These barreled actions are clamped in stout, return-to-battery test fixtures. These big, heavy test fixtures provide near-perfect repeatability (with no human-induced holding or aiming errors).
Sierra Bullets 10-Shot Groups at 200 yards
Check out these 10-shot test groups shot at the Sierra Test Range at 200 yards. Note that the numbers listed on each sample are actual measurements in inches. To convert to MOA, cut those numbers in half (to be more precise, divide by 2.094, which is 1 MOA at 200 yards). For example, the 0.340″ middle group works out to 0.162 MOA at 200 yards.
Scan-Verified 0.162 MOA Accuracy at 200 Yards
To verify the accuracy of Sierra’s measurements, we measured the middle (.338 caliber) 10-shot group with our On-Target Group Measurement software. We registered a group size reading of 0.339″ — within one-thousandth of the Sierra measurement. The calculated group size in MOA (Minute of Angle) is 0.162.
That’s amazingly good for ten rounds of big .338 caliber bullets. A FIVE-shot 0.162 MOA group at 200 would be considered excellent at any benchrest match. But remember this target has TEN shots. The current, one-target IBS world record for ten shots at 200 yards is 0.245″, set by Ed Watson in 1999.
Bevy of Barreled Actions for Bullet Testing
Sierra Bullets uses dozens of barreled actions for testing bullets in its enclosed, 200-yard test range. Each barrel has its own logbook to track the barrel’s usage.
Click Photo to Zoom
*Even Longer Test Tunnels Exist in Europe: At Stadeln in Germany, RWS (now part of RUAG) owns a 500 meter tunnel (above ground level) which has existed for decades. In Thun, Switzerland, RUAG has a fully-instrumented 500 meter underground tunnel. Near Ulm, Germany, there is a 5-lane 300 meter underground shooting range that is open to the public.
Winter is right around the corner, with December just two weeks away. Even now there is snow on the ground in Montana, Wyoming, Colorado and other northern and mountain states. And a major winter storm is predicted to hit America with snow and cold temperatures ahead of Thanksgiving week travel. Last week Denver had 20 inches of snow — the biggest November snowfall in over 40 years.
If you plan to go shooting or hunting in the weeks ahead, while the weather is below freezing and snow is on the ground, you need to be prepared. You should always have the right equipment and make sure that you can contact help if something goes wrong (such as not being able to start your vehicle).
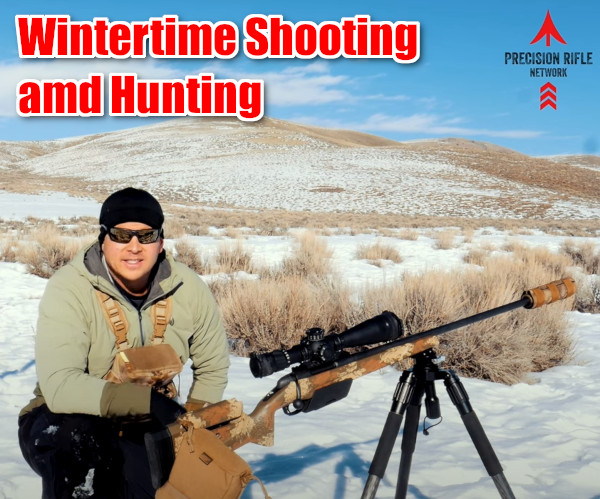
The folks at the Precision Rifle Network have created a good video on winter shooting and hunting. Host Marcus Hom provides his TOP 10 TIPS for wintertime shooting/hunting adventures. We recommend that any 4-season shooter watch this video.
TOP 10 TIPS for Winter Shooting and Hunting:
1. Wear Good Sunglasses — With snow on the ground, wearing sunglasses is a must because of the extra reflected light. You can get good sunglasses that also have ANSI Z87.1-approved impact protection.
2. Wear Protective, Moisture-Proof Clothing — Wear a set of Bibs and a long jacket. This will prevent you from getting snow inside your clothing when shooting prone.
3. Take Care of Your Hands — Bring good winter gloves, preferably with a waterproof outer layer. Make sure the inner gloves can work with your trigger/trigger guard.
4. Bring a Good Tripod — A tripod keeps you elevated so you can avoid laying down in snow or slush. That, in turn, avoids body heat loss. “Keeping out of the snow and shooting from an elevated position is pretty important in the wintertime.”
5. Protect Optics and Action — Keep your scope lenses and action clear of moisture, snow, and fog. You will want to have good caps on both lenses. Make sure the action remains closed, and consider some kind of wrap over the action until you’re ready to load and shoot.
6. Ranging Challenges — Laser range-finders don’t perform optimally with intense, bright, ambient light. Also, if it’s showing you may get false readings from snow particles. So take multiple readings to ensure you have the right distance. Also, if you have a reticle with MOA or MIL marks, and you know the size of your target, then you can range the target with the scope.
7. Drop and Windage Info (DOPE) Chart — Bring a waterproof, hard copy dope chart. Out in the field on cold days, a phone battery dies fast, and you’ll want to preserve that battery for emergency phone use if needed. So, you should keep a good old-fashioned drop chart in a waterproof laminate.
8. Muzzle Velocity Issues — Cold temperatures can lower muzzle velocity. Before you go, get an idea of how your velocity will change with low temperatures. Some powders are more sensitive to temperature than others, causing a noticeable reduction in muzzle velocity. A load you’ve worked out in summer may shoot LOW in winter because the actual velocity is low. Even with a “temperature stable” powder you may see a 10 fps slow-down. Do some winter velocity testing if you can before you go.
9. Keep Your Ammo Warm — A simple way to avoid muzzle velocity changes with low ambient temperatures is to keep you ammunition ON YOUR BODY. Have a pouch under your layered clothing where the ammo can be kept relatively warm. See video: 07:50
10. Safeguard Keys and Valuables — Keep keys and valuables in a secure, zippered pocket. “There is nothing worse than losing something… keys, phone, wallet. It’s really hard to find something when its buried under [many] inches of snow”. We also recommend keeping a spare vehicle key hidden on your car/truck. There are magnetic holders that can keep that spare key secure but safely hidden from view.
Winter Hunting — Success with Snow on the Ground
There has been snow on the ground for much of November in many areas of the country. Hunters have had to cope with the snow and cold temperatures. Our hunting editor, Colton Reid, recently returned from a successful deer hunt in the mountains of Utah. He said it was beautiful, but you needed really high-quality outdoor clothing — otherwise you could get in trouble. You need to stay warm and dry.
With careful planning, and some skilled tracking, Colton had success, making a perfect hit on a buck at 300 yards. The animal dropped instantly. Colton brought back a good harvest of deer meat, which formed part of the Thanksgiving feast for his family.
Colton offered these 5 TIPS for hunters. These apply in any season, but are even more important in winter with freezing temps and snow on the ground:
1. Have a Plan — know where you plan to go and when. Try to be where you want in the early morning and early evening hours when deer are likely most active.
2. Take Your Time — If you spot a deer and get too excited and don’t take your time you may spook him. Go slow and glass. If possible, wait for the animals to bed down and relax. Then work out the best way to approach your prey. Remember, “You get so few opportunities, don’t screw it up!”
3. Glass More, Walk Less — Let your eyes do the walking — get good binoculars and use them. With their heightened senses of smell and hearing, deer/elk are able to spot you way better than you can spot them. If you are walking around a lot, chances are you are getting spotted by your prey.
4. Pace Yourself When Packing Out — If you DO succeed, and bring down a big buck, will you be able to dress the animal and carry out the meat? Always be prepared to hike out with extra weight. If you are successful, make sure not to waste the meat you worked so hard for. Choose a pack that can help you carry a heavy load. Remember, this is not an insignificant challenge — you may be carrying 60 to 100 extra pounds in addition to your other gear. Again, take your time. Rest as needed. Don’t hurt yourself.
5. Always Enjoy the Experience — Have fun, and appreciate your hunt, whether you bag a buck or not. It is a privilege to experience the wilderness and to get away from the city. Enjoy it while you’re out there. And keep your spirits up. You may get tired, but remember that ‘comes with the territory’. At the end of the day, yes you may be exhausted. And you may want to quit and go home. But stay positive, stay focused. Be patient, the experience is worth it.
Winter Solace in the Backcountry
There is a nice thread in our Forum appropriately entitled “Winter Time”. You’ll find some great backcountry images taken by our Forum members. Winter is a special time in the outdoors. Forum member JDP explains: “Winter is the best time to shoot! One of the few of life’s ironies that works in my favor. The range is empty and barrels keep cool, no bugs, no waiting on people, no mirage. Yup, this world needs more thin blooded snow birds. This cool weather is terrible and dangerous, tell your friends! Do people get lonely while shooting or something? It’s the true holiday season in multiple ways.”
Forum member DNorton posted: “I live way up north where our white sandy beaches look like this!”
You have probably watched one of the excellent shooting sports videos Ryan Cleckner has done for the NSSF. Ryan’s Understanding Minute of Angle (MOA) video (see below) has been viewed over 3.6 million times! Ryan is noted for his ability to explain complex topics in an easy-to-comprehend manner.
Cleckner has also authored a hugely popular book, the Long Range Shooting Handbook, which expands on the topics covered in his popular video series. This book is the #1 Best Seller on Amazon in its category. You can view Sample Chapters from Ryan’s book — just click “Read Sample” on the Amazon product page.
As a long-range shooting expert, Ryan Cleckner has impressive credentials. Cleckner was a special operations sniper (1/75 Rgr) with multiple combat deployments, and he has served a U.S. Army sniper instructor. Currently he works as a firearms industry executive and attorney.
The Long Range Shooting Handbook is divided into three main categories: What It Is/How It Works, Fundamentals, and How to Use It. “What It Is/How It Works” covers equipment, terminology, and basic principles. “Fundamentals” covers the theory of long range shooting. “How to Use It” gives practical advice on implementing what you’ve learned, so you can progress as a skilled, long range shooter.
Ryan Cleckner’s best-selling Long Range Shooting Handbook is designed as an introduction to important fundamental concepts such as MOA vs. MILs, External Ballistics, and Environmental Effects. Included are personal tips and advice based on Cleckner’s years of experience as a sniper instructor.
Iain Harrison, editor of Recoil Magazine, said: “Whether you’re looking to dip a toe into the complex world of long range shooting, or you’re a seasoned shooter with years of trigger time, Ryan Cleckner’s book will prove to be excellent reference material. Well written and easy to understand, it covers all the essential topics that a well-rounded shooter needs to master.”
In this video, Ryan Cleckner reviews proper technique for rifle shooters. A stable platform, sight alignment, sight picture, and trigger control are key fundamentals to shooting properly.
As wintertime approaches, many of our readers will be switching to indoor shooting for a few months. Practicing at indoor ranges can be fun with both handguns and rifles (with permitted chamberings). But indoor shooters must be aware of noise issues and general safety concerns.
There are important safety and behavior rules you need to follow at a gun range. Sometimes bad range etiquette is simply annoying. Other times poor gun-handling practices can be downright dangerous. The NRA Blog has published a useful article about range safety and “range etiquette”. While these tips were formulated with indoor ranges in mind, most of the points apply equally well to outdoor ranges. You may want to print out this article to provide to novice shooters at your local range or club.
8 Tips for Gun Range Etiquette
Story by Kyle Jillson for NRABlog
Here are eight tips on range etiquette to keep yourself and others safe while enjoying your day out [at the range]. Special thanks to NRA Headquarters Range General Manager Michael Johns who assisted with this article.
1. Follow the Three Fundamental Rules for Safe Gun Handling
ALWAYS keep the gun pointed in a safe direction.
ALWAYS keep your finger off the trigger until ready to shoot.
ALWAYS keep the gun unloaded until ready to use.
This NSSF Video Covers Basic Gun Range Safety Rules:
2. Bring Safety Gear (Eye and Ear Protection)
Eye and Ear protection are MANDATORY for proper safety and health, no matter if “required” by range rules or not. It is the shooter’s responsibility to ensure proper protection is secured and used prior to entering/using any range. Hearing loss can be instantaneous and permanent in some cases. Eyesight can be ruined in an instant with a catastrophic firearm failure.
3. Carry a Gun Bag or Case
Common courtesy and general good behavior dictates that you bring all firearms to a range unloaded and cased and/or covered. No range staff appreciates a stranger walking into a range with a “naked” firearm whose loaded/unloaded condition is not known. You can buy a long gun sock or pistol case for less than $10.
4. Know Your Range’s Rules
Review and understand any and all “range specific” rules/requirements/expectations set forth by your range. What’s the range’s maximum rate of fire? Are you allowed to collect your brass? Are you required to take a test before you can shoot? Don’t be afraid to ask the staff questions or tell them it’s your first time. They’re there to help.
5. Follow ALL Range Officer instructions
ROs are the first and final authority on any range and their decisions are generally final. Arguing/debating with a Range Officer is both in poor taste and may just get you thrown out depending on circumstances.
6. Don’t Bother Others or Touch Their Guns
Respect other shooters’ privacy unless a safety issue arises. Do NOT engage other shooters to correct a perceived safety violation unless absolutely necessary – inform the RO instead. Shooters have the right and responsibility to call for a cease fire should a SERIOUS safety event occur. Handling/touching another shooter’s firearm without their permission is a major breech of protocol. Offering unsolicited “training” or other instructional suggestions to other shooters is also impolite.
7. Know What To Do During a Cease Fire
IMMEDIATELY set down your firearm, pointed downrange, and STEP AWAY from the shooting booth (or bench). The Range Officer(s) on duty will give instructions from that point and/or secure all firearms prior to going downrange if needed. ROs do not want shooters trying to “secure/unload” their firearms in a cease fire situation, possibly in a stressful event; they want the shooters separated from their guns instantly so that they can then control the situation as they see fit.
8. Clean Up After Yourself
Remember to take down your old targets, police your shooting booth, throw away your trash, and return any equipment/chairs, etc. Other people use the range too; no one wants to walk up to a dirty lane.
Look and be amazed. What you are seeing is the smallest 5-Shot group ever shot in 1000-yard competition. And it is also perfectly centered for a 50-5X max score, yes ALL Xs. Brilliant! This amazing group was shot by Mike Wilson in July of 2018 with his 17-lb Light Gun, chambered for a 6mmBR wildcat he calls the 6 BRAW (BR Ackley Improved Wilson). This spectacular feat of accuracy demonstrates the potential of the 6BR family of cartridges even at 1000 yards. For his record group, Mike shot Vapor Trail 103-grain bullets in Lapua 6mmBR fire-formed brass. He loaded Hodgdon H4895 powder with CCI 450 primers. The action was a BAT, the barrel a Brux.
The Best 5-Shot 1000-Yard Group in History
Story based on report by Sam Hall
Look at that target by Mike Wilson. This is one of the most remarkable displays of accuracy (and precision) in the history of long range shooting. This past weekend, Mike (aka “GA. Dawg” in our Forum) drilled a truly spectacular 1.087-inch, 5-shot group at 1000 yards, all centered up in the X-Ring. Yes, you read that right, a group barely over an inch at 1000, shot in competition at an official IBS benchrest match on July 21, 2018. Note, the group was measured at the range at an even smaller 1.068″ (see target). However, as certified by the IBS as a IBS Light Gun World Record, the group is listed as 1.087″.
How small is that in angular measurement? Well 1 MOA at 1000 yards is 10.47 inches, so Mike’s 50-5X masterpiece is 0.1038 MOA! Yes that is an IBS group size AND score World Record. And it is also smaller than the current NBRSA 1000-yard 5-shot LG world record, 1.473″ by Bill Schrader in 2002. This best-ever 1K group* was shot at an IBS registered 1000-yard match at Hawks Ridge Gun Club in North Carolina. Other records have been shot at Hawks Ridge in the past, but this is the most jaw-dropping.
Sam Hall (left, green shirt) holds record target by Mike Wilson (right, white shirt).
Sam Hall, past IBS National Champion and IBS 600-Yard Shooter of the Year, was stunned by Wilson’s accomplishment: “This is a truely awesome marksmanship feat — one of the best in history. I think I would trade all 14 of my 600-yard records for that one!”. Mike’s amazing target will be submitted for approval as new Group Size and Score IBS World Records. Official approval is pretty much a certainty. The previous 5-shot, 1000-yard IBS record is 1.397″ (50 score) by Tom Sarver in 2007. (The NBRSA 1000-Yard 5-shot LG record is 1.473″ by Bill Schrader in 2002.)
Posting on our Shooters’ Forum, Mike wrote: “Thanks everyone for the kind words. As humbling as this game is, when it comes together makes it all worthwhile! A very special THANK YOU to my traveling buddy, my son, Blake, and my wife Debra for allowing me to enjoy this crazy game.” Mike also wanted to thank his smiths and component suppliers.
Mike Wilson IBS 1000-Yard Light Gun Specifications
Action: BAT ‘B’ 1.550 Melonited Action with Jewell Trigger
Barrel: Brux HV 28″ Finished Length, 1:8″ Twist Rate
Chambering: 6 BRAW (6mmBR Ackley Improved Wilson), Chambered by Darrell Jones
Chamber Specs: 0.272″ No-turn Neck with 0.135″ Freebore
Stock: Shehane ST 1000 Fiberglass Stock (with stock work by Larry “Bullet” Archer)
Optics: Nightforce 12-42x56mm Benchrest NP-2 DD
LOAD Specs: Lapua 6mmBR brass (formed to 40° Ackley Improved), Vapor Trail 103gr bullets, Hodgdon H4895 powder, CCI 450 primers.
Leonard Baity front rest with Protektor Bag. Italian Lenzi bag in rear.
World Record-Setting Cartridge and Load
Mike was shooting a 40-degree Improved version of the 6mmBR Norma cartridge. Long popular with Benchrest and 300M shooters, the 6mmBR was the original inspiration for this website. Yep, we started as www.6mmBR.com. The Improved version has extra capacity, allowing about 100 FPS more velocity when chambered with a long throat. For his record group, Mike shot Vapor Trail 103-grain bullets in Lapua brass. He loaded Hodgdon H4895 powder with CCI 450 (small rifle magnum) primers.
Praise from Fellow Competitors
Here are some reactions to Mike’s amazing group by our Forum members:
“Amazing target Mike Wilson! Your group might last forever as ‘the goal’ of 1000-yard Benchrest! Heck that’s a great target even at 600 yards.” — Mike J.
“Think about this for a second. That group was barely larger than the size of your index finger’s first digit and he printed it at 1000 Yards.” — Carlos
“Unbelievable!! Doing that under chosen prime conditions is an amazing feat but to do that in competition and to have everything to come together is just unbelievable. Amazing how far skill, precision, knowledge, and the products of this sport have come. Never thought we would see a group this small and well placed especially in the hills of North Carolina where the wind always blows. Congratulations. A true lifetime achievement.” — Yote Hunter
“I think that one will stand for a while. Hard work does pay off, but it don’t hurt to be one of the givers in the sport. Mike, you are ‘The Man’!” — Bill Shehane
“Awesome, awesome. Now the goal is to shoot UNDER an inch!” — Alex Wheeler
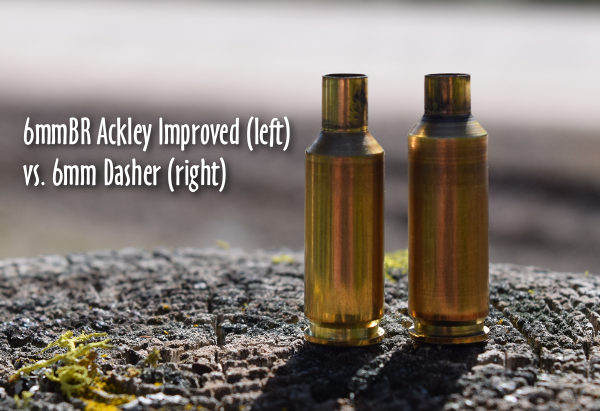
The 6mmBR Ackley Improved
Mike Wilson shot his spectacular group with a 40° Improved version of the 6mmBR cartridge with less body taper than a standard 6BR — the design is 0.463 at the body/shoulder junction (vs. 0.460 for standard 6BR). Mike calls his version of the 6BR Ackley a 6BRAW (“W” for Wilson). Sam Hall explained: “The 6BRAW is pretty much the same as a 6BRA or 6BR-AI (Ackley Improved). I sold the reamer to Mike last year. This has a 0.272 ‘No-Turn’ chamber with a 0.135 Freebore”.
This photo shows a 40° 6mmBR Ackley Improved (6BRA), as used by Tom Mousel in Deep Creek, Montana. Mike Wilson’s 6BRAW may be very slightly different. For Mousel’s 6BRA with 28″ Krieger barrel, the accuracy node is about 2980-2990 fps, so this gives up only 30-50 fps compared to typical Dasher velocities. Mike Wilson’s load runs about 2980 fps also.
In the past couple of years, the 6BR Ackley-type cartridges have been hugely successful in 600-yard and 1000-yard Benchrest. Sam Hall notes: “This year the little 6BR-AI has shot the smallest groups ever fired in 600-yard and 1000-yard competition. Back in April 2018, bullet-maker Bart Sauter, using a 6BRA, shot a 0.311″ 50-score 5-Shot group at 600 yards.” (Read Sauter Story). Bart’s stunning 0.05 MOA group is now the 600-yard IBS HG World Record.(Note: Bart’s target was originally measured at 0.282″ but was later IBS-certified at 0.311″.)
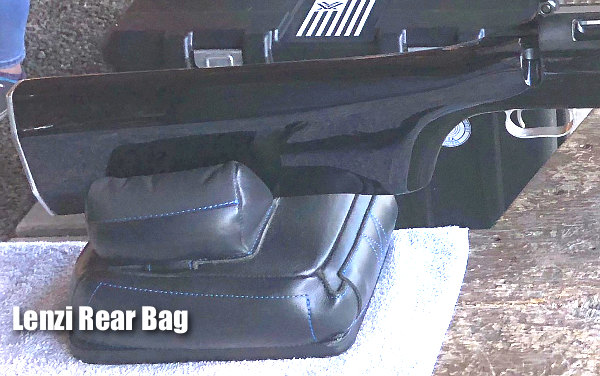
Mike used an Italian Lenzi rear bag. Mike says the super-slick nylon on the ears of this high quality rear bag make for better tracking. The ears provide support but don’t “grab” the stock, reports Mike.
More Comments by Fellow Shooters:
“Truly an amazing feat. The 5X was the icing on the cake! Many shooters would be very happy with that group size at 200 yards.” — Mr. Zero
“Words cannot adequately express how many of us feel about your magnificent accomplishment at 1000 yards. Congratulations — that is terrific!” — Gene Beggs
“Truly amazing … well done on a great achievement… RESPECT!” — Elardus
“Bravo Mike pour ce tir incroyable. Ton exploit est sur le forum de tir longue distance en France bonne continuation.” — Frederic Riso
* There are two North American sanctioning bodies for 1000-Yard Benchrest, the IBS and the NBRSA. The previous 5-shot, 1000-yard IBS record is 1.397″ (50 score) by Tom Sarver in 2007. The existing NBRSA 1000-Yard 5-shot Light Gun record is 1.473″, shot by Bill Schrader in 2002.
Dennis DeMille shows a young competitor at the CMP Western Games how to adjust his leather sling.
If you want to learn more about setting up your sling properly for position shooting, here are some tips from Dennis DeMille, a past Service Rifle Champion. Dennis explains how to choose a sling, and how to adjust it to fit properly.
The Benefits of Dry-Fire Training
Once you know how to set up your sling properly, you’ll want to practice. Dennis DeMille stresses the importance of dry-fire practice with sling and shooting coat. Dry-Fire training is essential to the sling disciplines. Dennis DeMille, a national Service Rifle Champion, told us that, for every minute he spent in actual competition, he would spend hours practicing without ammunition. While in the USMC, Dennis would practice in the barracks, working on his hold and dry-firing:
“The most important thing is to spend time off the range practicing. Most of what I learned as a High Power shooter I learned without ammunition — just spending time dry firing and doing holding exercises. Holding exercises will really identify the weak parts of your position. The primary purpose of dry firing is to get you used to shooting an empty rifle. If you can shoot a loaded rifle the same way you shoot an empty rifle then eventually you will become a High Master.”
SFC Brandon Green, 3-Time Nat’l High Power Champion. Brandon, one of the nation’s best “hard-holders”, demonstrates proper use of sling in prone position.
Setting-Up a Leather Service Rifle Sling for Competition
So you made the mistake of disassembling your leather service rifle sling, or are intimidated about how to use one? In this Creedmoor Sports InfoZone video, former Creedmoor G.M. Dennis DeMille explains how to set up and use a sling. The covers the basics — Dennis starts with a totally disassembled leather service rifle sling and shows you how to set it up properly.
Tip: “Many shooters shy away from using a leather sling because they have never been taught how to use one. That’s unfortunate. In my opinion a leather sling offers more support than a web sling, which is important when competing with the heavier than normal rifles.”
Configuring the Sling for the Standing (Offhand) Position
In this second in a series of Creedmoor InfoZone videos on the setup and use of the leather service rifle sling, Dennis DeMille details how to configure and best utilize the leather service rifle sling while shooting from the standing position.
Tip: “Putting the Frogs in different hole will change the amount of added elevation a sling provides.”
Looking at Sling Types — Comparing the Features
In this video Dennis showcases a large variety of shooting slings. He explains the strong points of each type so you can choose the sling best suited to your discipline and shooting style.


 In response to a Bulletin article about
 Eye Protection — Lesson Learned
 Editor’s Comment: Among competitive pistol shooters, the use of safety eyewear is universal. You’ll never see Rob Leatham, Julie Golob, or Jerry Miculek competing without eye protection — for good reason. The handgun sports’ governing bodies effectively enforce mandatory eye protection policies. We wish the same could be said for competitive rifle shooting. We often see benchrest, High Power, and F-Class competitors shooting without eye protection. We’ve heard all the excuses, yet none of them trump the safety considerations involved.


 How to Print Your Targets

 Do you know which one of your eyes is dominant? It’s easy to determine eye dominance with a simple exercise. Pick an object about 6-10 feet away (a light switch or door knob works well). Make an “OK” sign with your right hand (see photo) and hold that about 18″ from your face. Now, with both eyes open, look through the circle formed by your thumb and index finger. Center the circle on the object, so you can see the object in the middle.


 Scan-Verified 0.162 MOA Accuracy at 200 Yards


 With careful planning, and some skilled tracking, Colton had success, making a perfect hit on a buck at 300 yards. The animal dropped instantly. Colton brought back a good harvest of deer meat, which formed part of the Thanksgiving feast for his family.


 The Benefits of Dry-Fire Training


